


Transform Your Space: A Step-by-Step Guide to Creating a Stunning Accent Wall
There are few design gestures as immediate and transformative as a well executed accent wall. In a single plane, a room can gain mood, structure, intimacy, and visual rhythm. What once felt flat can suddenly feel architectural. What once seemed uncertain can appear purposeful. The beauty of the accent wall lies in this balance of simplicity and drama, offering a meaningful upgrade without requiring a complete redesign.
Table Of Content
- Why Accent Walls Still Matter in Modern Interiors
- Step 1: Choose the Right Wall, Not Just a Different Wall
- Questions to Ask Before You Commit
- Step 2: Decide What Kind of Accent Wall You Want to Create
- Step 3: Select a Color Palette with Depth and Restraint
- Elegant Color Directions for a Modern Accent Wall
- Step 4: Understand Sheen and Finish Before You Paint
- Step 5: Gather the Right Tools and Materials
- Step 6: Prepare the Wall Properly for a Lasting Finish
- Prep Considerations by Surface Type
- Step 7: Tape, Prime, and Create Clean Boundaries
- Step 8: Paint with Method, Not Hurry
- Tips for a More Professional Looking Finish
- Step 9: Add Architectural Character with Accessible DIY Techniques
- Step 10: Style the Accent Wall So It Feels Intentional
- Common Accent Wall Mistakes to Avoid
- Accent Wall Ideas by Room
- Bedroom
- Living Room
- Dining Room
- Home Office
- A Weekend Project with Lasting Impact
- Final Thoughts
Today, the most compelling accent walls are not merely louder walls. They are more thoughtful walls. Rather than relying on stark contrast alone, contemporary feature wall design leans into sophistication through nuanced color, tactile materials, elegant paneling, and a deeper understanding of how a room is experienced. An accent wall can frame a bed, anchor a sofa, elevate a dining room, or lend gallery like focus to art and shelving. It can also correct visual imbalances by grounding a long room, adding perceived height, or softening a space that feels too open.
This guide is designed to help you create a stunning accent wall with both artistic confidence and practical clarity. We will move through the entire process, from choosing the right wall and selecting the ideal finish to preparing surfaces correctly and applying paint or decorative treatments with care. Whether you are envisioning a soft earthy paint color, a moody panelled backdrop, or a textured feature with subtle luxury, the principles remain the same. A beautiful result begins with intention, and a lasting result begins with preparation.
Why Accent Walls Still Matter in Modern Interiors
Accent walls have endured because they solve several design challenges at once. They add distinction without overwhelming a room, and they allow homeowners to experiment with richer tones or decorative finishes in a measured way. In open plan homes especially, an accent wall can establish zones and create a sense of orientation. It is a quiet architectural move with an outsized visual effect.
There is also a financial elegance to the idea. Redesigning an entire room can quickly become costly, but a single feature wall can refresh the emotional atmosphere of a space over the course of a weekend. For DIY readers, this makes accent walls especially appealing. They offer a relatively accessible project with a high design return, provided the work is approached methodically.
Current design direction supports a more refined interpretation of the trend. Instead of highly saturated novelty colors used only for impact, recent palettes from major paint brands lean toward earthy neutrals, muted blues, warm grounded browns, and complex shades that shift beautifully with light. The modern accent wall is less about shouting and more about composing. It supports furniture, art, textures, and daily living rather than competing with them.
Design insight: The most successful accent walls feel like they belonged in the room all along. They do not interrupt the space. They complete it.
Step 1: Choose the Right Wall, Not Just a Different Wall
One of the most common misconceptions about accent walls is that any wall will do. In reality, placement is often more important than color. The best accent wall is usually one that already carries visual weight or deserves it. According to design guidance from Sherwin-Williams, the wall opposite the main entrance is often the most appropriate feature wall because it is the plane encountered first and helps visually orient the room. This is a useful principle because it reminds us that an accent wall should feel deliberate rather than arbitrary.
In bedrooms, the wall behind the bed is a natural choice because it frames the room’s primary furnishing and introduces a sense of ceremony. In living rooms, the ideal feature wall is often behind the sofa, around a fireplace, or along a built in media area. In dining rooms, the wall behind a sideboard or dining table can create a beautiful backdrop, particularly if pendant lighting and artwork are layered into the composition. In home offices, a feature wall behind the desk reads well on camera and establishes focus.
When choosing your wall, consider the room’s architecture and how people move through it. Is there a wall with strong symmetry, a centered window, or an elegant piece of millwork? Does one surface naturally hold the eye longer than the others? A feature wall should amplify those qualities. If the room already contains an awkward angle, cluttered doorway arrangement, or several competing focal points, painting that wall may make the imbalance more noticeable rather than less.
Questions to Ask Before You Commit
- Which wall do you see first when entering the room?
- Which wall anchors the main furniture grouping?
- Does the wall have a clean uninterrupted surface or attractive architecture?
- Will natural and artificial light flatter the chosen color or finish?
- Can the feature wall enhance the room’s proportions or mood?
If you answer these questions honestly, the right wall often reveals itself quickly. A thoughtful accent wall begins with composition, and composition begins with placement.
Step 2: Decide What Kind of Accent Wall You Want to Create
An accent wall does not have to be paint alone. This is where the project becomes exciting, because the term can include a broad family of treatments. Paint remains the most approachable and budget friendly option, but many of today’s most elegant feature walls combine color with texture or simple architectural detail. That could mean panel molding, board and batten, painted brick, slatted wood, wallpaper, limewash effect, or wainscoting with a tonal upper wall.
If your home leans contemporary, a matte painted wall in a complex earthy tone may be all you need. If your style is more classic or transitional, picture molding or rectangular panel trim can introduce graceful structure before color is added. If you want a more tactile effect, wallpaper in linen, grasscloth inspired patterns, or subtle geometrics can create depth without noise. Even painted brick can feel sophisticated when properly prepared and finished in the right sheen.
The best choice depends on three factors: the character of your room, your DIY comfort level, and the substrate you are working with. A plain drywall wall is often ideal for beginners. Wood paneling may need extra sanding and primer. Brick requires its own prep strategy and should never be painted before new mortar has cured fully. If you are looking for a high end result with manageable labor, simple molding details paired with refined paint color can offer an especially beautiful middle ground.
Step 3: Select a Color Palette with Depth and Restraint
Color is the emotional language of the accent wall. It shapes how the room feels in the morning, in the evening, in bright sun, and under lamplight. The current shift in design is toward shades with complexity rather than flat intensity. Think warm mushroom, softened olive, muted mineral blue, deep clay, smoky taupe, plum brown, charcoal with violet undertones, or a creamy stone that reads quietly against surrounding walls. These colors create atmosphere while remaining livable.
If your surrounding walls are white or pale neutral, your accent wall does not have to be dramatically darker to stand out. A medium tone with subtle undertones can introduce enough contrast while still feeling calm. Likewise, a dark accent wall does not automatically make a room feel smaller. In many cases, especially with good lighting and the right sheen, a deeper color can create depth and sophistication, making the wall visually recede and giving the room a cocooning elegance.
Try to think beyond the paint chip in isolation. Consider your upholstery, flooring, rugs, wood tones, metal finishes, and artwork. A beautiful feature wall works in conversation with these elements. If your sofa is warm beige linen, a muddy green or brown toned blue can be lovely. If your room has black accents and marble, a soft greige or mushroom can feel polished. If your textiles are rust, ochre, and cream, a grounding clay neutral can be striking without becoming heavy.
Elegant Color Directions for a Modern Accent Wall
- Earthy neutrals: Warm taupe, mushroom, clay beige, and stone create serene depth.
- Muted blues: Dusty blue, slate blue, and gray blue feel calming and tailored.
- Grounded darks: Smoky charcoal, olive brown, and plum toned brown add intimacy.
- Soft tonal contrasts: Accent walls only one or two shades deeper than surrounding walls feel especially sophisticated.
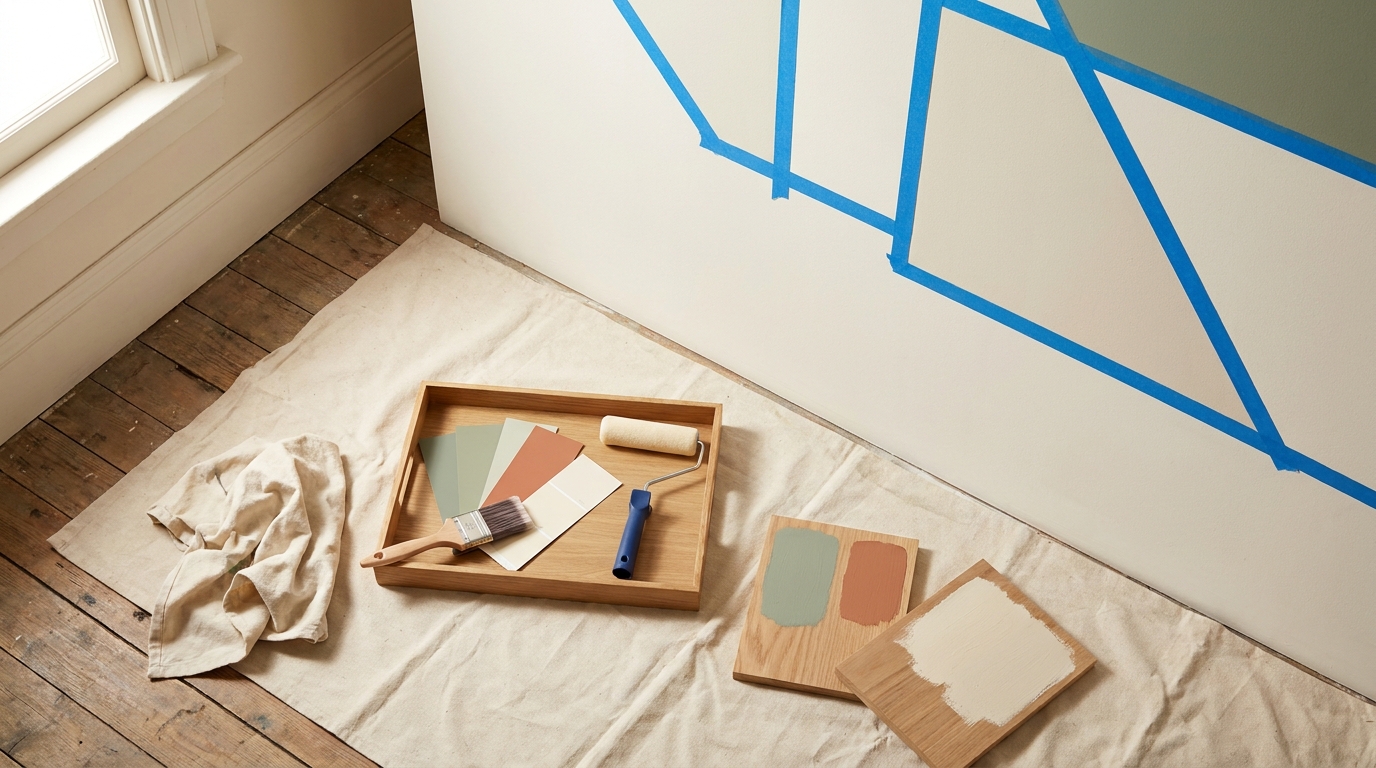
Before committing, paint large samples on poster board or directly on the wall and observe them over a full day. Morning light can bring out cool notes, while evening lighting can emphasize warmth or shadow. A color that feels exquisite in one room can feel entirely different in another. This small step protects the elegance of the final result.
Step 4: Understand Sheen and Finish Before You Paint
Color often receives all the attention, but sheen quietly determines how polished your accent wall will feel. Flat and matte finishes absorb light and hide minor imperfections, which makes them excellent for moody colors and elegant contemporary spaces. Eggshell offers a gentle luster that is practical for living rooms and bedrooms. Satin is more reflective and more washable, which can be useful in high traffic areas, but it also reveals wall flaws more readily. Glossier finishes are generally better reserved for trim or intentional decorative effects.
If your wall has a few surface inconsistencies and you are not planning a full skim coat, matte or eggshell is often the safest choice. If the accent wall includes decorative trim or panel molding, consider using the same sheen across the wall and molding for a seamless architectural effect. If you want the trim details to stand out slightly, a subtle sheen shift can be effective, though this approach requires precision to avoid looking accidental.
Remember that sheen also affects mood. A soft matte wall tends to feel velvety and immersive. A slightly lustrous finish can feel fresher and brighter. There is no universal answer, only the right decision for your room’s use, lighting, and aesthetic direction.
Step 5: Gather the Right Tools and Materials
A beautifully finished wall almost always reflects disciplined preparation, and that begins with the proper tools. You do not need a professional crew, but you do need a thoughtful setup. This project typically requires painter’s tape, drop cloths, a roller frame, roller covers suited to your wall texture, an angled brush for cutting in, a paint tray, stir sticks, a ladder if needed, patching compound, sandpaper, a microfiber cloth or tack cloth, and primer if your substrate calls for it. Ventilation matters as well, so open windows when possible and ensure steady airflow.
If you are adding trim, panel molding, or battens, include a level, measuring tape, construction adhesive, finishing nails if desired, caulk, and paintable wood filler. For brick or glossy paneling, make sure your primer is selected for adhesion and stain blocking as needed. Benjamin Moore’s guidance consistently emphasizes that preparation is the foundation of a successful paint project, and that principle is especially important on accent walls, where flaws are often more visible due to contrast and lighting.
Do not underestimate the value of quality tools. A better brush creates cleaner cut lines. A good roller produces more even coverage. A sturdier painter’s tape helps you protect adjacent walls and trim with confidence. Since the project is focused on one wall, it is worth investing a little more in materials that make the result feel professional.
Step 6: Prepare the Wall Properly for a Lasting Finish
This is the stage most likely to determine whether your accent wall looks polished for years or begins to fail within months. Proper wall preparation is not optional, even when using paint and primer in one products. Benjamin Moore notes that these formulas are self priming on most properly prepared surfaces, but that does not mean they replace cleaning, repairing, sanding, or substrate specific priming. In many cases, two coats are still recommended for full color development and performance.
Begin by removing artwork, outlet covers, switch plates, and nearby décor. Dust the wall thoroughly, then wash away grime, oils, or residue using a gentle cleaner appropriate for painted surfaces. Kitchens, hallways, and family rooms often hold invisible buildup that can interfere with adhesion. Allow the wall to dry completely before moving forward. Benjamin Moore also warns that applying primer or paint to damp walls can cause blistering, so patience here is essential.
Next, inspect the wall under angled light. Fill nail holes, dents, hairline cracks, and small imperfections with patching compound. Once dry, sand smooth and feather the edges so repairs disappear into the surface. If the wall has a glossy finish, light sanding helps create a better tooth for the new coating. Wipe away all dust before applying primer or paint.
Prep Considerations by Surface Type
- Drywall: Clean, patch, sand, and spot prime repairs or apply full primer if needed for even absorption.
- Previously painted glossy walls: Lightly sand to reduce sheen and improve adhesion.
- Wood paneling or trim: Sand glossy surfaces lightly, clean carefully, and use specialized primer if the wood is tannin rich to prevent bleed through.
- Interior brick: Use a stain blocking, high adhesion primer, and never paint new mortar until it has cured at least one month.
- Walls with moisture or mildew issues: Resolve the cause completely before painting.
Preparation can feel less glamorous than choosing color, but it is the hidden architecture of a beautiful finish. Every elegant wall begins here.
Step 7: Tape, Prime, and Create Clean Boundaries
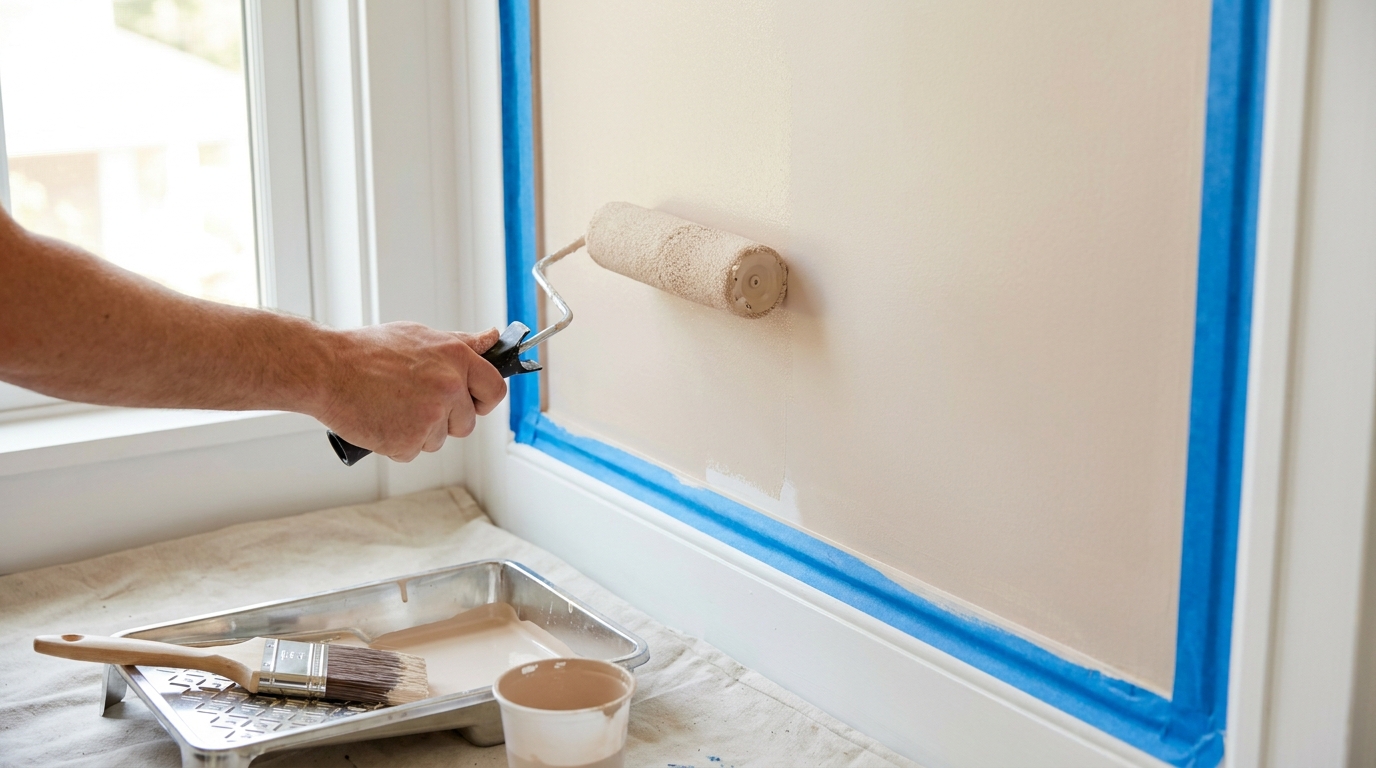
Once your wall is clean, dry, smooth, and dust free, it is time to establish crisp edges. Apply painter’s tape carefully along trim, baseboards, ceiling lines, window casings, and any adjoining walls. Press the tape down firmly to prevent seepage, but avoid stretching it excessively. If you want especially sharp lines where a dark accent meets a lighter adjacent wall, taking extra time here pays off visibly.
If your wall needs primer, apply it according to the product instructions and allow the recommended drying time. Primer is particularly important when you are making a significant color shift, painting repaired areas, working with absorbent surfaces, or handling substrates like brick and wood paneling. Even when paint and primer in one is used, dedicated primer may still provide better consistency and adhesion on challenging surfaces.
After priming, check the wall once more. Primer can reveal imperfections you did not initially notice. If necessary, do a final light sand and touch up repairs before moving to color. This extra pass often makes the difference between a DIY project that feels homemade and one that feels quietly professional.
Step 8: Paint with Method, Not Hurry
Painting an accent wall is not difficult, but it rewards rhythm and order. Start by cutting in with an angled brush along the taped edges, corners, ceiling line, and around outlets. Work in manageable sections and maintain a wet edge so the brushed areas blend smoothly with the rolled surface. Then use your roller to fill the larger field of the wall, working in overlapping passes from top to bottom.
Avoid overloading the roller, which can create drips and uneven texture. At the same time, do not stretch the paint too far in pursuit of economy, as thin coverage often leads to patchiness. Most walls benefit from two coats for even color development, especially with deeper or more nuanced shades. This aligns with manufacturer guidance that two coats are often recommended for both appearance and performance.
Let the first coat dry fully before applying the second. Resist the temptation to judge the final color too early. Many sophisticated tones look uneven, cool, or surprisingly intense when wet, then settle into their intended richness as they cure. When the last coat is nearly set but not rock hard, remove painter’s tape carefully to preserve clean edges. If the tape resists, score along the edge lightly with a utility knife.
Tips for a More Professional Looking Finish
- Stir paint thoroughly before and during use to maintain consistency.
- Use the same application method across the whole wall to keep texture uniform.
- Maintain ventilation, but avoid strong drafts that can affect drying too quickly.
- Allow full cure time before hanging art or pushing furniture tightly against the wall.
These details may seem small, yet they contribute greatly to the final sense of refinement. A luxury look is often built from disciplined restraint rather than complexity.
Step 9: Add Architectural Character with Accessible DIY Techniques
If you want your accent wall to feel even more elevated, paint can become the foundation for simple architectural enhancement. This is one of the most exciting directions in current DIY wall design and décor because it allows ordinary walls to feel bespoke. Panel molding, board and batten, vertical slats, and lower wall wainscoting can all be created with measured planning and straightforward materials. Painted in one cohesive tone, these treatments lend depth and tailored charm.
Picture molding suits traditional, Parisian inspired, and transitional interiors beautifully. It creates elegant frames on the wall and looks especially striking in a muted or dusty color. Board and batten introduces vertical rhythm and can make a room feel taller. Slatted wood treatments feel contemporary and sculptural, though they require more precision. Wainscoting is particularly useful in dining rooms, entryways, and hallways where it can protect walls while introducing visual structure.
The key is scale. Decorative elements should suit the room’s proportions rather than overpower them. In a small room, delicate molding in a single tonal shade can feel exquisite. In a larger room with high ceilings, bolder panel spacing or taller battens may be appropriate. If your goal is an elegant result, avoid crowding the wall with too many motifs. Repetition, symmetry, and measured spacing are what make simple millwork feel expensive.
Step 10: Style the Accent Wall So It Feels Intentional
A completed accent wall is not the end of the story. Styling determines whether it feels integrated into the room or simply painted. Because an accent wall acts as a focal plane, what sits against it matters enormously. A bed with layered pillows, a sofa with sculptural side tables, a streamlined desk, or a thoughtfully placed sideboard can all help the wall read as part of a composed interior rather than an isolated update.
Art should be chosen carefully. On a richly colored or architecturally detailed wall, fewer pieces often create more impact. A single large artwork, a mirror, or a restrained pair of sconces can be enough. If you prefer a gallery arrangement, keep frames cohesive and spacing disciplined. Plants, ceramics, books, and textiles can also echo the accent wall’s color family and enrich the overall scheme.
Lighting is equally important. Wall sconces, table lamps, and ceiling fixtures shape how the color is perceived at night. A sophisticated shade can lose its beauty under harsh cool light and become far more flattering under warm, layered illumination. If possible, review the wall in both daytime and evening settings before finalizing styling decisions. The goal is harmony, not decoration for its own sake.
Styling principle: A great accent wall supports the life of the room. It frames your furnishings, deepens your palette, and allows everyday objects to appear more considered.
Common Accent Wall Mistakes to Avoid
Even a promising idea can lose its charm through a few preventable errors. One of the most common is choosing a wall solely because it is empty rather than because it deserves emphasis. Another is rushing through prep, assuming the paint will hide flaws. In reality, contrast often makes dents, roller marks, and rough patches more obvious. A third mistake is selecting a color that fights the rest of the room instead of conversing with it.
Overly glossy finishes on imperfect walls can also disappoint, particularly in strong side light. So can the assumption that paint and primer in one eliminates the need for cleaning, sanding, or dedicated priming. It does not. Moisture problems are another major issue. Painting over dampness, mildew, or uncured masonry can lead to blistering, peeling, or staining later. Beautiful design cannot outpace material reality.
Finally, avoid thinking of accent walls as inherently bold or dramatic. Some of the most luxurious examples are barely contrasting at all. A wall one or two shades deeper than the surrounding room, paired with elegant texture and thoughtful lighting, can feel more timeless than any loud statement color. Subtlety has extraordinary power when handled well.
Accent Wall Ideas by Room
Bedroom
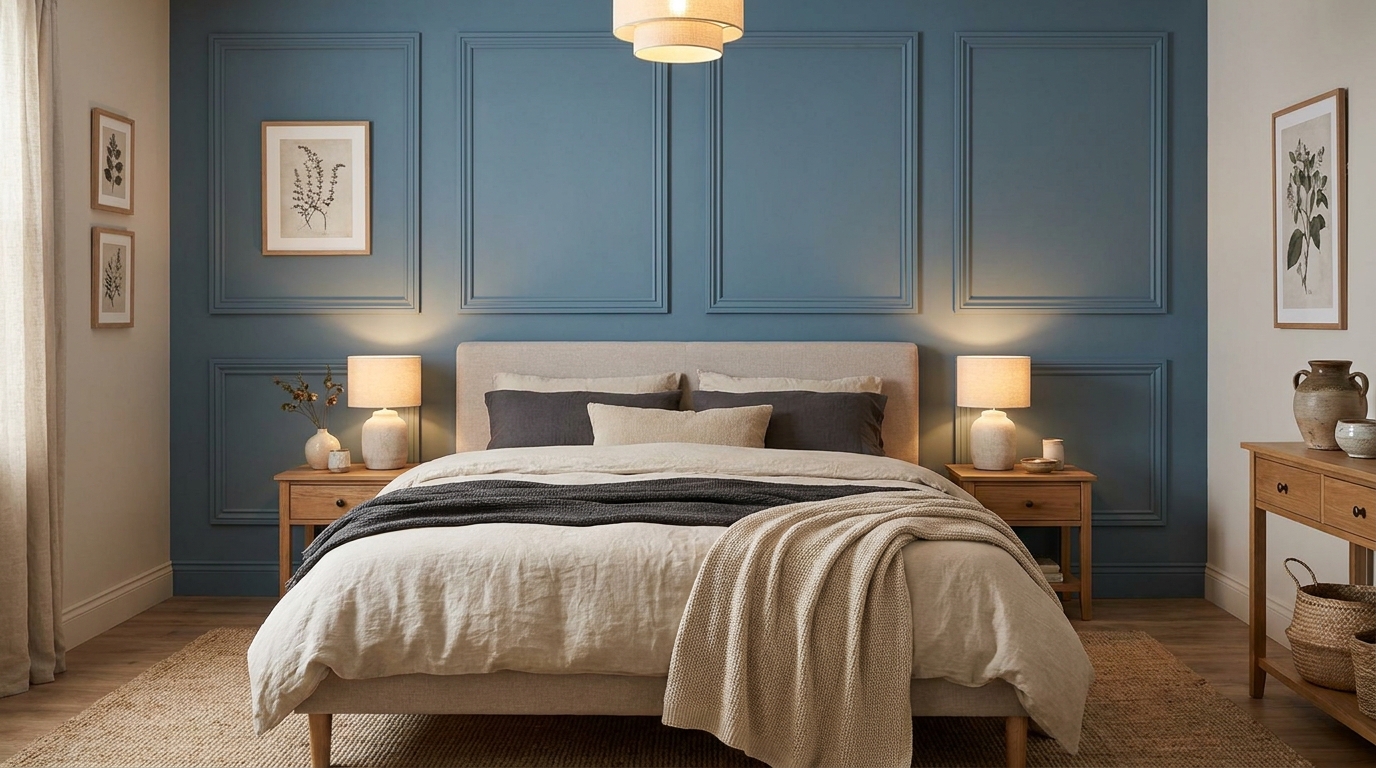
The bedroom is perhaps the most natural setting for an accent wall because it invites softness and enclosure. A feature wall behind the bed can frame the headboard, support layered bedding, and create a restful sense of order. Try muted blue, mushroom, warm olive, or a charcoal toned neutral in matte finish. If you want added grace, simple picture molding painted to match can make the wall feel custom without becoming ornate.
Living Room
In the living room, the accent wall should support conversation and comfort. Behind a sofa or fireplace, it can ground the furniture plan and lend depth to open spaces. Earthy taupe, smoky green, and plum brown are especially elegant choices for layered interiors. If your room already contains stone, built ins, or natural wood, select a tone that quietly echoes those materials.
Dining Room
A dining room feature wall can feel intimate and dramatic in the loveliest way. Because these rooms are often used more in the evening, richer colors tend to perform beautifully under warm light. Wainscoting, paneling, or wallpaper can add ceremony. If the room is small, a darker tone may actually make it feel more enveloping and refined.
Home Office
For a home office, an accent wall behind the desk creates visual structure and a polished backdrop for video calls. Consider calm but intelligent colors such as deep blue gray, warm greige, or softened green. Shelving, art, and focused task lighting can reinforce the wall’s purpose without overcrowding it. Since offices often need clarity and concentration, aim for depth with restraint.
A Weekend Project with Lasting Impact
One of the most appealing aspects of the accent wall is that it is achievable. With the right planning, it can be completed over a weekend and enjoyed for years. The project offers room for creativity, but it also teaches a timeless lesson about interiors: true beauty often comes from careful editing, thoughtful placement, and respect for materials. A single wall, treated with intention, can transform how an entire room is perceived.
If you are approaching this as your first decorative DIY project, let confidence come from process rather than speed. Choose the correct wall. Sample your colors. Prepare surfaces meticulously. Respect drying times. Build atmosphere through nuance instead of excess. These are the habits that produce a finish that not only looks beautiful in photographs, but also feels deeply right in everyday life.
In the end, a stunning accent wall is more than a design trick. It is a way of giving a room identity. It is the backdrop for rest, gathering, working, reading, and living. When it is done well, it changes not only the appearance of your space, but also its emotional texture. The room becomes more composed, more expressive, and more distinctly yours.
Final Thoughts
To transform your space with an accent wall is to engage in one of the simplest yet most poetic acts of home design. You are selecting a surface and asking it to hold meaning. Through color, texture, finish, and placement, that wall begins to tell the story of the room with greater clarity. It may become moody and intimate, soft and gallery like, or architectural and tailored, but in every case it brings intention to the everyday landscape of the home.
If you remember only one principle, let it be this: an accent wall succeeds when beauty and preparation are given equal respect. Elegant design choices matter, but so do clean surfaces, dry conditions, suitable primers, and patient application. When these elements meet, the result is not merely decorative. It is enduring.
Whether you choose a whisper soft neutral with refined panel molding or a richer earth toned paint that anchors the room in depth and calm, your accent wall can become a signature gesture. It can make your home feel more finished, more personal, and more artful. And often, that single thoughtful change is enough to transform the way you see the entire space.


No Comment! Be the first one.