


How to Choose the Right Paint for Your Home’s Exterior
Picking exterior paint sounds simple until you stand in front of the shelf and realize how many decisions are tied to that one purchase. You are not just choosing a color. You are choosing a coating system that has to stick to the surface, handle sunlight, shed water, survive seasonal movement, and still look decent years from now. If the wrong paint goes on the wrong surface or gets applied in the wrong conditions, it can fail early no matter how expensive the label is.
Table Of Content
- Why exterior paint is different from interior paint
- Start with the best all-around choice: 100% acrylic latex
- When other paint types still come into the conversation
- Choose paint based on the surface you are covering
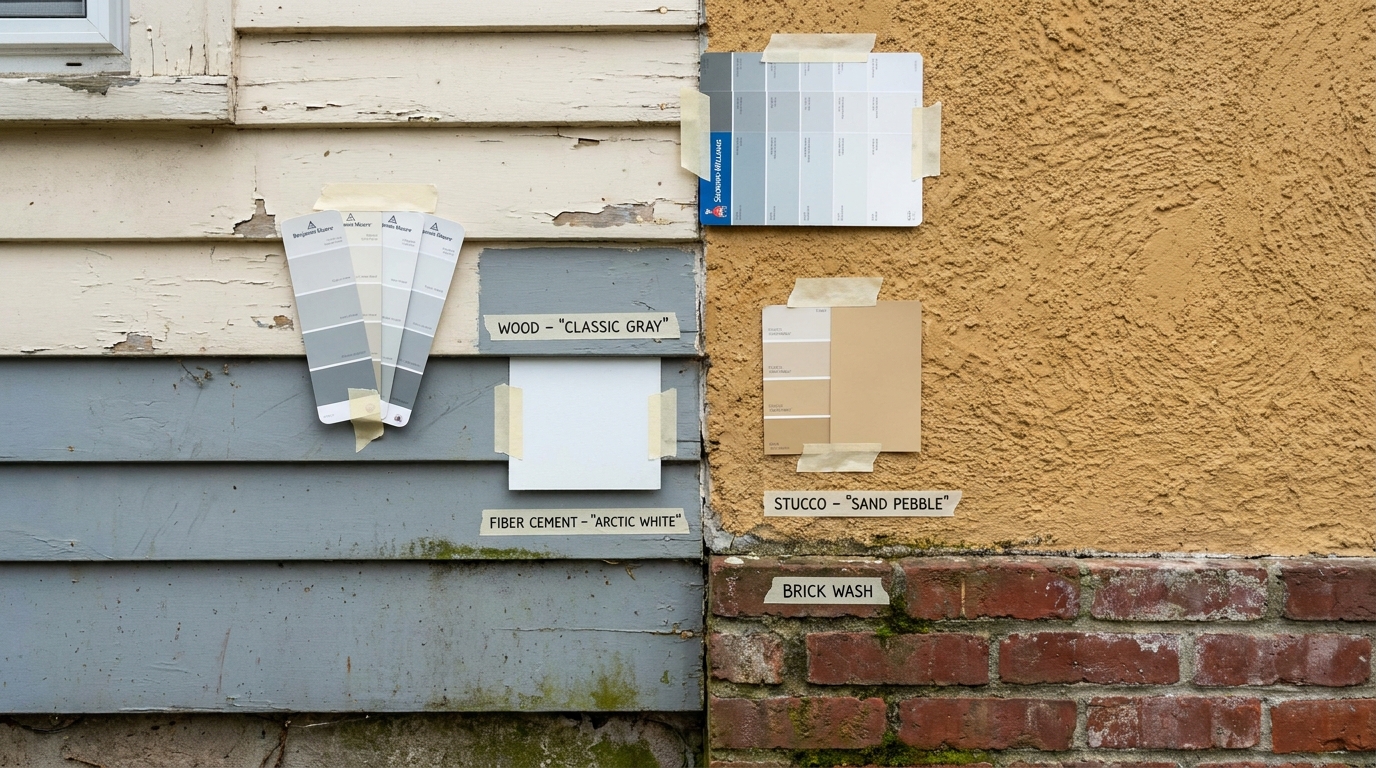
- Wood siding and wood trim
- Fiber cement siding
- Stucco and masonry
- Brick
- EIFS and engineered exterior systems
- Climate should drive the decision more than people think
- Why prep matters more than buying the most expensive can
- Primer selection: where the coating system really starts
- How to choose the right finish for siding, trim, and doors
- Color choice affects performance too
- Application conditions can make or break the job
- Older homes and the lead paint issue you should not ignore
- Common misconceptions that lead to bad results
- What newer exterior paint technology is actually worth paying attention to
- A practical decision process for choosing exterior paint
- How long should exterior paint last?
- Final thoughts
For most homeowners, the practical goal is straightforward. You want a paint that protects the house, holds its color, resists peeling, and works with your local weather. That means thinking about the material you are painting, the age and condition of the existing coating, the amount of sun and moisture the walls get, and the finish you want for appearance and maintenance. The right answer is usually less about hype and more about matching the product to the building.
In most of Canada and North America, 100% acrylic latex exterior paint is the default starting point for a reason. It is widely recommended because it offers strong adhesion, flexibility, good UV resistance, solid color retention, and compatibility with many common exterior surfaces. But even that solid default has limits. Surface prep, primer choice, climate, and application timing matter just as much as the topcoat you buy.
This guide breaks the decision down in practical terms. We will look at the main exterior paint types, where each one works best, how finishes affect durability and appearance, why climate should drive your choice, and what to watch for on older homes where lead paint may be present. If you want straight answers about what actually matters, this is where to start.
The best exterior paint job is not built on brand name alone. It lasts because the coating matches the surface, the prep is done properly, and the weather during application is within the manufacturer’s limits.
Why exterior paint is different from interior paint
Exterior paint is made for a harsher job. It has to handle sun exposure, rain, freeze thaw movement, temperature swings, dirt, mildew, and wind-driven moisture. Interior paint does not deal with those same stresses, so the resin system, additives, and performance targets are different. That is why using leftover interior wall paint outdoors is a bad shortcut, even on a small area.
Good exterior paints are formulated for expansion and contraction. Siding, trim, and masonry surfaces move as temperatures rise and fall. A brittle coating can crack under that movement, especially on wood trim and areas with strong sun exposure. Exterior products are also built with more attention to color retention, UV resistance, and moisture management.
Another difference is biological growth and contamination. Exterior walls deal with mildew, airborne dirt, pollen, chalking, and sometimes salt residue in coastal areas. Many quality exterior paints include mildew-resistant features or dirt-shedding technology, but no coating can perform well if it is laid over a dirty or unstable surface. That point comes up again and again because it is where many failures begin.
Start with the best all-around choice: 100% acrylic latex
If you want the practical short answer, 100% acrylic latex is the best all-around exterior paint choice for most homes. It works well on many common substrates, including wood siding, fiber cement, stucco, masonry, brick that is meant to be painted, and EIFS in many cases when paired with the right system. It stays more flexible than many older coatings, which helps it handle seasonal movement and reduces the risk of cracking and peeling.
Acrylic latex also performs well in sunlight. Homes with long sun exposure need paint that holds color and resists UV breakdown. Lower-grade paints may fade faster, chalk sooner, or lose adhesion as the binder wears down. A good acrylic product generally gives better long-term color retention and a more stable film.
It is also easier to work with for most homeowners and painters. Cleanup is simpler, odor is usually lower than traditional solvent-heavy products, and modern premium acrylics often dry and cure in a way that fits a shorter painting season better than older formulations did. That matters in places where weather windows are narrow and overnight moisture can interfere with fresh paint.
One common misconception is that any paint labeled latex is fine outside. That is not true. Exterior-specific acrylic latex is different from generic latex paint and very different from interior wall coatings. When you compare labels, look for exterior use and, ideally, a high quality 100% acrylic binder rather than assuming all latex products are equal.
When other paint types still come into the conversation
Although acrylic latex is the usual recommendation, other paint types still have a place in certain situations. Some trim systems, doors, and previously coated surfaces may benefit from specialty products or alkyd-modified coatings, especially where a harder finish or specific compatibility is needed. The key is not to treat those products as automatically better, but to use them where they actually make sense.
Older oil or alkyd coatings are still found on many homes, especially on trim, soffits, fascia, porch details, and doors. Repainting over them can be done successfully, but surface condition and adhesion testing matter. If the old coating is sound, properly cleaned, and scuff sanded where appropriate, a compatible bonding primer and quality topcoat can often bridge the transition. What you want to avoid is making assumptions based on appearance alone.
A practical rule is to be careful with layering a hard, brittle film over a more flexible one. In general, putting an alkyd-type finish over a latex system can create problems because the top layer may not move with the substrate and undercoat the same way. That mismatch can lead to cracking or adhesion failure over time. If you are not sure what is already on the house, test a small area or follow the coating manufacturer’s compatibility guidance.
Specialty coatings also come into play for masonry, metal, high-moisture exposure, and difficult substrates. That does not mean the whole house needs a complicated system. It just means one universal can is not always the best answer for siding, trim, doors, and foundation walls all at once.
Choose paint based on the surface you are covering
The material under the paint matters as much as the paint itself. A coating that performs well on fiber cement may not be the best first choice for bare cedar trim or a chalky stucco wall. Before you buy anything, identify exactly what surfaces are being painted and whether they are bare, weathered, previously painted, stained, chalking, or damaged.
Wood siding and wood trim
Wood moves with moisture and temperature, so flexibility is important. Acrylic latex is usually the strongest all-around choice because it can handle that movement better than harder, more brittle films. Bare wood generally benefits from primer, especially on repaired areas, end grain, knots, and places where old paint has failed down to raw substrate.
Surface prep on wood is critical because peeling paint often starts where moisture gets behind the film. Rotten sections, open joints, failed caulking, and exposed end grain should be addressed before painting. Paint is not a repair material. If the wood is taking on water from bad flashing, failed gutters, or missing sealant, the new coating will likely fail again.
Cedar and redwood can require special attention because tannins may bleed through lighter paint colors. In those cases, a stain-blocking primer is often the right move before the finish coats go on. It is a small step that can prevent ugly brown streaking later.
Fiber cement siding
Fiber cement is one of the easier exterior surfaces to coat well, but it still needs the correct system. High quality acrylic latex is commonly recommended because it adheres well and handles weather exposure effectively. The main concerns are making sure the surface is clean, dry, and free of dust or construction residue if the siding is newer.
Because fiber cement is dimensionally more stable than wood, it usually does not move as much. That helps paint life, but joints, cut edges, and installation details still matter. If caulking has failed or moisture is getting behind the panels, no topcoat will solve the underlying issue.
Stucco and masonry
Stucco, block, brick, and other masonry surfaces need coatings that can deal with porosity and moisture movement. Acrylic latex can work very well, but masonry often benefits from a dedicated masonry primer or conditioner first, especially if the surface is dusty, alkaline, patched, or unevenly absorbent. On these surfaces, vapor permeability becomes part of the discussion because trapped moisture can push coatings off from behind.
Painting masonry without checking for moisture problems is a common mistake. Efflorescence, damp patches, and recurring blistering all point to water movement through the wall. If that issue is not corrected, the new paint may fail no matter how premium it is. With masonry, success often starts with moisture control and the right primer.
Brick
Brick can be painted successfully, but it should not be treated casually because it is harder to reverse than painting wood siding. Once brick is painted, it generally becomes a long-term maintenance surface. If you decide to go ahead, the brick should be sound, clean, and free of trapped moisture issues. Breathable acrylic systems are often preferred so the wall can release some moisture vapor rather than trapping it behind a dense film.
Never paint brick just to cover symptoms such as spalling, heavy efflorescence, or water intrusion. Those are building problems first and finish problems second. Solve the source before you seal the surface under a coating.
EIFS and engineered exterior systems
EIFS and other engineered cladding systems need a little more caution. These products have specific manufacturer recommendations around coatings, vapor permeability, and maintenance. In many cases, quality acrylic latex products are still appropriate, but you should confirm compatibility with the siding or cladding system before moving ahead.
Because these surfaces can hide moisture issues if details fail, inspection matters. Cracks, impact damage, and failed sealant joints should be repaired first. Exterior paint can improve appearance, but it cannot make an exterior insulation finish system waterproof on its own.
Climate should drive the decision more than people think
A lot of homeowners shop by color and price first, then think about weather later. In real life, climate often decides how long the paint lasts. High humidity, heavy rain, coastal salt, strong sun, freeze thaw cycles, and sudden temperature drops all affect coating performance. A paint that looks fine on paper may not be the right fit if your local weather punishes exteriors for half the year.
In wet climates, resistance to mildew, moisture penetration, and early wash-off matters. In sunny climates, UV and fade resistance move to the top of the list. In colder regions, flexibility and cure performance during narrow shoulder-season windows become more important. For coastal homes, salt residue and wind-driven rain increase the demand for careful prep and a durable acrylic film.
One of the most useful recent improvements in exterior coatings is better early moisture resistance. Some premium products are designed to handle light rain or dew sooner after application than older paints could. That can be a real advantage in places where afternoon showers or overnight dampness make timing difficult. Even so, you still need to stay within the manufacturer’s application window for temperature, humidity, and cure time.
Dew point matters more than many DIY painters realize. A wall can feel dry but still be at risk if the surface temperature is near the dew point and moisture forms during cure. Painting too late in the day, too early in the morning, or during a cold snap can lead to poor film formation, surfactant leaching, mildew issues, and weak adhesion. Always check the product label for minimum temperature and drying conditions instead of relying on old rules of thumb.
Why prep matters more than buying the most expensive can
If there is one point worth repeating, it is this: premium paint does not compensate for poor prep. Most exterior coating failures start before the new paint goes on. Dirt, chalking, mildew, loose paint, rotten wood, damp masonry, and glossy unprepared surfaces all interfere with adhesion. If the surface is not stable, the finish cannot do its job.
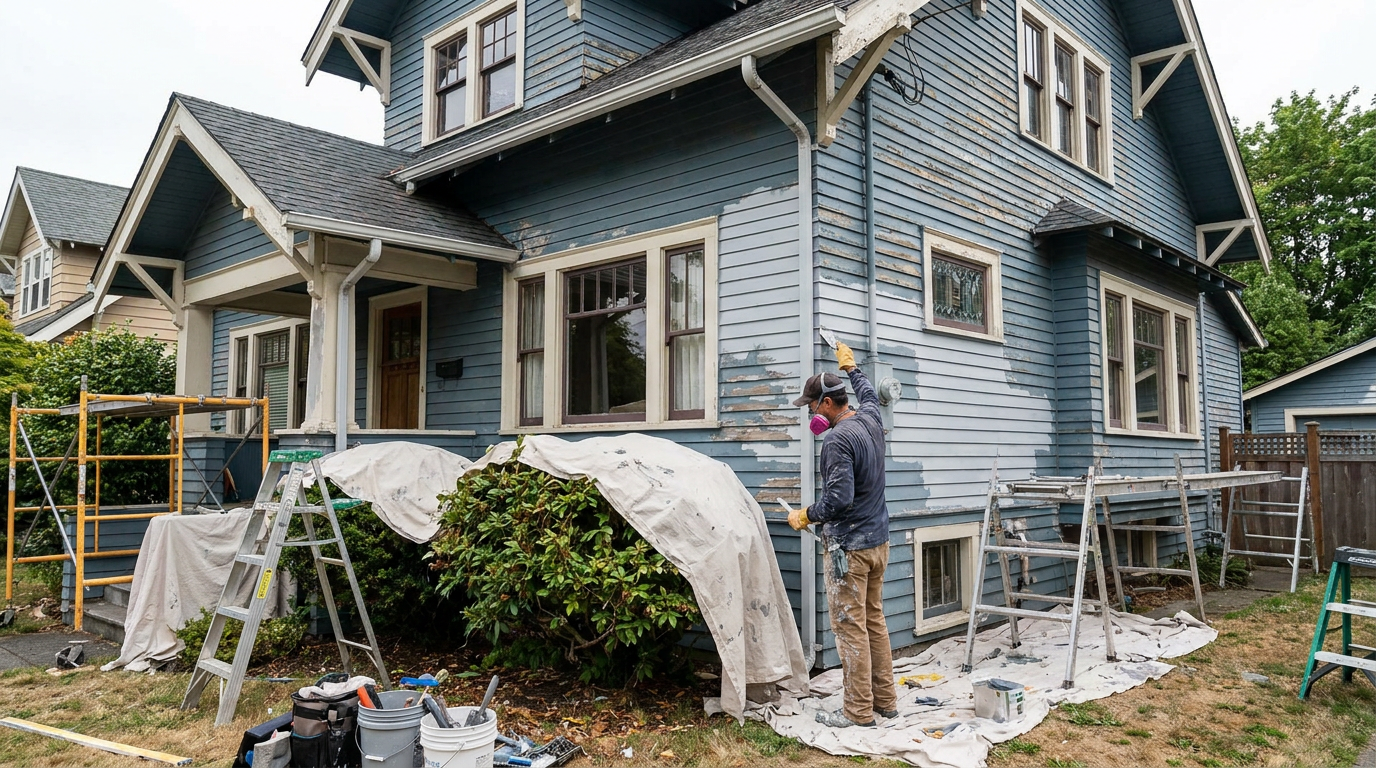
Exterior prep usually begins with washing. That can mean a low-pressure wash, scrub cleaning, or a combination depending on the siding. The goal is to remove dirt, chalk, pollen, mildew, and surface contamination without forcing water behind the cladding. Pressure washing can help, but too much pressure can damage wood, force water into joints, and create more problems than it solves.
After cleaning, any loose or failing paint has to come off. Scraping, sanding, feathering edges, and spot repairs are part of building a sound base. Bare areas generally need primer, and patched zones often do too. Self-priming paint can be useful, but it does not remove the need to prime raw substrate, stained areas, repaired spots, or places with known adhesion problems.
Chalk is another issue people often underestimate. If you rub the old surface and get a powdery residue on your hand, that chalk needs to be removed or sealed appropriately before repainting. Putting fresh paint over active chalking can lead to weak bond strength and premature failure. The same goes for mildew, which needs to be killed and cleaned, not just painted over.
Primer selection: where the coating system really starts
Primer is not the exciting part of the job, but it is often the reason the finish lasts. The right primer improves adhesion, balances porosity, blocks stains, and creates a more even surface for the topcoat. The wrong primer, or no primer where one is needed, can shorten the life of the whole system.
Bare wood usually needs primer. New masonry and repaired stucco often benefit from a masonry conditioner or masonry primer. Stain-prone woods may need a stain-blocking product. Glossy, weathered, or uncertain old coatings can sometimes benefit from a bonding primer. The exact choice depends on the substrate and the condition of the existing surface, not just on the topcoat brand.
Many current premium paints advertise self-priming features, and those claims can be valid on previously painted, sound, properly prepared surfaces. But self-priming does not mean prep-free. It also does not mean every bare patch, weathered repair, or porous section should skip primer. Treat those claims as a convenience for limited conditions, not a universal replacement for substrate-specific prep.
How to choose the right finish for siding, trim, and doors
Finish selection affects both appearance and performance. Lower-sheen finishes such as flat, matte, or low-lustre tend to hide surface imperfections better. Higher-sheen finishes such as satin, semi-gloss, and gloss usually clean more easily and can offer a tougher-feeling surface on trim and doors. The best finish depends on what you are painting and how much surface irregularity you need to disguise.
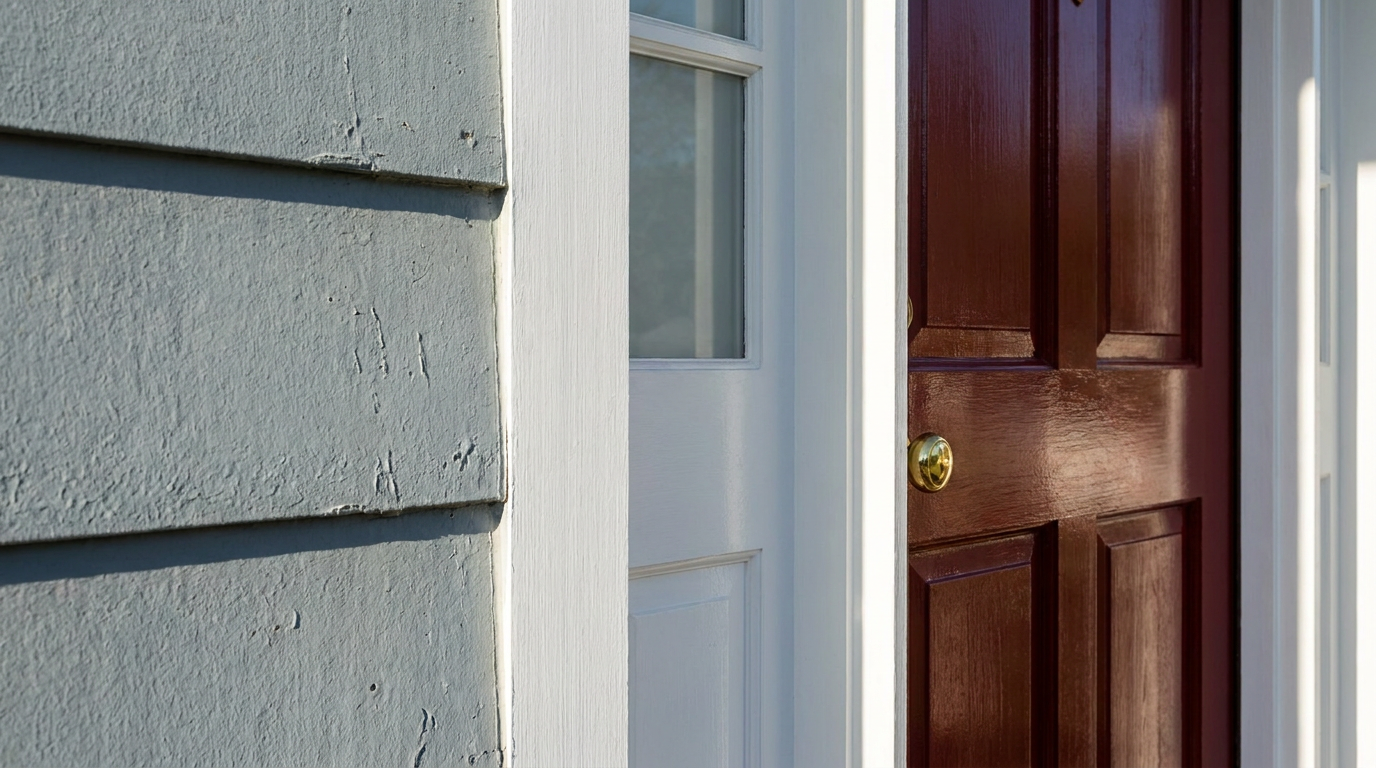
For main wall areas, many homeowners settle on low-lustre or satin because they strike a practical balance. Flat finishes hide waviness, patched areas, and older siding imperfections well, but they can pick up dirt more easily and may not wash as cleanly. Satin gives a little more durability and washability while still avoiding the harder reflections that show every flaw.
Trim is different because it takes more abuse and often benefits from a slightly higher sheen. Satin or semi-gloss is common on trim, fascia, window casings, and shutters because those surfaces need a finish that can handle touch cleaning and weather exposure. Front doors also often get satin or semi-gloss for the same reason, along with the visual contrast it creates.
Higher gloss is not automatically better. More sheen tends to highlight dents, waviness, patch marks, and brush overlap, especially on broad siding surfaces in direct sun. If the substrate is imperfect, a flatter finish often produces a better-looking result. Practical finish selection is about balancing cleanability, moisture resistance, and surface appearance rather than assuming shiny equals durable.
Color choice affects performance too
Most exterior paint decisions start with color, but color has practical consequences beyond appearance. Dark colors absorb more heat, which can increase movement in wood and stress on certain siding materials. On sun-exposed elevations, that extra heat load can affect expansion, contraction, and long-term color retention. It does not mean dark colors are wrong, but they should be chosen with awareness.
Very deep colors may also show fading sooner in harsh sun, depending on the pigment system and product quality. Premium exterior paints usually do a better job with color retention, but no paint is immune to intense UV exposure forever. If your home gets strong afternoon sun, talk to the supplier about how the specific product performs with deep colors.
Lighter colors often do a better job of softening surface imperfections and staying visually cooler. They can be especially practical on older siding with some waviness or patched areas. Again, this is not about rules. It is about knowing that color choice affects both the look and the workload of the coating over time.
Application conditions can make or break the job
One of the biggest causes of frustration is painting during the wrong weather window. Homeowners often plan the work around free time instead of around conditions, but fresh exterior paint does not care about the weekend schedule. It cares about air temperature, surface temperature, humidity, dew point, direct sun exposure, and how quickly the product can dry before temperatures drop.
If paint is applied when it is too cold, the film may not form properly. If it is too humid, too damp, or exposed to moisture too early, you can end up with leaching, streaking, poor adhesion, or mildew-prone surfaces. If the wall is baking in full sun, the paint may dry too quickly on the surface and not level or bond as well as it should. The label instructions are not filler. They are part of the coating system.
Modern paints often have improved low-temperature and quick-cure performance, but every product has a limit. Some can be applied at lower temperatures than older formulas, while others need more conservative conditions. The practical habit is to read the current technical sheet for the exact paint you are using and follow that guidance instead of relying on general advice from years ago.
Older homes and the lead paint issue you should not ignore
If your home is older, paint selection is not the first concern. Safety is. Many older homes in Canada and the United States may contain lead-based paint on the exterior. In the U.S., homes built before 1978 are the key risk group under lead-safe renovation rules. In Canada, homes built before 1960 are especially likely to contain lead-based paint, and some homes built later may still have it as well.
This matters because prep work can release hazardous dust and chips. Sanding, scraping, grinding, and heat stripping old paint without testing can spread contamination around the house and yard. That dust can be especially dangerous for children and pregnant women, but it is not safe for anyone. If the home is old enough to be a candidate, test before disturbing the coating.
Lead-safe work practices are not optional once lead is present. They affect containment, cleanup, waste handling, and the methods you should and should not use. Dry aggressive sanding and open-flame removal are not casual DIY decisions on an older house. If there is any doubt, use lead-safe testing and bring in qualified help where required.
Never assume old exterior paint is harmless. If the house falls into an age range where lead may be present, test first and use lead-safe renovation practices before sanding or scraping.
Common misconceptions that lead to bad results
A few myths keep showing up on paint jobs that fail early. One is the idea that oil-based paint is always tougher outdoors. Years ago that was a common view, but modern exterior acrylic latex systems often match or outperform oil-based products in many real-world conditions because they stay more flexible and hold up better against weathering. The better question is not which type sounds tougher. It is which one fits the surface and exposure.
Another bad assumption is that spending more always fixes the problem. Better paint can absolutely improve performance, but not if it goes over chalk, mildew, loose coating, or damp substrate. High-end products work best when the basics are done right. If the budget is tight, do not rob the prep to pay for the premium label.
There is also the belief that more gloss means more protection everywhere. In truth, high sheen can be useful on trim and doors, but it can make broad siding look worse by highlighting every surface defect. Choosing sheen should be a practical call based on substrate condition, moisture exposure, and desired appearance, not just a durability myth.
What newer exterior paint technology is actually worth paying attention to
Not every new product claim matters, but a few current trends are genuinely useful. One is faster-curing exterior coatings designed for shorter painting seasons. In regions where warm dry weather is limited, the ability to resist dew or light moisture sooner can be a meaningful advantage. It does not remove the need for proper planning, but it can widen the safe window a bit.
Another useful development is better dirt-shedding and self-cleaning behavior in some premium paints. These products are designed to resist grime pick-up and maintain a cleaner appearance over time, especially on exposed elevations. That can be worthwhile if the home faces busy roads, lots of tree debris, or long wet seasons that leave walls looking dirty quickly.
Manufacturers are also giving more precise application guidance than they used to. That is a good thing. Instead of broad seasonal advice, current technical sheets often spell out minimum application temperatures, humidity concerns, recoat timing, and cure expectations more clearly. For practical homeowners and contractors, that detail helps prevent expensive mistakes.
A practical decision process for choosing exterior paint
If you want to narrow the choice without getting overwhelmed, follow a simple process. Start by identifying the exact surfaces being painted and their condition. Determine whether you are dealing with wood, fiber cement, stucco, brick, masonry, EIFS, or mixed materials. Then check whether the existing coating is sound, chalking, peeling, glossy, or of unknown type.
Next, look at your climate and exposure. Consider sun intensity, humidity, salt exposure, rain, and how narrow your painting season is. Those factors help you decide whether you need a standard high-quality acrylic or a premium exterior product with better moisture resistance, mildew resistance, or faster cure behavior.
Then choose the finish by location. Lower sheen for imperfect broad siding areas, satin or similar for a balanced main wall finish, and satin to semi-gloss for trim and doors in most cases. After that, select the primer based on what is bare, patched, stained, porous, or difficult. The full system matters more than any single can.
Finally, time the job around the weather, not just around your schedule. Read the product data sheet, check temperature and dew point, and avoid the urge to rush. Exterior paint rewards patience more than speed.
- Identify the substrate and the condition of the existing coating.
- Confirm whether lead paint may be present on older homes before disturbing old layers.
- Choose a high-quality exterior-specific paint, usually 100% acrylic latex for most surfaces.
- Select the right primer for bare areas, repairs, stains, masonry, or bonding needs.
- Pick the sheen based on surface condition and how much washability you need.
- Paint only within the manufacturer’s temperature, humidity, and drying window.
How long should exterior paint last?
Paint life varies a lot because houses do not all face the same conditions. Surface prep quality, film thickness, climate, exposure, color choice, and maintenance all affect lifespan. A well-prepped, properly applied acrylic system on stable siding can last many years, while a rushed job on damp, poorly prepared wood can fail much sooner.
South and west elevations usually wear faster because they take more sun and weather. Trim often needs attention before broad wall areas because edges, joints, and horizontal details see more moisture stress. Shady sides may keep color better but can be more prone to mildew and dirt retention. In other words, repaint intervals are not just about age. They are about exposure and building details.
The best way to stretch paint life is simple. Keep the house clean, maintain gutters and flashing, repair failed caulk and cracked joints, and touch up small failures before water gets under the film. Exterior paint lasts longest when the house itself sheds water properly.
Final thoughts
Choosing the right paint for your home’s exterior comes down to a few practical truths. First, use an exterior-specific product and, in most cases, start with a quality 100% acrylic latex because it gives the best all-around balance of adhesion, flexibility, UV resistance, and surface compatibility. Second, match the paint and primer to the actual substrate rather than assuming one formula works equally well everywhere. Third, respect the climate, because weather exposure and application conditions are a big part of what determines whether the finish lasts.
Just as important, do not let the shopping process distract from the prep. Cleaning, scraping, treating mildew, removing chalk, priming bare areas, and correcting moisture issues are what give the topcoat a fair chance to perform. A house with good prep and a sensible coating system will usually outlast a rushed job done with a more expensive product.
If you approach exterior paint as part of the building envelope instead of just a color decision, you will make better choices. That mindset protects both the look of the house and the materials underneath. And in the long run, that is what a good exterior paint job is supposed to do.



No Comment! Be the first one.