


Transform Your Space: A Complete Guide to Creating Stunning Wall Panels
There are few design elements as quietly transformative as wall panels. A plain wall can feel flat, unfinished, or forgettable, yet the addition of thoughtfully chosen paneling introduces rhythm, depth, proportion, and character almost instantly. Whether you are drawn to the timeless grace of wainscoting, the tailored geometry of board and batten, or the modern warmth of slatted wood, wall panels have the power to make a room feel complete in a way that paint alone often cannot.
Table Of Content
- Why Wall Panels Are Having a Design Renaissance
- What Wall Panels Can Do Beyond Decoration
- Popular Types of Wall Panels and Where They Shine
- Wainscoting
- Board and Batten
- Slat Walls and Fluted Panels
- Full Height Panel Molding
- Acoustic Wall Panels
- How to Choose the Right Wall Panel Style for Your Room
- Planning with Accessibility and Future Adaptability in Mind
- Materials You Can Use for DIY Wall Panels
- Tools and Supplies for a Beginner Friendly Project
- Step by Step: How to Create a Stunning DIY Wall Panel Feature
- 1. Study the Wall and Define the Purpose
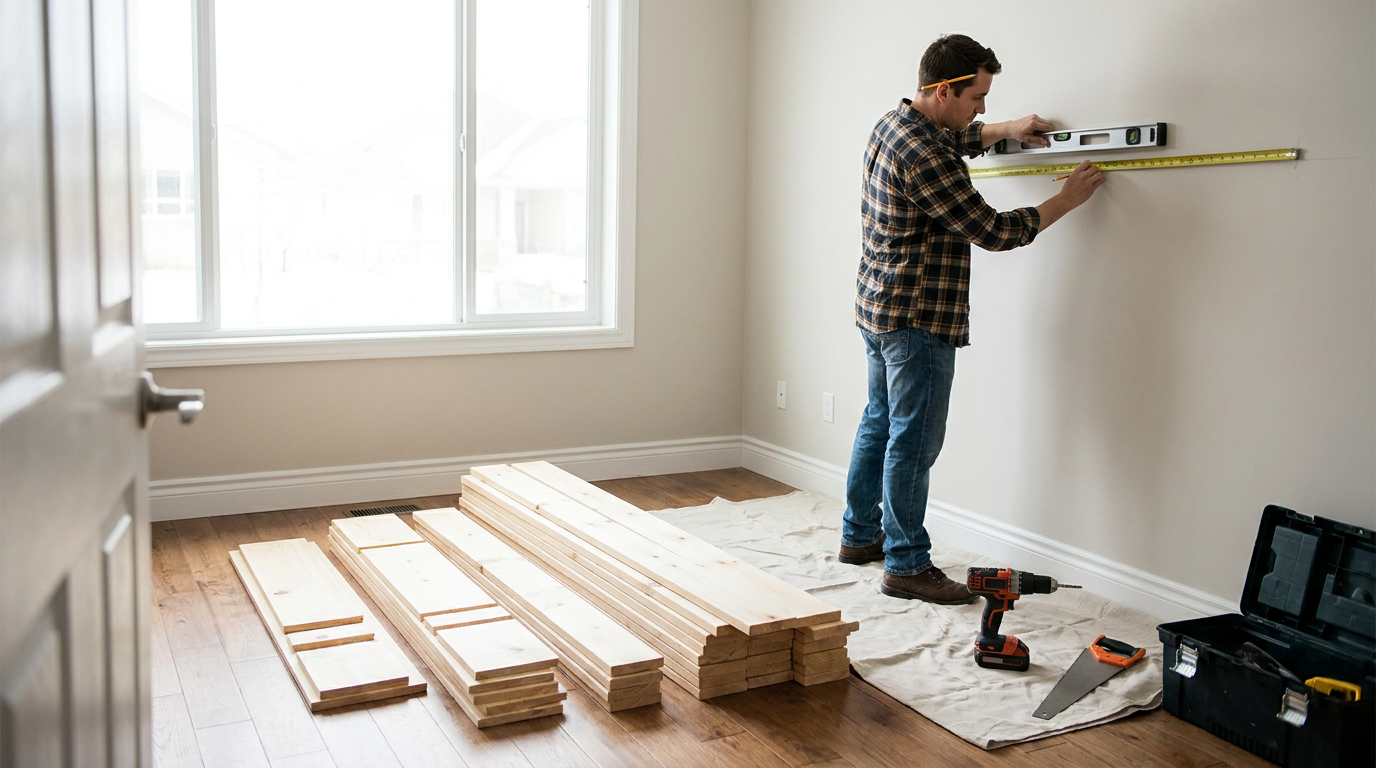
- 2. Measure with Care
- 3. Create a Layout Plan
- 4. Prep the Surface
- 5. Cut and Dry Fit
- 6. Install Securely and Neatly
- 7. Fill, Caulk, Sand, and Prime
- 8. Paint for a Unified Finish
- Room by Room Ideas for Stylish Wall Panels
- Living Room
- Bedroom
- Home Office
- Hallway or Entryway
- Nursery or Children’s Room
- Basement or Media Room
- Common Mistakes to Avoid
- Maintenance, Repair, and Long Term Care
- When to DIY and When to Call a Professional
- Final Thoughts: Beauty That Lives Well
What makes wall panels especially appealing today is their remarkable balance of beauty and practicality. They can create a more polished atmosphere, protect vulnerable walls from wear, soften sound in echo prone spaces, and even support future adaptability when planned with care. In many Canadian homes, wall finish updates are also relatively approachable because decorative wall treatments are usually considered cosmetic work rather than structural alteration, which means they are often more accessible to homeowners and renters than major renovations.
This guide is designed for beginners as well as design lovers who want a sophisticated result without unnecessary complexity. You will discover how to choose the right style for your home, which materials offer the best mix of elegance and ease, how to measure and plan a panel layout, and what installation steps matter most for a refined finish. Just as importantly, we will explore how to think beyond appearance so your wall panels support maintenance, longevity, and future accessibility rather than working against them.
Why Wall Panels Are Having a Design Renaissance
Interior design has been moving steadily toward texture rich spaces that feel layered, tactile, and emotionally inviting. In this climate, wall panels feel especially relevant because they deliver architectural interest without requiring a complete rebuild. They add shadow lines, visual structure, and crafted detail, turning an ordinary room into one that feels intentional and elevated.
Another reason for their popularity is versatility. Traditional homes can embrace paneled walls in classic proportions that echo heritage architecture, while minimalist interiors can use slim slat systems or fluted surfaces for a quieter contemporary effect. The language of wall paneling is broad enough to suit a serene bedroom, a dramatic dining room, a practical mudroom, or an acoustically improved home office.
There is also a practical reason behind the trend. DIY culture has matured, and many brands now offer easy install decorative or acoustic panel systems with straightforward steps like measuring, cutting to size, and fastening with adhesive or screws. Home improvement retailers in Canada regularly present wall paneling as a manageable project using simple materials such as standard 1×4 boards, making the high end look feel newly attainable.
Design insight: The best wall panels do not simply decorate a room. They give it structure, mood, and a sense of permanence.
What Wall Panels Can Do Beyond Decoration
A common misconception is that wall panels are purely ornamental. In reality, they sit within a much broader family of interior wall finishes that can influence durability, maintenance, acoustics, and future adaptability. Canadian construction specifications recognize wall finishes in a wide sense, including paneling, wall coverings, stone facing, special wall surfacing, and acoustical wall treatments. This matters because it reminds us that the wall surface is not only a visual plane but also a functional component of everyday life.
In busy households, lower wall paneling can protect surfaces from scuffs, furniture marks, and routine wear. In open plan homes, media rooms, or home offices, acoustic panels can help absorb sound and reduce echo, creating spaces that feel calmer and more comfortable. In bedrooms and lounges, the tactile softness of slats, fabric wrapped panels, or painted moldings can make a room feel more intimate and composed.
Wall panels can also support longer term planning. Accessibility guidance in Canada increasingly emphasizes future adaptability in housing, including reinforced wall areas in certain zones where grab bars or fixtures may be needed later. Decorative wall finishes should be planned so they do not interfere with those future needs. A beautiful wall today should not make tomorrow’s modifications harder, especially if you want a home that can gracefully evolve with age, mobility changes, or shifting family needs.
Popular Types of Wall Panels and Where They Shine
The most successful wall panel project begins with choosing a style that suits both the architecture of your home and the feeling you want to create. While trends matter, proportion and context matter more. A panel design should feel as though it belongs in the room rather than appearing imposed upon it.
Wainscoting
Wainscoting typically covers the lower portion of a wall and is often topped with a rail or molding. It is one of the most timeless ways to introduce character because it offers visual order without overwhelming the room. In hallways, dining rooms, stair landings, and entryways, it provides a refined boundary that is both decorative and protective.
This style works beautifully in traditional and transitional interiors, especially when painted in a soft neutral, muted green, charcoal, or warm white. If your ceilings are modest in height, lower wainscoting can preserve openness while still adding detail. If your room has generous proportions, a slightly taller treatment can create a more tailored and enveloping effect.
Board and Batten
Board and batten is beloved for good reason. It is among the most beginner friendly panel designs, often created using a framework of vertical and horizontal trim boards applied directly to a wall. The result is a crisp pattern of rectangles or squares that feels classic, balanced, and highly customizable.
This approach is ideal for bedrooms, nurseries, offices, living rooms, and even feature walls in small foyers. Because it can be created with standard lumber sizes such as 1×4 boards, it remains one of the most accessible DIY options. Painted in one unified shade with the wall behind it, board and batten can look surprisingly sophisticated and architectural.
Slat Walls and Fluted Panels
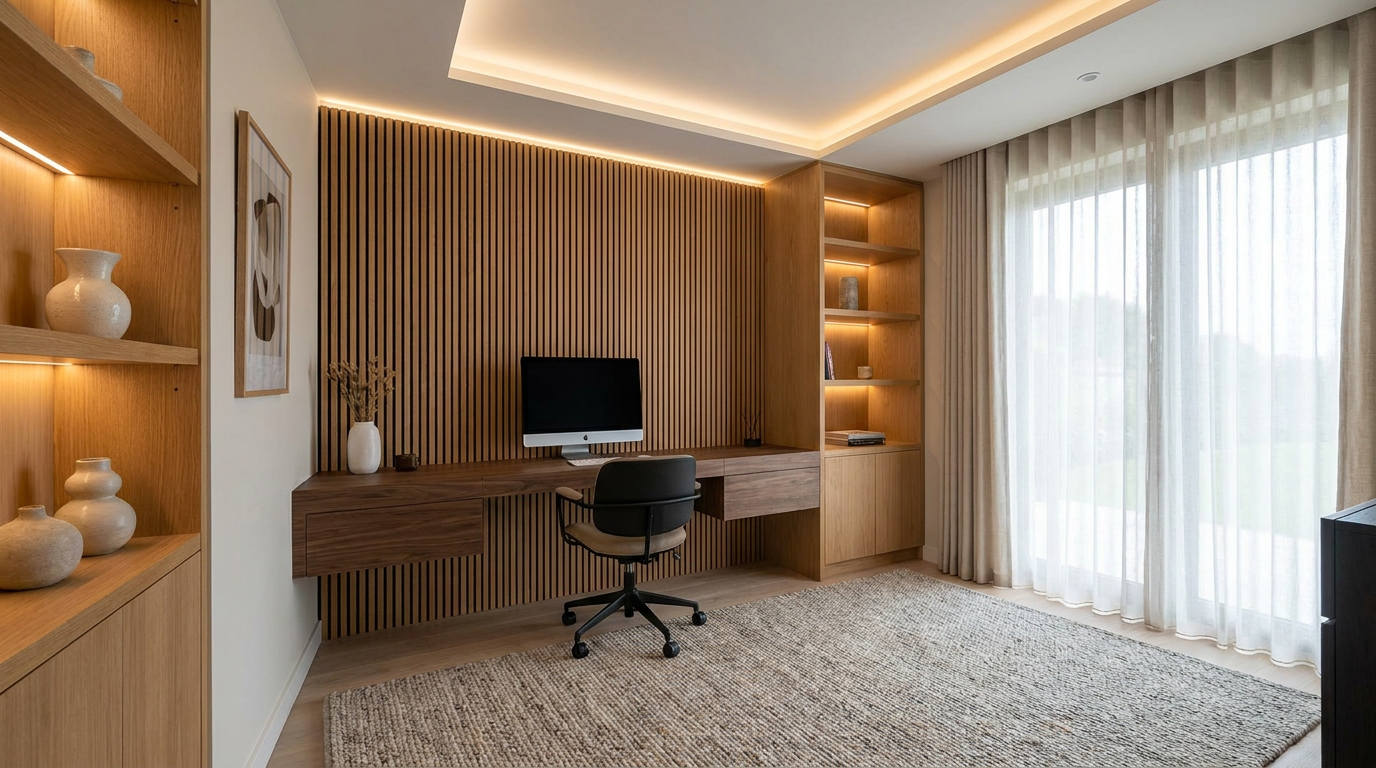
For contemporary interiors, slat walls and fluted panels offer a sleek sense of repetition and warmth. Vertical lines naturally draw the eye upward, which can make a room feel taller and more composed. Wood toned slats are especially popular because they soften modern spaces and introduce a natural material presence without clutter.
These panels work beautifully behind beds, in living rooms, around television walls, or in home offices where a sculptural backdrop is desired. Some systems include felt backing or acoustic engineering, which means they can look elegant while also improving sound quality. This dual purpose quality makes them particularly compelling in multi use rooms.
Full Height Panel Molding
Applied molding that creates full height rectangular panels delivers a distinctly tailored and often luxurious effect. It recalls classic Parisian apartments and refined heritage interiors, yet it can also feel fresh when paired with clean furnishings and restrained color. The beauty of this style lies in its proportion. Well spaced panel frames give a wall dignity and rhythm.
This option is ideal for formal living rooms, dining rooms, bedrooms, and libraries. It asks for careful planning because symmetry matters greatly, but the reward is substantial. When executed well, it can make a new build feel layered and established.
Acoustic Wall Panels
Acoustic panels are often misunderstood as purely technical products with little decorative value. In truth, many contemporary acoustic systems are visually elegant, available in slatted wood looks, upholstered formats, geometric tiles, and subtle felt surfaces. They are designed to absorb or diffuse sound, which helps reduce reverberation and improve comfort.
These panels are especially useful in open concept homes, home offices, podcast rooms, nurseries, and media spaces. If you have ever noticed voices bouncing around a sparsely furnished room, acoustic treatment can dramatically improve the atmosphere. The right panel can be a design statement and a quieting device at once.
How to Choose the Right Wall Panel Style for Your Room
Selecting a panel design is not only about what looks beautiful in a photograph. It is about the scale of the room, the quality of light, the function of the space, and the visual story of your home. A style that suits a dramatic dining room may feel too heavy in a compact hallway, while a delicate slat treatment might disappear in a room with ornate trim and high ceilings.
Begin by asking what the room needs. If it feels cold or unfinished, warm wood slats or painted moldings may add depth. If the walls are vulnerable to scuffs, lower paneling can provide protection. If the room echoes, acoustic panels may solve a comfort issue while also enriching the visual scheme. Good design begins with listening to the room rather than forcing a trend upon it.
Color also matters profoundly. Monochromatic wall panels painted the same shade as the surrounding wall offer subtle elegance and allow shadow to do the work. Contrasting trim can feel more graphic and energetic, though it draws stronger attention to every line. In smaller spaces, tone on tone treatments often feel more expansive and polished.
Planning with Accessibility and Future Adaptability in Mind
One of the most forward thinking aspects of modern interior design is the understanding that beauty should support life over time. In Canada, accessibility guidance increasingly encourages accessible ready planning in housing, including attention to wall reinforcement in certain areas for future grab bars or fixtures. Decorative wall finishes are usually not the subject of building codes in themselves, and replacing them often does not require a permit, but that flexibility should inspire thoughtful planning rather than improvisation.
If you are paneling a bathroom, hallway, bedroom, or any area that may one day need accessibility related modifications, consider where reinforced walls or future mounting points might be located. Avoid creating a system that is difficult to remove, impossible to patch, or likely to obstruct future fixtures. Modular and repairable designs are often more elegant in the long term than highly permanent decorative layers that resist adaptation.
Clearances also matter. Do not allow paneling, trim build out, or decorative protrusions to reduce essential passage width around doors, corridors, or furniture circulation. In most decorative projects the added thickness is modest, yet thoughtful planning is still wise, especially in compact homes, condos, or accessible living environments. A well designed wall treatment should quietly support ease of movement.
Future ready design: A wall can be beautiful now and adaptable later. The most successful interiors allow for change with dignity.
Materials You Can Use for DIY Wall Panels
The material you choose affects not only the look of the finished wall but also the installation process, durability, and maintenance. For many beginner projects, medium density fiberboard trim, primed wood boards, plywood strips, or standard dimensional lumber offer a practical starting point. These materials are widely available and work especially well for board and batten or applied molding layouts.
Prefabricated slat panels, decorative sheets, and acoustic systems are also increasingly common. They are often designed for straightforward installation and can save time because the spacing and alignment are pre configured. If you want a more modern or acoustically useful result, these systems may offer a more consistent finish than building every detail from scratch.
For bathrooms, basements, and moisture prone areas, choose products specifically suited to those conditions. A beautiful panel is not successful if it warps, swells, or traps moisture. Always read manufacturer guidance on where a product can be installed and how it should be sealed, painted, or maintained.
Tools and Supplies for a Beginner Friendly Project
Many decorative wall panel projects can be completed with a modest set of tools, especially if you choose a simple board and batten or molding pattern. The core process usually includes measuring the wall, planning a layout, cutting materials to size, fastening them securely, filling seams, sanding, caulking, priming, and painting. Precision matters more than complexity.
Before beginning, gather your tools so the installation feels calm and orderly. A well prepared work area often makes the difference between a graceful project and a frustrating one. You do not need a professional workshop to achieve a refined result, but you do need patience, accurate measuring, and respect for the finishing details.
- Tape measure and pencil for accurate layout
- Level or laser level for straight lines
- Miter saw or hand saw appropriate to your material
- Construction adhesive if suitable for the product
- Brad nailer or finish nails where recommended
- Stud finder for secure fastening and future planning
- Wood filler, caulk, sandpaper, primer, and paint
- Safety glasses and hearing protection when cutting
Step by Step: How to Create a Stunning DIY Wall Panel Feature
1. Study the Wall and Define the Purpose
Begin by examining the wall itself. Is it smooth, dry, and in good repair, or are there cracks, moisture issues, and uneven surfaces that should be addressed first. Consider what the room needs from this wall. Is it meant to become a visual focal point, a protective finish in a busy area, or an acoustic improvement in a work space.
This is also the moment to note outlets, switches, vents, baseboards, door trim, and any future access needs. If you are working in a space that may one day require accessibility modifications, identify likely reinforcement zones or mounting areas before covering the wall. The smartest design work often happens before any board is cut.
2. Measure with Care
Take full wall dimensions, then measure around doors, windows, and trim interruptions. If you are creating a symmetrical layout, divide the wall visually before committing to exact panel widths. Even minor dimensional differences can become very noticeable once trim lines are installed, so this stage deserves patience.
Many beginners make the mistake of starting from one side and hoping the pattern works itself out. Instead, map the composition on paper or use painter’s tape on the wall to preview spacing. This helps you refine the proportions and avoid awkward narrow sections at the edges.
3. Create a Layout Plan
A layout plan is where your project begins to feel designed rather than improvised. Decide the height of any horizontal rails, the width between vertical battens, and the size of each rectangular or square section. In a more traditional room, panels often look best when evenly spaced and aligned with key architectural features.
For modern slat installations, consider the visual rhythm and whether the slats will stop at a natural point such as a ceiling line, shelf edge, or media unit. The more integrated the design feels, the more luxurious it will appear. Grace often comes from alignment.
4. Prep the Surface
Clean the wall and patch any noticeable imperfections. Remove protruding hardware if necessary, and lightly sand rough areas. If you are painting the wall behind the panels, many people prefer to apply the base color before installation so any tiny reveal between trim pieces remains consistent.
Surface preparation is not the glamorous part of the project, but it is essential. Adhesive bonds more reliably to a sound surface, paint adheres better, and the final lines appear sharper. A polished room is built on invisible discipline.
5. Cut and Dry Fit
Cut your boards or panels according to the layout, then dry fit them against the wall before fastening anything permanently. This stage allows you to catch small discrepancies, confirm alignment, and refine the spacing if needed. It is much easier to adjust a plan before adhesive or nails are involved.
If you are creating a board and batten feature, start with horizontal members if your design includes them, then add vertical pieces. If you are installing panel molding frames, confirm that each section reads as visually balanced, even if the room itself is slightly imperfect. Your eye reads harmony more strongly than absolute mathematics.
6. Install Securely and Neatly
Attach the materials using the fastening method recommended for your product, which may include construction adhesive, mechanical fasteners, or both. Standard DIY guidance for decorative wall paneling often follows a straightforward sequence of measuring, cutting, and fastening, and that simplicity is part of its appeal. Work methodically, checking level as you go so the pattern remains crisp.
Do not rush through this stage simply because the transformation begins to appear. A single crooked line can disrupt the composure of the whole wall. Where possible, anchor into studs for additional stability, and be mindful of any concealed utilities.
7. Fill, Caulk, Sand, and Prime
The difference between homemade and beautifully finished often comes down to this stage. Fill nail holes, caulk seams where trim meets the wall, and sand any rough areas until the transitions feel seamless. Once primed, the paneling should begin to read as part of the architecture rather than applied decoration.
Use a high quality paintable caulk and resist applying too much. Fine, clean lines are what make painted panel walls look custom. Every softened seam contributes to the illusion that the wall was always meant to be this way.
8. Paint for a Unified Finish
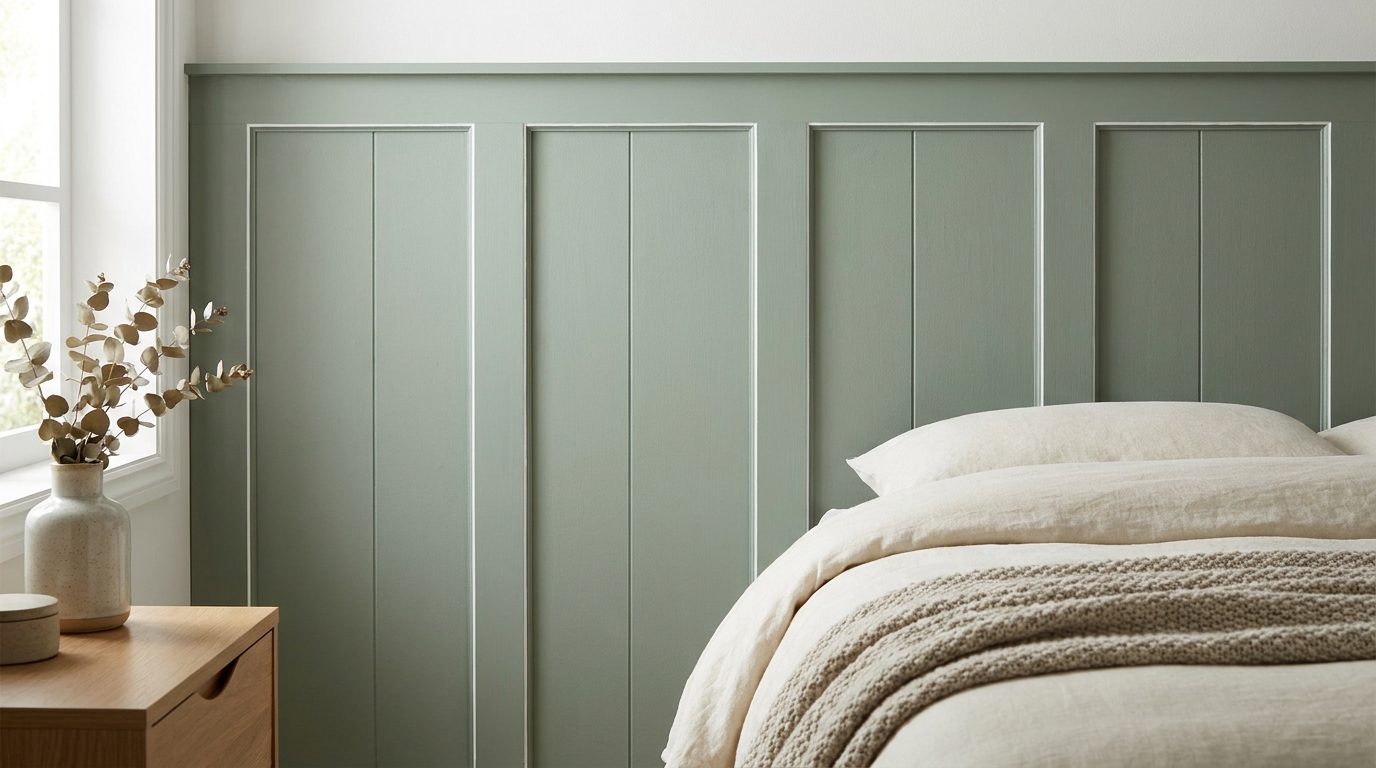
Paint brings the entire composition together. In most cases, painting the wall and trim the same color creates the most elegant effect because it emphasizes depth and shadow instead of contrast. Satin or eggshell finishes are often practical choices, though the ideal sheen depends on your wall condition and desired atmosphere.
Dark colors can feel wonderfully enveloping in dining rooms, bedrooms, and studies, while pale neutrals create softness and quiet sophistication. If your wall paneling is in a high traffic zone, choose a finish that is durable and easy to wipe clean. Beauty and maintenance should never be treated as separate decisions.
Room by Room Ideas for Stylish Wall Panels
Living Room
In the living room, wall panels can establish a focal point behind a sofa, fireplace, or media console. Full wall moldings create a refined salon effect, while slatted wood brings warmth to more contemporary spaces. If your living room is open to the kitchen or dining area, paneling can also help subtly define the zone without adding physical barriers.
Bedroom
Bedrooms benefit from the softness and visual calm of paneled walls. A feature wall behind the bed can replace the need for excessive artwork and immediately make the room feel more considered. Painted board and batten, upholstered panels, or fluted detailing can all create a cocooning atmosphere that supports rest.
Home Office
A home office is one of the most rewarding places to invest in wall panels because function and appearance meet so beautifully there. Acoustic slat panels can improve sound comfort during calls, while also creating a polished backdrop for virtual meetings. The result is a room that works harder while looking more composed.
Hallway or Entryway
These transitional spaces are often overlooked, yet they set the emotional tone of the home. Wainscoting or lower board and batten can add resilience where walls are frequently touched or bumped, and they make narrow zones feel more deliberate. Even a simple painted treatment can lend arrival a sense of ceremony.
Nursery or Children’s Room
Softly painted panels bring charm to a nursery without relying on fleeting themes. They add depth and can evolve as the child grows, making them a more timeless investment than highly specific decor. Choosing cleanable finishes is especially wise in these spaces.
Basement or Media Room
In finished basements and media rooms, moisture suitability and acoustic performance deserve extra attention. Decorative acoustic panels can help manage echo while adding warmth to spaces that often feel hard surfaced or visually flat. If any project intersects with broader renovation work, fire performance questions, building requirements, or multi unit housing rules, it is wise to verify local guidance before proceeding.
Common Mistakes to Avoid
Many wall panel projects fail not because the idea is poor, but because the details are rushed. One frequent mistake is ignoring scale. Oversized panels on a short wall can feel heavy, while tiny repetitive sections on a large wall can look busy and underwhelming. Let the architecture guide the proportions.
Another mistake is treating all panel products as interchangeable. Decorative wood slats are not the same as engineered acoustic systems, and moisture prone spaces need different materials than dry formal rooms. Understanding what the product is designed to do prevents disappointment later.
It is also unwise to assume every project is permit free under every circumstance. In Canada, replacing wall finishes is typically a low barrier cosmetic update, but if your project is tied to larger regulated work, involves fire performance considerations, or affects conditions in a basement, commercial style setting, or multi unit building, checking local rules is a prudent step. Beautiful design becomes more graceful when it is informed.
Maintenance, Repair, and Long Term Care
One reason wall panels remain so appealing is that they can age beautifully when maintained properly. Painted panels should be dusted occasionally and wiped gently in areas prone to fingerprints or scuffs. Wood toned surfaces may benefit from manufacturer recommended care products, especially if they have a delicate finish.
Repairability is another valuable quality. If a panel system is modular or composed of individual boards, damaged sections can often be replaced more easily than large seamless treatments. This is especially helpful in family homes, rental properties, or spaces where future modifications may be needed. Repairable design is a form of quiet luxury because it respects time.
When planning your installation, keep a small record of paint color, panel product name, and layout dimensions. This simple archive can make future touch ups or replacements far easier. The most thoughtful homes are not just styled well, they are remembered well.
When to DIY and When to Call a Professional
A straightforward board and batten feature wall or prefabricated decorative panel system can be an excellent DIY project for a patient beginner. If you are comfortable measuring carefully, making clean cuts, and handling the finishing steps, you can achieve an impressive result. The project is especially approachable when the wall is flat, uncomplicated, and free of unusual obstacles.
However, some situations benefit from professional help. Complex full room moldings, curved walls, advanced acoustic planning, moisture sensitive installations, or spaces with code related concerns may justify expert guidance. If you want the finish to align perfectly with cabinetry, built ins, or heritage details, skilled carpentry can be worth the investment.
There is no loss of elegance in choosing support where needed. Good design is not defined by doing everything alone. It is defined by making intelligent decisions that lead to a beautiful and lasting result.
Final Thoughts: Beauty That Lives Well
Wall panels are one of those rare design gestures that can feel both indulgent and sensible. They offer immediate visual transformation, yet they also answer practical needs such as durability, acoustic comfort, and spatial definition. In a time when many people want their homes to feel more personal, more serene, and more adaptable, paneling answers with unusual grace.
The most successful wall panel project begins not with a trend, but with intention. Choose a style that suits your architecture, a material that supports the room’s real life demands, and a layout that respects proportion. Then think one step further by considering maintenance, repairability, and future accessibility so your design remains generous to the life unfolding around it.
If you have been searching for a high impact update that feels elevated without requiring a full renovation, wall panels may be the perfect place to begin. A carefully paneled wall does more than decorate a room. It gives it poise, personality, and a sense of lasting design that can be enjoyed every day.


No Comment! Be the first one.