


Transform Your Walls with Beautiful Textured Finishes: A DIY Guide to Elegant, Modern Surfaces
There is something quietly transformative about a wall with texture. It catches the light differently throughout the day, softens the geometry of a room, and lends even the simplest interior a sense of intention. Where flat paint can feel crisp and practical, a textured finish introduces atmosphere. It gives a space a more layered, tailored presence, whether the effect is whisper soft and mineral-like or slightly more architectural and expressive.
Table Of Content
- Why Textured Finishes Feel Fresh Again
- Understanding the Most Popular Textured Wall Finishes
- Orange Peel Texture
- Knockdown Texture
- Sand Finish Paint
- Limewash
- Venetian Plaster and Mineral Plaster Looks
- How to Choose the Right Texture for Your Room
- What You Need Before You Begin
- Basic Tools and Materials Checklist
- Safety First, Especially in Older Homes
- Step-by-Step: How to Apply a Textured Finish
- Step 1: Evaluate and Repair the Surface
- Step 2: Clean and Protect the Room
- Step 3: Prime Thoroughly
- Step 4: Practice on a Sample Board
- Step 5: Apply the Texture Methodically
- Step 6: Allow Proper Drying and Cure Time
- Step 7: Paint or Seal if Needed
- Beginner-Friendly Projects vs Advanced Finishes
- How to Match Existing Texture for Repairs
- Color, Sheen, and Styling Considerations
- Maintenance and Cleaning
- Common Mistakes to Avoid
- When to Call a Professional
- Final Thoughts: Texture as a Form of Quiet Luxury
For many homeowners across Canada and North America, textured walls also offer a practical advantage. They can help conceal minor imperfections, blend repaired drywall patches more gracefully, and create a designer look without a full renovation. Yet the most compelling reason to explore them today is aesthetic. Modern textured finishes are no longer limited to heavy, dated surfaces associated with older ceilings or builder-grade treatments. They now include elegant limewash, Venetian plaster, sand finish paint, subtle orange peel, knockdown, and refined trowel-applied mineral effects that feel deeply current while remaining timeless.
This guide is designed to help you approach textured finishes with confidence and discernment. You will learn which textures are beginner-friendly, which require a steadier hand, how to plan a project realistically, what tools and materials matter most, and how to achieve a result that feels elevated rather than improvised. The goal is not simply to change your walls, but to make your home feel richer, more tactile, and more beautifully composed.
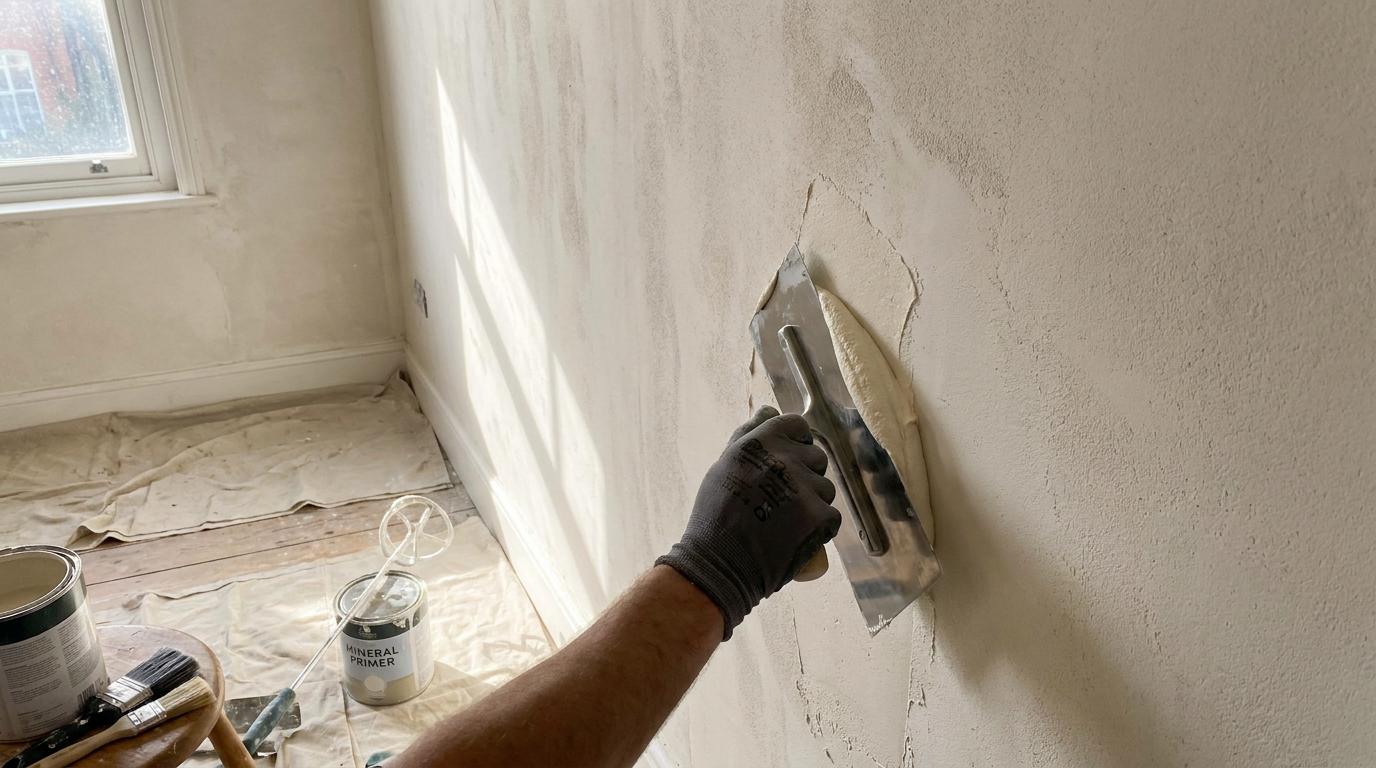
Why Textured Finishes Feel Fresh Again
Texture in interiors has returned with remarkable sophistication. The renewed interest has very little to do with nostalgia for heavy popcorn surfaces or aggressively patterned drywall. Instead, it reflects a broader design movement toward tactile, natural, and quietly luxurious materials. Organic modern rooms, warm minimal interiors, and Mediterranean-inspired spaces all lean on surface variation to bring depth to restrained palettes. When walls are treated with care, texture becomes part of the architecture of the room rather than an applied decorative trick.
This shift matters because many people still assume textured walls are outdated. In reality, the most desirable versions today are often the most subtle. A pale limewash in a bedroom can read like a cloud of pigment and chalk. A soft trowel texture in a hallway can mimic the grace of old plaster. Even a modest knockdown finish can feel clean and contemporary when paired with thoughtful lighting and a matte paint in a warm neutral. Texture is no longer a way to shout. More often, it is a way to give a room soul.
There is also a strong practical dimension behind its popularity. Textured finishes can camouflage uneven drywall, hairline flaws, or prior patching more effectively than a perfectly smooth wall. This makes them especially appealing in real homes where surfaces are rarely flawless. Rather than fighting every imperfection with endless sanding and skim coating, a well-chosen texture can turn the wall itself into a more forgiving and visually interesting backdrop.
Design insight: The most elegant textured walls do not compete with furniture or art. They support the room with depth, softness, and a sense of material richness.
Understanding the Most Popular Textured Wall Finishes
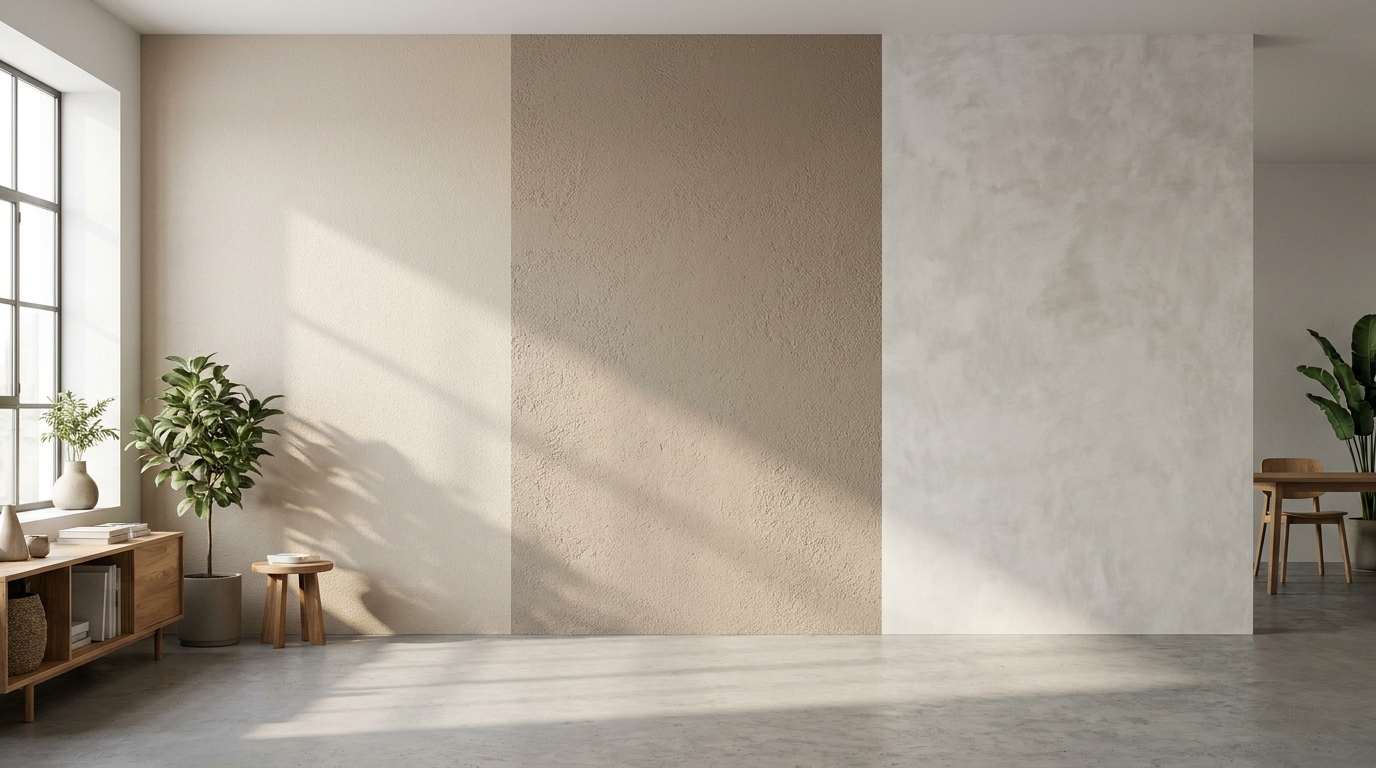
Before choosing a finish, it helps to understand that texture spans a broad range of looks and application methods. Some are sprayed, some rolled, some brushed, and some troweled by hand. The right option depends on your skill level, the condition of your walls, and the mood you want to create. A family room may suit a durable, low-maintenance orange peel or knockdown texture, while a dining room or bedroom may call for something more artisanal, such as limewash or Venetian plaster.
Orange Peel Texture
Orange peel is among the most familiar and approachable wall textures in North American homes. It has a gently dimpled effect, similar to the surface of citrus skin, and is usually created by spraying drywall compound or a premixed texture product. Because it is subtle, it works well in living areas, hallways, and ceilings where you want a forgiving surface without a dramatic decorative statement. It is often one of the easiest textures to live with because it adds depth while remaining visually quiet.
For DIYers, orange peel can be a useful option if you are blending repairs or refreshing walls that already have a textured character. It tends to hide minor inconsistencies better than flat paint on smooth drywall. Once dry, it can be primed and painted in almost any color, although softer matte or eggshell finishes often highlight it most gracefully.
Knockdown Texture
Knockdown begins with a sprayed or splattered texture that is later flattened lightly with a wide knife or trowel. The result is more organic than orange peel and has a softly mottled, handcrafted look. It works beautifully in transitional interiors where you want movement and visual warmth without committing to full plaster. It can also be an excellent solution for walls that need a little help looking intentional after repairs.
Although knockdown is still achievable for ambitious beginners, it requires timing. The material must set just enough before being knocked down, or the pattern can smear rather than soften. With practice and patience, however, it creates a remarkably custom result. Painted in a warm white, clay beige, or muted taupe, it can look serene and architectural.
Sand Finish Paint
Sand finish paint combines coating and texture in one product or system. Fine aggregate is suspended in the paint to create a grainy surface that is more delicate than dramatic. This can be a compelling choice if you want something straightforward and decorative without mastering trowel work. Sand finishes suit casual contemporary rooms, entryways, and accent walls where you want a more tactile envelope.
The key with sand textures is restraint. A fine-grade finish usually feels more elegant than a coarse one, especially in smaller rooms. Because the effect can slightly catch dust and shadow, the color palette should remain soft and cohesive if you are aiming for timelessness rather than novelty.
Limewash
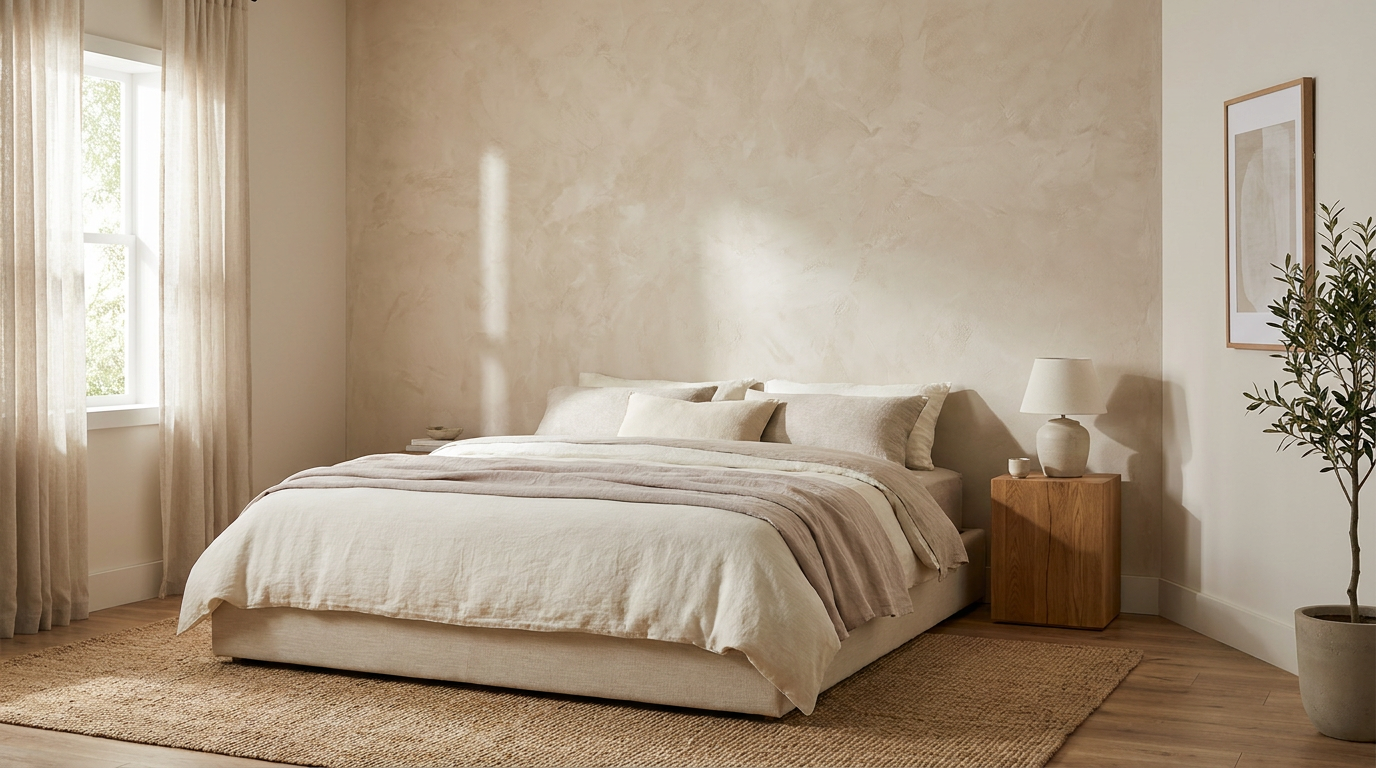
Limewash is one of the most beautiful finishes available to DIYers who want depth without obvious pattern. Traditionally made from crushed limestone and pigments, modern limewash products are often formulated to be easier to use in residential interiors. The effect is nuanced and atmospheric, with tonal variation that feels old-world and contemporary at once. It is particularly lovely in bedrooms, dining spaces, studies, and accent walls where mood matters.
The appeal of limewash lies in its softness. It does not create a raised texture in the same way a sprayed finish does, but it produces visual movement and a matte, mineral elegance that reads as textured from a design perspective. Brush technique matters, as layered strokes create the signature variation. If you appreciate a hand-finished, slightly romantic surface, limewash is a wonderful entry into decorative walls.
Venetian Plaster and Mineral Plaster Looks
Venetian plaster and related mineral finishes are often considered the couture end of textured walls. Applied with a trowel in thin, polished layers, they can range from softly matte to gently luminous. True Venetian plaster requires precision and practice, but many modern plaster-look products offer a more accessible path to a similar effect. The result is sophisticated, tactile, and deeply architectural.
This type of finish is ideal for spaces where you want the wall to feel like a material rather than a painted surface. It can elevate powder rooms, fireplaces, feature walls, and formal living spaces. Beginners can experiment on sample boards first, but it is wise to acknowledge that this is one of the more skill-sensitive categories. If perfection matters and the room is highly visible, professional help may be worth the investment.
How to Choose the Right Texture for Your Room
The most successful textured walls respond to both function and feeling. Start by asking what the room needs visually. Does it feel too flat, too cold, or too unfinished? Then consider how the space is used. High-traffic family zones usually benefit from textures that are durable and simple to repaint, while more intimate rooms can support nuanced finishes that are chosen primarily for beauty.
Scale also matters. In a small room, heavy texture can feel busy or close. A subtle trowel effect, limewash, or fine orange peel often works better because it enriches without overwhelming. In larger rooms, especially those with generous natural light, more expressive texture can create beautiful movement and prevent broad walls from feeling blank. Light should always be part of your decision. Raking light from windows or sconces will emphasize texture, sometimes dramatically.
Consider, too, the style of your home. If your interior leans modern and minimal, choose textures that are refined and restrained. If your décor has Mediterranean, rustic-luxury, or old-world influences, mineral plasters and layered limewash will feel especially at home. Matching the finish to the architecture ensures the room feels harmonious rather than decorated in isolation.
What You Need Before You Begin
Texture work almost always involves more steps than a standard paint job. Planning well is one of the clearest predictors of a graceful result. In addition to the finish itself, you may need patching compound, sanding tools, primer, painter’s tape, drop cloths, trays, mixers, brushes, rollers, spray tools, or a trowel depending on the method. Drying times should be built into your schedule from the start. Rushing between stages is one of the easiest ways to create inconsistency.
Prep work matters because even textured walls benefit from a stable foundation. Holes, loose paint, dust, oily residue, and crumbling patches need to be addressed before new material is applied. If you are using a rolled or painted texture product, check the manufacturer’s instructions for recommended primer and tool selection. Major paint manufacturers note that thicker roller covers are more effective on textured or semi-rough surfaces. In practical terms, that means a roller you might use for a smooth wall may not deliver enough material or proper coverage once texture enters the picture.
For reference, Benjamin Moore recommends thicker roller covers for rougher surfaces, such as a half-inch nap for semi-rough walls and three-quarter-inch for highly textured surfaces like textured ceilings, masonry, or stucco. This may seem like a technical detail, but it affects how evenly paint lands on peaks and recesses. The wrong roller can leave holidays, drag, or flatten the texture in unattractive ways.
Basic Tools and Materials Checklist
- Drop cloths and painter’s tape
- Safety glasses, gloves, and a dust mask or respirator as needed
- Patch compound or joint compound
- Sanding block or pole sander
- Primer suited to your wall condition and finish type
- Texture product, plaster, limewash, or joint compound mixture
- Rollers with appropriate nap thickness, trays, and extension pole
- Brushes, texture brush, spray can, hopper gun, knife, or trowel depending on technique
- Mixing bucket and drill mixer if required
- Topcoat paint if your chosen texture system requires painting after drying
Safety First, Especially in Older Homes
Elegant design always begins with a responsible process. If your home was built decades ago, do not assume that scraping, sanding, or removing an old textured finish is automatically harmless. Health Canada advises caution because older building materials may contain lead or asbestos, both of which can become hazardous if disturbed. This is particularly important when dealing with legacy textures, ceiling finishes, crumbling patch areas, or old paint layers that will be sanded aggressively.
Ventilation is equally important. Health Canada also recommends using low-emission or low-VOC products when possible and keeping renovation spaces well ventilated because paints, glues, varnishes, and related products can release volatile organic compounds. A low-VOC label is helpful, but it should not be treated as a complete guarantee of safety. Exposure depends on the specific chemicals involved, the amount used, and the conditions in the room. Open windows where possible, use fans appropriately, and avoid sleeping in freshly finished spaces until they are thoroughly aired out.
Wear eye protection, gloves, and a suitable mask or respirator depending on the work. If you are simply applying a water-based decorative finish over a sound wall, basic protection may be enough. If you are sanding, removing damaged texture, or disturbing unknown materials in an older home, be more cautious and consider professional testing first. The most beautiful DIY project is the one completed safely.
Step-by-Step: How to Apply a Textured Finish
The exact process varies by finish, but the following sequence provides a reliable framework for most DIY wall texture projects. Whether you are applying a subtle sprayed texture or a brushed limewash, the rhythm is similar: prepare carefully, prime properly, apply with consistency, allow adequate drying time, then finish and style the room with intention.
Step 1: Evaluate and Repair the Surface
Begin by examining the wall in daylight and with lamps on. Look for nail holes, hairline cracks, flaking paint, stains, and uneven patches. Fill small defects and let them dry fully, then sand until the transitions feel smooth to the touch. If the wall has larger irregularities, you may need a skim coat before texturing. Texture can soften imperfections, but it does not replace structural repair or proper patching.
This step is especially important if you are trying to blend previous damage. According to common drywall repair guidance from major home improvement retailers, matching the existing finish is essential before priming and repainting. Thinned joint compound or texture spray can often be used to recreate the pattern. A patch that is smooth in the middle of a textured wall will almost always remain visible after painting.
Step 2: Clean and Protect the Room
Dust and residue interfere with adhesion, so wipe walls as needed and make sure the surface is dry before priming. Remove wall art, cover floors and furniture, and tape edges neatly around trim, outlets, and ceilings if you want crisp transitions. Texture can travel farther than paint, especially when sprayed, so generous protection saves significant cleanup later.
Step 3: Prime Thoroughly
Primer is not an optional luxury here. It helps create a consistent surface, improves adhesion, reduces flashing, and gives the finish a more even absorbency. On repaired drywall, new joint compound can soak up product differently from old painted areas, which leads to blotchiness if skipped. Use a primer suited to your substrate and your chosen decorative system. Let it dry fully before moving to the next stage.
Step 4: Practice on a Sample Board
This is the step many DIYers resist, yet it is often the difference between a project that feels refined and one that feels uncertain. Use a scrap drywall panel, poster board, or an inconspicuous closet wall to test your technique. Practice your trowel angle, roller pressure, spray distance, or brush movement. Observe how the finish changes as it dries. Sample work reveals how heavy your application should be and how your chosen color interacts with texture.
Step 5: Apply the Texture Methodically
If you are doing orange peel or knockdown, follow product directions precisely regarding mixing, spray pattern, and set time. Keep your hand movement consistent and work in manageable sections so the texture remains uniform. For knockdown, allow the peaks to set before flattening them lightly with a broad knife. Do not overwork the surface. A soft, controlled pass is usually enough.
If you are applying limewash, use large crossing brush strokes that create movement rather than straight coverage lines. Work wet edge to wet edge so you do not create abrupt stops. Expect tonal variation, as that is part of the finish’s beauty. If using Venetian plaster or a plaster-look product, apply thin coats with a trowel and build depth gradually. Several delicate passes look far more elegant than one heavy, hurried coat.
Step 6: Allow Proper Drying and Cure Time
Texture work rewards patience. Drying times depend on humidity, temperature, wall porosity, and product formulation. In many Canadian climates, seasonal moisture can extend drying significantly, especially in basements or during humid months. Do not rush to paint or seal a finish before it is ready. Premature topcoating can disrupt adhesion, alter color, or trap moisture in ways that compromise the final look.
Step 7: Paint or Seal if Needed
Some textures are complete once dry, while others require a final paint coat or protective top layer. Sprayed drywall textures such as orange peel and knockdown are often painted afterward. Decorative mineral finishes may need a wax, soap, or specialty sealer depending on the product and room use. When painting a textured wall, remember that roller nap matters. Thicker covers help reach into the surface without leaving the valleys pale or the peaks dry.
Beginner-Friendly Projects vs Advanced Finishes
Not every texture asks for the same skill set, and acknowledging this at the start can save disappointment. For most beginners, the easiest entry points are sand finish paint, subtle orange peel, or simple knockdown on a low-stakes wall. These methods are practical, forgiving, and widely supported by retail-ready materials. They also make sense for utility rooms, secondary bedrooms, and repair zones where your main goal is to improve the surface and add polish.
Limewash can be approachable as well, especially if you enjoy painterly finishes and are comfortable embracing variation. It is less about mechanical precision and more about rhythm, overlap, and confidence. If you are seeking a decorative result with strong aesthetic value, limewash is often one of the most satisfying DIY choices.
Venetian plaster, polished plaster, and highly refined mineral trowel finishes sit at the more advanced end. The materials can be expensive, the technique is visible, and touch-ups are not always simple. For a statement fireplace wall, a front entry, or a room where every detail will be closely seen, hiring a professional plaster artisan may be money well spent. A sophisticated home is not defined by doing everything yourself. It is defined by choosing where your effort has the most beauty and impact.
How to Match Existing Texture for Repairs
One of the most useful skills in wall finishing is learning to repair without leaving a clear signature behind. If you have patched drywall after moving electrical outlets, fixing dents, or repairing minor water damage, the challenge is rarely just filling the hole. The challenge is making the surface disappear into the surrounding field of wall texture.
Start by studying the original pattern. Is it fine or coarse, sprayed or troweled, random or directional? Use thinned joint compound, aerosol texture, or a sponge, brush, or knife to imitate the existing surface on a test scrap first. Build slowly. It is easier to add a little more texture than to remove too much. Once the patch dries, prime it and repaint the whole area if needed for uniform sheen and color.
This matching process is where textured walls reveal one of their greatest practical strengths. A successful texture repair often blends far more gracefully than a smooth wall patch, which can show every edge under light. In lived-in homes, that forgiveness is invaluable.
Color, Sheen, and Styling Considerations
The finish you choose is only half the story. Color and sheen determine how the texture is perceived. Matte and flat finishes tend to look the most sophisticated on textured surfaces because they emphasize depth without adding glare. Eggshell can also work well, especially in family spaces where a little washability is useful. High sheen generally magnifies irregularity and should be used carefully unless the effect is intentional.
In terms of color, warm neutrals are particularly successful with texture because they allow light and shadow to do the decorative work. Chalky whites, mushroom tones, pale taupes, stone, clay, sand, olive-grey, and muted greige all pair beautifully with tactile finishes. Strong color can also be stunning, but in those cases the wall often becomes a true focal point and should be styled accordingly.
Once complete, keep the rest of the room balanced. Texture pairs beautifully with linen, bouclé, wood, travertine, ceramic, aged brass, and softly veined stone. If your walls carry a strong artisanal finish, allow furnishings to echo that calm richness rather than competing with it. This is where texture transcends décor and becomes atmosphere.
Maintenance and Cleaning
There is a common belief that all textured walls are difficult to maintain, but this is not entirely true. The care required depends on the depth of texture, the material, and whether the surface has been sealed or painted. A subtle orange peel painted in quality eggshell can be relatively straightforward to dust and wipe gently. A delicate limewash or unsealed plaster may require a lighter touch and more mindful cleaning.
For routine care, dust with a microfiber cloth, a soft brush attachment, or a dry electrostatic duster. Avoid saturating textured walls with water unless the finish is clearly washable according to the manufacturer. If spot cleaning is needed, test a discreet area first. Harsh scrubbing can flatten decorative surfaces or remove color variation, particularly on artisan coatings.
When planning a new project, maintenance should be part of your selection process. In kitchens, hallways, and children’s spaces, durability matters. In bedrooms and formal rooms, atmosphere may matter more. There is no universal best texture, only the right texture for the life of the room.
Common Mistakes to Avoid
- Skipping surface prep. Texture is forgiving, but it does not hide loose paint, grease, moisture problems, or poor patching.
- Ignoring primer. Without it, absorption can be uneven and the finished wall may look patchy or fail to adhere well.
- Using the wrong tools. Roller nap, trowel type, and spray pattern all affect the final appearance more than many beginners realize.
- Overworking the finish. Most textures become less elegant when repeatedly re-touched while drying.
- Choosing a texture too heavy for the room. Subtlety often reads more current and more expensive.
- Forgetting safety in older homes. Lead and asbestos risks should never be guessed at.
- Rushing drying times. Texture needs patience to settle into its full beauty.
When to Call a Professional
DIY can be deeply rewarding, but refinement often comes from knowing your limits. If your walls are significantly damaged, if moisture problems are present, if you suspect hazardous older materials, or if you want a truly polished Venetian plaster finish in a prominent room, a professional may be the wiser choice. Skilled drywall finishers and plaster artisans bring consistency, speed, and technical control that can justify the cost, especially in large or highly visible spaces.
You can also take a hybrid approach. Hire a professional to repair, skim, or base-coat the walls, then complete a decorative top finish yourself on an accent wall. This allows you to enjoy the creativity of the process without taking on the most technically demanding part alone. Good design is never about proving something. It is about creating a home that feels considered and enduring.
Final Thoughts: Texture as a Form of Quiet Luxury
Beautiful textured walls do more than decorate a room. They shift its emotional register. A once-flat space becomes softer, more storied, and more dimensional. Light glides differently, corners feel less abrupt, and neutral palettes suddenly gain depth and nuance. In this way, texture offers one of the most accessible paths to a more luxurious home, not because it is extravagant, but because it feels crafted.
If you approach your project with patience, proper prep, and a finish that truly suits the room, textured walls can offer both practical and aesthetic rewards. They can disguise the small imperfections of everyday architecture while introducing an artistry that feels timeless. Whether you choose a gentle orange peel, a modern knockdown, a sandy matte wash, or the old-world poetry of limewash or plaster, the effect is the same at heart. Your home begins to feel touched by the hand rather than simply covered by color.
That is the enduring beauty of texture. It asks us to look more closely, to appreciate subtle variation, and to understand that elegance often lives in surfaces that are not perfectly smooth. In a world drawn to convenience, textured finishes remind us that depth, however quietly expressed, is always worth the effort.


No Comment! Be the first one.