


Transform Your Space: A Step by Step Guide to Upholstering Furniture Like a Pro
There is something quietly transformative about upholstery. A worn chair with faded fabric, a bench that has lost its structure, or an heirloom armchair that no longer feels at home in your interior can all be renewed through careful, thoughtful reupholstery. Rather than discarding a piece that still has beauty in its proportions or strength in its frame, upholstery allows you to reveal its potential again. It is a practical craft, certainly, but it is also an art of proportion, texture, comfort, and finish.
Table Of Content
- Why Upholstery Is Worth Learning
- Choosing the Right Furniture Piece for Your First Project
- Understanding the Anatomy of Upholstered Furniture
- Tools and Materials You Will Need
- Essential Upholstery Tools
- Common Upholstery Materials
- How to Choose Upholstery Fabric with Confidence
- Preparing Your Workspace and Your Piece
- Step by Step: How to Upholster Furniture Like a Pro
- Step 1: Remove the Old Upholstery Carefully
- Step 2: Repair and Reinforce the Frame
- Step 3: Replace Webbing, Springs, or Support if Needed
- Step 4: Add Foam and Batting
- Step 5: Measure and Cut Your Fabric
- Step 6: Center, Stretch, and Staple in Sequence
- Step 7: Master the Corners
- Step 8: Add Trim, Piping, or Finishing Details
- Step 9: Finish the Underside
- Common Upholstery Mistakes and How to Avoid Them
- How to Style Your Newly Upholstered Piece
- Best Types of Furniture for DIY Upholstery Projects
- How to Care for Upholstered Furniture After the Makeover
- Final Thoughts
For many people, upholstery appears intimidating from a distance. The process seems highly technical, filled with unfamiliar tools, hidden layers, and professional secrets. Yet the reality is far more welcoming when each stage is approached patiently. Once you understand how furniture is built, how fabric behaves, and how tension creates a clean silhouette, the process becomes far less mysterious. What emerges is not just a recovered seat or chair, but a renewed relationship with your home and the objects you choose to live with.
This guide is designed to make upholstery feel both refined and accessible. You will learn how to assess a piece before you begin, how to choose the right tools and materials, and how to build a beautiful finish step by step. Whether you are covering a simple dining chair seat or giving new life to a statement accent chair, the principles remain much the same. With care, observation, and a little confidence, you can transform tired furniture into something polished, personal, and genuinely elegant.
Before diving in, it helps to remember that even professionals work in stages. Upholstery is not about rushing toward the final look. It is about respecting the sequence. The frame must be solid before the padding is placed. The padding must be smooth before the fabric is stretched. The fabric must be aligned before it is secured. When each layer is handled with intention, the final result feels effortless, even if the process behind it has required patience.
Why Upholstery Is Worth Learning
Reupholstering furniture is one of the most satisfying forms of DIY home improvement because it blends restoration with self expression. Unlike painting a wall or assembling a shelf, upholstery changes both the appearance and the physical experience of a piece. You influence how it looks, how it feels, and how it supports the body. That makes the transformation unusually tangible.
It is also a smart design decision. Vintage and well made furniture often has stronger frames and better proportions than mass produced alternatives. A solid wood chair or bench with worn fabric can become far more valuable to your home once recovered in a textile that complements your interior. In many cases, it is also more sustainable to restore what you already own than to replace it with something new. This is especially meaningful when the piece has family history, beautiful craftsmanship, or a silhouette that deserves preservation.
There is another reward as well, and it is less visible but equally important. Upholstery teaches you to look closely. You begin to notice seam placement, foam density, piping detail, and the way a textile shifts under tension. You become more literate in the language of furniture. Even if you only complete one or two projects, the experience refines your eye and sharpens your understanding of quality.
Choosing the Right Furniture Piece for Your First Project
The most successful upholstery projects begin with realistic selection. If you are a beginner, choose a piece with a straightforward shape and removable parts. Dining chair seats, ottomans, benches, and simple headboards are ideal starting points because they usually involve fewer curves, less hand sewing, and simpler fabric placement. These projects offer a wonderful opportunity to practice clean tension and neat corners without becoming overwhelmed by advanced structural work.
Look carefully at the condition of the frame before committing. A beautiful fabric cannot compensate for a weak or broken structure. Press on the seat, inspect the legs, and gently shake the piece to test for instability. If joints are loose, they should be repaired before you begin upholstering. If the wood is cracked or severely damaged, the restoration may require carpentry skills beyond the scope of a simple fabric makeover.
It is also wise to consider the complexity of the original design. Tufting, deep channeling, heavy pleating, and tightly curved arms can produce exquisite results, but they ask more from the maker. For a first project, seek simplicity. A graceful profile with clear edges will teach you more than an ornate piece that disguises basic upholstery principles behind decoration.
Understanding the Anatomy of Upholstered Furniture
Before you remove a single staple, take time to understand what you are looking at. Most upholstered furniture is built in layers. Beneath the decorative fabric you may find dust covers, trim, batting, foam, webbing, burlap, muslin, or other support materials. Each layer has a purpose. Some provide comfort, some provide shape, and some protect the layers beneath.
When beginners rush into a project, they often remove everything at once and then struggle to remember how the piece was assembled. The better approach is to work slowly and observe the order of construction. Remove components one by one and photograph every stage. Label pieces of old fabric if they will serve as patterns. Keep trim, screws, and hardware in separate containers so nothing is lost in the process.
This kind of careful deconstruction gives you a map. The old upholstery, even if worn and unattractive, contains valuable information about seam placement, staple locations, overlap, and grain direction. In many projects, the simplest path to a professional result is to let the original piece teach you how it wants to be rebuilt.
Tools and Materials You Will Need
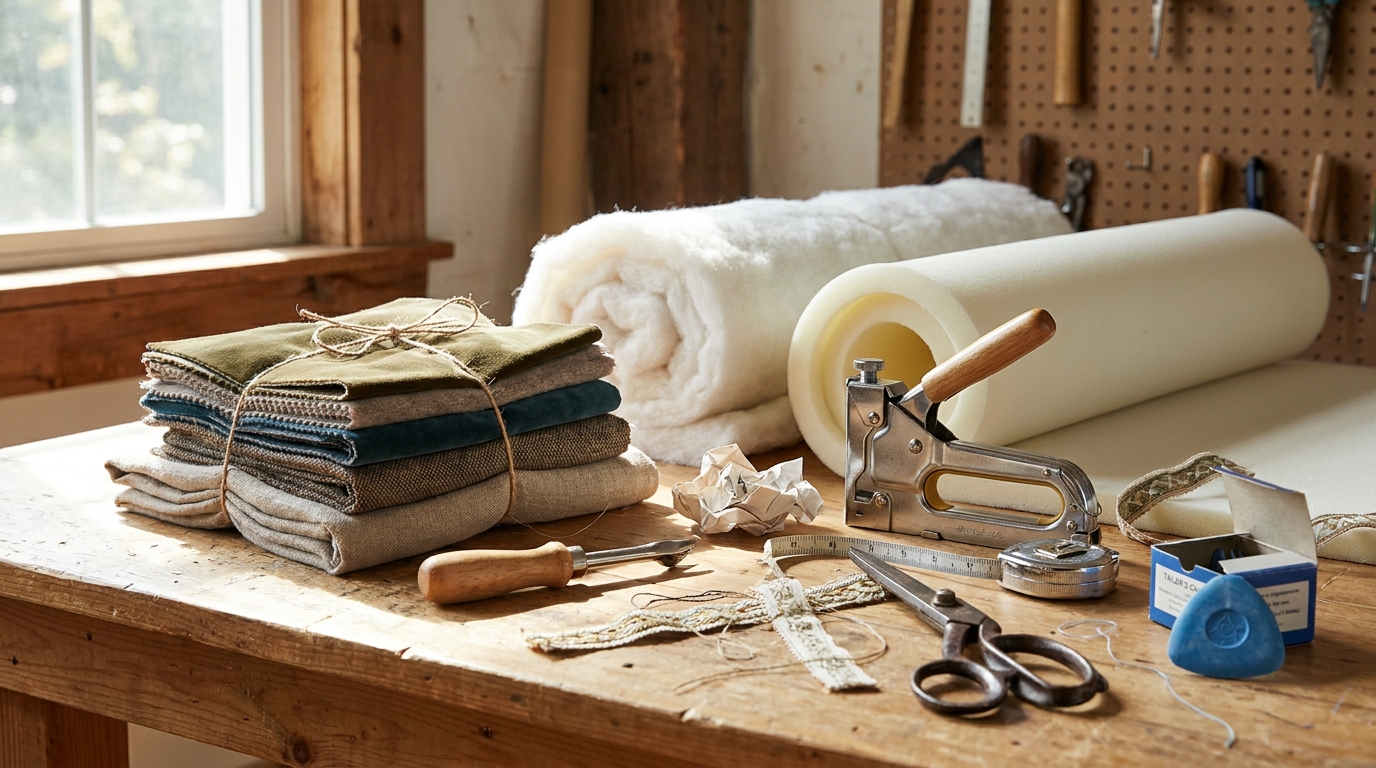
The right tools make upholstery not only easier but noticeably neater. While you do not need an industrial workshop for many home projects, a few essentials are worth having. A staple gun, fabric scissors, needle nose pliers, a tack remover, measuring tape, chalk, and a rubber mallet form the basic toolkit for most beginner friendly projects. If you plan to tackle more than one piece, these tools quickly justify themselves.
Materials matter just as much as tools. Upholstery fabric should be chosen with both beauty and durability in mind. You may also need foam, batting, dacron wrap, webbing, dust cover fabric, upholstery thread, trim, and possibly muslin depending on the type of piece. The exact combination depends on the furniture, but quality layers contribute enormously to the finished look and comfort.
To keep the process organized, gather everything before you begin. Stopping midway because you are short of batting or have the wrong staples interrupts the flow and can affect precision. A well prepared workspace allows you to move thoughtfully from one stage to the next. Good light is important too, because upholstery is all about details, and details are easiest to miss in dim conditions.
Essential Upholstery Tools
- Staple gun: Manual, electric, or pneumatic depending on your comfort level and the hardness of the frame.
- Staples: The correct size for your staple gun and furniture frame.
- Tack remover or staple lifter: For removing old fasteners cleanly.
- Fabric scissors: Sharp enough to cut thick upholstery textiles without fraying.
- Needle nose pliers: Helpful for pulling stubborn staples and tacks.
- Measuring tape and straight edge: For accurate cuts and fabric planning.
- Tailor chalk or fabric marker: For marking cut lines and placement points.
- Rubber mallet and hammer: Useful for trim, tack strips, and small adjustments.
Common Upholstery Materials
- Upholstery fabric: Linen blends, cotton blends, velvet, performance fabric, or textured weaves.
- Foam: For replacing flattened cushions or seat pads.
- Batting: To soften edges and create a fuller, smoother shape.
- Dacron wrap: Often used around foam for a more polished contour.
- Muslin: A useful underlayer for shaping and testing fit.
- Dust cover fabric: Applied to the underside for a finished professional underside.
- Trim or piping: For decorative and polished edge treatment where needed.
How to Choose Upholstery Fabric with Confidence
Fabric selection is where practicality meets visual identity. The textile you choose will determine not only the personality of the finished piece but also its longevity. A romantic linen may look exquisite on an occasional chair in a quiet bedroom, while a family dining chair may require a tougher woven or performance fabric that resists staining. The right fabric is always a dialogue between function and atmosphere.
Begin by considering how the furniture will be used. High traffic seating demands durability, and fabrics with a stronger weave often perform better over time. Delicate silk or loosely woven decorative textiles may be lovely to admire, but they are rarely suited to everyday wear. If the piece is for a busy living room, breakfast nook, or entryway bench, practical resilience matters as much as color.
Texture is another essential consideration. A smooth fabric creates a cleaner, more minimal line. A nubby weave, velvet, or subtle pattern adds softness and dimension. If the furniture has a simple shape, texture can make it feel richer. If the furniture already has ornate lines, a quieter fabric may allow the silhouette to speak more clearly.
Pattern deserves particular attention. Large scale prints can be striking, but they require more fabric and more careful alignment. Stripes and geometric motifs can look crisp and tailored, yet they reveal inaccuracy quickly if they are not perfectly straight. For beginners, solids, subtle textures, and forgiving small patterns are often the safest route. They allow you to focus on craft without the added pressure of exact pattern matching.
The most beautiful upholstered piece is not always the boldest one. Often, it is the one in which fabric, form, and function feel quietly in balance.
Preparing Your Workspace and Your Piece
A serene workspace leads to a more disciplined result. Choose an area with enough room to move around the furniture, open out fabric, and set tools within easy reach. Protect the floor with a drop cloth or old sheet, especially if the piece contains decades of dust or old stuffing. Keep a vacuum nearby because upholstery deconstruction can be surprisingly messy.
Before stripping the furniture, photograph it from every angle. Capture close ups of corners, folds, and any trim placement. These images will become invaluable when it is time to reconstruct what you have taken apart. If the seat is removable, detach it carefully and label the hardware. If the piece has decorative nails or piping, remove them patiently to preserve the lines of the frame.
As you begin to deconstruct, work methodically. Remove staples and tacks in sequence rather than pulling at the fabric roughly. Save each layer if it can be used as a reference pattern. Once the old fabric is off, clean the frame thoroughly. Dust, loose threads, and old debris can interfere with smooth rebuilding, so it is worth giving the piece a careful reset before moving on.
Step by Step: How to Upholster Furniture Like a Pro
The exact process varies depending on the furniture, but the following sequence applies beautifully to many common DIY upholstery projects. Think of these steps as a refined framework. As your confidence grows, you can adapt them to more complex forms.
Step 1: Remove the Old Upholstery Carefully
Start by taking off the existing fabric one section at a time. Use a tack remover or staple lifter to ease out staples without gouging the wood beneath. Pull the fabric away slowly so you can see where each layer begins and ends. If the original fabric pieces remain intact, set them aside flat because they can serve as highly accurate templates for the new material.
Observe what is beneath the surface as you go. You may find foam that has crumbled, batting that has compressed, or webbing that has slackened over time. These hidden elements affect comfort and shape, so replacing them may be necessary for a truly professional transformation. Removing old fabric is not only about making space for the new. It is about revealing the condition of the furniture itself.
Step 2: Repair and Reinforce the Frame
Once exposed, inspect the wooden frame closely. Tighten loose screws, reglue unstable joints, and sand any rough areas that might catch the new fabric. If the seat base is warped or damaged, repair it before adding padding. It is tempting to move quickly toward the visible makeover, but the invisible structure is what gives the final piece integrity.
If the piece has legs or visible wood detailing, this is also the moment to refresh the finish if desired. A gentle sanding and a new stain or paint treatment can elevate the result beautifully. Just be sure any refinishing is fully dry before upholstery materials are added. Clean transitions between wood and fabric are part of what makes a custom piece look sophisticated.
Step 3: Replace Webbing, Springs, or Support if Needed
Not every beginner project includes this stage, but some older furniture may require support restoration. If webbing is sagging or springs feel uneven, address that before replacing the upper layers. For a simple dining chair or bench, the support may be a straightforward board base. For armchairs and vintage seating, there may be more internal structure to assess.
Even if you are not rebuilding springs, understanding the support beneath the padding helps you judge how much foam and batting the piece needs. A seat that feels too hard may need more cushioning. A seat that loses its shape quickly may need firmer foam. Good upholstery does not chase softness alone. It aims for balanced comfort and tailored structure.
Step 4: Add Foam and Batting
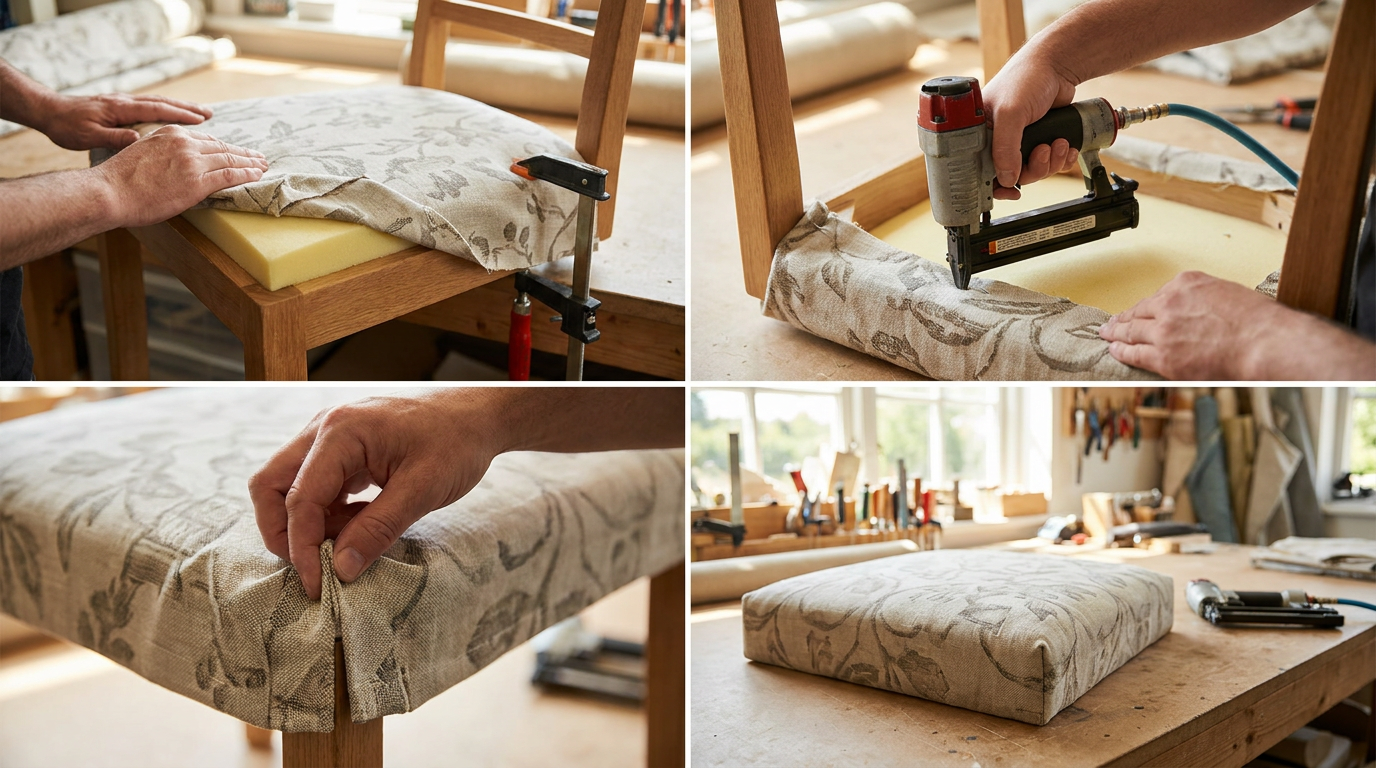
Cut your foam to the shape of the seat or area being upholstered. An electric carving knife is often used for clean foam cuts, though a sharp blade can work for simpler shapes. The foam should sit neatly within the boundaries of the frame without excessive overhang. Too much bulk can make the furniture look swollen rather than refined.
Once the foam is in place, wrap it with batting or dacron to soften edges and create a smoother transition beneath the fabric. Pull the batting snugly and staple it where appropriate on the underside or hidden areas. This layer has a subtle but powerful effect. It rounds sharp corners, disguises minor imperfections, and contributes to that plush, finished appearance associated with professional upholstery.
Step 5: Measure and Cut Your Fabric
Lay the old fabric pieces over the new textile when possible, allowing extra margin for wrapping and stapling. If no pattern piece is available, measure generously. It is always better to trim away excess than to discover too late that the material is too short to pull properly around the frame. As you cut, pay attention to grain direction, pattern orientation, and nap if you are using velvet or another directional fabric.
Place your cut fabric over the piece before securing anything. Check that the weave runs straight and that any pattern sits as intended. This pause is essential. Once staples go in, especially in heavier materials, repeated repositioning can mark the fabric or distort the shape. A few extra minutes at this stage can save hours of correction.
Step 6: Center, Stretch, and Staple in Sequence
Professional looking upholstery depends largely on even tension. Begin by placing one staple at the center of one side, then move to the opposite side and pull the fabric taut before stapling. Repeat at the centers of the remaining sides. This anchors the textile evenly. From there, work outward gradually from each center toward the corners, alternating sides as you go.
The goal is firm smoothness, not excessive force. If you pull too tightly, patterns distort and padding compresses unnaturally. If you pull too loosely, the fabric puckers and shifts with use. Keep checking the top surface as you staple. Turn the piece over often so you can correct subtle ripples before they become fixed. Upholstery rewards constant visual adjustment.
Step 7: Master the Corners
Corners are often where DIY work reveals itself, so give them special attention. Each corner must be folded with intention, almost like draping fabric in miniature. Smooth the excess neatly and decide where the fold line will sit. Some corners look best with a single clean pleat, while others require a flatter wrapped treatment depending on the shape of the furniture.
There is no single fold that works for every piece, which is why observation matters so much. Study the original corner if it was well done. Test the fold with your fingers before stapling permanently. A beautiful corner should feel controlled and symmetrical, with no bulky bunching visible from the top or side. Once secured, trim excess fabric if necessary to reduce thickness.
Step 8: Add Trim, Piping, or Finishing Details
Some pieces look complete with a simple stapled wrap hidden underneath. Others benefit from decorative finishing such as double welt cord, nailhead trim, gimp, or piping. These details conceal raw edges and bring a more custom, elevated look. If you are using trim, apply it slowly and consistently so it follows the line of the furniture without wavering.
Piping is especially effective for defining edges and giving furniture a tailored profile. If sewing your own piping feels too advanced for a first project, ready made trim can still create a graceful finish. Choose a detail that supports the style of the piece rather than overwhelming it. The best finishes are integrated, not excessive.
Step 9: Finish the Underside
One of the clearest signs of thoughtful upholstery is a tidy underside. After the visible upholstery is complete, cover the bottom with black cambric or another dust cover fabric. Fold the edges neatly and staple it in place to hide internal layers and exposed staples. This step is often overlooked in DIY projects, yet it adds an immediate sense of professionalism.
If the piece had removable feet, glides, or hardware, reinstall them once the dust cover is in place. Then inspect the furniture from every angle. Check for loose threads, uneven trim, or areas where the fabric may need one more staple. A final review allows you to refine the result before placing the piece back into your room.
Common Upholstery Mistakes and How to Avoid Them
Even careful makers encounter challenges, and most upholstery errors come down to one of three issues: poor planning, uneven tension, or rushing the finishing stages. Choosing a fabric without accounting for durability or pattern direction can create disappointment early. Cutting too quickly without confirming alignment can waste expensive material. Skipping photos during deconstruction can make reassembly far harder than it needs to be.
Another common mistake is overpulling fabric in the hope of achieving a tighter look. In reality, excessive tension can flatten padding, create stress points, and distort motifs. The aim is smoothness with balance. If wrinkles appear, it is usually better to remove a few staples and reset that section than to keep pulling harder in frustration.
Finishing details are where many projects lose their polish. Messy corners, visible staples, and an uncovered underside can make strong work look incomplete. Give yourself permission to slow down at the end. In upholstery, the final ten percent of the process often determines fifty percent of the visual impression.
How to Style Your Newly Upholstered Piece
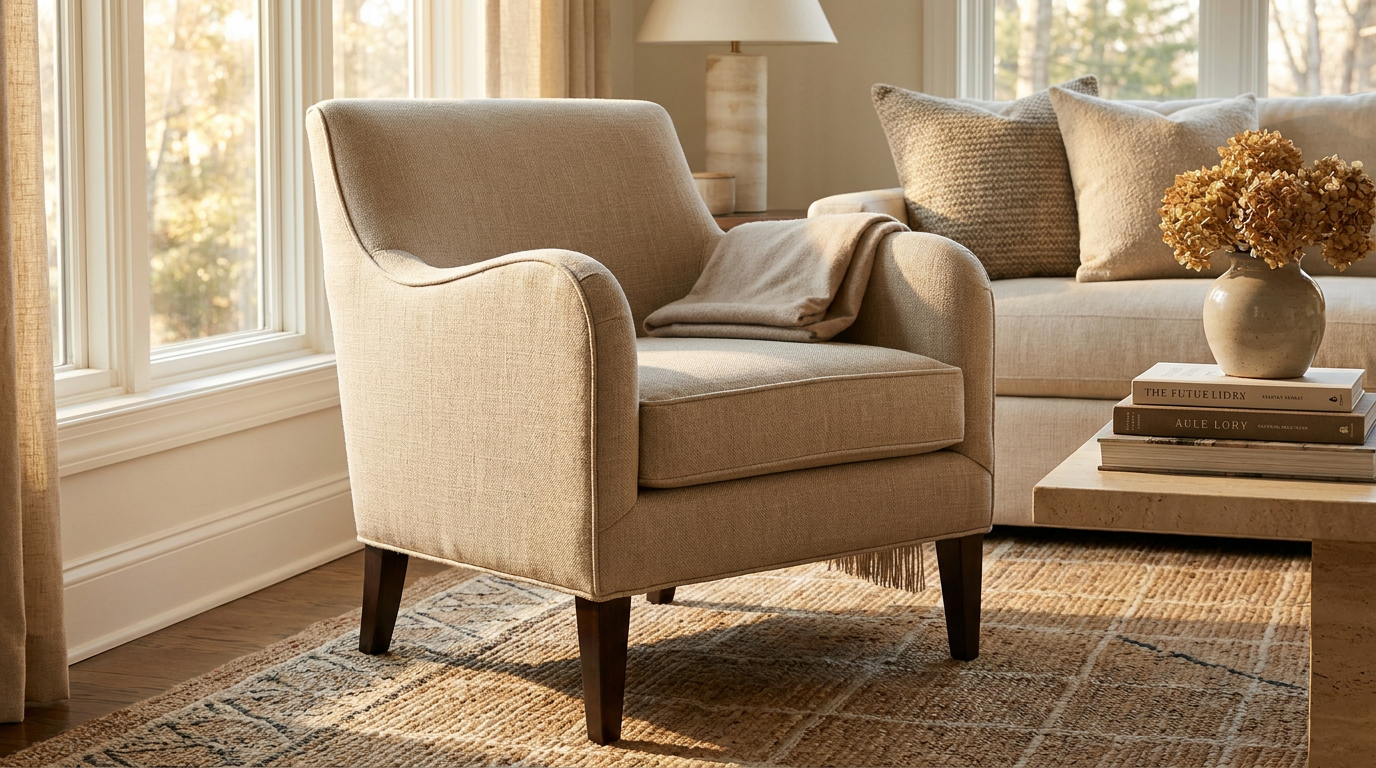
Once your furniture is complete, its placement matters. A newly upholstered chair or bench deserves to be seen as part of the composition of the room. Consider what textures surround it, how the light falls across the fabric, and whether the color connects with other elements in the space. Good styling does not mean forcing the piece to match everything. It means allowing it to contribute to a coherent visual rhythm.
A neutral upholstered chair can become quietly luxurious beside a brass floor lamp and a soft wool rug. A patterned bench may bring life to an entry when paired with restrained walls and sculptural accessories. If you have chosen a tactile fabric such as velvet or bouclé, let nearby materials contrast rather than compete. Wood, linen curtains, stone, and ceramics all help upholstery feel grounded and intentional.
There is also pleasure in acknowledging the story of the piece. A restored family chair in a reading corner, a recovered ottoman at the foot of a bed, or a reupholstered dining seat around a vintage table all carry a particular warmth. These are not anonymous purchases. They are objects shaped by your own hands and eye, which gives them a deeper presence in the home.
Best Types of Furniture for DIY Upholstery Projects
If you are inspired to continue after your first project, some furniture types offer an especially rewarding path forward. Dining chair seats remain one of the easiest and most useful categories because they are small, practical, and satisfying to complete. Storage benches are another excellent choice, offering both visible impact and relatively manageable construction.
Ottomans allow you to explore softer shaping and larger scale fabric placement without the complications of arms or back panels. Headboards can also be surprisingly approachable, especially when working with a simple rectangular design. Accent chairs vary more widely in difficulty, but those with detachable seats or clean modern lines can be good intermediate projects.
As your skill grows, you may feel drawn toward more complex pieces such as wingback chairs, tufted benches, or antique armchairs. These require more planning, more patience, and often more specialized techniques. They are worth attempting in time, but they become much more enjoyable when your understanding of tension, layering, and finishing is already well established.
How to Care for Upholstered Furniture After the Makeover
Once the work is done, proper care helps preserve the result. Vacuum upholstered surfaces gently with a brush attachment to remove dust before it settles into the fibers. Attend to spills quickly according to the fabric type, using the manufacturer recommendations when available. Blot rather than rub, especially on textured or delicate weaves.
Rotate cushions if the piece includes them, and avoid placing upholstered furniture in constant direct sunlight unless the textile is designed for strong exposure. Sun can fade even beautiful fabrics over time, softening their richness and altering color balance. If the chair or bench sits near a bright window, sheer curtains can help moderate the effect while maintaining a luminous atmosphere.
Most importantly, use the furniture with confidence. Upholstery is meant to support life, not sit untouched. A well chosen fabric and well executed upholstery job should offer durability as well as beauty. The loveliest pieces are those that continue to age gracefully while participating fully in the rhythms of daily living.
Final Thoughts
Learning how to upholster furniture like a pro is not about imitating perfection on the first attempt. It is about understanding the logic of layers, training the eye to notice tension and line, and giving yourself permission to move carefully through a tactile process. Each project teaches something new. One may sharpen your corners, another may improve your fabric planning, and another may reveal how much comfort depends on what lies beneath the visible surface.
What makes upholstery so compelling is that it combines utility with poetry. It lets you rescue shape, restore comfort, and compose atmosphere in a single gesture. An outdated piece becomes fresh, not through trend alone, but through considered craftsmanship. The new fabric, the smooth seat, the refined edge, and the quiet confidence of a finished silhouette all contribute to a room that feels more intentional.
If you begin with a manageable project, gather quality materials, and work with patience, upholstery becomes far less daunting than it first appears. It becomes a skill that enriches your home and your design sensibility at once. In time, you may discover that what started as a practical DIY experiment has become one of the most rewarding ways to transform a space. Not because it changes furniture alone, but because it teaches you how beauty is built layer by layer.


No Comment! Be the first one.