


How to Install Crown Molding Like a Pro: A Step-by-Step Guide for Homeowners
Crown molding has a way of changing the feel of a room without changing the room itself. It sits where the wall meets the ceiling, but the effect goes beyond that simple location. A plain room starts to feel finished, a newer room can look more custom, and an older room can regain some of the character it may have lost over time. For many homeowners, crown molding lands in that sweet spot between decorative upgrade and practical trim work.
Table Of Content
- What Makes Crown Molding Different From Other Trim
- Should You Use Wood, MDF, Foam, or Composite Crown Molding?
- Tools and Materials You Will Need
- Plan the Room Before You Start Cutting
- Step 1: Mark the Layout Line Around the Room
- Step 2: Measure Carefully and Build a Simple Cutting System
- Step 3: Understand Nested Cutting and Keep the Orientation Consistent
- Step 4: Cut and Fit Inside Corners the Right Way
- When a Mitered Inside Corner Still Makes Sense
- Step 5: Cut Outside Corners With Matching Miters
- Step 6: Use Scarf Joints on Long Runs
- Step 7: Dry-Fit Everything Before Final Installation
- Step 8: Install the Crown Molding Securely
- Step 9: Fill, Caulk, Sand, and Touch Up
- Common Mistakes Homeowners Make and How to Avoid Them
- How Long Does Crown Molding Installation Take?
- Is Crown Molding Worth Doing Yourself?
- Final Thoughts
At the same time, crown molding has a reputation for being difficult. That reputation is not completely unfair. It is not installed like baseboard, casing, or other flat trim. It sits at an angle, and that one detail changes how you measure, how you cut, how you hold the material on the saw, and how you fit corners. Most of the frustration beginners run into comes from treating crown like flat trim and expecting it to behave the same way.
The good news is that crown molding is absolutely a realistic DIY project if you go into it with the right expectations. This is precision work, not rushed work. If you are patient, make test cuts, dry-fit every piece, and keep your saw setup consistent, you can get a result that looks clean and professional. You do not need to be a finish carpenter to do this well, but you do need to work carefully and understand the process before the first cut.
This guide walks you through the full job from planning and material selection to layout, cutting, coping, installation, and final finishing. The goal is simple. By the end, you should understand not just what to do, but why each step matters, so you can handle the project with confidence in your own home.
Practical truth: Crown molding is manageable for homeowners, but it rewards patience. Good layout and test fitting matter more than speed.
What Makes Crown Molding Different From Other Trim
The first thing to understand is that crown molding does not sit flat against one surface. It bridges the corner between the wall and ceiling at a spring angle. That means the profile projects outward, and the back of the molding touches both the wall and the ceiling at specific points. Because of that geometry, your cuts have to account for how the piece will sit in the room, not how it looks lying flat on a bench.
This is why so many first attempts go wrong. A homeowner measures carefully, sets the saw to 45 degrees, makes a cut, and then finds that the piece does not match the corner. The issue usually is not just the angle. It is the orientation. If crown is held differently from one cut to the next, even correct measurements can produce mismatched joints. Consistency is everything here.
Inside corners and outside corners also work differently. Many people assume both should be joined with simple miter cuts, but professionals often handle them in different ways. Outside corners are usually made with complementary miters, while inside corners are often better handled with a coped joint. That coping step is one of the best things a homeowner can learn because real rooms are rarely perfectly square.
Should You Use Wood, MDF, Foam, or Composite Crown Molding?
Before you cut anything, decide what kind of molding makes sense for your room and your skill level. Traditional wood crown molding remains the premium option in many homes. It is durable, looks substantial, and can be painted or stained depending on the species and profile. If you want a classic finish and do not mind a bit more weight and cutting effort, wood is a strong choice.
Medium-density fiberboard, often sold as MDF crown molding, is common for painted trim. It is stable, relatively affordable, and easy to paint. Many homeowners like it because it comes pre-primed and gives a smooth final look. The downside is that MDF is heavier than foam and less forgiving around moisture, so it is usually better suited to dry interior rooms rather than damp spaces.
Foam and lightweight composite crown moldings have become more popular because they make the project less physically demanding. They are easier to lift, easier to cut, and often designed for adhesive-based installation with minimal fastening. For a beginner, that can remove a lot of stress. The tradeoff is that they do not always have the same crisp feel or durability as wood, especially in rooms where the trim may take more wear over time.
If this is your first time and you want the most forgiving material, a quality foam or composite product can be a smart entry point. If you want a more traditional result and are comfortable taking your time, pre-primed wood or MDF is often the best balance for most homeowners. Whatever you choose, it helps to buy a little extra for test cuts and mistakes because crown molding is one project where practice pieces are worth their cost.
Tools and Materials You Will Need
You do not need a shop full of specialty equipment, but you do need the right basic tools. The most important is a miter saw that can make consistent, accurate cuts. A compound miter saw helps, though many homeowners cut crown in a nested position rather than using full compound-angle settings. A coping saw is also useful if you plan to handle inside corners the way many professionals do, which is with coping instead of trying to force perfect mitered inside joints.
You will also need layout and fastening tools. A tape measure, pencil, level, stud finder, and caulk gun all matter here. For fastening, most people use a finish nailer, though hammer and finish nails are still possible if you work carefully. Wood glue or construction adhesive can help with seams and certain material types, especially on scarf joints and outside corners.
A complete shopping and prep list usually includes the molding itself, nails or fasteners sized for your walls and ceiling framing, wood filler, paintable caulk, sandpaper, primer or paint if the molding is unfinished, and painter’s tape for protecting finished surfaces. If you are installing stained wood crown, you may also need stain, clear finish, and a matching putty for touch-up. The cleaner your finish plan is before installation, the smoother the last phase of the project will go.
- Miter saw
- Coping saw
- Tape measure
- Level or laser level
- Stud finder
- Pencil
- Finish nailer or hammer and finish nails
- Construction adhesive or wood glue
- Wood filler or paintable putty
- Paintable caulk
- Sandpaper
- Ladder
- Safety glasses and hearing protection
Plan the Room Before You Start Cutting
Good trim work starts long before the first piece goes on the saw. Walk the room and look closely at the walls and ceiling. Check whether the ceiling dips, whether corners appear out of square, and whether any walls have a noticeable bow. These conditions are common, especially in older homes, and they affect how the molding will sit. If you assume the room is perfect, you will end up chasing gaps later.
Next, think through your joint locations. If a wall is longer than a single piece of molding, you will need a scarf joint where two lengths meet along a straight run. It is best to place scarf joints where they are less noticeable, often away from the main line of sight if possible. Also decide where you want your most visible corner joints to land. Starting in a less visible corner gives you room to learn and adjust before you reach the area everyone notices first.
If the molding is unfinished or if you plan to paint it, pre-finishing can save you time and leave you with a cleaner result. Many professionals prime and paint at least one coat before installation, then touch up after the trim is nailed in place. That reduces messy ceiling-edge painting later and keeps the profile cleaner. It is not mandatory, but it is one of those habits that tends to make the final work look sharper.
Step 1: Mark the Layout Line Around the Room
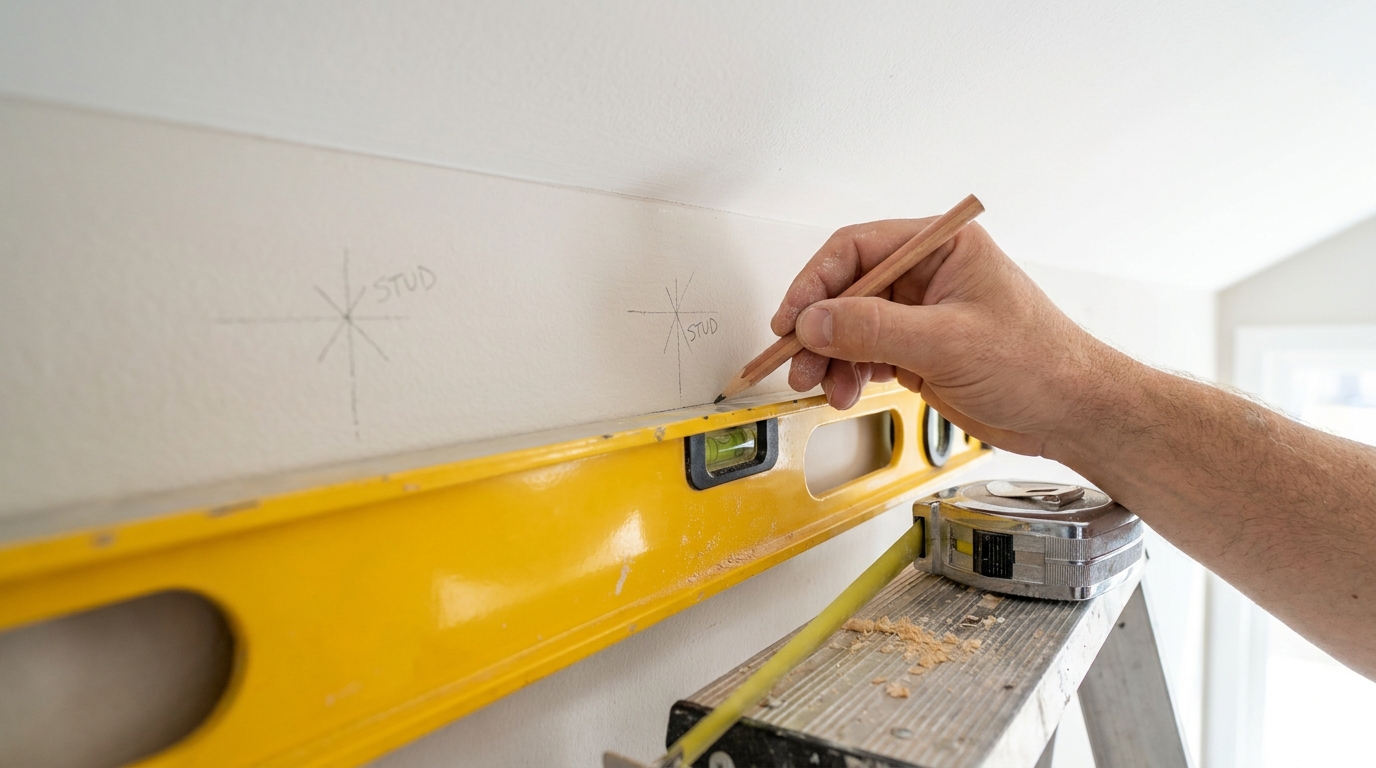
One of the most useful professional habits is establishing a layout line before installation. This is important because ceilings and walls are not always straight. Rather than trusting the room to tell you where the molding should sit, you mark the correct position yourself and install to that line. That gives you a reference that stays consistent from wall to wall.
The easiest way to do this is with a scrap piece of crown. Hold the scrap in its intended position at the wall-ceiling junction and mark where the bottom edge lands on the wall and where the top edge touches the ceiling. Use those dimensions as a reference around the room. A level, laser level, or chalk line can help transfer the line accurately, especially on long walls where small errors become visible.
As you move around the room, mark stud locations on the wall and ceiling framing where possible. These marks will tell you where you can fasten the molding securely. Light pencil marks are enough. You want them visible while working, but easy to cover later. If your room has inconsistent framing or limited fastening points, planning this early will help you avoid trying to hold a long piece in place while searching for structure.
Step 2: Measure Carefully and Build a Simple Cutting System
Measure each wall individually. Do not assume opposite walls are the same or that one inside corner is identical to another. Crown molding depends on precision, so every wall gets its own measurement. Write down not just the wall length, but also what type of cut each end needs. A piece might have an inside corner on one end and an outside corner on the other, and that matters as much as the actual dimension.
It also helps to create a repeatable system for your cuts. Many homeowners label the room clockwise and sketch each wall section on paper. Mark left and right ends clearly. Indicate whether each cut is inside, outside, or square. This simple habit prevents one of the most common mistakes in trim work, which is making a technically clean cut on the wrong end of the board.
Another smart move is to make a pair of labeled sample cuts from scrap. Keep a left inside reference, right inside reference, left outside reference, and right outside reference if needed. These samples act like a physical cheat sheet at the saw. Crown molding can get confusing fast when you flip it upside down and reverse it for cutting, so reference pieces can save expensive material and a lot of frustration.
Step 3: Understand Nested Cutting and Keep the Orientation Consistent
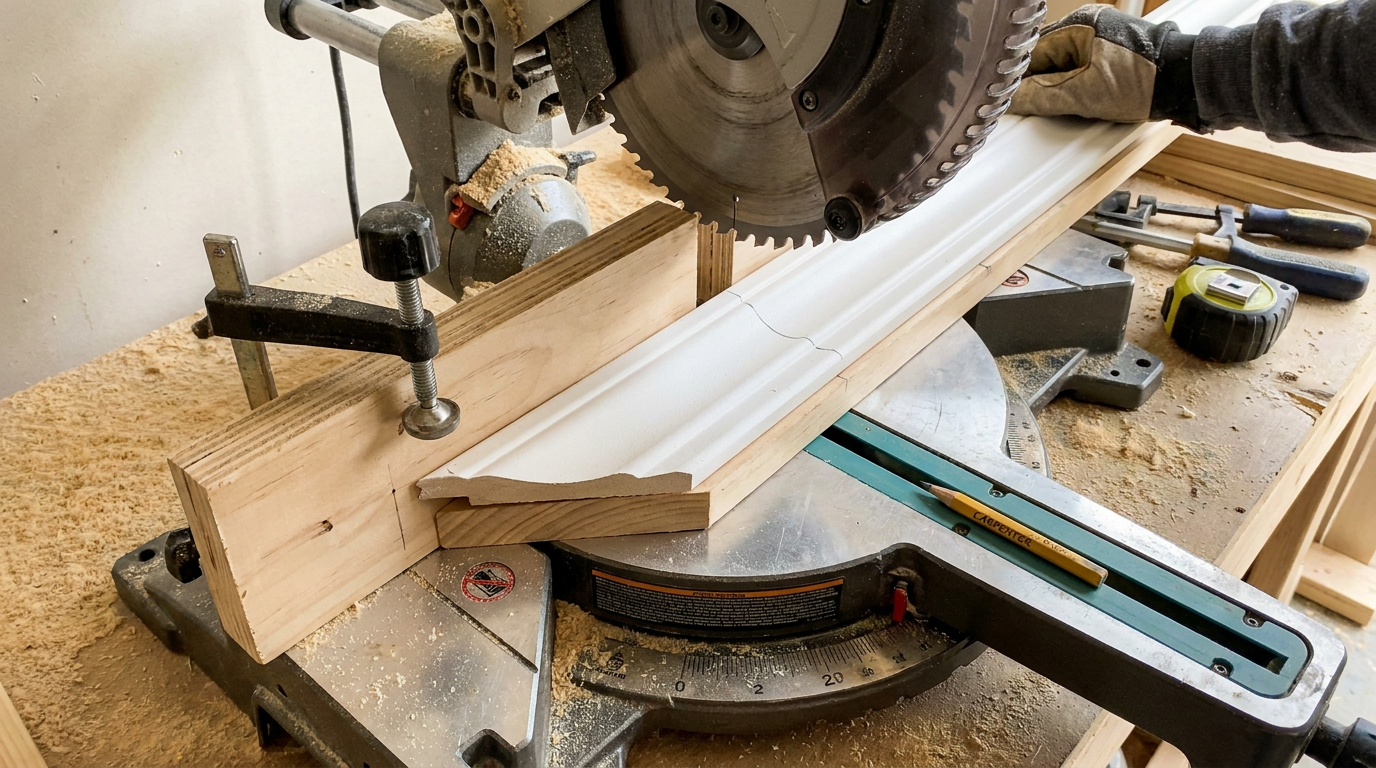
There are different ways to cut crown molding, but one of the most homeowner-friendly methods is the nested position. In this method, the crown is placed on the miter saw upside down and backward compared to how it sits on the wall. The part that touches the ceiling rests on the saw table, and the part that touches the wall rests against the saw fence. That setup mimics the installed angle and lets you use simpler miter adjustments for many standard cuts.
The important part is not just learning the setup once. It is repeating it exactly the same way every time. If one piece is nested correctly and the next is tilted slightly differently, the joint will not fit. This is where many beginners lose accuracy. A support jig or stop block on the saw can help hold the spring angle consistently, especially if you are working alone or using a profile that feels awkward on the saw.
Before cutting your real pieces, practice with scraps. Make test miters and hold them in the room where they will actually go. You are not wasting time doing this. You are building a reliable process. Crown molding is one of those jobs where ten minutes spent on practice can save an hour of patching, recutting, and second-guessing later.
Step 4: Cut and Fit Inside Corners the Right Way
Inside corners are where most DIY crown molding projects either settle down or start to go sideways. The traditional beginner instinct is to miter both pieces and try to make the corner close perfectly. That can work in an ideal room, but many rooms are not ideal. Walls lean, corners are slightly open or tight, and even a well-cut miter can leave a gap. That is why many professionals prefer a coped joint for inside corners.
With a coped joint, one piece is cut square and runs tight into the corner. The intersecting piece gets a miter cut first to reveal the profile, then that profile is cut back with a coping saw so the face of the molding fits over the first piece. The result is a shaped edge that can accommodate small corner irregularities much better than two miters trying to meet at a perfect angle. It sounds advanced, but in practice it is often easier to tune than a flawless miter.
Take your time with coping. After making the initial miter cut, follow the profile line with the coping saw and angle the blade slightly back to undercut the material. That undercut helps the face edge make contact while the back side stays clear. Once the cut is complete, refine the fit with a file, utility knife, or sandpaper if needed. Then hold it in place and check the fit against the installed square-cut piece. This is where patience pays off.
When a Mitered Inside Corner Still Makes Sense
There are situations where a mitered inside corner is acceptable. Lightweight foam products, very small rooms, or highly consistent new construction can sometimes make a miter joint practical. If you choose that route, test fit carefully and understand that minor wall irregularities may still show. A small amount of caulk can help finish a decent joint, but it should not be expected to correct a poorly fitting cut.
If you are deciding between coping and mitering for inside corners, the practical answer is simple. If you want the most forgiving and most professional-looking result in a real-world room, learn to cope. It is one skill that can transform your crown molding results.
Step 5: Cut Outside Corners With Matching Miters
Outside corners are handled differently. Here, a miter joint is usually the correct approach. Each piece is cut so the two exposed ends meet and wrap around the projecting corner. In many homes, that means complementary 45-degree miters, though real corners can vary enough that a slight adjustment may be needed. This is another reason dry fitting before fastening matters so much.
Because outside corners are visible and vulnerable, they benefit from extra attention. After cutting both pieces, hold them together at the corner and check the seam before installation. If the point is open or the back edges bind, adjust the angle slightly and retest. Small corrections are normal. Do not assume the room corner is exactly what the framing or drywall was supposed to produce.
When you install outside corners, a little glue at the joint can help keep the seam aligned over time. Nail both pieces securely into framing, but try not to distort the joint by forcing the molding into a corner that is out of shape. A clean outside corner often comes from balanced fastening and a well-fit seam, not from brute pressure.
Step 6: Use Scarf Joints on Long Runs
In longer rooms, a single piece of crown may not span the full wall. When that happens, you join two lengths along a straight run with a scarf joint. A scarf joint is made by cutting matching opposing angles so the seam overlaps diagonally rather than butting straight together. This makes the joint less noticeable and gives you more gluing surface.
The direction of the scarf can matter visually. In general, you want the seam to face away from the dominant viewing angle when possible, so it reads less clearly in normal light. Exact placement depends on the room, but the broader point is to think about visibility before installation rather than after. Seam planning is part of good trim work.
Glue the scarf, fit it tightly, and fasten each side securely into framing. If one piece is allowed to move, the seam can open later with seasonal expansion and contraction. A well-made scarf joint should not draw attention once the molding is painted and finished.
Step 7: Dry-Fit Everything Before Final Installation
Dry fitting is not optional if you want professional results. Every piece should be cut, carried to the room, and checked in place before you commit to nails or adhesive. This is the stage where you catch a reversed cut, a slightly open cope, a corner that needs a degree of adjustment, or a wall that is longer than your written note suggested. It is much easier to fix a loose piece in your hands than to fix a nailed piece overhead.
Dry fitting also helps you understand how the room is behaving. Some walls will accept the molding easily. Others will need a little persuasion or a small adjustment to the back edge. Real houses are full of minor variation. The better you study the fit while the piece is still removable, the better your final installation will look.
If a piece is close but not perfect, refine it now. Trim a hair off the miter, clean up the cope, or ease a tight back edge. Do not tell yourself the caulk will handle it later. Caulk is for fine finishing, not for correcting basic geometry. A trim job looks professional because the joints fit first and the finish products simply complete the look.
Step 8: Install the Crown Molding Securely
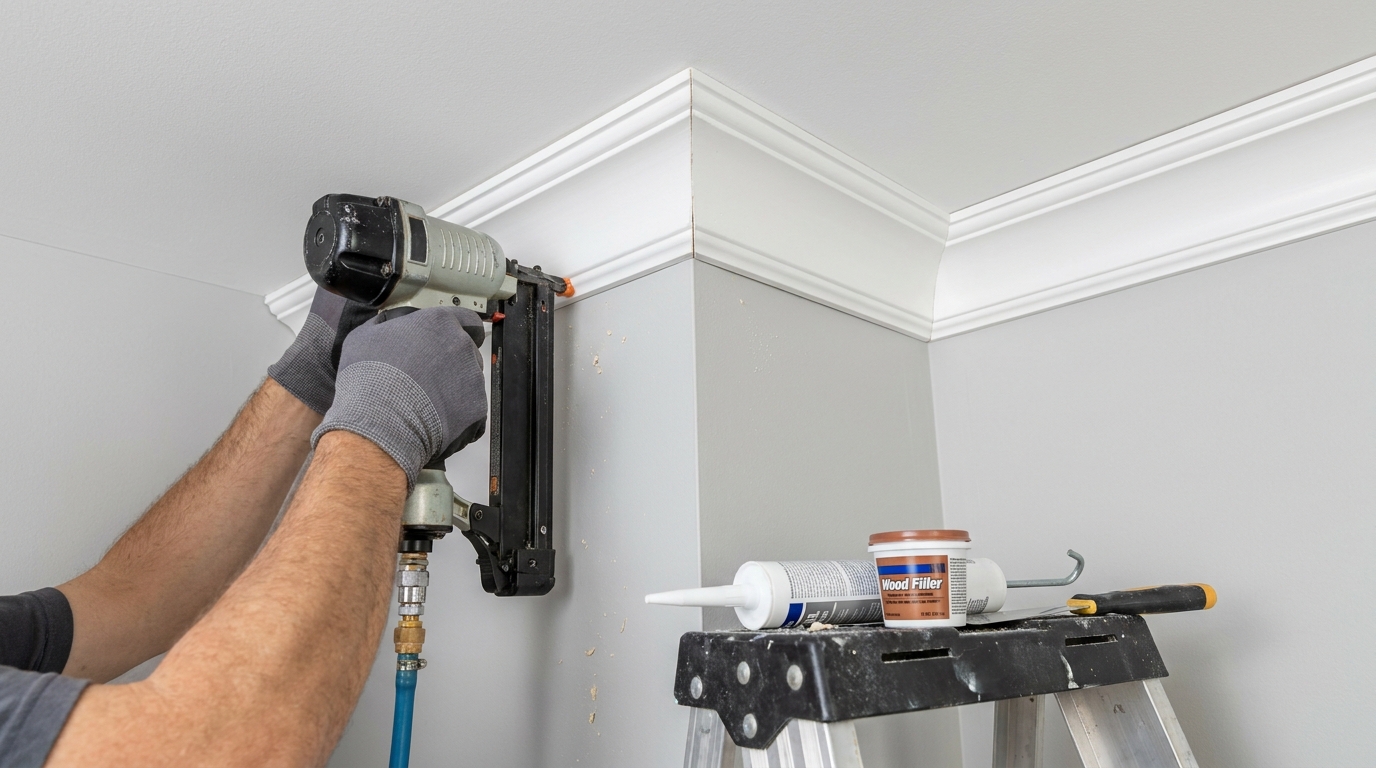
Once a piece fits well, move to installation. Lift the crown into place so its top and bottom edges align with the layout marks you made earlier. Hold it firmly at the correct spring angle and fasten into studs or ceiling framing where available. A finish nailer makes this process much easier because it lets you pin the molding in place without shifting the joint while you drive the fastener.
Start with the most stable point and work outward, checking alignment as you go. On long pieces, it helps to have a second person support the far end. Crown molding can flex, and even a slight sag during fastening can change how the joint closes at the corner. If you are working alone, temporary supports or blocks can make the job more manageable.
For lightweight foam or composite products, follow the manufacturer instructions closely. Some are designed to rely more heavily on adhesive than nails. Others use clips or specialized fasteners. The basic principles stay the same, but the installation method may differ from wood trim. When in doubt, the product-specific instructions should guide fastening details.
Step 9: Fill, Caulk, Sand, and Touch Up
The finishing stage is where the whole job comes together visually. Start by filling nail holes with an appropriate filler or putty. Let it dry fully, then sand it smooth so the repair disappears under paint. If you are working with stained wood, use a matching filler carefully and test it first so the repair blends as well as possible.
Next, caulk the small gaps where the molding meets the wall or ceiling. Use a paintable caulk and apply it sparingly. The goal is to clean up hairline inconsistencies, not to build a joint out of caulk. Smooth it neatly with a damp finger or caulk tool so the transition looks crisp. This step makes a big difference, especially in older rooms with slight wall or ceiling variation.
Finally, do your touch-up painting. If you pre-finished the trim, this phase should be fairly light. Usually it is just filling, sanding, spot priming where needed, and applying a final touch-up coat. If the molding was installed unfinished, you may need a full paint process after installation. Either way, slow and clean finishing work is what turns solid carpentry into a polished result.
Common Mistakes Homeowners Make and How to Avoid Them
The most common mistake is inconsistent saw orientation. If you do not hold the molding the same way for every cut, the joints will not match no matter how carefully you measured. Build a repeatable setup, label your references, and stick to one cutting method from start to finish. This alone prevents a lot of waste.
Another common issue is skipping layout lines. Homeowners sometimes try to follow the ceiling visually as they install, which can make the crown wander up and down around the room. A level reference line gives you a better target. It allows the molding to read straight even if the house itself is not perfectly straight.
Relying on caulk to fix bad cuts is another trap. Caulk can hide tiny gaps, but it cannot make an open outside corner or badly cut inside joint look truly right. Fit the wood first. Finish second. That order matters every time.
People also underestimate how helpful test pieces are. A few scraps used for saw setup, spring-angle reference, and practice coping can save multiple full-length boards. Especially on your first project, treat sample cuts as part of the process, not as wasted effort.
How Long Does Crown Molding Installation Take?
The timeline depends on the size of the room, the number of corners, the material you choose, and how familiar you are with trim work. A simple square room with paint-ready lightweight molding can sometimes be handled in a weekend by a careful DIYer. A larger room with multiple inside and outside corners, long runs, and stained wood trim will take longer. There is nothing wrong with that.
The biggest time factor is usually not fastening. It is cutting and fitting. That is where your attention should go. Rushing the cutting stage to save an hour often creates a finishing problem that costs half a day. Plan for a slower first room and a faster second one. Crown molding has a learning curve, but it is a manageable one.
Is Crown Molding Worth Doing Yourself?
For many homeowners, yes. Crown molding can deliver a strong visual upgrade without changing the structure of the room, and doing it yourself can save a meaningful amount on labor. More importantly, it is one of those projects that teaches useful finish carpentry habits. You learn to read a room, plan cuts, work to layout lines, and respect the difference between a rough fit and a finish fit.
That said, it is worth being honest about your own patience level. If you hate detailed measuring, overhead work, and repeated test fitting, this may not be your favorite project. But if you like careful work and want to build real DIY skill, crown molding is a solid challenge with a satisfying payoff.
Final Thoughts
Crown molding looks elegant when it is finished, but the process behind it is practical and methodical. Success comes from understanding the material, marking layout lines, keeping your saw orientation consistent, and treating corners with the respect they deserve. Inside corners usually benefit from coping. Outside corners usually need clean, matching miters. Long walls may need scarf joints. None of that is mysterious once you break it into steps.
If you remember one thing, let it be this. Do not rush crown molding. Measure carefully, cut test pieces, dry-fit every section, and let the room tell you what adjustments it needs. A careful homeowner can absolutely install crown molding like a pro, and the result is the kind of upgrade you notice every time you walk into the room.
Take your time, trust the process, and work for fit before finish. That is how good trim work gets done.



No Comment! Be the first one.