



Create Your Own Elegant Privacy Screens for Outdoor Spaces
Outdoor privacy is often imagined as something purely practical, a wall, a barrier, a simple line between your life and the view beyond it. Yet the most memorable outdoor spaces are rarely shaped by utility alone. They are composed with intention, balancing openness and shelter, light and enclosure, structure and softness. A well-designed privacy screen can do far more than block sightlines. It can frame a dining terrace, calm a windy corner, define a lounge area, and lend an architectural rhythm that makes the entire garden or patio feel more polished.
Table Of Content
- Why Privacy Screens Matter in Outdoor Styling
- Begin With the Space, Not the Screen
- Questions to answer before you build
- Choosing a Screen Style That Feels Elegant
- Selecting Materials for Beauty and Durability
- How different materials shape the final look
- Designing for Proportion, Opacity, and Atmosphere
- Planning a DIY Build That Works
- A simple step-by-step building sequence
- Code Awareness, Boundaries, and Canadian Climate Considerations
- How to Make a DIY Screen Look Custom and Luxurious
- Best Privacy Screen Ideas for Different Outdoor Spaces
- For patios
- For decks
- For balconies
- For gardens and yards
- Maintenance That Preserves the Elegance
- Common Mistakes to Avoid
- Final Thoughts: Build Privacy With Poetry and Purpose
For the DIY enthusiast, privacy screens offer an especially rewarding project because they combine craftsmanship with visible transformation. Unlike smaller decorative additions, a screen changes how a space is used and how it is perceived from the very first moment it stands in place. It can turn a bare deck into an outdoor room, a balcony into a secluded retreat, or a narrow side yard into a planted passage with intimacy and purpose. Better still, many current designs are modular and highly adaptable, which makes them accessible even for homeowners who are not experienced builders.
This guide is designed for readers who want both elegance and practicality. We will look at how to shape a privacy screen that feels visually refined while remaining durable, climate-aware, and realistic to build. We will also discuss materials that perform well in North American conditions, from cedar and composite to aluminum and recycled poly, along with important planning considerations such as property lines, circulation, wind exposure, and local regulations. The goal is not simply to construct a divider. It is to create a composed outdoor element that feels intentional, lasting, and beautifully at home in its setting.
Why Privacy Screens Matter in Outdoor Styling
Privacy screens are among the most versatile features in outdoor design because they solve several problems at once. They create visual separation where neighboring windows, fences, shared terraces, or open property edges can make a space feel exposed. They also guide movement and establish zones, allowing a large backyard to feel organized or a small patio to feel more intimate. In design terms, they act as vertical anchors, introducing height, pattern, and shadow into spaces that often rely too heavily on horizontal surfaces.
There is also an atmospheric value to screening that should not be overlooked. People relax more fully when they feel gently protected, not boxed in, but held within a defined edge. This is why a screen with carefully considered spacing or texture often feels more luxurious than a heavy solid wall. It creates privacy while preserving some permeability, letting air move through, allowing glimpses of greenery, and casting beautiful linear or woven shadows through the day.
Functionally, privacy screens can also improve comfort in subtle but meaningful ways. A slatted or partially open panel can soften wind without creating a harsh sail effect. A planted trellis can cool a seating area and make hard surfaces feel gentler. A modular screen can conceal storage, utility units, or an awkward boundary while contributing style instead of visual clutter. In other words, a privacy screen belongs not only to the world of backyard utility, but to the art of outdoor room planning.
The finest privacy screen does not announce itself as a barrier. It reads instead as architecture for the garden, a measured layer between exposure and ease.
Begin With the Space, Not the Screen
Before choosing slats, lattice, or metal framing, spend time understanding exactly what your outdoor area needs. The most successful DIY screens begin with a site-specific reading of the space rather than a copied design from a photograph. Ask what the screen is meant to solve. Is it shielding a dining table from a neighbor’s sightline, reducing wind on a balcony, screening a hot tub, separating a lounge from a play area, or simply making a patio feel more composed? The answer will influence the screen’s height, opacity, material, and placement.
Observe the site at different times of day if possible. Note where the sun falls, where wind tends to rush through, and where you naturally want to sit or move. Think about the way a screen might alter that experience. A completely solid panel may offer maximum privacy, but it can also create shade where you want warmth, trap wind in an unpleasant way, or make a compact area feel smaller. A slatted or woven design may achieve better balance, especially if your goal is seclusion with lightness.
It is equally important to examine property lines and placement limits before anything is built. Many DIY guides emphasize this for good reason. Boundary questions matter as much as design, and local rules can affect screen height, distance from lot lines, transparency requirements, and whether a permit is needed. In some Canadian contexts, screening and fence regulations can be surprisingly specific, with rules about materials, upper-section openness, or maximum height. Even where a screen feels minor, it should still be treated as a site element that deserves careful, informed planning.
Questions to answer before you build
- What exact view or exposure needs to be screened
- How much privacy is desired, partial or near total
- Whether the screen should also reduce wind or define a zone
- How tall and wide the screen can be within local rules
- Whether the surrounding circulation remains comfortable and accessible
- How much maintenance you are willing to take on over time
These early questions shape every good decision that follows. They help you avoid building a screen that looks attractive in isolation but feels heavy, unstable, or ill-suited once installed. Design is always most graceful when it answers a real condition with restraint and clarity.
Choosing a Screen Style That Feels Elegant
When people imagine privacy screens, they often assume that complete opacity is the only path to effectiveness. In reality, the opposite is frequently true. Some of the most elegant screens rely on measured openness rather than solid mass. They obscure direct sightlines while preserving air, filtered light, and visual softness. This is why slatted wood panels, woven designs, lattice structures, and planted trellises continue to feel more sophisticated than blank barriers.
Slatted screens are perhaps the most versatile option for modern outdoor spaces. Their rhythm creates order, and the gap between boards can be adjusted to control privacy with precision. Narrow spacing feels more sheltered, while slightly wider intervals keep the composition lighter. Vertical slats emphasize height and can make a compact patio feel taller. Horizontal slats, by contrast, can visually widen a narrow space and read as more contemporary in many settings.
Woven screens bring a handcrafted quality that feels warm and distinctive. They can be especially effective in gardens or transitional spaces where a softer, more artisanal expression is welcome. Research from major DIY retailers has highlighted modular woven designs that can be adapted to several lengths simply by changing slat dimensions, which is useful when you need a custom fit without rethinking the entire concept. This adaptability makes woven layouts appealing for homeowners who want something tailored yet approachable.
Lattice screens remain a classic choice because they strike an inherently balanced note between privacy and transparency. When refined with a painted or stained finish and paired with climbing plants, they become far more than a utilitarian panel. They create depth, shadow, and seasonal change. For those who prefer a natural-looking solution, lattice and trellis structures are also an ideal framework for living privacy, especially when paired with vines, espalier planting, or tall containers.
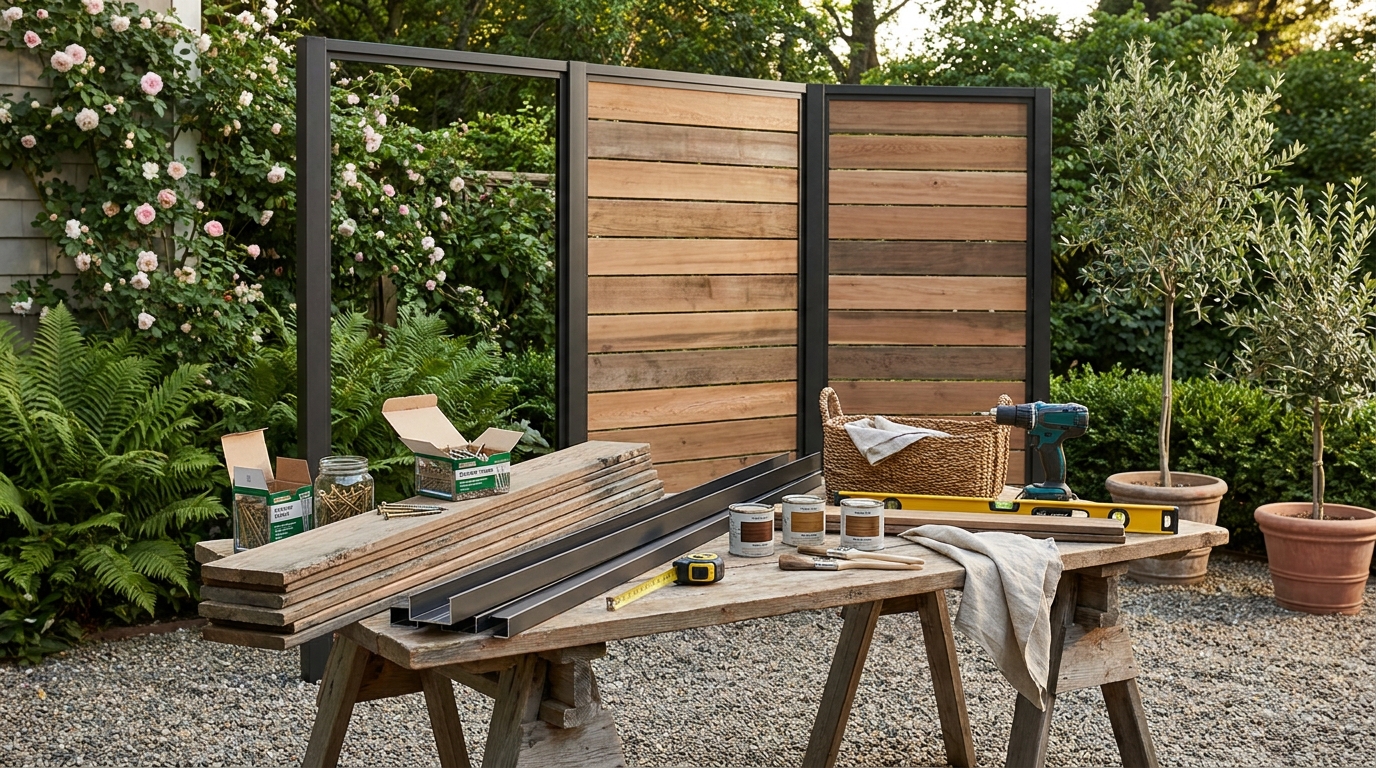
Mixed-material screens feel especially current and architectural. A cedar infill within a powder-coated aluminum frame, for example, offers warmth and crisp definition at once. Composite boards paired with dark structural elements can create a clean contemporary look with less maintenance than natural wood alone. The elegance of these combinations comes from contrast, the softness of grain against the precision of metal, the familiarity of wood tone against the restraint of matte black or charcoal.
Selecting Materials for Beauty and Durability
Material choice is where visual ambition meets long-term reality. Outdoor privacy screens are exposed to moisture, wind, sun, seasonal movement, and in many Canadian and northern American climates, freeze-thaw cycles that test both finishes and fasteners. It is wise to choose materials not only for appearance on installation day, but for how gracefully they will age with the level of maintenance you can realistically provide.
Cedar remains a favorite for DIY projects because it is relatively lightweight, naturally resistant to rot, and visually beautiful. Its grain and tone lend immediate warmth, whether left to weather to a silvery patina or protected with an exterior stain. Cedar works especially well in slatted and lattice designs because it is easy to cut and detail. However, like all wood, it benefits from thoughtful sealing, quality fastening, and adequate spacing to accommodate seasonal movement.
Composite materials have become increasingly popular for outdoor screening because they offer a polished appearance with lower maintenance. They resist rot and often hold color more consistently than painted wood. Their modern uniformity suits clean-lined designs, particularly when homeowners want a refined look without the commitment of regular sanding or staining. Composite can be heavier than wood, however, so support and anchoring deserve careful attention.
Aluminum is another strong option, especially for framing or fully metal screens in contemporary settings. Powder-coated finishes resist corrosion well and maintain a crisp appearance over time. Aluminum’s visual lightness makes it ideal for balconies or patios where a screen should feel elegant rather than bulky. It can also pair beautifully with timber infill, woven elements, or integrated lighting details.
Other practical materials include CPVC, polypropylene, and recycled poly products, all of which appear in current North American guidance for lower-maintenance exterior projects. These materials can be useful for homeowners prioritizing weather resistance, ease of care, and long-term durability. While they may not always deliver the organic nuance of natural wood, thoughtful color selection and mixed-material design can make them feel sophisticated rather than purely functional.
How different materials shape the final look
- Cedar: warm, natural, timeless, ideal for staining and classic slatted compositions
- Composite: streamlined, low-maintenance, excellent for modern outdoor rooms
- Aluminum: crisp, architectural, elegant in powder-coated dark finishes
- Recycled poly and polypropylene: durable and practical, useful for climate-exposed sites
- Mixed materials: balanced, custom-looking, often the most visually intentional approach
Whichever material you choose, invest in exterior-grade fasteners and hardware suited to your climate. Corrosion-resistant screws, durable post anchors, and finishes designed for outdoor exposure are not glamorous purchases, but they are what preserve the elegance of the finished work. A beautiful screen fails quickly if hidden components are chosen carelessly.
Designing for Proportion, Opacity, and Atmosphere
Elegance is often a matter of proportion. A privacy screen that is too low will not solve the problem it was built to address, but one that is too tall can dominate the space and feel defensive. Begin by identifying the true sightline you want to interrupt. Seated privacy typically requires less height than standing privacy, and screening a neighboring second-story window may require a different strategy altogether, such as a pergola extension, angled trellis, or layered planting rather than a single towering panel.
Opacity also deserves more nuance than a simple choice between open and closed. Slatted screens can be calibrated to reveal almost nothing from certain angles while remaining airy and luminous. Lattice and woven patterns can offer partial concealment that feels softer and more decorative. In windy locations, partial openness is often more comfortable and structurally sensible than a solid wall, because it allows pressure to move through the surface rather than fighting against it.
Color and finish contribute significantly to atmosphere. Natural stains bring out grain and create warmth, especially against stone, brick, and greenery. Charcoal, black, or deep bronze frames provide restraint and visual definition. Pale painted finishes can feel fresh in coastal or cottage settings, though they may demand more upkeep. The most successful palette is one that harmonizes with the architecture of the house and the hardscape surrounding the screen, rather than trying to appear as a separate decorative object.
Pattern should also be intentional. Repetition is what gives privacy screens their architectural character. Consistent slat spacing, clean alignments, balanced panel widths, and careful transitions at corners all help the screen feel considered. Even the simplest DIY build becomes more refined when proportion is deliberate and details are consistent.
Planning a DIY Build That Works
A graceful result begins with disciplined preparation. Measure the site precisely, then sketch the screen in elevation as well as plan view so you can understand not only its width and height, but also how it relates to circulation, seating, planters, steps, and doors. If local regulations require permit documentation, these drawings may also be useful in clarifying materials, dimensions, and placement before construction begins. This level of preparation may feel formal for a backyard project, but it often prevents costly revisions and structural uncertainty.
Modular construction is one of the most practical approaches for DIY privacy screens. Building in sections allows you to work more comfortably, transport panels more easily, and adjust the final composition if the site is slightly irregular. Retail and DIY guidance increasingly supports modular systems for exactly this reason. A panelized screen can also be repaired or replaced more easily in the future, which is especially valuable in climates where weather stress accumulates over time.
Anchoring is among the most important technical decisions in the project. Screens exposed to wind should be treated with respect, particularly if they are tall or relatively solid. Posts may need to be set in footings, attached to a deck structure designed to support them, or fixed with hardware rated for the intended load and environment. Moisture management matters as well. Wood should be kept away from constant ground contact where possible, and post bases should be detailed to reduce standing water and premature decay.
A simple step-by-step building sequence
- Verify property lines, local height rules, setbacks, and any permit requirements
- Measure the site and draw the screen with exact dimensions
- Choose a style and material based on privacy needs, maintenance tolerance, and climate
- Plan the structural support, including posts, anchors, and hardware
- Cut and prefinish components if the material and product allow it
- Install posts or frame supports carefully, checking plumb and alignment
- Assemble modular panels with consistent spacing and clean edges
- Attach panels securely and test for rigidity and movement
- Add finishing details such as caps, trim, integrated planters, or lighting
- Inspect the full installation after the first major weather event
This sequence is broad enough to suit different styles while giving structure to the process. If the project begins to feel more structural than decorative, that is a sign to pause and consult local professionals or regulations. An elegant screen should not only look composed, but also stand with confidence over time.
Code Awareness, Boundaries, and Canadian Climate Considerations
One of the most common misconceptions about privacy screens is that they are always informal additions exempt from oversight. In reality, local bylaws and site rules can have a direct influence on what you are permitted to build. Some jurisdictions treat certain screens similarly to fences, which means height limits, placement restrictions, and visibility requirements may apply. In Canada, examples of screening guidance show that rules can be especially specific, sometimes even requiring visually transparent upper sections or limiting materials in certain contexts.
This matters not because regulation is the most exciting part of design, but because it shapes the design from the beginning. If a municipality limits overall height, you may need to rely more on layered planting, slat orientation, or strategic placement rather than building taller. If a deck screen is close to a property edge, setback requirements may influence the entire layout. If documentation is required, drawings, elevations, and material descriptions can become part of the approval process. A wise DIY project respects these realities early rather than discovering them after materials have been purchased.
Climate resilience deserves equal attention. In regions with freeze-thaw cycles, water infiltration and expansion can shorten the life of finishes, crack lower-grade components, and loosen poorly considered connections. Moisture-resistant details, durable hardware, and well-drained bases become essential. Wind is another key factor, especially on exposed decks, open yards, and balconies. A screen that is too solid or too lightly anchored can become a structural risk rather than a comfort upgrade.
There is also a broader design responsibility when screens shape movement through an outdoor area. Accessibility considerations matter when a screen narrows pathways, defines edges, or creates protected rooms. Circulation should remain comfortable and intuitive. The screen should clarify the space, not introduce awkward barriers. In this sense, elegant design is inclusive design, composed with attention not only to appearance but also to ease of use.
How to Make a DIY Screen Look Custom and Luxurious
The difference between a basic backyard divider and an elegant privacy screen often lies in finishing choices. Clean proportions are the foundation, but details complete the effect. Frame the edges neatly, align slats precisely, and decide in advance how the screen meets the ground, deck surface, or adjacent wall. These transitions are where many DIY projects lose their refinement. A little discipline here creates a far more custom-looking result.
Integrated planters are one of the most beautiful ways to soften a screen. They anchor the structure visually and introduce seasonal richness through foliage, texture, and fragrance. Climbing vines can lace through lattice or trellis elements, while upright grasses and layered shrubs can echo the vertical rhythm of slatted panels. This pairing of built form and planting makes privacy feel more natural and less defensive.
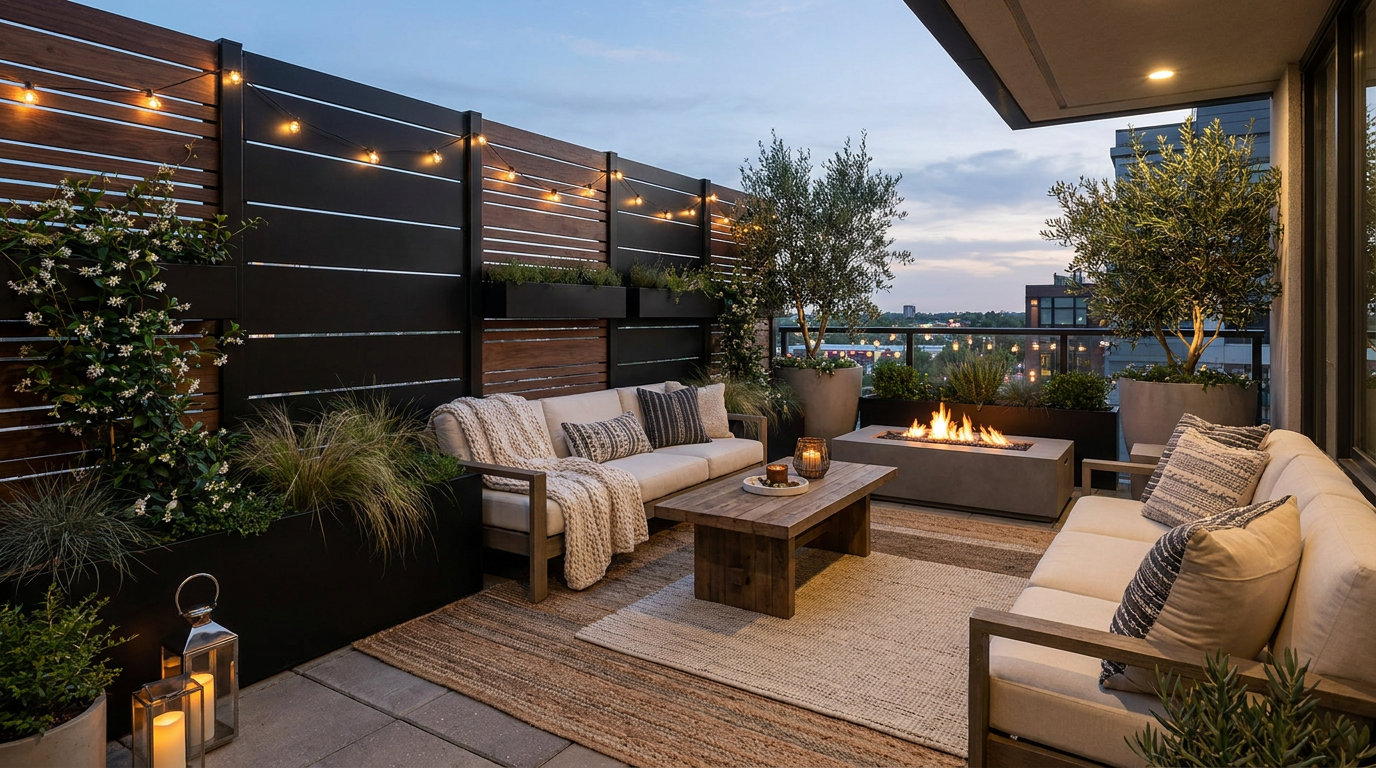
Lighting is another transformative addition. Small uplights at the base of a screen emphasize texture and cast dramatic evening shadows. Fine string lighting can soften a balcony screen into a romantic backdrop. Concealed LED strips along a frame can create a modern, almost architectural glow. The key is restraint. Lighting should reveal the screen’s composition, not overwhelm it.
Material contrast also elevates a simple build. A cedar field bordered by a dark frame feels intentional. A woven insert set within a crisp rectangular panel gains presence through that contrast. Even hardware selection matters, since visible black fasteners or concealed fastening methods can shift the visual language of the entire piece. Luxury, in this context, is not excess. It is coherence.
Best Privacy Screen Ideas for Different Outdoor Spaces
For patios
Patios benefit from screens that define a room-like perimeter without making the area feel enclosed. Vertical cedar slats, lattice with climbing jasmine or clematis, and mixed wood-metal panels all work beautifully here. Because patios often connect closely to indoor living areas, the screen should feel like an extension of the home’s architecture. Consider repeating colors or materials from nearby doors, window frames, or paving to create continuity.
For decks
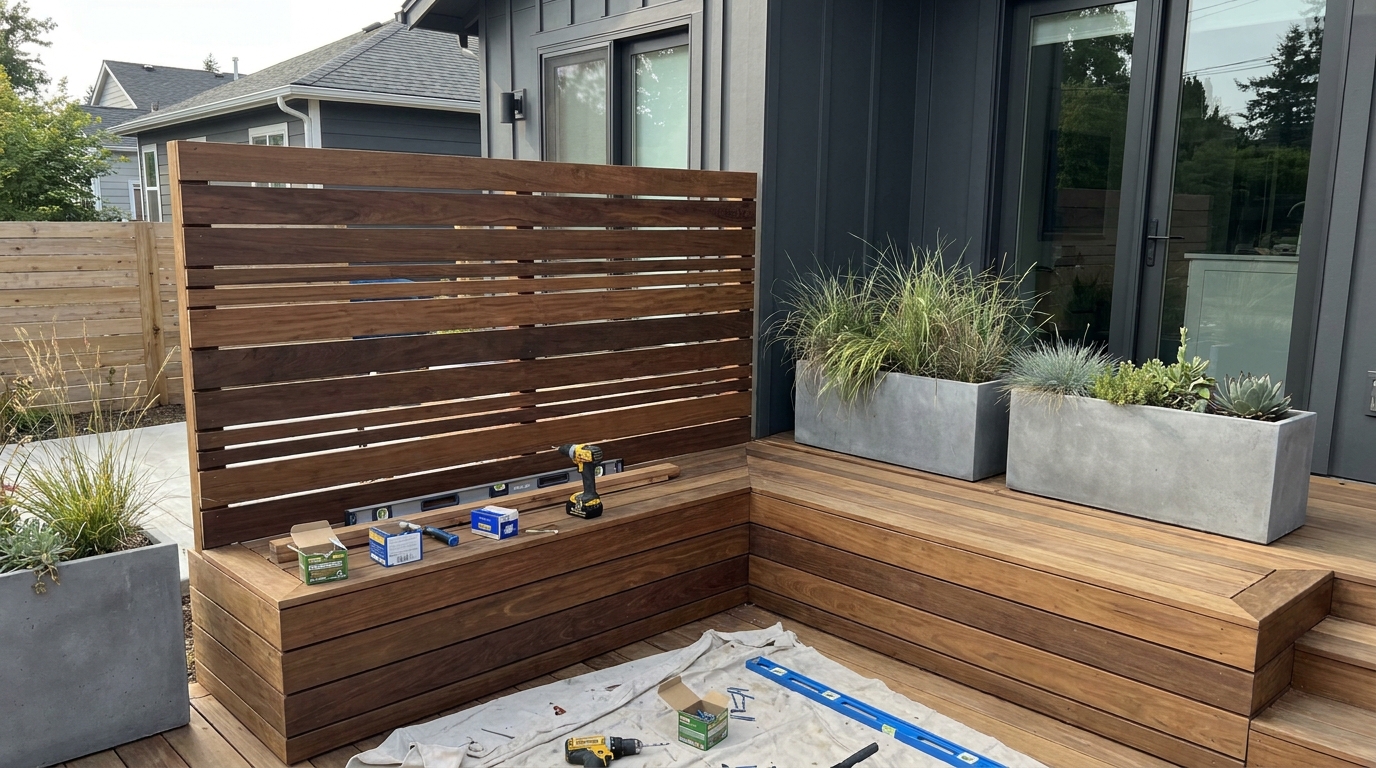
Deck privacy screens often need to perform more than one function, screening views, tempering wind, and creating comfort around seating or dining zones. Since decks are elevated in many cases, sightlines can be complex and wind loads more pronounced. Modular slatted panels are often ideal because they preserve some airflow while maintaining privacy. Anchoring is especially important here, and screens should integrate thoughtfully with existing railing and structural conditions.
For balconies
Balconies call for visual lightness. Heavy opaque screens can make a small elevated space feel closed off very quickly. Aluminum frames with slim infill, woven panels, narrow vertical battens, or planted trellises usually feel more elegant. Before installation, verify building or strata rules as well as safety requirements, because balcony modifications are often more regulated than ground-level projects.
For gardens and yards
In gardens, privacy screens can become sculptural. Freestanding lattice walls, woven timber panels, and long modular slatted runs can direct views and create a sequence of outdoor moments. Screens can hide compost zones, define a gravel lounge, or create a sheltered backdrop for a bench. Here, the relationship with planting is often the most important design ingredient. A screen should converse with the landscape around it rather than stand apart from it.
Maintenance That Preserves the Elegance
Even low-maintenance materials benefit from seasonal attention. Leaves, moisture, and surface debris can collect at the base of a screen and shorten its visual life if ignored. A gentle wash, inspection of hardware, and clearing of drainage zones can keep the installation looking intentional rather than neglected. In climates with hard winters, spring is an ideal time to check for movement, finish wear, or hardware stress after freeze-thaw cycles and storms.
Wood screens may need periodic resealing or staining depending on exposure and the look you prefer. Some homeowners love the silvering of cedar over time, while others want to preserve a warm honey or walnut tone. Neither is wrong, but the choice should be made consciously. Composite and metal systems are generally easier to maintain, though they should still be cleaned and checked for scratches, coating damage, or loose fittings.
Living screens and climbing plants introduce a different kind of care. They require pruning, guidance, and occasional thinning to keep the structure elegant rather than overgrown. Yet that maintenance is also part of their beauty. A planted privacy screen changes with the seasons, making the outdoor room feel alive and deeply rooted in place.
Common Mistakes to Avoid
The first mistake is assuming a privacy screen is too minor to require planning. This often leads to problems with height, placement, permits, or structural weakness. The second is making the screen more solid than necessary. Full opacity can create a visual dead end and increase wind stress, while a thoughtfully open design usually feels more graceful and comfortable.
Another frequent issue is choosing materials based only on first appearance. A beautiful but poorly suited material can age badly in a harsh climate or require more upkeep than expected. Neglecting hardware quality is also a classic misstep. Exterior-rated components may not be visually exciting, but they are essential to longevity. Finally, many DIYers focus so closely on the panel itself that they forget the surrounding composition. The screen should belong to the whole outdoor scene, relating to furniture, paving, planting, and circulation.
Final Thoughts: Build Privacy With Poetry and Purpose
Creating your own elegant privacy screen is not simply about hiding what lies beyond. It is about shaping how an outdoor space feels when you inhabit it. The best screens offer seclusion without heaviness, structure without stiffness, and practicality without sacrificing beauty. They respond to climate, context, and code, while still leaving room for artistry in line, texture, shadow, and material.
For DIY enthusiasts, this is what makes the project so satisfying. A privacy screen is useful from the first day, yet it also has the power to change the emotional tone of an entire exterior. It can make a simple patio feel composed, a balcony feel intimate, or a yard feel thoughtfully divided into places for rest, conversation, and retreat. With careful planning, durable materials, and an eye for proportion, even a modest build can feel remarkably sophisticated.
Approach the process as both craft and composition. Measure carefully, respect local rules, build with climate in mind, and finish with details that honor the setting. When done well, your privacy screen will not feel like an afterthought or a mere barrier. It will feel like part of the architecture of outdoor living, elegant, practical, and quietly transformative.


No Comment! Be the first one.