


How to Conduct a Home Envelope Inspection for Sustainability
A home envelope inspection may sound technical at first, but in practice it is one of the most useful and empowering ways to understand how your house performs. The home envelope is simply the collection of parts that separate indoors from outdoors, including the roof, attic, exterior walls, windows, doors, foundation, basement, crawlspace, and the many small openings where wires, pipes, vents, and ducts pass through. When these components work well together, your home stays more comfortable, uses less energy, manages moisture more effectively, and places less strain on heating and cooling systems.
Table Of Content
- Why a Home Envelope Inspection Matters for Sustainability
- What the Home Envelope Includes
- Tools That Make a Homeowner Inspection Easier
- When to Inspect and How to Prepare
- A Step by Step Home Envelope Inspection
- Step 1: Start Outside and Walk the Perimeter
- Step 2: Inspect the Attic First
- Step 3: Check Interior Ceilings and Exterior Walls
- Step 4: Test Windows and Doors Carefully
- Step 5: Move Down to the Basement, Crawlspace, and Foundation
- Step 6: Examine Mechanical and Utility Penetrations
- What Common Problems Usually Mean
- How to Prioritize Repairs Without Feeling Overwhelmed
- When to Call a Professional
- Do Not Forget Ventilation and Indoor Air Quality
- Sustainable Material Choices for Envelope Repairs
- Building the Habit: A Seasonal Envelope Checklist
- Final Thoughts
For homeowners interested in sustainability, this is an especially practical place to start. Improving the envelope is often more cost effective than jumping straight to expensive equipment replacements because it reduces the amount of energy your home needs in the first place. ENERGY STAR says sealing air leaks and adding insulation can provide up to 10% savings on annual energy bills, and its methodology estimates average savings of about 15% on heating and cooling costs when air sealing is combined with insulation in key areas. That means a careful inspection can do more than reveal maintenance issues. It can guide better long term decisions for comfort, resilience, and lower emissions.
Natural Resources Canada also emphasizes the value of looking at the house as a system rather than a collection of isolated parts. Its guidance explains that homes should be evaluated from the attic down to the foundation, ideally with diagnostics such as blower door testing to measure airtightness and help identify leakage pathways. Even without professional tools, homeowners can still learn a great deal through a thoughtful seasonal walkthrough. The goal is not to become a building scientist overnight. It is to notice patterns, document what you find, and focus first on the highest impact issues.
This guide is designed to make the process feel manageable. You do not need to solve everything in one weekend, and you do not need to assume every draft means a major renovation is ahead. A clear inspection routine can help you identify where heat is escaping, where moisture may be entering, and where small, sensible improvements can make your home healthier and more sustainable over time.
The most important mindset is this: you are not looking for perfection. You are looking for priorities. A few well targeted improvements, especially in the attic and basement, can make a meaningful difference in comfort, energy use, and environmental impact.
Why a Home Envelope Inspection Matters for Sustainability
Sustainability in housing is often framed around new technologies, but many of the most effective improvements are quieter and less visible. If your home leaks air around an attic hatch, through recessed lights, at the rim joist, or around window trim, your heating and cooling system has to work harder to maintain stable indoor temperatures. That increased demand raises energy bills and, depending on your fuel source, also increases greenhouse gas emissions. NRCan notes that better air sealing and insulation can reduce emissions by lowering heating and cooling demand, which makes envelope improvements a direct climate action at the household scale.
Envelope inspections also help protect the durability of the home itself. Moisture movement through building assemblies is strongly affected by air movement, which means air leaks are not only about drafts. Warm indoor air can carry moisture into colder cavities where condensation forms, sometimes quietly, behind finishes or above ceilings. By the time mold, staining, peeling paint, warped materials, or musty odours become obvious, the problem may have been developing for some time. A sustainability focused approach is therefore not just about saving energy. It is about preserving materials, extending the life of the building, and avoiding wasteful repairs.
There is also a common misconception that windows are always the biggest issue. In reality, many homes lose more performance through hidden leakage and insulation gaps in attics, foundations, and penetrations than through the glass itself. NRCan states that about 25% of heat loss in many older homes can be due to air leakage. That figure is a useful reminder that the most visible component is not always the most important one. Often, the highest value work happens in places you rarely see.
A sustainable home is not only one that uses less energy. It is one that stays dry, comfortable, durable, and healthy with the least amount of waste over time.
At the same time, balance matters. Tighter is not automatically better if a home does not have proper ventilation and moisture control. EPA guidance warns that energy upgrades can negatively affect indoor air quality if the home is not properly assessed and ventilated. That is why a good envelope inspection considers both efficiency and fresh air strategy. Reducing uncontrolled leakage is beneficial, but planned ventilation remains essential.
What the Home Envelope Includes
Before beginning the inspection, it helps to have a simple mental map of what you are assessing. The home envelope includes every building component that separates conditioned indoor space from the outdoors or from unconditioned areas. That includes obvious elements such as the roof and exterior walls, but it also includes more subtle transitions like attic hatches, crawlspace access doors, electrical penetrations, plumbing stacks, dryer vents, flue chases, and the framing junctions where different parts of the house connect.
In practical terms, homeowners should think in zones. Start at the top with the roof and attic, move through upper floor ceilings and walls, inspect windows and doors, then continue to the basement, crawlspace, and foundation. This top to bottom method reflects how energy advisors often approach the home because warm air naturally rises, making upper leaks especially important. At the same time, lower level leakage can create a stack effect that pulls outdoor air into the home and drives conditioned air out through the top.
Another helpful concept is that the envelope performs several jobs at once. It slows heat flow through insulation, controls air movement through the air barrier, manages water through flashing and drainage layers, and handles vapor movement with appropriate materials and detailing. When one of those functions breaks down, the effects are often felt somewhere else. A draft at a recessed light can contribute to heat loss, moisture movement, and uneven room temperatures all at once.
Tools That Make a Homeowner Inspection Easier
You do not need a suitcase of professional equipment to start, but a few simple tools can make the process more accurate and less frustrating. A flashlight is essential for checking attics, basements, crawlspaces, and utility areas. A notebook or phone can help you record findings room by room. It is also useful to bring painter’s tape or sticky notes so you can mark areas that need follow up.
For basic leak detection, many homeowners use a simple tissue test near windows, doors, and suspected draft points on a windy day. An incense stick or smoke pencil can also show air movement if used carefully and safely. A moisture meter can be helpful if you suspect damp framing or wall surfaces. An infrared thermometer is not the same as full thermography, but it can sometimes help identify unusual temperature differences around windows, doors, or ceiling areas.
If you want a deeper understanding of how the home performs, the most useful professional tools are a blower door test and infrared imaging. Natural Resources Canada notes that energy advisors typically evaluate homes from the attic down to the foundation and use a blower door test to measure airtightness. These diagnostics make hidden leakage easier to identify and can be especially helpful before larger retrofit decisions. Still, a homeowner walkthrough remains valuable because it builds awareness of seasonal patterns and maintenance needs.
When to Inspect and How to Prepare
The best time to inspect is usually during more extreme weather, when the difference between indoors and outdoors makes problems easier to notice. In winter, cold drafts, condensation, and uneven heating become more obvious. In summer, heat gain, humid conditions, and stuffiness can point to different weaknesses in the envelope. Many homeowners benefit from doing a light seasonal walkthrough twice a year, then a more detailed inspection annually.
Before you begin, choose a clear sequence so you do not miss areas or duplicate effort. It helps to inspect both inside and outside, and to take photos as you go. If you have access to the attic or crawlspace, wear appropriate clothing, gloves, and a dust mask as needed. Safety matters. Do not disturb insulation around electrical hazards, and avoid entering spaces that feel unsafe, unstable, or poorly ventilated.
It can also be helpful to gather a small amount of background information before you start. Look back at utility bills for unusual changes, notice rooms that are consistently harder to heat or cool, and ask yourself where condensation tends to appear. These clues can help you connect what you feel in daily life with what you observe during the inspection.
A Step by Step Home Envelope Inspection
Step 1: Start Outside and Walk the Perimeter
Begin with a slow exterior walk around the house. Look at the roofline, siding, trim, windows, doors, vents, and foundation. You are checking for obvious signs of wear, gaps, damage, staining, or moisture problems that could allow water or air to move where it should not. Pay close attention to where different materials meet because transitions are often where failures begin.
Look for cracked caulking around windows and doors, loose or damaged flashing, missing weatherstripping, and deteriorated sealant around penetrations. If shrubs or vines conceal lower walls, gently inspect those areas for trapped moisture or hidden deterioration. Also observe grading around the foundation. Water should move away from the house, not toward it, because persistent wetting at the base can affect both durability and indoor comfort.
Do not overlook vents and exhaust terminations. Dryer vents, bath fan outlets, intake hoods, and plumbing penetrations all interrupt the continuity of the envelope. If these elements are loose, poorly sealed, or damaged, they can contribute to both air leakage and moisture problems. A calm exterior pass often sets the stage for what you later confirm indoors.
Step 2: Inspect the Attic First
The attic is one of the most important places to inspect because it is often where major air leakage and insulation issues are found. ENERGY STAR and DOE both identify attic hatches, recessed lights, plumbing and wiring penetrations, and top plate junctions as common leakage points. Warm air naturally rises, so leaks into the attic can significantly increase heat loss in winter and can also carry moisture into colder spaces where condensation may develop.
When you enter the attic, first look for overall insulation coverage. Is the depth consistent, or are there thin spots and bare patches? Are there compressed areas near walkways or around service routes? Insulation should be continuous, not scattered or interrupted. Gaps around mechanical equipment, attic hatches, or partition walls can undermine performance more than many homeowners realize.
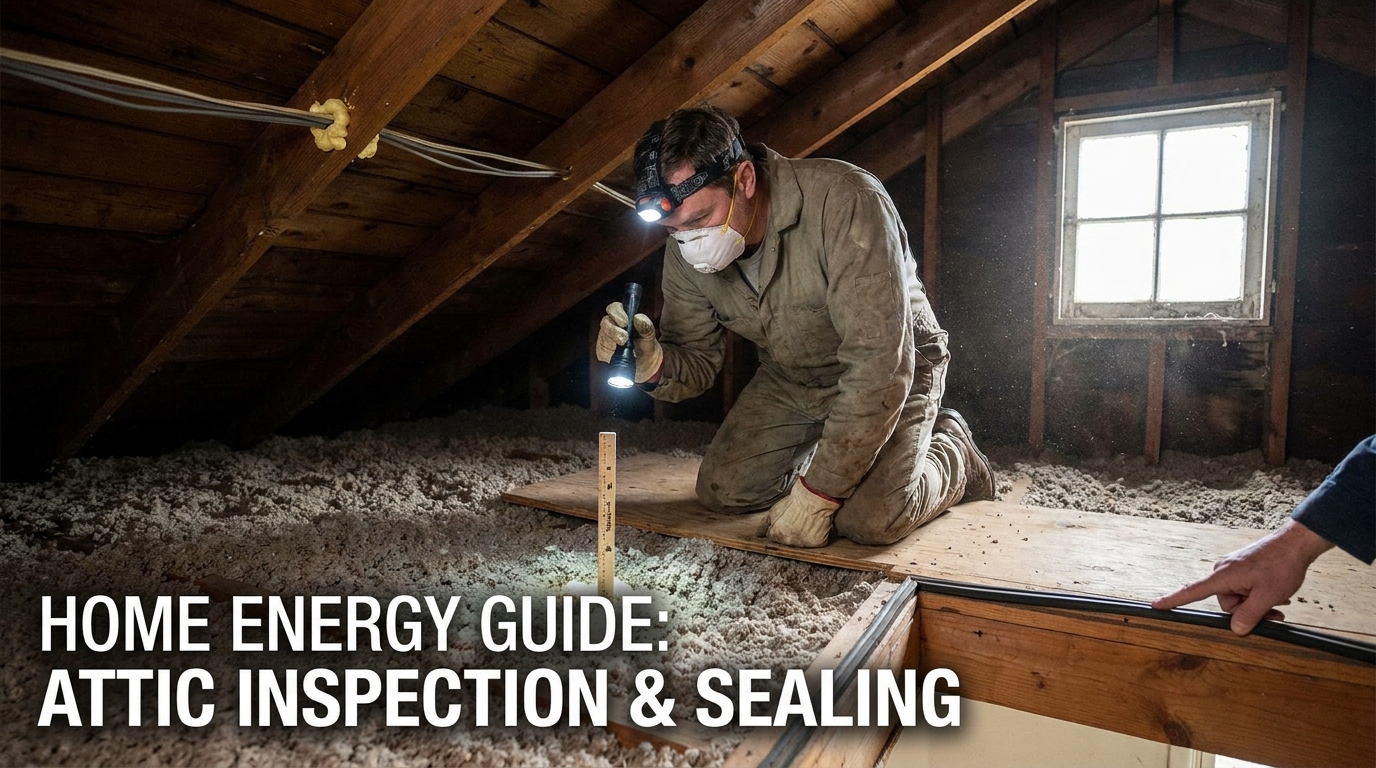
Next, look specifically for air leakage points. Attic hatches should close tightly and have weatherstripping if possible. Recessed lights can be significant leakage sites if they are older or not designed for insulated contact applications. Plumbing stacks, wiring holes, chimney chases, and duct penetrations should all be examined for gaps. Dark staining in insulation can sometimes indicate that dusty indoor air has been moving through that area over time.
Moisture clues are equally important. Check the underside of the roof sheathing for staining, mold, frost history, or dampness. These signs can suggest a mix of air leakage, inadequate ventilation, or roof issues. Ice dams at the eaves in winter also point to heat escaping into the attic, often due to insufficient air sealing and insulation continuity.
Step 3: Check Interior Ceilings and Exterior Walls
As you move back into the living areas, look at ceilings and exterior walls with fresh eyes. Hairline cracks are common in homes, but staining, bubbling paint, repeated drywall repairs, and isolated cold patches deserve attention. Exterior corners, ceiling perimeters, and areas around pot lights or attic access points are all worth noting. Uneven temperatures between rooms can also reveal missing insulation or thermal bridging.
Thermal bridging occurs when heat bypasses insulation through more conductive materials such as framing members. Homeowners do not need to calculate assembly values to notice its effects. If one wall consistently feels colder than others, or if condensation forms in the same pattern each winter, the wall may have insulation gaps or thermal bridging that deserves further investigation. This is one reason why whole house thinking matters. A room can feel uncomfortable even if the thermostat setting seems reasonable.
It is also helpful to note any signs of high indoor humidity. Condensation on walls or upper corners may not always be caused by an envelope failure alone, but it often points to a combination of air leakage, insufficient insulation, and ventilation imbalance. The inspection process is about spotting these patterns rather than assuming a single cause.
Step 4: Test Windows and Doors Carefully
Windows and doors are part of the envelope, but they should be assessed with a balanced perspective. It is easy to assume they are always the problem because they are visible and often feel cool in winter. In reality, the issue may be the perimeter sealing, weatherstripping, or installation details rather than the entire unit. Replacing all windows is a major expense, so it is worth understanding exactly where performance is being lost.
Run your hand around the perimeter of windows and doors on a cold or windy day. A tissue or smoke test can help reveal moving air. Check whether locks pull the sash or door tightly into place, and inspect weatherstripping for compression, gaps, or brittleness. From the exterior, look for cracked sealant, trim deterioration, or signs that water is entering around the assembly.

Condensation on the interior side of glazing can also be informative. Sometimes it reflects high indoor humidity, but persistent condensation at frames or on adjacent finishes can indicate thermal weakness or air leakage. If only certain windows show problems, compare their orientation, exposure, and surrounding wall conditions. That context helps avoid costly assumptions.
This is also where many homeowners discover the difference between air sealing and insulation. Insulation slows heat flow through materials, while air sealing reduces uncontrolled air movement. A well insulated wall can still feel uncomfortable if cold air is leaking around a window frame. These two strategies work best together, not as substitutes for each other.
Step 5: Move Down to the Basement, Crawlspace, and Foundation
After the attic, lower levels are often the next best place to focus. Basements and crawlspaces contain numerous leakage sites, including rim joists, sill plates, foundation cracks, utility penetrations, and access doors. Because stack effect draws air in at lower levels as warm air escapes above, sealing these areas can meaningfully improve comfort and reduce drafts throughout the house.
Inspect the rim joist area where the wood framing meets the foundation. This is a common leakage zone and often a weak point for insulation. Look for visible gaps, old fiberglass stuffed into cavities without air sealing, signs of condensation, staining, or insect activity. Utility penetrations for water lines, gas lines, electrical service, and vents should also be checked closely.
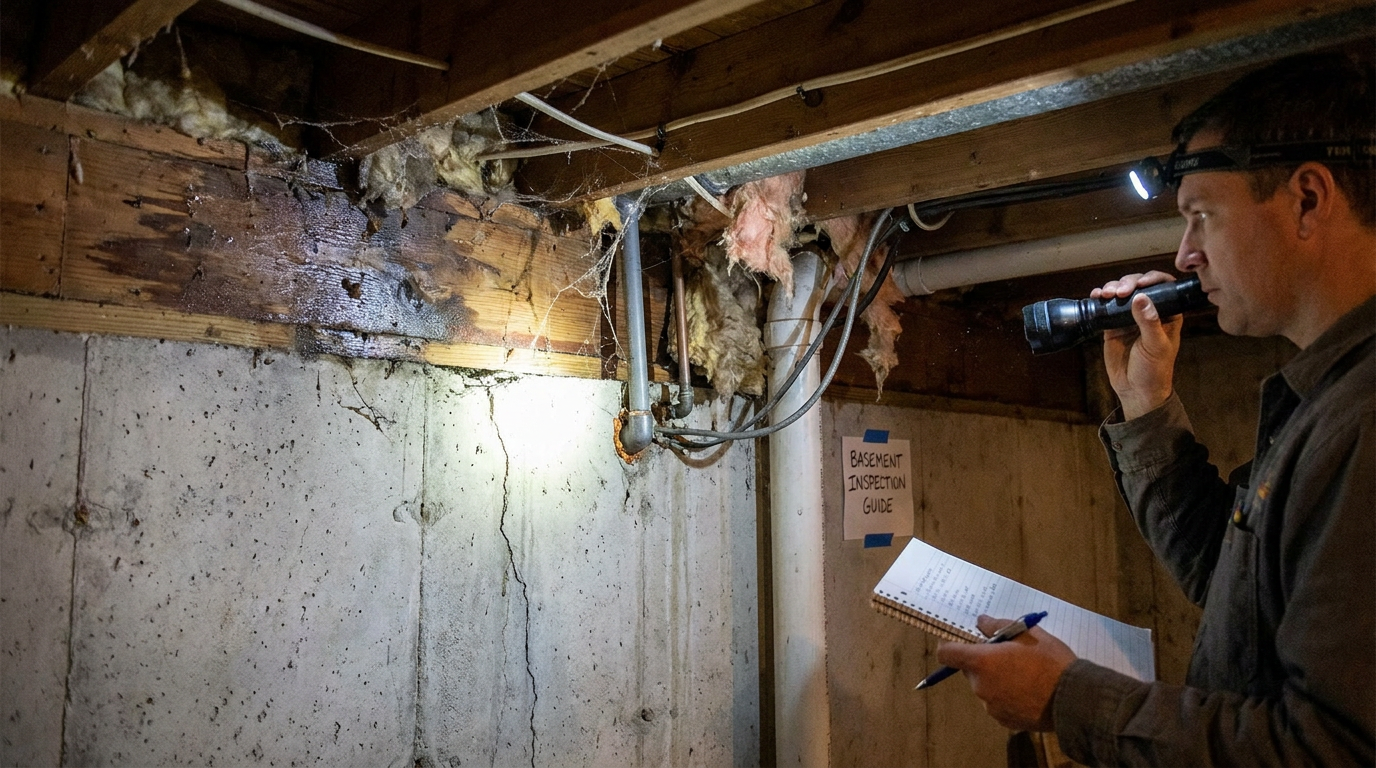
Foundation walls and slabs should be examined for cracks, efflorescence, dampness, and musty smells. Some hairline cracks are common, but active moisture intrusion should not be ignored. In crawlspaces, assess whether the space is vented or conditioned, whether there is visible ground moisture, and whether insulation and vapor control materials appear continuous and intact. Moisture issues at the bottom of the house often influence air quality and comfort above.
If you find chronic dampness, address drainage and moisture sources before adding new insulation or tightening the area further. Sustainable upgrades work best when they respect the building’s moisture behavior. Sealing a wet assembly without solving the water problem first can create larger issues later.
Step 6: Examine Mechanical and Utility Penetrations
Many envelope weak points are hidden in plain sight around systems we use every day. Exhaust fans, plumbing stacks, gas lines, cable penetrations, exterior faucets, and electrical entries all interrupt the air barrier. These openings may seem minor individually, but together they can contribute substantially to heat loss and discomfort. They are also among the easiest things to overlook during routine maintenance.
Check around penetrations wherever they pass through ceilings, walls, and foundation areas. Inside, look under sinks, behind access panels, near electrical service points, and around vent boots. Outside, check where those same elements terminate. Gaps, cracked sealants, missing escutcheon plates, and poorly fitting covers are all worth documenting.
Pay particular attention to chimneys and flues. These areas can be major leakage sites, but they also involve fire safety clearances and special materials. If you suspect leakage around high temperature components, it is wise to consult a professional rather than apply generic foam or sealant without confirming what is appropriate.
What Common Problems Usually Mean
During the inspection, you will probably encounter a mix of issues that range from simple maintenance to signs of larger performance problems. Drafts around trim or electrical outlets often indicate air barrier discontinuity. Patchy attic insulation usually means heat is escaping unevenly, raising energy use and comfort complaints. Condensation on windows may reflect high indoor humidity, poor ventilation, or cold surfaces caused by leakage and thermal bridging.
Musty smells, peeling finishes, water staining, and mold growth are stronger signals that moisture is moving or accumulating where it should not. Because air movement can transport moisture through assemblies, these clues deserve just as much attention as temperature related issues. In fact, moisture durability is often the more urgent concern because it affects health, material longevity, and repair costs.
One helpful principle is to distinguish symptoms from causes. A cold bedroom may be the symptom. The cause might be missing insulation above it, leakage at a kneewall, poor duct sealing, or all three. An effective inspection helps you slow down and ask what is driving the problem rather than just what is visible on the surface.
How to Prioritize Repairs Without Feeling Overwhelmed
Once you have finished the walkthrough, the next step is not to tackle everything at once. Instead, sort your findings into three categories: moisture and safety concerns, major air leakage opportunities, and comfort or finish issues. Moisture and safety should always come first because they affect durability and health. Active roof leaks, wet basements, mold concerns, combustion safety questions, and flue related issues should be addressed before routine efficiency work.
After that, focus on the biggest leakage sites and insulation gaps, especially in the attic and basement. This aligns with the guidance from ENERGY STAR, DOE, and NRCan, which consistently point to accessible framing junctions, penetrations, attic hatches, rim joists, and lower level leakage areas as high impact opportunities. Many homeowners are surprised by how much difference these less glamorous locations can make compared with more visible upgrades.
Then consider secondary items such as weatherstripping, localized caulking, or targeted insulation repairs around problem rooms. This staged approach makes the work more manageable financially and mentally. Sustainability is not about doing everything immediately. It is about making smart improvements in a sequence that respects both the house and your capacity.
- Address active water entry, mold risk, and safety issues first.
- Seal major air leaks in the attic, basement, crawlspace, and around penetrations.
- Improve insulation continuity where gaps or compression are obvious.
- Refine windows and doors with weatherstripping and perimeter sealing where needed.
- Reassess comfort and indoor air quality after each round of improvements.
When to Call a Professional
A homeowner inspection is a strong first step, but there are times when professional support is the most efficient path. If your home has chronic condensation, repeated ice dams, widespread mold, persistent comfort problems, or unusual energy bills with no obvious explanation, a certified energy advisor or experienced building envelope professional can add clarity. A blower door test and infrared imaging are especially useful when you want to identify hidden leakage patterns rather than rely on guesswork.
Professional guidance is also valuable before major retrofit decisions. For example, if you are considering new insulation, replacing siding, finishing a basement, or upgrading windows, it helps to understand how those changes interact with air barriers, vapor control, and ventilation strategy. The whole house perspective is what protects the value of the investment. A seemingly simple upgrade can create unintended moisture or air quality issues if it is not integrated thoughtfully.
In Canada, homeowners may also benefit from EnerGuide assessments or regionally available efficiency programs that connect inspection findings to incentives and verified performance improvements. These services can turn general observations into measurable action plans, which is particularly helpful if you want to phase upgrades over several years.
Do Not Forget Ventilation and Indoor Air Quality
One of the most important sustainability lessons in envelope work is that reducing uncontrolled leakage is only half of the story. Homes still need fresh air. If you make the envelope tighter without thinking about ventilation, moisture, odours, and indoor pollutants may linger longer than they should. EPA guidance highlights moisture control, source control, and adequate ventilation as essential after energy improvements.
That does not mean envelope upgrades are risky. It means they work best as part of a balanced plan. Kitchen and bathroom exhaust should function properly. Filters should be maintained. If the home becomes significantly tighter, a heat recovery ventilator or energy recovery ventilator may be worth discussing with a qualified professional, especially in colder climates where energy efficient fresh air is valuable.
This balance often reassures homeowners who worry that efficiency measures will make the house feel stuffy. In reality, a well sealed home with intentional ventilation usually feels more stable, cleaner, and more comfortable than a leaky one. The difference is that fresh air arrives by design rather than by accident.
Sustainable Material Choices for Envelope Repairs
As you move from inspection to upgrades, material selection can support your sustainability goals as well. More homeowners are paying attention not just to operating energy, but also to the embodied carbon of retrofit materials. This does not mean every repair requires a complex carbon analysis, but it can encourage thoughtful choices such as durable weatherstripping, responsibly selected insulation products, and repairs that preserve existing assemblies where possible rather than replacing them unnecessarily.
Durability is an environmental strategy in its own right. A repair that lasts well, controls moisture properly, and avoids repeated rework is usually the more sustainable choice. In some projects, lower carbon insulation or air sealing products may be available. In others, the biggest sustainability gain still comes from reducing energy waste quickly using practical materials that fit the assembly correctly. A balanced approach is often best.
It is also worth remembering that proper installation matters as much as product selection. Even a high performance material will underdeliver if gaps, compression, or moisture exposure compromise it. The inspection process you complete now can help you verify later that upgrades are not only specified well, but installed well too.
Building the Habit: A Seasonal Envelope Checklist
The most effective home envelope inspections are not one time events. They become a light seasonal habit, similar to checking gutters or changing filters. A quick review in fall and spring helps catch sealant failure, drainage issues, insulation disturbance, and moisture clues before they become bigger problems. This kind of routine maintenance is deeply sustainable because it protects the performance you already have.
- Walk the exterior and note any damaged flashing, loose trim, or failed caulking.
- Check the attic for insulation continuity, hatch sealing, and roof sheathing moisture signs.
- Test windows and doors for drafts, weatherstripping wear, and condensation patterns.
- Inspect the basement or crawlspace for rim joist leakage, dampness, and foundation changes.
- Review fans and ventilation systems to ensure the home remains healthy as it becomes more efficient.
Keeping a simple photo log can make these seasonal checks even more useful. It becomes easier to notice whether a crack is new, whether staining is spreading, or whether a comfort complaint lines up with a recurring condition in the same place. Over time, you build a more accurate picture of how your house responds to weather and use.
Final Thoughts
Conducting a home envelope inspection for sustainability is not about chasing perfection or turning your house into a science project. It is about becoming more observant, more intentional, and more confident in the small decisions that shape how your home performs every day. When you understand where air, heat, and moisture are moving, you are in a stronger position to reduce waste, improve comfort, and protect the building for the long term.
The encouraging part is that many of the highest impact opportunities are accessible. Air sealing and insulation improvements often provide meaningful returns in energy savings and comfort, and they support lower emissions at the same time. According to the research, attic and basement leakage, penetrations, and insulation continuity deserve particular attention, while moisture management and ventilation should remain part of the conversation throughout. That whole house mindset is what turns maintenance into sustainability.
If you take one thing from this guide, let it be this: start with a careful walkthrough and let the house tell you its story. A draft, a stain, a musty smell, or a patch of flattened insulation is not just a defect. It is information. With a little structure and patience, that information can lead to smarter upgrades, lower energy use, and a home that feels better to live in season after season.



No Comment! Be the first one.