


How to Conduct an Insulation Check for a Greener, More Energy-Efficient Home
If your home feels chilly in winter, overheats in summer, or seems to run the furnace or air conditioner more than it should, insulation may be part of the story. An insulation check is one of the most practical ways to understand how your home is performing, because it helps you identify where heat is escaping, where air is leaking in, and which upgrades could make the biggest difference. It is not just a technical exercise. It is a very approachable way for homeowners to improve comfort, lower utility bills, and make a home more resilient over time.
Table Of Content
- Why an Insulation Check Matters More Than Many Homeowners Realize
- What Insulation Does, and What It Cannot Do on Its Own
- Where to Start Your Home Insulation Check
- Prepare a Simple Inspection Checklist
- Step 1: Inspect the Attic Carefully
- What to Watch for in the Attic
- Step 2: Check the Basement or Crawl Space Rim Joists
- Step 3: Pay Attention to Floors Over Unheated Spaces
- Step 4: Look for Clues in Exterior Walls and Living Spaces
- Understand R-Value Without Oversimplifying It
- Why Air Sealing Deserves Equal Attention
- Common Problems Homeowners Find During an Insulation Check
- When a DIY Check Is Enough, and When to Call a Professional
- How to Prioritize Insulation Upgrades After Your Check
- A Simple Upgrade Order for Many Homes
- Checking for Incentives and Support
- How an Insulation Check Supports a Greener Home
- Final Thoughts
For many households, energy efficiency can feel abstract until it shows up as cold floors, drafty rooms, or rising monthly costs. The encouraging news is that insulation and air sealing are consistently recognized by major government energy programs in both Canada and the United States as among the most cost-effective home improvements available. The U.S. Department of Energy says homeowners may save up to 20 percent on heating and cooling costs, or up to 10 percent on total energy costs, by adding insulation in key areas such as attics, floors, crawl spaces, and accessible basement rim joists while also reducing unwanted air leaks.
That last point matters. Insulation does not work in isolation. Natural Resources Canada emphasizes that insulation performs best when paired with air sealing, because gaps, joints, and small openings can sharply reduce the real-world performance of an otherwise well-insulated assembly. In other words, a home can have insulation present and still waste energy if warm air is slipping through cracks and bypasses around it. A useful insulation check looks at both the material itself and the pathways around it.
This guide is designed to help you take charge of that process in a calm and practical way. You do not need to be a contractor to notice missing attic insulation, compressed batts, damp areas, or drafts around floors over unheated spaces. What you do need is a simple plan, a safe approach, and a basic understanding of what to look for. By the end, you should be able to assess the most important parts of your home, prioritize improvements sensibly, and know when it makes sense to bring in a professional.
Why an Insulation Check Matters More Than Many Homeowners Realize
Insulation is easy to overlook because most of it is hidden behind drywall, under attic floors, or tucked into basement and crawl space edges. Yet it plays a central role in how a home feels and how much energy it uses. A well-insulated, well-sealed building envelope slows heat loss in winter and heat gain in summer, which means your heating and cooling equipment does not have to work as hard. That can improve comfort, reduce wear on HVAC systems, and support a more durable home overall.
There is also a strong environmental case for paying attention to insulation. Lower energy use means lower operating emissions, especially in homes heated with fossil fuels. Even in homes moving toward electrification, reducing the heating and cooling load is one of the smartest first steps. The Department of Energy notes that envelope upgrades such as insulation and air sealing can lower the installed cost burden of a heat pump by reducing the size of system a home needs. Better insulation, in that sense, is not only a standalone upgrade. It can also prepare your home for future clean technology choices.
Canadian retrofit policy has reflected this value as well. Natural Resources Canada has reported that households participating in Greener Homes upgrades save about $386 per year on average in energy costs and reduce greenhouse gas emissions by 1.92 tonnes annually. Programs such as the Canada Greener Homes Affordability Program also highlight that insulation and heat pump upgrades are increasingly treated as connected parts of a whole-home strategy rather than separate projects.
Perhaps most importantly, an insulation check helps move the conversation from guesswork to observation. Instead of assuming your home needs more insulation everywhere, you can identify the actual trouble spots. You may find that one attic corner is thin and wind-washed, that the basement rim joists are uninsulated, or that a floor over the garage is causing comfort issues. Those kinds of findings lead to better decisions and often better value.
What Insulation Does, and What It Cannot Do on Its Own
Insulation slows the transfer of heat. In practical terms, that means it helps keep warm air inside during cold weather and outside during hot weather. The most familiar metric used to describe insulation is R-value, while Canadian materials may also refer to RSI. A higher number generally means greater resistance to heat flow, but it is important not to treat R-value as the whole story.
Real-world performance depends on installation quality, air leakage, moisture, and thermal bridging. Thermal bridging happens when heat moves through framing members or other conductive parts of the assembly more easily than through the insulation itself. NRCan notes that framing, sheathing, drywall, and exterior finishes can all affect the effective thermal resistance of a wall or roof assembly. That means a labeled insulation product value is not always equal to the performance you experience in the home.
This is one reason the common belief that more insulation always solves the problem can be misleading. If there are major air leaks in the attic floor, around penetrations, or at the rim joist, adding insulation on top may help, but it may not deliver the comfort and savings you expect. Likewise, if insulation is wet, compressed, or poorly installed, its performance may be significantly reduced. A good inspection looks beyond presence and asks a better question: Is this insulation in the right place, in the right amount, and still in good condition?
Practical takeaway: A greener home is not just a home with more insulation. It is a home where insulation, air sealing, moisture control, and ventilation are working together.
Where to Start Your Home Insulation Check
The most useful places for homeowners to inspect are the attic or roof area, basement or crawl space rim joists, exterior walls where signs are visible, and any floors over unheated spaces such as garages, crawl spaces, or open overhangs. These are the locations most often associated with meaningful heat loss and comfort complaints. They are also areas where visual clues can tell you a lot, even without specialized equipment.
Before you begin, gather a flashlight, tape measure or ruler, phone or notepad for recording observations, gloves, a dust mask, and stable footwear. If you are entering an attic, use a proper light source and only step on secure framing or designated walk boards. If conditions look unsafe, stop and reassess. The goal is not to do invasive demolition. It is to make a careful visual review of accessible areas and create a clear action list.
Prepare a Simple Inspection Checklist
Having a checklist keeps the process focused and makes it easier to compare spaces. During your inspection, you will want to note insulation type, approximate depth, visible gaps, signs of compression, moisture staining, mold, pest disturbance, and any obvious air leaks around penetrations. You should also note where insulation is missing entirely or where one area looks noticeably different from the rest.
- Start with the attic or roof area if it is safely accessible.
- Move to the basement or crawl space, especially the rim joist area.
- Check floors over unheated spaces for cold spots or visible insulation issues.
- Look for comfort clues around exterior walls, windows, outlets, and baseboards.
- Compare your observations against local climate-zone guidance and decide what needs attention first.
Step 1: Inspect the Attic Carefully
The attic is often the best place to begin because it is commonly one of the largest sources of heat loss in older homes and one of the easiest places to inspect visually. NRCan guidance notes that attic insulation should be assessed by measuring depth and checking for gaps, compression, moisture damage, and blocked ventilation. ENERGY STAR also emphasizes that attic air leaks can contribute to wasted energy, discomfort, and winter ice dams, which makes this area especially important.
Once in the attic, look across the insulation surface rather than focusing only on one spot. Is the coverage even, or are there thin areas where framing is exposed or nearly exposed. Are there places where insulation has been disturbed around hatches, ducts, wiring, or service pathways. Homes often lose performance not because insulation is absent everywhere, but because a handful of bypasses create disproportionate heat loss.
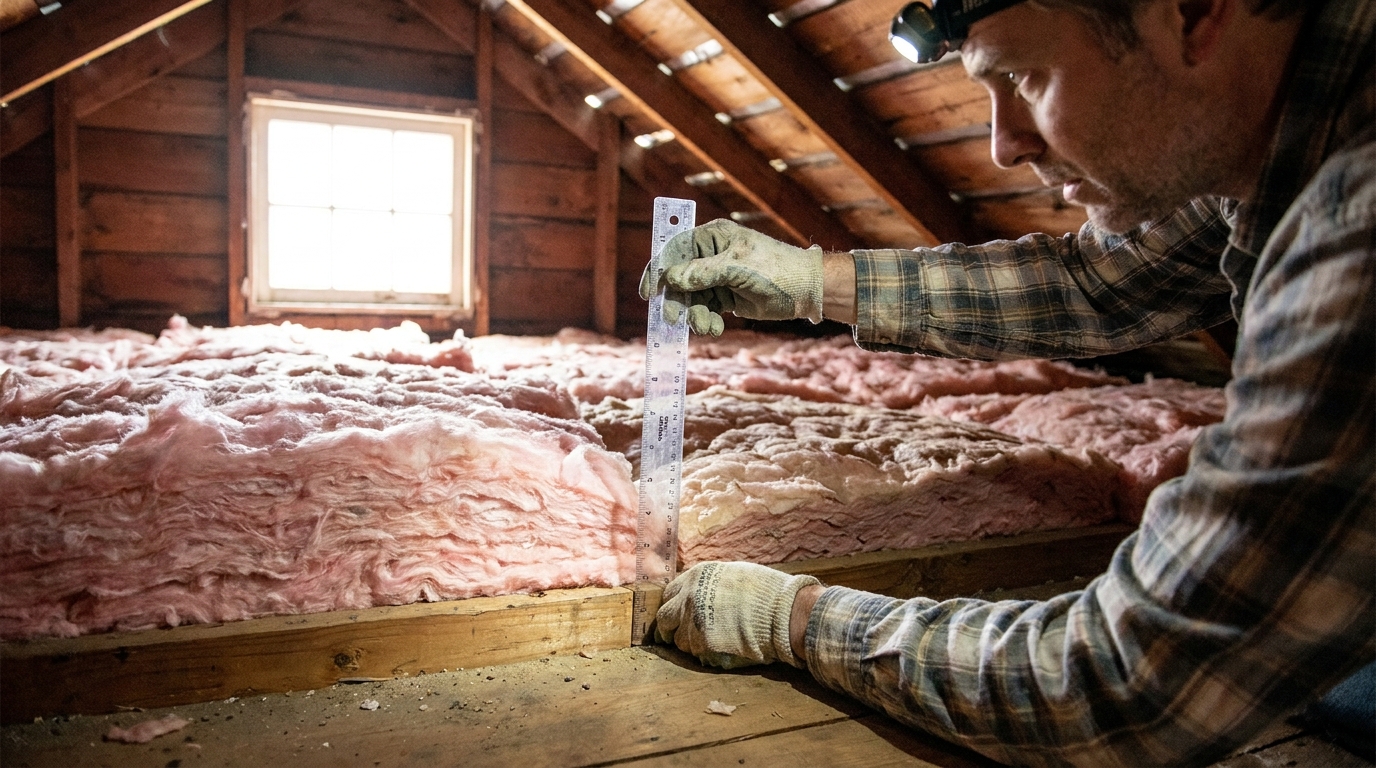
Use a ruler or tape measure to check insulation depth in several areas, not just one. Record the measurements and note the insulation type if you can identify it, such as fiberglass batt, blown cellulose, or blown fiberglass. Depth alone does not equal R-value perfectly, but it gives you a practical starting point. The Department of Energy provides climate-zone-based target R-values for ceilings, and guidance can vary widely depending on location. In uninsulated attics, target ceiling insulation levels may range from around R-30 in the warmest zones to R-60 in colder zones, which is why checking local recommendations matters.
As you inspect, pay close attention to the condition of the material. Insulation should not look soaked, moldy, heavily compacted, or crushed under storage items. Compressed insulation traps less air and performs less effectively. If you notice darkened areas, damp patches, frost, or a musty odor, those may be signs of air leakage or moisture problems that need to be resolved before simply adding more insulation.
Also look at ventilation pathways. Soffit vents should not be blocked by insulation, and airflow from soffits toward the attic space should remain open where the roof assembly requires ventilation. A common mistake is to treat the attic as a container to fill as much as possible, but ventilation and moisture management still matter. Insulation should improve performance, not create condensation risks.
What to Watch for in the Attic
- Uneven insulation depth or visible low spots
- Gaps around chimneys, plumbing stacks, wiring holes, or attic hatches
- Insulation pulled back from corners or eaves
- Compressed insulation under boards or stored items
- Wet, stained, moldy, or pest-damaged material
- Blocked soffit vents or signs of poor ventilation
If your attic has recessed lights, old wiring, or evidence of roof leakage, proceed with care. ENERGY STAR warns that some recessed fixtures were not designed to be covered by insulation, and older knob-and-tube wiring requires professional attention. In these situations, a DIY inspection is still useful, but the correction work should not be improvised.
Step 2: Check the Basement or Crawl Space Rim Joists
After the attic, the basement or crawl space is often the next most revealing location. In many homes, the rim joist area, which is the perimeter framing at the edge of the floor system above the foundation wall, is a quiet but significant source of energy loss. The Department of Energy specifically identifies accessible basement rim joists as a worthwhile insulation and air sealing target. Because this area includes many joints and transitions, it is also highly susceptible to air leakage.
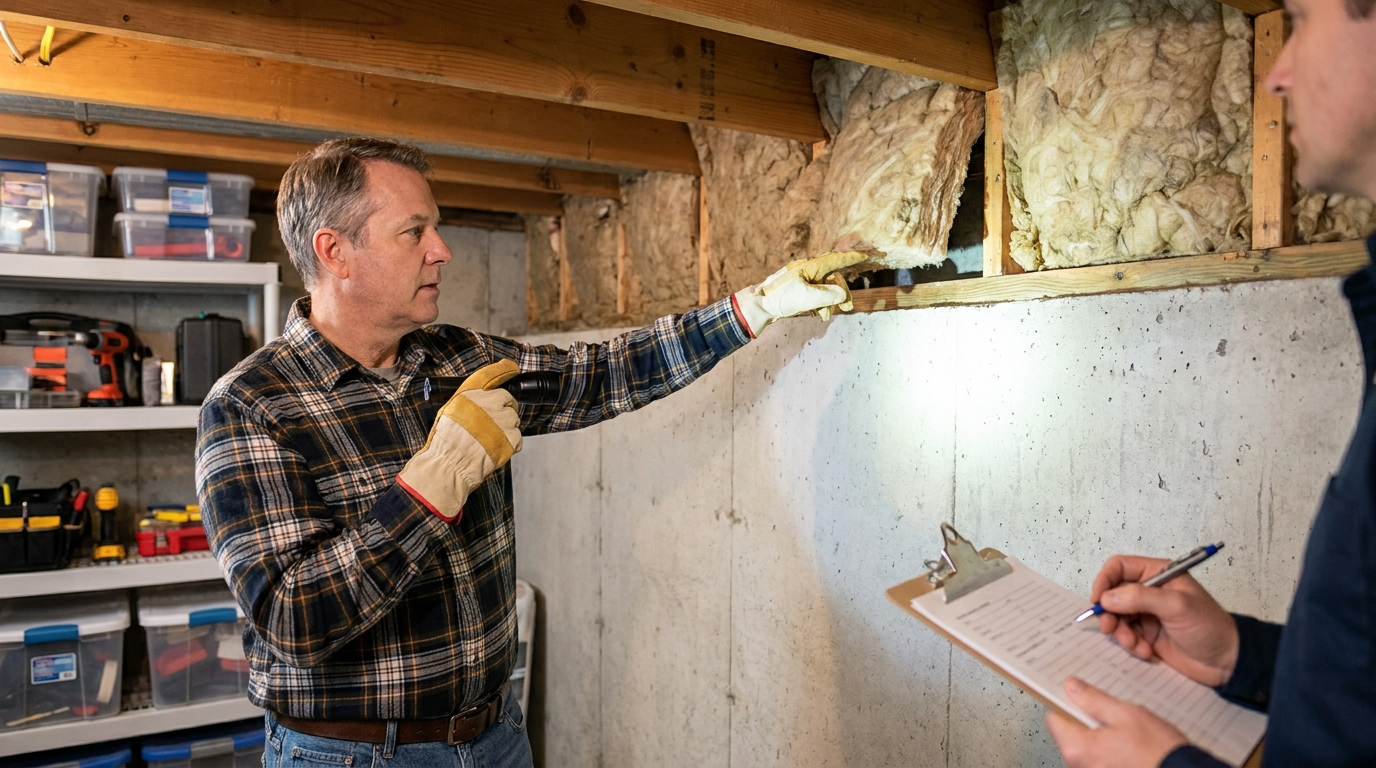
Walk the perimeter slowly with a flashlight. Look for bare wood, minimal insulation, visible cracks, old fiberglass stuffed loosely into cavities, or gaps around pipes and wiring. If the area is exposed, you may be able to see whether sections have been air sealed properly or whether they are simply insulated without attention to leakage paths. Homes that feel drafty at the floor level often have issues here, especially in colder climates.
Moisture matters in this zone too. Since the rim joist sits where the above-grade structure meets the foundation, it can be vulnerable to condensation if warm interior air reaches cold surfaces. Watch for staining, mold, damp smells, or signs of bulk water problems nearby. If you see active moisture issues, they should be addressed before adding or modifying insulation.
In crawl spaces, also note whether the space is vented or conditioned and how the insulation strategy appears to be set up. Some homes insulate the floor above the crawl space, while others insulate the crawl space walls as part of a conditioned envelope approach. What matters for your inspection is whether the strategy appears continuous, dry, and intact. Mixed or damaged approaches often signal a need for a more coordinated upgrade plan.
Step 3: Pay Attention to Floors Over Unheated Spaces
One of the most noticeable comfort complaints in a house is the cold floor above a garage, crawl space, cantilever, or unheated basement area. These floors may already contain insulation, but that does not guarantee good performance. Gaps, sagging batts, missing sections, and air movement can all undermine the assembly. If a room feels consistently colder than the rest of the home, it is worth tracing what lies beneath it.
If the underside is accessible, inspect the insulation visually. Are batts held firmly in place, or are they drooping away from the subfloor. Is there a protective air barrier or finish layer where required, or is insulation exposed and vulnerable to airflow. In some homes, exposed insulation under a floor performs poorly because wind or cold air is washing through or around it.
From inside the room above, note comfort patterns. Cold floor surfaces, uneven room temperature, and draft sensations near the perimeter can all indicate thermal weaknesses below. These clues are not as precise as a thermal camera or blower door test, but they are still useful. You are building a picture of which assemblies deserve priority.
Step 4: Look for Clues in Exterior Walls and Living Spaces
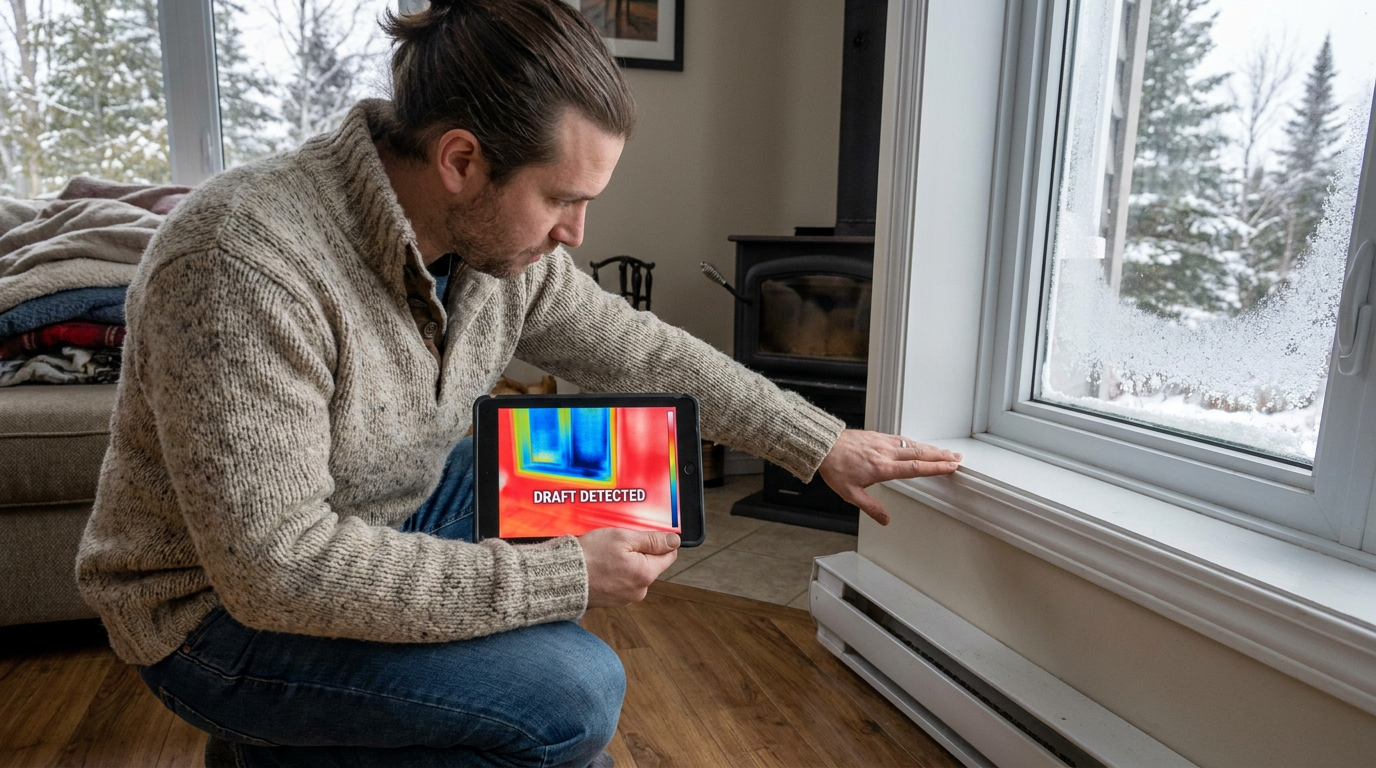
Exterior walls are harder to inspect directly without opening the assembly, but living spaces can still tell you a great deal. Walk through the house during a cold day or a hot afternoon and pay attention to rooms that feel difficult to keep comfortable. Place your hand near baseboards, window trim, electrical outlets on exterior walls, and the edges of flooring. Drafts and temperature swings may indicate air leakage, missing insulation, or both.
Windows are often blamed first, but walls and junctions around them can be just as important. A wall with old, settled insulation or significant thermal bridging may feel cool even if the window itself is relatively modern. Similarly, a room with insulation in the walls may still be uncomfortable if attic bypasses above or basement leakage below are affecting it.
You can also watch for subtle visual signs such as uneven paint wear near corners, condensation on cold surfaces, or areas where snow melts faster on part of a roofline outside. None of these signs proves a single diagnosis on its own, but together they help identify patterns. Comfort mapping is a valuable part of a homeowner-friendly insulation check.
Understand R-Value Without Oversimplifying It
Because insulation products are marketed by R-value, homeowners often assume that choosing the highest number available is the whole decision. In reality, the right target depends on your climate, the part of the home you are insulating, and the condition of the existing assembly. The Department of Energy offers climate-zone-based insulation recommendations, while NRCan materials similarly reinforce that there is no single universal number for every house in every region.
It is also worth remembering that the assembly matters as much as the product. A wall cavity with nominally high-R insulation can still underperform if wood framing creates thermal bridges, if air leakage bypasses the cavity, or if moisture has degraded the material. In attics, depth can be a useful indicator, but only when the insulation is evenly distributed and dry. In floors and rim joists, a neat-looking installation may still perform poorly if gaps are left around the edges.
For that reason, a sensible homeowner approach is to use R-value as one input rather than the sole benchmark. Ask how much insulation is present, whether it is appropriate for your climate, whether it is continuous, and whether air sealing has been addressed. Those questions lead to better outcomes than shopping by a number alone.
Why Air Sealing Deserves Equal Attention
One of the most persistent misconceptions in home efficiency is that insulation and air leakage are separate issues. In practice, they interact constantly. Warm air escaping through cracks into an attic can carry heat and moisture with it, reducing the benefit of insulation and increasing the risk of condensation. Cold air entering at the rim joist can make floors uncomfortable even if insulation is technically present nearby.
Both NRCan and ENERGY STAR stress that insulation performs best when unwanted air movement is controlled. This is especially important in attics, where bypasses around plumbing stacks, electrical penetrations, recessed fixtures, chimney chases, and attic hatches can create major losses. Air sealing these locations before or while improving insulation often delivers better results than adding insulation alone.
ENERGY STAR also notes that attic air sealing plus insulation can help reduce the likelihood of ice dams in winter. Ice dams form when roof sections warm unevenly, often because interior heat is escaping into the attic and melting snow from below. That is a useful reminder that building envelope issues are not only about bills. They can also affect roof durability and seasonal maintenance problems.
Common Problems Homeowners Find During an Insulation Check
Most homes do not have a single dramatic failure. Instead, they have a collection of small deficiencies that add up over time. One section of the attic may be thin. The hatch may be unsealed. The rim joist may be partly insulated but not air sealed. A floor over the garage may have batts that have sagged out of position. These are ordinary issues, which is good news, because ordinary issues are often solvable.
- Insulation that is present but unevenly distributed
- Compressed insulation under storage or service paths
- Wet or moldy insulation caused by leaks or condensation
- Missing insulation in bypass areas and corners
- Gaps around penetrations that let air leak through
- Blocked ventilation near eaves in ventilated attics
- Cold floors over garages, cantilevers, or crawl spaces
- Rim joists that are underinsulated or left bare
Another common finding is that previous work addressed only one part of the problem. For example, extra attic insulation may have been added years ago without sealing the attic floor first. Or basement walls may have been upgraded while the rim joist was left exposed. A good inspection helps you see these partial solutions clearly and think in terms of whole-home performance.
When a DIY Check Is Enough, and When to Call a Professional
A visual insulation check is well within reach for many homeowners, but there are limits to what should be handled as a DIY project. If your inspection reveals straightforward issues such as low attic insulation depth, obvious gaps around an attic hatch, or accessible draft points around the rim joist, you may be able to plan modest improvements confidently. If, however, you encounter moisture damage, mold, roof leaks, unsafe electrical conditions, or unclear ventilation problems, it is wise to pause and bring in qualified help.
ENERGY STAR flags several warning signs that deserve professional attention, including wet or moldy insulation, active roof leaks, recurring ice dams, poor attic ventilation, knob-and-tube wiring, or recessed lights not rated to be covered by insulation. These are not minor details. If moisture or electrical safety is involved, adding insulation without resolving the underlying issue can create a more serious problem.
A professional energy auditor can also help if you want a clearer whole-home picture. An energy assessment may include blower door testing, thermal imaging, and climate-specific recommendations that go beyond what a visual review can provide. In Canada, an EnerGuide-style assessment may be part of planning a larger retrofit. In the United States, local utility or state efficiency programs may offer related services or incentives.
Call a pro if: you find wet insulation, mold, recurring ice dams, evidence of roof leaks, unverified old wiring, unsafe attic conditions, or a complicated crawl space or moisture issue that is beyond visual diagnosis.
How to Prioritize Insulation Upgrades After Your Check
Once you have completed your inspection, the next step is to prioritize improvements. The most effective approach is usually to tackle the largest losses and the easiest wins first. For many homes, that means starting with attic air sealing and insulation, then addressing basement or crawl space leakage and insulation, and then moving to floors over unheated spaces or more involved wall improvements as needed.
Think in terms of impact, access, and risk. An attic that is easy to reach and clearly underinsulated may offer a strong return in comfort and energy savings. A rim joist with visible gaps may be another high-value target. By contrast, dense-packing exterior walls in a finished home may still be worthwhile, but it tends to be a more specialized project and may not be the first measure to pursue if the attic and basement remain weak.
It is also helpful to align your insulation plan with other upcoming projects. If you are considering a heat pump, roof replacement, siding update, or basement renovation, that may be the ideal time to improve parts of the envelope. Since DOE notes that envelope upgrades can reduce heat pump sizing needs, insulation checks often fit naturally into a broader home electrification plan.
A Simple Upgrade Order for Many Homes
- Seal obvious attic air leaks and improve attic insulation to climate-appropriate levels.
- Address basement or crawl space rim joists and related leakage points.
- Improve floors over unheated spaces that create comfort complaints.
- Investigate exterior wall options if rooms remain uneven or underperforming.
- Reassess overall HVAC needs after envelope improvements are complete.
Checking for Incentives and Support
Because insulation upgrades reduce both energy use and emissions, they are often supported by public programs. In Canada, NRCan has emphasized insulation retrofits through the Greener Homes framework, including affordability-focused support for low- to median-income households through the Canada Greener Homes Affordability Program. If you are planning a meaningful upgrade, it is worth checking federal, provincial, utility, or municipal resources before you begin.
In the United States, available support varies by state, utility territory, and income level, but home envelope improvements often qualify for rebates, tax incentives, or weatherization assistance. These programs can make a meaningful difference, especially when insulation and air sealing are bundled into a broader retrofit plan. Even if your project begins with a simple inspection, documenting what you find may help support a stronger application or contractor scope later.
How an Insulation Check Supports a Greener Home
There is a reason insulation remains one of the foundational ideas in sustainable housing. It is quiet, durable, and deeply practical. Unlike trend-driven upgrades, insulation works in the background every hour of every season. It lowers waste, supports comfort, reduces strain on mechanical systems, and can make cleaner heating and cooling technologies more viable.
A greener home is not defined only by visible technology. Solar panels, smart thermostats, and high-efficiency equipment all matter, but they work best when the building envelope itself is doing its job. If the home leaks heat easily, you end up paying to condition the outdoors. If the envelope is sound, every other efficiency measure has a stronger foundation.
That is why an insulation check is such a worthwhile place to begin. It is accessible, evidence-based, and empowering in a very grounded way. You are not being asked to overhaul everything at once. You are simply learning how your home behaves and taking thoughtful steps to improve it where it counts most.
Final Thoughts
If you have been wondering where to start with home energy efficiency, an insulation check is one of the clearest first moves available. It helps you identify hidden causes of discomfort, spot areas of unnecessary energy waste, and make better decisions about upgrades that deliver real value. The process does not require perfection. It requires attention, patience, and a willingness to look closely at the parts of the house that usually stay out of sight.
Begin with the attic if it is safely accessible. Measure depth, look for gaps, watch for moisture, and think about air sealing at the same time. Move to the basement or crawl space and inspect the rim joists. Pay attention to floors over unheated areas and comfort patterns in everyday rooms. Then compare what you find with local climate guidance and decide where the most sensible improvements lie.
In many homes, the result will be straightforward: seal the leaks, improve insulation where it is thin or damaged, and solve moisture or safety issues before doing more. That is not glamorous work, but it is some of the most meaningful work you can do for a lower-impact, more comfortable home. Sustainable housing choices are often strongest when they are practical, durable, and built into the everyday fabric of the building. Insulation belongs firmly in that category.


No Comment! Be the first one.