


Essential Plumbing Maintenance Checklists for Every Homeowner
Plumbing usually gets attention only when something goes wrong. A toilet starts running, a pipe leaks into a cabinet, the basement drain backs up, or the hot water runs rusty and cold. By the time you notice those problems, the repair bill is usually higher than it needed to be. The better approach is steady maintenance built around simple checklists that help you catch wear, waste, corrosion, and water quality concerns before they turn into damage.
Table Of Content
- Why Every Homeowner Needs a Plumbing Maintenance Checklist
- The Monthly Plumbing Maintenance Checklist
- What to inspect every month
- Monthly drain and fixture care
- The Seasonal Plumbing Maintenance Checklist
- Spring plumbing checklist
- Summer plumbing checklist
- Fall plumbing checklist
- Winter plumbing checklist
- Drinking Water Safety and Lead Awareness Checklist
- Water Heater Maintenance Checklist
- Appliance and Fixture Connection Checklist
- The Emergency Plumbing Preparedness Checklist
- Common Plumbing Maintenance Mistakes Homeowners Make
- When to Call a Professional
- How to Build a Simple Year Round Plumbing Routine
- Final Checklist to Keep Handy
This matters more than many homeowners realize. The U.S. Environmental Protection Agency has long warned that household leaks can waste thousands of gallons of water each year, and older EPA materials note that the average American family may waste more than 10,000 gallons annually from easy to fix leaks. That is not just wasted water. It is also wasted money, hidden moisture, and more strain on fixtures, valves, and building materials. A small drip under a sink or a silent toilet leak can do real damage if it goes ignored.
Plumbing maintenance is also about health, not just convenience. Health Canada and the CDC both note that lead can enter drinking water from older plumbing materials, including service lines, solder, fixtures, and fittings. Clear water does not guarantee safe water. Corrosion and lead problems are often invisible, which is why a smart plumbing routine includes attention to what your water touches before it reaches the tap.
In this guide, I am going to break plumbing maintenance into practical homeowner checklists you can actually use. You will find monthly habits, seasonal inspections, water heater tasks, drinking water safety checks, and emergency preparation steps. The goal is simple. Help you stay ahead of leaks, protect your home, and understand what needs your attention through the year.
Bottom line: plumbing maintenance works best when it is routine, seasonal, and documented. A few short checks each month can prevent the kinds of failures that lead to drywall damage, mold, flooring replacement, and major insurance claims.
Why Every Homeowner Needs a Plumbing Maintenance Checklist
A checklist turns plumbing maintenance into a repeatable system instead of a vague intention. Most homeowners are willing to do basic upkeep, but they often miss the same trouble spots because there is no regular process. Toilets get overlooked because they still flush. Supply hoses stay in service for too long because they are out of sight. Shutoff valves seize up because nobody tests them. A checklist solves that by putting common risk points in front of you on a schedule.
There is another reason to be methodical. Plumbing systems fail in patterns. Freeze damage tends to show up in winter and early spring. Basement moisture and sump pump issues often appear during rainy periods. Water heaters commonly reveal corrosion, sediment, and small leaks gradually over time. Seasonal planning matches the way houses actually behave, which is why it is more effective than waiting for obvious symptoms.
Insurance also makes this worth your time. Water related home claims remain a major issue in Canada and across North America, and many homeowners do not fully understand what their policy covers. Sewer backup and overland water protection may be optional coverage rather than automatic coverage. If you know your system, test your equipment, and document your plumbing setup, you are in a much stronger position both to prevent loss and to respond properly when something does happen.
The Monthly Plumbing Maintenance Checklist
Your monthly plumbing check does not need to take all afternoon. In most homes, thirty to forty five minutes is enough if you stay consistent. The purpose is to catch fresh leaks, test a few basic functions, and keep your eyes on fixtures that tend to wear quietly. Small monthly checks are the cheapest way to prevent larger repairs.
What to inspect every month
- Check all visible faucets for drips. Look at kitchen faucets, bathroom faucets, laundry sinks, and utility sinks. A slow drip is easy to ignore, but it wastes water and often points to worn internal parts that will not improve on their own.
- Test toilets for silent leaks. Put a few drops of food coloring in the tank and wait without flushing. If color appears in the bowl, the flapper or another internal component is leaking and should be repaired.
- Look under sinks and around toilets. Check the cabinet floor, supply line connections, shutoff valves, and the base of the drain. You are looking for staining, soft materials, corrosion, swelling, and that slight musty smell that often shows up before visible water damage.
- Inspect exposed pipes. Scan basement ceilings, utility rooms, crawlspaces, and garage walls where plumbing is visible. Watch for green or white buildup on metal pipes, rust on steel components, water marks, or signs of past dripping.
- Run water in less used fixtures. Guest bathrooms, basement sinks, and floor drains can dry out if left unused. Running water helps keep traps filled so sewer gases do not enter the home.
- Watch your water bill and water use patterns. If the bill jumps without a clear reason, you may have a hidden leak. EPA guidance supports the value of leak detection and flow monitoring because irregular use can reveal water waste and damage before it becomes obvious.
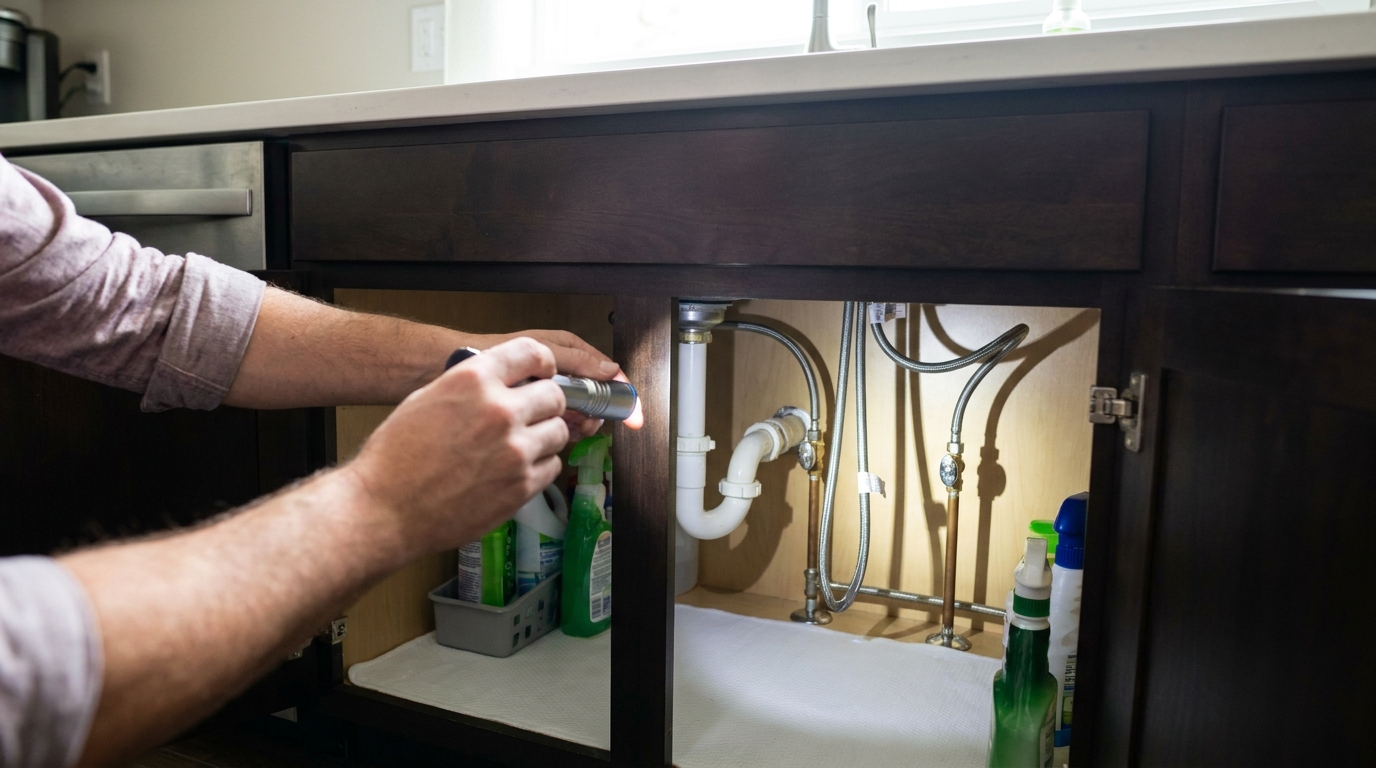
Do not rush these checks. The point is to become familiar with what normal looks like in your own house. Once you know what is typical, you can spot early changes much faster. That is often the difference between tightening a fitting and replacing a damaged cabinet bottom, subfloor, or section of drywall.
Monthly drain and fixture care
Drain maintenance should stay simple and practical. You do not need a shelf full of harsh chemicals, and in many cases they do more harm than good by damaging finishes, seals, or older piping. Instead, clear hair and debris from sink and tub strainers, clean faucet aerators when flow starts to drop, and flush infrequently used drains with water to maintain trap seals.
If a sink is draining slowly, start by removing visible debris and cleaning the stopper assembly. Bathroom sinks often collect hair, soap residue, and toothpaste buildup near the top of the drain. Kitchen sinks usually slow down because of grease, food scraps, and poor disposal habits. The best maintenance move is preventing buildup in the first place, not trying to dissolve it after the line is badly restricted.
The Seasonal Plumbing Maintenance Checklist
Seasonal maintenance is where most homeowners can make the biggest gains. Houses react to temperature swings, rainfall, ground saturation, and changing water use. By matching your checks to the season, you catch common failure points before they line up into a serious problem.
Spring plumbing checklist
Spring is about recovery and inspection. If you live in a climate with freezing weather, winter may have stressed hose bibs, exposed piping, drain systems, and sump equipment. Spring is the right time to look for damage that developed quietly while everything still seemed to work.
- Test outdoor hose bibs and exterior faucets. Turn them on and watch for weak flow, dripping, or water showing up inside the wall or basement ceiling. A split frost free faucet pipe may not reveal itself until spring use begins.
- Inspect exposed pipes for freeze damage. Look for hairline cracks, bulges, staining, or mineral marks around joints. Even minor freeze related damage can open up later under pressure.
- Check your sump pump. Pour water into the pit until the float rises and the pump activates. Confirm that the pump discharges properly and that the discharge line is clear and directed away from the foundation.
- Inspect floor drains and basement drains. Make sure they are clear and that traps contain water. If the basement has a history of dampness, this is one of the first places to pay attention.
- Look over appliance hoses. Washing machine, dishwasher, refrigerator, and utility sink supply lines should be checked for cracking, bulging, corrosion at fittings, or signs of rubbing.
- Clean around utility equipment. Water heaters, sump pumps, and shutoff valves should be accessible and visible. Clutter hides leaks and slows you down in an emergency.
Spring is also a good time to think about weather trends. Heavier rainfall, freeze thaw cycles, and basement flooding concerns are making routine plumbing checks more important in many areas. If your yard drains poorly or your basement has had moisture before, take that seriously before storm season ramps up.
Summer plumbing checklist
Summer plumbing issues often come from increased water use, outdoor fixtures, vacations, and neglected utility spaces. This season is ideal for servicing the parts of your system that are easy to reach and dry enough to inspect comfortably.
- Inspect irrigation connections and outdoor spigots. Look for leaks where hoses connect and check for constant seepage at hose bibs. Slow leaks outdoors often go unnoticed for months.
- Check water pressure. If pressure seems unusually high, install or test a pressure gauge and compare the reading to recommended household levels. Excess pressure wears out valves, hoses, fixtures, and appliance connections faster.
- Clean faucet aerators and showerheads. Mineral buildup can reduce flow and affect fixture performance. Cleaning these parts is simple and can improve both pressure and water efficiency.
- Inspect around the water heater. Summer is a practical time for maintenance because freezing is not a concern and access is easier. Look for moisture at the base, corrosion on fittings, and any signs of venting or condensate problems depending on the model.
- Prepare for vacations. If you will be away for more than a couple of days, know whether you plan to shut off the main water supply or isolate certain fixtures. At minimum, avoid leaving known weak points unaddressed while the house sits empty.
Summer is also a good time to add leak monitoring if your home does not already have it. EPA points out that leak detection and flow monitoring devices can identify irregular use and help reduce both water waste and home damage. These tools have gone from specialty upgrades to sensible homeowner protection.
Fall plumbing checklist
Fall is preparation season. You are trying to get ahead of freezing temperatures, holiday water use, and storm related drainage issues. Good fall plumbing work prevents some of the most expensive calls of the year.
- Disconnect and drain garden hoses. Leaving hoses attached can trap water in hose bibs and increase freeze risk.
- Shut off and drain exterior faucets where applicable. If your setup includes an interior shutoff for outdoor lines, use it and verify the line drains properly.
- Insulate vulnerable pipes. Pay attention to unheated basements, crawlspaces, garages, rim joists, and pipes near exterior walls. Insulation is cheap compared with burst pipe repairs.
- Seal drafts near plumbing lines. Openings around pipe penetrations can let freezing air into cabinets, crawlspaces, and utility areas. Basic air sealing helps protect the system.
- Test the sump pump again. Fall storms can still bring water issues, and you want the system ready before winter conditions make repairs harder.
- Review the main shutoff valve location. Every adult in the home should know where it is and how it works before cold weather increases pipe risk.
This is also a good point in the year to review your insurance coverage for sewer backup and overland water if those risks apply where you live. A lot of homeowners assume water damage is all treated the same. It is not. Knowing the details before a problem is part of practical maintenance.
Winter plumbing checklist
Winter is about active protection. Cold weather exposes weak spots fast, and once a pipe freezes, the damage can happen behind walls and ceilings where you do not see it until the thaw or the rupture. Prevention here is worth real money.
- Keep vulnerable areas above freezing. Maintain heat in basements, crawlspaces, utility rooms, and garages where plumbing runs. Do not let indoor temperatures swing too low during cold snaps.
- Open sink cabinet doors where pipes are on exterior walls. This lets warmer room air reach the plumbing during severe cold.
- Check pipe insulation after the first deep freeze. Sometimes insulation shifts, gets wet, or was incomplete in the first place. Recheck actual problem areas when winter arrives.
- Locate and label the main water shutoff. If a pipe bursts, speed matters. You do not want to search through storage boxes while water is pouring into the house.
- Monitor for reduced flow. A weak stream from one fixture on a cold day may be an early sign of freezing in that branch line.
- Keep a simple freeze response plan. Know who to call, where space heaters can be used safely, and what sections of the house are most vulnerable.
If you have a seasonal property, rental unit, or part of the home that is not occupied regularly, winterize it properly rather than guessing. Water left in neglected plumbing is one of the classic causes of expensive preventable damage.
Drinking Water Safety and Lead Awareness Checklist
One of the biggest misconceptions in home plumbing is the idea that clear water means everything is fine. It does not. Lead and corrosion issues are often invisible, and they can come from the home’s own plumbing materials even if the municipal supply meets standards at the treatment plant. This matters especially in older homes and neighborhoods where service lines, solder, or fixtures may contain lead.
Health Canada says lead can enter drinking water from older plumbing materials including lead service lines, solder, faucets, and fittings. The CDC also notes that the most common sources of lead in drinking water are lead pipes, faucets, and plumbing fixtures, and that there is no safe blood lead level identified for young children. That is why a plumbing maintenance plan should include targeted checks for drinking water safety, not just leaks and clogs.
- Find out whether your home has a lead service line. If you are not sure, contact your utility, municipality, or a qualified plumber for guidance on identification.
- Inspect visible plumbing for corrosion. Look for crusty buildup, discoloration, or deteriorating older metal parts near the water meter, shutoffs, exposed supply lines, and basement plumbing.
- Use only cold tap water for drinking and cooking. Official guidance recommends cold water because hot water can increase metal leaching from plumbing materials.
- Flush taps after water has been sitting in the pipes for several hours. Health Canada advises running the water until it runs cold before drinking or cooking if the water has been standing in the plumbing.
- Consider certified filtration if needed. If you have older plumbing, a lead service line, or testing concerns, use a filter certified for lead reduction and maintain it according to the manufacturer’s schedule.
- Test your water if you have concerns. This is especially important in older homes, homes with plumbing changes, or private well situations where the owner is responsible for the system.
If your home uses a private well, the responsibility is even more direct. In Canada, water oversight is shared across provinces, territories, and municipalities, but private well owners are generally responsible for their own water system maintenance. That means testing and upkeep are not optional habits. They are part of owning the system.
Water Heater Maintenance Checklist
Water heaters deserve their own checklist because they affect efficiency, comfort, operating cost, and safety. They also tend to fail in ways that create serious water damage. A neglected tank can leak slowly for months or fail suddenly, and many homeowners do not notice the warning signs until there is a puddle on the floor or rusty water at the tap.
The exact maintenance schedule depends on the model, fuel type, and manufacturer requirements. That matters. For flushing intervals, anode rod checks, condensate maintenance, and warranty safe service, always follow the unit manual first. Still, there are core tasks every homeowner should understand.
- Inspect the area around the tank or unit monthly. Look for rust streaks, dampness, staining, or active dripping at valves and fittings.
- Check the temperature setting. If the water is excessively hot, it raises scald risk and can waste energy. If performance has dropped, that can also point to sediment or equipment issues.
- Watch for sediment symptoms. Rumbling, popping, reduced hot water capacity, and slower recovery often suggest scale or sediment buildup in tank models.
- Follow the manufacturer guidance for flushing. Standard tank water heaters may need periodic flushing depending on water quality and design.
- Ask about anode rod inspection at recommended intervals. This is a major durability item on many tank units and one that homeowners often ignore until corrosion is advanced.
- Inspect venting and combustion areas if applicable. Gas models need proper professional attention when venting or burner performance looks questionable.
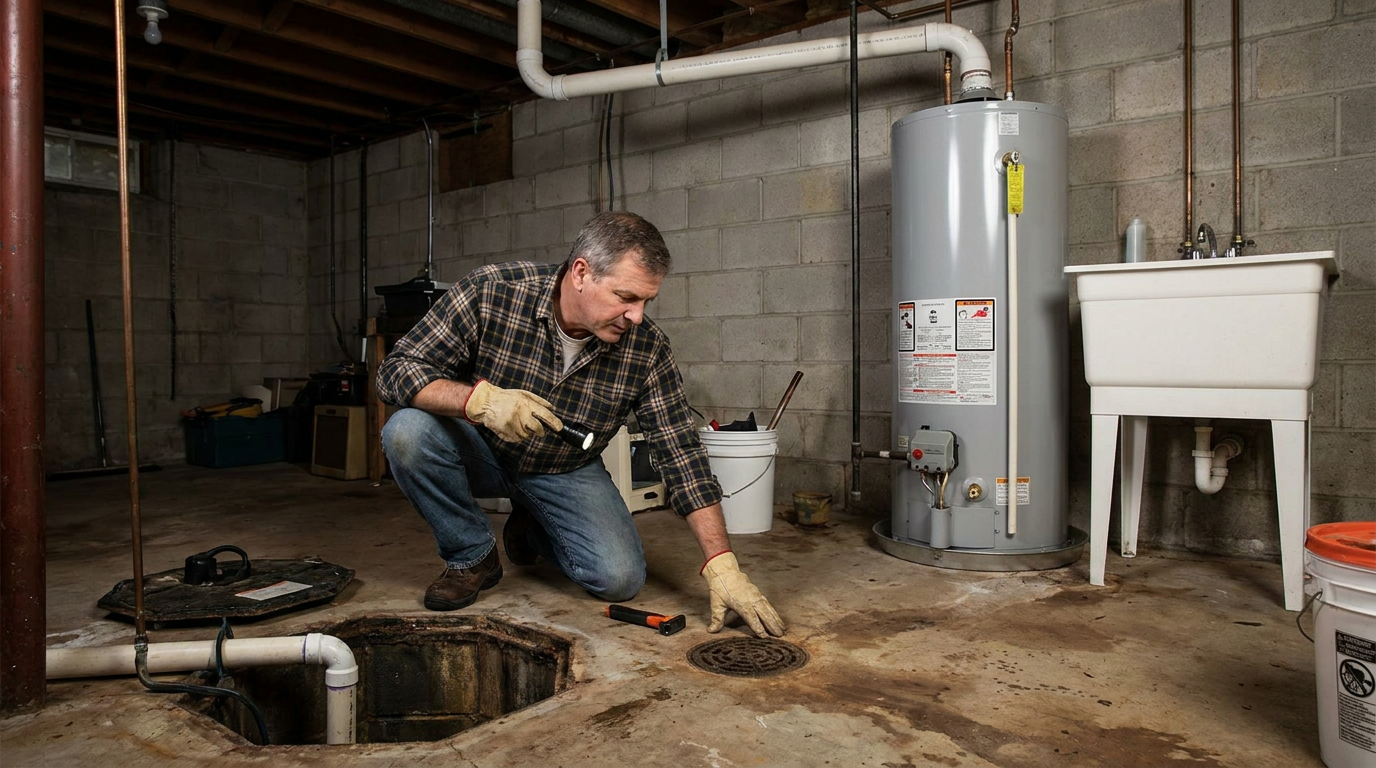
Heat pump water heaters need a slightly different maintenance mindset. ENERGY STAR notes that these units need routine service such as cleaning air filters every six to twelve months and cleaning condensate lines annually. If you own one, add those tasks to your calendar and do not assume it behaves exactly like a conventional tank. These units can be efficient and reliable, but they reward proper maintenance.
A smart habit is to keep a maintenance record near the unit or in a household file. Write down the model number, serial number, installation date, warranty information, filter cleaning dates, service visits, and any changes in performance. That record helps you make better repair decisions and makes replacement planning easier when the time comes.
Appliance and Fixture Connection Checklist
Some of the worst household leaks come from the simplest connections. Washing machine hoses, refrigerator ice maker lines, dishwasher connections, and toilet supply tubes work quietly in the background until they split, loosen, or corrode. Because they are small and often hidden, they are easy to forget. That is exactly why they belong on a checklist.
- Inspect washing machine hoses. Look for bulges, cracks, abrasion, rust at fittings, and signs of seepage. Replace aging rubber hoses with better quality options if appropriate.
- Check dishwasher and refrigerator supply lines. Look underneath and behind these appliances where possible. Even a slow leak can damage flooring and cabinets before it becomes visible in the room.
- Inspect toilet supply tubes and shutoff valves. Pay attention to corrosion, mineral buildup, or slight moisture around the connection points.
- Test shutoff valves gently. A valve that has not been touched in years may seize or begin leaking when finally needed. Testing them periodically helps avoid surprises during emergencies.
- Look at caulking and seals around tubs and showers. Not every water problem comes from a pipe. Failed seals can send water into framing and subfloors just as effectively.
When you replace an appliance, treat that as a maintenance opportunity. Inspect the shutoff valve, supply connection, and surrounding floor before the new unit goes in. It is much easier to correct a weak valve or suspicious hose when the area is already exposed.
The Emergency Plumbing Preparedness Checklist
Preventive maintenance lowers risk, but it does not eliminate it. A real homeowner plan needs an emergency checklist so you can act fast when a hose bursts, a valve fails, a toilet overflows, or a pipe freezes and splits. Fast response can cut damage dramatically.
- Know the location of the main water shutoff valve. Every adult in the household should know exactly where it is.
- Make sure the valve can actually be operated. If it requires a special wrench or valve key, keep that tool nearby and clearly labeled.
- Label fixture shutoffs where practical. Toilets, sinks, dishwashers, washing machines, and water heaters should be easy to isolate if needed.
- Keep a basic emergency kit. Include towels, a bucket, a flashlight, gloves, a wrench, plumber’s tape, and contact numbers for a licensed plumber and restoration contractor.
- Document your plumbing system. Record fixture locations, appliance model numbers, water heater information, and shutoff points. Photos are useful.
- Review your insurance policy. Confirm what is covered for water damage, sewer backup, and overland water. Do not assume standard coverage includes everything.
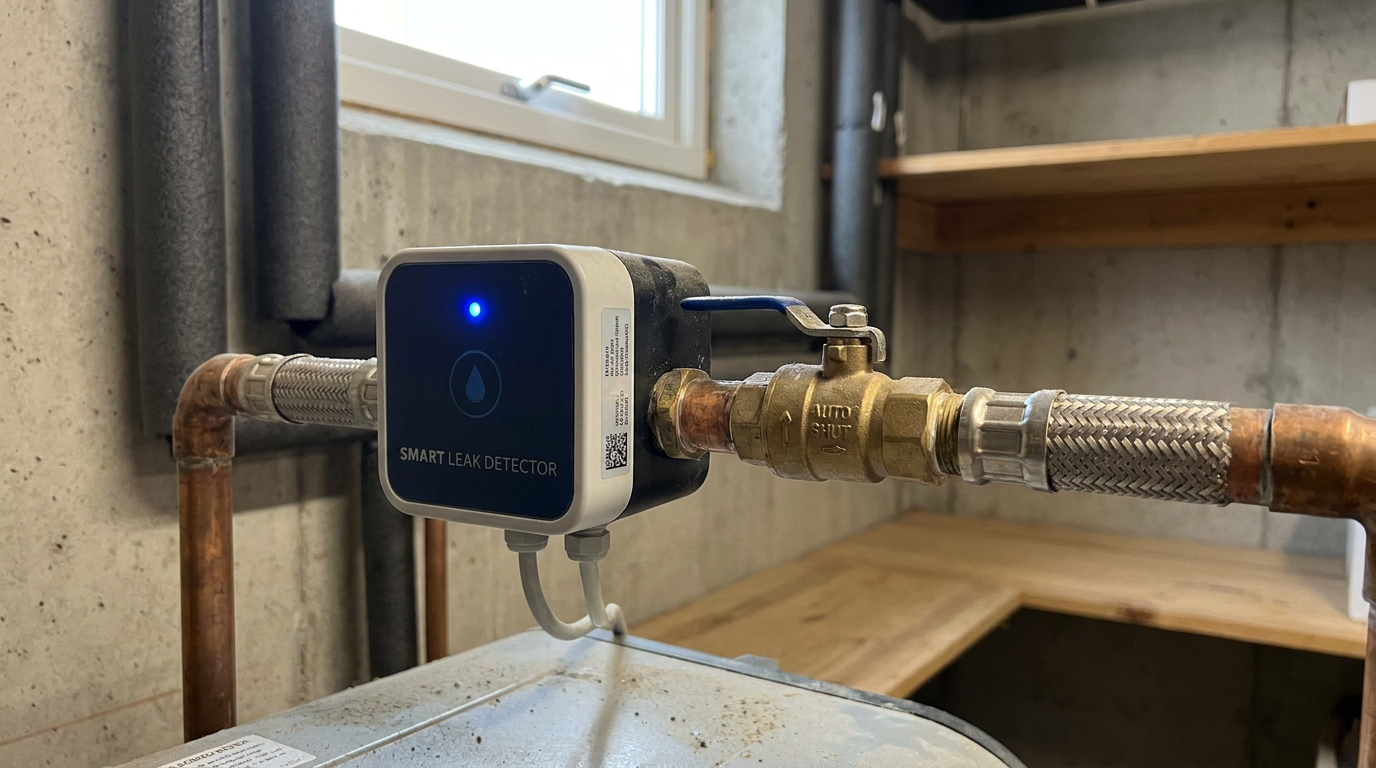
- Consider leak alarms and smart shutoff devices. These tools can alert you quickly or stop water automatically in some setups.
This is one of the clearest examples of where modern technology helps. Smart leak detectors, automatic shutoff valves, and flow monitoring devices are becoming mainstream for a reason. They are practical tools, especially for second homes, busy households, finished basements, and homes with older plumbing systems. They do not replace maintenance, but they give you earlier warning and a better chance to limit damage.
Common Plumbing Maintenance Mistakes Homeowners Make
The first mistake is waiting for a visible problem. Plumbing failures often build slowly. A small leak, mild corrosion, or a weak shutoff valve usually gives some warning, but only if someone is looking. Maintenance works because it catches the warning stage, not because it makes plumbing indestructible.
The second mistake is focusing only on drains and clogs. Drain care matters, but it is only one part of the system. Water supply lines, shutoff valves, toilet internals, appliance hoses, water heaters, sump pumps, and drinking water quality all deserve attention. A house can have perfectly clear drains and still have serious hidden plumbing risks.
The third mistake is assuming insurance will cover every kind of water damage. Coverage varies, and sewer backup or overland water protection may be separate or optional. Maintenance and policy review belong together because prevention and preparedness are part of the same job.
The fourth mistake is using hot water for drinking or cooking after concern about lead or corrosion. Official guidance is clear that only cold tap water should be used for drinking and cooking, since hot water can increase metal leaching. If water has been sitting in the pipes, flush the tap until the water runs cold.
The fifth mistake is skipping the manual for equipment. Water heaters, water treatment devices, pumps, and advanced fixtures often have maintenance steps that are model specific. Guessing can void warranties or miss the tasks that matter most.
When to Call a Professional
Homeowners can handle a lot of routine plumbing maintenance, but there is no benefit in pushing past your limits. Call a licensed plumber if you see active leaks inside walls or ceilings, repeated drain backups, water heater venting concerns, signs of significant corrosion, major pressure fluctuations, or anything that suggests a lead service line issue that needs confirmation or replacement planning. If a valve will not operate safely, that is also a professional job.
Testing and treatment decisions can also justify expert help. If you have questions about lead, corrosion, filtration, private well water, or whether old plumbing materials are affecting water quality, bring in qualified local guidance. The practical rule is simple. Routine inspection is a homeowner task. Diagnosis and correction become professional work when safety, code, concealed damage, or specialized equipment is involved.
How to Build a Simple Year Round Plumbing Routine
The best routine is the one you will actually keep. Put monthly checks on your calendar. Tie spring and fall inspections to other seasonal home maintenance. Keep a printed checklist in the utility room or save a digital one in your phone. Take photos of shutoff locations, appliance connections, and the water heater label so you are not scrambling for details later.
If you want to make the system even stronger, divide tasks by frequency. Monthly for leak checks and fixture scans. Seasonal for sump pumps, hose bibs, insulation, and appliance hoses. Annual for water heater review, policy review, and a closer look at water quality concerns. That structure is easy to maintain and covers most of the real risk points in a typical house.
Plumbing maintenance does not have to be technical to be effective. It just has to be deliberate. The point is not to turn every homeowner into a plumber. The point is to help you notice trouble sooner, use water more wisely, protect drinking water quality, and avoid expensive damage that starts with small overlooked problems.
Final Checklist to Keep Handy
If you want one short version to remember, here it is. Check for leaks every month. Test toilets and look under sinks. Inspect supply hoses and shutoff valves. Clean aerators and keep little used drains active. In spring and fall, test the sump pump, inspect outdoor faucets, and prepare for weather changes. In winter, protect pipes from freezing and know exactly how to shut water off fast. For drinking water, be alert to older plumbing materials, use only cold water for cooking and drinking, and flush taps after water has sat in the pipes. For the water heater, follow the manual and keep up with model specific service.
Those habits put you in control of your plumbing health. They reduce waste, lower the odds of sudden damage, and help you make better decisions about repairs and upgrades. In a well run home, plumbing maintenance is not an emergency response. It is a routine.


No Comment! Be the first one.