


A Step-by-Step Guide to Cleaning Upholstery Like a Pro
There is a particular pleasure in a well-kept room. Light settles differently on a sofa that has been cared for, colors appear truer, textures feel more inviting, and the entire space carries an air of quiet intention. Upholstery, perhaps more than any other element in the home, holds daily life within its fibers. It gathers dust, absorbs scent, welcomes guests, comforts children, and shelters the soft rituals of evening rest. To clean it well is not simply to remove dirt. It is to preserve atmosphere, shape, and beauty.
Table Of Content
- Why Upholstery Cleaning Should Never Be One Size Fits All
- Step 1: Read the Care Label Before You Do Anything Else
- What to Notice on the Label
- Step 2: Gather the Right Tools Before You Begin
- Basic Supplies for a Professional-Style Routine
- Step 3: Remove Loose Dust and Debris Thoroughly
- How Often Should You Vacuum Upholstery?
- Step 4: Spot Test Every Cleaner in a Hidden Area
- Step 5: Treat Spills Immediately and Blot, Never Scrub
- What to Do With Common Household Spills
- Step 6: Clean the Entire Surface Gently When Needed
- Why Less Product Usually Delivers Better Results
- Step 7: Manage Moisture Carefully to Prevent Odor and Mold
- When Water Damage Is More Than a Cleaning Issue
- Step 8: Restore the Texture and Finish
- Step 9: Build an Elegant Ongoing Maintenance Routine
- A Simple Upholstery Care Rhythm
- Special Considerations for Delicate and High-End Fabrics
- Common Mistakes That Make Upholstery Look Worse
- When to Call a Professional Upholstery Cleaner
- The Lasting Beauty of Gentle Precision
The most successful approach to upholstery cleaning is also the most graceful. Rather than treating every chair, bench, and sofa as though it were the same, a professional mindset begins with observation. One fabric welcomes water, another recoils from it. One stain lifts with patient blotting, while another requires a specific solvent or the experienced hand of a specialist. In this sense, upholstery cleaning is less a forceful chore and more a discipline of restraint, reading, and timing.
This guide offers a complete, step-by-step method for cleaning upholstery like a professional, while keeping the process accessible to everyday homeowners. It blends practical care with a refined French sensibility: preserving the textile rather than overwhelming it, choosing the least invasive method that works, and building a maintenance rhythm that keeps your furnishings elegant over time. Whether you are caring for a beloved linen armchair, a family-friendly performance sofa, or a velvet accent bench that anchors the room with style, the principles remain the same. Clean gently, act quickly, and always let the fabric tell you what it needs.
Why Upholstery Cleaning Should Never Be One Size Fits All
Many homeowners assume that if a piece of furniture looks sturdy, it can tolerate almost any cleaning method. This is one of the most common and costly mistakes. Upholstery is a layered construction that includes surface fabric, seams, dyes, padding, and interior support materials. A cleaner that appears harmless on one textile can create water rings, shrinkage, pile distortion, or discoloration on another. Surface appearance alone reveals very little about what is actually safe.
Professional care standards emphasize fabric-specific maintenance for good reason. Manufacturer instructions and textile care symbols are the first authority to consult, because they reflect how the piece was designed and tested. Some upholstery may be suited to water-based cleaning, some to solvent-based products, some to vacuuming only, and some to professional dry cleaning. Canadian consumer guidance and broader product safety recommendations consistently underline the same point: labels matter, and guessing is not a method.
There is also a practical elegance in following the gentlest path. Aggressive scrubbing, oversaturating fabric, or applying too much product may seem decisive in the moment, yet these habits often shorten the life of upholstery. Soil can be spread deeper into fibers, cleaner residue can attract more dirt, and moisture can linger where it is difficult to dry completely. Beautiful furniture is rarely rescued by force. More often, it is preserved by precision.
Step 1: Read the Care Label Before You Do Anything Else
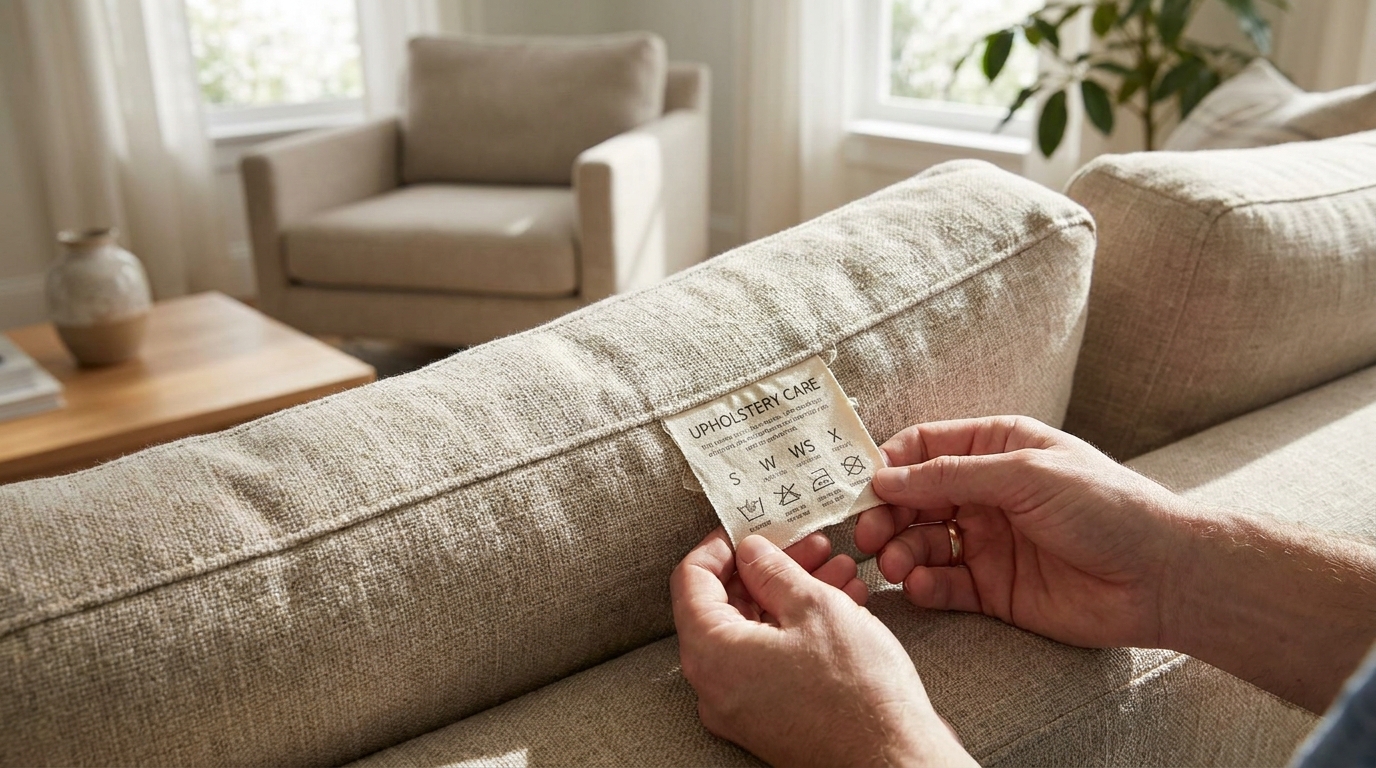
The first professional move is not spraying, brushing, or wiping. It is reading. Upholstery care labels often include cleaning codes or care symbols that indicate what the fabric can safely tolerate. If the label is attached beneath the seat cushion, under the frame, or in the manufacturer paperwork, take a moment to find it before you begin. This single step can protect you from expensive damage and unnecessary experimentation.
In many homes, labels are overlooked until after a mishap, yet they are the foundation of smart care. A water-safe performance fabric and a solvent-only decorative textile may look equally durable at first glance, but they should never be cleaned in the same way. Newer furniture may also include QR codes or online support pages that expand on care instructions, a growing trend that makes label literacy even more useful for modern homeowners.
While terminology varies by brand, cleaning guidance usually falls into a few broad categories. Some fabrics can be cleaned with water-based products, some require solvent-based cleaners, some recommend vacuuming only, and others call for professional treatment. If a label is missing or unclear, your safest decision is to contact the manufacturer or choose the least invasive option, which is usually thorough vacuuming and careful professional consultation before attempting stain removal.
What to Notice on the Label
Do not look only for a code and stop there. Read the surrounding language as well. The manufacturer may mention whether cushion covers are removable, whether the fabric has a protective finish, whether heat should be avoided, or whether professional service is advised for overall cleaning. These details help shape your method and can spare you from avoidable texture changes or shrinkage.
If your piece is vintage, custom-made, or reupholstered, the absence of a clear label should make you more cautious, not less. Decorative textiles, wool blends, silk, velvet, and loosely woven fabrics can all behave unpredictably when exposed to moisture or friction. In those cases, a careful hidden-area test becomes essential, and professional help may be the wisest choice for anything beyond surface maintenance.
The most polished homes are not maintained by heroic cleaning sessions. They are maintained by quiet consistency, careful label reading, and an instinct for gentleness.
Step 2: Gather the Right Tools Before You Begin
Professional-looking results usually come from calm preparation. Once you know what your upholstery can tolerate, assemble a small set of appropriate tools so you are not improvising mid-process. The goal is not to build a dramatic cleaning arsenal. It is to have a thoughtful collection of essentials that help you work cleanly and lightly.
At minimum, most homeowners benefit from a vacuum with an upholstery attachment, ideally one with strong filtration such as HEPA if allergies or indoor air quality are a concern. You will also want several clean white microfiber cloths, a soft brush, a small bowl for mixing any approved solution, and adequate ventilation. For some fabrics, a portable upholstery extractor may be helpful for spot cleaning pet messes or lifting residue, though even these machines must be used with restraint and according to the fabric instructions.
Avoid colored towels that may transfer dye, hard brushes that can roughen the pile, and random household products used without label confirmation. More tools do not equal better care. In upholstery cleaning, the elegance lies in using the right tools lightly rather than many tools aggressively.
Basic Supplies for a Professional-Style Routine
- Vacuum with upholstery attachment: Preferably with HEPA filtration for dust and allergen control.
- Clean white microfiber cloths: For blotting, lifting soil, and reducing the risk of color transfer.
- Soft natural or synthetic brush: Useful for lifting dust and restoring fabric nap gently.
- Approved upholstery cleaner: Chosen only after checking the label and product instructions.
- Small fan or open windows: To encourage drying and reduce the chance of lingering moisture.
- Portable extractor if appropriate: Helpful for certain messes, but only when the upholstery permits wet cleaning.
Step 3: Remove Loose Dust and Debris Thoroughly
Before addressing stains or deeper cleaning, remove all loose dry soil from the surface and crevices. This step is often underestimated, yet it makes every later step more effective. Dust, grit, hair, and crumbs can turn into muddy residue if they are mixed with moisture too early. Vacuuming first allows you to clean the actual fabric rather than a layer of debris sitting on top of it.
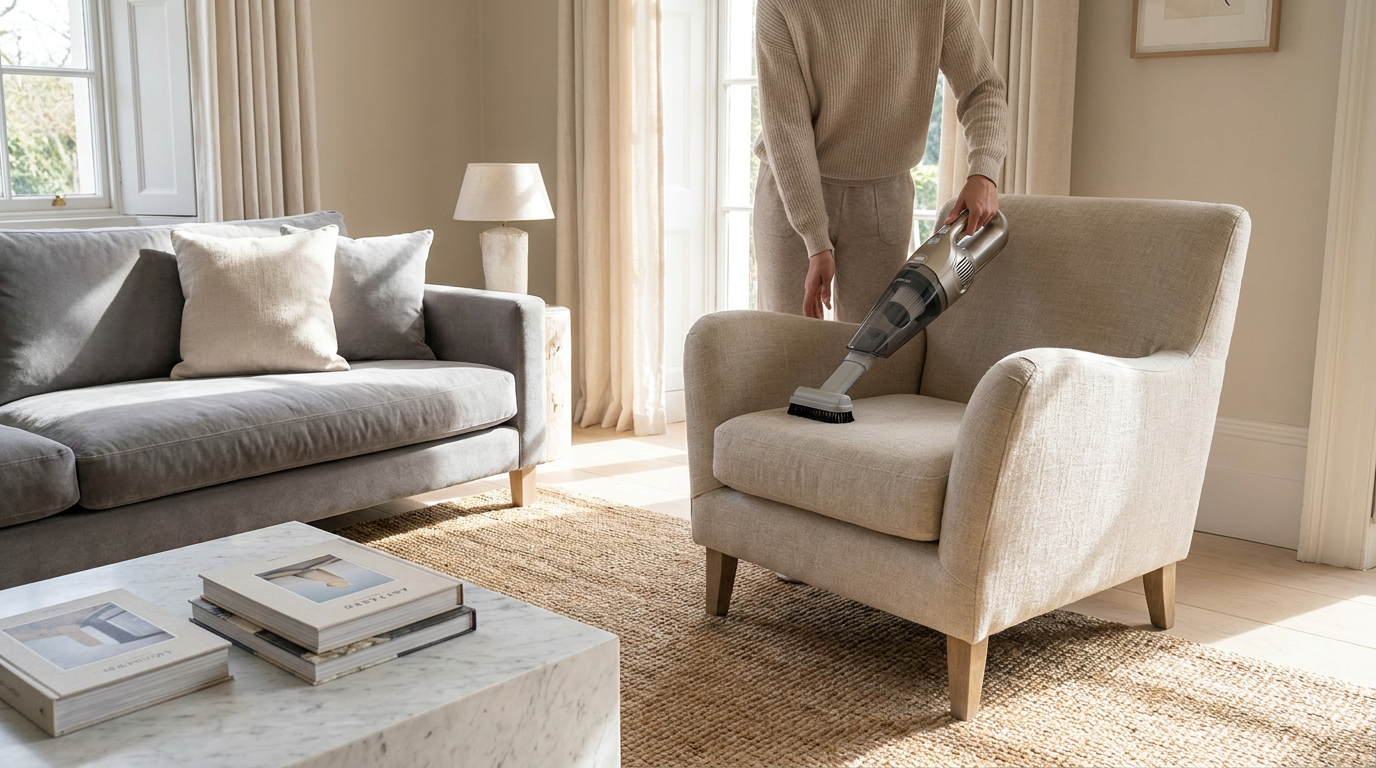
Use the upholstery attachment across seat cushions, backs, arms, and seams, working slowly enough for the suction to do its job. Lift cushions if possible and vacuum both sides, as well as the deck beneath them. Crevice tools are useful around welting and where the arm meets the seat, areas that quietly collect dust and can dull the freshness of the entire piece.
Industry guidance and professional standards support routine maintenance as a meaningful part of upholstery care, not an optional extra. The IICRC S300 standard notes that upholstered furniture should be routinely maintained at least monthly, with more frequent care for delicate or heavily used pieces, and that interim or periodic cleaning is often suitable every 12 to 24 months for lightly to moderately used furniture. In daily life, this translates beautifully into a maintenance-first philosophy: light weekly vacuuming, prompt spot care, and deeper refreshes at sensible intervals.
How Often Should You Vacuum Upholstery?
For a calm, well-kept home, a quick weekly pass is ideal for frequently used sofas and dining chairs, especially in homes with pets, children, or open windows that invite dust. Less-used accent seating can often be maintained with lighter but regular attention. Monthly maintenance should be considered the minimum threshold rather than the ideal. Waiting until upholstery looks visibly dirty usually means soil has already settled deeper into the fibers.
Vacuuming also supports indoor air quality, a concern that has become more prominent in recent years. Fine particles, pet dander, and allergens may accumulate on soft furnishings more than many people realize. A good filtration vacuum and steady maintenance routine help protect not only the look of the room but also the comfort of the people living in it.
Step 4: Spot Test Every Cleaner in a Hidden Area
Before any stain treatment or broad cleaning, test your chosen cleaner on an inconspicuous part of the upholstery. This might be the back lower edge, beneath a cushion, or another area that remains out of view. Consumer guidance consistently recommends hidden-area testing because even approved products can sometimes interact unexpectedly with dyes, finishes, or blends.
Apply a small amount exactly as you intend to use it, then wait for the fabric to dry fully. Look not only for obvious discoloration but also for texture changes, stiffening, ring marks, shrinkage, or altered sheen. A fabric can appear unharmed while damp and then dry into a visibly different patch. Patience here is not delay. It is expertise.
If the test area responds poorly, stop immediately and reassess. That may mean selecting a different product, scaling back to dry methods only, or calling a professional. The hidden-area test is your quiet insurance policy against turning a small stain into a much larger aesthetic problem.
Step 5: Treat Spills Immediately and Blot, Never Scrub
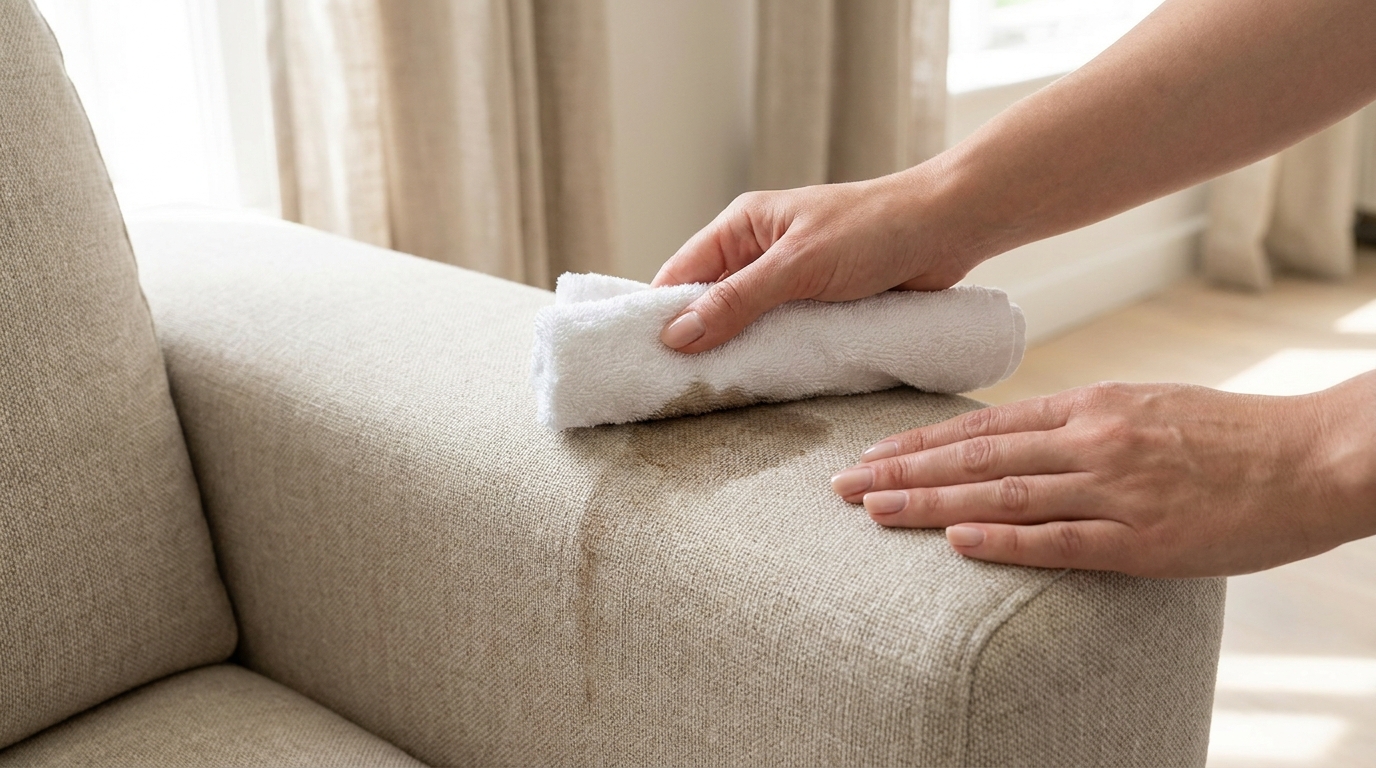
Fresh spills are usually far easier to address than old set stains, which is why quick response matters so much. The correct first action is to blot gently with a clean, dry, white cloth. Press to absorb liquid rather than dragging it across the fabric. Work from the outer edge of the spill inward so the stain does not spread beyond its original boundary.
Scrubbing is one of the great enemies of upholstery. It may feel active and useful, yet it can roughen fibers, flatten pile, distort the weave, and force the stain deeper into the padding. It can also create a visibly worn patch that remains long after the stain itself has faded. Professional results rely on controlled absorption and repetition, not friction.
If the label allows and your spot test is successful, use only a small amount of the appropriate cleaner. Dampen a cloth rather than soaking the fabric directly when possible, and continue blotting patiently. Rotate to clean sections of the cloth as soil transfers. The stain may lift in stages, and that is perfectly normal. Rushing usually causes more damage than the stain ever would.
What to Do With Common Household Spills
Coffee, tea, diluted juice, and minor food drips can often be improved with prompt blotting and an approved upholstery solution, provided the fabric permits it. Greasy spills may require a different product approach and should never be chased with excess water, which can spread oils or leave rings. Pet accidents demand speed, careful blotting, and thorough odor-aware cleaning, but still without saturating the upholstery or masking the issue under too much product.
One modern temptation is to over-disinfect upholstered surfaces. In reality, routine furniture cleaning does not automatically require antimicrobial treatment, and EPA guidance warns that many antimicrobial products are not intended for absorbent surfaces like fabrics or upholstery. Product labels must always be checked. Cleaning and disinfecting are not interchangeable, and elegance in care often means doing only what is truly necessary.
Step 6: Clean the Entire Surface Gently When Needed
Once loose soil has been removed and any isolated stains have been addressed, you may decide the furniture needs a broader refresh. This is where many well-meaning homeowners become too ambitious. A full-surface cleaning should still follow the least invasive method that works. The aim is visual renewal and hygienic freshness, not soaking the upholstery into submission.
For water-safe fabrics, apply your approved cleaner lightly and evenly, following the product instructions with discipline. Work in manageable sections so you can control moisture and maintain consistency. If the textile has a visible nap or directional weave, move with the fabric rather than against it. Uneven cleaning patterns are often the result of rushing or overapplying solution in one area while neglecting another.
For solvent-only or highly delicate fabrics, broad cleaning may not be an ideal DIY task at all. If the material is valuable, sentimental, or especially sensitive, professional upholstery care is often the most cost-effective decision in the long term. Protecting a beautiful piece is not a failure of self-sufficiency. It is a sign of good judgment.
Why Less Product Usually Delivers Better Results
Residue is one of the hidden reasons upholstery seems to get dirty again too quickly after cleaning. When too much soap or cleaner remains in the fibers, it can attract fresh dust and make the fabric feel dull or tacky. This is why low-residue, fabric-safe formulas have become increasingly popular. Homeowners want upholstery that looks naturally fresh, not artificially coated.
If you are using a portable extractor on an approved fabric, think of it as a precision tool rather than a flood method. Extract as much moisture as possible, make limited passes, and stop before the padding becomes saturated. Compact extraction devices are useful, especially for pet homes and spot cleaning, but they do not cancel the need for judgment. The machine should support the fabric, not dominate it.
Step 7: Manage Moisture Carefully to Prevent Odor and Mold
Moisture control is perhaps the most important technical principle in upholstery cleaning. Surface fabric may seem dry while the filling beneath remains damp, and that hidden moisture can lead to odor, mildew, and in some conditions mold. The U.S. EPA advises that water-damaged items should generally be dried within 24 to 48 hours to help prevent mold growth, while also noting that upholstered furniture can be especially difficult to dry completely within 48 hours. This matters not only after major water events, but also after spills, overzealous spot cleaning, humid weather, and basement moisture.
After any wet cleaning, increase air movement immediately. Open windows if outdoor humidity allows, use fans to circulate air across the piece, and separate cushions so all sides can breathe. Avoid replacing throws, decorative pillows, or slipcovers until the upholstery is truly dry. If a sofa still feels cool or slightly heavy, it may still be holding moisture internally.
In humid climates or during summer months, drying may take longer than expected. This is where discipline matters. Do not continue using the furniture as if nothing happened while it is still drying, and do not pile on fragrance products to conceal dampness. Odor is often a message, not a cosmetic problem. It is asking for better drying, not stronger perfume.
When Water Damage Is More Than a Cleaning Issue
If upholstery has been exposed to flooding, major leaks, sewage backup, or prolonged wetness, the situation may be beyond normal home cleaning. Valuable or sentimental pieces may warrant consultation with a restoration or water-damage professional, especially when complete drying within 48 hours is doubtful. EPA guidance supports seeking expert help for meaningful or difficult-to-dry upholstered items. A cherished heirloom chair deserves more than guesswork after a serious water event.
Visible mold, persistent odor, staining that blooms back through the fabric, or dampness deep in the cushion are all signs to stop DIY efforts and get expert support. Cleaning is one matter. Remediation is another. The distinction is important, especially when health and structural contamination may be involved.
Step 8: Restore the Texture and Finish
Professional-looking upholstery care does not end when the stain disappears. Once the piece is clean and dry, take a few moments to restore the fabric’s visual finish. This might mean lightly brushing the nap of velvet or microfiber, smoothing linen in the direction of the weave, or plumping cushions back into form. These final touches are what make furniture look renewed rather than merely washed.
Texture is one of upholstery’s most seductive qualities. It catches light, creates depth, and lends personality to even the simplest silhouette. When texture becomes matted or uneven after cleaning, the furniture may still appear tired despite being technically clean. A soft brush used gently after drying can revive the surface and bring back that tailored, cared-for presence that defines a polished room.
This is also the moment to inspect for lingering marks, water rings, or uneven areas that may need a second light correction. If a patch looks different only because the fibers are laying in another direction, brushing may solve it. If the issue is staining or discoloration, resist the urge to overwork it immediately. Let the fabric rest, reassess in full daylight, and only then decide whether further treatment is justified.
Step 9: Build an Elegant Ongoing Maintenance Routine
The secret to upholstery that always seems fresh is not constant deep cleaning. It is quiet maintenance. Routine care protects shape, color, and comfort, while reducing the need for more invasive restoration later. In the most beautifully kept homes, upholstery cleaning is woven into the rhythm of life rather than postponed until the furniture looks exhausted.
A useful maintenance schedule begins with weekly light attention to frequently used seating. Straighten cushions, remove lint or pet hair, and vacuum high-contact areas. Monthly, give the entire piece a more deliberate pass, including seams, undersides, and the frame edges near the floor. Every 12 to 24 months for light to moderate use, consider a more complete refresh or professional cleaning depending on the fabric and household conditions.
Homes with pets, small children, allergies, or active entertaining may need more frequent care. That is not a sign of failure. It is simply the natural consequence of a lively interior. Good maintenance adapts to the real life of the household while preserving a feeling of order and refinement.
A Simple Upholstery Care Rhythm
- Weekly: Light vacuuming of high-use pieces, quick lint removal, and immediate response to any spills.
- Monthly: Thorough vacuuming of all upholstered surfaces, cushions, seams, and hidden debris zones.
- Seasonally: Inspect for fading, wear, odor, moisture issues, and repeated stain-prone areas.
- Every 12 to 24 months: Plan interim or periodic deeper cleaning, especially for lightly to moderately used furniture.
- As needed: Seek professional help for delicate textiles, stubborn stains, or water damage concerns.
Special Considerations for Delicate and High-End Fabrics
Natural fibers and decorative textiles deserve particular caution. Wool can react differently from cotton, silk can be highly sensitive to moisture and spotting, and velvet may lose its signature depth if handled too roughly. Even among performance fabrics, finishes and constructions vary. What worked perfectly on one upholstered bench may be inappropriate for another that appears nearly identical.
For these pieces, prevention becomes even more valuable. Keep upholstery out of prolonged direct sunlight when possible, rotate cushions so wear develops evenly, and discourage habits that grind soil into one location repeatedly. Throws and arm covers may be helpful in some homes, though they should be chosen with the same aesthetic consideration as the furniture itself so the room remains composed rather than improvised.
When in doubt, consult the maker, upholsterer, or a qualified cleaning professional before proceeding. High-end fabrics often reward restraint. Their beauty lies partly in their sensitivity, and caring for them well means accepting that not every issue should be solved with a household spray bottle.
Common Mistakes That Make Upholstery Look Worse
Many upholstery problems are not caused by dirt alone but by attempted cleaning. Rubbing instead of blotting is a major example, as it damages fiber structure and enlarges stains. Overwetting is another, often leaving tide marks, stretched fabric, compressed filling, and a lingering musty smell that feels impossible to explain later.
Using too much cleaner is similarly deceptive. The fabric may look bright for a moment, but residue remains and attracts new soil quickly. Another common misconception is that every upholstery problem needs disinfection. In ordinary home care, cleaning is often enough, and applying products not intended for absorbent textiles can create unnecessary risk. A final mistake is ignoring drying time, which can turn a minor spill into a deeper odor or mold concern.
Professional-style care avoids drama. It asks quieter questions. What does the label say? How little moisture is required? Has the product been tested? Is the fabric actually dry? These are not glamorous questions, yet they are exactly what preserve elegance.
When to Call a Professional Upholstery Cleaner
There is wisdom in knowing when a piece has moved beyond a home-care situation. Large stains, unknown substances, delicate fabrics, severe odor, water intrusion, or overall dinginess on valuable furniture often justify professional attention. A skilled cleaner can assess fiber type, dye stability, cushioning, and the safest process far more accurately than a hurried online guess.
Professional help is especially sensible for antiques, custom upholstery, pale natural fabrics, and sentimental furnishings whose loss would feel deeply personal. It is also appropriate when an earlier DIY attempt has left rings, residue, or uneven coloration. In such cases, continuing to experiment may only deepen the problem.
If you do hire a professional, describe the fabric, the stain history, and any products already used. That information can shape the treatment plan and improve the outcome. The best professionals appreciate informed homeowners, and the collaboration often delivers better results than either approach alone.
The Lasting Beauty of Gentle Precision
To clean upholstery like a pro is not to imitate industrial force. It is to understand material, timing, and atmosphere. It means beginning with the care label, removing dust before moisture, testing every cleaner discreetly, blotting instead of scrubbing, and keeping drying at the center of the process. It means recognizing when a fabric asks for a soft hand and when a treasured piece deserves specialist care.
There is something deeply satisfying about furniture that has been attentively maintained. The seat cushions recover their freshness, the arms lose their haze of daily contact, and the room regains a kind of visual clarity. Upholstery does not need to look brand new to feel elegant. It simply needs to be well respected, thoughtfully refreshed, and allowed to age with grace.
In the end, the French spirit of home care is not perfectionism. It is discernment. A beautiful interior is not one that appears untouched by life. It is one in which life has been tended carefully, with enough skill and softness that beauty remains visible in every fold, seam, and silhouette.


No Comment! Be the first one.