


Step-by-Step Guide to Cabinet Refinishing for a Fresh Look
Cabinet refinishing is one of the most effective ways to change the look of a kitchen or bathroom without tearing the room apart. If the cabinet boxes are still solid, the doors still fit properly, and the layout works, refinishing can give you a major visual upgrade for a fraction of the cost of replacement. That matters because cabinets take up a lot of visual space, and even small changes in color, sheen, and hardware can make the whole room feel updated.
Table Of Content
- Why cabinet refinishing makes sense
- Know the difference between refinishing, refacing, and replacement
- Start with safety, especially in older homes
- Decide whether your cabinets are good candidates for refinishing
- Choose your finish system before you start
- Tools and materials that actually help
- Prepare the space so the project stays under control
- Step 1: Remove doors, drawers, and hardware
- Step 2: Clean thoroughly and do not rush it
- Step 3: Repair dents, chips, and minor damage
- Step 4: Sand or degloss for adhesion
- Step 5: Prime with the right product
- Step 6: Apply the finish coats with patience
- Brush, roll, or spray?
- Step 7: Respect cure time, not just dry time
- Step 8: Reassemble carefully and make final adjustments
- Common mistakes that shorten cabinet finish life
- How to care for newly refinished cabinets
- When refinishing is not the right choice
- A practical timeline for a DIY cabinet refinishing project
- Final thoughts on getting a fresh look that lasts
- Quick step-by-step recap
What many homeowners learn the hard way is that cabinet refinishing is not simply a matter of brushing on paint. Durable results come from careful preparation, sound product choices, and patience during drying and curing. The finish has to bond to surfaces that may be coated with grease, soap residue, old varnish, factory enamel, or laminate, and if that prep is skipped, even expensive paint can peel or chip early.
This guide covers the full process step by step, from deciding whether your cabinets are good candidates for refinishing to cleaning, sanding, priming, painting, and reassembly. It also covers an issue that should never be treated lightly in older homes, which is the risk of lead-based paint. If your home was built before 1978 in the United States, or if you are working in an older Canadian home where lead paint may be present, you need to think about lead safety before disturbing old finishes.
The goal here is not to overcomplicate the job. It is to help you do it once and do it properly. A fresh cabinet finish can absolutely be a practical DIY project, but the quality of the result comes from the parts of the work that are not glamorous: cleaning, dust control, labeling, drying time, and staying within the product system you choose.
Why cabinet refinishing makes sense
Refinishing is usually the most cost-effective cabinet update because it preserves the existing cabinet boxes and often the doors and drawer fronts as well. That means you avoid demolition, disposal fees, plumbing or countertop disruptions, and the chain reaction of repairs that often comes with full replacement. If your cabinet layout still works and the structure is sound, there is no reason to throw away usable material just to change the surface appearance.
It is also less disruptive to daily life. A full cabinet replacement can turn the kitchen into a construction zone for weeks, especially if walls, floors, or countertops are involved. Refinishing is still messy work, but it is usually more contained and much more predictable when planned well.
There is also a waste reduction advantage. More homeowners are choosing refinishing or refacing because it avoids sending large cabinet assemblies to landfill. That practical approach fits well with the way many good renovations should be handled: keep what is still sound, repair what can be repaired, and spend money where it actually improves performance or appearance.
That said, refinishing is not the answer for every cabinet set. If boxes are water-damaged, particleboard edges are swollen, laminate is delaminating, hinges no longer hold because screw holes are stripped out everywhere, or the cabinets are structurally loose, you may be better off repairing first, refacing, or replacing selected components.
Know the difference between refinishing, refacing, and replacement
Before you buy primer or paint, it helps to be clear on what cabinet refinishing actually means. Refinishing keeps the cabinet structure and changes the surface finish. That may include repainting stained wood, re-staining wood after stripping, or updating the clear coat and hardware. Refacing usually means replacing the doors and drawer fronts and applying a matching veneer or laminate to visible cabinet box surfaces. Replacement means full removal and installation of new cabinets.
Homeowners sometimes expect refinishing to solve problems that are really structural or layout issues. It will not fix a poor kitchen design, rotted sink base, failing drawer slides, or badly warped doors. What it will do is dramatically improve appearance when the cabinets themselves are still worth keeping.
A practical first step is to walk around the room and inspect each cabinet as if you were evaluating a used vehicle. Open every door, pull every drawer, look under the sink, inspect corners, feel for rough swelling at lower edges, and check whether coatings are flaking, glossy, sticky, or contaminated with silicone polish. That inspection tells you whether you are dealing with a straight refinishing job or something that also needs repair work.
Start with safety, especially in older homes
If your home was built before 1978 in the United States, assume there may be lead-based paint somewhere in the finish layers until you know otherwise. In Canada, older homes may also contain lead paint, with pre-1960 homes being especially likely, though later homes can still have lead on some components. Sanding, scraping, or stripping these surfaces can create dangerous dust, and the risk is serious for everyone in the home, especially children and pregnant women.
Even if you are doing your own project and not hiring a contractor, lead-safe work practices still matter. Lead dust is not only a concern when paint is visibly peeling. Dust can be created from intact painted surfaces when they are sanded or otherwise disturbed. That is why it is smart to consider lead testing before you start aggressive prep on older cabinets.
If there is any chance of lead, use containment, keep the work area isolated, avoid uncontrolled dry sanding, and clean with methods that actually remove fine dust. Wet methods, HEPA vacuuming, and wet wiping are part of that process. Do not let children, pets, or food preparation continue in the work zone while prep is underway.
Practical rule: If you suspect lead, stop treating the project like ordinary painting. Test first, contain the area, and use lead-safe methods before disturbing the old coating.
Ventilation also matters, but it does not replace dust control. Opening windows may help with odor when using certain products, yet dust from sanding or scraping needs to be physically contained and removed, not simply pushed around the room. If mold or water damage is found during the project, that is a separate issue that should be addressed before coating anything.
Decide whether your cabinets are good candidates for refinishing
The best candidates are cabinets that are structurally sound and have surfaces that can still hold a finish after proper preparation. Solid wood, plywood, MDF doors in good condition, and many factory-finished cabinet doors can be refinished successfully. Laminate and thermofoil can be more difficult, and some damaged surfaces may never hold paint well enough for a long-lasting result.
Look closely at the worst areas, not the best ones. The sink base, cabinet bottoms near exterior doors, and lower corners near dishwashers often tell the truth about cabinet condition. If water has caused swelling, edge failure, or delamination, paint will not fix it. You can patch minor damage, but broad soft or expanded areas usually point to repair or replacement.
Also think about door style. Flat doors and simple shaker profiles are easier to prep and finish than highly ornate routed doors with deep grooves. Complex profiles trap dust, hold drips, and require much more brushing detail. That does not make them impossible, but it does affect labor and finish quality for a DIYer.
Choose your finish system before you start
One of the most common mistakes in cabinet refinishing is buying products one at a time without checking compatibility. Cleaners, deglossers, primers, and topcoats should work together as a system, or at minimum be clearly compatible according to the manufacturer. Good adhesion comes from the full sequence, not just from the final coat.
For most homeowners working indoors, water-based cabinet enamels and hybrid alkyd products are practical choices. They generally offer lower odor, easier cleanup, and lower VOC levels than many traditional solvent-heavy products. Still, low VOC should not be treated as a magic label. Durability, blocking resistance, cure time, leveling, and overall chemical profile matter as much as the VOC number on the can.
Sheen is another decision worth making early. High gloss shows every flaw in substrate prep and application. Satin and matte finishes have become more popular because they hide minor imperfections better while still looking clean and current. Semi-gloss remains a common cabinet choice because it is relatively washable, but if your cabinet surfaces are not perfectly smooth, satin is often more forgiving.
Read the labels carefully for recoat windows, temperature range, humidity limits, and cure time. Dry to touch is not the same as cured. Cabinets can feel ready long before the finish has developed enough hardness for doors, drawers, and daily use.
Tools and materials that actually help
You do not need a contractor-sized shop to refinish cabinets, but you do need the right basic setup. A clean, organized workspace and dust control tools will improve the outcome more than fancy accessories. The simplest projects usually go best when doors and drawers are refinished in a separate garage or basement work area while the cabinet boxes are done in place.
Most DIY homeowners will want painter’s tape, plastic or paper for containment, drop cloths, a degreasing cleaner, microfiber cloths, sanding sponges, a random orbital sander if appropriate, a HEPA vacuum if available, patching filler, caulk for small finish gaps where appropriate, bonding primer, cabinet enamel, high-quality brushes, small rollers, and drying stands or painter’s pyramids. Screwdrivers, labels, zipper bags, and a marker are just as important because lost hardware and mixed-up hinges waste a surprising amount of time.
If you plan to spray, factor in the extra learning curve and overspray control. Spraying can produce an excellent smooth finish, but only when setup, thinning if allowed, filtration, masking, and technique are handled correctly. Many homeowners get very good results by brushing and rolling with quality cabinet products designed to level well.
Prepare the space so the project stays under control
Cabinet refinishing can spread farther than people expect. Dust, labels, doors, drying racks, hardware, and open cabinet boxes can take over the room if you do not organize the work from the start. Clear countertops, empty cabinets if needed, and protect floors and adjacent surfaces before the first screw comes out.
Set up a simple numbering system for doors, drawers, and hinge locations. Put a piece of painter’s tape on the inside of each door and each opening and label them to match. Hinges that look identical are not always adjusted the same way, so keeping each set together can save a lot of frustration during reinstallation.
If you are working in a kitchen, think about how you will manage daily life during the project. You may need a temporary coffee station, microwave area, or dishwashing plan. The less rushed you feel, the more likely you are to let products dry and cure properly instead of forcing the job forward.
Step 1: Remove doors, drawers, and hardware
Take off the cabinet doors, remove drawer fronts if practical, and remove all hardware including knobs, pulls, catches, and hinges. This creates a cleaner finish and prevents buildup around hardware edges. It also allows you to work flat on doors when possible, which reduces drips and helps the coating level out better.
Bag and label all screws and hardware by location. If you are planning to replace knobs or pulls with a different size, confirm hole spacing before you finish the surfaces. Filling old hardware holes and drilling new ones is easy enough, but it should be part of the plan, not a surprise after the paint is done.
Inspect hinge areas for loose screws, stripped holes, or cracked wood. Minor wear can be repaired with wood filler, dowels, or specialty screw hole repair methods before painting. This is the kind of small structural maintenance that is worth handling while everything is apart.
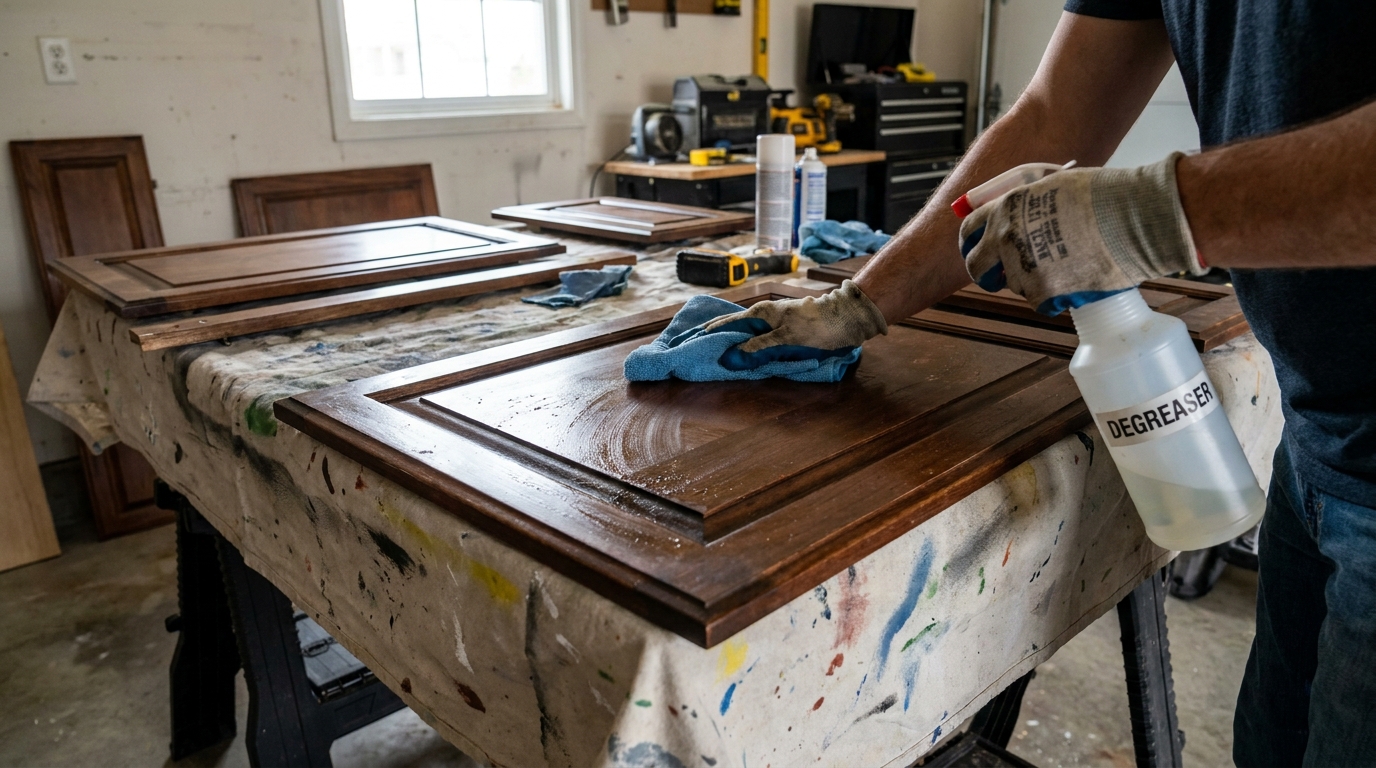
Step 2: Clean thoroughly and do not rush it
Degreasing is one of the most important parts of cabinet refinishing, especially in kitchens. Cabinet surfaces often carry a film of cooking oil, hand residue, cleaner buildup, and airborne grime that is not always obvious until sanding starts. Paint does not bond well to contamination, and a glossy greasy patch can ruin adhesion no matter how good the topcoat is.
Use a cleaner suited to cabinets and follow the instructions. Work in manageable sections, scrub profile edges and around handles, and change cloths as they get dirty so you are removing soil rather than spreading it around. Rinse or wipe as directed by the product, because some degreasers leave residues that must be removed before priming.
This is also the time to identify silicone contamination from furniture polish or similar products. Those areas can cause fisheyes or paint separation. If water beads strangely or cleaner smears rather than wets the surface, continue cleaning until the surface feels uniformly clean and dull rather than slick.
Let everything dry fully before moving to the next step. Moisture trapped in joints, routed details, or repaired areas can interfere with sanding and primer adhesion.
Step 3: Repair dents, chips, and minor damage
After cleaning, small flaws become easier to see. Fill nail holes, dings, shallow chips, and minor edge damage with a paintable wood filler or repair compound suitable for cabinetry. For stained cabinet refinishing, use a stainable filler only where appropriate, understanding that filler rarely accepts stain exactly like wood.
Do not overfill deep routed profiles or hinge mortises that need to stay crisp and functional. Let filler dry fully, then sand it flush. If you are dealing with cracked joints or separated seams, fix the structural issue first with glue or fasteners before relying on surface filler.
For thermofoil or laminate with peeling edges, refinishing may not be the best route unless you can repair and stabilize the surface properly. Paint over loose material will only hide the problem for a short time. Any edge that lifts now is likely to keep lifting later.
Step 4: Sand or degloss for adhesion
The purpose of sanding is not necessarily to remove every bit of the old finish. In most cabinet painting projects, the goal is to create a sound, slightly abraded surface that primer can grip. That may mean light sanding with fine to medium grit abrasives, using sanding sponges for profiles, or using a liquid deglosser if the product system allows it.
Be realistic here. Deglossers can help, but they are not a complete substitute for proper abrasion in every situation. Factory finishes, slick enamels, and high-touch surfaces usually benefit from actual sanding. What matters is a consistent surface with no shiny untouched islands left behind.
If there is any possibility of lead in the old coating, stop and use lead-safe methods. Avoid uncontrolled dry sanding, contain dust, and clean thoroughly with a HEPA vacuum and wet wiping methods. The goal is to improve adhesion without turning the project into a contamination problem.
After sanding, vacuum the surfaces carefully and wipe away remaining dust. Fine dust is one of the main reasons cabinet finishes feel gritty or fail to bond as expected. Good dust control is part of finish quality, not an optional cleanup step.
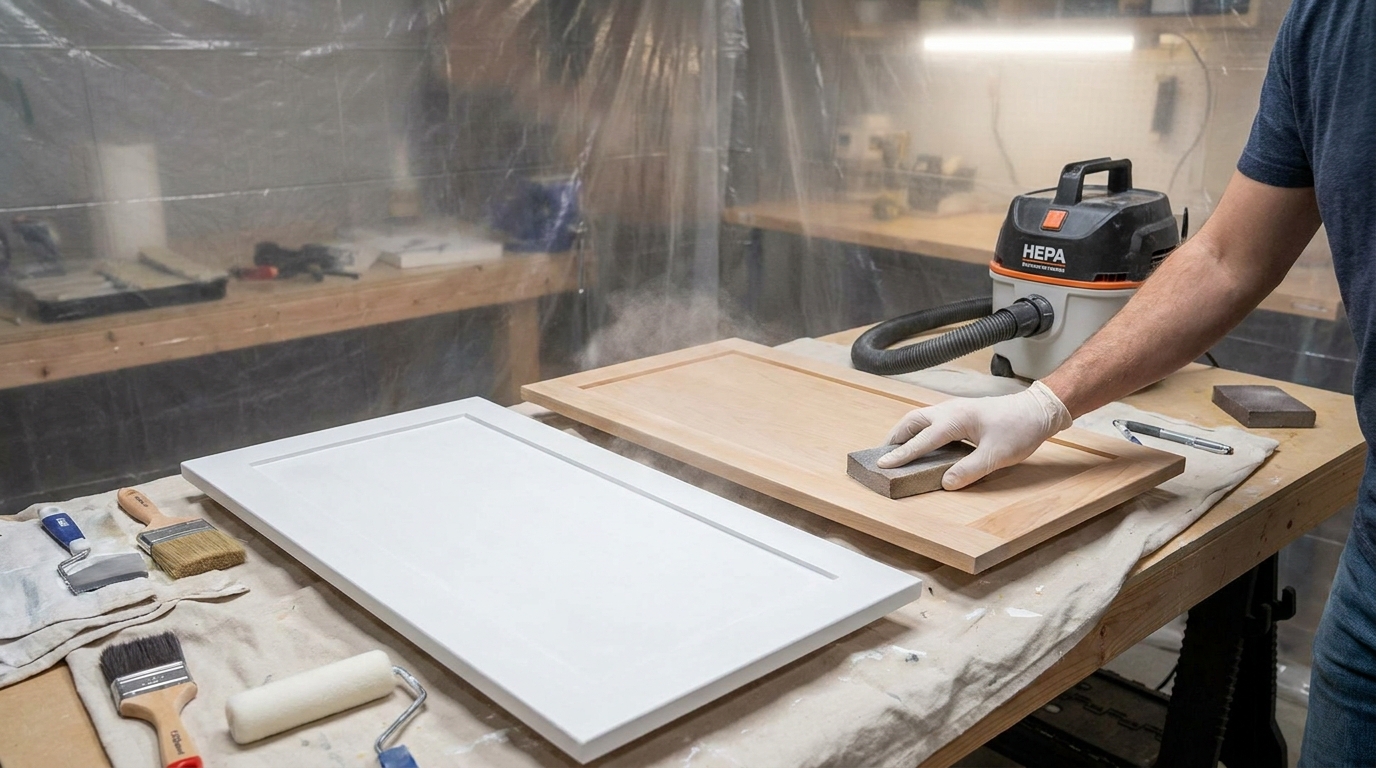
Step 5: Prime with the right product
Primer is what ties the old substrate to the new finish. It improves adhesion, blocks stains, and creates a more uniform surface for the topcoat. On cabinets, this step matters more than many homeowners expect because different substrates behave very differently. Bare wood, old varnish, MDF, laminate, and previously painted surfaces often need different primer characteristics.
A high-quality bonding primer is a common choice for painted cabinet refinishing. If you are covering tannin-rich wood, smoke staining, water stains, or unknown bleed-through, you may need a stain-blocking primer instead. Read the product guidance and do not assume one can solve every problem.
Apply primer evenly and avoid heavy buildup in corners or profile edges. Thick primer ridges can telegraph through the topcoat and make the finish look heavy. Once the primer has dried as directed, inspect the surface in angled light. Minor flaws often show up at this stage and can be sanded smooth before paint.
A light scuff sanding between primer and topcoat can make a noticeable difference in smoothness. Vacuum and tack off the dust again before moving to finish coats. This is slow work, but it is the part that makes the final result look deliberate rather than rushed.
Step 6: Apply the finish coats with patience
For most DIY homeowners, two finish coats over primer are standard, though some colors and product systems may need more. Follow the spread rate and drying time on the label rather than trying to force coverage in one thick pass. Thick coats tend to sag, show brush marks, and cure more slowly.
If brushing and rolling, use tools suited to fine finish work. A quality angled brush helps with inside corners and profiles, while a small high-density roller can lay out flat areas evenly. Work methodically, maintain a wet edge, and finish each section in the same direction to reduce lap marks.
One advantage of many modern water-based and hybrid cabinet coatings is that they level better than older interior wall paints, but they still need to be handled correctly. Overworking the paint after it starts to set can pull the film and create texture. Put it on cleanly, tip it off if needed, and let the coating level on its own.
Allow full dry time between coats, then scuff sand lightly if the product instructions call for it or if dust nibs have settled into the finish. Clean off the dust before recoating. Cabinet painting rewards consistency more than speed.
Brush, roll, or spray?
Each method can work. Brushing is simple and controlled but may leave more visible texture depending on product and technique. Rolling with a fine finish roller often gives a smoother result on flat areas. Spraying can create the smoothest appearance, but only if the workspace, masking, product viscosity, and spray technique are under control.
For most homeowners, brushing and rolling are the safer choice unless they already have experience spraying doors and trim. A sprayed finish done poorly can look worse than a brushed finish done carefully. The best method is the one you can execute cleanly and consistently in your actual workspace.
Step 7: Respect cure time, not just dry time
This is the stage where many cabinet refinishing projects get damaged. The doors may feel dry enough to touch, but the coating can still be soft underneath. Reinstalling hardware too early, stacking doors, closing drawers firmly, or loading shelves right away can leave impressions, sticking, chips, and blocked paint surfaces.
Always check the product’s cure guidance. Some finishes are ready for light handling in a day or two but need significantly longer to reach full hardness. Humidity, low temperature, and heavier coats can all extend that timeline. If you can give the project extra curing time, do it.
This waiting period is one reason refinishing requires planning. It is not just labor time. It is also downtime. A rushed return to service can undo a lot of careful prep and application.
Remember: Dry enough to touch is not the same as ready for daily kitchen use. Cure time is what gives the finish its working toughness.
Step 8: Reassemble carefully and make final adjustments
When the finish has cured enough for reassembly, reinstall hinges, knobs, pulls, and drawer fronts carefully. Use soft surfaces and avoid dragging hardware across fresh paint. If you changed hardware style, drill new holes with a template so alignment stays consistent from one door to the next.
Cabinet doors often need small hinge adjustments after reinstallation. That is normal. Take the time to line up reveals, level door tops, and make sure doors close properly without rubbing. Fresh paint on a misaligned door edge will chip quickly if the adjustment is skipped.
This is also a good moment to consider practical upgrades such as soft-close hinges, bumpers, or improved drawer slides if the cabinet construction allows it. Those changes do not affect the refinishing itself, but they can make old cabinets feel much newer in everyday use.
Common mistakes that shorten cabinet finish life
Most cabinet finish failures can be traced back to a handful of preventable mistakes. The first is weak cleaning. If grease, wax, or cleaner residue stays on the surface, the new finish may peel, separate, or scratch off far too easily. The second is inadequate abrasion or poor primer selection, which leaves the topcoat depending on a surface it cannot grip.
Another mistake is using the wrong paint. Standard wall paint is not designed for the wear that cabinet doors, drawer fronts, and frames take every day. Cabinets need a coating system made for harder service, whether that is a cabinet enamel, trim enamel, or another suitable finish recommended for high-touch millwork.
Applying coats too heavily is another frequent problem. Homeowners trying to get full coverage fast often create runs, edge buildup, tacky surfaces, and long cure times. Thin, even coats almost always perform better and look more professional.
Then there is impatience at the end of the project. Rehanging doors too early, cleaning the surface too aggressively too soon, or slamming drawers before full cure can permanently mark the finish. Cabinet work rewards patience in a way wall painting does not.
How to care for newly refinished cabinets
Once the cabinets are back in service, treat the finish with some restraint during the early period. Avoid harsh scrubbing pads, strong solvents, and grease-cutting chemicals unless the product manufacturer specifically approves them. A soft cloth with mild soap and water is usually enough for routine cleaning.
Wipe up water around sink bases and lower cabinet corners promptly. Even a good finish has limits if moisture is allowed to sit repeatedly at seams and edges. Hardware should also be tightened gently if it loosens over time, because movement around screw holes can chip paint films.
Use knobs and pulls consistently rather than grabbing door edges with greasy fingers. It sounds minor, but repeated hand contact is one reason painted cabinet edges get dirty and worn early. Good hardware is not just decorative. It protects the finish in normal daily use.
When refinishing is not the right choice
Some cabinets are simply beyond what a coating upgrade can solve. If cabinet boxes are loose, bottoms are sagging, sink bases are rotted, doors are warped, or laminate faces are peeling extensively, refinishing can become an attempt to decorate a structural problem. In those cases, selective repair, refacing, or replacement usually makes more sense.
You should also be cautious if the original finish is failing broadly across the whole surface in ways you cannot stabilize. Paint only performs as well as the layer beneath it. If old coatings are lifting from the substrate, your new finish may come off with them no matter how carefully you apply it.
Layout issues are another reason to step back. If the kitchen or bathroom is hard to use because storage is poor, drawers are too shallow, or the sink base and appliance clearances do not work, refinishing may improve appearance while leaving the daily frustration untouched. A good renovation decision should match the actual problem.
A practical timeline for a DIY cabinet refinishing project
A typical small to mid-sized kitchen often takes longer than first-time DIYers expect. Day one may be devoted just to clearing the space, labeling, removing doors and hardware, and cleaning. Day two may involve repairs and sanding. Day three may be for more sanding cleanup and primer. Then come one or two days of finish coats depending on dry times and conditions.
After that, the project still is not truly done. Cure time can add several more days before full reassembly and normal use. If weather is humid or the workspace is cool, the schedule stretches. That is not a sign the project is failing. It is simply how finish systems work.
A realistic timeline keeps you from making the worst choices. When homeowners expect a one-weekend turnaround, they usually compress prep, overcoat too fast, or rehang pieces before the finish is ready. If you plan the project with enough breathing room, the result is better and the stress level is much lower.
Final thoughts on getting a fresh look that lasts
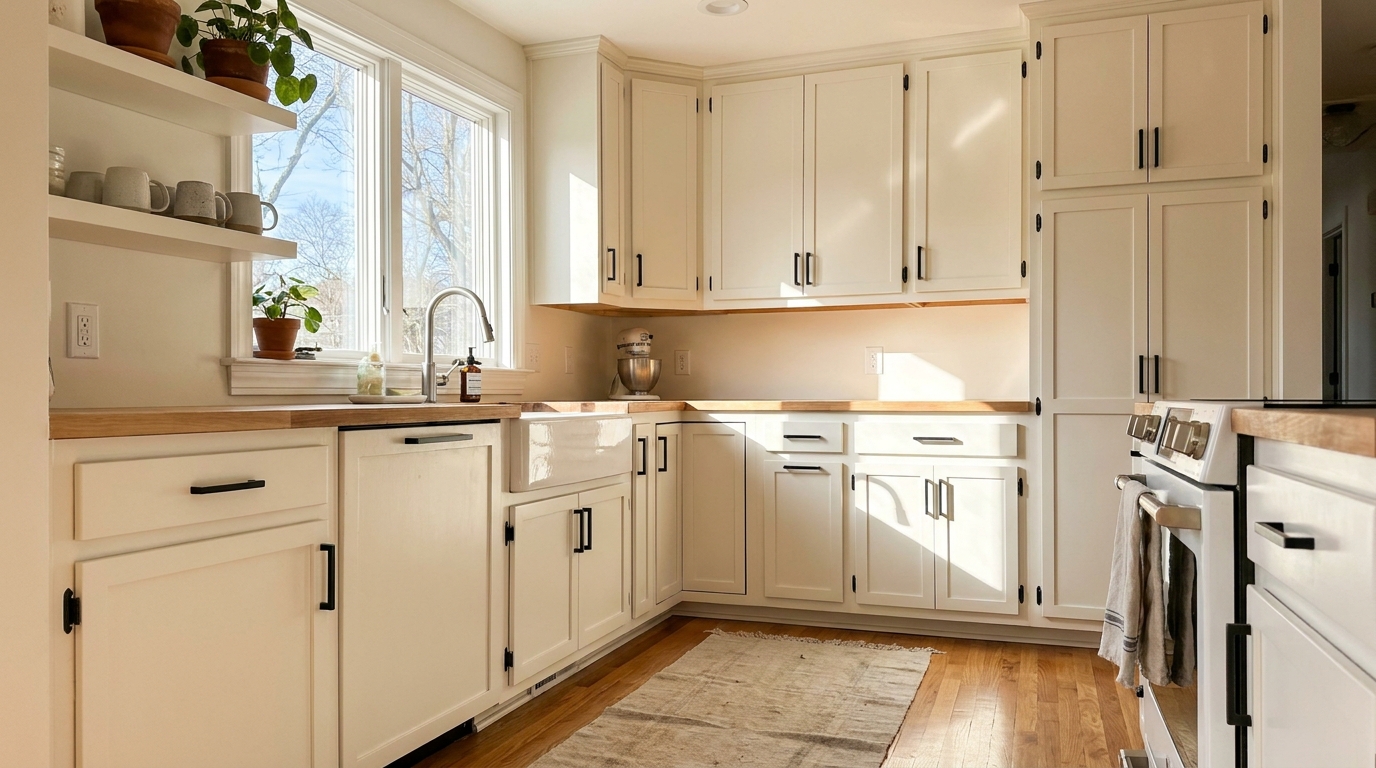
Cabinet refinishing works best when approached as a surface preparation project first and a painting project second. The visible color change gets all the attention, but the durability comes from what happens before the first finish coat ever goes on. Clean surfaces, good labeling, proper sanding or deglossing, the right primer, controlled dust, and enough cure time are what separate a cabinet refresh that lasts from one that starts failing within months.
For homeowners trying to improve a kitchen or bathroom without the cost of replacement, refinishing remains one of the smartest upgrades available. It preserves what is still working, reduces waste, and can transform the feel of a room in a very direct way. The key is being honest about cabinet condition and being disciplined with the process.
If the cabinets are solid and you are willing to work carefully, there is no reason a DIY refinishing project cannot deliver a strong result. Just do not skip the boring parts. In cabinet work, the boring parts are the parts that hold everything together.
Quick step-by-step recap
-
Inspect the cabinets for structural soundness, water damage, delamination, and old finish condition.
-
Consider lead risk in older homes before sanding or stripping any existing coating.
-
Choose a compatible system of cleaner, primer, and cabinet-grade topcoat.
-
Remove and label doors, drawers, hinges, and hardware carefully.
-
Clean all surfaces thoroughly to remove grease, soap residue, and contamination.
-
Repair minor dents, chips, and hardware-related damage.
-
Sand or degloss to create proper adhesion, then remove all dust.
-
Prime with the right bonding or stain-blocking primer for the substrate.
-
Apply two or more thin finish coats, following dry times and recoat guidance.
-
Allow full cure as much as possible before reassembly and normal use.
That is the process in plain terms. It is not complicated, but it does require care. If you respect the prep and the timing, cabinet refinishing can give your space a genuinely fresh look without the price and disruption of replacing everything behind the doors.



No Comment! Be the first one.