


Elevate Your Space: A DIY Guide to Installing Decorative Molding
There are few design details as transformative as decorative molding. A plain room can feel flat even when beautifully furnished, while a thoughtfully framed wall gains proportion, depth, and character almost instantly. Molding introduces an architectural rhythm that feels collected rather than temporary, and that shift is often what turns a house into a home with presence. It carries the quiet grace of traditional French interiors while honoring the meticulous craftsmanship that gives a room emotional texture.
Table Of Content
- Why Decorative Molding Changes a Room So Completely
- Choosing the Right Type of Decorative Molding
- How to Match Molding to Room Style
- Planning the Layout Before You Touch a Tool
- Basic Layout Guidelines
- Tools and Materials You Will Need
- How to Measure Decorative Molding Accurately
- Cutting the Molding Cleanly
- Helpful Cutting Habits
- Preparing the Wall Surface
- Installing Decorative Molding Step by Step
- Installation Order That Works Well for Most Walls
- Filling, Caulking, and Refining the Finish
- Painting for a Seamless, High End Result
- Design Ideas for Different Rooms
- Common DIY Mistakes and How to Avoid Them
- How Much Decorative Molding Installation Typically Costs
- Maintaining Decorative Molding Over Time
- Final Thoughts: Crafting Elegance with Your Own Hands
What makes decorative molding especially appealing today is that it no longer belongs only to old apartments, historic townhouses, or professionally managed renovations. With the right planning, a careful hand, and a patient eye, homeowners can install it themselves and achieve a polished result. The process is approachable, but the effect is elevated. It is one of the rare DIY projects that offers both practical satisfaction and unmistakable beauty.
This guide is designed to help you move through the entire process with confidence, from choosing the right molding profile to measuring, cutting, attaching, filling, caulking, and painting. Along the way, you will learn how to make the design suit your room rather than forcing your room to suit a trend. Decorative molding is not merely a trim detail. It is a way of shaping atmosphere, defining scale, and giving your walls the dignity of intention.
Whether you are enhancing a dining room, a bedroom, a hallway, or a small entry, the principles remain the same. Precision matters, but so does restraint. The most beautiful molding work feels balanced and effortless, as if it always belonged to the architecture. When installed with care, even a modest wall can take on a refined identity that feels timeless rather than ornamental for its own sake.
Decorative molding does not need to be extravagant to feel luxurious. Its power often lies in proportion, symmetry, and the subtle shadow lines that bring a wall to life.
Why Decorative Molding Changes a Room So Completely
Walls occupy more visual space than almost anything else in an interior, yet they are often left untreated beyond paint. Decorative molding changes that by giving the eye structure. It creates frames, divisions, and a sense of hierarchy that can make ceilings seem taller, rooms seem more tailored, and empty stretches of wall feel curated rather than unfinished. The result is not only decorative. It is deeply architectural.
In classic interiors, molding has long been used to articulate scale and establish harmony between doors, windows, ceilings, and furnishings. On a practical level, it can disguise minor surface imperfections and offer visual order in awkward or expansive rooms. On an emotional level, it introduces softness through shadow, elegance through symmetry, and richness through detail. A wall becomes less of a backdrop and more of a composed surface.
For DIY enthusiasts, molding also offers an unusual balance of accessibility and sophistication. Unlike a full renovation, it does not require moving plumbing, rewiring walls, or replacing structural elements. Yet the effect can be surprisingly dramatic. When painted in the same color as the wall, molding creates a subtle tonal relief. When contrasted, it reads as crisp and graphic. Both approaches can feel beautiful when chosen intentionally.
Choosing the Right Type of Decorative Molding
The first design decision is selecting the kind of molding you want to install. This choice should be guided by your room’s architecture, the mood you hope to create, and your comfort level with installation. A simple rectangular picture frame molding is often the most approachable option for beginners because it relies on repeated geometric panels and can be adapted to many wall sizes. It is especially effective in living rooms, bedrooms, and dining areas.
Chair rail molding introduces a horizontal line across the room, traditionally placed at about one third of the wall height. It can be used alone for understated definition or paired with lower wall paneling for a more classical effect. Wainscoting adds more dimension and often more complexity, especially if beadboard or panel systems are involved. Crown molding at the ceiling can be striking, though it is generally more advanced due to tricky angles and overhead installation.
For a graceful and highly versatile DIY project, wall frame molding remains the ideal starting point. It can look formal or contemporary depending on the profile you choose. Slim, clean profiles suit modern interiors that want architectural interest without heaviness. More detailed profiles with delicate curves feel softer and more traditional. The best choice is not always the most elaborate one. In many rooms, restraint reads as more expensive.
Material matters as well. Medium density fiberboard, often called MDF, is popular for interior molding because it is affordable, smooth, and easy to paint. Solid wood offers durability and authenticity, though it can be more expensive and may require additional sanding or priming. Polyurethane and other lightweight options can be useful in humid rooms or for decorative applications, though the feel and finish may differ slightly from wood-based trim. For many homeowners, pre-primed MDF molding offers the most manageable path to a polished result.
How to Match Molding to Room Style
The molding should feel in conversation with the rest of the room. In a high-ceilinged space with traditional doors, generous baseboards, and classic furniture, slightly deeper profiles and larger panel proportions will feel natural. In a smaller room with minimal furnishings and clean-lined lighting, narrow molding with wider negative space often feels more refined. Scale is everything. Oversized molding can overwhelm a compact room, while tiny molding can disappear in a grand one.
Look carefully at existing trim before you commit. Baseboards, door casings, and window trim all contribute to the language of the room. Decorative wall molding should support that language rather than compete with it. If your home leans transitional, choose a profile that bridges classic and modern. If your home is more historical, embrace the quiet romance of more traditional detailing, but keep the overall layout orderly and disciplined.
Planning the Layout Before You Touch a Tool
The most successful molding projects begin on paper, not on the wall. Before cutting anything, decide exactly where each frame or trim line will go. Symmetry is one of the reasons molding feels so satisfying to the eye, so this planning stage deserves patience. Measure the full width and height of the wall, note the location of outlets, switches, vents, and furniture, and think about the wall as a composition rather than a blank surface.
A common mistake is starting from one corner and simply repeating a panel size until you run out of wall. This can leave you with awkward leftover spacing at the far end. A better approach is to determine your desired panel size, then calculate the spacing between panels and between panels and adjacent trim. If exact repetition does not fit the wall gracefully, adjust the panel dimensions slightly so the whole arrangement looks intentional.
Painter’s tape is an excellent tool at this stage. Use it to map out your frames directly on the wall so you can see scale in real time. Step back, sit down, and view the wall from multiple angles. The taped layout will reveal whether the proportions feel elegant or cramped. It is far easier to move tape than to patch nail holes and recut trim.
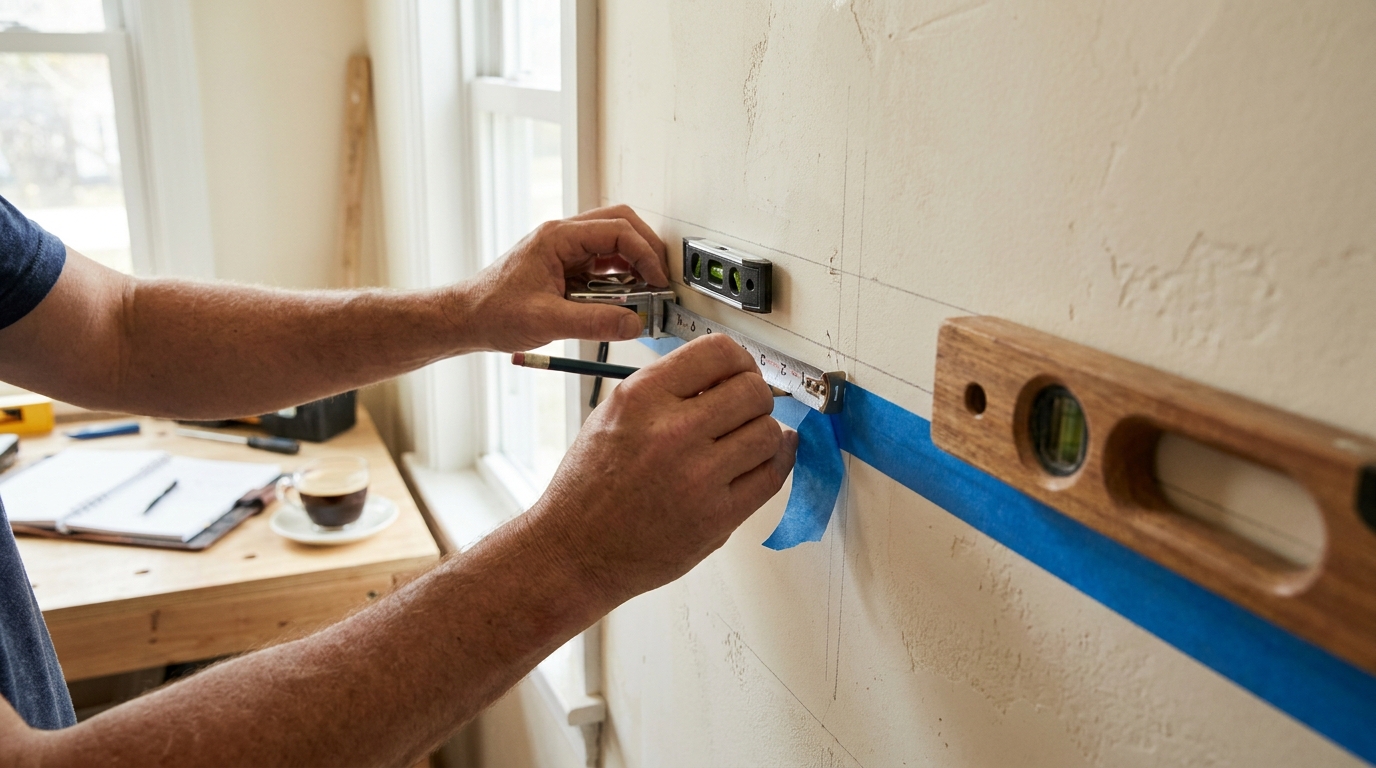
If your wall includes a door, window, or built-in element, treat that feature as part of the composition. You may want equal panels on either side of a central opening, or a larger panel above a chair rail with smaller ones below. The goal is visual harmony. Decorative molding should make the room feel more coherent, not more busy.
Basic Layout Guidelines
While every wall is different, a few principles can help you achieve a graceful layout:
- Keep outer margins consistent where possible, especially beside door casings and corners.
- Use equal spacing between panels for a calm, tailored effect.
- Leave enough negative space inside each frame so the wall can breathe.
- Align panel tops or bottoms with nearby architectural features when it improves cohesion.
- Test your design with tape before cutting any molding.
Tools and Materials You Will Need
Having the right tools nearby creates calm during installation and helps your work stay precise. You do not need a professional workshop, but you do need dependable basics. A measuring tape, pencil, level, stud finder, miter saw or miter box, construction adhesive, caulk gun, brad nailer or hammer and finishing nails, wood filler, sandpaper, primer, and paint are all commonly used. A clean cloth, painter’s tape, and a small putty knife will also prove useful throughout the process.
If you are new to trim work, a miter saw can make the project significantly easier because it allows consistent angled cuts. However, a manual miter box may still be suitable for a smaller room if used carefully. A brad nailer speeds up installation and can minimize surface damage, but finishing nails and a nail set can work just as well if you prefer a slower, more deliberate method. The finish matters more than the tool prestige.
Before beginning, inspect your molding pieces for any dents, rough edges, or slight warping. Store them flat if possible and let them acclimate to the room for a day or two. This is especially important with wood products that may respond to humidity or temperature. Small preparations like these often separate a rushed DIY outcome from one that feels tailored and enduring.
How to Measure Decorative Molding Accurately
Once your layout is finalized, transfer those dimensions carefully. Measure each molding section individually rather than assuming opposite sides are identical. Walls are not always perfectly square, and small inconsistencies can become noticeable when trim lines are expected to form neat rectangles. Accuracy here saves time and frustration later.
Mark each piece clearly with its intended location and orientation. It helps to create a simple numbering system that matches your wall diagram. For example, label a top horizontal piece for the left panel separately from the bottom horizontal piece, even if they seem close in size. This reduces confusion once cutting begins and keeps the process orderly.
Remember to account for mitered corners when measuring. Decorative wall molding frames are typically joined with 45 degree cuts at each corner, which means the measured finished length corresponds to the long points of the miter, not just the raw edge. If you are unfamiliar with this, make a couple of practice cuts on scrap material first. That small exercise can prevent an entire chain of avoidable mistakes.
Cutting the Molding Cleanly
Cutting is where the project starts to feel real. A clean miter joint gives decorative molding its seamless, tailored appearance, while a rough or reversed cut can disrupt the rhythm of the entire wall. Set your saw carefully, confirm the angle before each cut, and move slowly enough to stay precise. Rushing through trim cuts rarely saves time in the end.
When using a miter saw, keep the molding firmly against the fence and support longer pieces so they do not shift. Pay close attention to the direction of the angle. Many DIY installers find it helpful to cut one complete frame at a time and dry-fit it on the floor before moving on. This keeps the geometry clear in your mind and reduces the chance of mirrored errors.
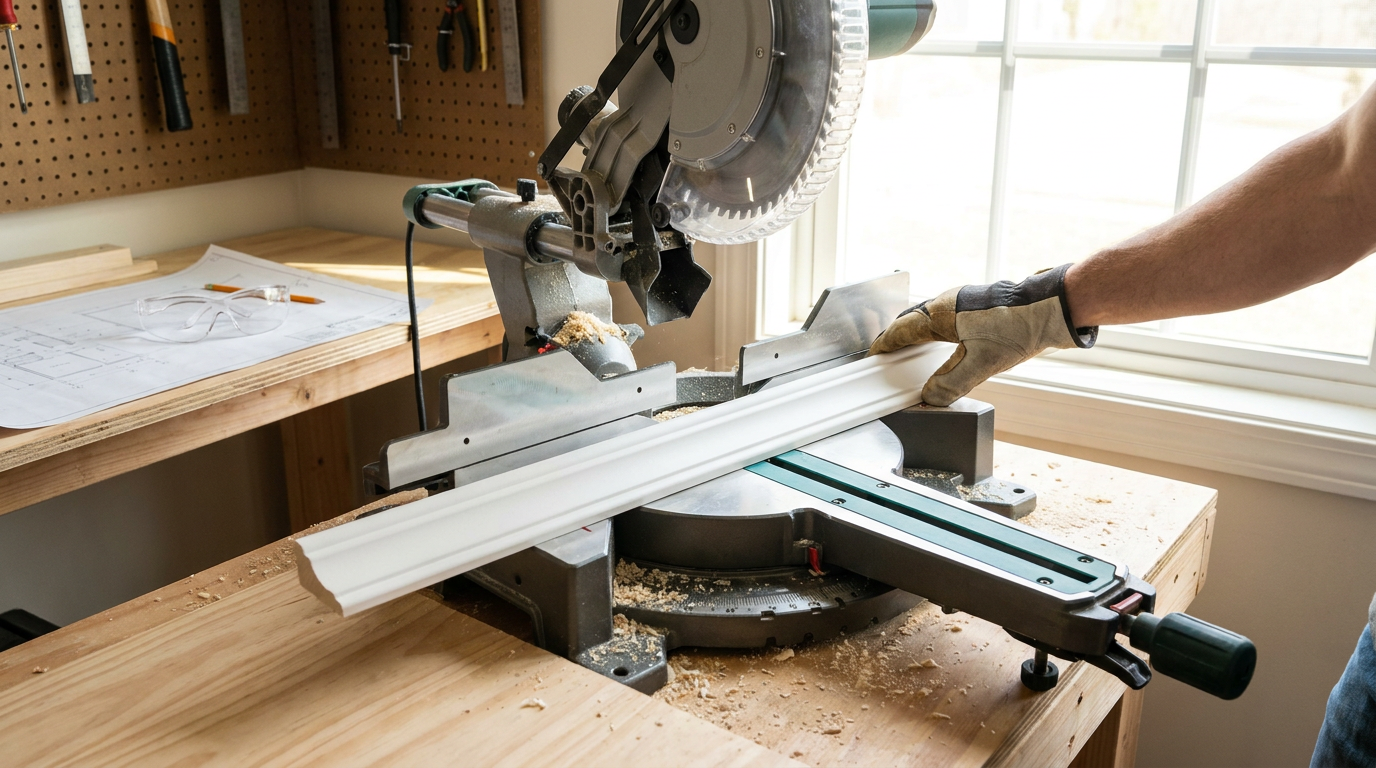
If a cut is slightly imperfect, do not panic. Minor gaps can often be corrected with a careful recut, light sanding, or later caulking if the discrepancy is very small. What matters is maintaining crisp lines and close-fitting corners. Decorative molding rewards patience more than speed.
Helpful Cutting Habits
- Measure twice before every cut, even if multiple pieces are meant to match.
- Use scrap pieces to confirm miter direction before cutting your finished lengths.
- Keep left and right pieces grouped together to avoid confusion.
- Dry-fit each frame on the floor or against the wall before applying adhesive.
- Recut a questionable piece rather than forcing it to fit.
Preparing the Wall Surface
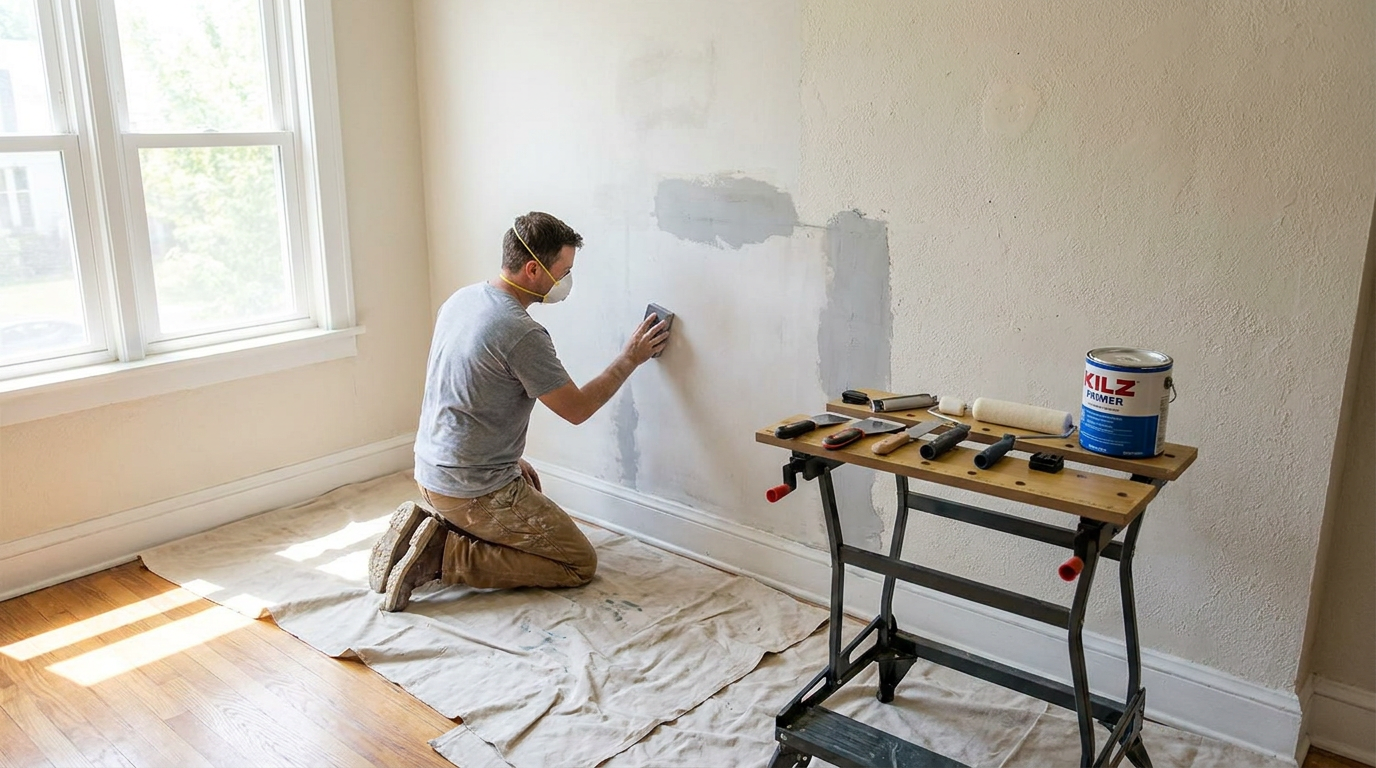
A beautifully cut molding profile can only perform as well as the wall beneath it. Before installation, clean the wall thoroughly and patch any dents, cracks, or peeling paint. Sand rough areas smooth and wipe away dust so adhesive can bond properly. If the wall has a glossy finish, lightly sanding it can improve grip and reduce the chance of adhesion issues.
Use a level and pencil to redraw key guide lines from your layout if they have faded or been painted over. In older homes, rely on visual balance rather than assuming every surface is perfectly straight. If the ceiling slopes slightly or the baseboard sits unevenly, your eye will usually prefer molding that looks level within the room’s visual context. Precision is important, but perception matters too.
If you are installing over freshly painted walls, make sure the paint has fully cured according to the manufacturer’s recommendation. Trapped moisture or soft paint films can affect both adhesion and finish quality. A calm, well-prepared surface allows the molding to sit neatly and stay secure over time.
Installing Decorative Molding Step by Step
The installation process itself is straightforward when broken into stages. Begin by dry-fitting all pieces of a frame on the wall to confirm that the joints align and the proportions match your layout. Once you are satisfied, apply a thin bead of construction adhesive to the back of the first piece. Press it into place along your guide marks and secure it with brad nails or finishing nails.
Continue with the adjoining pieces, checking corner alignment as you go. Use a level frequently, especially on the longer horizontal sections, because even slight drift becomes visible once the complete panel is assembled. If a wall is subtly uneven, hold the molding to your marked level line rather than letting the wall dictate the position. The eye reads the trim, not the plaster.
Work one panel or section at a time instead of trying to attach every horizontal piece first and every vertical piece later. Completing each frame helps maintain clarity and allows you to make small adjustments in sequence. As you progress, wipe away any excess adhesive promptly with a damp cloth before it dries.
If you are using a hammer instead of a nail gun, sink finishing nails gently and use a nail set to drive them just below the surface without denting the molding face. This gives you a cleaner finish when filling later. Be especially careful near narrow edges and delicate profiles, where splitting is more likely if nails are placed too aggressively.
Installation Order That Works Well for Most Walls
- Dry-fit the full frame or section first.
- Install the top horizontal piece and level it carefully.
- Add the side pieces and align the mitered corners.
- Install the bottom piece and confirm the frame closes neatly.
- Repeat for the remaining panels, checking spacing often.
Filling, Caulking, and Refining the Finish
This stage is where molding begins to shift from DIY project to integrated architecture. Fill all nail holes with wood filler or spackle suitable for trim work, allowing it to dry fully before sanding smooth. Then run a fine bead of paintable caulk along the edges where the molding meets the wall and at any tiny joint gaps. Smooth the caulk with a damp finger or caulking tool for a crisp, seamless transition.
Do not overapply filler or caulk in an attempt to fix large inaccuracies. These finishing materials are best for refinement, not rescue. If a corner gap is substantial, recutting the piece will almost always produce a better result than trying to disguise it. The goal is subtle perfection, not thick patchwork.
Once everything is dry, sand lightly and wipe away dust. Run your hand along the edges. The surface should feel continuous, with no obvious ridges at joints or filled nail holes. This tactile check is often just as revealing as a visual one. Elegant rooms are built not only for the eye, but for the hand that notices craftsmanship.
Painting for a Seamless, High End Result
Paint is what unifies the molding with the room and determines whether it reads as bold, soft, dramatic, or quietly architectural. If your molding is not pre-primed, start with a quality primer suited to the material. Even if it is pre-primed, spot-prime filled areas if needed. Then choose a finish that complements the wall treatment and the mood of the space.
Painting the molding the same color as the wall is one of the most elegant approaches, especially in soft neutrals, warm whites, muted greiges, dusty blues, or mineral greens. This monochromatic treatment allows the profile and shadow to do the work without introducing visual clutter. It feels sophisticated and calm, particularly in bedrooms, hallways, and dining rooms.
Contrasting trim can be beautiful as well, especially in spaces where you want a sharper, more graphic effect. A creamy molding against a richer wall tone can feel classic and tailored. A deep wall color with matching molding in satin or eggshell creates intimacy and drama. Whatever palette you choose, apply paint carefully with a fine brush and small roller if needed, maintaining crisp edges and even coverage.
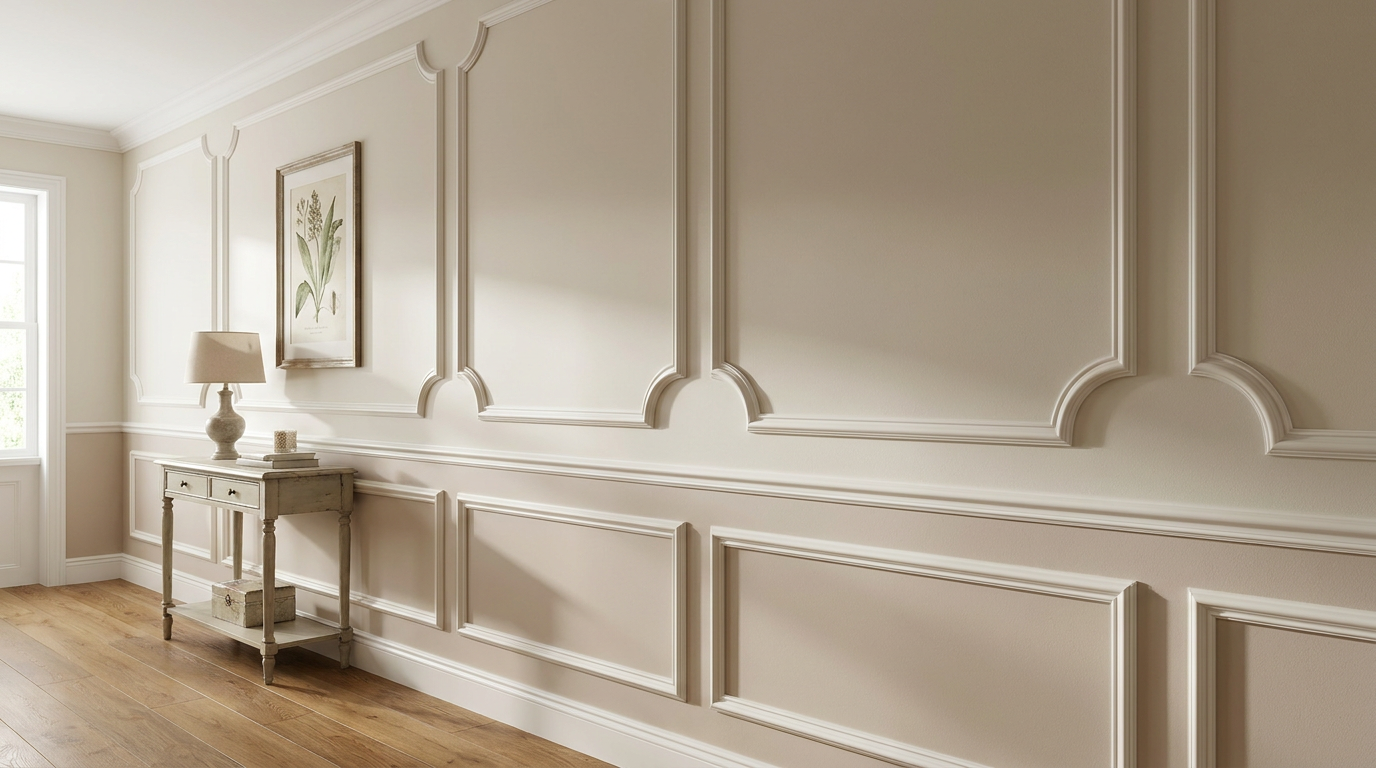
In most cases, two coats will produce the most polished result. Allow proper drying time between coats, and inspect the finish in daylight as well as evening light. Decorative molding catches shadow, so subtle paint inconsistencies may appear more visible once the sun shifts. A final touch-up pass is often worth the extra time.
Design Ideas for Different Rooms
In a living room, molding can anchor seating areas and make tall walls feel purposefully scaled. Large rectangular frames behind a sofa or along a fireplace wall create an elegant backdrop for art, sconces, or simply negative space. In a dining room, molding adds ceremony and makes even simple furnishings feel more considered. It is particularly effective when paired with a pendant light and a restrained palette.
Bedrooms benefit from molding’s softness. Frames behind the bed can function almost like an architectural headboard, adding presence without clutter. In guest rooms, decorative trim can elevate the atmosphere with relatively little furniture or styling. Hallways and entries, often overlooked, become far more memorable when molding adds rhythm to long walls and transitions.
For smaller rooms, less is often more. A simple repeated panel layout can make a compact study or powder room feel jewel-like rather than crowded. In larger rooms, increase the panel scale so the design does not feel fussy. The most beautiful installations always acknowledge the room’s proportions and respect the existing architecture.
Common DIY Mistakes and How to Avoid Them
The most common mistake is poor planning. Misaligned spacing, undersized panels, or uneven margins can make a finished project feel accidental rather than elegant. Spending extra time on the initial layout is the simplest way to protect the final result. Use tape, step back often, and trust proportion over impatience.
Another frequent issue is inaccurate cutting, especially with miters. If corners do not meet cleanly, the entire frame can appear skewed. Practice cuts help, and so does labeling each piece before installation. Never assume you will remember which angle belongs where after a stack of similar trim pieces accumulates.
Skipping the finishing stage is equally damaging. Nail holes, visible seams, and rough caulk lines immediately reduce the effect of the work. It is often the final ten percent of the project that creates the difference between homemade and beautifully executed. Take the time to fill, sand, caulk, prime, and paint with care.
How Much Decorative Molding Installation Typically Costs
One of the reasons decorative molding remains such a compelling project is its value. Compared with many architectural upgrades, it can deliver a striking transformation at a relatively moderate cost. The total will depend on room size, molding material, tool access, and paint selection. A small accent wall may require only a modest material investment, while a full room with multiple framed panels will naturally cost more.
If you already own basic tools, the savings can be substantial compared with hiring professional trim carpentry. Even if you need to purchase or rent a few items, the finished look often far exceeds the cost. From a design perspective, molding has an unusually high visual return. It makes a room feel more expensive because it adds form, detail, and a sense of permanence.
For budget-conscious projects, focus on one feature wall or a single room first. This allows you to build skill and confidence before expanding the treatment throughout the home. Decorative molding works beautifully when introduced gradually, especially if each space is tailored to its own scale and function.
Maintaining Decorative Molding Over Time
Once installed and painted, decorative molding is relatively easy to maintain. Dust it regularly with a soft cloth or brush attachment, especially along upper ledges and profile grooves where particles can collect. For marks or smudges, use a gentle damp cloth and avoid abrasive cleaners that could dull the paint finish.
Seasonal settling may occasionally reveal a hairline crack at a joint or along a caulk line, particularly in homes with shifting humidity. This is usually easy to repair with a light recaulk and touch-up paint. Keep a small amount of your wall and trim paint labeled for future maintenance. These tiny moments of upkeep help preserve the seamless effect that makes molding feel so refined.
If furniture is moved often near molded walls, consider felt pads or mindful spacing to prevent impact along lower sections. Decorative molding is durable, but like all carefully finished surfaces, it benefits from thoughtful use. The reward is a room that continues to feel composed and architectural for years to come.
Final Thoughts: Crafting Elegance with Your Own Hands
Decorative molding is more than a decorative layer. It is a way of giving a room memory, proportion, and poise. In homes that feel unfinished or visually flat, it introduces structure without heaviness and sophistication without requiring extravagance. Its beauty lies in the interplay between discipline and softness, geometry and shadow, precision and atmosphere.
For the DIY enthusiast, there is also a particular pleasure in this project because the transformation feels both visible and meaningful. You are not simply attaching trim. You are drawing architecture onto the surface of a room and teaching the eye where to rest. With careful measuring, patient cutting, and attentive finishing, the result can feel remarkably professional and deeply personal at once.
If you begin with one wall, one room, and one clear plan, decorative molding will quickly reveal why it has endured across centuries and styles. It speaks a language of permanence in a world full of temporary solutions. Installed by hand and finished with intention, it offers a kind of everyday luxury that is not loud, but lasting.


No Comment! Be the first one.