


How to Check Your Solar System Warranty: A Step-by-Step Guide for Homeowners
A solar energy system is one of the more meaningful upgrades a homeowner can make. It can lower utility costs, reduce reliance on fossil fuels, and add resilience and long term value to a property. Still, the value of a solar system is not only in the panels on the roof. It is also in the paperwork, protections, and performance expectations that support the system over time. That is where your warranty becomes important.
Table Of Content
- Why checking your solar warranty matters
- Start with the right mindset: this is about ownership, not paperwork
- Step 1: Gather every document connected to your solar installation
- What your solar file should include
- Step 2: Identify every component and match it to its warranty
- Common warranty categories in a residential solar system
- Step 3: Find the start date and duration of each warranty
- Step 4: Read the exclusions, not just the headline promise
- Step 5: Confirm serial numbers and equipment labels
- Step 6: Log into your monitoring portal and review system performance
- Questions to ask when reviewing production data
- Step 7: Separate normal wear from a potential warranty issue
- Step 8: Contact both the installer and the manufacturer when needed
- A practical email structure for a warranty inquiry
- Step 9: Check transfer rules if you bought or plan to sell the home
- Step 10: Review provincial or state consumer protection context
- Common misconceptions that lead to missed warranty benefits
- How often should you check your solar warranty?
- Create a simple solar warranty checklist for the future
- What to do if your warranty has already expired
- Final thoughts: your warranty is part of the system
Many homeowners assume they have one simple solar warranty that covers everything for decades. In practice, most solar systems come with several different warranties, each covering different parts, time periods, and claim processes. There may be a product warranty for the solar modules, a performance warranty for power output, a separate warranty for the inverter, another for a battery if one is installed, and a workmanship warranty from the installer. If you do not know how these pieces fit together, it becomes much harder to use them when you need them.
Checking your solar system warranty is not just an administrative task. It is a practical part of responsible ownership. A careful review can help you spot gaps in documentation, understand who to call if something goes wrong, and compare current system performance with what was promised at installation. It also gives you more confidence if you plan to sell your home, replace a component, or make a claim later.
This guide walks through the process step by step in a way that is clear and manageable. You do not need to be a solar professional to do this well. You simply need a folder for records, access to your monitoring platform, and a bit of time to understand how your system was sold, installed, and protected.
Good warranty protection starts with good records. The better you document your system, the easier it is to verify coverage, confirm performance, and act quickly if a repair or replacement is needed.
Why checking your solar warranty matters
Solar systems are built to last, but they are not static. Panels slowly degrade over time, inverters have shorter expected lifespans than modules, and batteries follow their own charging and cycling limits. According to guidance widely referenced in the industry, photovoltaic modules often degrade at roughly 0.5 percent to 1 percent per year. That means some decline is normal. What matters is whether your system is aging as expected, and whether any unusual drop in performance could qualify for service or replacement.
The inverter is especially important in this conversation. The U.S. Department of Energy notes that string inverters often last about 10 to 15 years, which is typically less than the lifespan of the panels themselves. A homeowner who assumes the whole solar system is covered for 25 years may be surprised to learn that the inverter protection ends much sooner. That does not mean the system is unreliable. It simply means warranty planning needs to match how real systems age.
There is also a practical consumer protection angle. Federal and provincial guidance in Canada, along with consumer guidance in the United States, makes it clear that warranties are usually limited. They commonly cover defects in materials or workmanship, but they often exclude misuse, neglect, unauthorized modifications, storm damage, or installation errors outside the manufacturer’s responsibility. If you are not sure what kind of issue you are looking at, it can be difficult to know whether the manufacturer, installer, or another service provider is responsible.
Checking your warranty now, before there is a problem, gives you a calmer starting point. You are not scrambling to find documents during a roof leak, an inverter shutdown, or an unexplained production drop. Instead, you already know your system details, your coverage periods, and your next steps.
Start with the right mindset: this is about ownership, not paperwork
There is a useful shift in perspective that makes this process easier. Rather than seeing a warranty check as a one time compliance task, think of it as part of owning a high performance home. Homeowners routinely track mortgage documents, appliance manuals, and home insurance renewals because those things protect value. Solar deserves the same attention. It is a building system with both environmental and financial returns, and it works best when the owner stays informed.
This approach also supports sustainability in a practical way. A well maintained solar system is more likely to operate efficiently, deliver the carbon savings you expected, and avoid premature replacement of expensive equipment. In other words, checking your warranty is not separate from climate conscious homeownership. It is one of the ordinary habits that helps a low impact home perform as intended.
Step 1: Gather every document connected to your solar installation
Your first step is to build a complete solar file. If your system was installed recently, this may be easy. If it was installed several years ago, or inherited when you bought the home, it may take more effort. Start by collecting the installation contract, the final invoice, permit and inspection records if you have them, manufacturer warranty sheets, equipment manuals, commissioning or activation documents, and any email correspondence that confirms product models or service commitments.
You should also locate your installer’s name, phone number, email address, and business address. If your installer is no longer operating, do not assume the warranty is useless. You may still be able to pursue product claims directly with the manufacturer if you have the serial numbers and proof of installation. This is one reason documentation matters so much. Installer disappearance is inconvenient, but it does not always eliminate your options.
Make sure to save your monitoring login credentials too. Many homeowners focus only on paper warranties and overlook digital access. In reality, your monitoring portal may be one of the most important tools you have for showing how the system has performed over time. It can help confirm when a problem started, whether output declined sharply, and whether the issue appears to be temporary or sustained.
A practical way to organize this is to create both a physical folder and a digital backup. Scan key documents, save them in clearly named folders, and include photos of labels and equipment. If your home is ever sold, or if you need to submit a claim years from now, this simple archive can save a great deal of stress.

What your solar file should include
- Original contract with installer or solar company
- Invoice and payment records showing installation date
- Product model numbers for panels, inverter, optimizer, and battery if present
- Serial numbers for major equipment
- Manufacturer warranty documents for each component
- Installer workmanship warranty terms
- Permit, inspection, or commissioning records if available
- Monitoring portal login credentials and screenshots of production data
- Roofing or third party warranty information if solar penetrations affect roof coverage
Step 2: Identify every component and match it to its warranty
Once your documents are together, list each major component in the system. Most homeowners know how many panels they have, but fewer know the exact inverter model, whether optimizers were used, or whether a battery carries a separate coverage schedule. Your goal here is to map every piece of equipment to a specific warranty and a responsible party.
For solar panels, you will usually see at least two forms of coverage. The first is a product warranty, sometimes called a materials or equipment warranty. This usually covers manufacturing defects in the module itself. The second is a performance warranty, which promises the panel will still produce a certain percentage of its original capacity after a stated number of years. Some modern modules now offer power output coverage extending to 30 years, reflecting improved durability and market competition.
For the inverter, the warranty is often separate and shorter. The same is true for battery systems, which may include limits based not only on years but also on cycles, throughput, or retained capacity. If your system includes optimizers, microinverters, combiner boxes, rapid shutdown devices, or other power electronics, those can have their own warranties as well.
Finally, look for the installer’s workmanship warranty. This is often the part homeowners overlook, yet it can be critical for issues involving wiring quality, flashing, roof penetrations, mounting hardware installation, or labor related defects. A manufacturer may cover a defective panel, but not the cost of correcting an installer’s error unless the installer’s own warranty addresses it.
Common warranty categories in a residential solar system
- Product warranty covering defects in the solar panels or other equipment materials.
- Performance warranty covering expected power output decline over time.
- Inverter warranty covering the central inverter, string inverter, or microinverters.
- Battery warranty covering battery hardware, retained capacity, or cycling limits.
- Workmanship warranty covering installation quality and labor related issues.
- Extended service agreement if you purchased additional maintenance or monitoring support.
This is also the moment to separate warranties from service plans. An extended service contract is not the same as the original manufacturer warranty. It may include inspections or labor coverage, but it may also have stricter conditions and shorter claim windows. Read it carefully rather than assuming it replaces the standard protections.
Step 3: Find the start date and duration of each warranty
A warranty period may begin on the purchase date, installation date, commissioning date, or interconnection date, depending on the company and product. That distinction matters. If your documents show different dates, do not guess. Confirm which one governs the warranty term. A few months can make the difference between an accepted claim and a denied one.
Create a simple table for yourself with columns for component, manufacturer, model number, serial number, warranty type, start date, end date, and contact details. This overview becomes the core of your solar record. It gives you a quick way to see what is still active and what should be planned for in the coming years.
Homeowners are often relieved to discover that some parts of the system still have coverage even when other parts do not. For example, a panel performance warranty may remain active long after the inverter warranty has expired. That does not solve every issue, but it does help you avoid broad assumptions like “the system is out of warranty” when only one component has aged out.
Step 4: Read the exclusions, not just the headline promise
This is where many warranty reviews become truly useful. A headline like “25 year warranty” can sound comprehensive, but the fine print usually tells a more limited story. Read the exclusions carefully. You are looking for details about what is not covered, what maintenance responsibilities belong to the homeowner, and what conditions could void a claim.
Common exclusions include damage from improper installation, unauthorized repairs, neglect, misuse, severe weather, fire, flood, vandalism, and modifications that were not approved by the manufacturer. Some warranties also require that products be installed according to specific standards or by qualified professionals. In Canada, this can connect to broader installation compliance expectations and best practice guidance for rooftop photovoltaic systems.
Pay close attention to labor costs as well. A warranty may cover the replacement part but not the shipping, diagnostic visit, removal, or reinstallation. In real world terms, that can still leave the homeowner with significant out of pocket costs. The best time to understand that is before a failure occurs.
If any wording feels vague, contact the installer or manufacturer and ask for clarification in writing. A short email exchange confirming what is covered is far more useful than an assumption made from memory.
Step 5: Confirm serial numbers and equipment labels
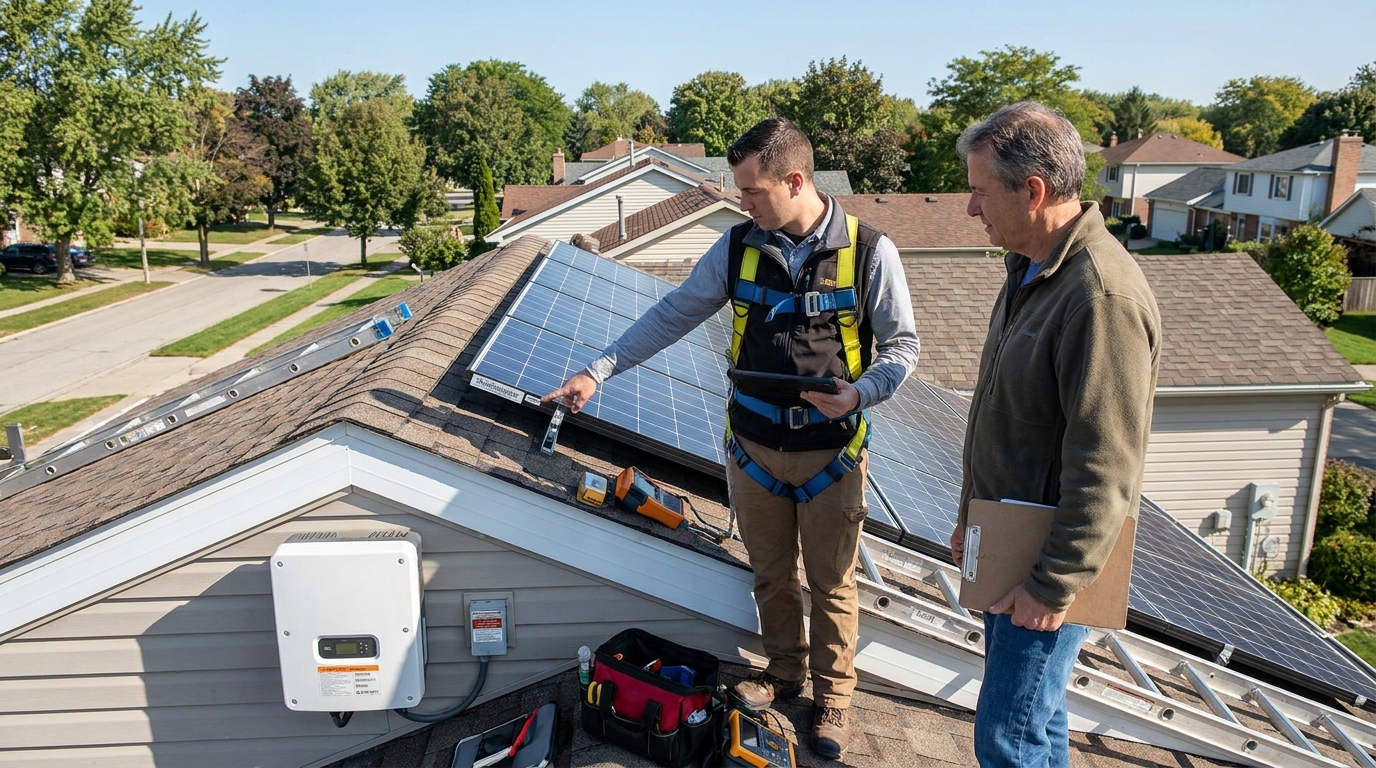
Serial numbers are often the link between your physical equipment and your legal coverage. If your documents do not include them, now is the time to record them. You may find labels on the back or side of the panels, on the inverter casing, inside a utility or equipment area, or within the commissioning package. If accessing a roof label is not safe, do not climb up casually. Ask your installer or a qualified technician for help, or use existing documentation if available.
Take clear photos of every accessible label and save them in your digital solar folder. Include wide context photos so it is obvious which device the label belongs to, then close ups so the text is readable. This becomes especially valuable if the manufacturer asks for proof during a claim or if labels fade over time.
Serial number tracking is also useful if the installer has closed, changed ownership, or lost records. A manufacturer may still be able to verify the product line and shipment history based on the serial number, even if you need to reconstruct the rest of the file yourself.
Step 6: Log into your monitoring portal and review system performance
Warranty checks are not only about dates and documents. They are also about whether the system is actually performing as expected. Log into your monitoring portal and look at daily, monthly, and annual production. If you have had the system for several years, compare current output with earlier periods while accounting for seasonality, weather, and any major shading changes such as tree growth or nearby construction.
Normal aging should be gradual. Industry research commonly places module degradation in the range of 0.5 percent to 1 percent per year. That means a slight decline does not necessarily indicate a defect. At the same time, homeowner guidance often notes that a year to year production drop greater than 10 percent can suggest maintenance issues that deserve attention. This is not a diagnosis on its own, but it is a helpful threshold for further investigation.
If your system appears to be underperforming, compare current data to the production estimate provided at installation, if you still have it. Also review whether all strings, modules, or microinverters are reporting normally. Sometimes the issue is not panel degradation at all. It may be an inverter fault, a disconnected optimizer, a communication error, or an outage that has not been properly logged.
Take screenshots of your production dashboard, especially if you notice a decline. Date stamped evidence is useful if you need to show that the issue was persistent and not just a short term weather event. It also helps when speaking with installers or manufacturers, because you can point to a trend rather than a vague concern.
Questions to ask when reviewing production data
- Has annual production declined gradually or suddenly?
- Is the decline within a normal aging range, or noticeably larger?
- Did the system ever stop reporting altogether?
- Are all modules or inverters showing activity?
- Has shading changed since installation?
- Have there been roof repairs, electrical work, or storms that may have affected performance?

Step 7: Separate normal wear from a potential warranty issue
This step requires some balance. Not every decline or fault means you have a valid claim. Solar systems are designed to age, and some replacement planning is expected over a 20 to 30 year performance horizon. Inverters, in particular, often need replacement before the panels themselves approach end of life. A battery may also lose usable capacity over time in a way that is normal under its warranty terms.
Your job is to determine whether the issue looks like expected wear or whether it may fall outside the promised standard. If a panel cracks internally without external damage, if an inverter fails well within its coverage period, or if a module’s output appears to drop faster than the performance warranty allows, those are stronger candidates for a formal claim. If the issue traces back to roof leaks around mounts, loose wiring, or flashing errors, the workmanship warranty may be more relevant than the product warranty.
It helps to frame the question carefully: What component appears to be affected, and what kind of failure is this? A precise description often leads more quickly to the right responsible party.
Step 8: Contact both the installer and the manufacturer when needed
Many homeowners contact only the installer and wait. In some cases that is appropriate, especially if the workmanship warranty or a monitoring service agreement is involved. But if you suspect an equipment defect, it is often wise to notify both the installer and the manufacturer. This creates a clearer record and reduces the risk of delays caused by uncertainty over responsibility.
When you reach out, be concise and organized. Include your address, installation date, model numbers, serial numbers, a summary of the issue, screenshots of monitoring data, and any photos that show the problem. Ask specifically whether the issue falls under product, performance, inverter, battery, or workmanship coverage. Also ask what documents they require to open a claim and whether there is a deadline for reporting the issue after discovery.
If the installer is unresponsive, document that too. Save emails, note phone calls, and keep a timeline. A clear paper trail is helpful if you eventually need to escalate to a manufacturer, financing provider, consumer protection office, or legal adviser.
A practical email structure for a warranty inquiry
- State your name, address, and installation date.
- Identify the equipment with model and serial numbers.
- Describe the issue factually and briefly.
- Attach or reference photos and production screenshots.
- Ask whether the issue is covered and what next steps are required.
- Request confirmation in writing.
Step 9: Check transfer rules if you bought or plan to sell the home
Solar warranties do not always transfer automatically when a home changes hands. Some require notice within a certain number of days after sale. Others may require transfer fees, proof of purchase, or formal registration. This is particularly important if you bought a home with existing solar and assumed all original protections came with it.
If you are a current owner who plans to sell, checking transferability now can make the process smoother later. Buyers are often reassured by clear documentation showing what remains under warranty, how the system has performed, and whether any equipment has already been replaced. In a competitive housing market, that kind of transparency can support confidence in the solar investment rather than raising questions.
For inherited systems, gather what you can from the previous owner, installer, and manufacturer. Even partial records can be enough to rebuild a warranty profile if you have the equipment information and installation address.
Step 10: Review provincial or state consumer protection context
Manufacturer warranties are written guarantees, but they exist within broader consumer protection frameworks. In Canada, warranty rights and implied protections can vary by province or territory. In the United States, similar variation exists across states, even though federal consumer guidance offers a general baseline for understanding warranties. This does not mean you need to become a legal specialist. It simply means your written warranty may not be the only source of protection if there is a dispute.
If you encounter a serious problem, especially one involving unclear representations or installation quality, it may be helpful to review your provincial or state consumer resources. Keep expectations realistic. Consumer protection systems do not replace a straightforward manufacturer claim, but they can provide context if communication breaks down or promised service is not delivered.
Common misconceptions that lead to missed warranty benefits
Some of the most expensive solar warranty problems come from simple misunderstandings. One common misconception is that a long panel warranty means the entire system is covered for the same period. In reality, the inverter, battery, and workmanship terms may be much shorter. Another is that a decline in output automatically means a panel defect, when in fact normal degradation, shading changes, or inverter issues may be responsible.
Homeowners also sometimes assume the warranty will cover any problem related to the solar system. That is rarely the case. Most warranties do not cover misuse, neglect, unauthorized repairs, or damage caused by improper installation if that problem belongs to another party. And while extended warranties can be useful, they are not interchangeable with the original manufacturer promises unless the contract says so clearly.
Perhaps the biggest misconception is that if the installer disappears, the warranty is effectively gone. That can be true for workmanship claims, but not necessarily for product claims. If you have the right serial numbers, installation records, and proof of ownership, you may still be able to work directly with the manufacturer.
How often should you check your solar warranty?
You do not need to read every warranty document every month. A practical rhythm is to do a full review once a year, ideally at the same time you review annual energy production. That way, your documentation and performance analysis stay connected. If you notice a significant drop in output, roof work is planned, the home will be sold, or a component is nearing the end of its warranty period, that is a good time for an additional check.
It is also wise to review the file after any major weather event or electrical service call. If work was done near the inverter, breaker panel, or roof penetrations, save those service records. Future warranty decisions may depend on whether the system was maintained properly and whether outside work affected the equipment.
Create a simple solar warranty checklist for the future
After you complete your review, turn it into a simple maintenance habit. Keep one page that lists all key dates, serial numbers, contacts, and logins. Add a note about expected component lifespans, especially if your inverter is moving toward the 10 to 15 year range. This does not mean failure is imminent. It simply means planning ahead is sensible.
Many homeowners find it helpful to save annual screenshots of total production and monthly output. Over time, this creates a straightforward performance history. If a claim ever depends on showing accelerated decline or intermittent faults, you will already have a baseline rather than trying to reconstruct it after the fact.
There is a quiet confidence that comes from this kind of record keeping. It turns solar ownership from something opaque into something understandable. That is valuable whether your priority is energy savings, resilience, lower emissions, or simply protecting a major home investment.
What to do if your warranty has already expired
An expired warranty does not mean your solar system is no longer worth maintaining. It simply shifts the conversation from coverage to lifecycle planning. If the panels are still producing well and only the inverter is aging, replacing that component may be an economical way to extend the life of the whole system. This is one reason industry conversations increasingly focus on repowering and long term maintenance, not only original installation.
Ask a qualified professional to assess the system before making major decisions. A targeted repair or component upgrade can sometimes restore strong performance without replacing everything. In sustainability terms, that is often the more thoughtful approach. It preserves usable materials, supports continued clean energy generation, and helps you get the full value from the system you already have.
Final thoughts: your warranty is part of the system
Solar ownership is often framed around hardware, but the supporting details matter just as much. Your warranties, performance records, serial numbers, and service history are all part of how the system works for you over the long term. When those pieces are organized, you are in a much stronger position to respond to problems early, make informed maintenance decisions, and preserve the value of your investment.
There is also something encouraging in this. Sustainable living does not have to mean mastering every technical detail. Often, it looks like practical stewardship. It looks like knowing what you own, keeping the right records, and checking in once a year to make sure the system is still doing the work it was meant to do. That is not complicated, and it is well within reach for most homeowners.
If you take one thing from this guide, let it be this: do not wait for a problem to learn your warranty. A simple review today can save time, money, and uncertainty later. More importantly, it helps you stay connected to the performance and purpose of one of the most meaningful upgrades your home can have.


No Comment! Be the first one.