


How to Conduct a Solar Panel Wiring Inspection: A Step-by-Step Guide for Homeowners
Solar panels are often described as low maintenance, and in many ways that is true. Once a residential system is installed correctly, it can operate quietly for years with only modest attention. Still, low maintenance does not mean no maintenance. A simple wiring inspection, done carefully and visually, can help you catch small issues before they affect safety, energy production, or the long term value of your system.
Table Of Content
- Why wiring inspections matter
- Start with safety first
- Basic safety checklist before you begin
- What documents to gather first
- Step 1: Review system performance before you look at hardware
- Step 2: Inspect the panels and visible rooftop wiring from the ground
- Step 3: Check accessible conduit and exterior cable runs
- Step 4: Examine junction boxes, combiner boxes, and disconnect areas visually
- Step 5: Inspect the inverter area
- Step 6: Check attic or interior roof entry points if safely accessible
- Step 7: Look for weather and pest related vulnerabilities
- Step 8: Know the red flags that mean stop and call a professional
- What a simple homeowner inspection routine can look like
- Sample maintenance rhythm
- Common misconceptions to leave behind
- How wiring inspection fits into broader solar maintenance
- Final thoughts
For most homeowners, the right approach is not electrical troubleshooting. It is observation, documentation, and knowing what is normal for your system. The U.S. Department of Energy notes that residential solar systems are installed to meet local building, fire, and electrical codes, and they are inspected by qualified professionals during installation. That foundation matters, because your goal now is to support that professional work with a practical routine that helps you spot changes early.
This guide walks through a homeowner friendly solar panel wiring inspection step by step. It focuses on accessible areas such as visible conduit, cable runs, junction boxes, roof entry points, disconnects, combiner boxes, and inverter connections. It also explains what not to do, because photovoltaic systems can include high voltage DC wiring that remains hazardous even when the equipment appears inactive.
If you take one idea from this article, let it be this: a wiring inspection is a visual maintenance check, not a DIY repair project. You do not need to remove covers, disconnect connectors, tighten terminations, or test live circuits to be an effective system owner. A calm monthly glance, a more detailed seasonal review, and timely professional service when needed can go a long way toward protecting both safety and performance.
Why wiring inspections matter
Solar systems depend on more than panels alone. Wiring connects each panel or string of panels to the rest of the system, carries power to the inverter, links safety equipment, and supports the overall reliability of your installation. When wiring components remain protected, secure, and dry, the system has a much better chance of operating efficiently for decades. When cables are damaged or terminations degrade, output can fall and safety risks can rise.
Many homeowners assume that if their inverter still shows production, all electrical components must be in good condition. That is a common misconception. A system can continue generating while a connector is deteriorating, a conduit fitting is loosening, or moisture is beginning to affect an enclosure. Small problems are often easier and less expensive to address when they are identified early, before they become repeated inverter errors, noticeable production losses, or visible heat damage.
Weather is one of the main reasons inspections are worth doing. Wind, hail, ultraviolet exposure, temperature swings, heavy rain, and snow loads can all put stress on cable insulation, connectors, seals, and mounting points over time. In some homes, rodents or birds create another layer of risk by chewing exposed materials or nesting near protected spaces. A good inspection routine helps you notice these changes sooner, especially after severe weather.
There is also a practical financial reason to pay attention. Solar is an investment in lower operating costs and cleaner energy, and wiring issues can quietly reduce production before a complete failure occurs. Pairing visual inspections with inverter or app based monitoring gives you a stronger, more modern maintenance strategy. It is a small amount of effort that can help preserve system efficiency and support warranty conversations if service is ever needed.
Think of wiring inspection as part of smart home stewardship. You are not trying to become a solar electrician. You are simply learning to recognize what looks orderly, intact, and normal, and what clearly does not.
Start with safety first
Before anything else, it is important to set clear limits around what a homeowner inspection should involve. Solar electrical work carries shock and arc flash hazards. PV systems can involve high voltage DC conductors, and those hazards do not disappear just because the sun is low, the inverter is quiet, or a system looks inactive from the outside. This is why professional standards, code compliance, and installer procedures matter so much.
Your inspection should stay visual and low risk. That means no opening sealed components unless the manufacturer explicitly allows it for owners, no handling exposed conductors, no unplugging connectors, no tightening lugs, and no testing circuits unless you are trained, equipped, and authorized to do so. If your system includes shutoff instructions for owners, follow them exactly and only when necessary. If you are not sure whether a step is safe, skip it and contact your installer.
It is also wise to choose your inspection conditions carefully. Do not inspect after dark with a flashlight on the roof, during high winds, during rain, or on icy surfaces. If any roof level view requires climbing in unsafe conditions, stay on the ground and use binoculars or your phone camera zoom. A safe inspection from the ground is far better than a risky close look.
Pay special attention to red flag conditions. If you see damaged insulation, exposed copper, melted materials, scorch marks, signs of arcing, cracked boxes, water inside enclosures, loose hanging wires, or storm damage to the array, stop there. Those are professional service issues, not homeowner maintenance tasks. If you smell burning near the inverter or disconnect, hear unusual buzzing, or receive repeated inverter fault alerts, contact a qualified solar electrician or your original installer promptly.
Basic safety checklist before you begin
-
Review your installer packet, operating manual, and any homeowner shutdown instructions for your specific system.
-
Wear closed toe shoes and avoid working alone if you are checking exterior areas around the home.
-
Keep the inspection visual. Do not touch conductors, remove covers, or attempt repairs.
-
Use a phone or notebook to document what you see rather than trying to fix it on the spot.
-
Plan to call a qualified professional if anything looks damaged, loose, scorched, wet inside an enclosure, or otherwise abnormal.
What documents to gather first
One of the most overlooked parts of solar maintenance is recordkeeping. Yet it is one of the simplest things you can do to make inspections easier and more accurate. If you have your as built drawings, single line diagram, installer photos, equipment manuals, warranties, and prior service reports, you have a baseline for what your system should look like. That context can make the difference between guessing and observing with confidence.
Your system documentation may show where conduit runs are expected, what type of inverter you have, where disconnects are located, and how the strings are arranged. It can also help you understand the names of the components you are seeing during an inspection. Even if you are not reading every technical detail, having those documents together in one folder or digital file makes future maintenance much smoother.
Monitoring records are equally useful. Pull up your inverter app or monitoring portal before your inspection and look at recent production trends. Are you seeing a sudden drop compared with similar weather days, a repeated fault code, or one section of the system underperforming if your software gives that level of detail? Production data does not diagnose a wiring issue by itself, but it helps you know where to pay attention and gives a professional better information if a service call is needed.
If you do not yet have a maintenance log, this is a good time to create one. Record the inspection date, weather conditions, what you reviewed, and whether you observed any changes. Save photos in a dedicated album. Over time, that simple habit can reveal gradual wear that would otherwise be easy to miss.
Step 1: Review system performance before you look at hardware
A smart wiring inspection often begins on your phone rather than at the panels. Open your monitoring app or inverter display and review the system status. You are looking for signs that something may be off, such as unexplained drops in production, repeated warnings, string level irregularities if available, or periods where the system shut down unexpectedly. Compare recent output with similar days or the same season in previous months, allowing for normal weather and shading differences.
This step matters because wiring issues do not always announce themselves visually at first. A loose connection or connector corrosion may begin as a performance problem before obvious physical damage appears. On the other hand, a production dip is not always a wiring problem. Dirt, snow, shade growth, or seasonal variation can also reduce output. The goal is not to self diagnose every change but to notice patterns that deserve closer attention.
Write down or screenshot anything unusual. If your inverter displays fault codes, note the exact code and the date. Many homeowners make the mistake of relying on memory, then struggling to explain intermittent issues when they contact service later. A quick screenshot can save time and help a technician connect your observations to the system history.
If everything looks normal in the monitoring software, that is useful information too. It suggests that your inspection is likely a preventive check rather than a response to a known problem. Preventive maintenance may feel uneventful, but that is often a sign that your routine is working as intended.
Step 2: Inspect the panels and visible rooftop wiring from the ground
From a safe location on the ground, look up at the array and scan slowly. You are not trying to see every connector in detail. Instead, you are looking for broad signs of damage or change. Check whether any panels appear shifted, cracked, heavily soiled in one section, or shadowed by new tree growth. If your array design allows you to see edge wiring from below or from a nearby upper window, look for anything hanging, sagging, or obviously out of place.
Roof level visual changes can point to wiring stress. A shifted panel or loosened racking component can sometimes pull against cable management points. Storm debris can also catch on exposed materials, and repeated wind movement may wear insulation over time if something comes loose. Even if you cannot inspect every wire directly, changes in the array itself can indicate that a closer professional evaluation is worth scheduling.
If you have safe access to an upper window or balcony that offers a better view, that can be useful as long as you stay well within safe boundaries. Use your phone camera zoom to document anything questionable. A photo taken now can help you compare later or send clear evidence to your installer without climbing onto the roof.
Be especially cautious after hail, windstorms, or falling branches. Broken modules, displaced panels, or visible debris around the array are all reasons to pause and bring in a professional. Panels are generally safe when intact, but storm damaged systems deserve extra respect and should not be approached casually.
Step 3: Check accessible conduit and exterior cable runs
Next, move to the accessible parts of the system at ground level or along exterior walls. Many residential systems route wiring through metal or UV rated conduit from the roof to the inverter or service equipment. Conduit is there to protect conductors, so your inspection should focus on whether that protective pathway still looks secure and weather tight.
Look for cracked conduit, missing straps, bent sections, loose fittings, separated joints, rust, impact damage, or signs that the conduit has pulled away from the wall. These kinds of issues may not mean the conductors inside are damaged, but they do suggest the wiring could be less protected than intended. Also check around penetrations where conduit enters the home or equipment. The sealant and flashing should appear intact, with no obvious gaps that would invite moisture.
If any cable runs are visible outside of conduit, inspect them visually for UV wear, abrasion, chewing, or sagging. Cable management is a surprisingly important part of solar longevity. Wiring should not be rubbing against sharp metal edges, drooping into standing water zones, or hanging in a way that invites movement in the wind. Homeowners should not reposition or secure these cables themselves unless the installer specifically designed a non electrical user adjustment, which is uncommon. Still, noticing a loose support point early can prevent bigger problems later.
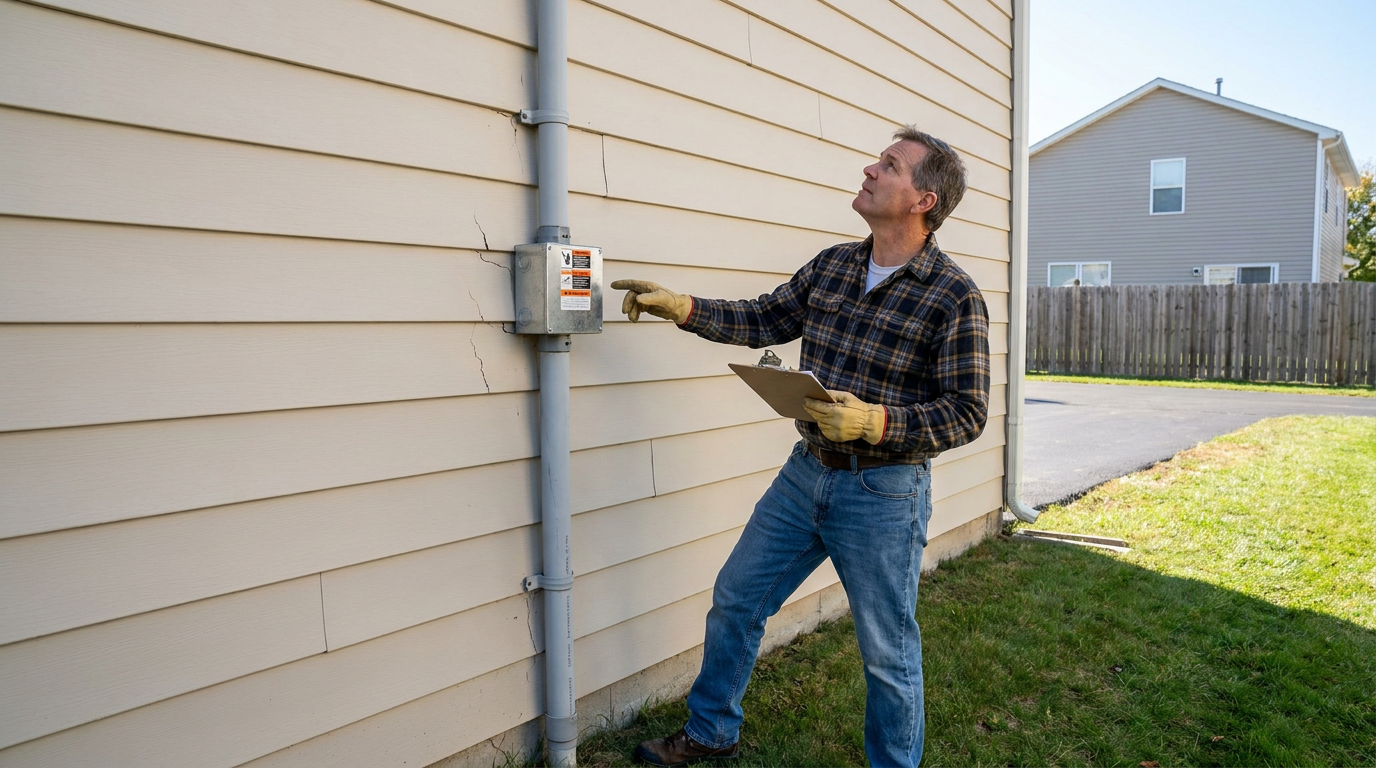
Take photos of any area that looks aged or questionable. Sometimes a fitting that seemed fine at first glance looks more concerning when viewed closely in a photo. Documentation also helps you track whether a small exterior issue is stable or gradually worsening over time.
Step 4: Examine junction boxes, combiner boxes, and disconnect areas visually
Many home solar systems include junction boxes, combiner boxes, disconnect switches, and related enclosures in accessible locations. These components are critical points in the electrical pathway, but they are also places where homeowners should be especially disciplined about staying visual. Do not open locked or sealed enclosures unless your manufacturer documentation clearly allows owner access and no exposed live components are present. In most cases, the inspection should happen from the outside only.
Look at the condition of each enclosure. The box should appear closed, properly mounted, and dry from the outside. Watch for cracks, corrosion, staining, warping, missing screws, insect entry, rodent activity, or water marks beneath the box. A weatherproof enclosure that suddenly shows discoloration or mineral streaking may be telling you that moisture has found a path in. Moisture is one of the most important warning signs in electrical equipment and should never be dismissed.
At disconnect switches, check that labels remain legible and the housing appears intact. If the switch handle position does not match the system state shown in your monitoring app, note it and contact a professional rather than testing it repeatedly. If you hear unusual sounds near any enclosure, such as crackling or persistent buzzing, step away and arrange service. Those are not normal homeowner maintenance findings.
This is also a good moment to confirm that emergency information remains easy to find. Safety labels, circuit directories, and shutoff instructions should stay readable over time. If labels have faded due to sun exposure, ask your installer about replacing them. Clear labeling supports both household safety and faster response if service is ever needed.
Step 5: Inspect the inverter area
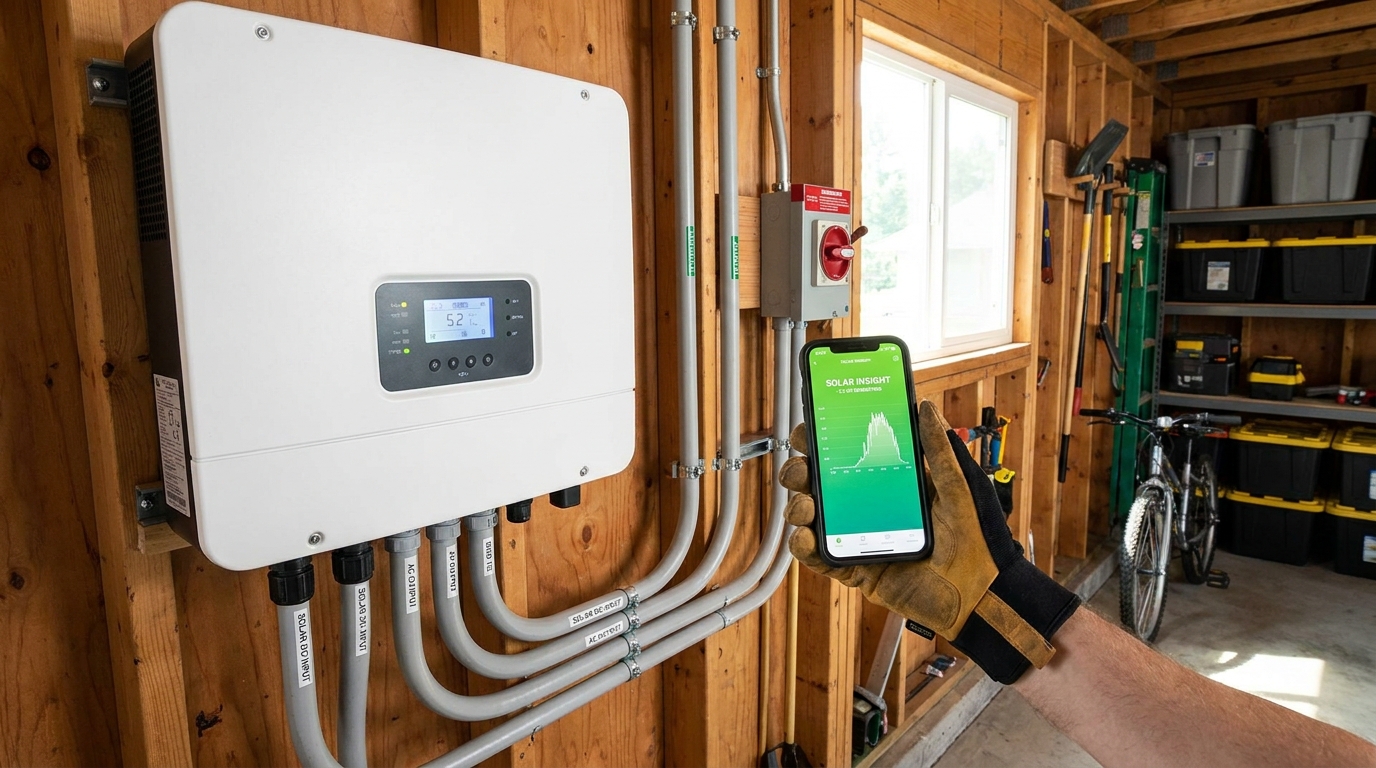
The inverter is often the heart of a homeowner inspection routine because it combines visible hardware with useful status information. Start by checking the area around the inverter itself. It should be clean, dry, and free from stored items that block airflow. If your inverter is in a garage or utility room, avoid stacking boxes around it, and make sure vents are not obstructed. Overheating can affect performance and may complicate troubleshooting.
Then look at the visible conduit and cable entries into the inverter. Are the fittings snug and aligned? Do you see rust, cracking, stains, or insect activity around the entry points? Is there any sign of melted plastic, darkened material, or a burnt smell? These are all reasons to stop and contact a professional. You should not remove the inverter cover or attempt to inspect internal wiring.
Use the inverter display or app to cross check system status while you are standing there. If you have a recent fault code, listen and look for anything unusual but keep your distance from electrical terminations. Repeated inverter faults can sometimes point to wiring or connector issues upstream, especially if they coincide with weather events or production drops. They can also indicate other equipment problems, so avoid assumptions and focus on recording the evidence.
If your system includes rapid shutdown or arc fault protection, the inverter documentation may mention related notifications or normal indicator lights. These systems exist to improve safety, but they do not make the wiring harmless to inspect physically. Think of them as an added layer of protection, not a reason to become hands on.
Step 6: Check attic or interior roof entry points if safely accessible
Some homes have accessible attic or utility space views where solar conduit or roof penetrations can be seen. If you can inspect these areas safely from a stable surface with adequate lighting, they are worth including in your routine. Look for water staining, damp insulation, signs of pests, or daylight where it should not be visible around a penetration. Wiring problems are not always the issue in these spaces. Sometimes the bigger concern is a compromised seal that could eventually affect both the electrical system and the building envelope.
If conduit runs through the attic, observe whether it appears supported and undisturbed. A clean, intact pathway is what you want to see. If there are visible signs of chewing, nesting, or debris around the route, note them. Rodent damage is a real maintenance issue for some solar systems, especially where wiring is accessible to animals. Again, do not touch or move wiring. Pest related signs should be documented and addressed through both solar service and pest control as needed.
Interior spaces can also reveal long term moisture patterns that are harder to notice outside. Slight staining near a roof entry point may not look dramatic, but it can justify a professional roofing or solar inspection before damage spreads. Solar maintenance works best when it supports the house as a whole, not just the power equipment.
Step 7: Look for weather and pest related vulnerabilities
Extreme weather is an increasingly important part of solar ownership. Even well installed systems can be affected by years of expansion and contraction, repeated wind exposure, hail strikes, heavy snow, or debris impact. That is why post storm inspections are becoming a standard best practice. After a significant weather event, conduct a careful visual review from the ground and around accessible equipment areas, then compare your observations with normal system performance in the app.
Watch for displaced panels, bent conduit, loosened attachment points, damaged seals, moisture near electrical equipment, and sudden fault alerts. If there was flooding near ground mounted equipment or wall mounted disconnects, treat that seriously even if the system still appears to be operating. Water exposure changes the safety picture and should be evaluated professionally.
Pests deserve similar attention because they can create hidden problems over time. Rodents may chew insulation. Birds may nest under arrays. Insects may enter compromised boxes. You do not need to see the exact damage to suspect a problem. Droppings, nesting material, scratching sounds, or repeated debris buildup near wiring routes can be enough reason to schedule service.
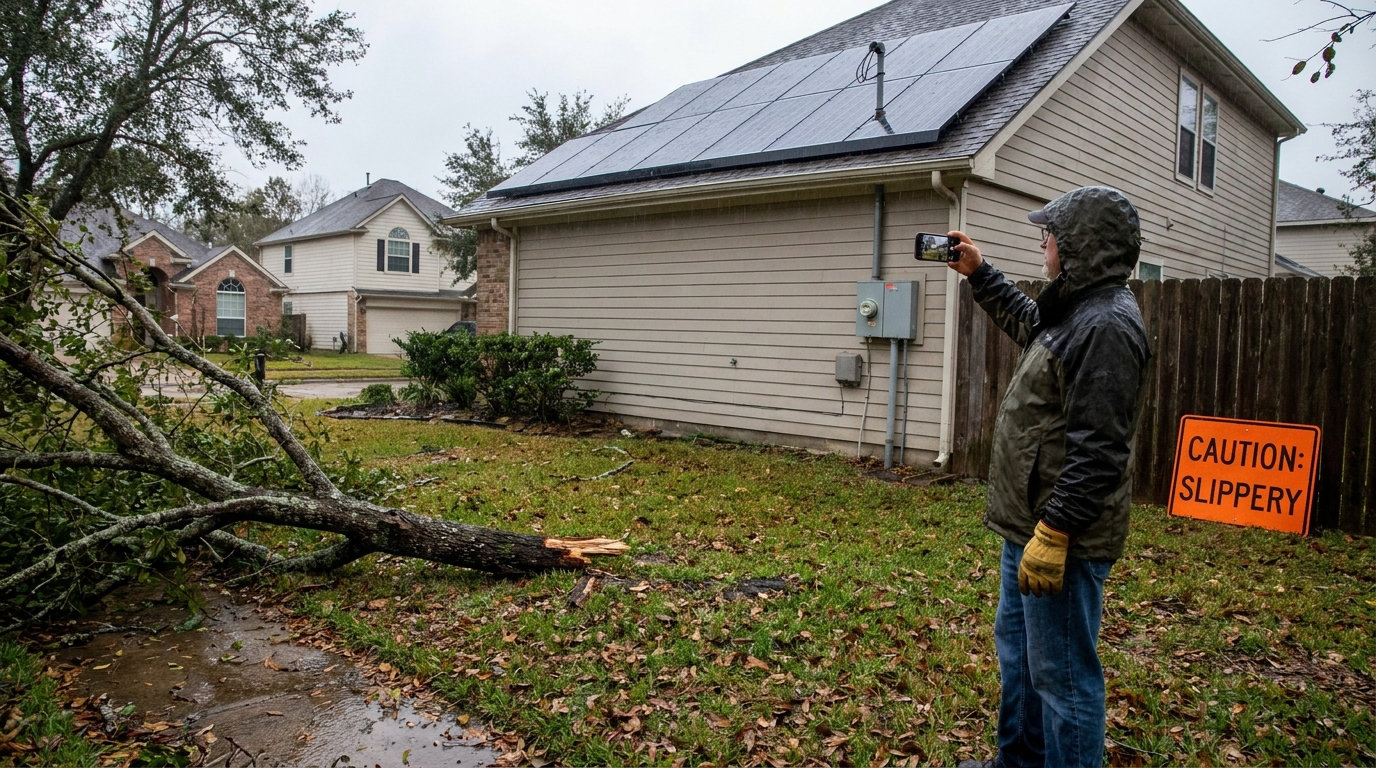
One of the most helpful habits is to perform a quick weather follow up within a day or two of any major storm. A short check after wind, hail, or heavy rain can catch fresh problems while they are still easy to document. It also gives you a more accurate timeline if you need to file a warranty or insurance claim.
Step 8: Know the red flags that mean stop and call a professional
Homeowner maintenance is valuable, but only when paired with good judgment about where its limits are. Certain findings should end your inspection and trigger a service call. These include damaged insulation, exposed conductors, melting, burn marks, discoloration that suggests overheating, cracked or broken panels, water inside or entering enclosures, loose hanging wires, disconnected connectors, repeated inverter shutdowns, and any sign of smoke or burning odor.
It is also worth escalating if your production falls unexpectedly and does not recover after obvious non electrical causes are ruled out, such as temporary snow cover or a new shading event. A minor production drop is not always dirt or seasonality. Wiring faults, connector corrosion, failed strings, or inverter side issues can all contribute. Your role is not to determine which one with certainty. Your role is to notice the change and communicate it clearly.
If you are ever tempted to tighten a connector, splice a cable, replace a fitting, or climb onto the roof to get a better look, pause there. Those are exactly the moments when a practical inspection can drift into unsafe territory. Solar systems reward restraint. A careful observer with photos and notes is far more helpful than a well meaning homeowner who has accidentally altered evidence or created a new hazard.
What a simple homeowner inspection routine can look like
The easiest way to make wiring inspection sustainable is to turn it into a light, repeatable routine rather than a major project. A monthly glance at your monitoring app only takes a few minutes. That quick review helps you catch unusual output patterns, error messages, or communication issues before they linger too long.
Each season, set aside a bit more time for a visual walkaround. Check the array from the ground, inspect visible conduit and enclosures, review the inverter area, and note any signs of weathering or pests. If your property has trees, include a look at whether branches are creating new shade or increasing debris risk. Trimming vegetation, where appropriate, is part of protecting solar performance and reducing wear.
After severe weather, perform an additional check even if the system seems fine. Storms are one of the most common reasons a system that looked stable last month may now need attention. And every few years, or according to installer guidance, consider a professional inspection as preventive maintenance. A trained technician can evaluate torque, terminations, grounding and bonding, internal components, and other details that are not appropriate for homeowners to handle.
Sample maintenance rhythm
-
Monthly: review inverter app or monitoring portal for output changes, fault codes, and offline periods.
-
Seasonally: perform a visual inspection of the array from the ground, accessible conduit, boxes, inverter area, and roof entry points.
-
After major storms: document visible changes, compare production trends, and contact a professional if anything looks abnormal.
-
As recommended by your installer: schedule periodic professional maintenance or diagnostic inspection.
Common misconceptions to leave behind
One common misconception is that solar wiring is maintenance free forever once installed. In reality, the system is designed for long term durability, but all exterior building systems experience wear. Sun, rain, movement, and pests do not ignore wiring simply because it is part of a renewable energy system. Maintenance can be minimal without being nonexistent.
Another misconception is that a system producing power must be electrically safe in every respect. Output alone does not verify that every connector, enclosure, and cable support is in good condition. A system can still generate while a component is deteriorating, and that is one reason inspections and monitoring matter together.
Homeowners also sometimes assume that every small performance dip is caused by dirt or shade. Those factors are common, but they are not the whole story. A wiring issue can reduce output as well, which is why repeated underperformance deserves a broader look. And finally, there is the idea that a handy homeowner should be able to tighten or replace simple connectors. With solar, that is not a safe assumption. Even modest looking work can involve serious electrical risk and code implications.
How wiring inspection fits into broader solar maintenance
Wiring inspection works best as one part of a thoughtful solar care routine. Cleaning panels when appropriate, keeping nearby vegetation under control, checking racking and roof seals visually, and reviewing your monitoring data all support the same larger goal: maintaining safe, efficient, low impact energy production over time. The wiring itself may only be one piece of the system, but it connects every other piece together.
There is also a bigger sustainability lesson here. Long lasting clean technology depends on attentive stewardship. Taking a few practical steps each season helps your existing system perform better for longer, which is often one of the most effective forms of sustainable living. It is not about perfection. It is about preserving what you have already invested in, with calm consistency rather than urgency.
For homeowners who want to be more proactive, the best next step is often organizational rather than technical. Keep your documents in one place, label your photos by date, learn what your inverter messages mean at a basic level, and establish a relationship with a qualified solar service provider before you urgently need one. That kind of preparation makes every future inspection easier and less stressful.
Final thoughts
A solar panel wiring inspection does not need to be complicated to be worthwhile. In fact, the most effective homeowner approach is often the simplest: observe carefully, monitor performance regularly, document what you see, and bring in a qualified professional whenever a problem goes beyond the visible and obvious. That balance protects safety while still giving you an active role in maintaining your system.
Residential solar is designed to be a durable, practical part of everyday housing. With a steady maintenance rhythm, you can help your system stay that way. A few minutes of attention each month, a more thorough visual check each season, and a healthy respect for electrical safety can support reliable energy production for years to come.
If your system has been trouble free, this kind of inspection will likely feel reassuring rather than dramatic. That is a good outcome. Maintenance is often at its best when it quietly confirms that everything is working as it should. And when something does change, you will be ready to catch it early, respond thoughtfully, and protect both your home and your renewable energy investment.



No Comment! Be the first one.