


How to Safely Remove Snow and Debris from Your Solar Panels
Solar panels are built to handle the seasons, but winter still changes how they perform. Snow accumulation, ice buildup, and organic debris can temporarily reduce energy production, even when the system itself is in good condition. For homeowners, the challenge is knowing how to respond without creating a bigger problem through unsafe cleaning methods or accidental panel damage.
Table Of Content
- Why snow and debris matter for solar performance
- Do you need to remove snow from solar panels at all?
- How panel angle affects snow shedding
- The safest winter maintenance mindset
- When it is safe to remove snow yourself
- Tools that are generally safest for homeowners
- Recommended tool characteristics
- Tools and methods to avoid completely
- Step-by-step: how to remove light snow safely
- How to handle ice on solar panels
- Removing leaves, needles, dust, and bird droppings
- Common debris sources that reduce solar output
- What to inspect after heavy snow or winter storms
- Warning signs that deserve professional attention
- When to stop and call a professional
- How to monitor performance during winter
- Prevention is more effective than frequent cleaning
- Misconceptions that lead to risky winter maintenance
- A simple homeowner checklist for winter solar care
- Final thoughts: protect the system by slowing down
The reassuring news is that most winter solar maintenance is about observation, patience, and prevention, not constant intervention. In many cases, snow will melt or slide off naturally once sunlight returns and temperatures shift. That means the safest decision is often to leave the array alone, monitor output, and only step in when a small, low-risk action can be done from a secure position.
This guide focuses on practical, homeowner-friendly ways to remove snow and debris when it is actually necessary. It also explains when to stop, when to wait, and when it is worth bringing in a qualified solar professional. If you approach winter maintenance with a steady, cautious mindset, you can protect your energy production while also protecting your roof, your equipment, and your own safety.
Key principle: Treat solar panels as precision energy equipment, not as ordinary roof surfaces. What seems like a quick cleanup can cause scratches, microcracks, slips, falls, or hidden electrical damage if done carelessly.
Why snow and debris matter for solar performance
Solar panels need access to light, so anything that blocks that light can affect production. A heavy blanket of snow can cover an array completely, while leaves, dust, bird droppings, and pine needles can create smaller shaded spots across the glass. Even minor shading matters because solar modules are made of interconnected cells, and a small obstruction can reduce output more than many homeowners expect.
Winter conditions can also make other issues easier to miss. Shorter days already reduce total solar generation, so underperformance caused by snow or debris may blend into the season unless you are paying attention to your monitoring app or inverter readings. That is one reason winter maintenance is increasingly tied to performance tracking, not just visual cleaning.
There is also a structural and safety side to the conversation. In Canada and northern parts of the United States, roof snow loads can become part of broader winter planning. A solar array may be designed for local conditions, but deep accumulation still affects access, visibility, drainage, and how safely someone can move around the property after a storm.
Importantly, a drop in output does not always mean your panels need manual cleaning. Authoritative U.S. guidance from the Department of Energy and the National Renewable Energy Laboratory notes that most snow will naturally melt or slide off solar panels, especially on steeper roof pitches and panel tilt angles. The practical takeaway is simple: a temporary production dip is normal in winter, and immediate cleaning is not always the best response.
Do you need to remove snow from solar panels at all?
This is the first question every homeowner should ask, because the safest winter maintenance is often the maintenance you do not perform. Solar panels are typically dark, smooth, and installed at an angle, all of which help encourage snow shedding once sunlight warms the surface. Steeper tilt angles generally perform better here, and some systems clear themselves relatively quickly after a storm.
If the snow layer is light and the forecast includes sun or slightly warmer weather, waiting can be the smartest option. You avoid the risk of climbing onto an icy roof, you reduce the chance of damaging the panel glass, and you let the system behave as designed. This matters because many homeowners overestimate the benefit of immediate snow removal and underestimate the hazards involved.
On the other hand, there are situations where some manual help may be reasonable. If panels are low enough to access safely from the ground, if the snow is light and dry, and if you can use a soft roof-safe tool without forcing or scraping, a careful cleanup may restore production sooner. The key is that the method must be genuinely low risk. If it involves steep roof access, unstable footing, or hard tools, it is no longer a good homeowner task.
It can help to think of winter solar care as a balance between energy yield and equipment protection. The goal is not to clear every panel after every snowfall. The goal is to support long-term system performance without exposing yourself or the array to unnecessary harm.
How panel angle affects snow shedding
Not all solar installations behave the same way in winter. One of the biggest factors is tilt angle. Panels mounted at steeper angles tend to shed snow more effectively, while flatter arrays often hold onto it longer. Department of Energy guidance has noted that tilt angles up to roughly 60 degrees can be more effective at shedding snow and hail than lower-angle installations.
For homeowners, this helps explain why your neighbor’s array may clear faster than yours after the same storm. It does not necessarily mean one system is defective. Roof pitch, orientation, panel surface temperature, wind exposure, and the type of snow all influence how quickly an array clears itself.
This is also a useful reminder for anyone planning a new system in a snowy climate. Winter performance is shaped as much by design decisions as by seasonal maintenance habits. In regions with regular snow events, mounting configuration, local snow-load engineering, and installer experience can matter more over the long term than any cleaning tool you buy later.
The safest winter maintenance mindset
Homeowners sometimes approach snow-covered panels with the same instincts they use for a driveway, walkway, or car windshield. That comparison is understandable, but it is not appropriate for photovoltaic equipment. Solar modules have glass surfaces, aluminum frames, wiring, connectors, and internal cells that can suffer from scratches, impact stress, and hidden microcracks.
The safest mindset is to focus on what you can inspect and manage without stepping onto the roof or touching the panels directly. That usually means checking output in your monitoring app, looking up at the array from the ground, noting any unusual accumulation, and confirming that no branches, ice dams, or roof drainage issues are affecting the system area.
If cleaning is needed, aim for the least invasive action possible. Use soft tools only. Remove only what is easy to reach safely. Stop the moment conditions feel unstable, visibility is poor, or the snow depth suggests that waiting or calling a professional is the wiser path. Calm decisions are often the most cost-effective ones in solar maintenance.
When it is safe to remove snow yourself
A homeowner may be able to remove snow from solar panels safely when several conditions are true at once. First, the array must be accessible from the ground or from a very stable, non-icy location that does not require walking on the roof. Second, the snow should be light enough to move gently with a soft tool rather than packed, frozen, or bonded to the glass.
Third, weather conditions should be stable. Good visibility, no active snowfall, no freezing rain, and no slippery surfaces nearby are all important. If temperatures have caused the snow to turn to ice, that is usually a clear sign to stop. Ice should not be chipped, scraped, or pried from the panels.
Finally, you should be able to work without reaching awkwardly, stretching excessively, or placing yourself under a sliding snow load. A sudden release from the panel surface can send snow and ice down quickly. Safe positioning matters just as much as tool choice.
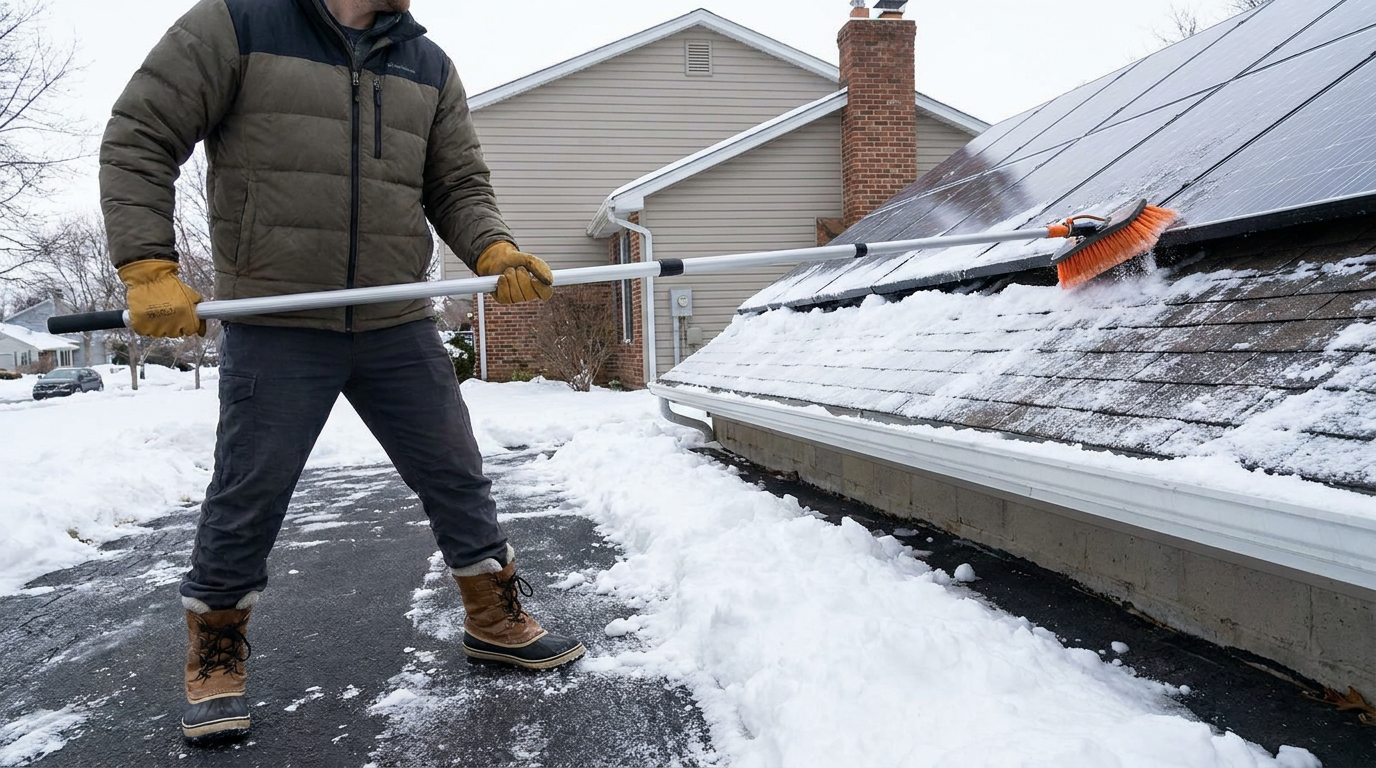
Tools that are generally safest for homeowners
If you decide a small amount of snow or debris can be removed safely, the right tool makes a significant difference. The best options are designed to be soft, non-abrasive, and usable from a distance. You are not trying to scrub the glass. You are trying to encourage light material to slide away without scratching or stressing the module.
The most practical homeowner tools usually include telescoping poles fitted with soft-bristle heads or roof-safe brushes intended for solar panels. Some homeowners also use foam-headed snow removal tools designed for delicate exterior surfaces, provided they are clean, soft, and used gently. Ground-level access is always preferable, especially for lower roof edges or garage-mounted arrays.
What matters most is not the brand name but the softness and control of the tool. A clean soft-bristle broom can be appropriate for reachable areas, while rough push brooms, metal-edged tools, or anything stiff enough to scratch glass should be avoided. Before each use, inspect the tool for grit, sand, or embedded debris that could mark the panel surface.
Recommended tool characteristics
- Soft bristles or foam contact surfaces
- Long telescoping reach to reduce the need for climbing
- Lightweight construction for controlled movement
- Non-metal contact points where the tool touches the panel
- Clean surfaces free from dirt, grit, or ice
Tools and methods to avoid completely
Some winter cleaning habits can cause far more damage than the snow itself. Shovels, ice scrapers, metal rakes, and sharp tools should never be used on solar panels. These can scratch the glass, dent frames, loosen hardware, and create cracks in the cells beneath the surface. Even if a panel still looks intact afterward, hidden microcracks may reduce output over time.
Homeowners should also avoid pressure washers in freezing conditions or any cleaning method that involves sudden temperature shock. Throwing hot water onto cold panels may seem convenient, but rapid temperature changes are not a good idea for glass and can create icy runoff on roofs, walkways, and ladders. The result is often more risk with very little real benefit.
Most importantly, do not stand on the panels and do not walk on an icy roof to reach them. Department of Energy guidance specifically warns against stepping on modules and using shovels or forceful removal methods. Rooftop slips and falls are one of the most serious winter hazards, and no short-term production gain is worth that risk.
Step-by-step: how to remove light snow safely
If your array is accessible from the ground and the snow is light, dry, and loose, a careful cleaning process may help. Keep expectations modest. The objective is to remove what comes away easily, not to force the panels completely clear.
- Check conditions first. Confirm that surfaces around you are stable and not icy. Look for overhead hazards, falling snow zones, and any sign that the roof edge could shed material onto your position.
- Inspect the array visually. If you see cracked glass, bent frames, hanging wires, or anything unusual, stop and call a professional. Do not touch a damaged solar system.
- Use a clean, soft telescoping tool. Start from the lower edge of the accessible panel area and move gently upward or across with minimal pressure. Let gravity do most of the work.
- Do not scrape. If the snow does not move easily, it is likely compacted or bonded by ice. That is your signal to stop rather than press harder.
- Clear only what you can reach comfortably. Partial clearing can still help restore exposure to sunlight, especially if lower sections begin warming and encourage additional shedding.
- Step away and monitor. Once the easy material is gone, let the remaining snow melt or slide naturally. Then watch system output over the next day or two.
This kind of method is intentionally conservative. Many homeowners are tempted to finish the job once they start, but restraint is part of safe maintenance. If conditions or reach are not ideal, stopping early is often the correct decision.
How to handle ice on solar panels
Ice deserves its own category because it is more dangerous and less homeowner-friendly than snow. Snow may brush away lightly, but ice often bonds to the surface and should not be chipped, scraped, or forcibly removed. Attempting to break it loose can scratch the glass, crack the cells, damage the frame seal, or cause the tool to slip unexpectedly.
In most cases, the best approach to ice is patience. Sunlight, ambient warming, and the panel’s dark surface often help with gradual thawing. If temperatures stay low and ice persists, monitoring the system is more appropriate than aggressive cleaning. A temporary production drop is frustrating, but a broken module is much more expensive.
If ice appears alongside other warning signs such as visible frame separation, unusual noise, water intrusion near wiring, or flashing inverter errors, that points to a larger maintenance issue. At that stage, a qualified solar professional should inspect the system rather than a homeowner improvising a fix.
Removing leaves, needles, dust, and bird droppings
Debris removal is generally less risky than snow removal, but it still needs care. Leaves, pine needles, dirt, pollen, and bird droppings may not look dramatic from the ground, yet they can cause localized shading that reduces production. Over time, debris can also collect at panel edges, around clamps, or near drainage paths, allowing moisture and grime to linger longer than they should.
Many homeowners will notice this kind of buildup in late fall, during winter wind events, or in early spring after snowmelt exposes what was trapped on the array. If the system is accessible from the ground, a soft-bristle telescoping brush can often remove dry surface debris gently. For anything stuck to the panel, light contact is still the rule. There should be no scraping or hard rubbing.
When conditions are not freezing and the manufacturer permits it, some homeowners use clean water and a soft tool for grime that will not lift dry. However, winter is often not the ideal time for wet cleaning because water can refreeze on the roof or surrounding surfaces. If debris is stubborn, moderate temperatures and a professional cleaning may be the better option.
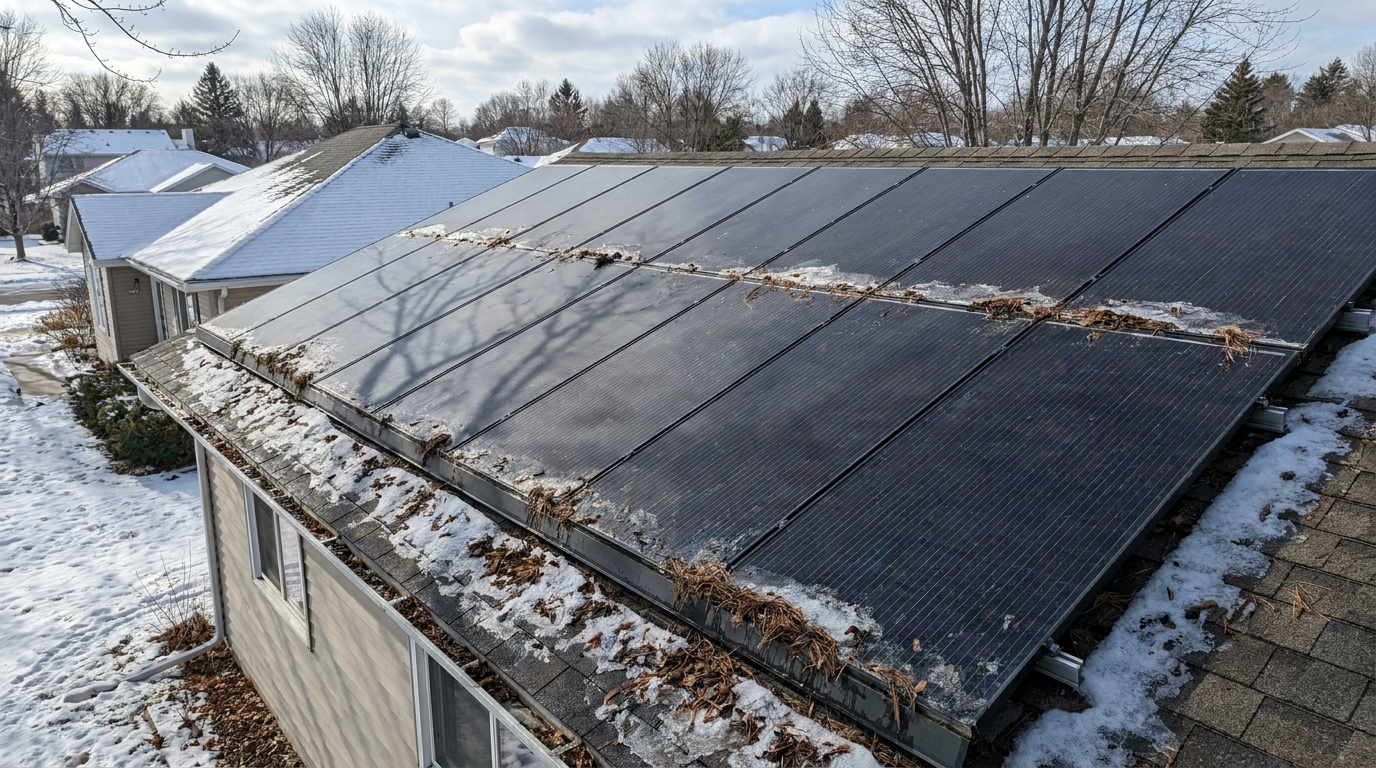
Common debris sources that reduce solar output
- Leaves trapped along the bottom edge of modules
- Pine needles collecting in corners and around mounts
- Bird droppings creating concentrated shaded spots
- Dust and pollen film reducing light transmission
- Branches and twigs dropped after wind or storms
What to inspect after heavy snow or winter storms
Snow removal is only one part of winter solar maintenance. Storms can create hidden damage even when the panels appear intact from a distance. Mechanical stress from snow load, freeze-thaw cycles, hail, and wind can contribute to cracked cells, warped modules, detached frames, loosened hardware, or compromised wiring. These issues may reduce output slowly or create more immediate safety concerns.
After a major weather event, do a visual inspection from the ground and compare what you see to normal conditions. Look for new sagging, uneven panel alignment, visible debris impact, or anything hanging below the array. Then check your monitoring data for a sudden performance drop that cannot be explained by weather alone.
If your system has multiple strings or module-level monitoring, compare one section of the array to another. A single panel, string, or optimizer behaving differently may point to storm-related damage rather than ordinary winter variation. Homeowners do not need to diagnose the electrical cause themselves, but noticing the pattern early is valuable.
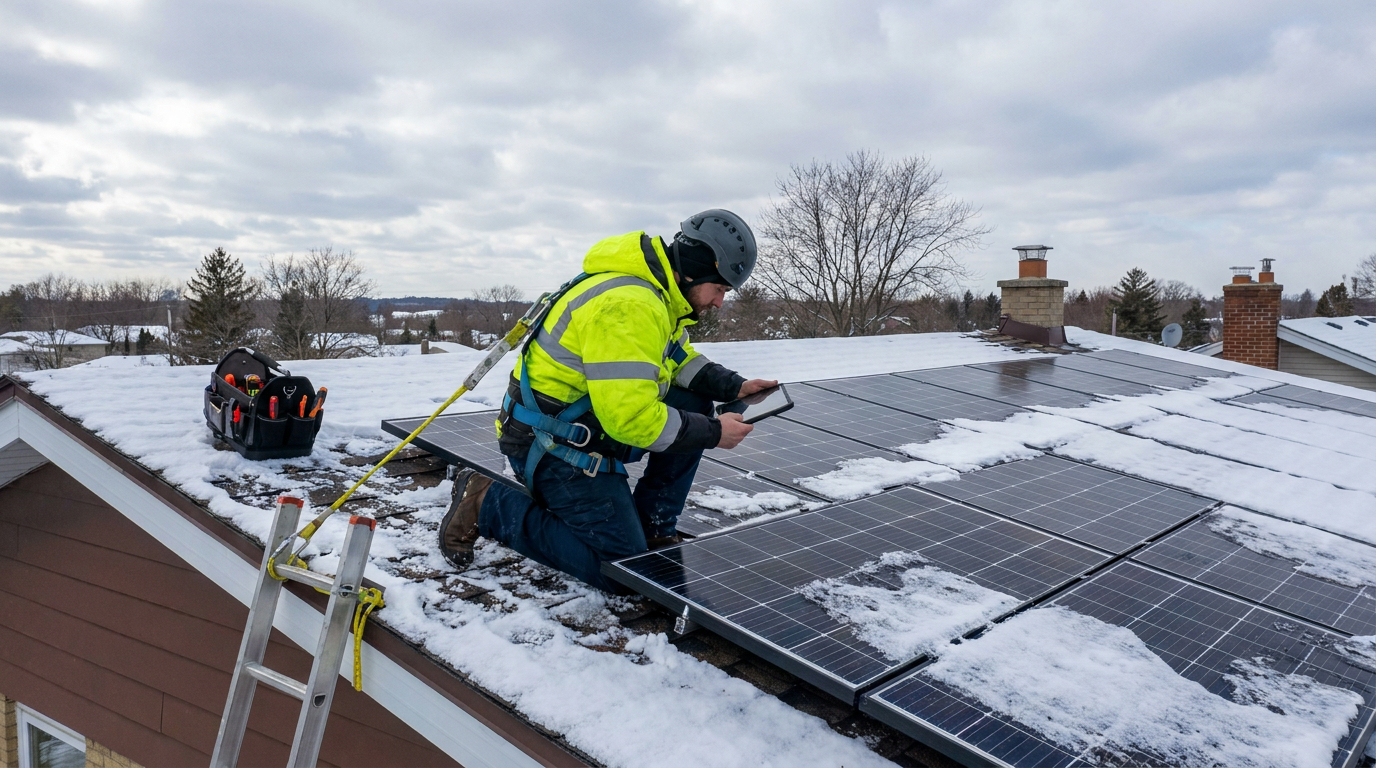
Warning signs that deserve professional attention
- Cracked glass or visible impact marks
- Loose or detached frame sections
- Panels shifted out of alignment
- Exposed, hanging, or chewed wiring
- Persistent inverter errors or rapid production loss
- Burn marks, unusual smells, or signs of moisture intrusion
When to stop and call a professional
There is real value in knowing your limits as a homeowner. If the roof is steep, the panels are buried under deep snow, access is blocked by ice, or the system sits high above the ground, that is already enough reason to bring in qualified help. Professional crews have the right access equipment, safety training, and panel-safe methods to inspect and clean the array without improvisation.
You should also call a professional if you suspect damage rather than simple snow cover. Cracked glass, bent rails, loose hardware, disconnected wiring, and unexplained underperformance all go beyond routine maintenance. Solar equipment combines structural and electrical systems, and trying to repair either one without training can create serious hazards.
Another overlooked scenario is when the array is so deeply buried that snow-removal crews or contractors may not even see it clearly. Department of Energy guidance notes that physical markers and signage can help prevent accidental impact damage in these conditions. In high-snow areas, this kind of preventive planning is often more useful than repeated manual clearing after each storm.
Good rule: If your cleaning plan requires courage more than caution, it is probably not the right plan.
How to monitor performance during winter
One of the smartest things a homeowner can do in winter is use data, not guesswork. Your inverter portal or solar monitoring app can tell you whether a snow event caused a brief production dip or whether the system is struggling longer than expected. This makes it easier to decide whether waiting is reasonable or whether an inspection is needed.
Look for broad trends rather than single low-output hours. Production will naturally vary with shorter daylight, cloud cover, low sun angles, and fresh snowfall. What matters is whether output returns to an expected seasonal range after conditions improve. If it does not, debris buildup or hidden damage may be worth investigating.
It can be helpful to keep a simple maintenance log with storm dates, estimated snow depth, any debris removal you performed, and any changes in production. Homeowners and installers are paying more attention to documented maintenance events because this record can reveal persistent winter underperformance or help explain degradation over time.
Prevention is more effective than frequent cleaning
The most sustainable approach to winter solar maintenance is to reduce the need for intervention in the first place. Good system design, proper installation, and seasonal observation usually do more for long-term performance than repeated manual snow removal. This is particularly true in regions with frequent storms, where aggressive cleaning after every event can increase wear and safety exposure.
Trim overhanging branches before winter if they commonly drop needles, leaves, or twigs onto the array. Keep surrounding roof drainage paths clear so melting snow and runoff can move away as intended. If your property uses snow-removal services, mark the array location clearly when rooflines or ground-mounted systems become difficult to see after major accumulation.
For homeowners considering a new system, ask installers about snow shedding, mounting strength, regional snow-load assumptions, and safe access for future inspection. A practical conversation at the design stage can prevent a great deal of winter frustration later.
Misconceptions that lead to risky winter maintenance
Several common myths push homeowners toward unnecessary cleaning. One is the idea that panels must be perfectly clear to work at all. In reality, partially exposed areas may still produce power, and many systems recover naturally as sun and temperature improve. Another misconception is that every snowfall should be followed by immediate action. Often, waiting a day is both safer and more effective.
Another persistent myth is that if a panel looks fine after winter, it must be undamaged. Unfortunately, that is not always true. Microcracks and internal stress can exist without obvious visible breaks, which is why unusual production data after a storm should not be ignored simply because the array still looks neat from the yard.
Finally, many people assume that common snow tools are acceptable as long as they are used gently. They are not. Solar modules should never be treated like siding, patio glass, or a windshield. Their performance depends on surfaces and internal components that are durable, but not invulnerable.
A simple homeowner checklist for winter solar care
If you want a practical routine, keep it simple and repeatable. The best maintenance habits are the ones you can sustain without stress and without taking risks during bad weather. A few calm checks each month are usually more useful than one dramatic cleanup attempt after a storm.
- Review monitoring data after major snowfalls and compare to typical winter output
- Visually inspect panels from the ground for buildup, shifting, or damage
- Remove only light, reachable snow with a clean soft tool from a safe position
- Clear nearby branches or obvious debris sources when conditions are safe
- Document storms, maintenance actions, and any unusual performance trends
- Arrange a professional inspection if damage or persistent underperformance is suspected
Final thoughts: protect the system by slowing down
Solar panels are a long-term investment, and winter maintenance should support that long view. While snow and debris can affect production, the bigger risk for many homeowners is trying to solve the problem too aggressively. The safest and most effective approach is usually a combination of patience, light-touch cleaning only when conditions are clearly safe, and prompt professional help when something seems wrong.
For most homes, winter solar care is less about constant snow removal and more about understanding how the system behaves in your climate. Some arrays shed quickly, some retain snow longer, and some need occasional debris attention after storms or seasonal change. Once you learn the normal pattern, it becomes easier to respond calmly rather than reactively.
If you remember one idea from this guide, let it be this: your personal safety matters just as much as your panel efficiency. There is no benefit in recovering a little winter output if the process leads to a fall, a cracked module, or a hidden repair issue. Respect the equipment, work from the safest position available, and let observation guide your decisions.
Done thoughtfully, winter solar maintenance can be surprisingly minimal. A clear view from the ground, a soft tool used sparingly, and a willingness to wait for natural shedding will often take you further than force ever could. That is the kind of practical, low-pressure maintenance strategy that helps solar perform well not just this winter, but for many winters to come.



No Comment! Be the first one.