


Essential Steps for Proper Surface Preparation Before Painting
Most paint problems do not start with the paint. They start with the surface underneath it. If a wall, trim board, ceiling, or exterior siding is dirty, loose, glossy, damp, damaged, or uneven, even good paint will struggle to bond and cure the way it should. That is why proper surface preparation before painting is not a side task. It is the foundation that determines how smooth the finish looks, how well the color covers, and how long the job holds up under everyday wear.
Table Of Content
- Why Surface Preparation Matters More Than Most People Think
- Start with a Careful Inspection
- Protect the Work Area Before You Begin
- Clean the Surface Thoroughly
- Remove Loose and Failing Material
- Repair Holes, Cracks, and Surface Damage
- Sand for Smoothness and Adhesion
- Know When Priming Is Necessary
- Choosing the Right Primer for the Surface
- Surface Preparation by Material
- Drywall and Painted Interior Walls
- Ceilings
- Wood Trim, Doors, and Cabinets
- Metal Surfaces
- Exterior Siding and Trim
- Common Surface Preparation Mistakes to Avoid
- A Practical Step by Step Preparation Sequence
- How Proper Preparation Improves the Final Result
- Final Thoughts
Homeowners often focus on color choices, sheen levels, and brand names, which all matter. Still, the practical work that happens before the roller comes out is what separates a quick cosmetic update from a paint job that actually lasts. Cleaning, repairing, sanding, and priming are not glamorous steps, but they solve the most common causes of failure. When those steps are handled properly, paint flows more evenly, dries more consistently, and resists peeling, blistering, and premature scuffing.
This guide breaks down the essential steps for preparing surfaces before painting in a clear, practical way. It covers interior walls, ceilings, trim, wood, metal, previously painted surfaces, and exterior areas. It also explains common mistakes that lead to poor results and shows how to match the preparation method to the material you are working on. If you want a paint finish that looks better on day one and still looks good years later, this is where the job really begins.
Why Surface Preparation Matters More Than Most People Think
Paint needs a sound surface to grip. It does not perform well when it is applied over dust, grease, chalky residue, peeling layers, or soft damaged material. In some cases the paint may stick at first and look acceptable for a short time, but problems often show up later. Bubbling, cracking, flashing, lap marks, patch visibility, and uneven sheen are all common signs that the prep work was rushed or skipped.
Surface preparation also affects how much paint you use. A porous or patched wall that has not been primed may absorb paint unevenly, forcing you to apply extra coats just to get consistent color. On the other hand, a properly prepared and primed surface usually gives you better coverage and a more uniform finish. That saves both time and material, which matters whether you are painting one room or an entire house.
Another reason prep matters is that it exposes hidden issues. Once you start cleaning and inspecting closely, you may find water stains, failed caulk joints, nail pops, rust spots, mildew, or soft wood. Those are not painting issues alone. They are maintenance issues that should be handled before any finish coat goes on. Painting over them only hides the problem briefly and often makes later repairs more difficult.
A good paint job is built in layers, and the first layer is not paint. It is preparation.
Start with a Careful Inspection
Before you open a paint can, walk the entire area slowly and inspect it in good light. Look at the surface from different angles because raking light reveals dents, texture problems, and patched areas more clearly than direct front light. Use your hand as well as your eyes. A wall can look fine from across the room and still feel rough, dusty, greasy, or uneven up close.
During inspection, identify what material you are dealing with and what condition it is in. Drywall, plaster, painted wood, stained wood, metal, masonry, and vinyl each need a different approach. Also note whether the existing finish is glossy, chalky, peeling, or stained. The wrong prep method can create more work, while the right one lets the next steps move efficiently.
This is also the time to check for signs of moisture. Stains on ceilings, bubbling paint near windows, mildew in bathrooms, or flaking paint on exterior trim may point to water intrusion or high humidity. Paint should never be used as a substitute for fixing leaks or ventilation problems. If the surface is damp or the cause of moisture has not been addressed, the new coating is already at a disadvantage.
Protect the Work Area Before You Begin
Good preparation includes protecting everything around the surface. Move furniture when possible and cover the rest with plastic or clean fabric drop cloths. Use floor protection that will not shift underfoot. Paper, canvas, or rosin paper often works better than thin plastic on walking paths because it reduces slipping and tears less easily during sanding and patching work.
Remove switch plates, outlet covers, curtain hardware, vent grilles, and anything else that interrupts the surface. It may feel faster to paint around these items, but the finished result usually looks rushed. Clean cut lines and full coverage are much easier when hardware is out of the way. Label screws and store small parts together so reinstallation goes smoothly.
If you are sanding or using cleaning products, make sure the space is ventilated and wear the appropriate protective gear. Dust masks, respirators, gloves, and eye protection are not overkill when you are dealing with fine dust, cleaning solutions, or old flaking coatings. In older homes, be especially cautious around layers of old paint that may contain hazardous materials. If you suspect lead based paint, follow proper testing and safety procedures before disturbing the surface.
Clean the Surface Thoroughly
Cleaning is one of the most overlooked steps in painting prep, especially indoors where walls may not look visibly dirty. In reality, household surfaces collect dust, cooking residue, oils from hands, smoke residue, and cleaning product buildup. Bathrooms add soap film and moisture related grime. Bedrooms and living rooms may have less obvious dirt, but they still collect enough contamination to interfere with adhesion.
For many interior walls, a mild cleaner and clean water are enough. Wash the surface with a sponge or microfiber cloth, paying close attention to areas around light switches, doors, trim, and corners where hands and dust collect. Rinse if needed so cleaner residue is not left behind. Then allow the surface to dry fully before moving to patching or sanding.
Kitchen walls often need stronger degreasing attention because grease can be invisible but still substantial. A wall near a range or prep area may feel dry to the touch and still carry enough oily residue to weaken paint adhesion. On these surfaces, use a cleaner designed to cut grease, then rinse thoroughly according to product directions. Glossy spots, smoke residue, and airborne cooking oils should all be addressed before paint ever reaches the wall.
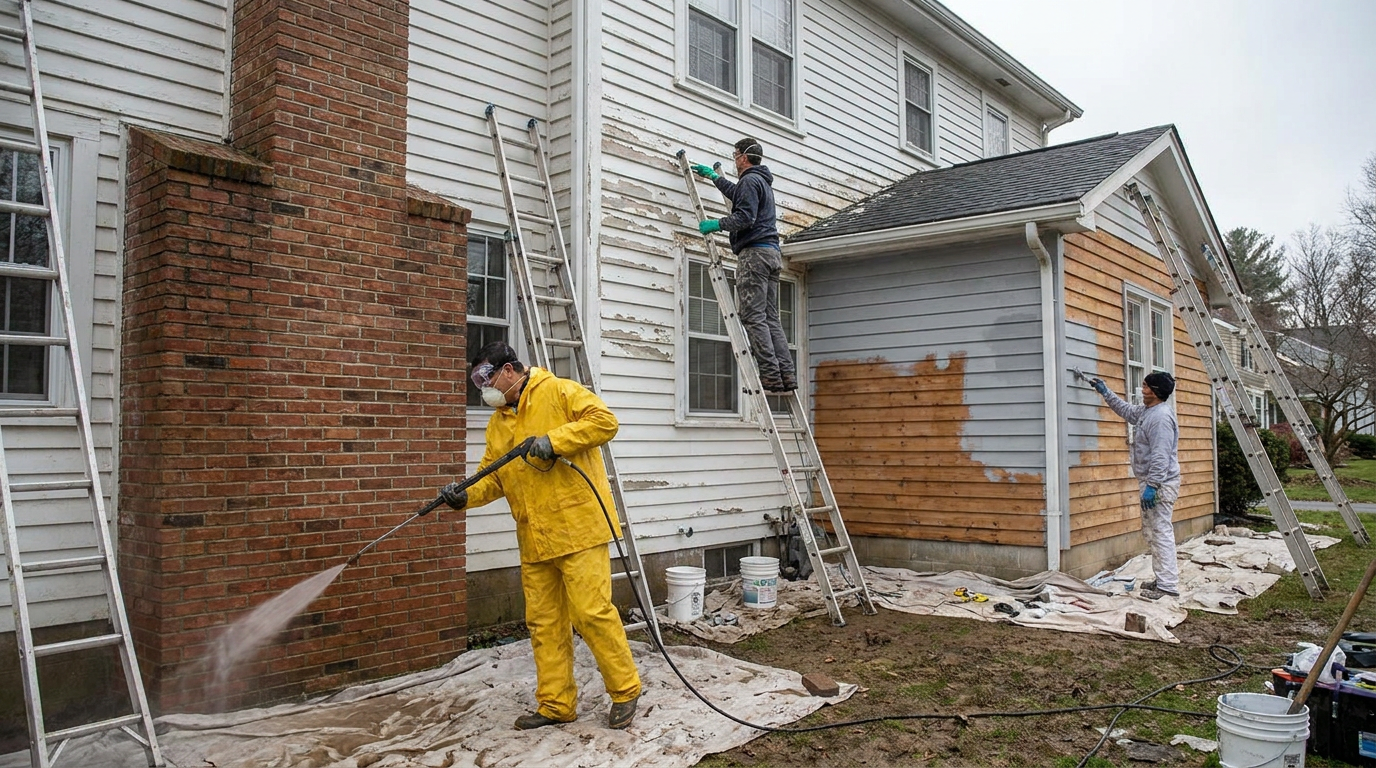
Exterior surfaces require even more attention. Dirt, mildew, chalking, cobwebs, and airborne pollutants can all prevent paint from bonding. Depending on the material and condition, cleaning may involve a hose, scrub brush, detergent, or pressure washer. Pressure washing can be effective, but it needs to be done carefully. Too much pressure can gouge wood, force water behind siding, or damage caulk joints. After washing, the surface must be allowed to dry completely before repairs or priming begin.
Remove Loose and Failing Material
Paint should only go over a stable surface. If the existing coating is peeling, flaking, blistering, or alligatored, those loose layers need to come off. New paint cannot permanently hold together old paint that has already lost its bond. What often happens is that the fresh coat sticks to the failing layer rather than the substrate underneath, and then both layers fail together.
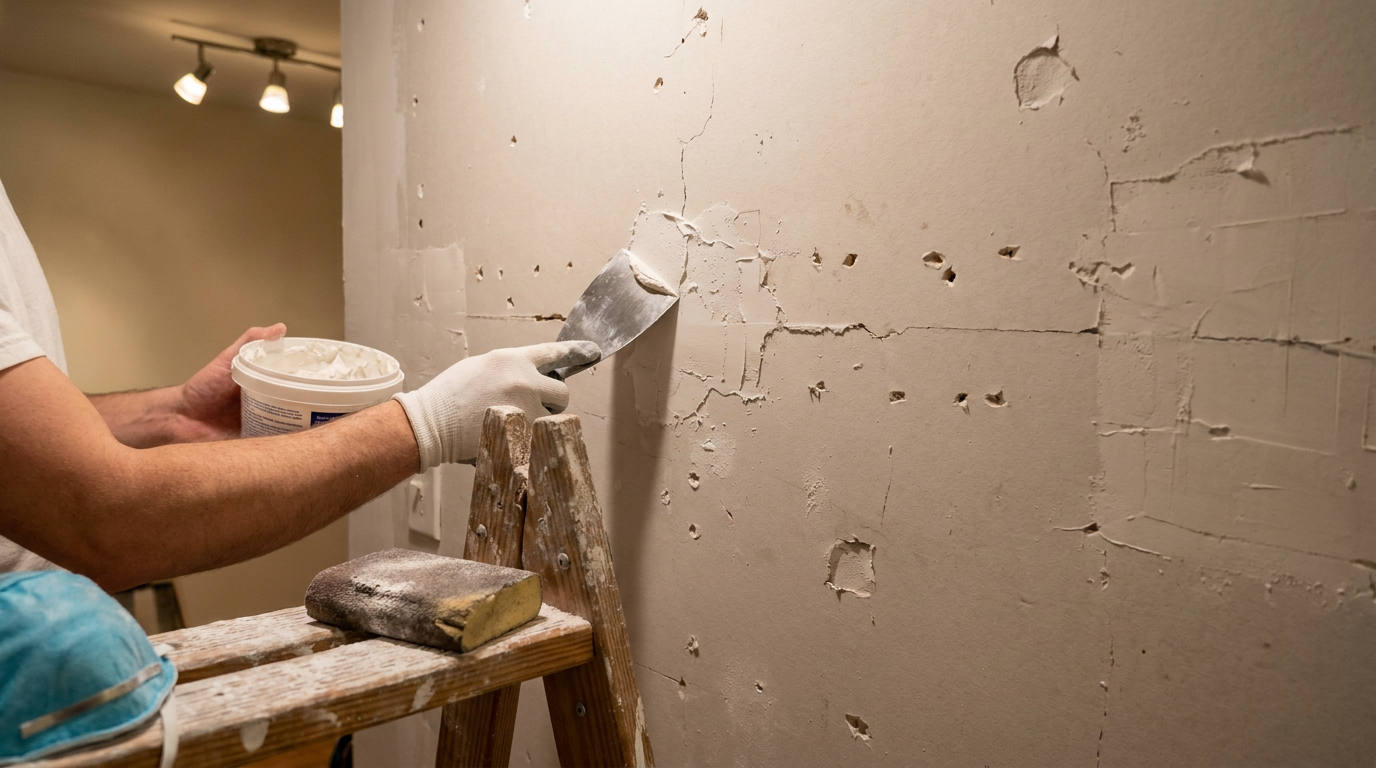
Use a scraper, putty knife, or wire brush depending on the material and the condition of the old coating. Scrape back to the point where the remaining paint is firmly attached. Do not stop at the first loose edge. Keep going until the transition reaches a stable boundary. The goal is not just to knock off what falls easily. The goal is to create a surface where every remaining layer is sound.
After scraping, feather the edges with sandpaper so the transition between bare and painted areas is less visible. This matters because hard paint ridges tend to telegraph through finish coats. On walls and trim, even a small edge can catch light and make the repair stand out. A little extra time here usually improves the final look more than an extra top coat later.
Repair Holes, Cracks, and Surface Damage
Once the surface is clean and stable, repair any physical damage. On drywall, that usually means filling nail holes, dents, screw depressions, and small gouges with spackle or joint compound. Larger holes may need a patch kit or a proper drywall repair with backing support and compound applied in several thin coats. Each layer should dry fully before sanding and reapplying.
Cracks need a little judgment. Hairline cracks in drywall or plaster can often be opened slightly, filled, and sanded smooth. Wider or recurring cracks may point to movement, poor joint taping, or settlement. In those cases, a more durable repair method may be needed, such as tape and compound, flexible caulk for appropriate joints, or further evaluation if structural movement is suspected.
Wood trim and siding often need filler in nail holes, small checks, and minor surface damage. Use a product suitable for the location and exposure conditions. Interior trim fillers and exterior wood repair compounds are not always interchangeable. Any soft or rotted wood should be addressed properly, because filler cannot replace material that has lost its strength. If the substrate is deteriorated, repair or replacement comes before painting.
For masonry, patching compounds should be compatible with the specific surface, whether that is concrete, stucco, or block. Loose or crumbling sections must be removed back to sound material before patching. Masonry repairs often need curing time that is longer than homeowners expect, so check product instructions carefully. Painting too soon can trap moisture and interfere with both the patch and the coating.
Sand for Smoothness and Adhesion
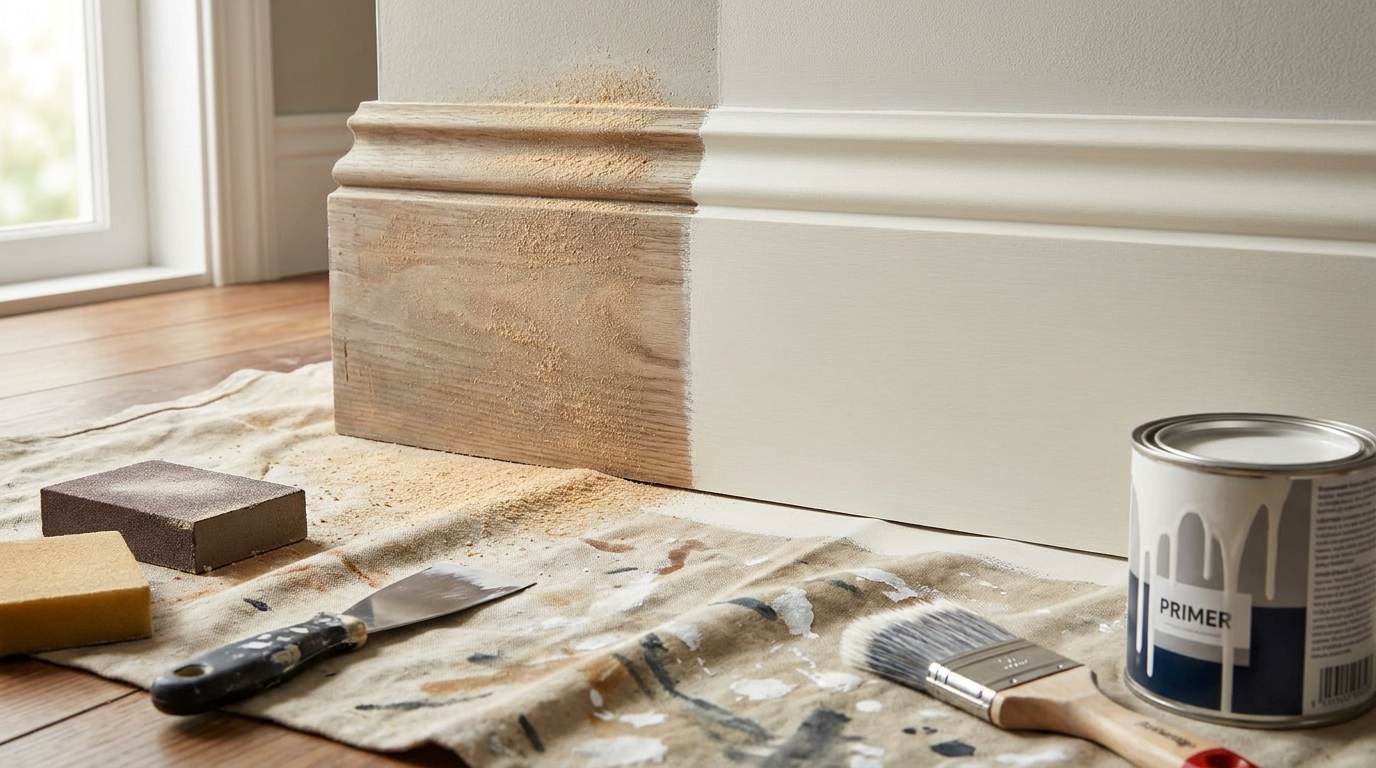
Sanding does two jobs at once. It smooths patched and uneven areas, and it creates a profile that helps new coatings grip the surface better. On drywall and plaster, sanding blends repaired areas into the surrounding wall. On glossy paint, stained trim, laminate-like finishes, and previously coated woodwork, sanding dulls the surface so primer and paint have something to bite into.
The right grit depends on the task. Finer grits are useful for light scuff sanding and finish smoothing, while medium grits are better for heavier leveling and edge feathering. The goal is not to aggressively remove material unless the condition requires it. The goal is controlled abrasion that leaves the surface even, dull where needed, and ready for the next layer.
After sanding, remove all dust completely. This step is often skipped and it causes real problems. Dust left on walls or trim can mix with paint, create gritty texture, weaken adhesion, and interfere with smooth cutting and rolling. Vacuum the surface, wipe it down with a damp cloth where appropriate, or use a tack method suited to the material. The surface should feel clean and dust free before primer is applied.
Know When Priming Is Necessary
Many paint products are marketed as paint and primer in one, but that does not eliminate the need for a separate primer in all situations. Primer and paint do different jobs. Paint provides color, sheen, and surface durability. Primer seals porous areas, improves adhesion, blocks stains, and creates a more uniform base. On some repaint jobs, a separate primer may not be needed. On many others, it absolutely is.
You should plan to prime bare drywall, fresh joint compound, raw wood, patched areas, stained surfaces, metal repairs, and any surface where adhesion is questionable. Primer is also important when you are making a major color change, especially from dark to light or from patchy mixed surfaces to a uniform final finish. Without primer, the top coat may absorb unevenly and leave dull spots, flashing, or visible patch outlines.
Stain blocking deserves special attention. Water marks, smoke damage, tannins in wood, and certain old stains can bleed right through regular paint. A quality stain blocking primer creates a barrier that standard wall paint does not. If the stain source is still active, such as an unresolved roof leak, fix the cause first. But once the issue has been addressed and the surface is dry, the right primer becomes essential.
Choosing the Right Primer for the Surface
Not all primers are equal, and choosing the wrong one can waste effort. Drywall primer is made to seal porous new wallboard and joint compound so finish paint covers more evenly. Bonding primer is used over glossy or difficult surfaces where adhesion is the main concern. Stain blocking primer is designed for discoloration problems. Metal primer helps prevent corrosion and promotes adhesion on ferrous and non ferrous surfaces depending on the formulation.
Wood can be tricky because species, previous coating type, and exposure all matter. Bare wood generally benefits from primer to control absorption and reduce tannin bleed, especially on woods like cedar or redwood. Exterior wood in weather exposed locations needs a primer suited for that environment. Interior trim with an old glossy enamel usually needs cleaning, sanding, and a bonding primer before the finish coat.
On masonry and concrete, primer selection depends on whether the surface is raw, previously painted, or prone to alkalinity and moisture movement. Fresh masonry may need curing time before priming and painting. If moisture is coming through from behind, no primer will permanently solve that until the water issue is addressed. Surface prep and moisture control always come before finish expectations.
Surface Preparation by Material
Drywall and Painted Interior Walls
For standard interior walls, the usual sequence is inspection, cleaning, patching, sanding, dust removal, spot priming, and then full painting. The main challenge is often making repairs disappear. That means using thin compound applications, sanding carefully, and priming repairs so the finish coat dries at the same rate across the wall. If only patches are primed and the wall color is changing significantly, a full prime coat may still be worth it for consistency.
Glossy walls in kitchens, bathrooms, or previously painted accent walls need extra attention. After cleaning, scuff sanding helps break the sheen so the new system can bond more reliably. If the old paint is in good condition but slick, a bonding primer adds insurance. Skipping this step may not show immediate failure, but it often increases the risk of scratching, peeling, or poor edge adhesion later.
Ceilings
Ceilings are easy to underestimate because they do not get touched often, but they still collect dust, cobwebs, smoke residue, and sometimes moisture stains. Cleaning and stain treatment are especially important here because marks can bleed through fresh paint. Any peeling sections should be scraped and feathered. Texture repairs need patience because uneven patches stand out quickly overhead when light hits them at an angle.
If there has been a leak, make sure the area is completely dry and the cause has been fixed before priming. A stain blocking primer is often necessary to keep discoloration from returning. Flat ceiling paint can hide minor imperfections, but it cannot hide poor preparation. On a large blank plane above your head, bad patching and flashing are usually more visible than people expect.
Wood Trim, Doors, and Cabinets
Woodwork needs a different level of care because smoothness is more noticeable on trim and doors than on broad wall surfaces. Start by cleaning thoroughly, especially around handles, edges, and kitchen cabinet faces where grease and hand oils build up. Sand enough to dull the old finish and smooth any filler repairs. If there are chips or dents, use a suitable filler, sand it flush, and remove all dust before priming.
Glossy enamel and factory finishes can be stubborn surfaces. They often look solid but resist new coatings unless they are cleaned and deglossed properly. A bonding primer is usually the safe move here. On cabinets in particular, prep quality has more impact on durability than the color coat itself. If the surface is not properly cleaned and keyed, paint on doors and drawer fronts tends to fail first because those areas see constant contact.
Metal Surfaces
Metal needs to be free of rust, oil, dirt, and loose coating before painting. Surface rust should be wire brushed or sanded off back to sound metal as much as practical. Any remaining corrosion should be treated according to product recommendations. Bare metal usually needs a metal specific primer before finish paint. Using a general wall primer on metal often leads to adhesion and corrosion problems.
For previously painted metal that is still sound, cleaning and scuff sanding may be enough before priming and repainting. The environment matters a lot. Interior handrails have different demands than exterior railings or metal doors exposed to weather. Choose products designed for the service conditions, but remember that coating performance still depends on how well the metal was prepared.
Exterior Siding and Trim
Exterior prep is where shortcuts cost the most. Weather, sun, moisture, and movement all work against the coating system, so the surface must be as clean and stable as possible. Wash dirt and mildew away, scrape failing paint, sand edges, repair damaged substrate, recaulk where joints have opened, and prime all bare areas. Every one of those steps affects how long the exterior finish holds up.
Timing matters outdoors. Do not clean one day and paint the next unless you are certain the substrate has dried fully. Wood, fiber cement, masonry, and trim details can hold moisture longer than they appear to on the surface. Painting over trapped moisture often leads to blistering, peeling, and early failure. Drying time should be treated as part of the prep schedule, not dead time in the project.
Common Surface Preparation Mistakes to Avoid
A very common mistake is painting over dirt because the surface looks clean from a distance. Dust and grime do not need to be dramatic to interfere with paint. Another common error is patching holes and then failing to sand and prime the repair properly. The wall may be physically fixed, but the finish ends up showing dull spots, raised patches, or texture differences once the paint dries.
Another issue is underestimating glossy surfaces. Homeowners often assume a fresh coat will stick because the old finish is intact. In reality, intact and glossy are two different things. A slick old coating often needs both scuff sanding and a suitable primer to create a dependable bond. Ignoring that step usually shows up first in high traffic areas where paint gets scratched or peeled by normal use.
Rushing drying times is also a major problem. Cleaners need to dry, patches need to cure, caulk needs to set, washed exteriors need to dry out, and primer needs to be ready for recoating. If one layer is trapped under another too soon, the coating system can fail in ways that are frustrating and expensive to fix. Fast projects are fine. Rushed curing is not.
Finally, many people skip a final inspection before painting. That is the last chance to catch ridges, missed holes, dust, residue, rough patches, or unprimed spots. A few minutes of checking the work with good lighting can prevent the kind of defects that become obvious only after the finish coat has dried and the room is put back together.
A Practical Step by Step Preparation Sequence
If you want a straightforward order to follow, the process is usually easier when broken into a repeatable sequence. Specific materials may vary, but the logic stays mostly the same. The cleaner and more stable the substrate becomes with each step, the better your finish coat will perform.
- Inspect the surface for dirt, peeling paint, cracks, water damage, gloss, stains, and material type.
- Protect the area with drop cloths, remove hardware, and set up ventilation and safety gear.
- Clean thoroughly using the right cleaner for the location and residue type.
- Scrape and remove loose material until only sound coating remains.
- Repair damage with patching compound, filler, caulk, or substrate repair as needed.
- Sand the surface to feather edges, smooth repairs, and dull glossy finishes.
- Remove dust by vacuuming, wiping, or using a suitable dust removal method.
- Prime where needed based on material, repairs, stains, and adhesion requirements.
- Reinspect in good light before starting the finish coats.
How Proper Preparation Improves the Final Result
When surface preparation is done right, the improvement is visible right away. Paint lays down more evenly, covers more consistently, and cures into a finish that looks intentional rather than patchy. Edges appear cleaner, trim looks sharper, and sheen levels stay more uniform across the surface. Even before durability becomes part of the story, the visual difference is usually obvious.
The long term benefits matter just as much. Well prepared surfaces are less likely to peel, chip, blister, or show stain bleed. They also stand up better to cleaning and day to day wear. In practical terms, that means less touch up work, longer repaint cycles, and better value from the time and money invested in the job. Preparation is not just about making paint look good. It is about helping it perform as intended.
There is also a confidence factor that comes from doing the groundwork properly. Once the surface is clean, repaired, smooth, and primed where needed, the painting stage becomes far more predictable. You are no longer hoping the coating will cover defects or bond over questionable areas. You have already handled the problems at the source, which is almost always the smarter and more reliable approach.
Final Thoughts
Proper surface preparation before painting is not the exciting part of the project, but it is the part that determines whether the result looks professional and lasts. Every surface tells you what it needs if you take the time to inspect it honestly. Some only need light cleaning and spot repairs. Others need scraping, sanding, stain blocking, or more substantial substrate work before they are ready for finish paint.
The main thing is to respect the sequence. Clean first, repair what is damaged, sand what is rough or glossy, remove dust, and prime where conditions call for it. Those steps are not busywork. They are what make paint adhesion possible and what help the final coat dry into a finish that looks smooth, consistent, and durable.
If you want better painting results, start by shifting your attention away from the final color for a moment and onto the surface beneath it. The quality of that base will determine nearly everything that follows. In painting, as in most building work, the hidden part of the job is usually the part that matters most.


No Comment! Be the first one.