


How to Install Wallpaper: A Step-by-Step Guide for Beginners
Wallpaper has a reputation for being tricky, and some of that reputation is earned. It can look excellent when it is done right, and it can look rough very quickly when the prep or layout is off. The good news is that first-time installers usually do not fail because wallpaper is too complex. They fail because they rush the early steps, skip surface prep, or assume the paper will hide problems that should have been fixed before the first strip ever touched the wall.
Table Of Content
- Start by Choosing the Right Wallpaper for Your Skill Level
- Tools and Materials You Will Need
- Step 1: Inspect the Wall Honestly
- Step 2: Clean, Patch, Sand, and Prime
- Step 3: Measure the Room and Plan for Waste
- Step 4: Mark a Plumb Line for the First Strip
- Step 5: Cut the First Strips with Pattern Repeat in Mind
- Step 6: Hang the First Strip from Top to Bottom
- Step 7: Match the Pattern and Hang the Next Strip
- Step 8: Smooth Bubbles and Manage Seams Carefully
- Step 9: Trim at the Ceiling, Baseboard, and Corners
- Step 10: Keep Going One Strip at a Time
- Common Wallpaper Mistakes Beginners Make
- Tips for Bathrooms, Kitchens, and Other Tricky Rooms
- What to Do If Something Goes Wrong
- Aftercare and Long-Term Results
- Final Thoughts
If you want a clean result, think like a finisher, not just a decorator. Wallpaper follows every dip, bump, seam, and bad patch in the wall. It also magnifies layout errors, especially with bold patterns. That is why the best beginner strategy is simple. Choose the right product for your skill level, get the wall properly prepared, plan the layout before cutting, and correct small mistakes right away instead of hoping they disappear later.
This guide walks through the full process in a practical order, from choosing wallpaper and getting the room ready to hanging each strip and trimming it clean. It also covers the mistakes beginners make most often, including poor pattern alignment, bad seam handling, and installing over walls that are not ready. If you are willing to slow down and work carefully, wallpaper is absolutely a manageable DIY project.
The biggest truth about wallpaper installation is this: wallpaper is forgiving when the wall is clean, smooth, dry, and primed. It is very unforgiving when those basics are skipped.
Before you start, one safety note matters. If you are working in a home built before 1977 and the project involves stripping old wallpaper, sanding painted walls, or disturbing old coatings underneath, check lead-paint precautions first. That part is not optional in older homes. A decorative project can become a health issue if legacy paint layers are handled carelessly.
Start by Choosing the Right Wallpaper for Your Skill Level
Not all wallpaper installs the same way, and beginners should not treat every product as equal. Some papers are much easier to handle than others. The right choice depends on the room, the wall condition, how permanent you want the finish to be, and how much patience you have for pattern alignment and adhesive cleanup.
Peel-and-stick wallpaper is often the lowest-stress option for beginners because it can usually be repositioned more easily than traditional wallpaper. That does not mean it is foolproof. It still needs a clean, sound, smooth wall, and it does not perform well over dusty, textured, damp, or poorly painted surfaces. If the wall is not ready, peel-and-stick can peel at the corners or fail at the seams.
Pre-pasted wallpaper already has adhesive on the backing that is activated with water. This can simplify the process because you do not have to spread paste separately, but you still need to follow the manufacturer instructions closely. Too much water, too little soak time, or uneven activation can create loose spots or seam problems.
Unpasted wallpaper gives you the most control, but it also asks more from the installer. You have to apply the right adhesive and use the proper amount. This is common with many higher-end or heavier wallpapers. It can produce excellent results, but for a true beginner, it usually makes sense only if you are willing to move slowly and stay organized.
There are also practical differences in finish and durability. Some wallpaper is washable and works better for busy areas. Some is paintable. Some is made to strip off more cleanly later. In bathrooms, laundry rooms, and other moisture-prone spaces, product choice matters even more because humidity can loosen seams and lift edges. Good ventilation helps, but it does not turn an unsuitable wallpaper into the right one for a damp room.
Tools and Materials You Will Need
Good wallpaper work is easier when the tools are ready before the first strip is cut. You do not need a truckload of specialty gear, but you do need the right basics. Missing tools usually lead to rushed substitutions, and rushed substitutions usually show in the finished wall.
- Wallpaper rolls with extra material for waste and pattern matching
- Wallpaper primer appropriate for the wall surface
- Adhesive or paste if the wallpaper is not peel-and-stick or pre-pasted
- Joint compound or wall filler for dents and holes
- Sandpaper or sanding sponge for smoothing patches and glossy paint
- Cleaning supplies such as sponge, bucket, and mild cleaner
- Tape measure and pencil
- Level or laser level for a plumb line
- Utility knife with fresh sharp blades
- Straightedge or taping knife for trimming
- Wallpaper smoothing tool or brush
- Seam roller used gently if recommended for the wallpaper type
- Step ladder
- Drop cloth to protect the floor and keep cut pieces clean
One practical tip is to have more blades than you think you need. A dull knife tears wallpaper instead of cutting it cleanly. That is how corners get ragged and seams start to look amateur. Sharp blades are cheap compared with ruined paper.
Step 1: Inspect the Wall Honestly
The wall decides how easy this job will be. Before thinking about adhesive or pattern layout, inspect the entire surface in good light. Run your hand across it. Look for nail pops, dents, peeling paint, old adhesive, grease, patched areas, cracks, and texture. Anything you can feel through your hand has a good chance of showing through the wallpaper.
New drywall needs special attention. It should be fully cured, dry, and properly primed before wallpaper goes up. Bare drywall is not an acceptable surface for wallpaper. It absorbs moisture unpredictably, grips paper too aggressively in spots, and makes future removal harder than it should be.
Previously painted walls should be patched, sanded smooth, spot-primed where needed, and then fully primed before installation. A wall that looks decent under paint is not necessarily ready for wallpaper. Wallpaper highlights flaws more than paint does, especially when light hits the wall from the side.
If the wall has old wallpaper, remove it fully. Do not wallpaper over a failing layer and expect a good result. Once the old paper is stripped, clean off all adhesive residue, let the wall dry completely, repair damage, sand it smooth, and prime it again. Old glue left behind can interfere with new adhesion and create bumps or discoloration under the new paper.
Step 2: Clean, Patch, Sand, and Prime
This is the part beginners most want to shorten, and it is the part that matters most. Wallpaper needs a stable surface. Dust, grease, soap residue, smoke film, and old adhesive all work against you. Wash the wall as needed and let it dry. In kitchens or around light switches, do not assume the wall is clean just because it looks clean. Surface contamination is often invisible.
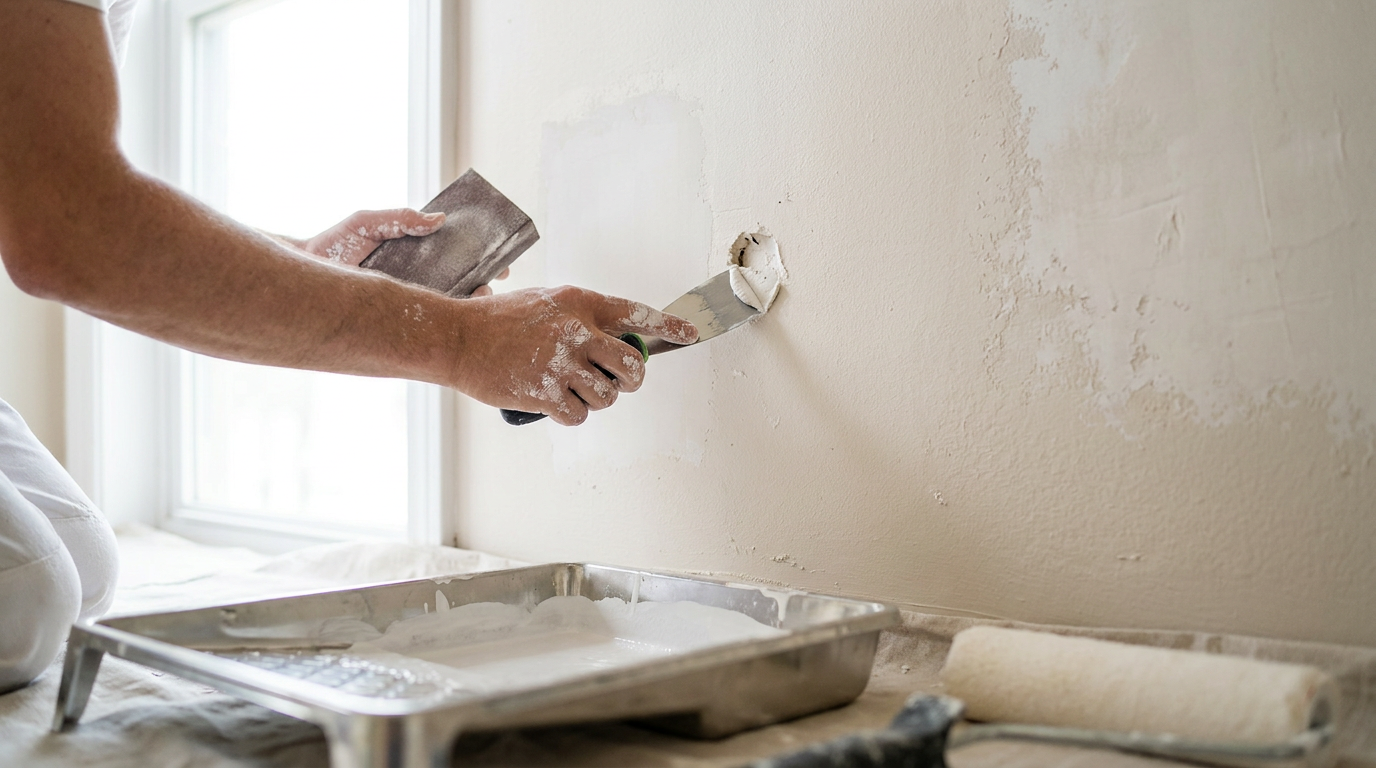
Patch any holes, dings, and low spots with a suitable filler or joint compound. Let it dry fully, then sand it smooth. Feather the repair into the surrounding wall. If you can see or feel a hard patch edge, it will likely show after the paper is up. This is one of those times where five extra minutes of sanding can save you from staring at a flaw for years.
After sanding, remove every bit of dust. Then apply wallpaper primer according to the product instructions. Primer is not just a formality. It creates a more uniform surface, improves adhesion, helps with slip during installation, and can make future wallpaper removal less destructive. A common misconception is that any painted wall is ready for wallpaper as is. In practice, proper priming is a big part of what separates a durable install from a problem wall.
If you are working in a bathroom or another humid area, make sure the room is dry and reasonably ventilated before starting. Moisture trapped in the wall or persistent humidity in the room can cause seams to fail later. Wallpaper and damp surfaces are a poor combination, even when the install looks fine on day one.
Step 3: Measure the Room and Plan for Waste
Wallpaper estimation is where pattern repeat starts to cost beginners money. You are not just covering square footage. You are also dealing with vertical strips, trimming allowance, pattern matching, windows, doors, and waste at the top and bottom. The larger the pattern repeat, the more paper you may lose aligning one strip to the next.
Measure the height of the wall in several places. Older homes are often not perfectly level or consistent. Add a few extra inches to each strip for trimming. Then look at the wallpaper label and note the roll coverage, the width, and the pattern repeat. A bold floral or geometric print can generate noticeably more waste than a subtle texture or random pattern.
Do not cut the whole room at once. That is a beginner mistake. It sounds efficient, but it makes it easier to waste paper if your measurements are slightly off or if the pattern shifts more than expected. Cut one strip, confirm the fit, and then continue in sequence.
If this is your first wallpaper project, consider starting with an accent wall or a simpler pattern. There is no shame in choosing a wallpaper that gives you a better chance of success. A straight, practical win is better than a dramatic pattern that turns into a frustrating lesson.
Step 4: Mark a Plumb Line for the First Strip
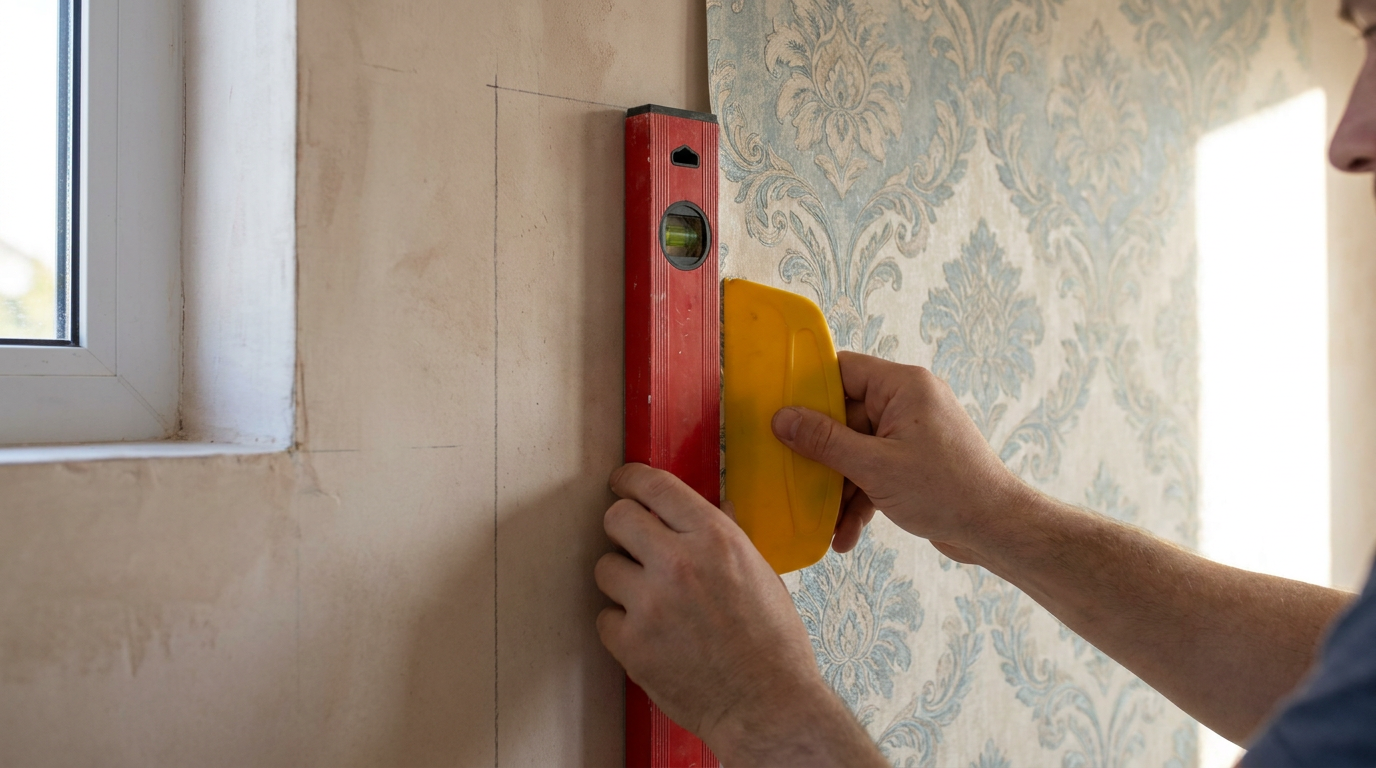
Do not trust corners to be straight. In many homes, they are not. The first strip sets the direction for the whole room, so it needs to start from a true vertical reference. Use a level or laser level to mark a plumb line where the first strip will go. That line matters more than the corner itself.
This is one of the most important steps in wallpaper installation. If the first strip leans even slightly, every strip after it will follow that error. By the time you reach the far end of the wall, the pattern may be noticeably off, seams may creep, and trimming around doors or ceilings may become awkward. Small errors compound quickly in finish work.
Many beginners want to start in the most visible corner because it feels natural. A better approach is to think about where the pattern break will be least noticeable and how the wallpaper will wrap around the room. In some spaces, especially with strong patterns, planning the starting point carefully gives you a cleaner final look.
Step 5: Cut the First Strips with Pattern Repeat in Mind
Once the wall is ready and the plumb line is marked, cut the first strip to length with extra material at the top and bottom for trimming. If the wallpaper has a repeat, align the next strip so the pattern will match when the pieces are hung side by side. This is where many beginners realize that wallpaper uses more material than they expected.
Lay the strips on a clean surface and keep them in order. That simple habit helps prevent confusion once paste is applied or backing is removed. If the paper has a directional pattern, double-check that all strips are oriented the same way. Turning one strip the wrong direction is an easy mistake and a frustrating one to discover after it is on the wall.
If you are using unpasted wallpaper, follow the manufacturer guidance for applying adhesive. Paste choice depends on the wallpaper material and the surface being covered. Using the wrong adhesive or too much of it can create slip issues, staining, seam ooze, or poor bond strength. If the instructions call for booking, which is folding pasted sides together for a set period, do not skip it.
For pre-pasted wallpaper, activate the adhesive exactly as directed. For peel-and-stick, peel only as much backing as you can control cleanly. Pulling off the entire backing at once makes it harder to align the strip and easier for it to stick to itself or pick up dust.
Step 6: Hang the First Strip from Top to Bottom
Position the top of the strip first, leaving a little excess at the ceiling line. Align one edge with the plumb line, not with the corner if the two disagree. Then work downward slowly. Use your smoothing tool or wallpaper brush to press the paper onto the wall from the center outward, pushing air bubbles toward the edges as you go.
Do not force the wallpaper into place with aggressive pressure right away. Give yourself room to adjust while the adhesive is still workable. This is especially important with patterned paper because even a small shift at the top can throw off the seam lower down. A steady hand is more useful here than a fast one.
If you get a bubble, stop and deal with it while the strip is still fresh. Most bubbles are caused by trapped air, uneven smoothing, or a small area that did not make proper contact. Fixing them early is usually simple. Ignoring them and hoping they flatten later is not a good plan.
Check that the strip remains plumb as you move down the wall. In wallpaper work, you do not really earn progress until each strip is confirmed straight. A strip that is mostly straight is not straight enough when the next strip has to match perfectly against it.
Step 7: Match the Pattern and Hang the Next Strip
The second strip is where the job starts to feel real. Position it beside the first strip and align the pattern carefully before pressing it fully into place. Depending on the wallpaper, the seams may butt together edge to edge, not overlap. Follow the product instructions because seam handling varies by material.
Pattern alignment is not just cosmetic. It affects waste, layout, and how professional the finished wall looks. Beginners sometimes think they can cheat the match slightly in a less visible area. Sometimes you can hide a tiny compromise, but more often the eye catches it immediately. If the pattern is meant to repeat, it needs to repeat consistently.
Smooth the strip the same way as the first one, from the center outward. Watch the seam as you work. You want a tight, clean joint without forcing paste out everywhere or stretching the paper. Some wallpapers can be damaged by overworking the seam, so this is a place to stay gentle and controlled.
If the seam starts to open, edge lift appears, or the pattern drifts off, stop and reposition before moving on. Wallpaper mistakes become harder to hide once the adhesive grabs. Correcting a small alignment issue immediately is far easier than trying to disguise it after three more strips are already up.
Step 8: Smooth Bubbles and Manage Seams Carefully
Every wallpaper installer deals with bubbles, but not all bubbles mean failure. Small pockets of trapped air can often be smoothed out as you work. The key is to use even pressure and work from the center toward the edge. Random rubbing usually just moves the problem around.
Seams need a balanced touch. If the product instructions allow seam rolling, use a light hand. Pressing too hard can squeeze out too much adhesive, flatten the edge unnaturally, or leave a shiny track on delicate wallpaper surfaces. That is one reason it pays to read the wallpaper label rather than relying on one generic technique for every product.
Paste residue should be cleaned promptly and carefully if the wallpaper type allows it. Dried paste can leave marks or attract dust. Use a clean damp sponge, not a dripping wet one, and avoid soaking the seam. Too much water during cleanup can create its own problems.
Keep stepping back to inspect your work from a few feet away. Up close, you are checking details. From a distance, you are checking the overall effect. Both views matter. A seam that looks fine from six inches away may still show a pattern drift when viewed across the room.
Step 9: Trim at the Ceiling, Baseboard, and Corners
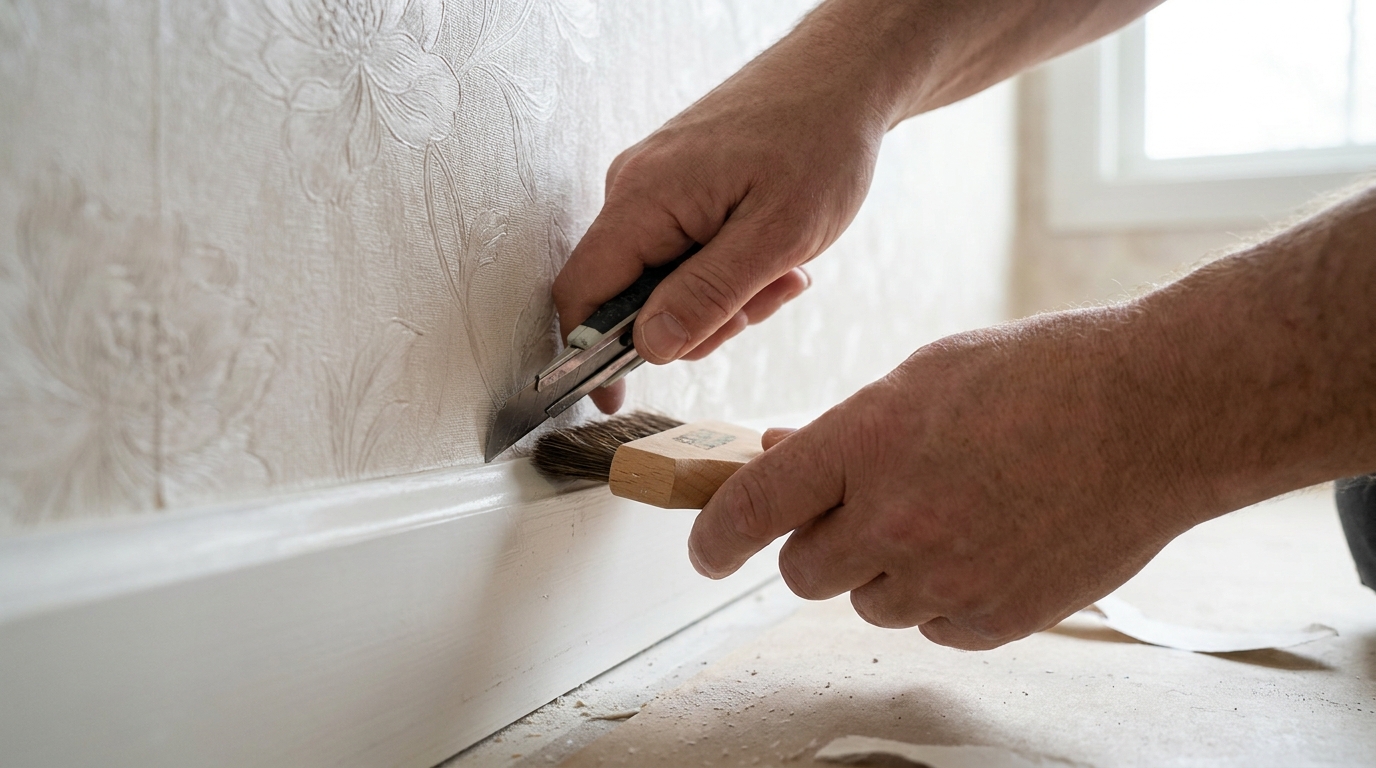
Once the strip is smoothed and positioned correctly, trim the excess at the top and bottom using a sharp utility knife and a straightedge or broad taping knife. Change blades often. Clean cuts are part of what makes wallpaper look built-in rather than stuck on.
Work carefully around outlets, switches, windows, and doors. Turn off power before cutting around electrical cover plates and remove the plates for a cleaner result. Make relief cuts only as needed, and always keep control of the knife. Ragged trimming is one of the quickest ways to spoil a good installation.
Inside corners deserve patience. Few corners are perfectly straight, so do not assume a full-width strip will sit perfectly around one. In many cases, it is better to wrap a small amount around the corner and start the next wall with a new plumb line if needed. Trying to force a wide strip around an out-of-true corner often leads to wrinkles and misalignment.
Step 10: Keep Going One Strip at a Time
The basic rhythm stays the same across the wall. Align the pattern, position the strip, smooth it out, inspect the seam, and trim cleanly. Do not let early success make you casual. A lot of wallpaper jobs go wrong in the middle because the installer gets faster instead of staying consistent.
As you move across the room, pay attention to how the pattern will land at the last corner or near major focal points. Depending on the room and wallpaper design, it may be worth shifting the starting location slightly at the planning stage so the least visible area carries the least perfect match. This kind of layout thinking is common in finish work and it pays off here too.
If you need to stop for the day, do it at a logical break and protect the remaining wallpaper from dust, damage, and humidity. Store rolls flat or upright as recommended by the manufacturer. A clean jobsite is not just nice to look at. It prevents dirt from ending up in adhesive and under seams.
Common Wallpaper Mistakes Beginners Make
Most wallpaper problems are predictable, which is useful because predictable problems can be avoided. The following mistakes show up again and again on first-time installs, and nearly all of them come back to prep, layout, or rushing.
- Skipping primer. Paint alone is not always a proper wallpaper base, and shiny or patchy surfaces can cause adhesion trouble.
- Installing over rough or dirty walls. Wallpaper does not hide wall flaws nearly as well as people think.
- Ignoring pattern repeat. This creates waste surprises and visible mismatches.
- Starting without a plumb line. If the first strip is off, the whole wall drifts.
- Cutting too many strips at once. This often leads to waste and sequence confusion.
- Using the wrong adhesive. Paste must match the wallpaper type and wall surface.
- Rushing seam rolling and cleanup. Too much pressure or too much water can damage the finish.
- Working in a damp room. Humidity and poor ventilation can cause seam failure and lifted edges.
The practical lesson is simple. If something looks questionable while you are installing it, stop and correct it then. Wallpaper rarely rewards wishful thinking. Small flaws almost always become more obvious after the paper sets and the room light changes across the day.
Tips for Bathrooms, Kitchens, and Other Tricky Rooms
Bathrooms and kitchens ask more from wallpaper because they deal with moisture, temperature swings, and more cleaning. That does not mean wallpaper cannot work there. It means you need to be more selective with product choice and more careful about room conditions. Good exhaust ventilation matters in bathrooms, and wallpaper too close to frequent splash zones is asking for edge problems over time.
In a bathroom, choose a wallpaper designed for the conditions or one specifically recommended by the manufacturer for higher-humidity spaces. Make sure the walls are dry before installation and that the room has a functioning exhaust fan. If the bathroom regularly holds steam for long periods, even a careful install can struggle later.
In kitchens, grease and residue are often the hidden issue. Clean the walls thoroughly before priming, especially near cooking areas. Wallpaper over contamination is a common cause of poor bond. In busy family homes, washable surfaces are often worth the extra cost because they are easier to maintain without damaging the finish.
Accent walls are often the smartest beginner project because they limit the number of corners, cuts, and room transitions. They also let you work with a stronger pattern in a smaller area. If you are learning, there is nothing wrong with building confidence on one wall before committing to a full room.
What to Do If Something Goes Wrong
Even careful beginners hit a few problems. The useful question is not whether something goes wrong. It is whether you catch it quickly enough to fix it cleanly. If a strip goes up crooked, remove or reposition it while the adhesive is still workable. Do not keep adding strips and hope the issue disappears.
If a seam opens slightly, press it back according to the wallpaper instructions and address the reason it opened. That might be poor alignment, too little adhesive at the edge, or a wall condition issue. If an area will not adhere because the wall is dusty, glossy, or contaminated, the real fix may involve taking the strip down and correcting the substrate rather than forcing the paper to stay put.
For bubbles, first determine whether they are air or excess paste. Air can often be smoothed outward. Paste pockets may need time to settle depending on the wallpaper. Follow the manufacturer guidance before poking or cutting anything. Random fixes usually make the finish worse.
If the pattern match is off, decide immediately whether it is acceptable or needs to be redone. There is no benefit in pretending a visible mismatch will become invisible later. Wallpaper rewards honesty. If it is wrong and you can still correct it, correct it.
Aftercare and Long-Term Results
Once the wallpaper is installed, give it time to settle and cure according to the product directions. Try to keep the room at a stable temperature and avoid excess humidity during that early period. In bathrooms, this may mean using the fan consistently and keeping showers shorter for a day or two if possible.
Clean the wallpaper only as recommended for that specific material. Some surfaces are washable and durable. Others need a much lighter touch. Treating all wallpaper the same is a good way to damage the finish, especially at seams and edges.
Pay attention to any early signs of edge lift or seam movement. Catching a small issue early is much easier than fixing a larger section after repeated humidity cycles. In most cases, if the wall was prepared correctly and the wallpaper was suited to the room, the finish should stay stable and look good for years.
Final Thoughts
Wallpaper installation is a finish trade task in miniature. It is not mainly about speed or confidence. It is about prep, sequence, and attention to detail. That is actually good news for beginners because it means the job is less about natural talent and more about being methodical.
If you remember nothing else, remember these priorities. Start with a clean, dry, smooth, primed wall. Choose a wallpaper type that fits your skill level and the room conditions. Measure carefully with pattern repeat in mind. Mark a true plumb line for the first strip. Then hang each piece slowly, correct errors immediately, and trim with a sharp blade.
A well-wallpapered room does not just look stylish. It looks intentional and well-finished. Take your time, respect the prep, and the results will usually follow. For first-time installers, that is the practical path to a wall you can actually be proud of.



No Comment! Be the first one.