



How to Build Your Own Raised Garden Beds for a Thriving Vegetable Garden
Raised garden beds have become popular for a simple reason. They work. If your yard has poor soil, heavy clay, rocks, drainage problems, or spots that stay compacted from foot traffic, a raised bed gives you a clean start and a lot more control. For vegetable gardeners, that control matters because healthy crops depend on good soil structure, steady moisture, enough root space, and a layout that makes regular care manageable through the whole season.
Table Of Content
- Why raised garden beds make sense for vegetable gardening
- Choosing the right location before you build
- Picking a bed size that is actually practical
- Choosing food-safe and durable materials
- Tools and materials you will need
- How to build a simple raised garden bed step by step
- Step 1: Mark the layout and clear the area
- Step 2: Cut and assemble the frame
- Step 3: Set the bed in place and level it
- Step 4: Fill with the right soil mix
- Step 5: Water the bed and let it settle
- Soil testing is still part of the job
- Planting your raised bed for strong results
- Watering and irrigation in raised beds
- Common mistakes that shorten the life of a raised bed
- Misconceptions worth clearing up
- Accessibility and ergonomic design choices that matter
- Keeping raised beds productive year after year
- What a raised bed project really costs
- A practical plan for your first raised bed
- Final thoughts
There is also a practical side that people appreciate once they build one. Raised beds reduce the need to bend as far, they keep growing areas clearly defined, and they make it easier to avoid stepping on the soil where vegetables are trying to root. In many parts of Canada and North America, raised beds can also warm and dry faster in spring than in-ground plots, which may let you plant earlier and recover more quickly after heavy rain. That does not make them magic, but it does make them a smart solution for a lot of yards.
This guide takes a hands-on approach to building your own raised garden beds. It covers planning, sizing, material choices, soil, assembly, drainage, and long-term maintenance. It also addresses common mistakes and a few misconceptions that lead to disappointment. If you want a raised bed that lasts, grows well, and makes your vegetable garden easier to manage, the work starts with a good layout and practical decisions, not just a stack of boards.
Practical takeaway: A raised bed does not have to be complicated to work well. A simple, level, well-built box in full sun, filled with quality soil and compost, will outperform an elaborate bed filled with poor material.
Why raised garden beds make sense for vegetable gardening
The biggest advantage of raised beds is control. In a standard in-ground garden, you work with whatever soil is already there. Sometimes that is fine, but often it is not. Native soil can be too dense, too rocky, too wet, too low in organic matter, or in urban areas, a possible contamination concern. A raised bed lets you create a growing space with a better structure from day one, using a measured blend of soil and compost rather than trying to improve a problem site all at once.
Raised beds also improve access. Instead of walking through the garden and compacting the soil, you work from the outside edge and leave the growing area loose and well-aerated. This matters more than many beginners realize because compacted soil slows drainage, reduces oxygen at the root zone, and makes it harder for vegetables to establish strong root systems. Good bed design protects the soil as much as it supports the plants.
For many households, ease of use is just as important as crop performance. Raised beds can be built at heights that reduce strain on the knees and back. They can be arranged with wide, stable paths that make it easier to move a wheelbarrow, kneel safely, or garden with limited mobility. Extension guidance in recent years has increasingly treated raised beds as an accessibility tool as much as a production method, and that is a sensible shift because a garden that is easier to reach is a garden that gets used and maintained.
Another clear benefit is drainage management. In heavy soils, water can sit too long around roots, especially after prolonged rain. Raised beds do not remove the need for drainage planning, but they do improve the odds because the root zone sits above grade and uses a lighter, better-structured mix. That can make a noticeable difference for crops like tomatoes, peppers, carrots, onions, and greens that prefer steady moisture without waterlogging.
Choosing the right location before you build
Location is where many raised bed projects succeed or fail. Most vegetables need full sun, which generally means at least six to eight hours of direct light a day. Leafy crops can manage with slightly less, but fruiting vegetables such as tomatoes, peppers, cucumbers, and squash produce better when they have strong sunlight through most of the day. If your yard has a sunny corner and a shaded corner, put the raised bed in the sunny one even if it means a little more walking.
Look at drainage and convenience at the same time. A bed that sits in a soggy low spot will still struggle, even though it is raised. A bed placed too far from a hose, water source, or daily traffic path may also become harder to manage than expected. Since vegetables need regular watering, checking, harvesting, and occasional pest control, the best location is usually one that combines sun, decent drainage, and easy access from the house or shed.
Take time to look overhead as well. Tree roots and overhanging branches can create ongoing competition for water and nutrients, while too much leaf drop can shade the bed and add cleanup work. If you are building near a fence, wall, or garage, watch how shadows move during the day. A bed that looks sunny at noon may be shaded for long stretches in the morning or evening.
If contamination is a concern, raised beds can be especially useful. In older urban lots or properties near heavy traffic, past industrial use, or questionable fill, using a raised bed with imported soil can be a safer way to grow food. That said, site conditions still matter. You may choose to add a barrier under the bed depending on the situation, and you should avoid disturbing suspect soil unnecessarily.
Picking a bed size that is actually practical
A common beginner mistake is building beds too wide. It seems efficient at first, but a bed that is hard to reach becomes hard to weed, plant, and harvest. The most practical guidance is to keep the bed narrow enough that you can comfortably reach the center from the side without stepping into the soil. For most people, that means a width of about three to four feet. Four feet is common because it balances reach with usable growing space.
One of the most popular beginner layouts is a 4 x 8 foot bed. It fits standard material lengths well, offers enough room for a meaningful amount of vegetables, and stays manageable for planting and maintenance. If you are tight on space, a 3 x 6 foot bed can still be very productive. If accessibility is a major priority, you may want a narrower bed with wider paths around it so every section remains easy to reach.
Height depends on your goals. A basic raised bed can be as shallow as 8 to 12 inches if the ground underneath drains reasonably well and roots can continue below. Deeper beds can be helpful where native soil is especially poor, where contamination is a concern, or where easier access is part of the design. Taller beds require more material and more fill, so there is a real cost tradeoff. Deeper is not automatically better. It is only better if the crops, site, or user needs justify it.
Do not forget the paths. Gardeners often focus on the beds and leave too little room around them. Make pathways wide enough to walk comfortably and wider if you plan to use a cart or wheelbarrow. A well-laid-out garden saves time every week because you are not squeezing between corners, brushing against wet plants, or compacting spots you need to keep loose.
Choosing food-safe and durable materials
Material choice matters for strength, lifespan, and food safety. For edible gardens, untreated rot-resistant lumber is a common and practical option. Cedar and similar woods are popular because they hold up reasonably well outdoors without relying on chemical treatment. Metal, stone, and masonry can also work, especially if you want a longer-lasting or more modern-looking bed. The right answer depends on budget, appearance, local climate, and how permanent you want the garden to be.
One point worth taking seriously is treated wood. Health Canada advises that treated wood should not be used where it will come into direct contact with food, including as edging for an edible garden. That makes food-safe alternatives the safer and more straightforward choice for vegetable beds. Some gardeners still debate this topic, but if you are building a bed for edible crops, there is little advantage in choosing a material that raises avoidable questions.
Durability also depends on details, not just the material itself. Beds fail early when corners are weak, screws are too short, or boards sit unevenly on the ground and twist under the pressure of wet soil. Use exterior-grade fasteners, reinforce corners properly, and keep the frame level. A simple bed assembled carefully will often outlast a larger or more expensive bed built in a hurry.
If you want the boards to last longer, it helps to reduce constant moisture around them. Good drainage, mulch on the soil surface, and a site that does not stay soggy all season will all extend the life of a wooden frame. Some gardeners line the interior with a barrier where appropriate, but the key point is to think about moisture at the soil line because that is where most wooden beds begin to break down.
Tools and materials you will need
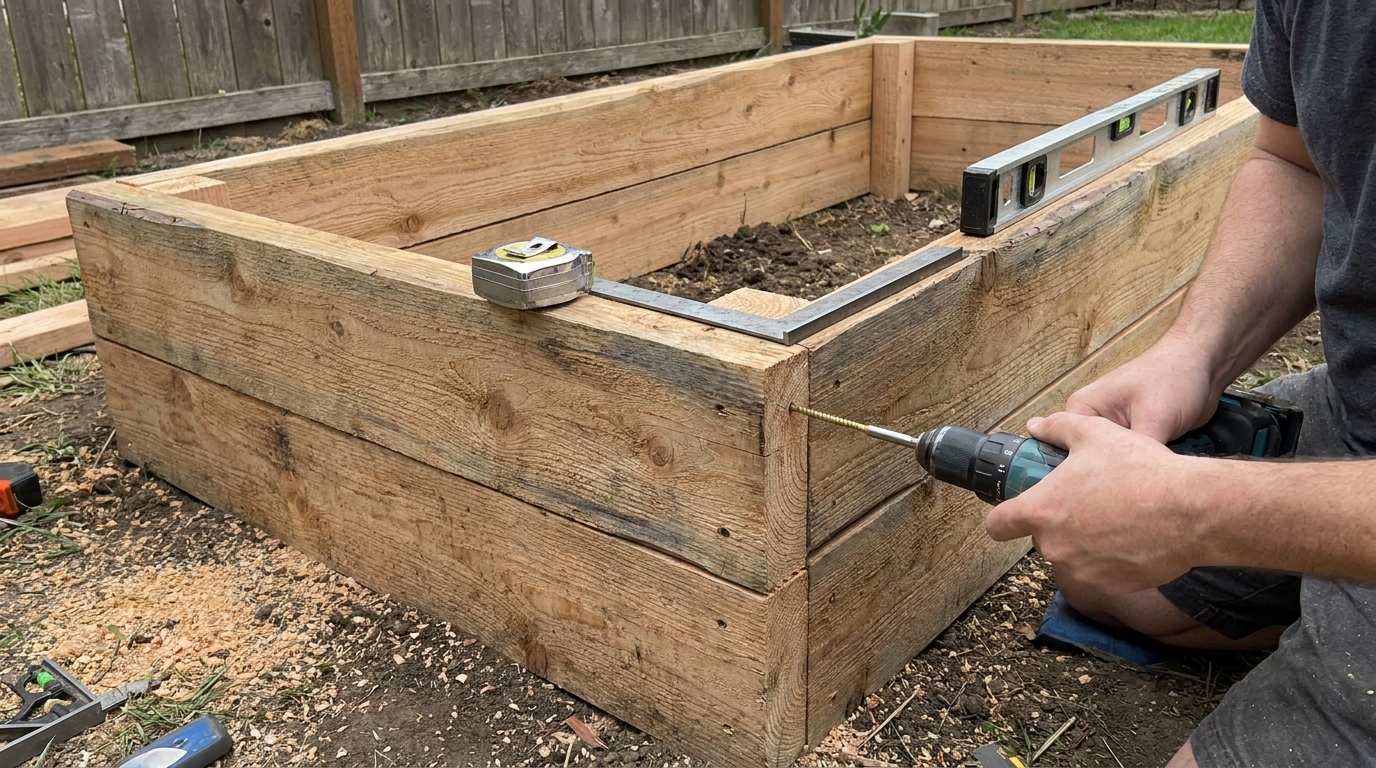
You do not need a shop full of specialty tools to build a solid raised bed. Most simple beds can be built with a tape measure, drill, saw, carpenter square, level, and basic work gloves. If you are buying lumber pre-cut, the job gets even easier. What matters more than advanced tools is accurate measuring, square corners, and solid fastening.
For a standard 4 x 8 foot bed, you will generally need boards for the long and short sides, corner supports or stakes, exterior-grade screws, and enough soil and compost to fill the frame. Depending on the site, you may also want cardboard for weed suppression under the bed, mulch for the paths, hardware cloth if burrowing pests are a problem, and drip irrigation components if you want a more efficient watering setup from the start.
Before you buy soil, calculate volume. Soil is one of the biggest cost factors in a raised bed project, and underestimating it is very common. Even a single bed can take more material than expected once you account for depth. Plan the fill carefully so you are not left scrambling with half a bed completed and no quality soil available.
How to build a simple raised garden bed step by step
Step 1: Mark the layout and clear the area
Start by marking the bed footprint with stakes, string, or a simple outline on the ground. Remove turf, weeds, large rocks, and debris from the area. You do not have to excavate deeply, but you do want a relatively clean, even surface so the frame sits flat and stable. If the spot is badly uneven, take the extra time to correct it now because leveling after assembly is harder.
Check the bed location from all angles before you go further. Imagine where you will stand to plant, how you will reach it with a hose, and whether nearby doors, fences, or paths will feel crowded once the frame is full. A few minutes of walking around the layout can save a lot of regret later.
Step 2: Cut and assemble the frame
Cut the boards to size if needed, then dry-fit them on the ground. Check for square by measuring corner to corner. If the diagonal measurements match, the frame is square. Fasten the corners with exterior-grade screws into sturdy corner blocks, stakes, or overlapping joints, depending on your design.
Keep the frame simple and solid. Many failures happen because people rely on too few screws or weak corner connections. Wet soil is heavy, and over time it pushes outward. Secure corners well, and if the bed is long or tall, consider adding bracing at the midpoint to reduce bowing.
Step 3: Set the bed in place and level it
Move the assembled frame into position and check it with a level. Small adjustments make a big difference. A bed that is out of level can drain unevenly, hold water on one side, and look visibly off once it is filled. Shim or scrape away small amounts of soil as needed to get the frame sitting evenly.
At this stage, you can also decide whether to add a base layer such as cardboard to suppress existing weeds. If burrowing pests are a known issue, hardware cloth under the bed may be worth the effort before you add soil. Think through these site-specific issues now because they are much harder to address once the bed is full.
Step 4: Fill with the right soil mix
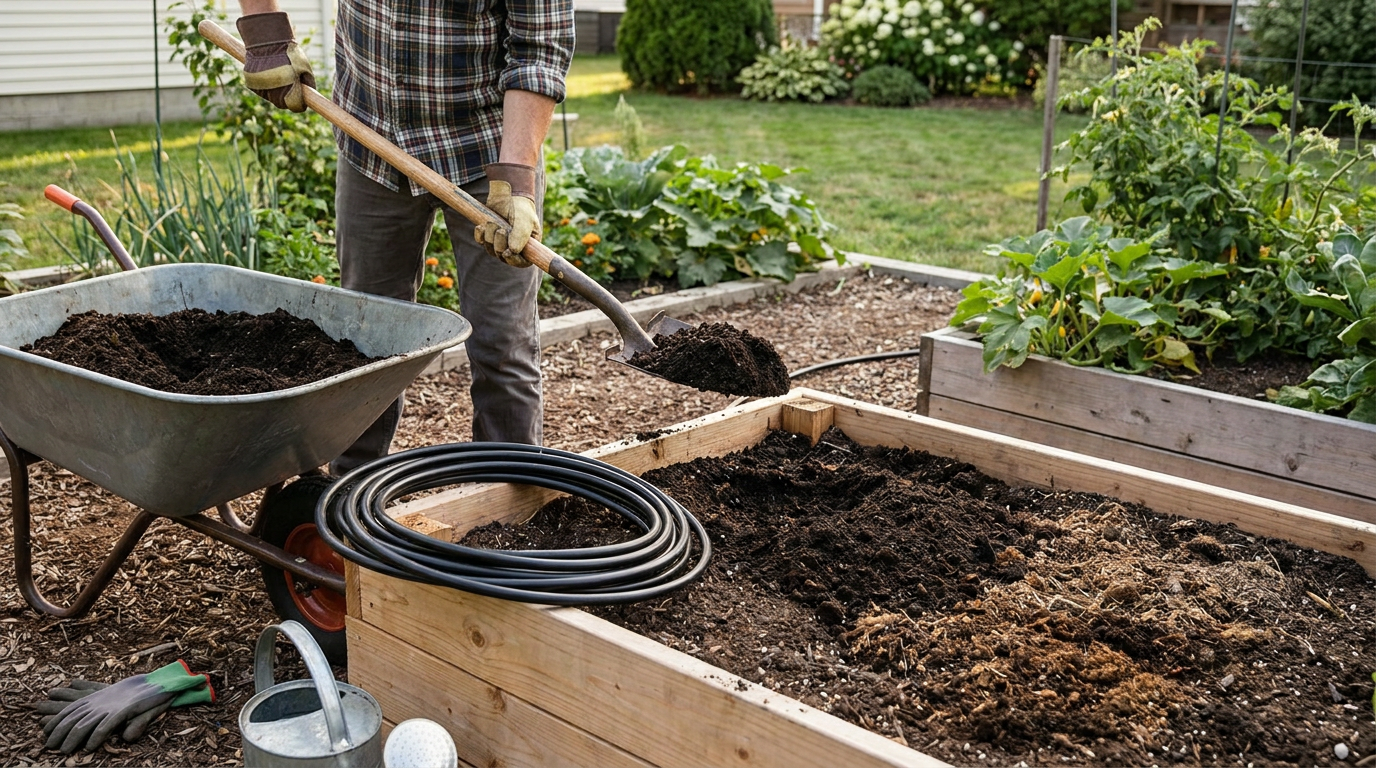
The quality of the fill is one of the most important decisions in the whole project. A raised bed is only as good as the material inside it. Penn State Extension recommends a mix of about 70 percent soil and 30 percent compost when both are good quality and from reputable sources. That blend gives you structure, drainage, and organic matter without turning the bed into a pile of overly rich compost that may settle too fast or drain unpredictably.
Do not use random subsoil, demolition fill, or unknown material just to save money. That is one of the quickest ways to end up with compacted soil, poor drainage, nutrient problems, or contamination concerns. Good raised-bed soil should feel crumbly, hold moisture without staying soggy, and support root growth through the full depth of the bed.
As you fill, lightly settle the mix with water or by hand, but do not stomp it down. Raised beds are meant to protect soil structure, not compact it. Expect some settling over time, especially in the first season. It is normal to top up the bed later with compost or additional mix once the material begins to stabilize.
Step 5: Water the bed and let it settle
Once filled, water the bed thoroughly. This helps settle the mix, reveals low spots, and gives you a better sense of how the material drains. If the surface drops noticeably, add more of the same blend. A freshly built bed often needs one or two adjustments before it is ready for final planting.
If you are not planting immediately, cover the soil with mulch to protect it from crusting, erosion, and weed seeds. A bare raised bed can dry out faster than people expect, especially in warm or windy conditions.
Soil testing is still part of the job
A raised bed gives you more control, but it does not remove the need for testing. In fact, testing can be even more useful because the growing environment is limited and easier to adjust. University of Minnesota Extension advises sampling the bed itself rather than the walkways and sampling the top 0 to 6 inches for vegetable beds. That is practical advice because fertilizer recommendations are only as good as the sample you submit.
Many people assume bagged or bulk garden mix is automatically balanced. Sometimes it is, sometimes it is not. Compost quality varies, pH can drift, and nutrient levels can be uneven depending on the source materials. A soil test tells you what is actually happening in your bed instead of what you hope is happening.
This matters over time because raised beds are productive spaces. Vegetables remove nutrients, irrigation can leach some materials downward, and repeated additions of compost can shift the balance in ways that are not always obvious from plant appearance alone. Good gardening is not guesswork. Testing keeps small problems from becoming season-long problems.
Planting your raised bed for strong results
Once the bed is ready, plant with spacing in mind. Raised beds are often planted more intensively than row gardens, but crowded plants still compete for light, water, and airflow. Follow spacing guidance for the crops you are growing, and be realistic about mature size. Tiny seedlings do not tell you how large a tomato plant or zucchini will become by midsummer.
It helps to group crops by growth habit and seasonal timing. Quick greens, radishes, and early root crops can occupy part of the bed while slower warm-season vegetables are still getting established. Trellised crops can go along the north side in many layouts so they do not shade shorter plants. The structure of the bed makes planning easier because your growing area is fixed and visible.
After planting, mulch the soil surface. Mulch helps reduce moisture loss, slows weed growth, and protects soil structure from heavy rain. It does not need to be complicated. The goal is to keep the bed productive and stable, not constantly reworked.
Watering and irrigation in raised beds
Raised beds often drain better than in-ground plots, but that also means they can dry faster. New gardeners sometimes interpret the improved drainage as a reason to water casually, then wonder why plants struggle in hot weather. The better approach is steady watering based on crop needs, weather, and soil feel. Check the moisture below the surface rather than judging by appearance alone.
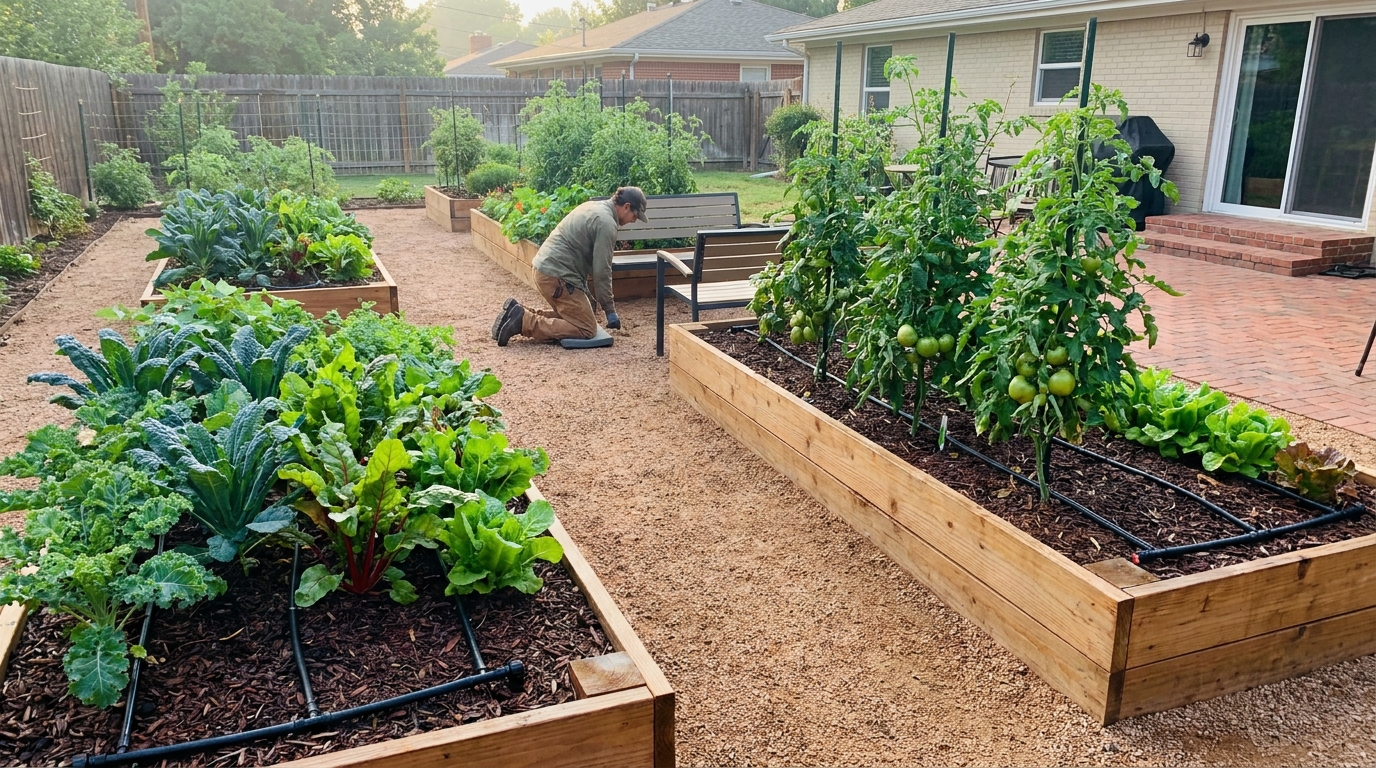
Drip irrigation is an especially good match for raised beds because the layout is compact and defined. A simple drip line or soaker setup delivers water where roots need it and reduces waste between rows or paths. It also helps keep foliage drier, which can lower disease pressure compared with frequent overhead watering. This is one of the more useful upgrades you can make if you want the bed to be efficient and easier to manage all season.
Water deeply enough to encourage roots to grow down rather than staying shallow near the surface. Short, frequent sprinkling often creates weaker rooting and more moisture swings. A raised bed should be easy to monitor, so take advantage of that. Consistency usually matters more than quantity on any single day.
Common mistakes that shorten the life of a raised bed
The first common mistake is building too wide. If you cannot reach the center, you will eventually step into the bed, compact the soil, and make routine tasks harder than they need to be. The second is using poor fill material. No amount of good carpentry can rescue a bed filled with bad soil. Vegetables respond to root conditions first, not to how attractive the frame looks from the patio.
Another mistake is ignoring drainage because the bed is open to the ground. Open-bottom beds still need thoughtful siting. If the base stays saturated or the surrounding area traps water, roots will still suffer. Beds also fail early when gardeners skip proper screws, bracing, or leveling. Soil is heavy and persistent. Weak construction always shows up eventually.
A final mistake is treating raised beds as maintenance-free. They still need compost, mulch, watering, crop rotation, and pest monitoring. Raised beds reduce some problems, but they do not eliminate weeds, insects, or disease. The benefit is not zero maintenance. The benefit is a more manageable system.
Misconceptions worth clearing up
One widespread misconception is that any fill material will work as long as the bed is raised off the ground. That is false. Poor fill still compacts, drains badly, or lacks nutrients. Another misconception is that pressure-treated lumber is always fine for edible gardens. For a vegetable bed, food-safe materials are the better path, especially given Canadian guidance against treated wood in direct food-contact applications.
There is also the idea that deeper is always better. In practice, the right depth depends on the crops, the site below the bed, and your accessibility needs. Very deep beds cost more to build and fill, and they are not automatically more productive. Good root conditions matter more than simply adding depth.
Many gardeners also assume raised beds do not need soil testing or fertility management. In reality, they are controlled systems that benefit greatly from testing because adjustments can be targeted and effective. The bed may be smaller than an in-ground plot, but that just makes management easier, not unnecessary.
Accessibility and ergonomic design choices that matter
One of the best current trends in raised-bed gardening is the focus on accessibility. A well-designed bed can make gardening possible for people who cannot comfortably work at ground level for long periods. Height, reach, path width, and stable footing all matter. A bed that is easy to access gets planted, weeded, harvested, and enjoyed more consistently.
If mobility is part of the design, start with bed width before height. Being able to reach the center without strain is essential. Then look at path surfaces, turning space, hose placement, and whether tools can be used comfortably from a seated or standing position. Small adjustments in layout often make a bigger difference than adding another few inches of bed depth.
Accessibility is not just for people with permanent mobility limitations. It also benefits older gardeners, people recovering from injury, and anyone who wants a garden that is less punishing on the body over a long season. Practical design usually means fewer abandoned projects and better long-term results.
Keeping raised beds productive year after year
A raised bed should get easier to manage after the first year, not harder. The best long-term approach is to protect the soil rather than constantly turning it over. Add compost when needed, keep the surface mulched, avoid stepping into the bed, and rotate crops as much as space allows. These habits support soil structure and steady fertility without unnecessary disturbance.
Crop rotation matters even in small spaces. If tomatoes or related crops occupy the same section every year, disease and nutrient issues can build up. Rotate plant families where possible and vary rooting depth and nutrient demand across seasons. Even a simple rotation is better than planting the same crops in the same spot indefinitely.
Watch the bed over time. If water starts to run off instead of soaking in, if growth weakens despite regular feeding, or if the soil settles heavily, it may be time to top up with a better blend and retest. Raised beds are manageable because their scale is manageable. Small interventions done at the right time usually prevent larger repairs later.
What a raised bed project really costs
Cost depends mostly on size, material, and soil volume. Lumber can be reasonable for a simple build, but soil often surprises people because a raised bed takes a substantial amount once you calculate the cubic volume. Metal and masonry beds may last longer, but the upfront cost is usually higher. If the budget is tight, it often makes more sense to build one bed well than to build several beds with poor materials and poor soil.
Think about the project in layers. The frame is the structure, but the soil is the working heart of the bed. Saving money on the frame while investing in good fill is usually a sound trade. Saving money by using questionable fill is usually false economy because correcting a bad mix later is time-consuming and expensive.
There are also operating costs to consider, though they are usually modest. Compost top-ups, mulch, seeds or starts, irrigation parts, and occasional repairs all add up over time. The upside is that a solid raised bed becomes a durable garden system that can produce for years if you maintain it properly.
A practical plan for your first raised bed
If you are new to this, keep the first build straightforward. Choose a sunny site, build a bed about 4 x 8 feet or another size you can easily reach across, use food-safe materials, level the frame carefully, and fill it with a quality mix of soil and compost. Add mulch, water consistently, and plant crops you actually like to eat. That simple approach works better than trying to copy a large, complicated garden before you understand how your yard behaves.
Raised beds are beginner-friendly not because they remove all the work, but because they put the important variables within reach. You decide the soil, the shape, the path layout, and the crop plan. That is a real advantage, especially on difficult sites or in busy households where the garden needs to be efficient and reliable.
If you build the bed well and manage the soil with some discipline, the payoff is straightforward. Better drainage, cleaner structure, easier access, and healthier vegetables. That is the value of a raised garden bed. It is not a trend piece or a decorative box. It is a practical growing system that earns its place in the yard when it is built with the right priorities.
Final thoughts
The best raised garden beds are not necessarily the most expensive or the tallest. They are the ones that match the site, fit the gardener, and use quality soil from the start. When the width is practical, the materials are food-safe, and the bed is set up for easy watering and maintenance, vegetable gardening becomes much more manageable.
That is why raised beds remain one of the most useful DIY outdoor projects for home gardeners. They solve real problems, especially poor soil, drainage issues, and difficult access. Build one carefully, treat the soil as the priority, and you give yourself a better chance at a productive, enjoyable vegetable garden season after season.


No Comment! Be the first one.