



Transform Your Garage: Essential DIY Upgrades for Better Storage, Comfort, and Style
For many homeowners, the garage is the hardest working space in the house and the least organized. It stores tools, sports gear, paint, yard supplies, holiday decorations, car care products, and often everything else that does not have a proper home indoors. The trouble is that a garage can become cluttered so gradually that people stop seeing how much usable space they have lost. A few practical upgrades can change that quickly, and most of them are well within reach for a capable DIY homeowner.
Table Of Content
- Start with a Clear Plan, Not a Shopping Trip
- Set Up the Space by Frequency of Use
- Upgrade Storage First for the Biggest Everyday Return
- Install Wall-Mounted Tool and Utility Storage
- Add Open Shelving for Durable, Visible Storage
- Use Overhead Storage for Seasonal and Bulky Items
- Build a Garage That Supports How You Live
- Refresh the Workbench Instead of Replacing It
- Improve Lighting for Safety, Accuracy, and Atmosphere
- Layer the Lighting Instead of Relying on One Fixture
- Seal Air Leaks and Improve Comfort Without a Full Remodel
- Replace Worn Weatherstripping and Seal Obvious Gaps
- Consider Insulation Where It Delivers the Most Value
- Make Safety Part of the Upgrade, Not an Afterthought
- Take Carbon Monoxide Risk Seriously
- Improve the Look of the Garage with Small Finish Upgrades
- Create a Cohesive Visual System
- Step-by-Step Weekend Garage Upgrade Plan
- Cost Priorities That Deliver Real Value
- Common Mistakes to Avoid During a Garage Makeover
- The Garage Upgrade That Matters Most
The good news is that a better garage does not require a full renovation or a big budget. In most cases, the highest value improvements are simple ones that improve how the space works every day. Better storage, stronger lighting, improved air sealing, safer cabinet access, and a smarter layout can make the garage easier to use, more comfortable through the seasons, and better looking at the same time. This is where function and style come together in a way that actually matters.
This guide focuses on upgrades that offer practical results without calling in a contractor. The goal is not to turn the garage into a showroom unless that is what you want. The goal is to create a space that supports real life, keeps important items accessible, protects your home, and feels less like a dumping ground. If you approach the project in the right order, you will get better results and avoid spending money on fixes that do not solve the actual problems.
One of the biggest misconceptions about garage makeovers is that they need expensive cabinets, specialty flooring, and custom-built systems to feel finished. In reality, homeowners often get far more day to day value from simple organization, cleaner lighting, and better use of wall and ceiling space. Another common mistake is treating the garage as separate from the house when it comes to comfort and safety. In an attached garage especially, air leaks, fumes, poor lighting, and loose storage all affect more than just the garage itself.
What follows is a practical roadmap. It starts with clearing the space and planning how you actually use it. Then it moves into storage upgrades, lighting, comfort improvements, and safety details that are easy to overlook. If you tackle these areas in sequence, your garage can become easier to maintain and a lot more pleasant to spend time in.
Start with a Clear Plan, Not a Shopping Trip
The best garage upgrades begin before you buy a single shelf or bin. Start by removing everything you can from the floor and grouping items by category. Keep automotive supplies together, lawn and garden equipment together, sports gear together, and workshop tools together. This lets you see how much space each category really needs and which items should be easiest to reach.
This step matters because storage systems only work when they match the way the space is used. If you install attractive shelving before sorting your belongings, you may end up wasting valuable wall area on the wrong items. Frequently used tools should not go above head height, and winter decorations should not take up the best workbench zone in July. A garage that works well is planned around access, not just capacity.
As you sort, be realistic about what belongs in the garage and what should leave the property. Broken hand tools, dried-up paint, duplicate supplies, and mystery hardware piles are common space wasters. If something has not been used in years and serves no clear purpose, it is probably occupying space needed for something more useful. The first improvement in any garage makeover is almost always reclaimed square footage.
Once the categories are clear, sketch a simple floor plan. Mark where the vehicle parks, where the main walking path should stay open, and where any work area makes sense. If the garage also functions as a laundry overflow, hobby area, gym corner, or mudroom entry, build those uses into the plan from the beginning. Garages are now often multi-use spaces, and the layout should reflect that rather than fighting it.
Set Up the Space by Frequency of Use
One of the most effective organizing principles is also the simplest. The items you use often should be easiest to see and reach. Seasonal or occasional items can move higher on the wall, into overhead storage, or toward the back. This keeps the best storage positions available for what you actually need during a normal week.
That approach also makes the garage safer and less frustrating. Climbing over boxes to get a rake or moving a ladder every time you need a drill wastes time and increases the chance of accidents. A functional garage cuts down on unnecessary lifting, reaching, and floor clutter. That is where style starts to show up naturally, because orderly spaces simply look better.
Practical rule: If an item is used weekly, keep it at eye level or within easy arm reach. If it is used once a year, store it higher or farther back.
Upgrade Storage First for the Biggest Everyday Return
If your garage floor is doing too much of the storage work, that is the first problem to solve. Wall space and overhead space are usually underused, and they offer the fastest path to a cleaner, more flexible garage. Moving gear off the floor makes room for parking, sweeping, project work, and safer movement through the space. It also helps you see what you own without digging through stacks.
Vertical storage is especially valuable because garages tend to have long stretches of wall that can be converted into highly functional zones. Even a narrow wall beside a door or workbench can hold hand tools, extension cords, small shelves, or hanging baskets. Modular systems are popular for a reason. They let homeowners mix hooks, bins, rails, and shelves in a way that can change as needs change.
When choosing storage, think in layers. Base cabinets and low shelves are useful, but most garages also benefit from a middle layer for frequently used tools and an upper layer for long-term storage. This avoids overloading one part of the room while leaving another blank. It also makes the garage feel intentional instead of improvised.
Install Wall-Mounted Tool and Utility Storage
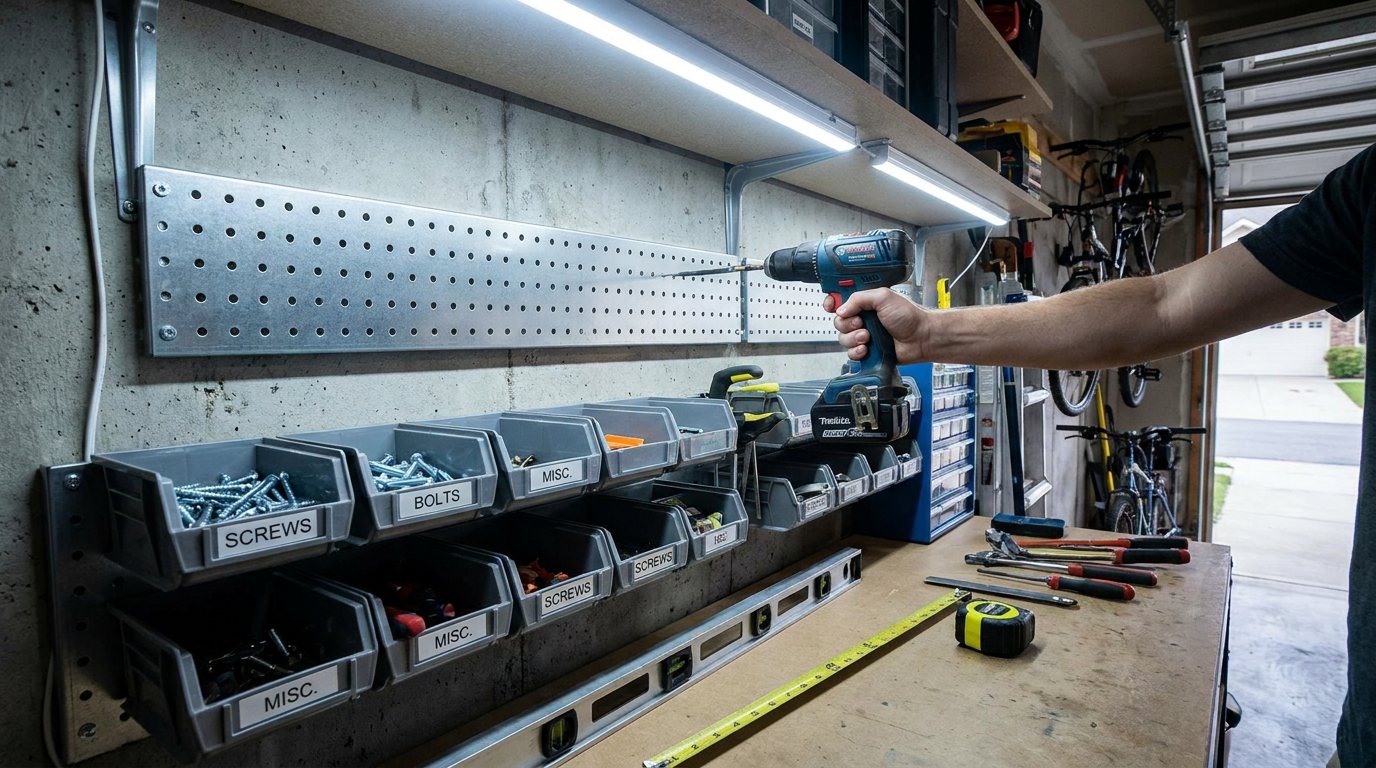
Pegboard and slatwall systems remain some of the best garage upgrades because they are affordable, visible, and adaptable. A pegboard panel over a workbench can hold hand tools, safety glasses, tape measures, and small hardware containers. Slatwall systems can support heavier accessories such as baskets, hooks, and specialty holders for cords or garden tools. Both options keep equipment off work surfaces and easy to return after use.
The best results come from assigning zones rather than hanging things wherever they fit. Put gardening tools near the exterior door if that is how you access the yard. Keep car care items near the front of the garage. Place workshop tools where they support the bench. A garage feels more polished when the storage layout follows the way tasks actually happen.
Labeling matters more than many people think. Clear labels on bins and shelves reduce the slow drift back into clutter because everyone in the household knows where things belong. Labels also save time when you are looking for holiday lights, bike pump accessories, or spare fasteners. A tidy garage stays tidy longer when it is easy to put things away correctly.
Add Open Shelving for Durable, Visible Storage
Strong open shelving is a practical choice for many garages because it handles heavy items, keeps contents visible, and costs less than full cabinetry. Metal or heavy-duty resin shelving works well for bins, coolers, car fluids, and project materials. Anchoring shelving properly to wall framing or following the manufacturer’s load guidance is important, especially when storing dense items like paint cans or hardware boxes.
Try not to turn shelving into a deep pile of mixed items. Use matching bins where possible and keep similar categories together. Clear bins are especially useful for smaller seasonal items, while opaque bins work well if they are clearly labeled. The point is not just to store more. It is to store more intelligently so you can find things without creating another mess.
Use Overhead Storage for Seasonal and Bulky Items
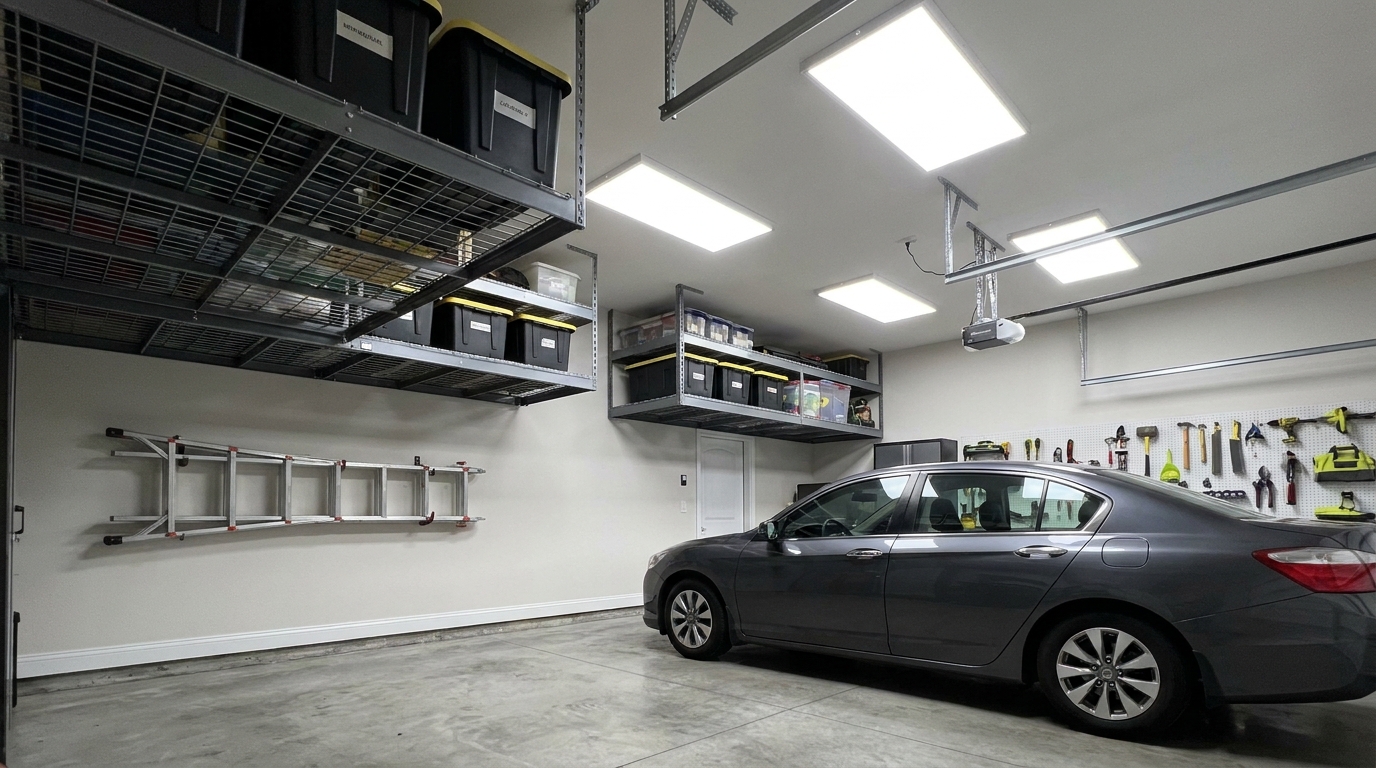
Ceiling-mounted storage racks are one of the most efficient ways to reclaim garage floor space. They are ideal for seasonal decorations, camping gear, spare coolers, and other items that do not need regular access. In garages with adequate ceiling height, this can free up an impressive amount of room along the perimeter and around parked vehicles.
Safety and access matter here. Do not store extremely heavy items overhead unless the rack and structure are designed for it and properly installed. Keep the heaviest bins manageable enough to lower safely from a ladder. Think of overhead storage as the place for light to medium-weight, low-frequency items, not as a catch-all for anything awkward.
There is also a visual benefit. Getting oversized bins and seasonal clutter above eye level reduces visual noise and makes the garage feel larger. That cleaner look is part of the style upgrade, even though the main purpose is function.
Build a Garage That Supports How You Live
Not every homeowner uses the garage in the same way. For some, it is mainly vehicle storage. For others, it is a workshop, a home gym, a place to tune bikes, or a staging area for yard work and family gear. The most successful upgrades happen when the garage is designed around those real uses rather than a generic idea of organization.
If you work on projects, a proper workbench is worth the space it takes. It does not need to be elaborate. A sturdy bench with good lighting, a protected top, and nearby tool storage can make the garage much more useful. If your household uses the garage as a transition space, a small bench, wall hooks, and a boot tray near the entry can reduce clutter before it reaches the house.
Multi-use garages benefit from visual boundaries. A tool wall, a shelf run, or a mat under a gym area can help define zones without construction. This makes the space feel more organized and more pleasant to use. You do not need finished walls and premium cabinetry to achieve that. You need a layout that respects the tasks happening there.
Refresh the Workbench Instead of Replacing It
Old workbenches often look worse than they function. Before replacing one, consider a practical refresh. Tighten loose fasteners, add a new plywood or hardboard top, mount a power strip safely, and install task lighting above it. A coat of paint on the base and a simple tool board behind it can make a tired bench feel like part of a planned workspace again.
This kind of upgrade delivers both function and style because it improves the area where detail work gets done. A brighter bench makes measuring, cutting, and repairs easier. Cleaner surfaces also reduce the chance of losing small parts in dust and clutter. Sometimes the right improvement is not new furniture. It is restoring what already works.
Improve Lighting for Safety, Accuracy, and Atmosphere
Lighting is one of the fastest ways to change how a garage looks and feels. Many garages still rely on a single dim ceiling fixture that leaves dark corners and shadows over work areas. That kind of lighting makes every task harder, from unloading groceries to finding hardware to doing simple repairs. It also makes the space feel neglected even when it is organized.
Modern LED lighting solves several problems at once. It gives you more brightness with less energy use, lasts much longer than older bulbs, and starts reliably in cold weather. Guidance on energy-efficient lighting often recommends choosing fixtures based on the amount of light needed, measured in lumens, rather than just wattage. For garages, that usually means bright general lighting plus stronger task lighting where precise work happens.
Color temperature matters too. Many homeowners prefer daylight-like LEDs in the 4000K to 5000K range for garages because they improve visibility and make tools, labels, and work surfaces easier to read. Warmer light can look softer, but it is usually less effective in a work-oriented space. The right lighting does not just improve appearance. It improves accuracy and comfort.
Layer the Lighting Instead of Relying on One Fixture
A practical garage lighting plan uses layers. Start with overhead LED shop lights or high-output fixtures for general illumination. Then add brighter task lighting over the workbench, utility sink, or tool area. If there is a side entry or interior access door, consider motion-sensor lighting there for convenience and security.
Zoned switches also help. It is useful to control the workbench lights separately from the full overhead lights so you do not have to flood the whole garage every time you need one small task area. In larger garages, dividing the lighting into front and back zones is another smart move. Convenience matters because when lighting is easy to use, people actually use it properly.
Lighting also contributes to ambiance more than people expect. A bright, evenly lit garage feels cleaner, safer, and more inviting. That can make the space more likely to be used for hobbies, maintenance, or exercise rather than avoided. Style in a garage is not about fancy finishes first. It is about making the room feel cared for and easy to inhabit.
Seal Air Leaks and Improve Comfort Without a Full Remodel
One of the most overlooked garage upgrades is also one of the most cost effective. Air sealing and weatherstripping can make a major difference in comfort, efficiency, and household protection, especially in attached garages. If outside air is pouring through gaps at doors, wall penetrations, or the connection to the house, the garage becomes drafty, harder to use, and more likely to affect nearby interior rooms.
Energy guidance consistently points to sealing air leaks and adding insulation as practical ways to improve comfort and reduce energy waste. ENERGY STAR notes that these measures may provide up to 10 percent savings on annual energy bills in the right conditions. Natural Resources Canada also recommends insulating and air sealing the walls, ceiling, and door adjoining a house to reduce heat loss and help prevent garage fumes from entering the home. That means these upgrades are about more than temperature. They also help with indoor air quality and household safety.
There is a common misconception that insulation only matters in winter. In reality, air sealing and insulation help during hot weather too by reducing heat gain and making the space less extreme. Even if your garage is not fully conditioned, reducing drafts and temperature swings can make it more usable through much more of the year.
Replace Worn Weatherstripping and Seal Obvious Gaps
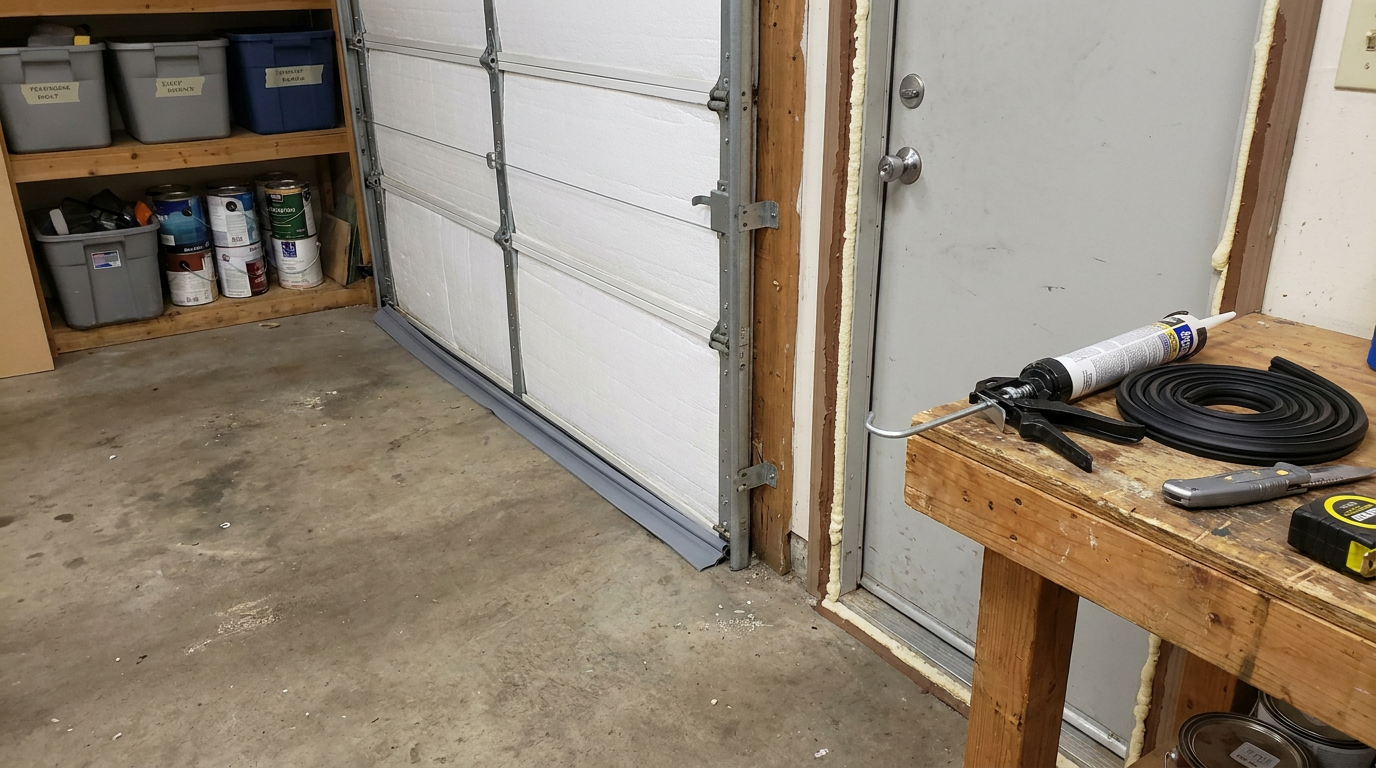
Start with the easiest fixes. Inspect the bottom seal on the overhead garage door, the side jamb weatherstripping, and the seals around any service door to the outside. If the rubber is cracked, flattened, or missing sections, replacing it is a manageable DIY job and often one of the best comfort upgrades for the money. Check for daylight around closed doors, especially in the corners.
Next, look at smaller gaps around pipe penetrations, wiring holes, and framing joints where appropriate sealants can be used. Caulk or foam products can help close those leaks, but use the right product in the right location and avoid blocking areas that need proper ventilation or service access. The goal is controlled sealing, not random filling.
If the garage is attached, pay special attention to the wall and ceiling assembly adjoining the house. Gaps here can allow cold air, heat, and potentially fumes to move toward living spaces. This is also a good time to inspect the door between the garage and home and make sure it closes properly and seals reasonably well.
Consider Insulation Where It Delivers the Most Value
Full insulation projects vary depending on the garage construction, but even partial upgrades can help. If walls are open during another project, adding insulation is usually worthwhile. In finished attached garages, the highest priority is often the shared walls and ceiling areas that affect the house directly. Garage doors can also be improved with insulation kits in some cases, though results depend on the door design and local climate.
If there is ductwork passing through the garage, that deserves attention too. ENERGY STAR notes that ducts located in places such as garages, attics, basements, and crawlspaces should be sealed and insulated. Properly sealed ducts can improve HVAC efficiency by as much as 20 percent. This is one of those behind-the-scenes upgrades that does not change the look of the garage much, but it can significantly affect comfort and system performance.
Make Safety Part of the Upgrade, Not an Afterthought
A garage stores more hazardous items than most rooms in a home. Fuels, cleaners, paints, batteries, sharp tools, and power equipment often end up mixed together in open view or easy reach. Better organization helps, but true improvement means making safety decisions on purpose. This is especially important for households with children, pets, or frequent guests.
Secure storage should be part of your plan from the beginning. Consumer safety guidance recommends locking up medications and cleaners and keeping them out of children’s reach. In garage terms, that means using lockable cabinets or elevated secure storage for chemicals, solvents, automotive fluids, and anything else that should not be casually accessible. It is a simple upgrade that protects more than the garage itself.
Sharp tools, extension cords, and ladders also deserve proper homes. Hanging long-handled tools keeps them from tipping over in corners. Cord reels or dedicated hooks prevent tangles and trip hazards. Ladders should be stored so they are stable and not blocking access routes. A safe garage is usually a more orderly garage because items have dedicated positions instead of landing wherever there is room.
Take Carbon Monoxide Risk Seriously
One misconception still shows up in many households: the belief that running a car or small engine in the garage is safe if the door is open. It is not a risk worth taking. Research published in PubMed found that carbon monoxide in a residential garage reached 253 parts per million after 20 minutes with a car without a catalytic converter and 30 parts per million with a modern car that had one. Small engines and generators can produce even higher levels.
The practical rule is simple. Never idle a car or run gasoline-powered tools, pressure washers, snow blowers, or generators in an attached garage. Do not rely on an open door to make it safe. Carbon monoxide can accumulate quickly and can also migrate into the home. A carbon monoxide alarm in the home is a smart and necessary layer of protection.
Safety reminder: An attached garage is part of your home’s risk profile. Air sealing, proper storage, and never running fuel-powered equipment indoors all matter.
Improve the Look of the Garage with Small Finish Upgrades
Once storage, lighting, and safety are handled, a few finish upgrades can make the garage feel complete. This is where homeowners often expect to spend heavily, but you can get a more attractive result through simple cleanup and consistency. The visual payoff usually comes from removing clutter, brightening surfaces, and making the storage system look intentional.
Start by cleaning the walls, sweeping thoroughly, and dealing with stains or residue on shelves and benches. If the walls are unfinished but sound, a coat of light-colored paint can brighten the entire garage and improve how light bounces around the room. White, soft gray, or a warm off-white often works well because it increases visibility and gives the space a cleaner look without feeling harsh.
You do not need a showroom floor to improve appearance either. In many garages, a thorough cleaning and selective touch-up are enough. If the floor is in decent condition, focus on keeping it clear and visible. Organization often has a bigger impact on how the garage looks than decorative upgrades do.
Create a Cohesive Visual System
Style in a garage comes from repetition and order more than expensive materials. Matching storage bins, consistent labels, aligned shelving, and grouped tools create a sense of structure. That alone can make the garage feel updated. When every bin is a different size and every surface holds unrelated items, the room feels chaotic no matter how much money has been spent.
If you want an easy finishing move, choose one or two durable accent colors for labels, bins, hooks, or cabinet fronts. Keep it simple and practical. The goal is not decoration for its own sake. The goal is to make the room easier to read at a glance and more pleasant to walk into every day.
Step-by-Step Weekend Garage Upgrade Plan
If you want a practical path through this project, break it into a simple sequence over one or two weekends. This keeps the work manageable and reduces the chance of creating a bigger mess halfway through. It also helps you spend money where it has the most impact first.
-
Empty and sort the garage by category. Remove trash, donate what is still usable, and dispose of hazardous materials according to local rules. Sweep the space so you can work safely and see the actual floor area available.
-
Sketch the layout with clear zones for parking, walking, storage, and work. Decide what should stay low, what can go overhead, and what needs fast access.
-
Install wall storage first. Put up pegboard, slatwall, or utility rails where they solve real clutter problems. Add shelving and bins based on the categories you sorted earlier.
-
Add overhead storage for seasonal or bulky items. Keep weight limits in mind and avoid storing anything overhead that you will need all the time.
-
Upgrade lighting. Replace old fixtures with bright LED shop lights and add task lighting over the workbench or utility areas. Test the space at night to make sure shadows are reduced.
-
Seal gaps and replace worn weatherstripping around doors. Inspect the shared wall and ceiling areas in attached garages for obvious leaks or areas needing attention.
-
Secure hazardous items in locking or elevated cabinets. Rehang tools, organize cords, and make sure the floor path stays open.
-
Finish with a bench refresh, wall paint if needed, and consistent labeling so the system is easy to maintain.
Cost Priorities That Deliver Real Value
When budgets are limited, focus first on improvements that affect daily use. Better lighting, stronger storage, and weatherstripping usually return more value than decorative features. They make the garage easier to use now and support future upgrades later. A clean, bright, organized garage will almost always outperform a half-finished cosmetic makeover.
If you are deciding where to spend the next dollar, think in terms of function per square foot. A well-placed wall system can reclaim floor area. An LED fixture can improve the entire room at once. A few rolls of weatherstripping can make the garage and adjacent rooms feel less drafty. These are modest expenses compared with large custom solutions, but they solve real problems.
It is also worth checking whether local utilities or energy programs offer rebates or assessments related to air sealing, insulation, or efficiency improvements. Some homeowners can reduce costs that way, especially if the garage work ties into broader home performance upgrades. Even if no incentive applies, these are still some of the more practical investments you can make.
Common Mistakes to Avoid During a Garage Makeover
The biggest mistake is organizing clutter instead of reducing it. If the garage is full of items you do not need, new shelves will only hold unnecessary things more neatly. Decluttering first gives every later decision more value. It also helps prevent overspending on storage for items that should have left the property.
Another mistake is filling lower wall space with seldom-used items. Prime storage space should support the tasks you do most often. Seasonal decorations, backup supplies, and infrequent gear can go higher or farther back. Keep the best locations for the things you reach for regularly.
Poor lighting is another common problem. Homeowners sometimes add storage but leave the original dim fixture in place, which limits the benefit of all the new organization. If you cannot see labels clearly or work without shadows, the garage is still underperforming. Bright, layered lighting is not optional if you want the room to work properly.
Finally, do not ignore safety details because they are less visible. Unsecured chemicals, overloaded racks, blocked exits, and assumptions about ventilation can create real hazards. A garage upgrade should improve safety as much as appearance. In a well-planned space, those two goals usually support each other.
The Garage Upgrade That Matters Most
If there is one principle that ties all of this together, it is this: the best garage is the one that supports your daily life without getting in your way. It does not have to be expensive, overly finished, or designed for social media. It has to be usable, durable, and easy to maintain. That is what gives these upgrades lasting value.
For most homeowners, the biggest transformation comes from a combination of better storage, brighter LED lighting, smarter layout, and basic air sealing. Those changes make the garage feel larger, cleaner, and more capable right away. They also create a strong foundation for any future improvements, whether that means a dedicated workshop corner, a home gym zone, or simply a place where the car finally fits again.
Approach the project practically. Fix what slows you down, store what crowds the floor, brighten what hides in shadow, and seal what makes the space uncomfortable or less safe. Done in that order, a garage upgrade stops being a cosmetic project and becomes a real improvement to how the home works. That is the kind of style most homeowners appreciate every single day.


No Comment! Be the first one.