



How to Finish Your Basement: A Step-by-Step DIY Guide That Avoids Costly Mistakes
Finishing a basement is one of the most practical ways to add usable space to a home without building an addition. A well-planned basement can become a family room, home office, workout area, guest space, or a combination of all of them. It can also improve resale appeal if the work is done properly and the space feels dry, comfortable, and safe. The key point is that a basement is not just another room below grade. It behaves differently from the rest of the house, and that changes how you should approach every stage of the project.
Table Of Content
- Step 1: Start with a full basement assessment
- Step 2: Test for radon and understand health risks
- Step 3: Check permits, code rules, and room use requirements
- Step 4: Plan the layout around real constraints, not wishful thinking
- Step 5: Fix water issues before framing a single wall
- Step 6: Air seal and insulate the basement correctly
- Step 7: Frame with access, straightness, and future service in mind
- Step 8: Rough in electrical, lighting, plumbing, and HVAC
- Step 9: Pass inspections before you close the walls
- Step 10: Hang drywall and finish surfaces with patience
- Step 11: Choose flooring that respects basement conditions
- Step 12: Finish trim, doors, and the small details that make the room usable
- Common basement finishing mistakes to avoid
- When to call a professional
- A simple step-by-step basement finishing checklist
- Final thoughts
The biggest mistake homeowners make is treating basement finishing like a standard interior remodel. They start by sketching walls, buying drywall, or pricing flooring before they understand moisture, insulation, ventilation, radon, and code requirements. That usually leads to problems hidden behind finished surfaces, and those problems are expensive to correct later. A basement that looks dry can still have seasonal seepage, humid air, condensation on cool concrete, or air leaks at the rim joist that make the room cold and uncomfortable.
A better approach is to work in the right order. Diagnose the space first, deal with water and air leaks, confirm permit requirements, test for radon, and then build your finishing plan around the basement you actually have. Natural Resources Canada notes that basement walls can account for about 25 percent of a home’s total heat loss, which is a strong reminder that insulation and air sealing are not cosmetic upgrades. They are central parts of a successful basement project. If you get the fundamentals right, the drywall, paint, flooring, and trim are much easier to finish with confidence.
This guide walks through the process step by step with a practical DIY focus. It also explains where homeowners should slow down, ask questions, or bring in a qualified pro. That matters because some parts of basement finishing are straightforward for a careful DIYer, while others involve building code, life safety, electrical work, plumbing, or specialty installation methods that should not be guessed at.
Step 1: Start with a full basement assessment
Before you buy materials or draw a final layout, inspect the basement as if you are trying to prove it is not ready to finish. That mindset helps you catch the problems that often get buried under fresh framing and drywall. Look at foundation walls, slab edges, around windows, pipe penetrations, rim joists, sump pits, floor drains, and any visible cracks. Check for staining, white mineral deposits, peeling paint, musty smells, rust on metal items, or old water marks on framing and concrete. These clues tell you how moisture has behaved over time, not just how the basement looks on a dry day.
It helps to inspect after heavy rain if possible. Water issues are often intermittent, and a dry week can hide them. If you see active leaks, damp insulation, mold, recurring condensation, or standing water near walls, stop there and solve those issues before anything else. Finishes trap moisture, and trapped moisture turns a manageable problem into damaged drywall, rotten lumber, and mold growth inside closed assemblies.
Also pay attention to existing mechanical systems. Note the path of ducts, plumbing lines, cleanouts, gas piping, electrical panels, shutoff valves, and appliances. Many basement plans fall apart because homeowners design a room without leaving service access or enough clearance around systems that need maintenance. A finished basement should still allow practical access to the house’s infrastructure.
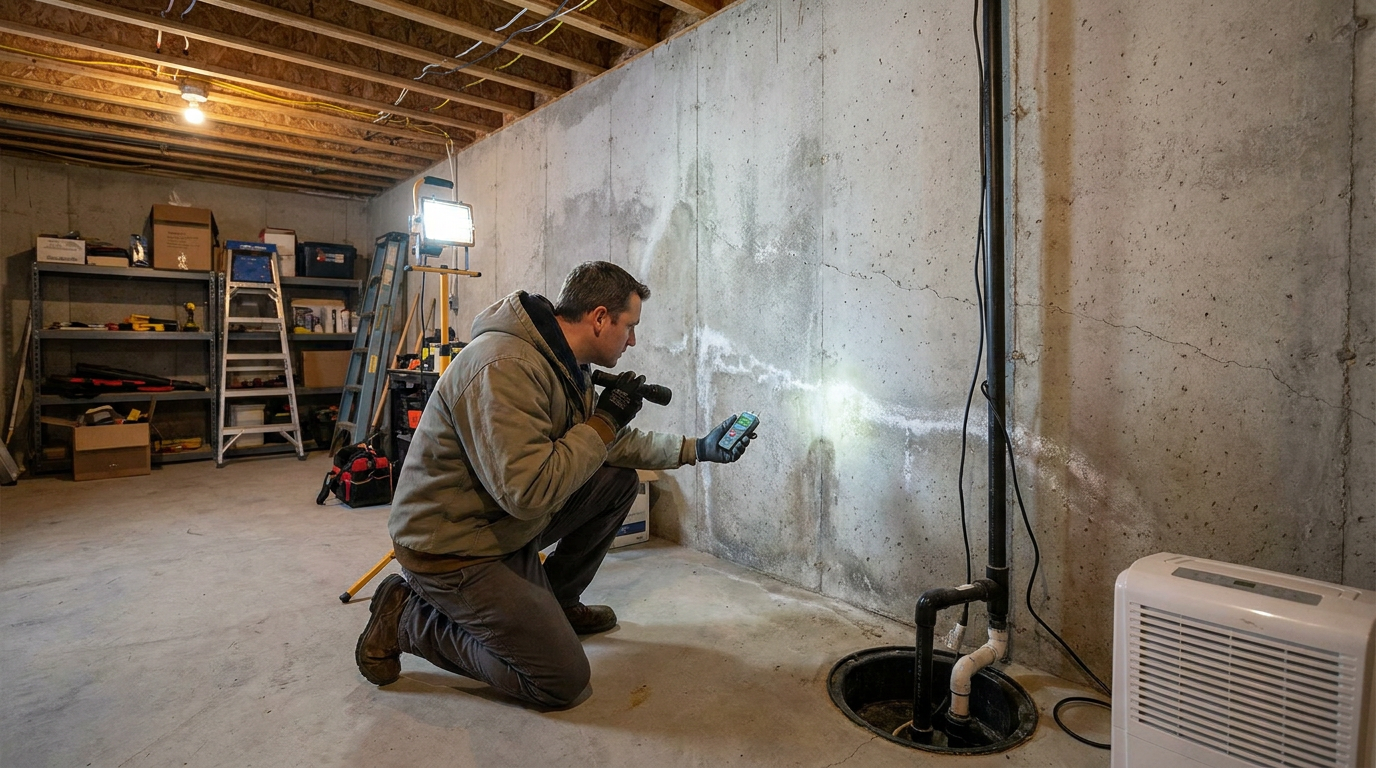
Humidity is another part of the assessment. A basement can be structurally sound and still be too damp for comfortable living. If the space regularly feels clammy, that is a sign to evaluate ventilation, dehumidification, air sealing, and insulation strategy before finishing. The goal is to make the basement stable first, because decorative materials do not fix building-performance problems.
Practical rule: If you would not be comfortable storing cardboard boxes or fabric furniture against the wall in its current condition, the basement is not ready to be covered with finished materials yet.
Step 2: Test for radon and understand health risks
Radon is easy to overlook because you cannot see or smell it, but it should be part of any basement finishing plan. The EPA says radon can enter any home, old or new, through foundation cracks and other openings. Since the basement is the lowest level of the home, it is a sensible place to test first, especially if the finished space will be used often or turned into a bedroom, office, or play area. Finishing the basement first and testing later is the wrong order because mitigation may require access to the slab or foundation details.
The EPA action level is 4 pCi/L, which is 150 Bq/m³. If test results are at or above that level, mitigation is recommended. Depending on where you live, local guidance may also encourage action at lower levels. The important thing is not to assume radon is only a problem in older homes or certain neighborhoods. Radon varies house by house, even between similar homes on the same street.
For many homeowners, radon testing is inexpensive and straightforward. Short-term and long-term tests are available, and if the result is elevated, a qualified radon mitigation contractor can recommend a proper system. If you are already opening parts of the basement, this is also a good time to think about passive radon-ready details if they make sense for your house and local practice. It is much easier to coordinate these decisions before finishes go in.
Step 3: Check permits, code rules, and room use requirements
Basement finishing often requires permits, and the exact requirements depend on your local authority. In Ontario, for example, a building permit is issued by the authority enforcing the Ontario Building Code, and permit approval depends on applicable law and code compliance. Similar rules apply elsewhere, even if the process and terminology differ. If your project includes framing, insulation, electrical work, plumbing, new bedrooms, egress changes, or HVAC changes, there is a strong chance permits and inspections are required.
Do not treat permits as a technicality. They affect life safety, insurance, resale, and the quality of the finished work. Inspections also force the project to stay honest because rough framing, wiring, insulation, and fire blocking are much easier to verify before drywall covers everything. A basement that was finished without approvals can create problems later, especially if a future buyer asks whether the space is legal living area or whether a bedroom meets emergency escape rules.
This matters even more if you want a bedroom in the basement. Sleeping rooms generally need compliant emergency egress or rescue openings under model code rules. A basement bedroom is not just another finished room with a bed in it. Window size, opening dimensions, sill height, window well details, and escape access can all matter. If your plan includes a bathroom, wet bar, laundry relocation, or kitchenette, ask about plumbing venting, fixture counts, backwater protection, and whether any extra approvals are needed.
A short conversation with the building department at the beginning can save a lot of rework. Bring a rough layout, ceiling height information, window sizes, and a basic description of what you want to build. Ask clearly what permits are required, what drawings they expect, and what inspections you need along the way.
Step 4: Plan the layout around real constraints, not wishful thinking
Once the basement has been checked for moisture and safety issues, the next job is planning a layout that actually fits the space. The best basement layouts work with low ceilings, beams, columns, ducts, drains, and utility zones instead of pretending those obstacles do not exist. Trying to hide every pipe and duct often creates a cramped ceiling and awkward soffits everywhere. A more practical design groups utility runs, leaves service access where needed, and assigns room uses based on the height and shape of the space.
Start with the fixed elements you cannot easily move. Mark the furnace, water heater, panel, cleanouts, sump pit, support posts, windows, stairs, and major duct runs. Then decide which areas are best for open living space, enclosed storage, mechanical access, and any rooms that need privacy. If you want a TV room, place it where ceiling height is most comfortable. If you want a workspace or kids’ area, prioritize the parts of the basement with the most natural light.
Think carefully about future use. A flexible basement ages better than one built around a narrow trend. Open multiuse space usually gives a better return than overcomplicated partitioning. If you are adding a bathroom, try to keep it near existing plumbing lines to reduce cost and simplify rough-in work. If you are planning a bedroom, address egress before finalizing anything else.
Also decide early how finished you want the ceiling to be. Drywalled ceilings look clean, but they reduce access to pipes, wires, and ducts unless access panels are planned carefully. Suspended ceilings offer easier access but create a different look and usually need enough height to feel comfortable. There is no universal best choice. The right option depends on your ceiling height, mechanical complexity, and priorities for maintenance versus appearance.
Step 5: Fix water issues before framing a single wall
If your assessment found any water entry or moisture management issues, this is the point where they get fixed. Basement water problems can come from exterior grading, clogged gutters, short downspouts, poor drainage, foundation cracks, leaking window wells, plumbing leaks, or humidity and condensation rather than bulk water. The source matters because the fix depends on the cause. You do not want to spend money on interior finishes when the real problem is outside the house.
Start with the simple exterior basics. Make sure the ground slopes away from the foundation, downspouts discharge well away from the house, and gutters are clean and functioning properly. Check window wells for debris and drainage issues. Inside, evaluate whether the sump pump works correctly and whether a battery backup makes sense in your area. If the basement has a history of seepage, a waterproofing contractor or foundation specialist may be worth calling before any DIY finishing starts.
Hairline cracks are common in concrete, but active movement, widening cracks, or water penetration deserve closer attention. If you are unsure whether a crack is cosmetic or structural, get a professional opinion. A basement finish is only as durable as the conditions behind it. Trying to hide a water problem behind insulation and drywall does not solve it. It simply delays the repair until it becomes larger and more expensive.
Step 6: Air seal and insulate the basement correctly
This is where many basement projects either succeed or fail. Natural Resources Canada advises treating basement insulation alongside waterproofing, radon remediation, and finishing work because these systems affect one another. That is exactly right. You are not just trying to make the basement warmer. You are trying to control heat loss, condensation risk, and comfort while keeping materials away from damp concrete surfaces.
NRCan notes that basements can account for about 25 percent of a home’s total heat loss. That makes air sealing and insulation some of the highest-impact parts of the whole project. Air leaks at the rim joist, around penetrations, and at the top of the foundation are common sources of cold drafts and condensation. If you skip that work, the basement may still feel chilly even after you spend money on insulation and drywall.
For many moisture-aware basement assemblies, rigid foam insulation against the concrete wall works better than fiberglass batts placed directly against foundation walls. Rigid foam helps separate interior materials from cool concrete and reduces the chance of condensation inside the wall assembly. In some cases, spray foam may be appropriate, particularly at rim joists or for more complex sealing details. NRCan notes that closed-cell spray foam can help control dampness on basement walls, but it should be applied by a certified installer. That is one of the areas where many DIYers are better off hiring out the work.
NRCan also advises at least RSI 2.1, roughly R-12, for some interior basement insulation assemblies unless local code requires more. Always verify local requirements because minimum insulation levels vary by location and code edition. The right assembly for your basement depends on climate, wall condition, space constraints, and code expectations. In many cases, a common approach is to air seal the wall, apply rigid foam to the concrete, seal the seams, then frame a wall inboard of that layer. Additional batt insulation may be used in the stud cavities depending on the assembly and local code.
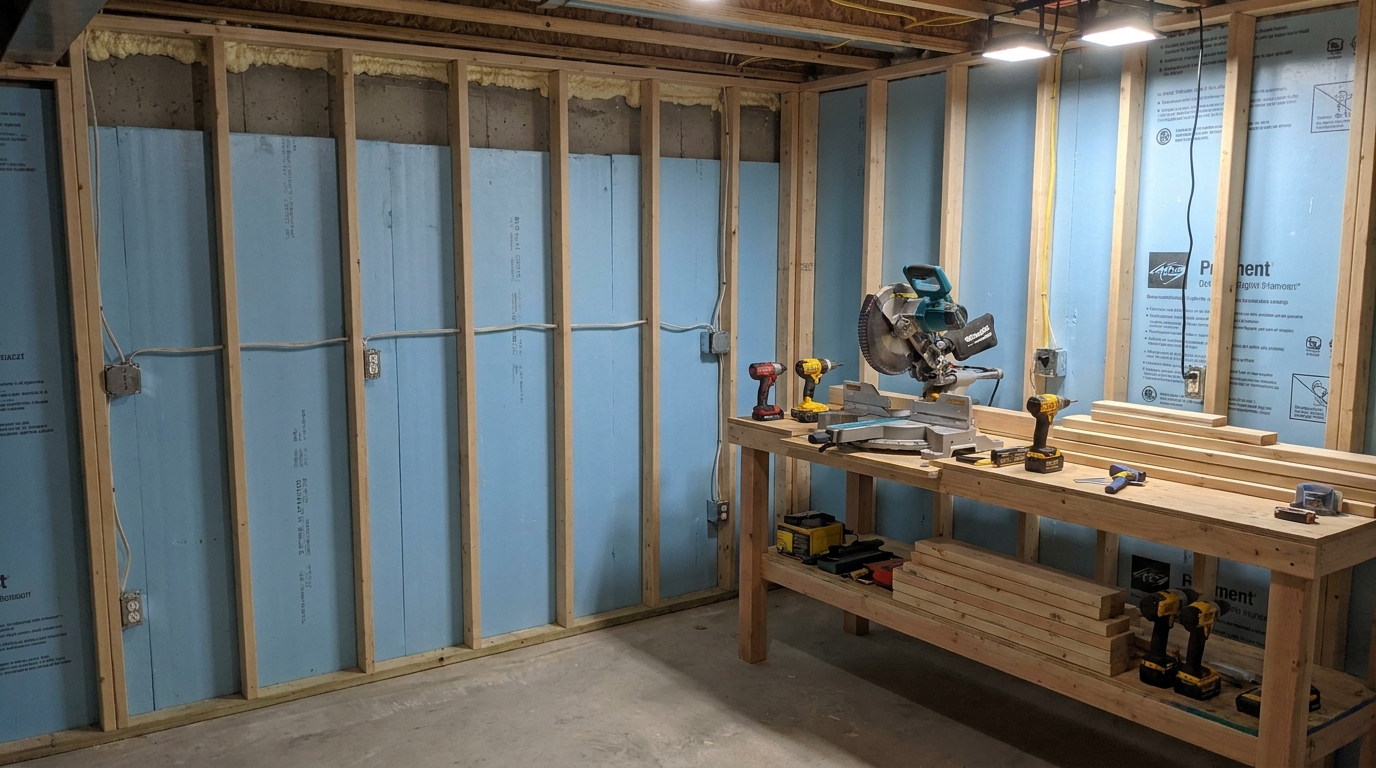
Be careful with old advice that treats poly sheeting and fiberglass as a one-size-fits-all solution. Basement assemblies need to handle moisture differently from above-grade walls. More insulation alone does not fix comfort problems if the real issue is thermal bridging, air leakage, or wet materials trapped against concrete. Follow a basement-specific approach that matches current best practice and local code.
Step 7: Frame with access, straightness, and future service in mind
After the wall assembly is decided, framing can begin. This is one of the more approachable parts of the project for a careful DIYer, but accuracy matters. Basement walls should be laid out so finished surfaces stay straight even when the concrete behind them is not. Take time to mark wall lines carefully, check for plumb conditions, and plan around beams, windows, and mechanical obstacles before fastening everything in place.
Use pressure-treated lumber where required by code, particularly where wood contacts concrete. Maintain any needed separation between new framing and foundation walls based on your insulation approach and local requirements. Keep framing away from obvious damp areas, and do not block access to shutoff valves, cleanouts, electrical panels, or equipment that needs maintenance clearance.
Think about backing and blocking while the walls are open. If you plan to mount a TV, floating shelves, handrails, cabinets, or bathroom accessories, this is the time to install solid backing. The same goes for door framing, sound control between rooms, and rough openings sized correctly for finish materials. A little planning here saves a lot of frustration later.
Basement ceilings deserve the same attention. If you need soffits to conceal ducts or pipes, keep them as organized and minimal as possible. Random soffits make a basement feel chopped up. Continuous, intentional-looking drops usually look better and simplify drywall work. Also decide now where you will need access panels so you are not cutting into finished surfaces later.
Step 8: Rough in electrical, lighting, plumbing, and HVAC
With framing complete, rough-ins come next. This stage is where the basement starts to become functional, but it is also where shortcuts create long-term annoyances. Good lighting, enough receptacles, balanced heating and cooling, and proper ventilation matter just as much as paint and flooring. A finished basement that looks attractive but feels dark, stale, or hard to heat is not truly finished well.
Lighting should be layered. Recessed lights are popular in basements because they preserve headroom, but they should be spaced thoughtfully rather than scattered without a plan. Add task lighting where people will read, work, or exercise. Consider switched outlets or low-profile wall fixtures if ceiling space is tight. Since basements often have limited daylight, lighting design has an outsized effect on whether the space feels inviting.
HVAC is often underplanned in basement projects. If the basement is simply tied into the system without enough supply and return balance, it may end up cold in winter, stuffy in summer, or both. Talk to an HVAC professional if you are altering room layout significantly or adding enclosed spaces that affect airflow. Ventilation is especially important if the basement is very tight after air sealing and insulation upgrades. Dehumidification may still be useful even in a properly finished basement, depending on climate and how the house performs seasonally.
Electrical and plumbing rules are not good places to guess. Many homeowners can handle some aspects of planning, but code compliance and safety are critical. If your jurisdiction requires licensed trades for certain work, follow that requirement. Even where homeowner work is allowed, inspections matter. A finished basement usually contains enough wiring, receptacles, and possibly bathroom plumbing that rough-in mistakes can be expensive to open up and correct later.
Step 9: Pass inspections before you close the walls
This step sounds obvious, but it is where impatient projects go wrong. Do not insulate over work that has not been checked if your permit process requires an inspection first. Do not hang drywall just because the framing is done and the room is starting to look finished. Once the walls are closed, verifying fire blocking, wire protection, plumbing supports, and insulation details becomes much harder.
Use the inspection stage as quality control, not just bureaucracy. Walk the basement yourself before the inspector comes. Take photos of every wall and ceiling while the rough work is still visible. Those photos are useful later when you want to find wires, pipes, backing, or shutoffs behind finished surfaces. Keep notes on circuit locations, plumbing routes, insulation products, and any hidden access points. Future you will be glad you did.
Step 10: Hang drywall and finish surfaces with patience
Drywall makes the basement feel real, but it also exposes every framing mistake and every rushed decision. Take time to shim or correct surfaces if needed before installation. In basements, moisture-resistant products may be appropriate in some locations, especially bathrooms or utility-adjacent areas, but product choice should match actual conditions and local requirements. Standard drywall in a dry, well-built assembly can be fine, while damp spaces need a different strategy entirely.
For ceilings, plan sheet layout carefully if you are working around soffits, lights, and access panels. Heavy overhead drywall is not the best place to improvise. A panel lift makes the work safer and more accurate. Seams, corner bead, and finishing passes take time, and drying conditions in basements can be slower than upstairs, so do not rush mudding and sanding. Clean drywall finishing is one of the most visible indicators of quality in a basement project.
Paint color matters more in basements than many homeowners expect. Lighter, warm neutral colors usually help offset the reduced daylight and lower ceiling feel. Sheen also matters. Extremely glossy finishes can emphasize every surface defect, while flat finishes may be less washable in high-use family spaces. Aim for a finish that suits the room’s function and the quality of the surface preparation underneath.
Step 11: Choose flooring that respects basement conditions
Basement flooring should be selected with moisture and temperature in mind, not just appearance. Even a dry basement slab can be cooler than the rest of the house, and some flooring materials handle that better than others. This is why flooring that works beautifully on an upper level may underperform below grade. Read product specs carefully and confirm the manufacturer approves the material for basement installations.
Luxury vinyl plank, tile, and some engineered systems are common basement choices because they are durable and more forgiving than solid hardwood. Carpet can work in basements that are truly dry and well controlled, especially if comfort is a priority, but it is less forgiving if moisture returns. If you want a warmer floor underfoot, look into underlayment systems designed for basement applications. Just be sure they fit your ceiling-height constraints and flooring compatibility requirements.
Whatever material you choose, the slab has to be properly prepared. That may mean leveling, patching cracks, testing moisture conditions, or allowing enough curing time for repairs. Skipping prep to save time nearly always shows up later as a floor that moves, gaps, or fails prematurely.
Step 12: Finish trim, doors, and the small details that make the room usable
Trim work is where the basement shifts from construction zone to finished living space. Install baseboards, casings, interior doors, shelving, and hardware with the same practical mindset you used for the hidden work. In basements, durable finishes usually outperform delicate ones. If the space will be used by kids, guests, or as a multipurpose family zone, simple trim profiles and tough paint choices are often the smartest route.
Storage deserves special attention. A basement can become cluttered quickly if every square foot is assigned to seating or recreation without enough room for seasonal items, tools, or house supplies. Built-in storage, utility closets, or even one unfinished service area can make the finished basement more useful over time. Not every inch needs to be polished to be valuable.
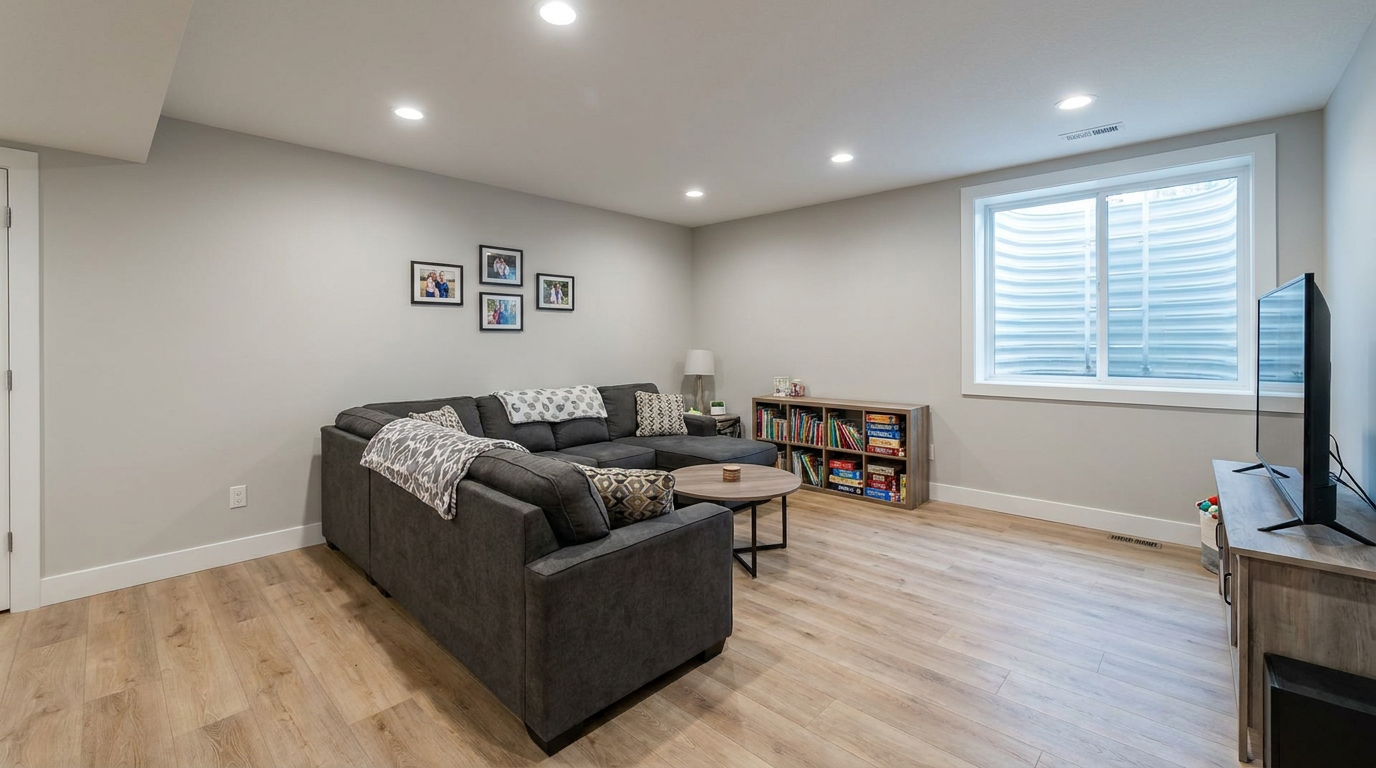
Pay attention to transitions and final function checks. Open every door fully. Test clearances around furniture. Verify all registers, returns, and switches are accessible. Confirm the bathroom fan works if you installed one. Make sure windows open properly and any egress route is not blocked by décor or storage. Good workmanship shows up in these small practical details.
Common basement finishing mistakes to avoid
Some mistakes show up again and again in DIY basement projects, and most of them come from doing the steps out of order. The first is assuming a dry-looking basement is ready to finish without deeper inspection. Hidden moisture, seasonal humidity, and intermittent seepage are common. The second is insulating and drywalling first with plans to solve water problems later. That usually turns a visible issue into hidden damage.
Another common mistake is underestimating code requirements for bedrooms and life safety. A basement sleeping room typically needs compliant egress, and the details matter. Homeowners also often ignore radon because it is invisible, but EPA guidance is clear that any home can have elevated radon levels. Testing should be part of the early planning stage, not an afterthought.
Comfort problems are another source of disappointment. More insulation alone does not guarantee a comfortable basement. Air sealing, rim-joist treatment, HVAC balance, and humidity control all play a role. Finally, many DIYers overfinish utility areas and block access to systems that need maintenance. A basement should be easier to live with after renovation, not harder to service.
When to call a professional
A lot of basement work is within reach for a patient and skilled homeowner, but not every task should be DIY. Call a professional if you have persistent water entry, signs of structural movement, mold concerns, complicated plumbing relocations, major HVAC changes, or uncertain code conditions. Radon mitigation and closed-cell spray foam installation are also areas where specialized training matters. The goal is not to do every task yourself. The goal is to end up with a basement that performs well for years.
There is no shame in dividing the project intelligently. Many homeowners handle demolition, layout, framing, insulation prep, painting, and finish trim while hiring out electrical, plumbing, spray foam, or drywall finishing. That often gives the best mix of cost control and quality. Practical DIY means knowing where your limits are and protecting the overall project.
A simple step-by-step basement finishing checklist
- Inspect the basement for leaks, cracks, humidity, mold, and service-access constraints.
- Test for radon before finishes are installed.
- Confirm permit requirements, inspections, and bedroom egress rules.
- Create a layout based on ceiling height, windows, utilities, and future use.
- Fix exterior drainage and interior water issues first.
- Air seal the basement, especially the rim joist and penetrations.
- Choose a moisture-aware insulation strategy that fits local code.
- Frame walls and ceilings with access and straightness in mind.
- Rough in electrical, plumbing, lighting, and HVAC carefully.
- Pass required inspections before closing walls.
- Install drywall, finish surfaces, and paint patiently.
- Choose basement-appropriate flooring and complete trim and storage details.
Final thoughts
Finishing a basement adds value when it creates a space that people actually want to spend time in. That means more than fresh paint and new floors. It means the room is warm enough, dry enough, bright enough, safe enough, and practical enough to use every day. The real work happens in the hidden layers behind the finished surfaces.
If you take the project in the right order, basement finishing becomes much more manageable. Diagnose first, solve moisture and air leakage, check radon and code requirements, then build with assemblies that respect how basements behave. That is the difference between a basement that looks finished and one that is properly finished. For a DIY homeowner, that approach saves money, avoids rework, and produces results you can trust long after the last coat of paint dries.


No Comment! Be the first one.