



How to Design and Build Your Perfect Media Room
A well-built media room can completely change how you use your home. It can be the place where the family watches films together, where friends gather for game day, where the kids play console games, or where you unwind at the end of a long week. The best part is that a media room does not have to look like a commercial theater to work well. It simply needs to match your space, your habits, and your budget.
Table Of Content
- Start with the Way You Will Actually Use the Room
- Choose the Best Room You Have, Not the Ideal Room You Wish You Had
- Plan the Layout Before You Buy the Screen
- TV or Projector: Which Makes More Sense?
- Build the Sound System Around the Listening Position
- Basic Audio Layouts That Make Sense
- Do Not Confuse Acoustic Treatment with Soundproofing
- DIY Acoustic Fixes That Usually Help
- Use Layered Lighting, Not Just Darkness
- Get the Wiring Right Before the Walls Close Up
- Choose Finishes That Support the Experience
- Pick Seating for Sightlines, Comfort, and Conversation
- A Practical Step by Step Build Sequence
- What You Can DIY and What Is Better Left to Pros
- Must Have Features Versus Nice to Have Upgrades
- Must Have Features
- Nice to Have Upgrades
- Common Mistakes to Avoid
- Final Thoughts
That is where many homeowners go wrong. They start by shopping for a giant television, a projector, or an oversized surround system before they have worked out the basics of the room. In practice, the room itself shapes the experience more than most people expect. The dimensions, seating position, speaker placement, lighting control, surface materials, and wiring plan all influence whether the room feels immersive or frustrating.
Research and manufacturer guidance consistently point to the same conclusion: there is no single perfect layout for every home. A dedicated theater room, a basement conversion, a bonus room, and a multipurpose family room all call for different decisions. The right media room is the one that supports how you actually watch and listen, not the one that copies a showroom photo without regard for real constraints.
This guide walks through the process step by step. It covers how to choose the right room, set your goals, plan the screen and seating, place speakers properly, improve acoustics, build in practical lighting, manage wiring, and decide what you can do yourself versus what is worth handing off to a professional. If you want straight answers and a room that works in the real world, this is where to start.
Start with the Way You Will Actually Use the Room
Before you think about products, think about behavior. A media room used mainly for movie nights has different priorities than one used for everyday streaming, gaming, sports, and casual family hangouts. If the room serves several purposes, you need flexibility more than you need a strict theater layout. That often affects seating choices, lighting design, storage, and whether you go with a TV or a projector.
For some households, the best media room is a dedicated dark room with controlled lighting and focused seating. For others, it is a comfortable basement lounge with a large screen and good sound, but enough ambient light to move around safely and enough durability for everyday use. Neither approach is wrong. The practical choice depends on your household, not on trends alone.
This early planning stage is also where you define your budget. It helps to divide the project into categories such as display, audio, lighting, seating, finishes, wiring, and acoustic improvements. When people skip this step, they often overspend on electronics and leave too little for the things that make the room comfortable and functional. A great media room is a system, not just a shopping list.
Practical rule: Build the room around your primary seating position and typical use, then choose equipment that fits that plan. Do not force the room to adapt to a purchase you already made.
Choose the Best Room You Have, Not the Ideal Room You Wish You Had
A media room can be a dedicated theater, a basement, a finished attic, a bonus room over the garage, a spare bedroom, or part of a larger living area. The best room is usually the one that gives you the most control over light, noise, and layout. In many homes, that means a basement or an enclosed spare room. In others, a family room may be the only realistic choice, and that is fine if you plan carefully.
Look closely at the room shape and access points. A rectangular room is usually easier to work with than an irregular one because it gives you more predictable speaker placement and cleaner sightlines. Open doorways, large reflective windows, and traffic paths that cross in front of the screen can all reduce comfort and performance. Even if you cannot change the room structure, you can often improve the layout by repositioning furniture and controlling light and reflections.
Ceiling height matters as well. It affects both comfort and the potential for immersive audio formats that use height or overhead channels. If you are considering ceiling speakers or a projector, you need to account for joist direction, clearance, mounting points, and access for wiring. These are the kinds of details that separate a smooth project from one full of compromises.
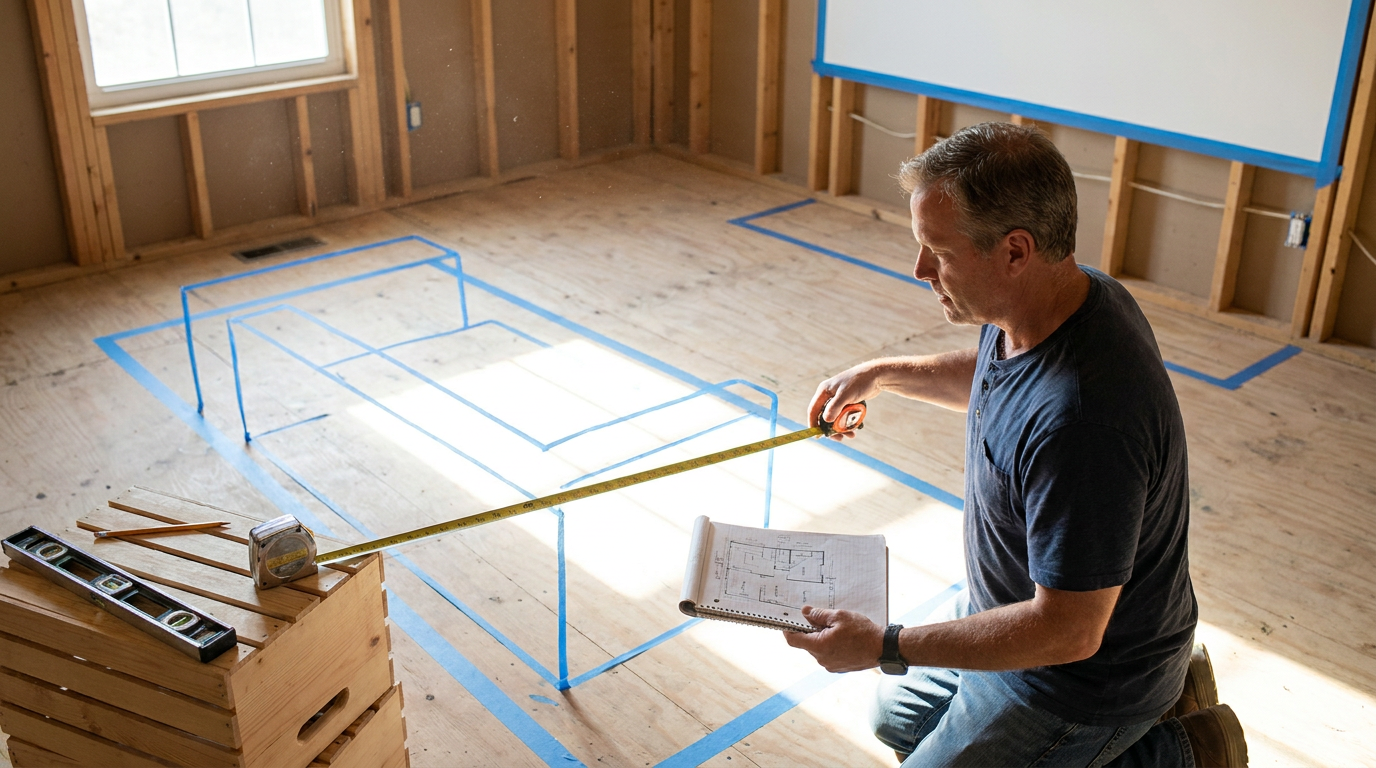
If you are finishing a basement, also think about moisture, temperature, and ventilation before you invest in finishes and electronics. A media room packed with gear can produce noticeable heat, and basements can hold humidity if they are not managed properly. It is better to solve those issues up front than to fight comfort problems later.
Plan the Layout Before You Buy the Screen
One of the most common mistakes is choosing the display too early. People see a sale on a giant TV or fall in love with the idea of a projector, then discover their seating distance, lighting conditions, or wall dimensions are not a good match. The better sequence is to measure the room, choose the main seating location, estimate the viewing distance, and then select the screen size and display type that fits those conditions.
The screen should face the audience directly whenever possible. Seating should be aligned as close to the room centerline as practical, especially if you care about balanced sound and comfortable viewing angles. This advice is consistent with home theater guidance from Dolby, which emphasizes that room size, shape, seating position, and speaker placement all influence the final setup.
If the room will be used in daylight or with moderate ambient light, a large TV is often the simpler and better choice. Modern large-format TVs offer strong brightness, easy installation, and good results in spaces that are not fully dark. A projector can create a more cinematic scale, but it usually performs best when the room has good light control and enough throw distance. A projector setup can also involve more planning for mounting, ventilation, screen selection, and wiring.
Try marking the proposed screen size on the wall with painter tape. Then set chairs at your likely viewing distance and sit in them. This low-tech step can save you from spending thousands on the wrong display size. It also helps you see whether the room still has enough circulation space and whether a coffee table or walkway will interfere with the experience.
TV or Projector: Which Makes More Sense?
A TV is usually the practical winner for mixed use. It works well for streaming, sports, gaming, and daytime viewing, and it requires less work to get a strong image. A projector makes sense when your main goal is scale and you have enough space and light control to support it. Neither option is automatically better. The right answer depends on the room and how often you will use it.
Do not assume a projector always creates the superior media room. That is a common misconception. In many homes, a high-quality TV paired with proper audio, controlled lighting, and comfortable seating delivers a better overall result than a projector setup squeezed into the wrong room.
Build the Sound System Around the Listening Position
Audio is where a media room either comes alive or falls flat. A good sound system does not need to be extreme, but it does need to fit the room. Dolby notes that common immersive audio systems are labeled with configurations such as 2.1.2, 5.1.2, and 7.1.4. Those numbers refer to ear-level speakers, subwoofers, and height or overhead channels. The key point is not to chase the biggest number. It is to choose a layout that your room can actually support.
Speaker placement matters more than many buyers realize. Dolby’s guidance emphasizes arranging speakers around the listener in triangle-like geometry and selecting a system that fits the room rather than oversizing it. In plain terms, that means you should establish your main listening seat first, then place the front speakers, center channel, surround speakers, and subwoofer based on that location. If the primary seating is pushed hard against a wall or off to one side, surround performance will usually suffer.
For many homes, a properly set up 5.1 or 5.1.2 system is more satisfying than a poorly placed 7.1.4 system. Bigger is not automatically better. If your room is small, irregular, or multipurpose, a simpler layout with careful placement and calibration often wins. The same logic applies to subwoofers. Good bass depends on placement and room response, not just raw size or price.
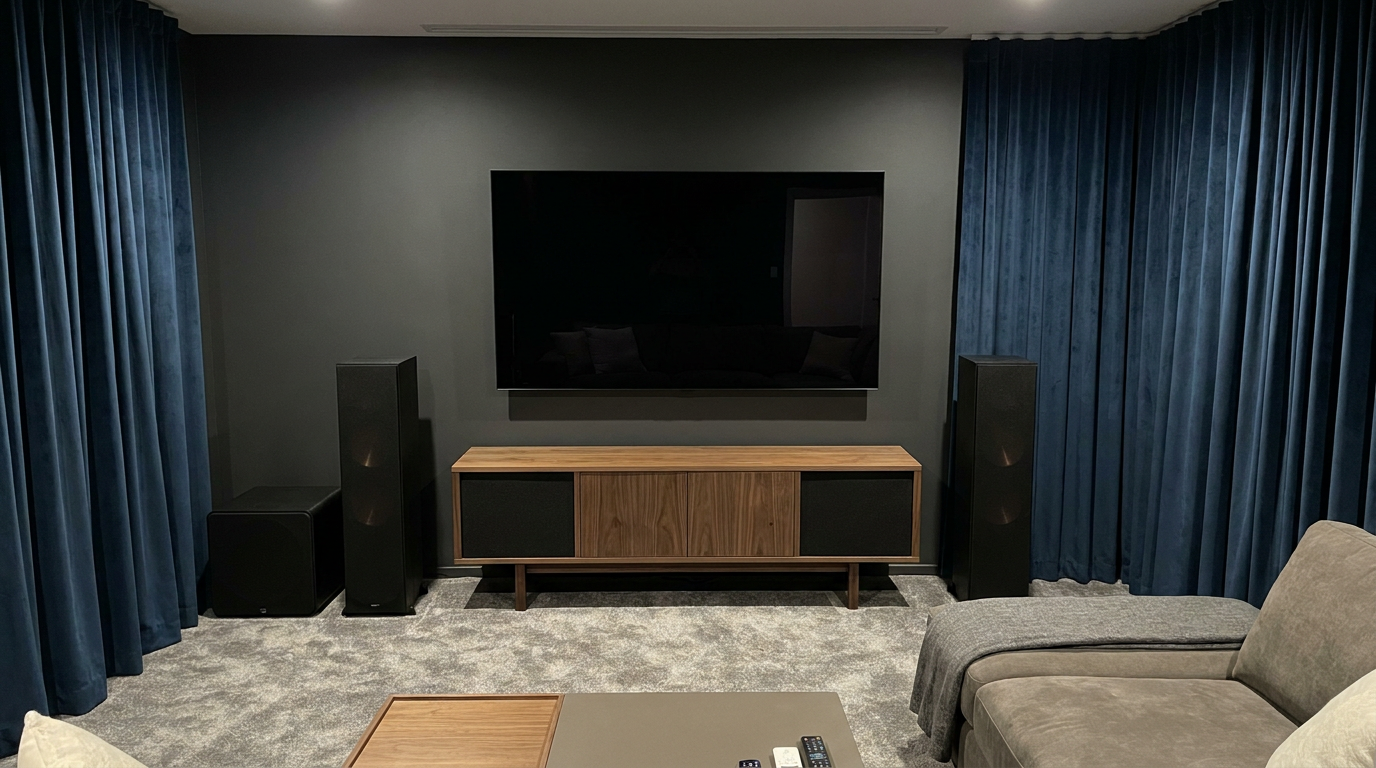
If you want modern immersive sound, pay attention to your AV receiver. Current guidance supports choosing a receiver with up-to-date HDMI connections such as HDMI 2.1 for modern video passthrough and Dolby Atmos-capable systems. This matters especially if you stream high-resolution content, use new gaming consoles, or want to avoid replacing your receiver too soon.
Basic Audio Layouts That Make Sense
A 3.1 layout, with left, center, right, and one subwoofer, is often the minimum setup that noticeably improves dialogue and impact over TV speakers. A 5.1 system adds surround channels and is a strong choice for most dedicated or semi-dedicated rooms. A 5.1.2 or 5.1.4 setup introduces height effects and can create a more immersive sound field if your room and budget allow it. Larger layouts such as 7.1.4 are best suited to rooms with enough depth and width to place speakers correctly.
Try not to mix room ambition with room reality. If the back wall is very close to your seats, adding extra rear speakers may not help much. If the ceiling is unusually low or full of obstacles, overhead channels may need careful planning or may be better handled by Atmos-enabled alternatives. A professional installer can be useful here, but even a DIY approach can work well if you map the room honestly.
Do Not Confuse Acoustic Treatment with Soundproofing
This is one of the most important practical distinctions in media room design. Acoustic treatment improves how the room sounds inside. Soundproofing reduces how much sound travels out of the room or comes into it from elsewhere. They are not the same thing, and they require different solutions.
A lot of homeowners focus only on electronics and ignore the room surfaces. Hard floors, bare walls, large windows, and low furniture density can create harsh reflections and muddy dialogue. Soft materials such as rugs, upholstered seating, heavy curtains, and fabric wall treatments can all help reduce reflections and improve clarity. In many DIY-friendly spaces, these simple changes make a more noticeable difference than upgrading to more expensive speakers.
Bass is harder to control than mid and high frequencies. Subwoofers interact strongly with room dimensions, and certain spots can cause boomy or weak bass. Before buying a larger subwoofer, try experimenting with placement. Sometimes moving the subwoofer even a small distance changes the response considerably at the main seat.
If sound leakage is the problem, basic acoustic panels will not solve it. Soundproofing usually involves heavier construction measures such as insulation, decoupling methods, upgraded doors, sealed gaps, and careful attention to penetrations for wiring and vents. Those measures are more involved and often better handled during framing or renovation rather than after the room is fully finished.
The practical takeaway is simple: make the room less reflective first, then calibrate the system, then evaluate whether more equipment is actually needed. Many people spend money in the reverse order and never get the results they expected.
DIY Acoustic Fixes That Usually Help
- Area rugs and carpet can reduce floor reflections, especially in rooms with hard flooring.
- Heavy curtains or lined drapes help with both light control and sound reflections around windows.
- Upholstered seating absorbs more sound than leather or sparse minimalist furniture.
- Bookshelves and varied surfaces can break up reflections better than long bare walls.
- Targeted acoustic panels at first reflection points can improve clarity without covering every wall.
These upgrades are not glamorous, but they are practical. They also fit the growing interest in DIY-friendly acoustic improvements before costly gear upgrades. In a real home, that is often the smarter path.
Use Layered Lighting, Not Just Darkness
Many people assume a media room should be as dark as possible at all times. That sounds right in theory, but it is not how most homes actually function. You still need to enter the room safely, find the remote, carry food and drinks, and use the space for more than one purpose. The better approach is layered lighting with dimmable control.
Current energy guidance supports making LED lighting the practical default. The U.S. Department of Energy has documented the ongoing shift toward more efficient lighting technologies and standards, which reinforces the case for using dimmable LED fixtures, efficient lamps, and controls that reduce energy use while improving usability. For a media room, this is not just about efficiency. It is about glare control, scene setting, and comfort.
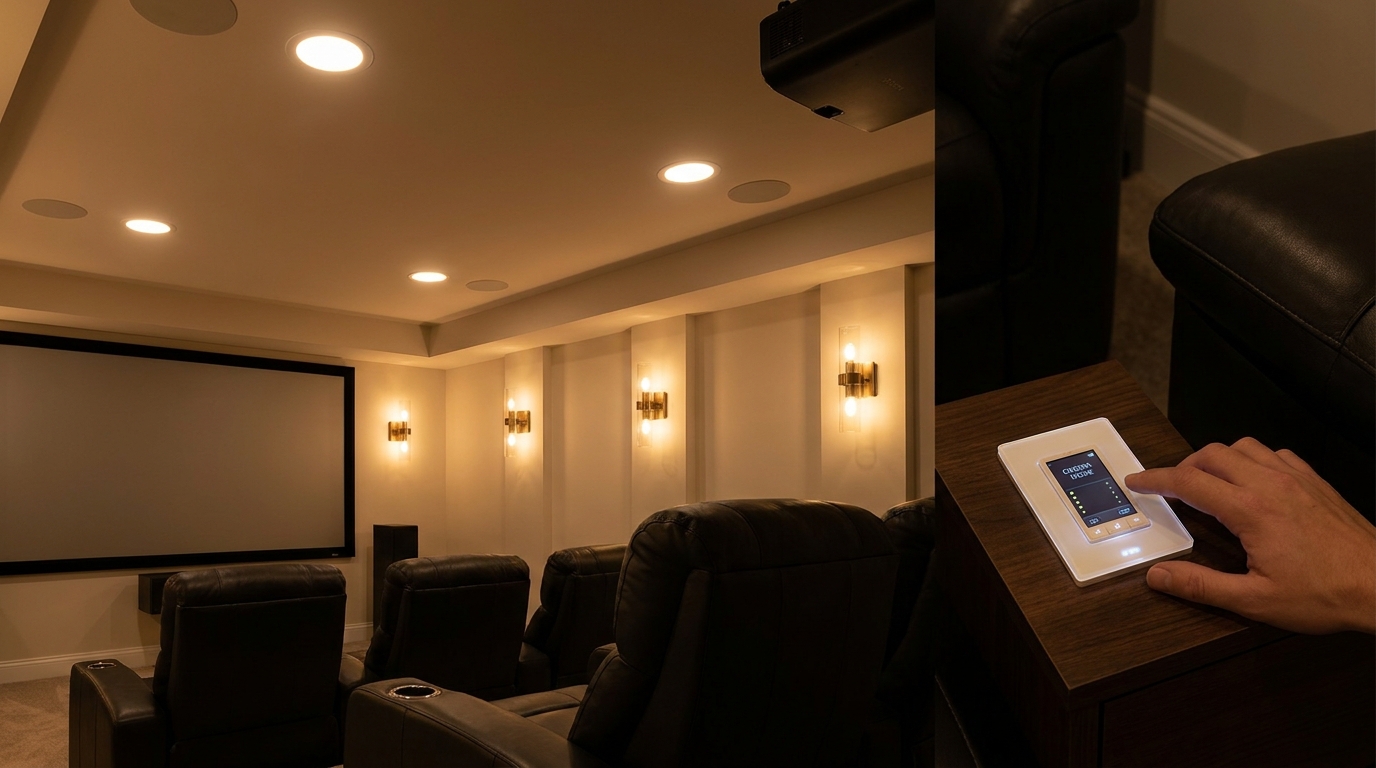
A solid media room usually includes three lighting layers. Ambient lighting provides general illumination for cleaning, setup, and everyday use. Task lighting helps at a snack counter, equipment cabinet, or game shelf. Accent lighting adds low-level visual comfort without washing out the screen. Wall sconces, toe-kick lighting, step lights, and dimmable recessed fixtures can all play a role if they are placed carefully.
Put lights on separate zones if you can. That allows you to lower the main lights while keeping a soft path light or accent glow. Smart dimmers and scene controls are especially useful here. With one button, you can move from bright cleanup mode to low movie mode without fiddling with several switches.
Keep fixture placement out of direct reflection paths whenever possible. A bright recessed light directly over the main seating area or in line with the screen can create glare and eye strain. Small layout decisions here have a big effect on comfort, particularly during long viewing sessions.
Get the Wiring Right Before the Walls Close Up
Clean wiring is one of those things that people appreciate most after the room is done. It improves appearance, reduces clutter, and makes the room feel intentional rather than improvised. The best time to plan it is before drywall, trim, and finish work are complete. That includes speaker wire, HDMI runs, network cable, power outlets, subwoofer locations, control wires, and conduit where future upgrades are likely.
If you are doing a new build or a major renovation, run more low-voltage infrastructure than you think you need. Technology changes, and spare conduit or extra cabling can save major frustration later. If your display is wall-mounted, think about where the equipment will live and how signals and power will reach it without exposed cords. If you are considering a projector, plan for the ceiling mount point, power, data, and ventilation needs early.
Be careful with code and safety. Electrical work, in-wall cabling, structural alterations, and some low-voltage installations may require permits or licensed trades depending on your location. That is especially true in North America, where local code rules can differ from one jurisdiction to another. This is not the place to guess. If you are uncertain, check with your local building department or a qualified electrician.
A neat equipment cabinet or media console also needs ventilation. Receivers, consoles, streamers, and amplifiers generate heat, and poor airflow shortens equipment life and can cause shutdowns. Leave breathing room around components and avoid sealing hot gear into tight enclosed furniture without ventilation.
Choose Finishes That Support the Experience
Finishes do more than make the room look good. They affect light reflection, acoustics, durability, and maintenance. Darker matte finishes usually perform better around screens because they reduce reflections and visual distraction. That does not mean the whole room has to be black. It means the wall around the display and the immediate field of view should avoid glossy bright surfaces if image quality matters to you.
Flooring should balance sound, comfort, and cleaning. Carpet and large rugs are often helpful for acoustics and warmth, especially in basement media rooms. Hard flooring can still work, but it usually benefits from rugs and soft furnishings to keep reflections in check. If snacks and drinks are common, choose fabrics and surfaces that can handle real life rather than fragile showroom materials.
Storage matters more than people expect. Media rooms tend to collect remotes, controllers, charging cables, blankets, game accessories, and streaming devices. Built-in storage, hidden baskets, or a cabinet with dedicated zones can keep the room functional and reduce the clutter that slowly undermines a good design.
Pick Seating for Sightlines, Comfort, and Conversation
Seating should support the room rather than dominate it. The first job is to ensure clear sightlines to the screen from the main seats. The second is to maintain a balanced listening position, especially if you invested in surround sound. The third is to make the room usable for real people over real stretches of time.
Sectionals work well in multipurpose rooms because they encourage lounging and casual use. Theater recliners can be excellent in a dedicated media room, but they take up more space and can lock you into a rigid layout. A sofa plus a pair of movable chairs often gives the best balance in smaller or flexible rooms. It allows you to keep the main listening position centered while still adapting the room for guests.
Do not push all seating hard against the back wall unless the room absolutely forces it. That usually hurts sound balance and can exaggerate bass issues. Even a modest gap between the back wall and the main seats can help. If the room is large enough for a second row, think carefully about risers, ceiling height, and whether the extra row will compromise the first row.
A Practical Step by Step Build Sequence
The easiest way to keep a media room project on track is to sequence the work properly. This avoids the expensive habit of buying gear first and trying to force the room around it later. A disciplined process also makes it easier to identify the parts that are DIY-friendly and the parts that need professional help.
- Measure the room including ceiling height, door swings, windows, and obstructions.
- Define the primary seating position based on likely use and room centerline.
- Choose screen type and size after confirming viewing distance and light conditions.
- Plan speaker locations around the main listening position using a realistic system size.
- Map power, low-voltage, and network runs before walls are closed or finishes are completed.
- Address acoustics and light control with room surfaces, curtains, rugs, and treatment.
- Select lighting layers and controls using dimmable LEDs and sensible zone planning.
- Install furniture and storage only after the key technical positions are fixed.
- Calibrate the system and test with real content before making final adjustments.
This order saves time and money because each step informs the next one. It also prevents the most common regret: a room with expensive components that still feels awkward to use.
What You Can DIY and What Is Better Left to Pros
Many parts of a media room build are well within reach for a capable homeowner. Layout planning, furniture selection, painting, curtains, acoustic softening, shelving, cable organization, and basic device setup are all realistic DIY tasks in many homes. If you work carefully, you can make major improvements without hiring out every stage.
That said, there is no shame in calling a pro where the work becomes technical, code-sensitive, or risky. In-wall wiring, electrical circuits, structural modifications, ceiling speaker installation, sound isolation assemblies, custom cabinetry, and complex projector installs are all areas where professional help can protect both safety and final performance. The smart approach is not to do everything yourself. It is to know where your limit is.
- DIY-friendly tasks: room measuring, layout testing, painting, curtains, rugs, furniture setup, equipment shelf assembly, basic acoustic panels, simple wall-mount planning, universal remote or app setup.
- Best left to professionals: new electrical circuits, permit-required work, in-wall cable routing across finished spaces, ceiling speaker cutting and support, advanced receiver calibration, projector mounting on difficult ceilings, soundproofing construction, HVAC changes.
If you are trying to control costs, use professionals strategically. Have them handle the infrastructure and technical work, then take on the finishes and furnishing yourself. That often gives the best balance of quality, safety, and budget.
Must Have Features Versus Nice to Have Upgrades
Every project benefits from honest priorities. Some features meaningfully improve the room right away, while others are upgrades you can add later if the budget allows. Sorting these categories early keeps the project grounded.
Must Have Features
- Comfortable seating with clear sightlines to the screen.
- A display matched to the room rather than chosen in isolation.
- Balanced front audio and clear dialogue at minimum, ideally with a center channel and subwoofer.
- Light control through shades, curtains, darker finishes, or smart zoning.
- Basic acoustic softening such as rugs, upholstery, and reflection control.
- Clean wiring and adequate power planned safely.
Nice to Have Upgrades
- Immersive height channels for Dolby Atmos-style audio.
- Advanced acoustic treatment beyond simple soft furnishings.
- Custom built-ins for equipment and storage.
- Dedicated snack or bar area if space allows.
- Smart scene control for lighting, shades, and AV power-up.
- Second row seating or risers in larger dedicated rooms.
This kind of prioritizing is what helps you build a room that feels complete even if it evolves over time. Good media rooms are often phased projects, and that is perfectly normal.
Common Mistakes to Avoid
The first big mistake is oversizing the equipment for the room. More speakers, larger subs, or a larger screen do not automatically improve the experience. Placement, calibration, and proportion matter more. The second mistake is ignoring acoustics and light control. A reflective room with glare problems will undercut even premium electronics.
The third mistake is forgetting daily usability. If the room is too dark to move through, if the seats are too far apart for conversation, or if equipment access is frustrating, the room will not get used as much as you imagined. The fourth mistake is failing to plan for wiring, power, and ventilation early enough. Retrofitting these details after finishes are complete is almost always harder and more expensive.
The last mistake is chasing a showroom look instead of building for your actual life. A media room should fit your home, your family, and your habits. If you mainly stream shows after dinner and host the occasional game night, design for that. If you are a serious film enthusiast and want a dedicated cinema feel, build toward that with realistic expectations. The point is to be honest from the start.
Final Thoughts
The perfect media room is rarely the one with the most gear. It is the one where the room, the layout, the sound, the lighting, and the seating all support the experience you want. That can be a dedicated theater space, but it can just as easily be a thoughtful basement conversion, a spare-room retreat, or a hardworking family room with better sound and smarter lighting.
If you remember one thing, let it be this: start with the room and the seating position, then build outward. Follow a practical sequence. Choose a display that suits the space. Place speakers around the listener rather than cramming them in wherever they fit. Use dimmable LED lighting and control glare. Improve acoustics before assuming you need more expensive equipment. And bring in professionals where safety, code, or technical complexity make that the sensible move.
Done properly, a media room does more than look good in photos. It becomes a room people actually use, week after week, because it is comfortable, clear, immersive, and easy to live with. That is the kind of build that holds up over time, and that is what makes it worth doing right.

No Comment! Be the first one.