



Prepare Your HVAC for Fall: A Step-by-Step Seasonal Tuning Guide for Comfort, Safety, and Energy Savings
As summer gives way to cooler mornings and longer nights, many homeowners start thinking about sweaters, storm windows, and the return of steady indoor heating. What often gets delayed, though, is the simple maintenance that helps a heating system run well when it matters most. Fall HVAC preparation is easy to overlook because the equipment may still seem fine after months of lighter use. Yet this is exactly the moment when a little attention can make a meaningful difference in comfort, efficiency, and reliability.
Table Of Content
- Why Fall Is the Best Time to Tune Your Heating System
- What a Fall HVAC Tune-Up Should Accomplish
- Your Step-by-Step Fall HVAC Tuning Checklist
- Step 1: Start Early and Schedule a Professional Pre-Season Inspection
- Step 2: Replace or Clean the Air Filter
- Step 3: Check Return Vents and Supply Registers for Obstructions
- Step 4: Clear Debris Around Outdoor Equipment
- Step 5: Test the Thermostat Before You Need It
- Step 6: Run a Simple Airflow and Comfort Check Through the House
- Step 7: Inspect Visible Ductwork, Pipes, and Insulation
- Step 8: Check for Drafts and Support the HVAC System With Weatherization
- Step 9: Think About Ventilation and Indoor Air Quality
- Step 10: Review the Age and Performance of Your Equipment
- What to Leave to a Qualified HVAC Professional
- Common Fall HVAC Misconceptions to Avoid
- A Simple Fall HVAC Maintenance Routine You Can Repeat Each Year
- When It Might Be Time to Upgrade Instead of Tune Up
- Final Thoughts: Small Steps Now, Better Performance All Season
- Quick Reference Fall HVAC Checklist
Seasonal tuning is not just about preventing a breakdown on the first truly cold day. It is also a practical way to reduce energy waste, support indoor air quality, and catch small issues before they become expensive repairs. According to ENERGY STAR, nearly half of the energy used in a typical home goes to heating and cooling, which means even modest improvements in airflow, controls, and maintenance can have a real impact on utility bills. For homeowners trying to balance cost, comfort, and sustainability, that makes fall HVAC care one of the higher value tasks on the seasonal checklist.
This guide walks through a straightforward process for preparing your HVAC system for fall. It combines homeowner friendly steps with the professional checks that should be part of an annual pre season inspection. Along the way, it also explains how tuning your system connects to broader energy saving habits such as air sealing, thermostat scheduling, and replacement planning. The goal is simple: do the practical work now so your home is more comfortable, efficient, and dependable through the colder months ahead.
Why Fall Is the Best Time to Tune Your Heating System
Fall is ideal for HVAC maintenance because it sits at a natural transition point. Your cooling season is winding down, your heating system is about to take over, and contractors are often easier to book before the first major cold snap. Waiting until winter creates a familiar problem. Systems tend to fail when demand rises, and by then service companies are usually busier, response times are longer, and the discomfort of a malfunction is much more immediate.
There is also a strong efficiency reason to tune up in the fall. Dust accumulation, clogged filters, obstructed vents, and neglected controls can quietly reduce performance even if the system still turns on and produces heat. ENERGY STAR notes that airflow problems alone can reduce efficiency by up to 15 percent. That statistic is useful because it highlights an important misconception: a working system is not automatically an efficient system. Many homes lose performance gradually, which is why preventive maintenance can produce benefits before a visible failure ever appears.
Safety is another reason this season matters, especially for furnaces and boilers that burn fuel. Professional fall inspections typically include checks of gas or oil connections, burners, controls, and heat exchanger condition. Those steps help verify that the system is operating safely and as intended before it runs regularly through winter. In practical terms, seasonal tuning is not only a comfort task. It is a safety check and a performance reset.
What a Fall HVAC Tune-Up Should Accomplish
A useful way to think about seasonal tuning is that it has three goals. The first is comfort, meaning your home heats evenly and responds predictably as weather changes. The second is efficiency, which means the system moves air properly, uses sensible thermostat settings, and does not waste energy because of neglected maintenance. The third is reliability and safety, which comes from identifying worn components or combustion concerns before winter puts the system under steady demand.
A tune up is not exactly the same thing as a repair. Maintenance is preventive. It is the routine work that keeps equipment operating as well as possible and helps avoid future faults. Repair, by contrast, addresses a specific problem that has already shown up. That difference matters because many homeowners wait for clear symptoms before taking action. In reality, one of the best returns on HVAC maintenance comes from dealing with issues while they are still small, inexpensive, and manageable.
For most homes, the best approach combines a few DIY tasks with one professional pre season inspection. You do not need to be highly technical to handle the homeowner side of the process. Filter checks, vent clearing, outdoor cleanup, and thermostat review are simple but valuable. More technical work involving combustion, electrical components, refrigerant related systems, motors, and controls should be left to a qualified technician.
Your Step-by-Step Fall HVAC Tuning Checklist
The steps below are arranged in a practical order so you can move from the simplest visual checks to the more system specific tasks. Some homes will have a furnace, others a boiler, and many newer or all electric homes will rely on a heat pump. The exact equipment varies, but the principles of airflow, clean operation, sensible controls, and preventive inspection apply almost everywhere.
Step 1: Start Early and Schedule a Professional Pre-Season Inspection
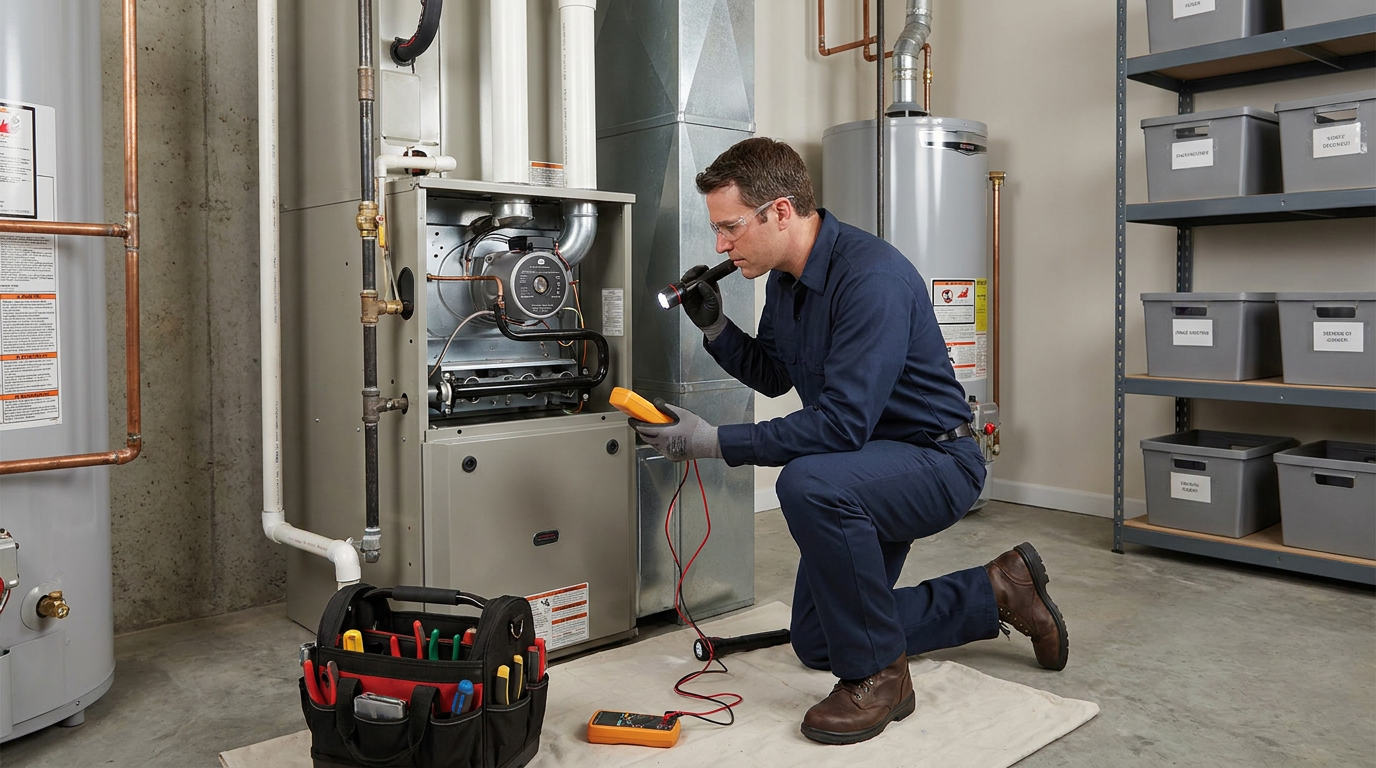
The most important first step is to schedule a professional inspection before cold weather fully arrives. ENERGY STAR recommends annual pre season checkups, with heating systems serviced in the fall. This is not just a generic suggestion. It reflects the reality that heating equipment performs best and most safely when it is inspected before heavy use begins. Booking early also gives you more flexibility if a part needs to be ordered or a repair should be completed before winter.
During a professional tune up, a technician may inspect electrical connections, motors, system controls, and condensate drains. For fuel burning systems, the inspection should also include gas or oil connections, burner operation, combustion performance, and the heat exchanger. These checks are difficult for a homeowner to perform properly and safely without training. They are worth the investment because they address the hidden parts of system performance that visual checks alone cannot confirm.
If you only take one action this fall, make it this one. Even a newer system benefits from routine maintenance, and in some cases it may help preserve warranty compliance. New equipment is not immune to airflow problems, loose connections, installation issues, or maintenance related performance loss. Preventive service is simply part of owning mechanical equipment well.
Step 2: Replace or Clean the Air Filter
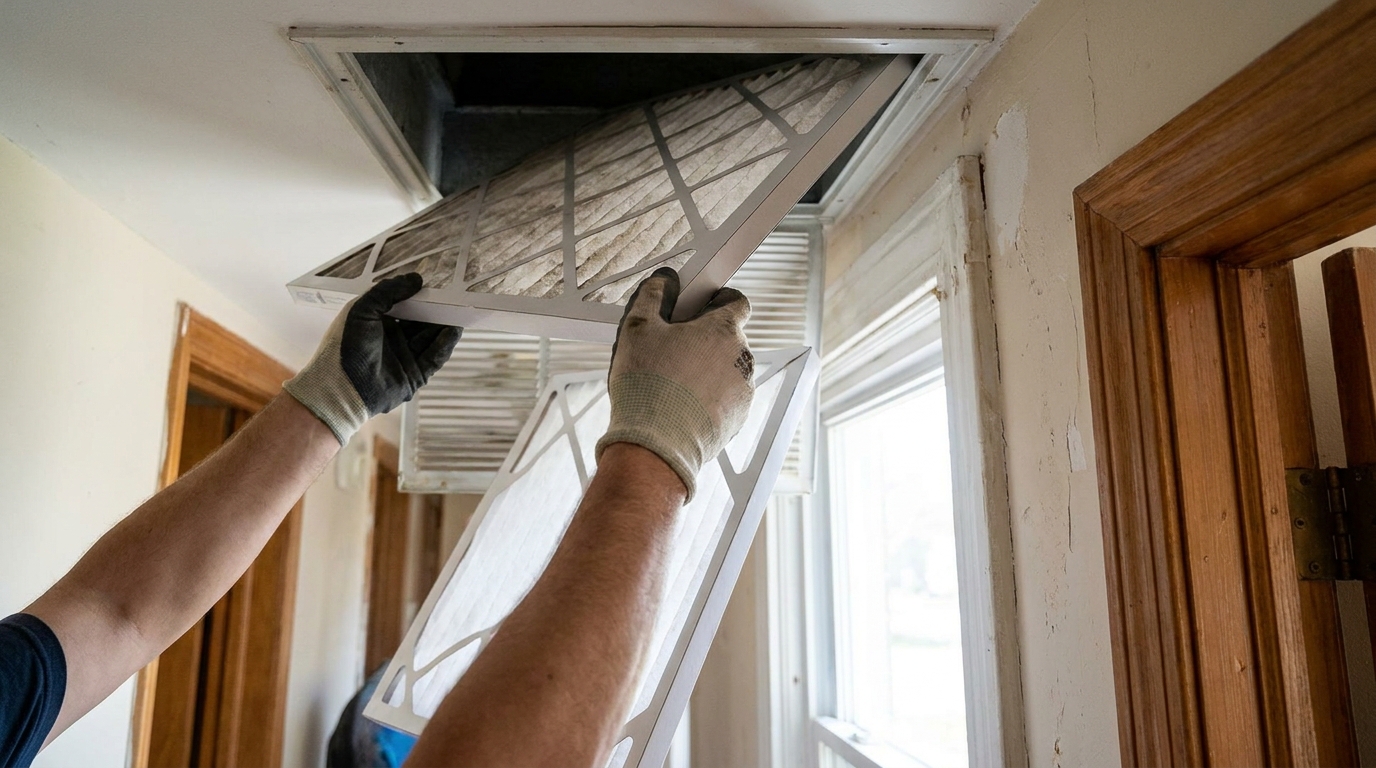
If there is one homeowner task that consistently offers high value, it is checking and replacing the air filter. Dirty filters restrict airflow, force the system to work harder, and can increase energy use while also putting stress on equipment. ENERGY STAR advises checking filters monthly and changing them at least every three months, or more often during heavy use. In homes with pets, allergies, renovation dust, or higher occupancy, replacement may need to happen even more often.
The simple version of this step is to locate the filter, confirm the correct size, and inspect its condition. If it looks loaded with dust or debris, replace it with the manufacturer recommended type. If your system uses a reusable filter, clean it according to the instructions and allow it to dry fully before reinstalling it. This is a good time to note the installation date somewhere visible so the next check is easier to remember.
Choosing a filter should be done thoughtfully rather than assuming the most restrictive option is always best. Higher MERV ratings can improve particle capture, but a filter that is too restrictive for the system may reduce airflow if the equipment is not designed for it. If you are unsure, ask your HVAC contractor what filter rating is appropriate for your system and your indoor air goals. The best filter is the one that balances clean air with proper system performance.
Step 3: Check Return Vents and Supply Registers for Obstructions
Airflow is the quiet foundation of HVAC efficiency. When return vents are blocked by furniture, rugs, or storage items, the system struggles to circulate air properly. Supply registers face a similar problem when they are covered by curtains, boxes, or household clutter. Because airflow problems can cut efficiency by up to 15 percent, this is one of the easiest improvements a homeowner can make at no real cost.
Walk through each room and inspect visible vents and registers. Make sure return grilles are open and unobstructed, and confirm that supply registers are not blocked by furniture placement or seasonal storage. If dust has collected on the grilles, vacuum or wipe them clean. The objective is not perfection. It is simply to allow the system to move air the way it was designed to.
One common misconception is that closing many vents will save energy by reducing the area you heat. In ducted systems, that often does not work as intended. It can disrupt airflow balance, increase pressure in the duct system, and reduce overall performance. If certain rooms are consistently too warm or too cool, it is better to investigate airflow balancing, duct condition, insulation, or thermostat placement rather than trying to solve the issue by closing every register in sight.
Step 4: Clear Debris Around Outdoor Equipment
If your system includes an outdoor unit, such as a heat pump or central air condenser that also shares components with your heating setup, take time to clean the area around it. Leaves, twigs, grass clippings, and windblown debris can gather around the cabinet and interfere with airflow. This can be especially noticeable in fall, when trees drop leaves quickly and yard maintenance patterns change.
Turn off power if appropriate according to manufacturer guidance, then gently remove loose debris from around the unit. Trim back vegetation to maintain clear space around the equipment, and inspect the visible fins for dirt buildup. A soft brush or careful vacuuming may be appropriate for light cleaning, but avoid bending fins or using aggressive methods that could damage the unit. If the coil is heavily soiled, ask your technician whether a professional cleaning is needed.
This step matters for both performance and equipment life. Outdoor units need room to breathe, and restricted airflow can affect efficiency during heating as well as cooling. In colder climates where heat pumps are increasingly common, fall cleanup is especially worthwhile because these systems may run year round. Keeping the unit clean and unobstructed is one of the simplest ways to support steady cold weather performance.
Step 5: Test the Thermostat Before You Need It
Many heating complaints begin not with the furnace or heat pump itself, but with thermostat settings that no longer match the season. Before temperatures drop sharply, switch the thermostat to heating mode and test the system. Raise the setting a few degrees and make sure the equipment responds, warm air reaches the rooms, and the cycle ends normally. Catching an issue now is much easier than discovering it on a freezing evening.
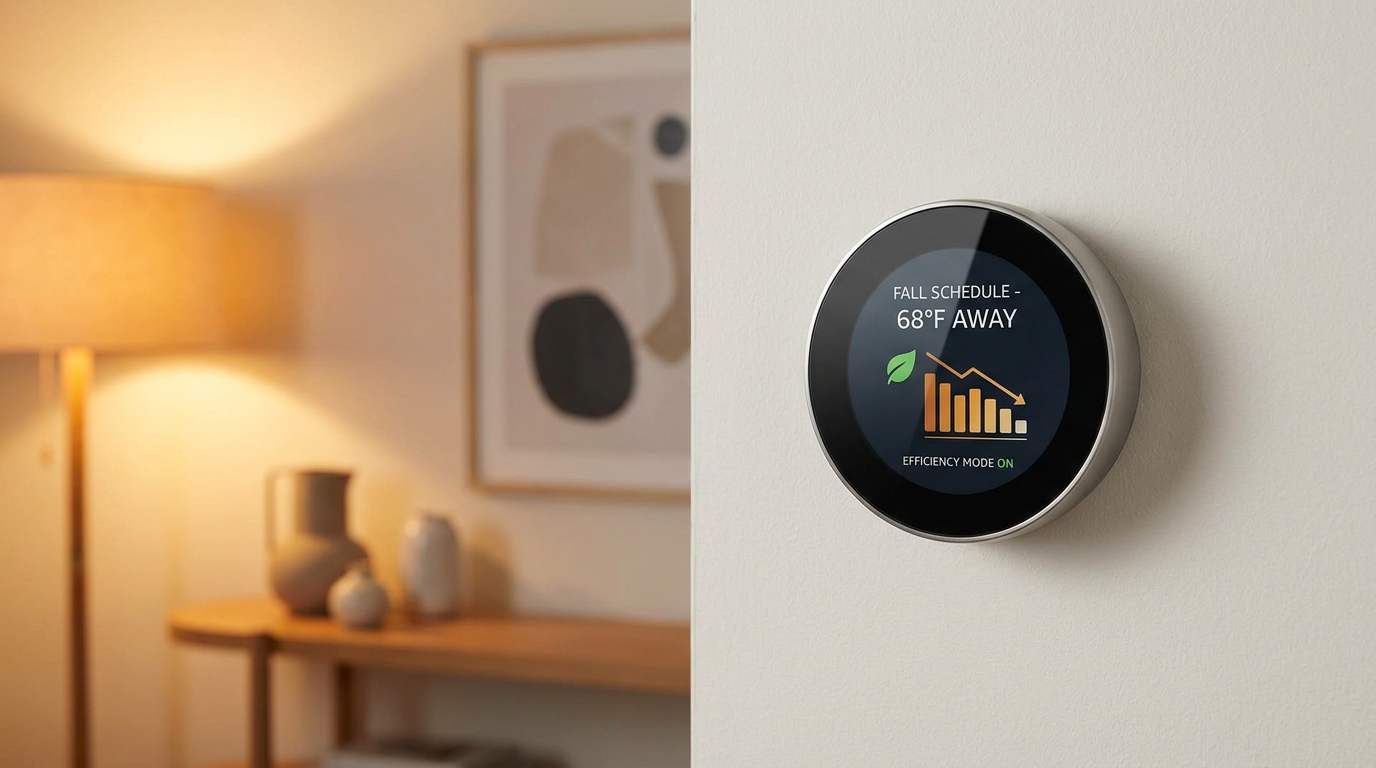
Fall is also the right time to review your schedule. ENERGY STAR and ASHRAE both support setback strategies, and ASHRAE consumer guidance suggests around 68 F, or 20 C, when the home is occupied and about 60 F, or 15 C, at night or when away. Exact comfort levels vary by household, insulation quality, and health needs, but the principle is clear. Thoughtful temperature setbacks can reduce unnecessary heating without sacrificing comfort.
If you have a programmable or smart thermostat, update the schedule to reflect school, work, and sleep routines for the colder season. Many homes drift into wasteful settings simply because summer schedules were never changed. This is a small adjustment, but because heating represents such a large share of household energy use, thermostat accuracy and schedule logic matter more than many people realize.
Step 6: Run a Simple Airflow and Comfort Check Through the House
Once the system is on heating mode, walk through your home and pay attention to how it feels room by room. Are some rooms heating much slower than others? Do certain vents blow weakly while others seem strong? Are there unusual noises, stale areas, or rooms that feel drafty no matter what the thermostat says? These observations are useful because they can point to issues with ducts, insulation, balancing, or return air pathways.
You do not need specialized instruments to notice patterns. A practical homeowner inspection often starts with comfort itself. If the upstairs is consistently much warmer than the main floor, if one bedroom never quite heats up, or if the system seems to run for a long time without improving comfort, make note of it for your technician. Real world patterns help narrow down whether the issue is mechanical, airflow related, or connected to the building envelope.
This is also a good time to listen. Grinding, rattling, whistling, or banging sounds are not always urgent, but they should not be ignored. A seasonal tune up works best when it includes your observations as well as the technician’s measurements. Together, they create a clearer picture of how the system is performing under actual household conditions.
Step 7: Inspect Visible Ductwork, Pipes, and Insulation
If your home has accessible ductwork in a basement, crawl space, utility room, or attic, take a few minutes to look for obvious issues. Loose connections, disconnected sections, missing insulation, and visible damage can all affect performance. Conditioned air that escapes into an unheated basement or attic never reaches the rooms you are paying to heat. In practical terms, leaks and poor insulation make your system work harder for less comfort.
You do not need to dismantle anything. A visual pass is enough to identify whether further evaluation is worthwhile. If you notice tape peeling away, crushed flex ducts, condensation, or obvious gaps at joints, bring that information to your HVAC contractor. Duct sealing and insulation can be a meaningful efficiency upgrade, especially in older homes where the duct system has not received much attention.
For hydronic systems with visible pipes, look for drips, corrosion, or insulation gaps. Boilers and hot water distribution systems have their own maintenance needs, and small visible signs can help identify when service is needed. The broader lesson is that heat delivery matters just as much as heat generation. Even an efficient furnace, boiler, or heat pump can underperform if the distribution system is neglected.
Step 8: Check for Drafts and Support the HVAC System With Weatherization
One of the most sustainable ways to improve heating efficiency is to reduce the amount of heat your home loses in the first place. HVAC maintenance and weatherization work best together. If your home leaks warm air through gaps around windows, doors, attic penetrations, or rim joists, the heating system must run longer to maintain comfort. That increases wear, raises bills, and can make certain rooms feel unevenly heated.
Walk around your home on a cool day and notice where drafts are strongest. Window frames, exterior doors, attic hatches, plumbing penetrations, and older recessed lighting can all be trouble spots. Basic air sealing with caulk or weatherstripping is often inexpensive and immediately helpful. In many homes, this kind of envelope improvement does as much for comfort as changes to the HVAC equipment itself.
Insulation also plays a major role. If your attic insulation is thin, patchy, or compressed, or if walls and floors over unconditioned spaces feel noticeably cold, your system may be compensating for building losses more than you realize. Seasonal tuning is a good reminder that HVAC efficiency is not only about the machine. It is about the relationship between the machine and the home it serves.
Step 9: Think About Ventilation and Indoor Air Quality
As homes become better sealed and heating season begins, indoor air can sometimes feel stale or overly dry. People often focus on temperature first, but comfort also includes air freshness and cleanliness. Fall is a useful time to consider whether your home has adequate ventilation, whether the filter strategy supports your air quality needs, and whether bathrooms and kitchens exhaust moisture effectively.
This is especially relevant in tighter, better insulated homes. As sustainability improvements reduce air leakage, intentional ventilation becomes more important. The answer is not to make the home leaky again. It is to think more holistically about fresh air, filtration, and moisture control. If condensation forms on windows, indoor air feels stuffy, or household members notice increased allergy symptoms, mention it during your HVAC inspection.
For some homes, a ventilation upgrade or a better integrated indoor air quality strategy may be appropriate over time. The right solution depends on climate, occupancy, and house design. What matters most for fall preparation is recognizing that efficient heating and healthy indoor air should work together, not compete with one another.
Step 10: Review the Age and Performance of Your Equipment
Fall maintenance is also a smart time to ask a bigger question: is this system still the right fit for the home? ENERGY STAR notes that a heat pump or air conditioner more than 10 years old, or a furnace or boiler more than 15 years old, may be a candidate for replacement, especially if repairs are becoming frequent or utility bills are rising. That does not mean every older system must be replaced immediately. It means age should prompt a more informed conversation.
If your equipment still operates reliably, a tune up may be all you need this season. But if the technician identifies recurring issues, declining efficiency, or signs of significant wear, replacement planning can be more practical than waiting for a winter failure. Properly installed high efficiency units can save up to 20 percent on heating and cooling costs, according to ENERGY STAR. That is not only a financial benefit. It can also reduce household energy demand and support lower carbon living over time.
For homeowners interested in cleaner heating options, fall is a good season to explore heat pumps, ductless mini splits, or other electrified systems, especially in regions where incentives or rebates are available. ASHRAE has emphasized the growing role of heat pumps in more sustainable residential HVAC design, and cold climate performance has improved significantly in many newer models. If replacement is on the horizon, planning early allows you to compare options carefully rather than making a rushed emergency purchase.
What to Leave to a Qualified HVAC Professional
Homeowners can and should take care of basic maintenance, but there is a clear line between routine upkeep and technical service. Any work involving combustion, gas or oil connections, electrical testing, motors, control systems, burners, heat exchangers, refrigerant related components, or condensate drainage should be handled by a qualified technician. These systems affect safety, efficiency, and code compliance in ways that DIY troubleshooting may not fully address.
A professional fall service visit typically includes cleaning and inspecting internal components, checking safety controls, confirming proper startup and shutdown behavior, tightening or evaluating electrical connections, and assessing signs of wear. On a fuel burning system, combustion safety is a key part of the visit. On a heat pump, the technician may inspect defrost controls, airflow, and other operating conditions relevant to colder weather performance.
It is worth keeping written notes from each annual visit. A simple record of filter changes, tune ups, repairs, and technician recommendations helps you track patterns over time. This can make future decisions easier, especially if you are weighing whether to repair or replace older equipment. Good home maintenance often becomes more effective when it is documented, not just remembered.
Helpful perspective: Seasonal HVAC maintenance is most effective when you treat it as part of a system. The equipment, thermostat, ductwork, insulation, ventilation, and daily habits all influence how much comfort you get from every unit of energy you use.
Common Fall HVAC Misconceptions to Avoid
Several persistent myths can get in the way of practical maintenance. The first is the belief that if the system is still running, it must be efficient. In reality, clogged filters, poor airflow, minor duct leaks, and drifted thermostat schedules can all waste energy quietly while the system appears normal. The second is that filters only need annual attention. Most homes need monthly filter checks during heavy use, and many need more frequent replacements than expected.
Another common misconception is that only older systems need tune ups. Even new systems require regular maintenance to protect performance and support longevity. A final misunderstanding is that closing multiple vents saves energy. In many ducted systems, that can create pressure and airflow problems rather than meaningful savings. The better strategy is to support proper airflow and reduce heating demand through smarter controls and weatherization.
These myths matter because they shape how homeowners prioritize maintenance. Fall HVAC care does not need to be elaborate, expensive, or intimidating. It simply needs to be consistent and informed. A few correct habits, repeated each season, usually outperform occasional reactive fixes.
A Simple Fall HVAC Maintenance Routine You Can Repeat Each Year
If you want a practical annual rhythm, keep it simple. Early in fall, schedule professional service. On the same weekend, replace or clean the filter, clear vents, tidy the area around any outdoor unit, and test the thermostat. Then do a quick home walkthrough for drafts, uneven heating, and unusual noises. That basic routine covers the highest value steps without becoming overwhelming.
After the heating season begins, continue checking the filter monthly and keep an eye on comfort patterns. If your home starts feeling stuffier, noisier, or less evenly heated, address those signs early. Preventive maintenance works best when it remains active during the season rather than stopping after one tune up. Think of the annual service as the foundation and the monthly checks as the follow through.
For homeowners who want to go further, pair your seasonal HVAC routine with one envelope improvement each year. One fall you might seal obvious drafts. Another year you might add attic insulation or improve duct sealing. Over time, these practical upgrades reduce the workload on your HVAC system and make comfort easier to maintain. Sustainability becomes much more achievable when it is built through steady, manageable decisions.
When It Might Be Time to Upgrade Instead of Tune Up
There comes a point when maintenance alone is no longer the most sensible path. If your heating system is nearing or beyond the age thresholds noted by ENERGY STAR, if repairs are becoming frequent, or if utility costs keep climbing without a clear explanation, replacement may deserve serious consideration. The same is true if comfort remains uneven despite tune ups and airflow corrections. Some systems are simply less capable than modern alternatives, especially in homes that have changed over time.
Upgrading does not have to mean choosing the most complex option available. The best system is one that fits the home, climate, and household priorities. For some, that may be a high efficiency furnace. For others, it may be a cold climate heat pump or a ductless mini split setup that improves zoning and year round efficiency. A good contractor can help assess load needs, installation quality requirements, and available incentives so you can compare near term cost with long term performance.
What matters most is avoiding a rushed decision made during an emergency. Fall gives you a valuable planning window. If replacement is even a possibility in the next year or two, use this season’s tune up as a fact finding step. Ask questions, review age and performance honestly, and gather estimates before winter pressure makes every decision feel urgent.
Final Thoughts: Small Steps Now, Better Performance All Season
Preparing your HVAC system for fall is one of those household habits that pays off in several directions at once. It supports comfort on cold mornings, reduces the chance of inconvenient winter breakdowns, helps control heating costs, and strengthens the safety of fuel burning equipment. It also aligns naturally with a more sustainable approach to homeownership, because well maintained systems use energy more responsibly and last longer.
The encouraging part is that most of the highest value steps are not complicated. A professional pre season inspection, regular filter attention, unobstructed airflow, smart thermostat settings, and a bit of weatherization can go a long way. These are practical decisions, not dramatic ones. They fit the kind of sustainability that works in real homes and real budgets.
If you have been meaning to prepare your heating system for colder weather, start this week rather than waiting for the forecast to force the issue. Clear the vents, check the filter, test the thermostat, and book the service visit. Your future winter self will likely be very glad you did.
Quick Reference Fall HVAC Checklist
-
Schedule a professional pre season heating inspection early in the fall.
-
Check and replace or clean the air filter, then note the date for the next monthly check.
-
Make sure return vents and supply registers are clean and unobstructed.
-
Clear leaves, dust, and vegetation from around any outdoor HVAC unit.
-
Test the thermostat in heating mode and update schedules for fall and winter routines.
-
Walk through the house to identify uneven heating, drafts, or unusual system noises.
-
Inspect visible ducts or pipes for obvious leaks, insulation gaps, or damage.
-
Seal simple air leaks and consider insulation improvements to reduce heating demand.
-
Discuss indoor air quality, ventilation, and filter strategy with your technician if needed.
-
Review equipment age, repair history, and efficiency to decide whether tune up, repair, or upgrade makes the most sense.


No Comment! Be the first one.