


How to Effectively Air Seal Your Home for Better Energy Efficiency
Air sealing is one of those home improvements that rarely looks dramatic when it is finished, yet it can quietly transform the way a house feels and performs every day. If your home has cold drafts in winter, hot spots in summer, or rooms that never seem to stay comfortable, uncontrolled air leakage may be a larger problem than you realize. In many homes, especially older ones, conditioned air is constantly escaping through small gaps and hidden openings in the building envelope, which means your heating and cooling system has to work harder than necessary.
Table Of Content
- Why air sealing matters more than many homeowners think
- Start with the right mindset: seal strategically, not everywhere at once
- How to find air leaks in your home
- The best places to air seal first
- 1. Attic penetrations and attic hatches
- 2. Basement and crawl space rim joists
- 3. Plumbing, wiring, and duct chases
- 4. Doors and operable windows
- Choosing sustainable and durable air sealing materials
- A step by step DIY air sealing workflow
- Important safety considerations before and after air sealing
- Common mistakes to avoid
- When to call a professional
- How air sealing fits into a long term green home strategy
- Final thoughts
That is why air sealing is often recommended as an early step in a smart retrofit plan. ENERGY STAR says sealing air leaks and adding insulation can reduce annual energy bills by up to 10 percent. EPA and ENERGY STAR methodology also estimates average savings of 15 percent on heating and cooling costs, or 11 percent on total energy costs, when homeowners air seal and insulate attics, floors over crawl spaces, and accessible basement rim joists. Those are meaningful numbers, but the benefits go beyond utility bills. A well sealed home is often quieter, more comfortable, less dusty, and better protected against moisture problems that can develop when warm and cool air move unpredictably through the structure.
There is also a broader sustainability story here. Air sealing helps your home waste less energy without requiring a full renovation, which makes it one of the most practical ways to reduce environmental impact through everyday housing decisions. It can be done thoughtfully, using durable materials, low waste methods, and a clear focus on the biggest leaks first. That approach is not only more efficient, it is usually more cost effective and less frustrating for homeowners.
This guide will walk you through the process in a homeowner friendly way. We will look at where leaks tend to hide, how to inspect your home, which materials make sense for different gaps, and how to avoid common mistakes. Just as importantly, we will also talk about ventilation and safety, because a tighter home should still be a healthy home.
Practical takeaway: The best air sealing strategy is usually simple. Find the leaks, seal the big ones first, and make sure the house remains properly ventilated afterward.
Why air sealing matters more than many homeowners think
It is easy to assume that the biggest energy losses happen through old windows or doors because those are the places where drafts are easiest to feel. Sometimes that is true, but official guidance from ENERGY STAR and Natural Resources Canada points to a different pattern in many homes. The largest leakage zones are often hidden in attics, basements, rim joists, plumbing and wiring penetrations, recessed lights, attic hatches, and utility chases. In other words, the most important leaks are often out of sight.
This matters because air leakage is different from poor insulation. Insulation slows heat transfer, but it does not stop uncontrolled airflow on its own. If warm indoor air can move through cracks, bypass insulation, and escape into an attic or wall cavity, your home loses energy and can also invite moisture problems. That is why experts consistently frame air sealing and insulation as companion upgrades rather than competing ones.
In Canada, NRCan describes reducing draftiness as the single most important retrofit homeowners can make to improve energy efficiency, and something that should be considered early in any retrofit plan. That recommendation aligns with the growing whole house approach now seen across North American home performance programs. Air sealing is no longer viewed as a minor handyman task. It is part of how homes are evaluated, labeled, and improved over time.
If you are thinking about rebates, an energy audit, or a deeper renovation, airtightness may also be measured professionally. EnerGuide home evaluations include blower door testing to assess how much air your home leaks and to help guide retrofit priorities. Even if you are not ready for a professional assessment, understanding air sealing now can help you make better decisions later and avoid wasting money on cosmetic fixes that do not address the real problem.
Start with the right mindset: seal strategically, not everywhere at once
One of the most useful misconceptions to clear up at the beginning is that effective air sealing does not mean covering every crack you can find with foam or caulk. More material is not automatically better. In fact, overapplying sealants can create a mess, waste products, interfere with drainage or movement, and sometimes create maintenance issues down the line. The more durable approach is to match the right material to the right type of gap.
It also helps to think in terms of pressure and air pathways. In winter, warm indoor air naturally rises, which means upper parts of the home often leak conditioned air into the attic. At the same time, replacement air is drawn in through lower areas such as basements and crawl spaces. This stack effect is one reason attic and basement sealing is so important. If you only focus on the middle of the home, you may improve comfort a little, but you will not address the most powerful leakage patterns.
A calm, staged workflow is usually best. Begin with inspection. Then prioritize larger hidden leaks over smaller obvious ones. Seal accessible attic and basement penetrations, address doors and operable windows with weatherstripping, and only then move to finer details. This sequence helps you use materials more intentionally and gives you a clearer sense of which improvements are actually making a difference.
How to find air leaks in your home
You do not need specialized equipment to start identifying likely problem areas, although a professional blower door test can be extremely helpful if you want a more complete picture. For a homeowner level assessment, the goal is to combine observation with a bit of simple detective work. Try to inspect your home during a season when indoor and outdoor temperatures are noticeably different, because drafts will be easier to detect.
Walk through your house slowly and pay attention to comfort changes around baseboards, trim, attic hatches, plumbing penetrations, electrical boxes, and door edges. On a cool day, your hand may be enough to feel air movement. You can also look for visual clues such as dust streaks around trim, insulation that appears disturbed, or cobwebs moving near cracks and penetrations. These small signs often point to a larger pressure pathway nearby.
Attics and basements deserve extra attention because they tend to hold the most important hidden leaks. In the attic, look around light fixtures, bathroom fan housings, plumbing stacks, wiring holes, chimney chases, dropped soffits, and the attic access hatch itself. In the basement, inspect the rim joist area, where the wood framing meets the top of the foundation wall, as well as utility penetrations, duct connections, and any framed cavities that lead upward into the house.
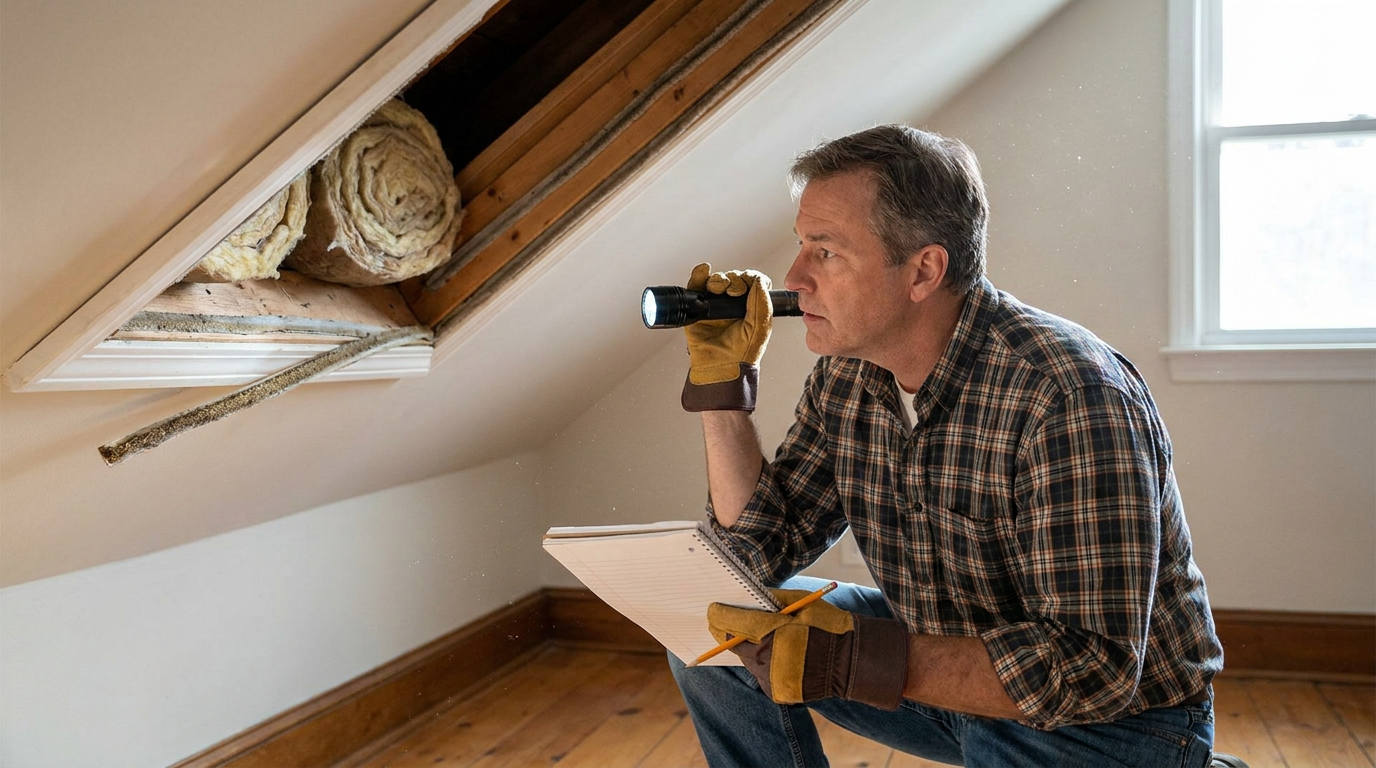
Windows and doors should still be checked, especially if weatherstripping is worn or frames are visibly out of alignment, but it is worth remembering that they are not usually the only story. Many homeowners spend heavily on replacement windows while leaving significant attic and basement leakage untouched. A more balanced approach often delivers better comfort and energy performance for less money.
If you want extra confidence in what you are seeing, a home energy advisor or qualified contractor can help identify leakage paths more precisely. This can be especially useful if you are planning larger upgrades, if your home has combustion appliances, or if you suspect that moisture and ventilation issues may be tied to air movement through the building envelope.
The best places to air seal first
1. Attic penetrations and attic hatches
The attic is often the first place to focus because rising warm air creates strong leakage pressure there in winter. Small openings in the ceiling plane can collectively add up to a surprisingly large escape route for heated air. Common trouble spots include recessed lights, electrical penetrations, plumbing stacks, fan housings, and framing gaps around dropped ceilings or partition walls.
The attic hatch is another frequent weak point. If it lacks weatherstripping, insulation, or a snug fit, it can behave like a large unsealed opening right in the lid of your home. Sealing the perimeter with durable weatherstripping and ensuring the hatch itself is insulated is often one of the simplest high value improvements a homeowner can make.
Be careful around heat producing fixtures and follow clearance requirements around chimneys or flues. Not every gap can be sealed with the same material, and fire safety always takes priority. If you are unsure about recessed lights, masonry chimney clearances, or older attic conditions, it is wise to pause and consult a qualified professional before proceeding.
2. Basement and crawl space rim joists
Basement rim joists are one of the most consistently overlooked leakage areas in North American homes. This band of framing sits at the outer edge of the floor structure above the foundation and often contains numerous small cracks, joints, and penetrations. Because the basement is a lower pressure zone during colder months, outside air can be drawn in here continuously.
Accessible rim joists are also one of the areas highlighted by ENERGY STAR methodology for meaningful savings when paired with insulation. Sealing these joints can reduce drafts on main floors, improve comfort near exterior walls, and help manage moisture migration. It is one of those upgrades that may not be visible once done, yet often has a noticeable effect on how the house feels.
Pipe penetrations, cable entries, and utility lines in the basement should be treated as part of the same system. If an opening leads from the outside or into wall and floor cavities, it is part of your home’s air leakage network. Even modest sealing work in this area can produce a more stable indoor environment.
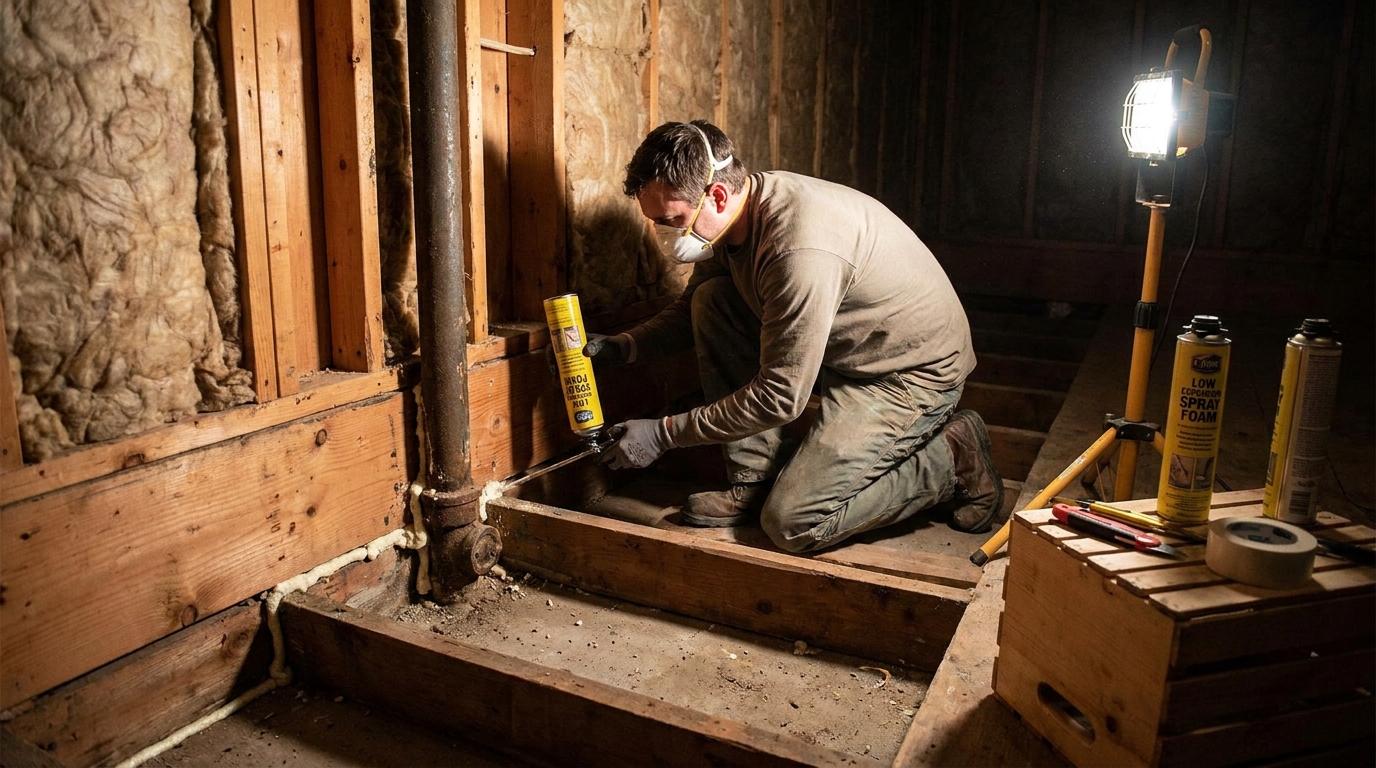
3. Plumbing, wiring, and duct chases
Any place where pipes, wires, or ducts pass through walls, floors, or ceilings is a likely leakage point. These penetrations are often small individually, but because they create direct pathways between conditioned and unconditioned spaces, they can be surprisingly important. Utility chases that run from the basement to the attic can function like hidden chimneys inside the house.
Look behind sinks, under tubs, around furnace or water heater venting areas, and near laundry connections. In unfinished spaces, these penetrations are often easier to spot than in finished rooms. Sealing them carefully can interrupt major air pathways without requiring invasive work.
Ducts deserve their own note. If you can see disconnected or poorly sealed duct joints, those should be addressed with appropriate duct sealing methods rather than general purpose tape. Duct leakage affects both efficiency and comfort, and it can change pressure relationships within the house. If ducts run through attics, crawl spaces, or garages, the payoff for sealing them can be especially worthwhile.
4. Doors and operable windows
Doors and windows may not always be the largest source of leakage, but they are still important because they affect daily comfort directly. A front door with flattened weatherstripping or a worn door sweep can make an entry hall feel permanently chilly. Operable windows often leak at movable joints rather than through the glass itself, which means basic maintenance can matter more than replacement.
Weatherstripping is generally the right solution for components that move. Caulk should be reserved for stationary joints where movement is not expected. This distinction matters because sealants that crack under movement will not last, and weatherstripping used in the wrong place may not create a clean durable seal.
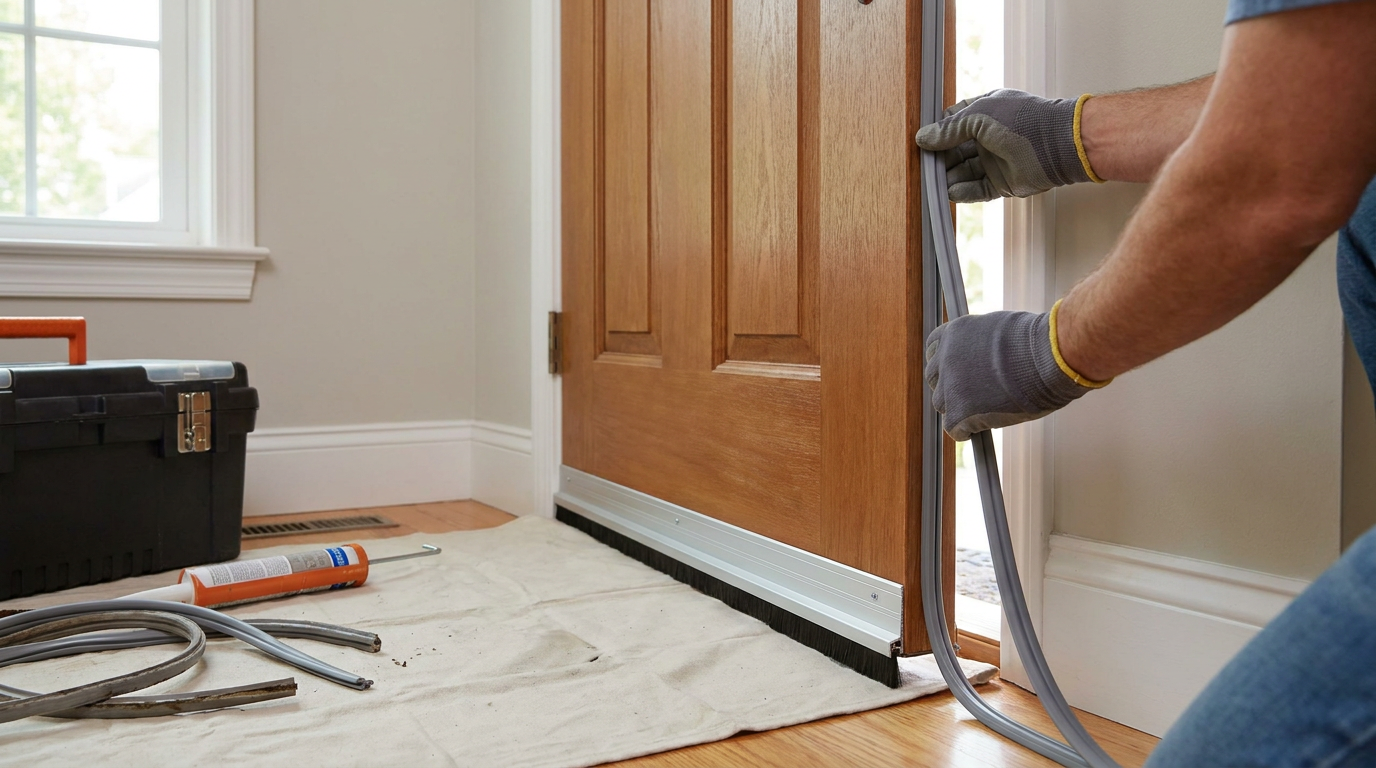
Simple improvements around doors and windows can deliver a quick comfort boost. They also help complete the envelope once larger hidden leaks have been addressed. Think of them as part of the finish work in a broader air sealing strategy rather than the entire strategy on their own.
Choosing sustainable and durable air sealing materials
A more sustainable air sealing approach is not necessarily about buying the most specialized product on the shelf. It is about using durable materials in the right quantity and applying them where they will do the most good. Low waste decisions often begin with sequencing. If you identify your biggest leaks first, you are less likely to overbuy products or use high impact materials where a simpler solution would work just as well.
For small stationary gaps, caulk is often the best choice. It creates a durable seal with relatively little material and works well around trim, small cracks, and joints where there is no expected movement beyond normal minor expansion. Choosing a quality low VOC product can improve indoor comfort during installation and reduce lingering odors.
For larger gaps around penetrations, low expansion spray foam is often the practical option. The phrase low expansion matters here because it is easier to control and less likely to distort nearby materials. It is useful around pipes, cables, and framing gaps, but it should be used carefully, sparingly, and only where appropriate. More foam is not a sign of better craftsmanship. A neat targeted seal is usually more durable and less wasteful.
Weatherstripping is designed for movable joints such as doors and operable windows. It comes in several forms, and the best version depends on the location, friction, and expected wear. A slightly more durable product often pays off because these are components you use every day. Attic hatches can also benefit from weatherstripping, often with excellent results.
Backer rod and gaskets are easy to overlook, but they are useful sustainable tools because they reduce unnecessary sealant use. Backer rod fills deeper gaps before caulking, which helps the sealant perform better and keeps you from overapplying material. Outlet and switch gaskets on exterior walls can be a modest but worthwhile detail in some homes, particularly when paired with sealing of larger leakage points nearby.
Whenever possible, choose products with clear performance information, appropriate temperature ratings, and a reputation for long term durability. A seal that fails after one or two seasons creates more waste than a slightly better product installed well the first time. Sustainable building decisions are often less about novelty and more about longevity.
A step by step DIY air sealing workflow
If you want a practical path to follow, the process below keeps things manageable and aligned with official guidance from ENERGY STAR, NRCan, EPA, and Health Canada. The order matters because it prioritizes the areas that usually have the biggest impact while helping you avoid unnecessary work.
- Inspect before buying materials. Walk through the attic, basement, crawl space, and main living areas. Make notes, take photos, and group leaks by type and size.
- Start with the attic plane. Seal accessible penetrations, improve the attic hatch seal, and address major bypasses that connect living space to the attic.
- Move to the basement or crawl space. Seal accessible rim joists, utility entries, and visible framing gaps that connect to the outdoors or wall cavities.
- Seal plumbing, wiring, and duct penetrations. Use the right material for each opening and avoid blocking required clearances or service access.
- Weatherstrip doors and operable windows. Replace worn weatherstripping, add door sweeps where needed, and caulk only the fixed joints.
- Check insulation after sealing. Air sealing and insulation work best together, especially in attics and floors over unconditioned spaces.
- Review ventilation and combustion safety. Make sure the home still has adequate fresh air pathways and that combustion appliances are operating safely.
Working in this sequence tends to produce the best return for effort. It also makes your results easier to evaluate. If comfort improves significantly after attic and basement sealing, you know you addressed meaningful leakage points rather than only cosmetic ones.
Important safety considerations before and after air sealing
Air sealing should always be approached as part of a whole house system. Tightening a home without maintaining proper ventilation can increase indoor pollutants, trap excess moisture, and in some cases create dangerous combustion issues. Health Canada warns that inadequate makeup air can contribute to backdrafting, which may pull combustion gases including carbon monoxide back into the home rather than exhausting them safely.
This does not mean homeowners should avoid air sealing. It means the work should be done thoughtfully, especially in homes with natural draft gas appliances, fireplaces, or attached garages. If your house already has humidity problems, persistent condensation, stale air, or combustion equipment that has not been recently checked, those issues deserve attention alongside airtightness improvements.
Very airtight homes often benefit from controlled mechanical ventilation such as an HRV or ERV system. These systems are designed to bring in fresh air while managing energy loss more effectively than random leakage through cracks. You do not need a ventilation upgrade every time you add weatherstripping or seal a rim joist, but if you are pursuing extensive air sealing or a major retrofit, ventilation planning becomes increasingly important.
EPA guidance on healthy homes also supports integrating energy efficiency improvements with indoor air quality practices rather than treating them separately. That is a reassuring idea because it frames air sealing not as a tradeoff, but as part of a better balanced home. Comfort, efficiency, and healthy indoor air can support each other when improvements are planned carefully.
Healthy home reminder: A tighter home should still breathe in a controlled way. If you significantly reduce leakage, make sure ventilation and combustion safety are reviewed too.
Common mistakes to avoid
One of the most common mistakes is focusing only on windows and doors while ignoring the attic and basement. Because leaks at eye level are easiest to notice, they tend to receive the most attention, even when larger hidden openings are driving the energy loss. This can lead to spending more money for less real improvement.
Another mistake is confusing air sealing with insulation. Adding more insulation over a leaky attic floor, for example, may still leave major bypasses open. Warm air can continue moving through those gaps and reduce the effectiveness of the insulation. Sealing first, then insulating as needed, is usually the more durable sequence.
Overusing spray foam is another issue. Foam is useful, but it is not a universal answer. In some places a gasket, weatherstrip, or backer rod with caulk is cleaner, more precise, and less wasteful. Applying foam where movement, maintenance access, or fire clearance matters can create problems rather than solve them.
Finally, some homeowners assume a tighter house is automatically healthier because fewer drafts must mean better indoor conditions. In reality, unmanaged airtightness can worsen air quality if ventilation is not considered. A thoughtful air sealing project improves the envelope while preserving the balance your home needs to stay safe and comfortable.
When to call a professional
Many air sealing tasks are realistic for careful homeowners, especially weatherstripping, attic hatch improvements, and sealing accessible small penetrations. But there are times when professional help makes sense. If your home has a complex attic layout, combustion appliances, moisture issues, suspected mold, or inaccessible leakage paths, a trained contractor or energy advisor can help prioritize work safely.
Professional testing is especially valuable if you want to measure results. A blower door test can reveal just how much leakage your home has and identify areas that are hard to diagnose with a basic walk through. For homeowners planning grants, incentive programs, or larger retrofits, this kind of evaluation can also help document progress and support better decision making.
In many cases, the best outcome comes from a combination approach. You might handle straightforward tasks yourself, then bring in a professional for combustion safety checks, blower door testing, or more technical sealing work. That blend of DIY and expert input is often both practical and economical.
How air sealing fits into a long term green home strategy
Air sealing works best when it is seen not as a one time patch job, but as part of a larger building envelope maintenance plan. Homes age, materials move, and renovations can open new leakage paths. Rechecking seals around attic hatches, utility penetrations, and weatherstripped components every few years is a simple way to protect the gains you have made.
It also pairs naturally with other green upgrades. If you are improving attic insulation, renovating a basement, replacing siding, or upgrading HVAC equipment, air sealing should be part of the conversation. Addressing leakage while assemblies are accessible can save labor, reduce material waste, and improve the performance of every other upgrade around it.
This whole house perspective is becoming more common in both code discussions and retrofit programs. Canadian and U.S. guidance increasingly connect airtightness with ventilation, moisture control, comfort, and healthy indoor environments. That is encouraging because it reflects a more mature understanding of sustainability in housing. Practical improvements, done in the right order, can create homes that are not only lower in energy use but also calmer and more resilient to live in.
For many homeowners, air sealing is one of the most approachable places to begin. It does not require a dramatic design change or a complete rebuild. It asks for attention, patience, and a willingness to focus on the details that shape everyday performance. In return, it offers a home that wastes less, feels steadier, and supports the kind of long term efficiency that good green building is really about.
Final thoughts
If you have been wondering where to start with home energy efficiency, air sealing is a sensible answer. It addresses comfort and energy waste at the same time, and it often delivers benefits that homeowners notice quickly. The key is to resist the urge to treat it as a scattershot sealing exercise. The most effective path is strategic: inspect carefully, focus on attics and basements first, use durable low waste materials, and think about ventilation as part of the same system.
That balanced approach is what makes air sealing such a valuable maintenance project. It is practical enough for many homeowners to begin on their own, yet substantial enough to support larger sustainability goals over time. Whether you are chasing lower bills, fewer drafts, better comfort, or a stronger retrofit foundation, thoughtful air sealing is one of the clearest ways to make your home work better with less waste.
And perhaps that is the most reassuring part. Better performance does not always begin with a major renovation. Sometimes it begins with finding the quiet gaps, sealing them well, and letting the home hold onto its comfort a little more gracefully.



No Comment! Be the first one.