


How to Replace and Upgrade Your Outlets and Switches Safely: A Homeowner’s Step by Step Guide
Replacing old outlets and switches is one of the most practical home maintenance skills a homeowner can learn. It does not require a full renovation budget, and it can make a room feel cleaner, safer, and more functional in a single afternoon. Worn devices, loose plugs, cracked faceplates, and outdated switch styles are all common signs that basic electrical hardware is ready for attention. If you approach the job with patience and respect for safety, this is a task many homeowners can handle without hiring out.
Table Of Content
- Why Homeowners Replace and Upgrade Outlets and Switches
- Know Your Limits Before You Start
- Tools and Materials You Will Need
- Electrical Safety Basics That Matter Every Time
- What the Wire Colors Usually Mean
- Step One: Shut Off Power and Confirm It Is Dead
- Step Two: Document the Existing Wiring
- How to Replace a Standard Duplex Outlet
- How to Replace a Standard Single Pole Light Switch
- Upgrading to Modern Outlet and Switch Options
- GFCI Outlets
- Tamper Resistant Outlets
- USB Combination Outlets
- Dimmers and Smart Switches
- Common Problems You May Find in the Box
- Mistakes to Avoid
- How to Test Your Work Properly
- When You Should Call an Electrician
- Tips for a Cleaner, More Professional Result
- Final Thoughts
That said, electrical work is not the place for guesswork. A switch or receptacle may look simple from the outside, but the wiring behind the wall matters, and a careless mistake can create a shock hazard, a damaged device, or even a fire risk. The goal is not just to swap parts, but to understand how the system works well enough to complete the job correctly. Good workmanship matters here just as much as confidence.
This guide explains how to replace and upgrade your outlets and switches safely, step by step. You will learn what tools to gather, how to shut off power and verify it properly, how typical outlet and switch wiring is arranged, and what to watch for when something behind the wall does not match expectations. By the end, you should have a clear sense of what you can do yourself and when it is smarter to stop and call a licensed electrician.
The most important tool in any electrical job is not a screwdriver. It is the habit of testing for power every single time.
Why Homeowners Replace and Upgrade Outlets and Switches
Most outlet and switch replacements start with a practical problem. Maybe a plug keeps falling out because the receptacle has lost tension. Maybe a switch crackles, feels warm, or only works if you press it a certain way. Sometimes the reason is cosmetic, such as replacing old almond colored devices with modern white rocker switches and screwless wall plates. Other times the reason is safety, especially in older homes where devices are worn or not up to current standards.
Upgrading can also improve how you use your space. A standard receptacle can be replaced with a tamper resistant device for child safety, a GFCI outlet for bathrooms or kitchens, or even a USB combination outlet for convenient charging. A basic switch can be upgraded to a dimmer, timer, occupancy sensor, or smart switch if the wiring conditions support it. These are not just style changes. In many cases, they improve convenience and bring older rooms closer to modern expectations.
There is also value in simply opening up a device box and seeing what condition it is in. You may discover loose wire connections, damaged insulation, overcrowded boxes, missing grounds, or signs of overheating. Catching those issues early matters. Basic maintenance often reveals the story of how well the electrical system has been treated over the years.
Know Your Limits Before You Start
There is a big difference between replacing a like for like outlet on a modern grounded circuit and trying to troubleshoot a multi wire branch circuit in an older house. Homeowners should be honest about that difference. If you remove the cover plate and find aluminum wiring, scorched insulation, a crowded box with multiple splices, or wiring that does not match normal color conventions, that is a good time to stop. The safest move is often recognizing when the job has moved beyond routine maintenance.
You should also check your local code requirements before starting. Electrical rules vary by location, and some upgrades, especially in kitchens, bathrooms, garages, unfinished basements, and outdoor areas, may require specific device types. Tamper resistant outlets are standard in many areas, and GFCI or AFCI protection may be required depending on the circuit and room. A little homework up front can keep a simple repair from becoming a redo later.
If at any point you are not sure what a wire does, do not energize the circuit and hope for the best. Electrical work rewards careful, methodical action and punishes assumptions. That is true whether you are replacing a ten dollar switch or installing a more advanced smart control.
Tools and Materials You Will Need
A clean job starts with having the right tools on hand before you remove anything. You do not need a truck full of gear, but you do need a few basic items that let you work safely and make solid connections. Cheap tools and rushed preparation are where many small electrical jobs go sideways. Good tools improve both safety and finish quality.
For most outlet and switch replacements, gather a non contact voltage tester, a plug in outlet tester, insulated screwdrivers, a wire stripper, needle nose pliers, a flashlight or headlamp, electrical tape, and replacement devices with matching wall plates. If you are working in a metal box or older home, it also helps to have extra wire connectors and short lengths of copper wire for pigtails. A phone camera is useful as well because taking a clear picture before disconnecting wires can save you from guessing later.
- Non contact voltage tester
- Plug in outlet tester
- Flathead and Phillips insulated screwdrivers
- Wire stripper and cutter
- Needle nose pliers
- Flashlight or headlamp
- Electrical tape
- Replacement outlet or switch
- Matching faceplate
- Wire connectors and pigtail wire if needed
- Phone or camera for reference photos
When buying the new device, match the amperage rating to the circuit and existing device unless you fully understand what the circuit requires. Most general lighting and receptacle circuits in homes are either 15 amp or 20 amp. A standard 15 amp outlet is common on 15 amp circuits and also on many 20 amp residential branch circuits where code allows it. If you are unsure, do not improvise. Match what is there or verify the circuit design before changing ratings.
Electrical Safety Basics That Matter Every Time
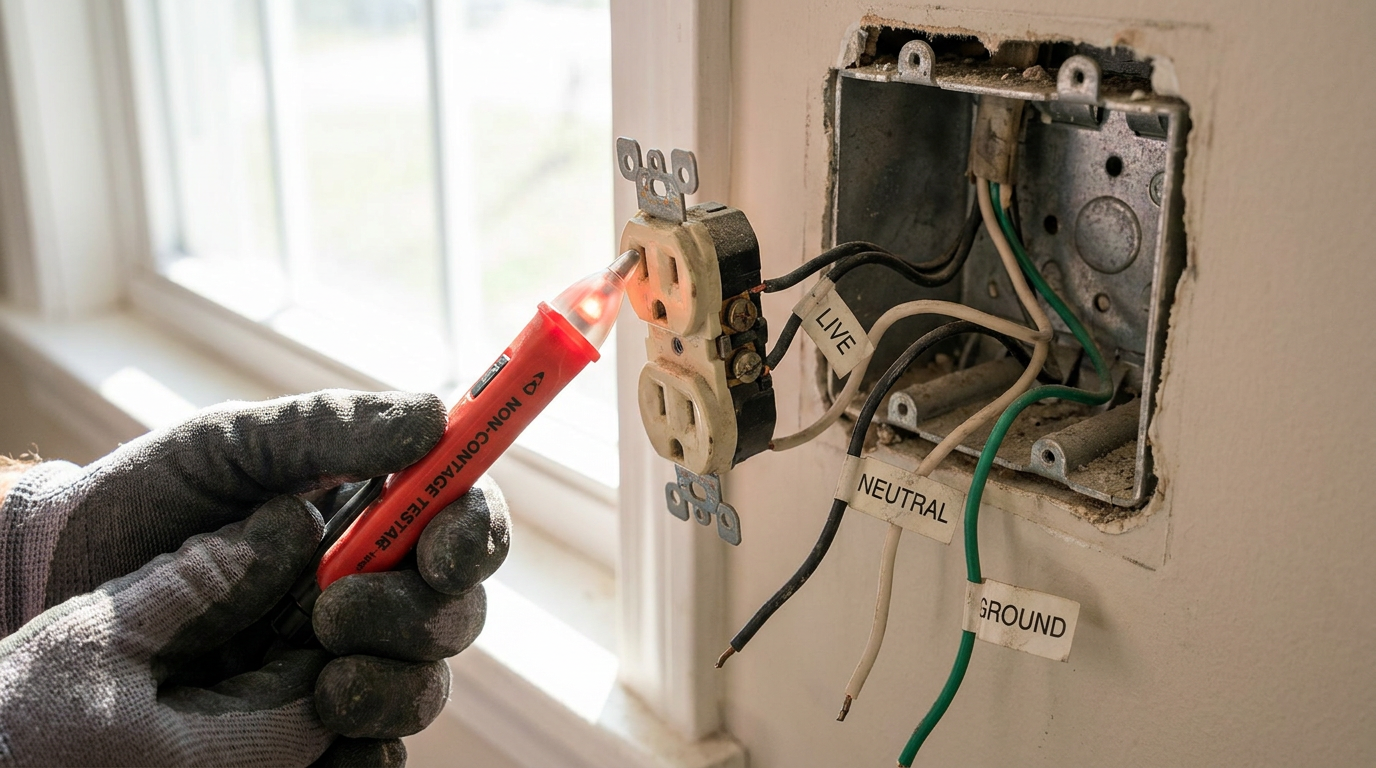
The first rule is simple. Turn off the power at the breaker, not just at the switch. A wall switch only interrupts one conductor in the circuit, and in some older or improperly wired conditions, even that may not happen the way you expect. The breaker is where you isolate the circuit. Once it is off, return to the device and test before touching anything.
Use a non contact voltage tester first, then confirm with a plug in tester for outlets if possible. If the tester still shows power, stop and find the correct breaker. In some houses, panel directories are mislabeled or incomplete, so do not assume the writing on the panel door is accurate. This is why the testing step is not optional.
Work in good light and keep your hands dry. If you are replacing a bathroom, laundry, kitchen, garage, or exterior device, be especially aware of moisture conditions and code related protection requirements. You are not just changing hardware. You are working on a system designed to carry current through the walls of your house. Respect that every time you loosen a screw.
What the Wire Colors Usually Mean
In many standard residential circuits, black or red wires are hot, white wires are neutral, and bare copper or green wires are ground. That is the usual pattern, but older work and past repairs do not always follow the usual pattern. A white wire may sometimes be used as a hot conductor if it was repurposed in a switch loop, and not every box will include a neutral. Smart switches often require a neutral, so checking what wires are present matters before you buy a device.
The brass colored terminal screws on an outlet are for hot wires, and the silver colored screws are for neutrals. The green screw is for the ground. On a basic single pole switch, the two current carrying terminal screws connect the incoming hot and the switched hot to the light or load. The green screw again is for ground. Keeping these roles straight is the foundation of a safe installation.
Step One: Shut Off Power and Confirm It Is Dead
Go to the electrical panel and turn off the breaker feeding the outlet or switch you plan to replace. If you are not certain which breaker controls that device, plug in a lamp or outlet tester before shutting breakers one by one until the device loses power. For a switch, turn the light on first so you can see when it goes dead. Then return to the work area and begin testing.
Remove the faceplate screws and pull off the plate carefully. Before touching the device screws or wires, use the non contact tester around the sides of the device, near each conductor, and inside the box opening if accessible. For an outlet, also use a plug in tester before removing the receptacle from the box. This double check takes less than a minute and can prevent the kind of mistake that turns a basic repair into an emergency.
Once you are satisfied that the power is off, unscrew the device from the box and gently pull it forward. Do not yank. Conductors can be short, stiff, or brittle in older boxes, and forcing them can break insulation or loosen a splice behind the device. Move slowly enough to inspect what you have before disconnecting anything.
Step Two: Document the Existing Wiring
Before you remove a single wire, take a clear photo from the front and from the side. This matters more than many people realize. If you step away for a tool or get interrupted, a good reference image can save you from relying on memory. It also helps if the device has more than one cable entering the box, which is common when power is feeding through to other outlets or lights on the circuit.
Look closely at how many wires connect to the device and where they land. On an outlet, note which wires are on the brass side and which are on the silver side. On a switch, note whether there are two wires plus ground for a single pole configuration, or more for a three way switch. If there are tabs between the screws on a receptacle, notice whether they are intact or broken off, because that changes how the outlet functions.
If the device is back stabbed, meaning the wires are pushed into holes in the back instead of wrapped around screw terminals, this is a good opportunity to improve the connection. Back stab connections are common on older devices and can loosen over time. Many electricians prefer side screw or clamp style terminations because they hold better and are easier to inspect.
How to Replace a Standard Duplex Outlet
A standard duplex outlet is one of the simplest device replacements when the existing wiring is straightforward and in good condition. After documenting the wiring, disconnect the old receptacle. If the wires are looped around terminal screws, loosen the screws and remove the wires carefully. If they are back stabbed, some devices have a release slot where a small screwdriver can help free the wire. Avoid twisting or nicking the copper.
Inspect the conductor ends. If the copper is damaged, corroded, or bent out of shape, trim back a small amount and strip fresh insulation to the length specified on the new receptacle. Form a neat clockwise hook with needle nose pliers if you are using screw terminals. The clockwise direction matters because tightening the screw then draws the wire in rather than pushing it out.
- Connect the bare or green ground wire to the green screw.
- Connect the white neutral wire or wires to the silver terminal side.
- Connect the black or red hot wire or wires to the brass terminal side.
- Tighten all terminal screws firmly.
- Fold the wires back into the box carefully and mount the receptacle straight.
- Install the faceplate without overtightening.
If there are multiple wires feeding through the box, some homeowners are tempted to land two conductors under one screw. Only do that if the device is specifically rated for it, and even then, many pros prefer pigtails. A pigtail setup joins the feed wires together with a short lead that connects to the device, reducing strain and making the installation cleaner. It is often the more reliable method, especially in crowded boxes.
Once the outlet is secured, restore power at the panel and test it with a plug in outlet tester. The tester should confirm correct hot, neutral, and ground relationships. If the tester indicates reverse polarity, open ground, or another fault, shut power back off and recheck your connections before using the outlet.
How to Replace a Standard Single Pole Light Switch
Single pole switches are also straightforward if you are replacing the same style with the same style. After turning off the breaker and verifying the box is dead, remove the faceplate and device screws, then pull the switch forward. Take photos and identify the two current carrying wires and the ground. On a simple single pole switch, the two switch terminals are interchangeable in function, but the ground is not. It must connect correctly.
Disconnect the old switch and prepare the wire ends if needed. If the wires were back stabbed, move them to screw terminals on the new switch whenever possible. This is a good quality upgrade even if the device itself is the same style. Strong mechanical connections usually age better than convenience style push ins on inexpensive switches.
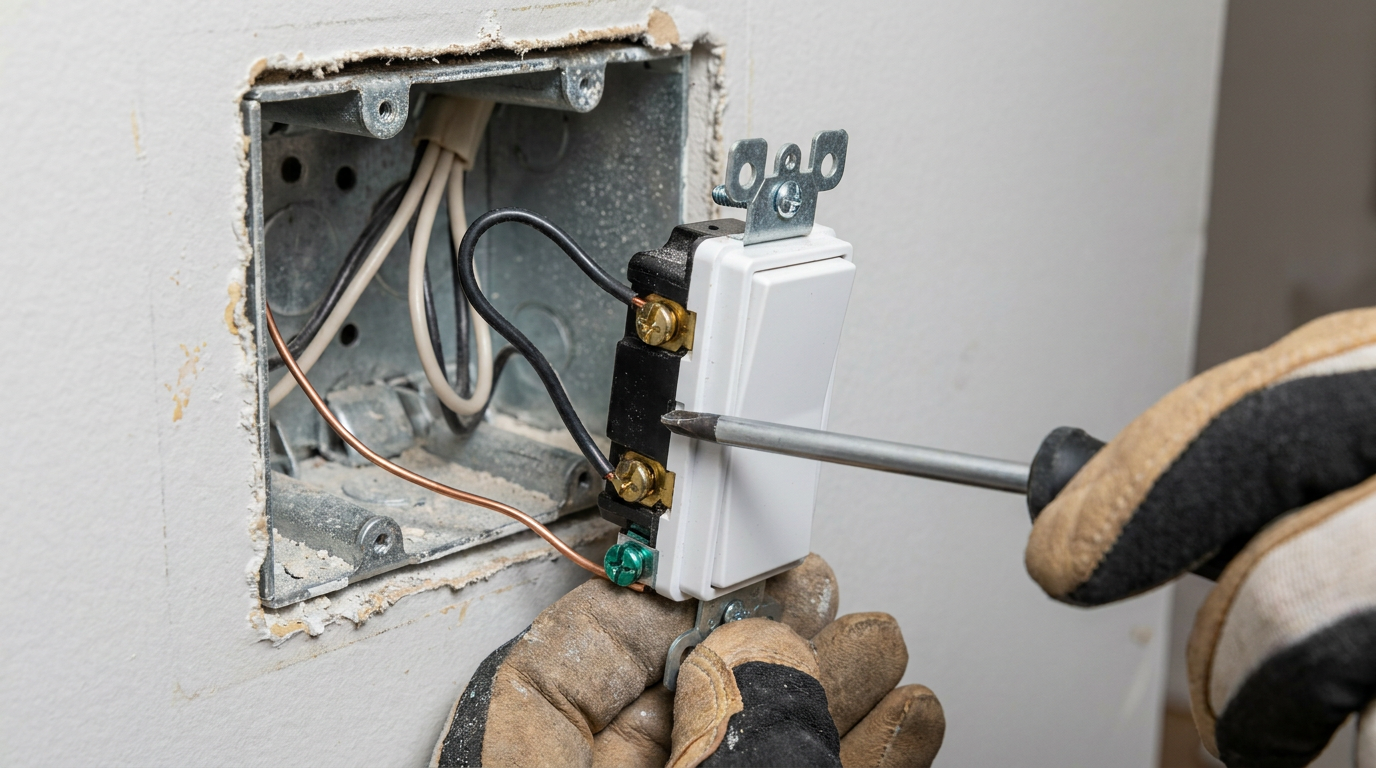
- Attach the bare or green ground wire to the green screw.
- Attach one hot wire to one brass or dark terminal.
- Attach the other switched leg to the remaining terminal.
- Tighten the screws securely.
- Fold the wires carefully into the box and mount the switch upright.
- Reinstall the faceplate and restore power for testing.
If the switch controls a light but the light does not work after replacement, shut off power and verify that both current carrying wires are firmly landed and that no conductor slipped out from under a terminal. Also check whether the bulb or fixture itself may be the issue. Keep troubleshooting simple and systematic instead of changing multiple variables at once.
Upgrading to Modern Outlet and Switch Options
Once you understand basic replacement, upgrades become much easier to evaluate. Not every fancy device is right for every box, but many are worthwhile. Modern devices can improve safety, convenience, and appearance without changing the entire electrical system. The key is choosing a device that matches the circuit and the wiring that is actually present in the box.
GFCI Outlets
Ground fault circuit interrupter outlets are designed to cut power quickly when they detect an imbalance that could indicate current leaking through water or a person. They are commonly required in bathrooms, kitchens, garages, basements, laundry areas, and outdoor locations. A GFCI receptacle has clearly marked line and load terminals, and that distinction matters. The incoming power feed belongs on the line side.
If you connect the feed to the wrong terminals, the device may not reset or protect properly. If you only want to protect that single receptacle, use only the line terminals. If you want the GFCI to protect downstream outlets as well, the outgoing conductors must be connected to the load terminals exactly as instructed by the manufacturer. Read the included diagram carefully. This is one place where skipping the instructions is a real mistake.
Tamper Resistant Outlets
Tamper resistant receptacles look much like standard outlets, but they include internal shutters that resist foreign objects being inserted into one slot. They are now standard in many homes, especially where children may be present. Installation is the same as with a standard duplex receptacle, and the added safety is worth it. If you are already replacing worn outlets, this is usually the best default upgrade.
USB Combination Outlets
USB outlets can reduce charger clutter in bedrooms, kitchens, and home offices. Before installing one, check the box size and wire fill. Some combination devices are bulkier than standard receptacles, and a cramped box can make installation difficult or noncompliant. If folding the wires back feels forced, the box may simply be too small for the upgrade.
Dimmers and Smart Switches
Dimmers can improve comfort and help tailor light levels in living rooms, dining rooms, and bedrooms, but they must be compatible with the fixture and bulbs. LEDs in particular require dimmer compatibility. Smart switches add scheduling, app control, and voice integration, but many need a neutral wire in the switch box. Older homes often do not have one present, so check before buying. Some smart switches are designed for no neutral applications, but they have their own compatibility requirements.
When upgrading a switch, always confirm whether the existing setup is a single pole or three way circuit. A three way switch controls a light from two locations and uses traveler wires in addition to the common terminal. Replacing a three way switch with the wrong device or mixing up the common wire will cause problems quickly. If you are not familiar with three way wiring, do not treat it like a standard switch swap.
Common Problems You May Find in the Box
Not every device replacement goes as neatly as the how to photos suggest. Real homes come with patched together histories, and electrical boxes often reflect that. One of the most common issues is short wire length. If the conductors barely extend out of the box, adding pigtails may be necessary. Another common issue is a missing ground in older wiring systems. You cannot just ignore that detail if the new device depends on grounding for safety and proper operation.
You may also find signs of overheating, such as darkened insulation, melted plastic, or scorched terminal areas on the old device. That is not normal wear. It suggests a loose connection, overloaded device, or other problem that needs more than a quick replacement. If you see that kind of damage, inspect the wire ends carefully and consider having the circuit evaluated before putting it back into service.
Loose boxes are another frequent annoyance. A switch or receptacle should mount securely, sit flush with the wall surface, and not wobble when used. If the box itself is loose in the wall, fix that issue before relying on the new device to compensate. Good electrical finish work depends on a solid box and proper device alignment.
Mistakes to Avoid
Most outlet and switch problems come from a short list of avoidable mistakes. The first is failing to test for power. The second is mixing up hot and neutral on a receptacle, which creates reverse polarity. The third is leaving a loose terminal screw, which can lead to heat buildup and intermittent operation. These are not advanced errors. They are basic workmanship issues, and they matter.
Another common mistake is forcing too much hardware into too little box space. Large smart devices, GFCIs, and extra pigtails all take room. Overcrowded boxes strain conductors and make clean terminations harder. A neat fold of wires is not just about appearance. It protects insulation and helps the device sit correctly without pinching anything.
Many homeowners also make the mistake of replacing a device without addressing the reason it failed. If an outlet was loose because the plug blades no longer held tightly, replacement alone solves it. But if a switch was warm, a receptacle was discolored, or breakers have been tripping, there may be a bigger issue upstream or on the load side. Device replacement is maintenance, not magic. If the symptoms point to a circuit problem, investigate that honestly.
How to Test Your Work Properly
Once the new outlet or switch is installed and the faceplate is on, turn the breaker back on and test the device methodically. For an outlet, plug in a receptacle tester and confirm the indicator lights show correct wiring. Then plug in a lamp or small appliance to make sure the outlet carries load normally. A tester is useful, but it does not replace the simple proof of actual operation.
For a switch, flip it several times and observe the controlled fixture. The switch should feel firm and consistent, with no buzzing, sparking, or excessive warmth during normal use. If it is a dimmer or smart switch, walk through the full function set and verify that it behaves as intended. Follow the manufacturer setup instructions instead of improvising your own sequence.
If a GFCI outlet or breaker is involved, use the test and reset buttons after installation. A GFCI is not truly done until you have confirmed that its protective function works. The same goes for any smart or specialty device. Successful installation means correct operation, not just getting the cover plate back on the wall.
When You Should Call an Electrician
There is no shame in drawing the line. In fact, it is one of the smartest habits a homeowner can develop. If you open the box and find aluminum branch wiring, no grounding path where one is needed, signs of arcing, inconsistent wire colors, damaged insulation inside the wall cavity, or multiple cables with unclear routing, it is time to bring in a licensed electrician. The same goes for flickering lights that persist after replacement, tripping breakers, or any situation where the device is only one symptom of a larger issue.
Call for help as well if you are dealing with a three way or four way switching arrangement and do not have a clear understanding of the circuit. These systems are not impossible to learn, but they are less forgiving if you start moving wires around without identifying the common and traveler conductors. Specialty devices, older homes, and previous DIY modifications all add complexity fast.
Good maintenance is not about proving you can do everything yourself. It is about knowing what is routine, what is repairable, and what deserves a pro. That mindset protects both your house and your confidence.
Tips for a Cleaner, More Professional Result
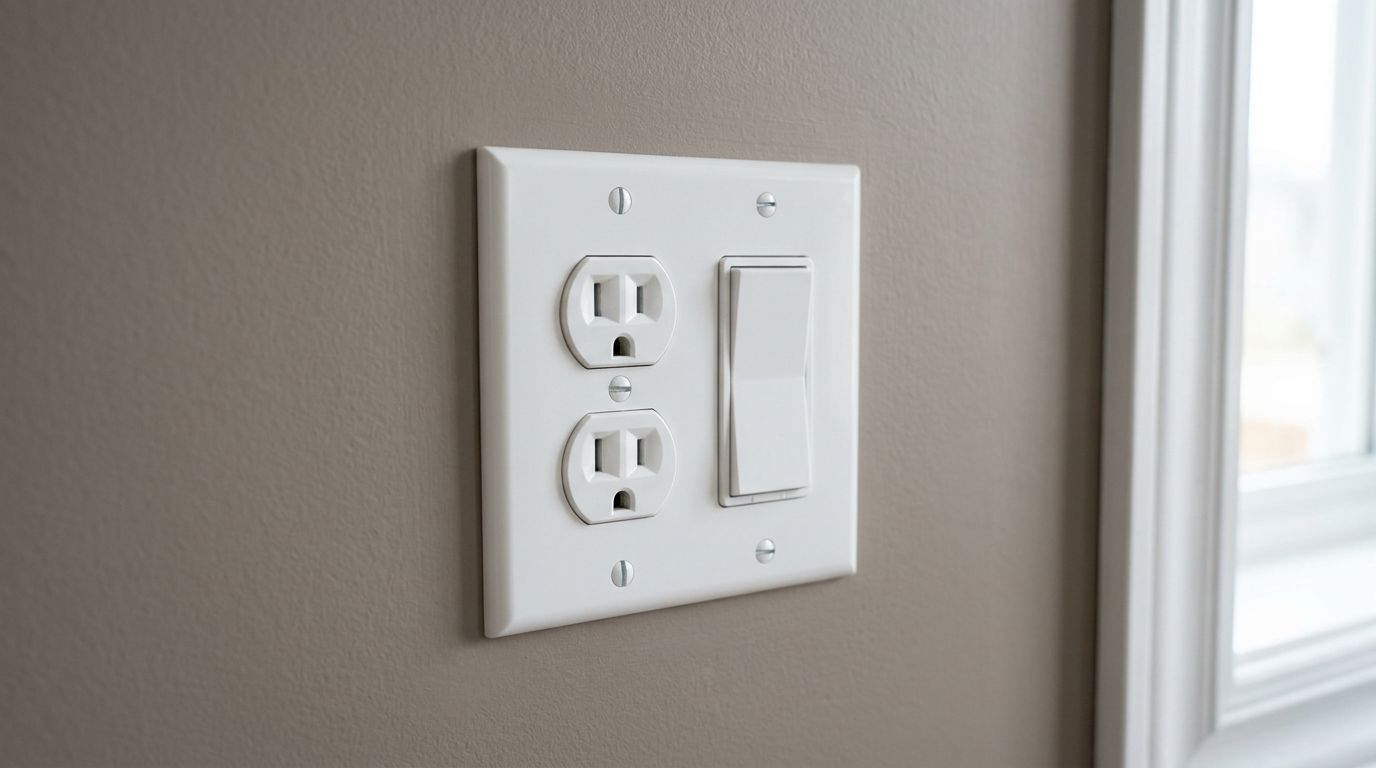
If you want the finished work to look as good as it functions, take a few extra minutes with the details. Align all devices vertically before tightening the mounting screws fully. Use a level if needed, especially when you are replacing multiple devices on the same wall. Small alignment issues stand out more than people expect once the plate is on and the room lighting hits it.
Replace cracked or yellowed wall plates while you are there. It is a low cost upgrade that makes the whole job look finished. If the wall surface is uneven from old paint or patching, choose a plate style that sits cleanly and avoid overtightening, which can crack plastic or make the device sit crooked. Professional looking results usually come from patience, not from expensive materials.
Finally, label your electrical panel accurately if you confirmed the correct breaker during the job. That is one of those small maintenance tasks that pays off later. The next time you need to service a room, you will save time and reduce uncertainty. Homes work better when someone takes the time to understand the systems behind the walls.
Final Thoughts
Replacing and upgrading outlets and switches safely is a practical skill that gives homeowners more control over their homes. It can solve everyday annoyances, improve appearance, and add safety features where they matter most. More importantly, it teaches you to pay attention to wiring quality, box condition, and the small details that separate a quick fix from solid maintenance.
The process is straightforward when you respect the order of operations. Shut off power at the breaker, test for voltage, document the existing wiring, make clean and correct connections, mount the device neatly, and test your work after restoring power. That sequence should become a habit. The actual device may change from a standard outlet to a GFCI or a smart switch, but the discipline stays the same.
If you approach the work carefully, there is a lot a homeowner can do here. And if the wiring in the box tells you the job is more complicated than expected, listen to that. Good judgment is part of good workmanship. In electrical maintenance, that matters every bit as much as turning the screws.


No Comment! Be the first one.