


How to Conduct a Thermal Bridge Check for Your Home
Many homes feel colder than they should even after the heating system is running properly and the insulation levels seem reasonable on paper. That disconnect often comes down to the parts of the building envelope that allow heat to move more easily than the surrounding assembly. These weak points are called thermal bridges, and they are one of the most overlooked reasons for energy loss, chilly surfaces, and winter condensation inside otherwise functional homes.
Table Of Content
- What a thermal bridge actually is
- Thermal bridging versus air leakage
- Why a thermal bridge check matters for comfort, energy, and durability
- When to do a thermal bridge check
- Tools that make a DIY thermal bridge check easier
- Common places where thermal bridges show up in homes
- Step by step: how to conduct a thermal bridge check
- Step 1: Start with a comfort map of the house
- Step 2: Do a visual inspection indoors and out
- Step 3: Compare surface temperatures by hand and by simple measurement
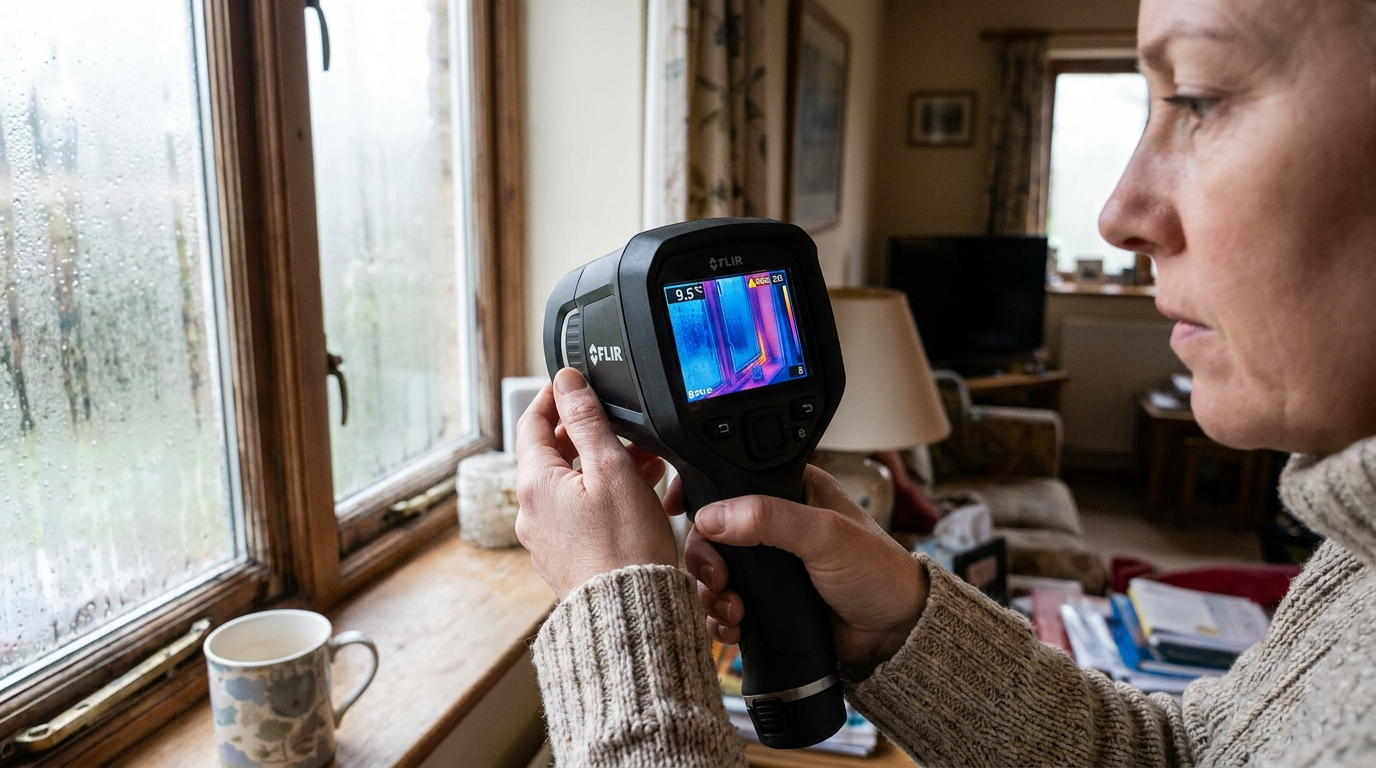
- Step 4: Use an infrared camera if available
- Step 5: Check for air movement to confirm what you found
- Step 6: Inspect the highest value problem areas more closely
- Step 7: Prioritize fixes by impact and timing
- How to interpret what you find
- Practical fixes homeowners can make
- Places where professional help makes sense
- Common misconceptions to avoid
- A simple homeowner checklist for future inspections
- Final thoughts
A thermal bridge check is a practical way to look for those hidden losses without immediately jumping to a major renovation or a professional assessment. As a homeowner, you can learn a great deal by observing comfort patterns, inspecting key junctions, and using a few simple tools at the right time of year. This is especially valuable because thermal bridging is not always obvious, and it is often confused with air leakage even though the two problems are different.
Public building science guidance in Canada and the United States consistently points to thermal bridging as a meaningful issue in both older and newer homes. CMHC research has found that typical building designs can lose 20 to 50 percent of thermal performance because of thermal bridging. That is a significant gap, and it helps explain why a room can feel uncomfortable even when the cavity insulation between studs appears adequate.
This guide will walk you through a homeowner friendly process for conducting a thermal bridge check step by step. You will learn where to look, how to tell a likely thermal bridge from a draft or moisture problem, what tools can help, and which fixes make the most sense depending on your budget and renovation plans. The goal is not perfection. The goal is clarity, so you can make steady improvements that support comfort, lower energy use, and a more resilient home.
What a thermal bridge actually is
A thermal bridge is a part of the building envelope where heat flows more easily because a more conductive material bypasses or interrupts the insulation layer. In simple terms, it is a shortcut for heat. Common bridge materials include wood framing, steel, concrete, and poorly detailed connections around openings and structural transitions.
It helps to think of your home’s thermal envelope as a continuous blanket wrapped around the conditioned space. Whenever that blanket is pinched, broken, or crossed by a material that transfers heat efficiently, the inside surface in that area becomes colder in winter and warmer in summer. You may not see the heat loss directly, but you can often feel it as discomfort or spot it as condensation on a nearby surface.
Thermal bridges are not rare defects limited to unusual custom homes. Even standard wood framed houses can have meaningful bridging because framing occupies a substantial share of wall area. U.S. Department of Energy materials note that wood framing can make up nearly one fourth of above grade wall area, which means the wall performs less like the insulation label and more like a combination of insulated cavities and conductive framing paths.
That is why a home can be technically insulated and still have cold strips on walls, cold floor edges, or recurring moisture near corners and windows. If the building envelope lacks continuity, adding more insulation in one part of the assembly may not solve the whole problem. A good thermal bridge check helps you see the house more realistically, as an interconnected system rather than a series of isolated upgrades.
Thermal bridging versus air leakage
Before you start inspecting your home, it is worth drawing a clear line between thermal bridging and air leakage. They often occur together, and they can produce similar comfort complaints, but they are not the same thing. Thermal bridging is conductive heat loss through materials. Air leakage is moving air that slips around or through the enclosure, often bypassing insulation altogether.
RESNET distinguishes thermal bridging from thermal bypass, which is hidden air movement around the thermal barrier. That distinction matters because many homeowners assume every cold spot is a draft, then focus only on caulking and weatherstripping. Those are useful measures, but they will not fully address heat loss if the real issue is an uninterrupted framing member, a slab edge, or a metal or concrete connection carrying heat outward.
The opposite misunderstanding also happens. A cold patch that shows up on an infrared camera does not automatically mean you have found a thermal bridge. It could indicate air leakage, damp insulation, missing insulation, or even a thermal mass effect. This is why a careful thermal bridge check uses more than one clue before drawing conclusions.
A practical rule is to treat your findings like a small investigation. If you notice a cold surface at a specific junction, confirm whether you also feel moving air, see staining, find gaps in the air barrier, or observe moisture. That extra step keeps your diagnosis grounded and helps you choose a fix that actually matches the problem.
Important: A thermal bridge is a heat path through materials. A draft is moving air. They can happen in the same place, but solving one does not always solve the other.
Why a thermal bridge check matters for comfort, energy, and durability
Home energy discussions often focus on furnace efficiency, insulation thickness, or window replacement, but surface temperature is just as important to daily comfort. When interior surfaces are cold, your body loses heat to those surfaces even if the thermostat says the room is warm enough. That is why perimeter rooms, floor edges, and window areas can feel uncomfortable long before the heating system falls behind.
Thermal bridges also affect moisture risk. When an interior surface drops low enough, moisture in the indoor air can condense on it. Over time, repeated condensation can stain finishes, encourage mould, and contribute to material deterioration. In colder climates, the clues might include water on window edges, darkened corner paint, frost near attic hatches, or persistent dampness where walls meet foundations.
Reducing thermal bridging can support meaningful whole home efficiency improvements as part of a broader envelope strategy. NRCan reports that ENERGY STAR qualified new homes in Canada are on average about 20 percent more energy efficient than homes built to minimum code. While many factors contribute to that result, better envelope continuity is part of the picture. The lesson for homeowners is simple: improving how the envelope works together often delivers more lasting comfort than chasing one isolated upgrade at a time.
The durability angle matters just as much as the energy savings. Colder surfaces are more vulnerable to condensation, and repeated wetting can become a hidden maintenance issue long before utility bills draw attention. A thermal bridge check is therefore not just about spending less on heating. It is a way to understand where your home may be under stress, so you can respond before the symptoms become expensive.
When to do a thermal bridge check
The best time to check for thermal bridges is during cold weather, especially on a winter morning or during a shoulder season day when the indoor and outdoor temperatures are clearly different. CMHC guidance notes that infrared work is most useful when there is at least a 10°C indoor outdoor temperature difference. That temperature gap helps anomalies stand out more clearly on surfaces and on thermal imaging tools.
If you are not using an infrared camera, a cooler outdoor day is still helpful because your senses become more informative. Cold surfaces feel easier to distinguish by hand, and signs like condensation, frost, or persistent chill are more noticeable. Try to choose a time when interior conditions are steady, the heating system has been running normally, and direct sunlight is not dramatically warming one wall more than another.
Early morning can be ideal because solar gain has not yet changed the surface temperatures on exterior walls and windows. Windy conditions may also reveal air leakage more clearly, but they can make interpretation trickier because a cold area may be driven by moving air rather than conduction alone. If you are trying to separate bridging from leakage, calm cold days are often easier to read.
If you plan to use a thermal camera, avoid scanning immediately after cooking, showering, or opening windows for ventilation, since those short term changes can create misleading patterns. The more stable your conditions, the more useful your observations will be. Consistency matters more than complexity.
Tools that make a DIY thermal bridge check easier
You do not need a professional energy audit to begin. In fact, some of the best first clues come from simply slowing down and paying attention to how the house feels in winter. Start with your hands, your eyes, and a notebook. Walk the perimeter of each room and note where surfaces feel distinctly colder than neighboring areas.
Beyond that, a few simple tools can make the process more systematic. A small handheld infrared thermometer can help compare one surface to another, though it does not create a full image. An affordable thermal camera, including the growing number that connect to smartphones, can help you see broader temperature patterns. A smoke pencil, incense stick, or other draft detection tool can help verify whether air movement is part of what you are seeing.
For a more advanced investigation, a professional blower door test is extremely useful because it exaggerates leakage paths and makes it easier to separate air movement from conductive heat loss. However, a blower door is optional for a homeowner level check. You can learn a great deal without one, especially if you pair visual clues with basic confirmation methods.
It is wise to gather a flashlight, painter’s tape, a notebook, and your phone camera as well. Mark suspicious areas temporarily, take photos for comparison, and write down the room conditions and outdoor temperature. Small records are helpful later when deciding whether the issue is widespread, seasonal, or isolated to one assembly.
Common places where thermal bridges show up in homes
A successful thermal bridge check starts with knowing where these weak points commonly occur. In most homes, they appear at transitions, penetrations, and structural elements that interrupt insulation continuity. Some are visible and easy to inspect. Others are hidden behind finishes but leave clear clues on interior surfaces.
Window frames and window perimeters are among the most familiar examples. Even good windows can have colder edges than the insulated wall around them, and older installations often have weak connections between the frame and rough opening. If the trim, drywall return, or adjacent wall surface feels cold or shows recurring condensation, that area deserves a closer look.
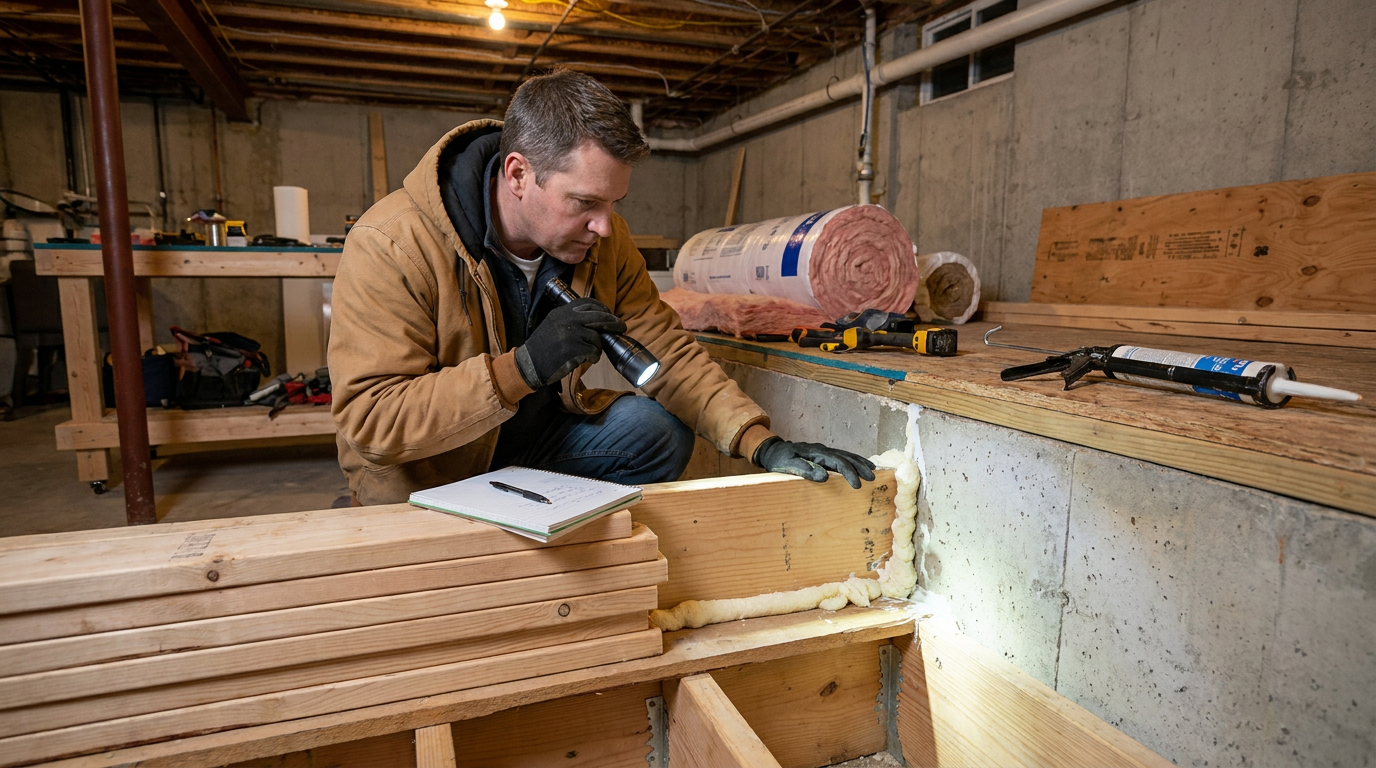
Rim or band joists are another high priority location. This is the junction where the floor framing meets the top of the foundation wall, and it is a common source of both thermal bridging and air leakage. Because the area often includes wood framing, gaps, and interrupted insulation, it can become one of the most important places to inspect in basements and crawlspaces.
Slab edges and foundation transitions also deserve attention. Concrete conducts heat far more readily than insulated wall assemblies, so the edges where the floor slab meets the foundation or exterior can be persistent heat loss zones. Inside the home, that may show up as cold flooring near exterior walls, chilly finished basement corners, or temperature differences where the wall meets the floor.
Attic hatches, pull down stairs, and the top plates of exterior walls are also worth checking. These areas often suffer from incomplete insulation coverage or poorly sealed transitions between conditioned and unconditioned space. In winter, attic access panels may feel cold to the touch, and ceiling perimeters near eaves can be noticeably cooler than the center of the room.
Cantilevered floors, balconies, attached garages, and bonus rooms over unconditioned spaces often contain more complex thermal bridges because structural members pass through the insulated boundary. In houses with additions or renovations, junctions between old and new construction can also be problematic. Whenever a home changes geometry or function, continuity becomes more difficult to maintain.
Step by step: how to conduct a thermal bridge check
Step 1: Start with a comfort map of the house
Begin your inspection by walking through the home and identifying where comfort problems tend to happen. Notice rooms that feel consistently colder, spots where you avoid sitting in winter, or areas where floors always seem chilly underfoot. These lived experience clues are valuable because thermal bridges are often felt before they are measured.
Use a simple floor plan or notebook and mark the recurring trouble spots. Include notes such as cold wall behind sofa, condensation on bedroom window corner, cold floor near patio door, or musty basement perimeter. Over time, these patterns often point to envelope weak points much more clearly than a single quick scan.
Try to compare similar rooms if possible. If one north facing bedroom is comfortable and another is not, ask what differs about the exterior walls, windows, overhangs, or framing conditions. Comparison helps you separate house wide issues from a local bridge or detail problem.
Step 2: Do a visual inspection indoors and out
Next, inspect the areas where the building envelope changes direction or meets another assembly. Indoors, look around windows, baseboards on exterior walls, attic hatches, recessed corners, basement rim joists, and floors over garages or cantilevers. Outdoors, observe slab edges, balcony connections, exposed foundation areas, and places where siding, trim, or cladding transitions might suggest interrupted insulation behind them.
Look for staining, peeling paint, darkened corners, frost, visible gaps, or recurring condensation. These signs do not prove thermal bridging by themselves, but they often indicate low surface temperatures or accompanying air leakage. Pay close attention to details that repeat in several places because repeated symptoms usually point to a consistent assembly issue rather than an isolated defect.
It also helps to think historically. Has the home had window replacements, a partial basement finish, siding updates, or a room addition? Thermal bridges often emerge where renovation scopes stopped short of maintaining continuity. A home can look updated and still have persistent weak points hidden at the seams.
Step 3: Compare surface temperatures by hand and by simple measurement
Once you have identified likely trouble spots, compare them with nearby surfaces that should perform better. Run your hand across a wall, then over a stud line if you can locate one, then toward a corner, window edge, or floor perimeter. Distinct temperature differences can indicate conductive pathways beneath the finish.
If you have an infrared thermometer, take surface readings at the center of insulated wall areas and compare them with readings at studs, corners, headers, and junctions. The exact numbers matter less than the pattern. If one location is consistently colder than the surrounding area under stable conditions, it merits follow up.
Be patient with interpretation. Materials with different surface textures or finishes may read differently, and shiny surfaces can distort infrared readings. The most useful approach is relative comparison, not chasing one exact temperature. You are trying to identify anomalies, not certify a laboratory result.
Step 4: Use an infrared camera if available
An infrared camera can make hidden patterns visible very quickly, which is why homeowners are using them more often as part of DIY diagnostics. Scan exterior walls, ceiling perimeters, around windows and doors, basement rim joists, and transitions to garages or unconditioned spaces. You may see cooler stripes at framing locations, colder outlines around openings, or concentrated cold areas at junctions.
CMHC guidance is helpful here: thermal imaging is most effective when the indoor outdoor temperature difference is at least 10°C, and the findings should be verified. This matters because a thermal image is not a final diagnosis. A dark or cool area on the image could be a thermal bridge, missing insulation, wet insulation, or an air leak.
Use the camera slowly and compare similar assemblies. For example, scan several windows, not just one. If one window perimeter is much colder than others, that suggests a localized problem. If all exterior wall stud lines are visible as cooler vertical bands, that indicates a broader framing related heat flow pattern that may be typical for the assembly.
Document what you see with photos and notes. A camera is most useful when it supports decision making later, especially if you plan to discuss upgrades with an insulation contractor, energy advisor, or renovation professional. Clear records save time and improve the quality of any future work.
Step 5: Check for air movement to confirm what you found
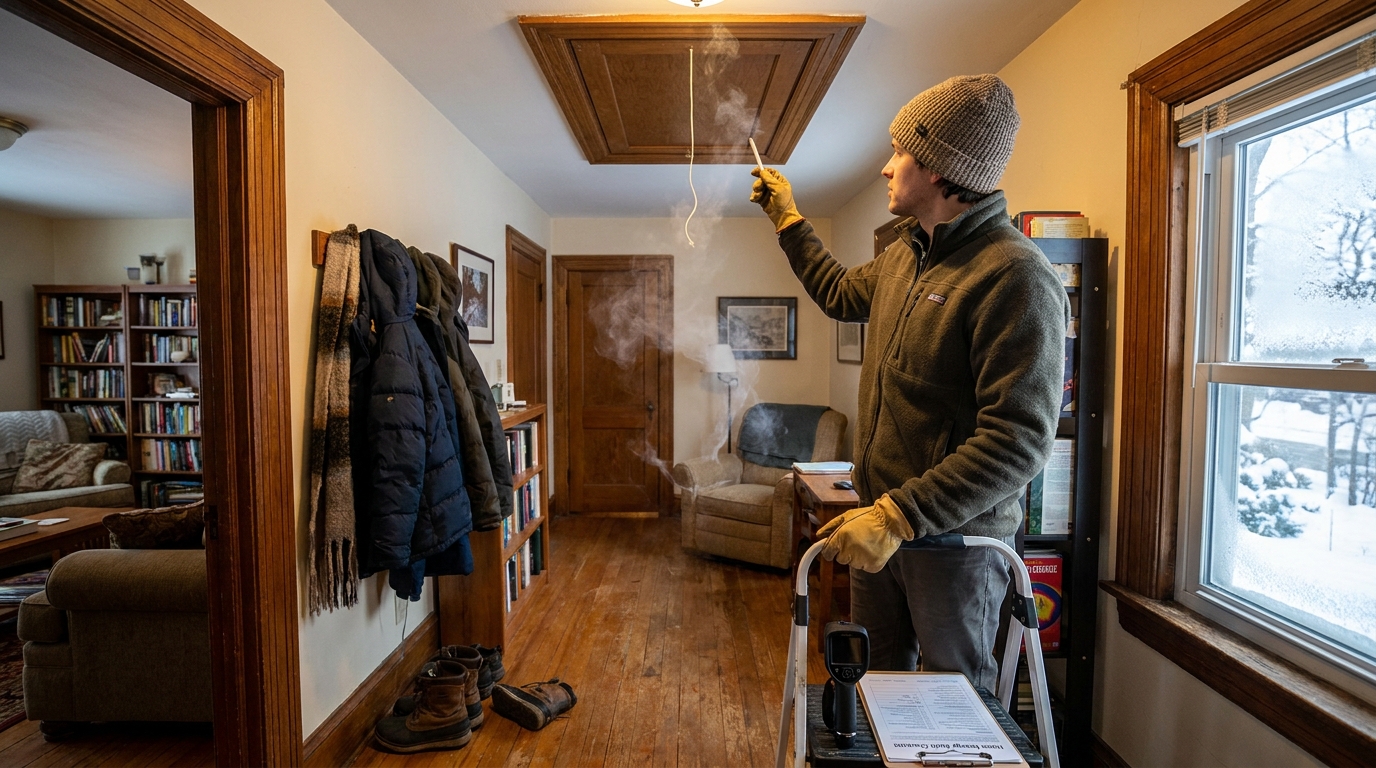
After you identify a suspicious cold area, test for air leakage before assuming it is purely thermal bridging. Hold a smoke pencil or an incense stick near window trim, baseboards, attic hatches, electrical penetrations on exterior walls, and the rim joist area. If the smoke stream bends or wavers, moving air is involved.
This confirmation step is important because many home comfort problems are mixed conditions. A rim joist, for instance, often loses heat conductively through framing and also leaks air through joints and penetrations. If you seal only the leakage path, the area may improve but remain cooler than the rest of the assembly because the thermal bridge is still present.
Likewise, if you insulate a spot without controlling air leakage, cold air can continue to wash around the insulation and reduce its effective performance. The most durable fixes usually respect both functions. The air barrier and the thermal layer need to work together.
Step 6: Inspect the highest value problem areas more closely
Once your first pass is complete, return to the locations that matter most for comfort and moisture. In many homes, that means window perimeters, rim joists, attic accesses, slab edges, and cantilevered floors. Focus on the assemblies that combine cold surfaces with visible symptoms such as condensation, staining, or persistent discomfort.
If you have access to unfinished spaces, take advantage of it. Basements, crawlspaces, attics, and utility rooms often reveal what finished rooms hide. You may find insulation interruptions, unsealed penetrations, compressed batts, or exposed structural elements that align with the cold areas you mapped indoors.
Use painter’s tape to label concern points temporarily. This sounds simple, but it turns a vague sense of unease into a practical action list. When you can physically point to the likely weak spots, the next decision becomes easier.
Step 7: Prioritize fixes by impact and timing
After your inspection, sort your findings into three categories: easy air sealing and weatherstripping fixes, accessible insulation improvements, and larger assembly upgrades best done during future renovations. This keeps the work manageable and helps you avoid over investing in a temporary patch where a better long term solution is already on the horizon.
High priority quick wins often include sealing attic hatches, improving weatherstripping, air sealing accessible gaps at the rim joist, and addressing obvious leakage around service penetrations. These steps may not eliminate all thermal bridging, but they often improve comfort quickly and reduce moisture risk in the meantime.
Medium scope improvements may include insulating rim joists properly, adding insulated attic access covers, improving basement perimeter insulation, or refining window air sealing during trim repairs. Larger upgrades include continuous exterior insulation, insulated siding, slab edge improvements, and window replacement with better installation detailing. Those deeper measures are often most cost effective when you are already planning siding, window, or foundation work.
How to interpret what you find
The most useful outcome of a thermal bridge check is not just spotting cold places. It is understanding the pattern behind them. If cold lines appear regularly at stud spacing on exterior walls, that suggests typical framing related thermal bridging. If the problem is concentrated at a single window, the issue may be installation quality or localized air leakage. If a whole basement perimeter feels cold, slab edge or foundation insulation continuity may be the real concern.
Try to think in assemblies rather than isolated surfaces. A cold upstairs floor might relate to a cantilevered bump out below. A damp corner may point to poor insulation continuity at the roof wall junction. A ceiling stain near the exterior edge could be tied to both thermal bridging and air leakage into the attic. The house is giving clues, but those clues often connect across floors and spaces.
It is also helpful to rank issues by consequence. Some thermal bridges are mainly an efficiency concern. Others create enough surface cooling to trigger condensation and potential mould growth. When moisture symptoms are present, those locations deserve more urgent attention because the long term cost of inaction can be higher than the heat loss alone suggests.
Practical fixes homeowners can make
Not every thermal bridge can be fully corrected without opening up the assembly, but many can be improved meaningfully. The most accessible homeowner actions usually involve pairing air sealing with better insulation continuity where access allows. That combination is more effective than relying on either one by itself.
At attic hatches, for example, adding durable weatherstripping and an insulated cover can improve both leakage control and surface temperature. At accessible rim joists, carefully air sealing gaps and insulating with an approach appropriate to your climate and assembly can produce noticeable comfort gains. Around windows, correcting failed sealant or trim air leaks may reduce drafts, while future replacement or deeper retrofit work can address the bridge more fully.
For larger scale improvements, DOE guidance highlights continuous exterior insulation as a key strategy because it wraps over framing and reduces the repeated conductive paths that cavity insulation alone cannot solve. Insulated siding, exterior rigid insulation, insulated headers, advanced framing strategies, and slab or foundation insulation all aim to preserve continuity. These are not always weekend projects, but they are often the right answer when a cladding or major renovation project is already planned.
That timing piece is important. Thermal bridge fixes are often best integrated into work you already intend to do, such as re siding the house, replacing windows, refinishing a basement, or rebuilding a porch connection. Access is easier, detailing can be handled more cleanly, and the incremental cost is often much lower than returning later to reopen finishes.
Places where professional help makes sense
A homeowner check can take you surprisingly far, but some conditions benefit from professional support. If you find extensive condensation, suspected mould, structural steel or concrete bridge conditions, or complex transitions in a renovated home, a building envelope specialist or energy advisor can help interpret what is happening more precisely. This is especially true when durability concerns go beyond comfort and energy use.
A professional energy audit with blower door testing and infrared thermography is often worthwhile if you plan a major retrofit. The blower door depressurizes the house and makes leakage pathways much easier to verify, while the thermal imaging reveals where temperature anomalies align with those leaks or persist independently as conductive bridges. That combination helps prevent misdiagnosis.
You should also be cautious if a proposed solution seems to focus only on one layer of the assembly while ignoring moisture management, vapour control, or drying potential. Good envelope work balances thermal performance with durability. The best professionals will discuss these interactions clearly rather than offering a one size fits all patch.
Common misconceptions to avoid
One of the biggest misconceptions is that more cavity insulation automatically solves thermal bridging. It helps the insulated portions of the assembly, but it does not remove the framing, slab edge, or structural connection that is bypassing that insulation. If continuity remains broken, the bridge remains part of the thermal picture.
Another common mistake is assuming all cold areas are simply drafts. Air leakage is important and often easier to notice, but conductive losses can be just as significant. Sealing a crack may stop the moving air while leaving a cold framing path intact. The result is improvement, but not always resolution.
It is also easy to overread thermal camera images. Infrared tools are helpful, but they are not mind readers. Without verification, a cool area could be wet insulation, an airflow path, or just a material responding differently to recent temperature changes. Interpretation is strongest when you compare locations, confirm with smoke or hand checks, and review the assembly behind the surface if possible.
Finally, do not assume thermal bridging is only an issue in very old homes. Many renovated homes still have weak transitions, and some newer homes have complex designs that create bridge opportunities at balconies, cantilevers, and overframed corners. Age matters less than continuity.
A simple homeowner checklist for future inspections
-
Choose a cold day with a strong indoor outdoor temperature difference, ideally at least 10°C if using thermal imaging.
-
Walk the house and note comfort complaints such as cold floors, chilly corners, and recurring condensation.
-
Inspect common bridge locations including window edges, rim joists, slab edges, attic hatches, and walls next to garages or cantilevered floors.
-
Compare surface temperatures by hand, with an infrared thermometer, or with a thermal camera if available.
-
Verify suspicious cold spots with smoke testing or other draft detection to separate bridging from leakage.
-
Look for moisture clues such as staining, frost, mould, or peeling finishes where surfaces stay cold.
-
Sort findings into quick fixes, accessible insulation upgrades, and future renovation opportunities.
-
Recheck the same areas after improvements so you can measure the effect and refine your plan.
Final thoughts
A thermal bridge check is one of the most practical ways to understand how your home is really performing in winter. It translates abstract ideas like building envelope continuity and heat flow into something you can see, feel, and act on. For many homeowners, that clarity is the difference between guessing at upgrades and making improvements that actually change comfort.
The encouraging part is that you do not need to solve everything at once. Start with observation, confirm what you find, and prioritize the places where cold surfaces are affecting comfort or creating condensation risk. Some fixes will be simple and immediate. Others will make the most sense when a larger renovation is already planned.
Sustainable housing decisions often work best when they are calm, practical, and well timed. A thoughtful thermal bridge check fits that approach perfectly. It helps you make your home warmer, more efficient, and more durable by understanding where heat is quietly slipping away and where continuity can be restored with care.


No Comment! Be the first one.