


How to Choose and Apply Protective Coatings for Your Home’s Surfaces
Protective coatings are one of those parts of home maintenance that people often notice only after something starts to fail. A deck begins to gray and crack, a metal railing starts rusting at the joints, a basement floor powders and stains, or a painted window sill peels after a few seasons of moisture and sun. At that point, many homeowners go looking for a product that promises a quick fix. The better approach is to understand that a protective coating is not just a finish. It is a system built around the surface underneath, the conditions that surface faces, and the way the product is applied.
Table Of Content
- What Protective Coatings Actually Do
- The Main Types of Protective Coatings Homeowners Use
- Paint
- Stain
- Varnish and Clear Wood Finishes
- Lacquer
- Epoxy
- Elastomeric and Specialty Maintenance Coatings
- Start With the Surface, Not the Label
- Wood Surfaces
- Concrete Surfaces
- Metal Surfaces
- Masonry and Stucco
- Previously Painted Surfaces
- How to Choose the Right Coating by Performance Need
- Why Surface Preparation Decides the Job
- Basic Prep Checklist
- How to Apply Protective Coatings the Right Way
- Step 1: Read the Label and Plan the Conditions
- Step 2: Stir Properly and Use the Right Tools
- Step 3: Prime When the System Calls for It
- Step 4: Apply Thin, Even Coats
- Step 5: Respect Recoat and Cure Times
- Practical Coating Choices Around the Home
- Exterior Wood Door
- Garage Floor
- Metal Railing or Fence
- Basement Masonry Wall
- Cabinetry and Trim
- Indoor Air Quality, VOCs, and Safe Use
- Common Mistakes That Shorten Coating Life
- A Practical Step by Step Plan for Homeowners
- Final Thoughts
That matters because the same coating that works well on a kitchen cabinet may fail badly on a porch step, and a tough concrete floor product may be the wrong choice for a damp masonry wall. In practical terms, choosing a coating comes down to matching the product to the substrate, the exposure, and the level of wear. Wood, concrete, metal, masonry, and previously painted surfaces all behave differently, and they need different prep and different chemistry if you want the job to last.
This guide breaks the subject down in plain language. You will learn what the main types of protective coatings actually do, where each one makes sense in a home, how to prepare surfaces properly, and how to apply coatings in a way that gives you the best chance of long service life. If you are a homeowner trying to protect what you already have, this is the practical side of the job that matters most.
It is also worth treating this as both a durability decision and an indoor air quality decision. In both Canada and the United States, architectural coatings are regulated because coatings can release volatile organic compounds, often called VOCs. Canada regulates VOC concentration limits for architectural coatings, and U.S. regulators continue to update VOC related rules for coating categories including aerosol coatings. At the same time, the U.S. Environmental Protection Agency notes that low VOC labeling does not automatically mean a product is safer for indoor air, because some exempt solvents and other ingredients may still raise health concerns. That is why product choice, ventilation, application method, and cure time all deserve attention.
If you keep one idea in mind through the whole project, make it this: the coating only performs as well as the surface preparation and application allow. Brand matters less than proper cleaning, sanding, moisture control, priming, coating thickness, and curing. Good workmanship is what turns a can of finish into real protection.
What Protective Coatings Actually Do
A protective coating has one main job, which is to create a barrier or treatment layer that helps a surface resist the things that normally break it down. Those threats vary by location. Inside a home, they can include moisture, abrasion, repeated cleaning, skin oils, food spills, and impact. Outside, add sunlight, temperature swings, rain, snow, freeze thaw cycles, and airborne dirt. In garages and utility spaces, chemical spills, hot tires, and humidity often come into the picture as well.
Different coatings protect in different ways. Some sit mostly on the surface and form a film, like many paints, varnishes, and epoxies. Some soak in and help repel water while leaving more of the original texture visible, like penetrating concrete sealers or certain wood treatments. Some remain more flexible so they can bridge minor movement and resist cracking. Others are chosen mainly because they resist scrubbing, foot traffic, or staining better than standard paint.
The practical performance categories homeowners should think about are moisture resistance, UV resistance, abrasion resistance, chemical resistance, flexibility, breathability, and ease of repair. A front door in full sun needs something different from an interior stair tread. A concrete basement wall with moisture migration issues needs something different from a dry garage floor. The point is not to memorize chemistry. The point is to understand what the surface is up against and choose accordingly.
Protective coatings work best when you think of them as a system of preparation, primer when needed, topcoats, and curing time rather than a single product in a can.
The Main Types of Protective Coatings Homeowners Use
Paint
Paint is the most familiar category, and for many surfaces it is the first line of protection. It can provide color, UV resistance, washable surfaces, and a sealed outer layer when used with the right primer and under proper conditions. Exterior paints are formulated to handle weather and sunlight better than interior products, and trim paints are usually tougher than standard wall paints because they are expected to resist more contact and cleaning.
Paint is often the right choice when your main goal is broad surface protection with a consistent appearance. It is commonly used on siding, trim, doors, railings, fences, drywall, masonry, and previously coated materials. The important thing is not just whether it says interior or exterior on the label, but whether it is suited to the substrate underneath and whether the product system calls for a dedicated primer.
Stain
Stain is mainly used on wood when you want some protection without hiding the grain entirely. It can be transparent, semi transparent, or more opaque depending on the look and level of hiding you want. In practical use, stain is often a better fit than paint for decks, fences, and some wood siding because it tends to wear by fading rather than peeling, which can make maintenance easier.
That said, stain is not automatically lower maintenance. Exterior wood still needs careful prep and periodic recoating, especially in high sun or wet locations. The big advantage is that you preserve the look of the wood while adding water resistance and some UV protection, though usually less of a heavy barrier than a full paint system provides.
Varnish and Clear Wood Finishes
Varnishes and similar clear finishes are used when the beauty of the wood itself is part of the goal. These coatings are common on doors, furniture, trim, and some specialty exterior wood applications. Indoors, they can provide a durable and washable finish. Outdoors, clear finishes usually need strong UV resistance or they can break down faster than pigmented coatings.
Homeowners should be realistic here. A clear finish on exterior wood can look excellent, but it usually asks more of you in maintenance because sunlight is hard on transparent systems. If the wood gets strong sun and weather, an exterior paint or high quality stain is often a more forgiving option.
Lacquer
Lacquer is more common in shop finishing and cabinetry than in general homeowner maintenance, but it still appears in some furniture and trim work. It can create a smooth attractive finish and dries quickly, though application can be less forgiving and product ventilation matters a great deal. For most homeowners working on site, other coating systems are often easier and safer to manage.
Epoxy
Epoxy coatings are known for toughness, especially on concrete floors and some high wear surfaces. A properly chosen and properly applied epoxy system can provide strong abrasion resistance and better resistance to stains and chemicals than ordinary paint. That is why homeowners often look at epoxy for garages, workshops, utility rooms, and basement floors.
But epoxy is also one of the easiest products to get wrong if moisture, temperature, timing, or prep are ignored. Many failures blamed on the product are really prep failures. If the slab has moisture problems, surface contamination, or insufficient profile for adhesion, the coating can blister, peel, or wear prematurely.
Elastomeric and Specialty Maintenance Coatings
These coatings are designed for situations where flexibility, weather resistance, or crack bridging are especially important. They are often used on masonry, stucco, and some exterior surfaces that expand, contract, or develop fine cracking. In damp or exposed conditions, these coatings can outperform harder, less flexible films. The key is using them where that flexibility and weather performance actually solve a problem.
Specialty maintenance coatings also include products aimed at rust control, waterproofing, porch and floor durability, or direct to metal performance. Some are excellent in the right use case. The mistake is assuming that a specialty label means universal performance. Always check whether the coating is approved for your actual surface and service conditions.
Start With the Surface, Not the Label
The most reliable way to choose a coating is to begin with the substrate. Product labels use a lot of broad language, but surfaces are specific. Wood moves with humidity. Concrete can hold moisture and alkalinity. Metal corrodes. Masonry often needs to breathe. Existing paint layers may or may not be compatible with what you plan to put over them. Once you understand the surface, the choice gets simpler.
Wood Surfaces
Wood is common around the home and one of the most varied materials to coat because use matters so much. Exterior wood on decks, fences, doors, trim, and siding has to manage sun and moisture. Interior wood on cabinets, trim, and stairs deals more with wear, cleaning, and appearance. If you want to show grain, stain or a clear finish is usually the path. If you want maximum weather protection and more complete UV shielding, an exterior grade paint system is usually stronger.
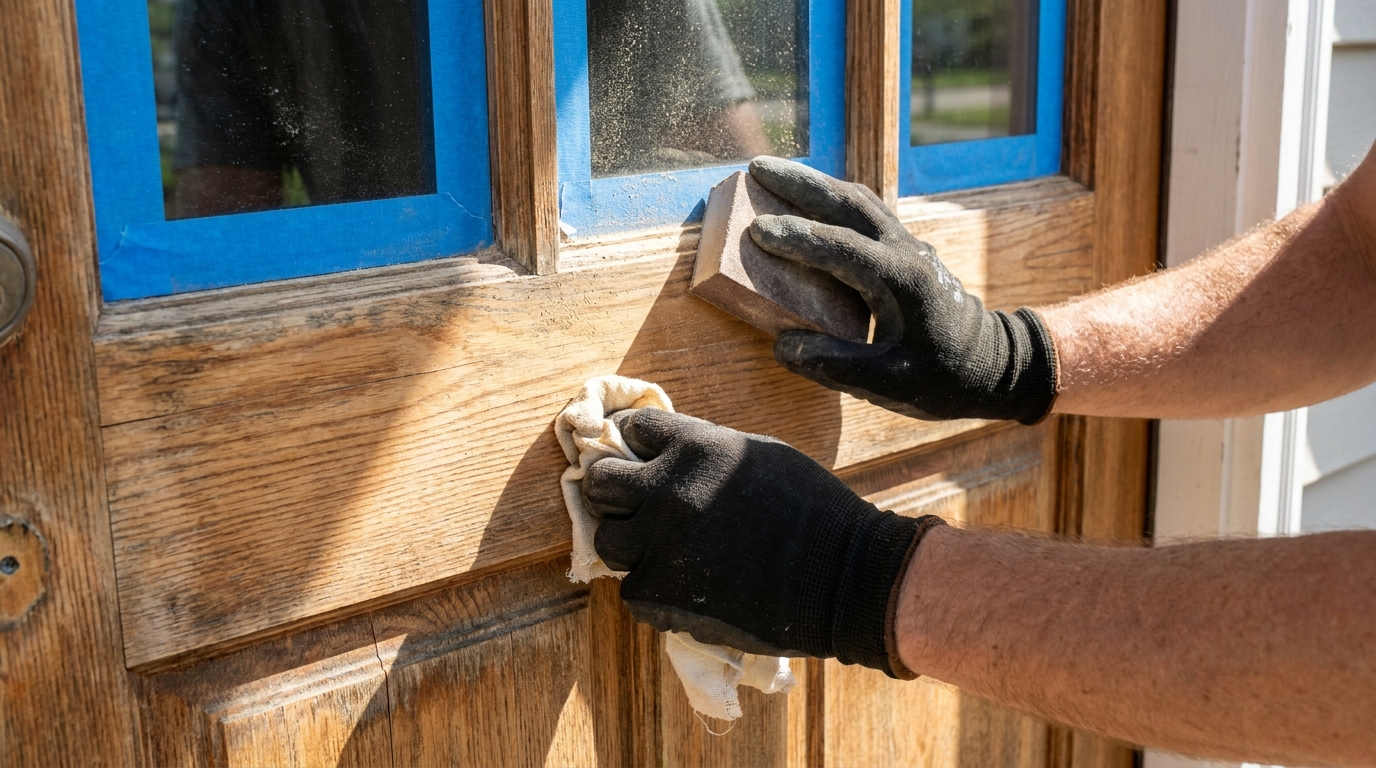
Surface prep for wood usually includes cleaning, scraping any loose finish, sanding dull or uneven areas, and removing dust thoroughly. Bare wood may need a primer depending on the coating system. If the wood has mildew, water damage, or active moisture issues, deal with those before coating. No finish will save wet or deteriorating wood for long.
Concrete Surfaces
Concrete is often treated as if it is simple because it looks solid and hard. In reality, concrete can be one of the trickier surfaces in the house because moisture and contamination matter so much. Garage floors, basement slabs, patios, and masonry walls all fall under this broad category, but they do not all need the same treatment. A garage floor may need an epoxy or other durable traffic coating. A basement wall may need a breathable masonry coating rather than a hard film that traps moisture.
Before coating concrete, think about moisture first. If water is moving through the slab or wall, the coating can fail no matter how good the label looks. Oil stains, curing compounds, dust, old adhesives, and smooth troweled surfaces can also interfere with adhesion. Crack repair, cleaning, and in many cases profiling the surface are part of doing it right.
Metal Surfaces
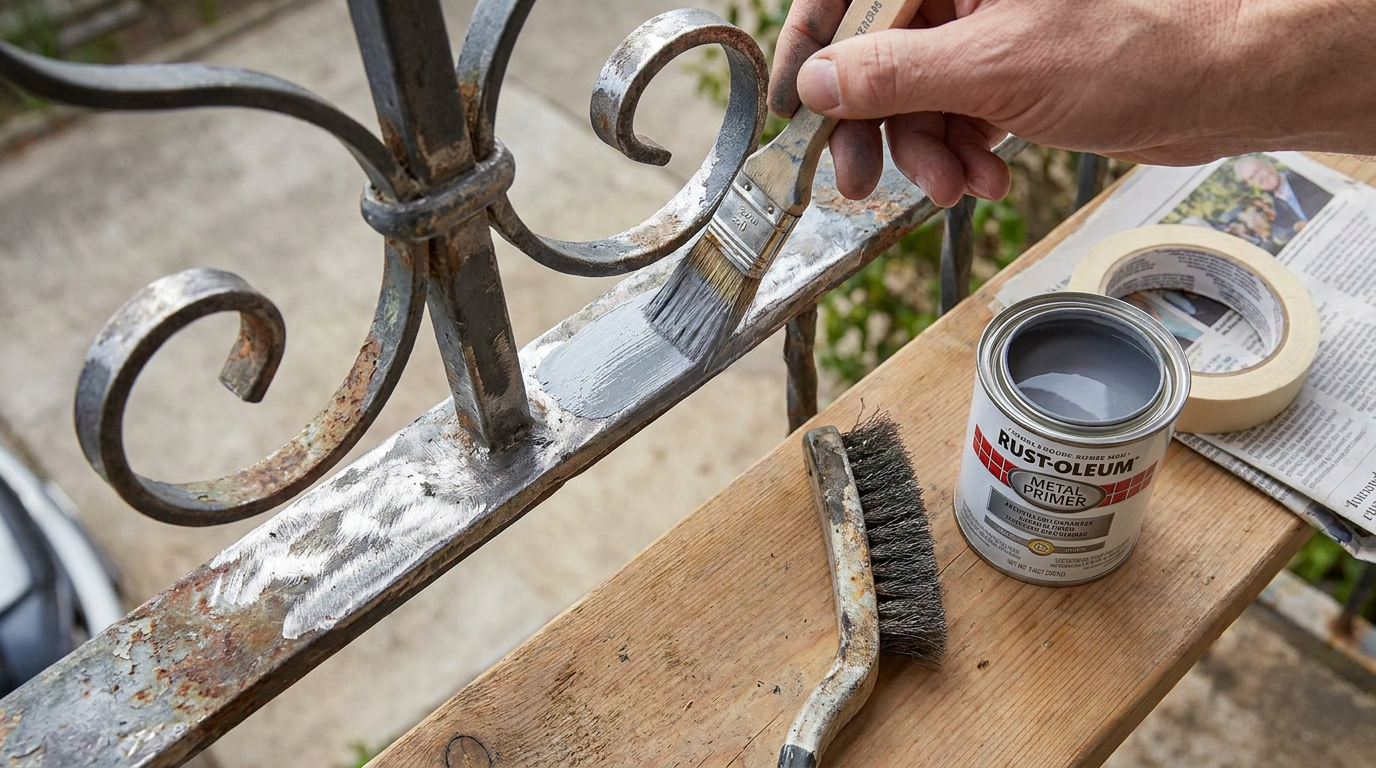
Metal needs protection because bare or damaged metal corrodes. Outdoor railings, steel doors, metal fences, and utility items around the house all need attention once rust starts. In most cases, the proper system is rust removal or scale removal, cleaning, a corrosion inhibiting primer, and then a compatible topcoat. Primer is not a decorative extra here. It is often a core part of adhesion and corrosion resistance.
If you paint directly over active rust without proper prep, you are usually just hiding the problem for a while. Some rust converting products have their place, but they still depend on following the product instructions closely. Metal work rewards careful cleaning and thin, well bonded coats.
Masonry and Stucco
Masonry surfaces can look durable enough to coat with anything, but moisture behavior is the issue. Brick, block, stucco, and similar materials often need coatings that allow some vapor movement, especially in older or damp walls. A hard impermeable film on a moisture active wall can trap problems behind it. That can lead to blistering, peeling, or damage to the material itself.
When dealing with masonry, pay attention to whether the wall is dry, whether efflorescence is present, and whether the product is described as breathable or suitable for that substrate. If moisture keeps showing up, solve the water source first. Coating over a water management problem usually just delays the repair.
Previously Painted Surfaces
Existing coatings add another layer of judgment because compatibility matters. If the old paint is sound, well adhered, and appropriate for the location, you may be able to clean, sand lightly, spot prime, and recoat. If it is chalking, peeling, soft, or incompatible with the new material, the system may fail from below even if the new topcoat is high quality.
A small test patch in a hidden area is a smart move, especially if you do not know the history of the surface. Check adhesion after the coating cures enough to evaluate it. It is a simple step that can save a lot of rework.
How to Choose the Right Coating by Performance Need
Once you know the surface, the next question is what kind of protection the area actually needs. Homeowners often buy based on color, finish, or a general durability claim, but performance needs are more specific than that. A bathroom vanity, an entry door, and a garage floor all ask for different strengths from a coating system.
- Moisture resistance matters in bathrooms, kitchens, basements, laundry areas, decks, fences, and exterior trim. Choose products rated for wet or humid conditions and make sure the surface is dry enough to coat.
- UV resistance matters outdoors, especially on doors, trim, siding, and any horizontal wood surface. Sunlight is one of the fastest ways to age a finish.
- Abrasion resistance matters on floors, stairs, handrails, trim, cabinets, and tabletops. These areas need harder wearing topcoats or multi coat systems.
- Chemical and stain resistance matters most in garages, workshops, mudrooms, and utility spaces where spills are likely.
- Flexibility matters on surfaces that move, expand, contract, or develop fine cracks, such as some exterior masonry and trim details.
- Breathability matters on masonry and some below grade surfaces where trapped moisture can do more harm than a less sealed finish.
- Ease of repair matters on exposed wood and outdoor surfaces that need periodic maintenance. A finish that fades gradually can sometimes be easier to maintain than one that peels dramatically.
Finish sheen also affects real world performance. Glossy and semi gloss coatings are often easier to wipe clean and can resist scrubbing better, but they also highlight dents, patches, roller marks, and surface unevenness. Matte and lower sheen finishes can hide flaws better, though they may be less washable depending on formulation. Pick sheen with both appearance and service conditions in mind.
Why Surface Preparation Decides the Job
Surface preparation is the part people try to shorten because it is less satisfying than opening the can. It is also the part most responsible for whether the coating bonds, cures, and wears properly. Technical guidance across coating systems comes back to the same point: clean away what should not be there, stabilize what is loose or failing, and create a surface the coating can actually grip.
That usually means removing dust, grease, chalking residue, rust, oxidation, loose paint, soap film, waxes, mildew, and other contaminants. It can also mean repairing cracks, patching damaged areas, sanding glossy finishes, and allowing the surface to dry fully. If moisture, active leaks, or structural movement are present, prep may extend beyond cosmetic work and into actual repair.
For homeowners, a useful rule is this: if you would not want to tape over it, do not coat over it. Any loose, dirty, oily, flaky, or damp layer weakens everything on top of it. Good coatings need direct contact with a stable surface.
Basic Prep Checklist
- Read the product label before you start prep so you know the surface requirements.
- Wash away dirt, grease, and residues with the appropriate cleaner.
- Remove peeling paint, rust, or unstable old coating.
- Sand glossy or rough areas as needed for smoothness and adhesion.
- Repair cracks, holes, or damaged spots with compatible materials.
- Remove sanding dust completely.
- Confirm the surface is dry and within the product’s moisture, temperature, and humidity limits.
- Prime where required, especially on bare wood, repaired surfaces, and metal.
How to Apply Protective Coatings the Right Way
Application technique matters more than many homeowners realize. A coating can be the right product and still fail if it is put on too thick, recoated too soon, applied outside the recommended temperature range, or rushed before the surface is ready. Manufacturers give application instructions for a reason. The chemistry is designed around film thickness, flash off, drying, and cure time.
In most cases, thin, even coats outperform thick coats. Heavy coats may look productive in the moment, but they can trap water or solvent, slow curing, increase sagging, and weaken adhesion. Thin coats also allow more consistent drying and make it easier to respect the product’s coverage rate. The old instinct to lay it on thick for more protection usually causes more trouble than it solves.
Step 1: Read the Label and Plan the Conditions
Before opening the can, check the recommended temperature range, humidity limits, drying time, recoat window, and cure time. Some coatings are very sensitive to cool weather or high humidity. Others need a narrower window for applying the next coat. If the surface will be used hard before full cure, schedule accordingly.
Dry time and cure time are not the same thing. A surface may feel dry to the touch and still be far from fully hardened. Floors, railings, doors, and shelves often get damaged because they were put back into service too early. Give the coating time to develop its intended performance.
Step 2: Stir Properly and Use the Right Tools
Most coatings should be stirred rather than shaken unless the manufacturer says otherwise. Stirring helps distribute solids and flattening agents without introducing unnecessary bubbles. Use clean tools suited to the product, whether that is a quality brush, the right roller nap, or approved spray equipment. Poor tools create poor film build and poor finish quality.
Work from a clean tray or pail, and keep dirt out of the coating. On larger jobs, maintaining a wet edge helps avoid lap marks. On trim or railings, a smaller brush often gives better control than trying to force the job with a large one.
Step 3: Prime When the System Calls for It
Primer is there to solve specific problems. It improves adhesion to bare or difficult surfaces, helps seal porous areas, blocks stains in some systems, and provides corrosion resistance on metal. It is especially important on metal, on patched or repaired areas, and on many bare substrates. Skipping primer because the topcoat says paint and primer in one can be a gamble if the substrate has real demands.
Step 4: Apply Thin, Even Coats
Load the brush or roller properly, spread the product out, and avoid overworking it once it starts setting up. If you keep brushing or rolling after the coating begins to tack, you can pull the film and leave texture or weak spots. Follow the spread rate on the label. Coverage rates are not just sales information. They are tied to proper film thickness.
For demanding surfaces, assume that multiple coats are normal. One coat is rarely enough for maximum durability on trim, cabinets, floors, exterior joinery, or repaired areas. A properly built system usually includes a sequence of preparation, application, flash off, and curing, with each coat playing its part.
Step 5: Respect Recoat and Cure Times
If you recoat too early, you can trap solvents or water and interfere with proper film development. If you wait too long on some systems, you may pass the ideal recoat window and need additional sanding or other prep before the next layer will bond well. This is especially important with floor coatings, clear finishes, and specialty systems such as epoxies.
Once the final coat is on, protect it from heavy use, water exposure, dust, and impact until full cure. Homeowners often lose the benefit of careful work by using the surface too soon. Give the coating time to become what it was designed to be.
Practical Coating Choices Around the Home
Exterior Wood Door
If you have a wood front door, the first choice is whether you want to show the grain or maximize weather protection. If appearance of the wood is the priority, an exterior clear finish or stain system can work, but expect maintenance in sunny or exposed conditions. If long term weather resistance is the priority, a high quality exterior paint system generally gives more UV protection and often longer service intervals.
Prep should include washing, sanding weathered areas, removing any failing finish, dust removal, and spot or full priming as needed. Pay close attention to the top and bottom edges of the door if accessible, because unprotected edges can take on moisture and shorten the life of the finish.
Garage Floor
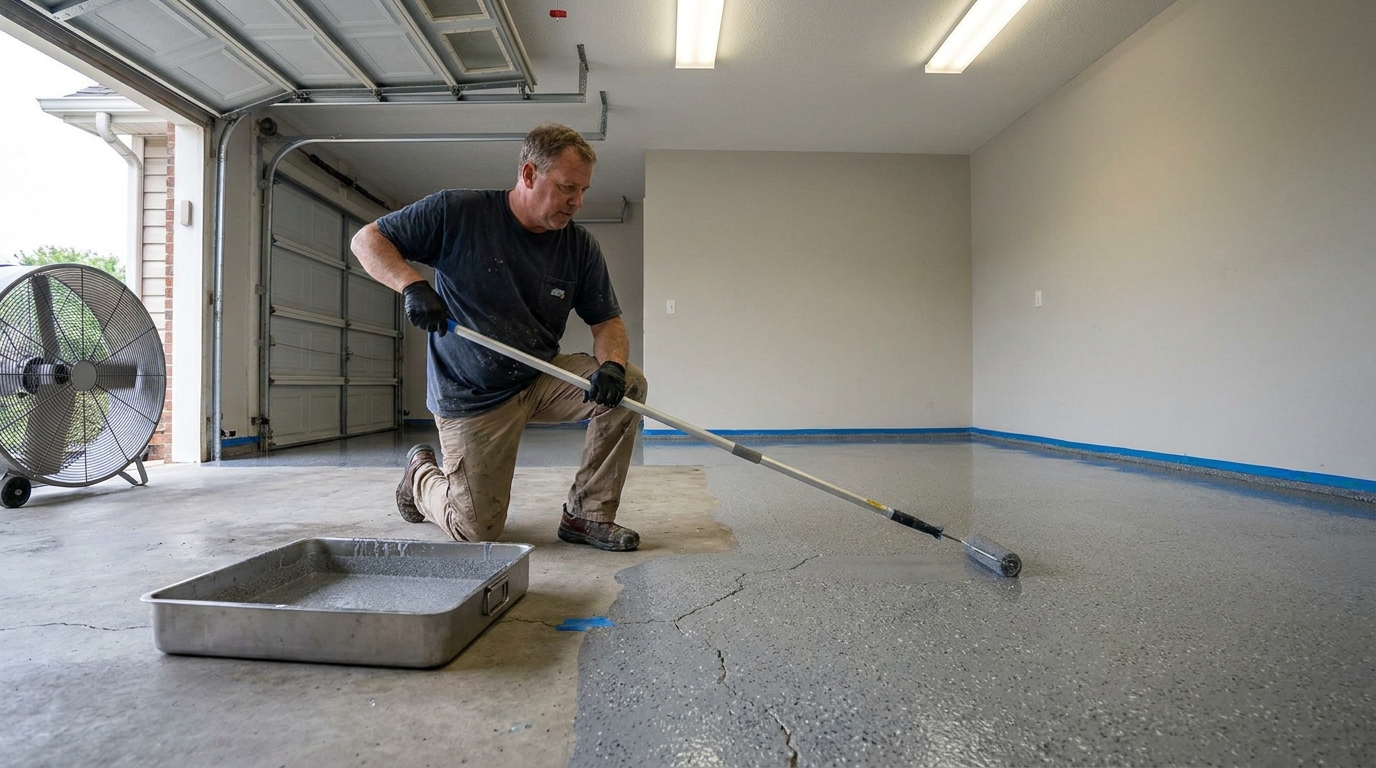
A garage floor takes abuse from tires, grit, moisture, and spills. Standard floor paint may be enough for light duty use, but a true epoxy or other heavy duty floor system is often the better choice for durability. The critical issue is concrete condition. If the slab has moisture vapor problems, contamination, or weak surface paste, any coating can fail.
Do not skip cleaning and moisture evaluation. Repair cracks appropriately, etch or mechanically prepare if the system requires it, and apply within the recommended time and temperature range. This is a job where the prep can take longer than the coating, and that is normal.
Metal Railing or Fence
For metal outside, rust removal and priming are the backbone of the work. A corrosion resistant primer under a compatible topcoat gives better long term performance than decorative paint alone. Pay attention to welds, joints, lower sections near grade, and horizontal surfaces where water sits.
Use a wire brush, scraper, or other approved method to remove loose corrosion and failing paint. Clean thoroughly, prime bare areas promptly, and then topcoat with thin even layers. Metal jobs tend to reward patience and punish shortcuts.
Basement Masonry Wall
If the wall is dry and stable, a breathable masonry coating can improve appearance and make the space easier to maintain. If the wall has active dampness, efflorescence, or water entry, hold off on decorative coating until the moisture issue is solved. A coating is not a substitute for drainage, grading, or leak repair.
Look for systems intended for masonry and review whether they allow vapor movement. In below grade or older homes, breathability is often as important as water resistance.
Cabinetry and Trim
These are high touch surfaces, so cleanability and abrasion resistance matter. A tougher enamel or trim specific coating usually performs better than ordinary wall paint. Gloss level is a design choice, but remember that higher sheen can show brush marks and surface flaws more clearly.
Degreasing, sanding, dust removal, and proper cure time are what separate a durable cabinet finish from one that chips around handles and edges. The coating needs time to harden before heavy use.
Indoor Air Quality, VOCs, and Safe Use
Homeowners should take indoor air concerns seriously during coating projects. Health Canada advises that VOCs can come from paints, glues, varnish products, and other household materials, and notes that children, seniors, pregnant people, and people with asthma or other respiratory conditions may be more susceptible to exposure effects. The EPA also notes that VOC levels can be higher indoors than outdoors and stresses ventilation and proper product use.
The practical takeaway is simple. Do not assume low VOC or no VOC wording tells the whole safety story. Some products may still contain other ingredients that affect indoor air quality or require careful handling. Read the safety information, ventilate the space well, and allow proper cure time before using the room normally.
- Open windows when weather and security allow.
- Use exhaust fans where practical.
- Keep vulnerable family members away from the work area during application and early curing.
- Follow label guidance for respirators, gloves, and cleanup.
- Do not rush reoccupying a newly coated room just because the surface feels dry.
Water based and lower odor formulations have improved a great deal, and they can be a very good option for many indoor projects. Still, they are not universally better in every use case. Performance depends on the substrate, the wear level, the exposure conditions, and the details of the formulation. Choose by use case, not just by a broad marketing claim.
Common Mistakes That Shorten Coating Life
The same failures show up again and again in home coating work. The first is choosing by label alone without understanding the surface. The second is underestimating prep. The third is applying heavy coats in hopes of getting better coverage or faster completion. The fourth is ignoring cure time and putting the surface back into service too soon.
Another common mistake is coating over moisture problems. Peeling on a basement wall, bubbling on exterior trim, and failure on a concrete slab often trace back to moisture moving through or behind the surface. If the substrate is not right, the coating cannot make it right.
Finally, many homeowners skip primer where primer is doing a real job. On metal and previously damaged surfaces especially, that shortcut can undo the whole project. When a system calls for primer, assume it is there for performance, not just tradition.
A Practical Step by Step Plan for Homeowners
- Identify the surface clearly: wood, concrete, metal, masonry, or previously coated material.
- List the exposure conditions: indoors or outdoors, sun, moisture, traffic, chemicals, movement, or abrasion.
- Choose the coating category based on function first, then appearance.
- Read the full label and technical instructions before buying all supplies.
- Prepare the surface thoroughly, including cleaning, sanding, repairs, and drying time.
- Prime where the system requires it.
- Apply thin even coats within the specified temperature and humidity range.
- Respect recoat windows and full cure time.
- Ventilate the area and protect household occupants during and after application.
- Inspect the finish after cure and plan maintenance before visible failure begins.
Final Thoughts
Protective coatings are one of the best ways to extend the life of the surfaces you already own, but only when the product, the surface, and the application all match. That is the part worth remembering. There is no single best coating for every project. There is only a best fit for a specific substrate, a specific environment, and a specific level of wear.
If you choose by surface first, prep with care, apply the coating in thin controlled coats, and give it the cure time it needs, you will get better results than any shortcut can offer. That is true whether you are finishing a front door, protecting a garage floor, repainting trim, or stopping rust on outdoor metal. The good work is in the details, and the details are what make a finish last.
For homeowners, that is the real value of understanding protective coatings. You stop buying promises and start building a durable system. In the long run, that saves money, reduces repeat work, and keeps the house in better shape.


No Comment! Be the first one.