


Crafting Timeless Wall Art: A DIY Guide to Elevate Your Space with Elegant, Personal Design
Wall art has always carried a special power in interior design. It is often the element that turns a room from simply furnished into deeply expressive, from practical into memorable. A blank wall can feel unfinished, while a thoughtfully designed one introduces atmosphere, rhythm, and identity. In today’s homes, where many people want beauty that feels personal rather than generic, DIY wall art has become one of the most compelling ways to transform a space with intention.
Table Of Content
- Why DIY Wall Art Feels So Relevant Right Now
- Before You Begin: The Foundations of a Polished Result
- Essential Materials to Keep on Hand
- Project One: A Serene Abstract Painted Canvas
- What You Will Need
- Step by Step Method
- How to Make It Look More Elevated
- Project Two: Framed Textile Wall Art for Soft, Tactile Luxury
- What You Will Need
- Step by Step Method
- Styling Tips for a More Designer Look
- Project Three: Decorative Wall Moulding as Architectural Art
- What You Will Need
- Step by Step Method
- Why This Works So Well as Wall Art
- Choosing the Right Project for Your Space
- Common Mistakes to Avoid
- How to Style Timeless Wall Art in Different Rooms
- Living Room
- Bedroom
- Dining Room
- Hallway or Entry
- The Lasting Beauty of Personal Craftsmanship
- Quick Reference: A Graceful Planning Checklist
Its appeal is easy to understand. Wall art offers immediate visual impact, yet it does not always require a major renovation budget or professional installation. In North America, this category continues to grow, with recent market outlooks estimating the regional wall art market at roughly US$9.8 billion in 2025 and projecting it to reach around US$14.6 billion by 2033. That momentum reflects a wider appetite for smaller home updates that still feel dramatic, considered, and highly visible in everyday life.
What makes this movement especially exciting is that wall art is no longer limited to framed prints. It now includes painted surfaces, wall moulding, texture layering, peel and stick finishes, murals, gallery arrangements, textile compositions, and architectural detailing. These approaches invite homeowners to become artists of their own environment. They also challenge the old misconception that elegant interiors must be purchased fully formed. In truth, some of the most beautiful rooms are shaped slowly, with personal touches and handmade elements that lend warmth and character.
This article is designed for both beginners and experienced decorators who want to create something sophisticated without making the process feel intimidating. We will explore three timeless DIY wall art projects that combine refinement with accessibility. The first is a painted abstract canvas that brings softness and modern serenity to a room. The second is framed textile art, a tactile and quietly luxurious statement. The third is a moulding panel composition that blurs the line between wall treatment and wall art. Together, these projects offer distinct expressions of style while remaining approachable for a wide range of skill levels.
Along the way, we will also discuss materials, preparation, color direction, indoor air quality, and styling principles that help your finished work look polished rather than improvised. If you have ever assumed that wall art must be expensive, advanced, or confined to a gallery wall of purchased pieces, this guide will invite you to see your walls differently. With thoughtful choices, careful measuring, and a graceful sense of composition, your home can hold art that feels timeless because it is both beautiful and deeply yours.
Why DIY Wall Art Feels So Relevant Right Now
Design trends for 2025 are leaning toward interiors that feel calm, layered, and emotionally restorative. Major color forecasts have emphasized muted mauves, tranquil blue greens, earthy neutrals, warm browns, and other quiet luxury tones that create a sense of softness and balance. At the same time, wall treatments are becoming more expressive. Tactile surfaces, statement walls, decorative moulding, and curated artistic accents are all rising in popularity because they bring personality without overwhelming a room.
DIY wall art fits beautifully into this design landscape because it allows you to respond to trends in a selective and enduring way. Instead of following every passing look, you can take inspiration from these palettes and textures to create pieces that work specifically with your architecture, lighting, and furniture. The result tends to feel more integrated. Rather than decorating around an object that could belong anywhere, you are designing something that belongs precisely in your space.
There is also a practical dimension to this renewed interest. Many high impact wall ideas require only modest toolkits and a little patience. Canadian home improvement examples have shown that decorative moulding walls, hand painted effects, chalkboard treatments, color block features, and peel and stick coverings are all achievable for everyday homeowners. Sophisticated design no longer depends on elaborate technical skill alone. It depends on proportion, preparation, and restraint.
Another important consideration is the growing awareness around indoor air quality. Health Canada identifies paint and varnish as possible sources of indoor VOC exposure, and the Government of Canada regulates VOC concentration limits for architectural coatings. For readers planning DIY wall projects, especially in bedrooms, nurseries, or compact apartments, it is wise to choose low VOC or zero VOC paints and low emission products where possible. Some homeowners also look for third party certifications such as GREENGUARD. Beauty and wellbeing should always coexist, particularly in the spaces we inhabit every day.
Timeless wall art does not ask a room to become louder. It asks the room to become more itself.
Before You Begin: The Foundations of a Polished Result
One of the most common mistakes in any DIY wall design project is underestimating preparation. Elegant results are rarely accidental. Even the most effortless looking wall treatment usually depends on careful measuring, surface cleaning, sample testing, and material planning. Taking time at the beginning saves frustration later and gives your final work a professional finish.
Start by evaluating the wall itself. Look for small dents, nail holes, uneven texture, or old adhesive residue. Fill imperfections, sand lightly where needed, and wipe the surface clean so that paint, fabric, or trim can adhere properly. If you are working on a rented home or a surface you may want to restore later, think about reversibility before choosing your method. Framed textile art and large canvases are especially useful in these situations because they deliver strong visual presence without permanently altering the wall.
Next, consider scale. One oversized piece can feel sculptural and serene, while a composition of smaller elements can feel layered and intimate. The dimensions of your wall, ceiling height, furniture placement, and natural light all affect what will feel balanced. If the art will hang above a console, bed, or sofa, aim for a width that relates comfortably to the furniture below. As a general principle, wall art often looks best when it spans roughly two thirds to three quarters of the furniture width beneath it, though exact proportions can vary based on the room and the mood you want to create.
Color deserves equal attention. A successful wall art piece often echoes tones already present in the room, but it does not need to match them exactly. Repeating one or two colors from a rug, cushion, drapery, or accent chair is often enough to create harmony. If your room feels visually busy, choose a softer tonal palette. If the room is restrained and neutral, you can introduce a more graphic gesture or subtle contrast through texture rather than strong saturation.
Essential Materials to Keep on Hand
Although each project has its own supply list, there are a few foundational items worth gathering before you begin. Having them ready creates a calmer workflow and makes the process feel far more enjoyable.
- Measuring tape and pencil for layout accuracy and positioning.
- Level to ensure lines, frames, and trim remain precise.
- Painter’s tape for marking boundaries and testing placement.
- Low VOC paint and primer for safer indoor use and a more comfortable painting experience.
- Quality brushes and mini rollers for smoother finishes and cleaner edges.
- Drop cloths and sanding sponges for preparation and cleanup.
- Stud finder, picture hooks, and wall anchors for secure installation.
If you are new to DIY, do not let this list discourage you. Most of these tools are affordable and versatile enough to be used again and again. The aim is not to accumulate endless supplies but to invest in a few reliable basics that support beautiful results over time.
Project One: A Serene Abstract Painted Canvas
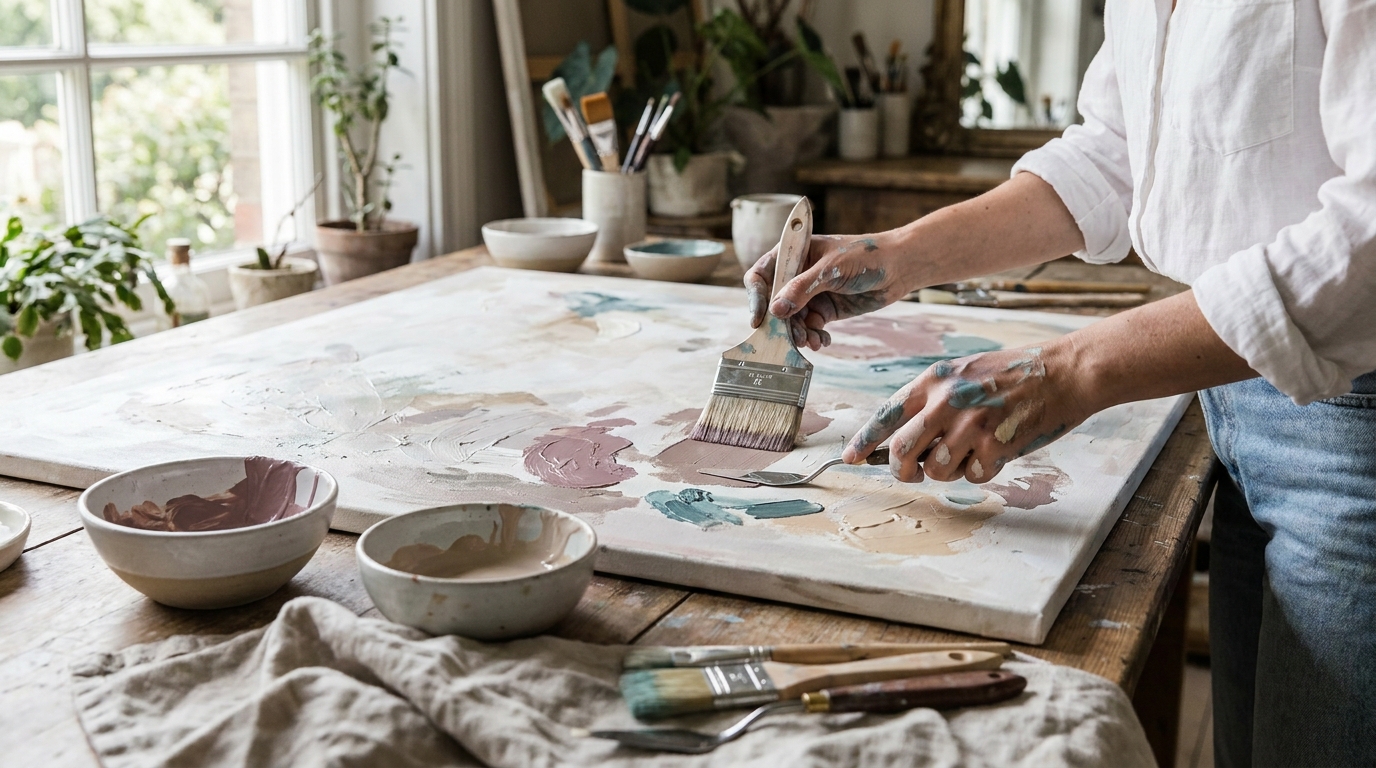
The first project is perhaps the most approachable for beginners, yet it can look wonderfully refined when handled with intention. Abstract painted canvas art works so well because it feels custom by nature. You can adjust the colors to your room, control the scale, and choose a style that feels airy and understated rather than chaotic. In an elegant home, the goal is not to paint something overly complicated. It is to create movement, softness, and composition.
This kind of wall art is especially effective in living rooms, bedrooms, hallways, and home offices. It complements contemporary, transitional, Scandinavian, and even more classic interiors when the palette is restrained. Soft creams, clay tones, dusty mauves, pale blue greens, and warm taupes are particularly aligned with current design preferences, yet they also feel timeless because they echo natural materials and landscapes.
What You Will Need
- A stretched canvas in your preferred size, ideally large scale for impact.
- Low VOC acrylic or interior sample paints in three to five coordinating shades.
- White paint for softening colors and building layers.
- Paintbrushes in different widths, plus a palette knife or old card.
- A water cup, mixing tray, rag, and drop cloth.
- Optional matte varnish formulated for indoor art pieces.
Step by Step Method
Begin by placing your canvas on a protected surface in bright natural light. Study the room where the piece will hang and decide whether you want the art to feel tonal, contrastive, or gently atmospheric. A useful beginner approach is to choose one dominant neutral, one secondary color, one deeper grounding tone, and one lighter accent. Test small combinations on paper first so you can see how the shades relate when dry.
Paint the entire canvas in a soft base color and let it dry fully. This first layer creates cohesion and removes the starkness of blank white. Once dry, sketch a loose composition in your mind rather than with rigid lines. Think in terms of large organic shapes, quiet empty space, and overlapping forms. Strong abstract work often succeeds because it leaves room for the eye to rest.
Apply your second color in broad areas using a wide brush. Keep your hand relaxed and avoid trying to make everything symmetrical. Add a third tone in smaller sections, letting some edges feather and others remain gently defined. If the composition begins to feel heavy, blend a little white into one area to introduce softness and air. A palette knife or old card can be used to drag paint lightly across the surface, creating subtle texture that catches light beautifully.
Step back frequently as you work. This is where many people improve the piece most. What feels balanced up close can appear crowded from a distance. If needed, paint over a section and simplify. Sophistication usually comes from editing, not from adding more. Once the overall design feels resolved, allow the canvas to dry completely before applying an optional matte varnish for protection.
When hanging the piece, place the center approximately at eye level, or slightly lower if it will sit above furniture. If the canvas is large, let it be the main voice on the wall rather than surrounding it with too many competing objects. A single oversized abstract can create the kind of quiet drama that designers often seek in luxury interiors.
How to Make It Look More Elevated
The most elegant painted canvases are often the simplest. Limit your palette, vary your brushwork subtly, and avoid harsh outlines unless the room itself is very graphic. If your home includes natural oak, linen, boucle, travertine, or warm stone tones, echo those materials in the painting through earthy neutrals and chalky textures. You can also float frame the finished canvas in a slim oak or black wood frame for an extra architectural touch.
This project is also an ideal answer to the misconception that wall art must be expensive to feel important. A carefully painted canvas can look deeply custom because it is custom. It is shaped by your room, your color story, and your hand. In that sense, its value goes far beyond what it cost to make.
Project Two: Framed Textile Wall Art for Soft, Tactile Luxury
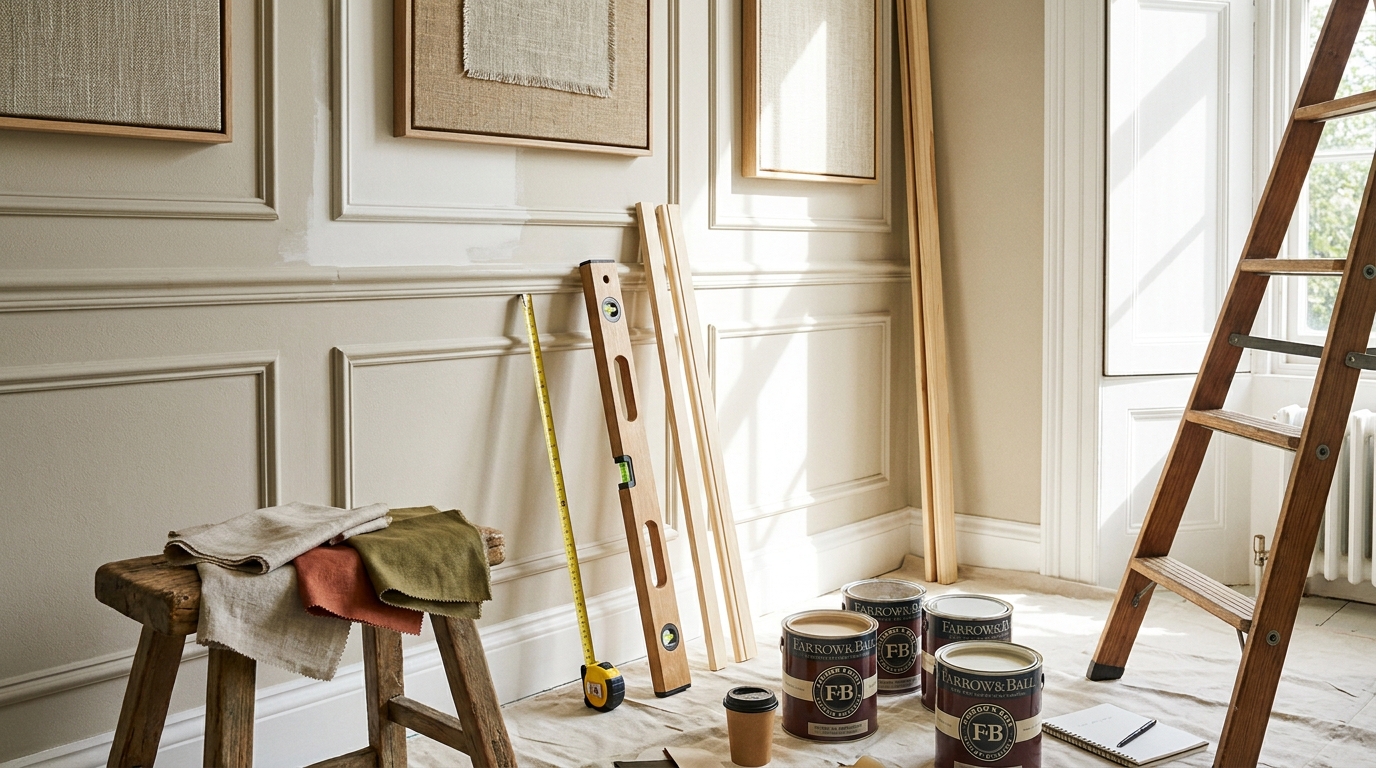
If painted art speaks through color and form, textile wall art speaks through texture, depth, and material presence. Framed textiles have a calm, sophisticated quality that works beautifully in serene interiors. They can reference traditional craft, contemporary minimalism, or global design influences depending on the fabric you choose. Linen, raw silk, cotton slub, lightweight wool, and subtle embroidered textiles all lend themselves to this project.
This approach is especially useful for those who love wall art but feel less comfortable painting. It requires attention and patience rather than drawing skill. It also brings a warmth that many rooms need, particularly spaces with hard surfaces such as plaster, stone, tile, or sleek cabinetry. In bedrooms and sitting areas, textile art can soften acoustics visually and emotionally, making the room feel more layered and inviting.
What You Will Need
- A large frame with or without glass, depending on your preferred finish.
- Fabric in linen, cotton, silk blend, or another textural material.
- Backing board such as foam board or acid free mount board.
- Fabric scissors, acid free tape, or staple gun if suitable for the backing.
- Optional trim, mat, or second layer of textile for dimension.
Step by Step Method
Start by choosing your textile carefully. The beauty of this project lies in the material itself, so seek a fabric with visual depth. This might be a handwoven neutral linen, a vintage textile fragment, a subtle stripe, or a tonal embroidered cloth. The piece should feel intentional and elegant rather than busy. If your room already contains many patterns, a quieter fabric is usually the better choice.
Lay the fabric flat and iron it gently if needed. Cut it so that it extends several inches beyond the backing board on all sides. Position the fabric over the board and study how the weave, pattern, or texture sits within the frame proportions. This is the moment to decide whether you want the composition perfectly centered or slightly asymmetrical. Small shifts can make the result feel more artistic and curated.
Once satisfied, secure the textile at the back of the board using acid free tape or staples, depending on your materials. Pull it taut, but do not stretch so aggressively that the weave distorts. If you want a softer, gallery inspired finish, place a thin layer of batting under the fabric before mounting it. This creates a lightly padded effect that feels especially luxurious with linen and silk blends.
Place the mounted fabric inside the frame. You may choose to omit the glass if the textile has dimensional texture that you want to preserve visually. For flatter materials or more delicate pieces, glass offers protection and a crisp finish. Hang the frame as a single statement or pair it with a second piece for symmetry. In bedrooms, two framed textiles above a bed can feel serene and balanced. In a hallway or dining room, one large framed fabric panel can become a sophisticated focal point.
Styling Tips for a More Designer Look
Color is important here, but restraint is equally valuable. Neutral textiles in warm ivory, stone, camel, olive gray, and muted rose can appear remarkably luxurious when framed generously. If you want more contrast, consider a deep espresso textile in a light oak frame, or a sandy linen in a black frame with ample negative space around it. Scale matters as much as the fabric itself. A small sample can disappear, while a larger panel feels intentional and architectural.
Textile art also invites storytelling. It can incorporate a remnant from a meaningful garment, a vintage market find, or a handmade cloth sourced during travel. That personal layer gives the piece emotional gravity, which is one reason it feels so enduring. Rather than decorating with something anonymous, you create a composition that carries memory, craftsmanship, and tactile beauty into the room.
Project Three: Decorative Wall Moulding as Architectural Art
The third project moves beyond the frame and onto the wall itself. Decorative moulding panels are an ideal example of how wall art can become architectural. They add rhythm, proportion, and elegance while remaining surprisingly achievable for a confident beginner with basic tools. This treatment works beautifully in dining rooms, entryways, stair landings, bedrooms, and living spaces where you want a stronger sense of finish.
What makes this approach timeless is its relationship to classic interior architecture. Yet it is equally adaptable to modern homes. In a traditional room, moulding can reinforce symmetry and refinement. In a contemporary space, it can add subtle dimension without clutter. Painted in one soft, tonal shade, the result feels sculptural rather than ornate. This is especially appealing for those who want statement walls that remain calm and sophisticated.
What You Will Need
- Decorative trim or moulding strips suitable for interior walls.
- Measuring tape, pencil, level, and painter’s tape.
- Miter box or saw for cutting corners.
- Construction adhesive and finishing nails if needed.
- Wood filler, caulk, sanding sponge, primer, and low VOC paint.
Step by Step Method
Begin by measuring your wall and deciding on the panel layout. Symmetry is your ally in this project. You might choose a series of evenly spaced vertical rectangles, larger panels below chair rail height, or one centered composition behind a bed or console. Use painter’s tape to mark the design directly on the wall first. This allows you to assess scale and spacing before making any cuts.
Once the layout feels balanced, measure each trim piece carefully and cut the ends at the necessary angles. Dry fit the pieces on the wall before attaching them. This step is essential because even small measurement errors become visible in a geometric design. If a corner is slightly off, refine it now rather than hoping caulk will disguise the issue later.
Apply adhesive to the back of each trim piece and press it into place, checking alignment with a level. Some projects also benefit from a few finishing nails for added security, depending on the wall and trim weight. Continue panel by panel until the composition is complete. Fill nail holes, caulk the edges where trim meets wall, and sand lightly once dry for a seamless finish.
Prime the moulding if required, then paint the entire wall and trim in the same color. This tonal approach is what gives the treatment its artful, integrated quality. Rather than reading as separate pieces stuck onto a wall, the moulding becomes part of a subtle relief composition. Soft earthy neutrals, misty blue greens, warm whites, and muted taupes all work beautifully here. If you want a bolder statement, a rich brown or olive can feel cocooning and elegant, especially in dining rooms or studies.
Why This Works So Well as Wall Art
Decorative moulding panels blur several categories at once. They are part wall treatment, part design feature, and part sculptural artwork. They create shadow lines that shift with daylight, introducing movement without pattern. They also support many styles of decor, from classic to modern, disproving the misconception that DIY wall design belongs only in very contemporary spaces. In fact, moulding may be one of the most versatile and enduring DIY wall upgrades available.
Because this project becomes a permanent visual layer in the room, it is worth choosing quality materials and low emission finishes. If painting a whole feature wall, use low odour low VOC products whenever possible, especially if the room is used daily while the paint cures. The finished result should feel as pleasing to live with as it is to look at.
Choosing the Right Project for Your Space
Although all three projects are elegant and accessible, each serves a different design need. The painted abstract canvas is ideal when a room needs color, softness, and a focal point without physical alteration to the wall. Framed textile art is perfect when you want texture, warmth, and a curated feel. Decorative moulding panels suit spaces that need architecture, structure, and a sense of permanence.
Think also about your comfort level. If you enjoy freeform creativity and are willing to experiment, the painted canvas may be the most satisfying. If you prefer precision and a material led approach, textile framing offers a calm and controlled process. If you are confident measuring and cutting, moulding panels can deliver the most transformative result. There is no hierarchy here. The best project is the one that suits your room, your taste, and the way you like to work.
It can also be beautiful to combine these ideas across a home. A moulded dining room, a textile art hallway, and a painted canvas bedroom can feel connected when united by palette and restraint. This layered approach gives your interiors variety while preserving harmony, which is often the hallmark of deeply considered homes.
Common Mistakes to Avoid
Even simple wall art projects benefit from a disciplined eye. One common mistake is choosing colors in isolation rather than in relation to the room. Always test swatches and look at them in natural and artificial light. Another mistake is making a piece too small for the wall it occupies. Underscaled art often feels apologetic, while properly scaled art feels intentional and serene.
Skipping prep is another frequent issue. Dusty walls, rushed measuring, and uneven surfaces can undermine even the loveliest concept. With framed textile art, insufficient tension can cause sagging. With painted canvases, overworking the surface can make the piece look muddy rather than graceful. With moulding panels, inaccurate spacing is the quickest way to lose refinement. Precision and simplicity matter more than complexity.
There is also a tendency to over decorate around a newly finished wall. Let your DIY wall art breathe. Give it visual space so that its form, texture, or color can be appreciated. Restraint is often what allows handmade work to feel elevated rather than overly busy.
How to Style Timeless Wall Art in Different Rooms
Living Room
In a living room, wall art often sets the emotional tone for the entire space. Large abstract canvases work beautifully above sofas, especially when they echo upholstery and rug tones without copying them. If your room is open plan, art can also help define the seating area. Consider repeating one color from the canvas in a cushion or ceramic object nearby to create cohesion without obvious matching.
Bedroom
Bedrooms benefit from wall art that feels soft and restorative. Framed textile pieces are especially effective here because they introduce visual warmth and a gentle tactile presence. If using moulding behind the bed, keep the color tonal and calm so the architecture feels soothing rather than dramatic. Low VOC products are particularly wise in this room because of the amount of time spent there.
Dining Room
Dining rooms can carry a bit more mood. Decorative moulding in a warm brown, muted olive, or deep neutral can create beautiful intimacy in evening light. A single oversized canvas or framed textile can also work well, especially if the room has a pared back furniture arrangement. The aim is to create atmosphere, not distraction.
Hallway or Entry
These transitional spaces are perfect for art that creates impact quickly. A framed textile panel can make an entry feel curated and welcoming. A painted canvas can energize a hallway with color and movement. If the space is narrow, choose one strong focal piece rather than several smaller items that may create visual clutter.
The Lasting Beauty of Personal Craftsmanship
There is something deeply satisfying about creating a home with your own hands, especially when the result feels elegant enough to rival pieces found in boutiques or galleries. DIY wall art invites you into that experience. It reminds us that beauty is not only something we buy. It is also something we shape through attention, taste, and care.
As wall design continues to evolve through texture, color, and more expressive treatments, the most compelling interiors will likely be those that balance trend awareness with personal meaning. A hand painted canvas in a serene palette, a framed textile with quiet history, or a moulded wall that honors proportion and light can all feel timeless because they are rooted in something more enduring than novelty. They respond to the architecture of the room and to the life unfolding inside it.
If you begin with thoughtful preparation, choose materials with both aesthetics and indoor air quality in mind, and allow restraint to guide your decisions, these projects can deliver remarkable results. More than decoration, they become part of the identity of your home. And that, perhaps, is the true luxury of wall art. It is not only what it adds to a wall. It is what it reveals about the space, and about you.
Quick Reference: A Graceful Planning Checklist
- Measure the wall and test the scale of your design before beginning.
- Repair, clean, and prep the surface for a polished finish.
- Choose colors that echo the room’s existing palette.
- Prioritize low VOC or zero VOC paints and low emission products where possible.
- Keep compositions simple enough to feel timeless.
- Step back often during the process to assess balance and proportion.
- Style the finished wall with restraint so the artwork can breathe.
With these principles in place, even a modest DIY project can achieve extraordinary elegance. Your walls are not merely boundaries. They are canvases for atmosphere, memory, and design. Treat them with artistry, and they will transform the way your home feels every single day.


No Comment! Be the first one.