


How to Perform Quick Paint Touch-Ups Like a Pro
A good paint touch-up is one of those small jobs that can make a room look cared for again in less than an hour. A few scuffs near a hallway corner, a chip on trim, or a dent in drywall can draw the eye every time you walk past it. The good news is that you usually do not need to repaint the entire room to fix those problems. The better news is that a professional-looking result is less about luck and more about using the right process.
Table Of Content
- Why Some Paint Touch-Ups Disappear and Others Stand Out
- Start With the First Question: Does It Need Paint?
- The Tools and Materials That Actually Help
- Safety First, Especially in Older Homes
- Step 1: Identify the Surface and the Type of Damage
- Step 2: Find the Best Paint Match You Can
- Step 3: Clean the Area Properly
- Step 4: Repair Dents, Holes, and Gouges Before Painting
- Step 5: Match the Original Tool and Application Method
- Step 6: Use Less Paint Than You Think You Need
- Step 7: Blend, Do Not Expand the Problem
- Touching Up Walls
- Touching Up Trim and Doors
- Touching Up Painted Furniture
- Common Mistakes That Make Touch-Ups Look Worse
- When a Full Repaint Is the Better Call
- How to Store Paint So Future Touch-Ups Go Better
- A Simple Step by Step Touch-Up Sequence You Can Follow
- Final Thoughts
The biggest mistake homeowners make is thinking touch-up paint is just a matter of opening an old can and brushing some color on the wall. In real life, touch-ups are a matching and blending job. Color matters, but so do sheen, surface texture, the tool you use, and the way the original paint was applied. If any one of those is off, the repair can stand out even more than the original damage.
This guide walks through a practical, step by step method for quick paint touch-ups on walls, trim, and furniture. It covers how to tell whether a mark needs paint at all, how to prep the surface properly, how to use the least amount of paint necessary, and how to decide when a touch-up has reached its limit. If you want straight answers and results that actually look clean in normal daylight, this is the approach to use.
Key idea: The best paint touch-ups are small, controlled, and matched to the original finish. Most failed touch-ups happen because too much paint is applied, the wrong tool is used, or the sheen does not match.
Why Some Paint Touch-Ups Disappear and Others Stand Out
Before getting into the steps, it helps to understand why touch-ups can be tricky. Paint does not just carry color. It also reflects light based on its sheen, and it leaves behind a texture pattern based on the roller cover, brush type, and application method. That is why two areas painted with the same color can still look different when viewed from an angle or in bright daylight.
Flat and low-sheen finishes are generally the easiest to touch up. They tend to hide minor differences in application and reflect less light, so the repair is less obvious. Satin, pearl, semi-gloss, and gloss paints are harder to spot repair because they show flashing, shadowing, and picture framing much more easily. If a wall has a shinier finish, the best touch-up method still helps, but you should set realistic expectations.
Texture also plays a big role. If the original wall was rolled, touching it up with a brush can leave a different surface pattern that catches light in a new way. That mismatch often shows up even when the color is right. The same issue happens on woodwork if the original finish was laid off smoothly and the touch-up is applied too heavily or with the wrong brush.
Age matters too. Even leftover paint from the same can may not blend perfectly if the surrounding surface has faded, been cleaned many times, or picked up wear. That does not mean touch-up is pointless. It means your goal is to make the repair visually disappear in normal use, not to chase laboratory-level perfection.
Start With the First Question: Does It Need Paint?
Not every wall mark is paint failure. In busy homes, many dark lines, smudges, and transfer marks are just surface dirt. Shoes, bags, chairs, strollers, and vacuum handles leave marks that often clean off with mild soap and water. If you paint over a removable scuff, you may create a repair patch where none was necessary.
The fastest way to save time is to inspect the mark under good light. If the paint film is still intact and the issue looks like surface transfer, start with gentle cleaning. Use a soft cloth or sponge, mild soapy water, and light pressure. Wipe the area dry and let it fully air out before deciding whether the mark is gone or whether there is real paint damage underneath.
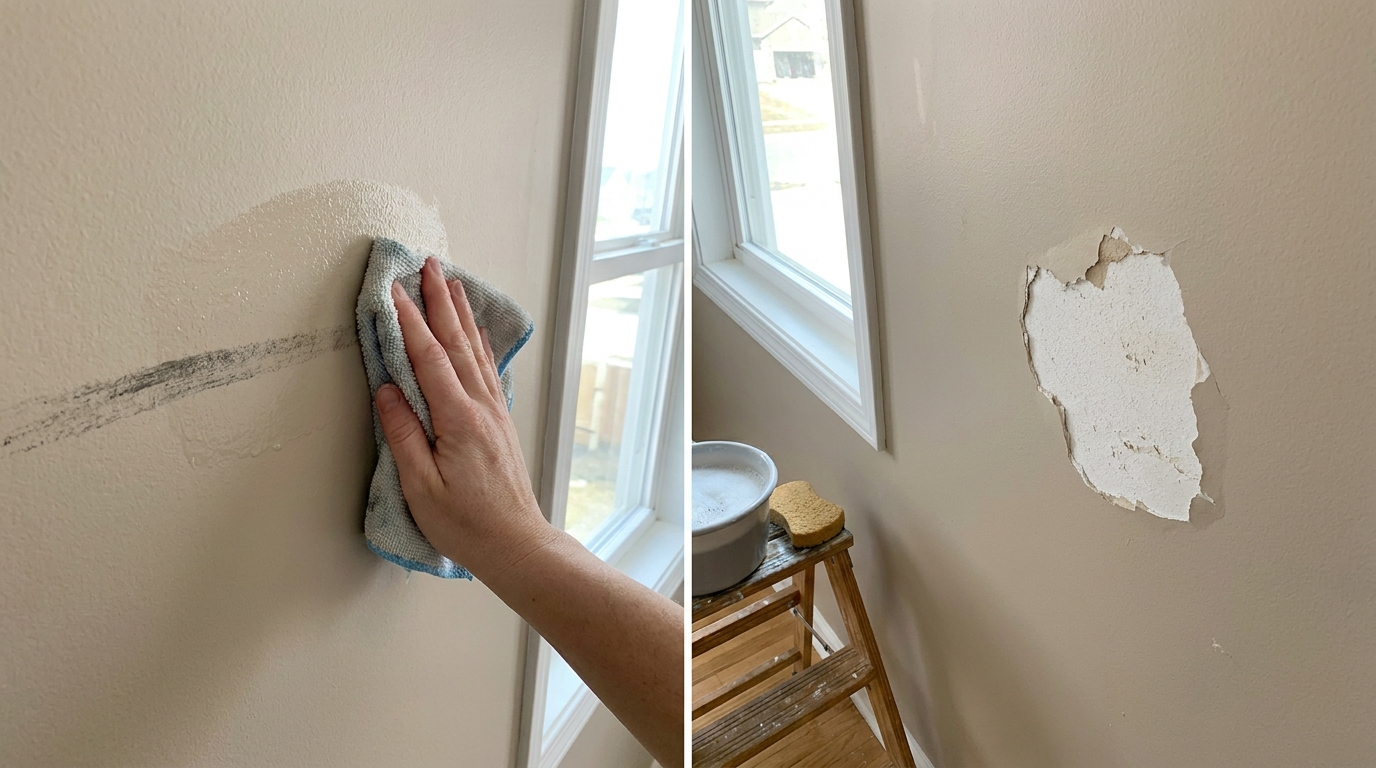
This first step matters more than people think. A wall that only needed cleaning can end up with a visible patch if you rush in with paint. It also gives you a chance to see whether the damaged area is truly small enough for a touch-up or whether there is a deeper dent, scratch, or gouge that will need repair first.
The Tools and Materials That Actually Help
You do not need a shop full of supplies to do good touch-ups, but you do need a few specific things. The right tools help you control paint film thickness, reduce visible edges, and keep the repair proportional to the damage. Cheap substitutes often create a patch that is larger and more noticeable than the original flaw.
For most homeowners, a practical touch-up kit should include the original paint if available, a label with the brand, product line, color name or code, and sheen, a soft cloth, mild cleaner, a putty knife, lightweight spackle or filler, a fine sanding sponge, spot primer, a small angled sash brush, and a mini roller that matches the original wall texture as closely as possible. A paint tray or small cup also helps you avoid overloading the tool.
If you know the original applicator, try to match it. That means using a roller if the wall was rolled, and choosing a similar nap thickness if you can. It also means using the same type of brush for trim or furniture if that information is available. Matching the original method is one of the most practical ways to reduce visible texture changes.
Safety First, Especially in Older Homes
Most quick touch-ups are low risk, but sanding, scraping, or disturbing old paint can become a health issue in older homes. In Canada, homes built before 1960 may contain lead-based paint. In the United States, homes built before 1978 may contain lead-based paint. If lead paint is present, sanding or scraping can release hazardous dust.
If you live in an older home and you are not sure what is on the walls or trim, slow down before doing any abrasive prep. Simple cleaning and very minor non-abrasive touch-up may be one thing, but sanding through older coatings is another. If there is any chance you are dealing with lead-based paint, use lead-safe practices and consider professional testing or advice before disturbing the surface.
This is especially important around windows, doors, trim, and older furniture where multiple layers of old paint may exist. For paid renovation work in pre-1978 U.S. housing and child-occupied facilities, the EPA Renovation, Repair and Painting rule applies. Even for homeowners doing their own work, the practical lesson is the same: do not treat old paint casually if sanding or scraping is involved.
Step 1: Identify the Surface and the Type of Damage
A solid touch-up starts with a clear diagnosis. Are you dealing with a surface scuff, a chip, a shallow scratch, a nail hole, a drywall dent, a stain bleed, or a larger patch where material is actually missing? Each one calls for a slightly different approach, and the sooner you sort that out, the cleaner the repair will be.
For painted walls, the common categories are removable marks, paint loss without substrate damage, and surface damage that affects the drywall or patch beneath. On trim and furniture, you are usually looking at chips, impact damage, rubbed edges, or small finish wear. The method changes because woodwork is often smoother and glossier, which means flaws are easier to see.
Here is the simple decision point. If the mark cleans off, stop there. If the paint is missing but the surface is still smooth, a direct touch-up may work. If the surface is dented, gouged, or rough, repair and prime first. If the damaged area is large, repeated in several places, or located on a high-gloss finish, a full repaint of the section may be the smarter move.
Step 2: Find the Best Paint Match You Can
This is where many touch-up jobs are won or lost. The best case is having the original paint can with the label intact. That label should tell you the brand, product line, color code, sheen, and sometimes where it was used. If you have that information, you are already ahead because you can match more than just the color.
If the original paint is still usable, stir it thoroughly. Paint separates over time, and using it without mixing can shift both color and sheen. If the paint is too old, contaminated, badly skinned over, or smells off in a way that suggests it has gone bad, replace it rather than forcing a poor match.
If you do not have the original can, try to identify the finish as closely as possible. Flat, matte, eggshell, satin, and semi-gloss can look similar until they are patched side by side. The wrong sheen is often more noticeable than a slight color variation. If needed, take a sample or a removable piece such as a switch plate painted with the wall color to a paint store for matching, but understand that matched paint is still not guaranteed to disappear if the texture and application method differ.
Step 3: Clean the Area Properly
Paint does not like dirt, grease, chalk, or dust. Even a very small repair area should be cleaned before paint goes on. On walls, use mild soap and water, then rinse if needed and allow the spot to dry completely. On trim or furniture, especially in kitchens or near hand contact, make sure oils and residue are fully removed.
Skipping this step causes two problems. First, paint can fail to bond cleanly to the spot. Second, you can trap a dull or dirty halo around the touch-up area that makes the repair noticeable. Clean prep is one of the reasons professional work tends to look simple. The finish itself starts well before the paintbrush comes out.
Drying time matters. Even if the wall looks dry, a damp surface can change how the paint lays down and how the sheen settles. Give it enough time, especially if you washed a larger area or used more water than expected.
Step 4: Repair Dents, Holes, and Gouges Before Painting
If the surface has actual damage, paint alone will not hide it. A dented wall touched up without filler still looks dented, just in fresh color. The right move is to repair the defect first, then sand it smooth, then prime if needed, and only then apply the finish coat.
For a small drywall ding or nail hole, use a lightweight spackle or patching compound and press it in with a putty knife. Keep the repair tight to the defect instead of spreading filler over a broad area. Once dry, sand lightly until the patch is flush with the surrounding wall. Run your hand across it as well as looking at it, because your fingers will catch ridges that your eyes can miss.
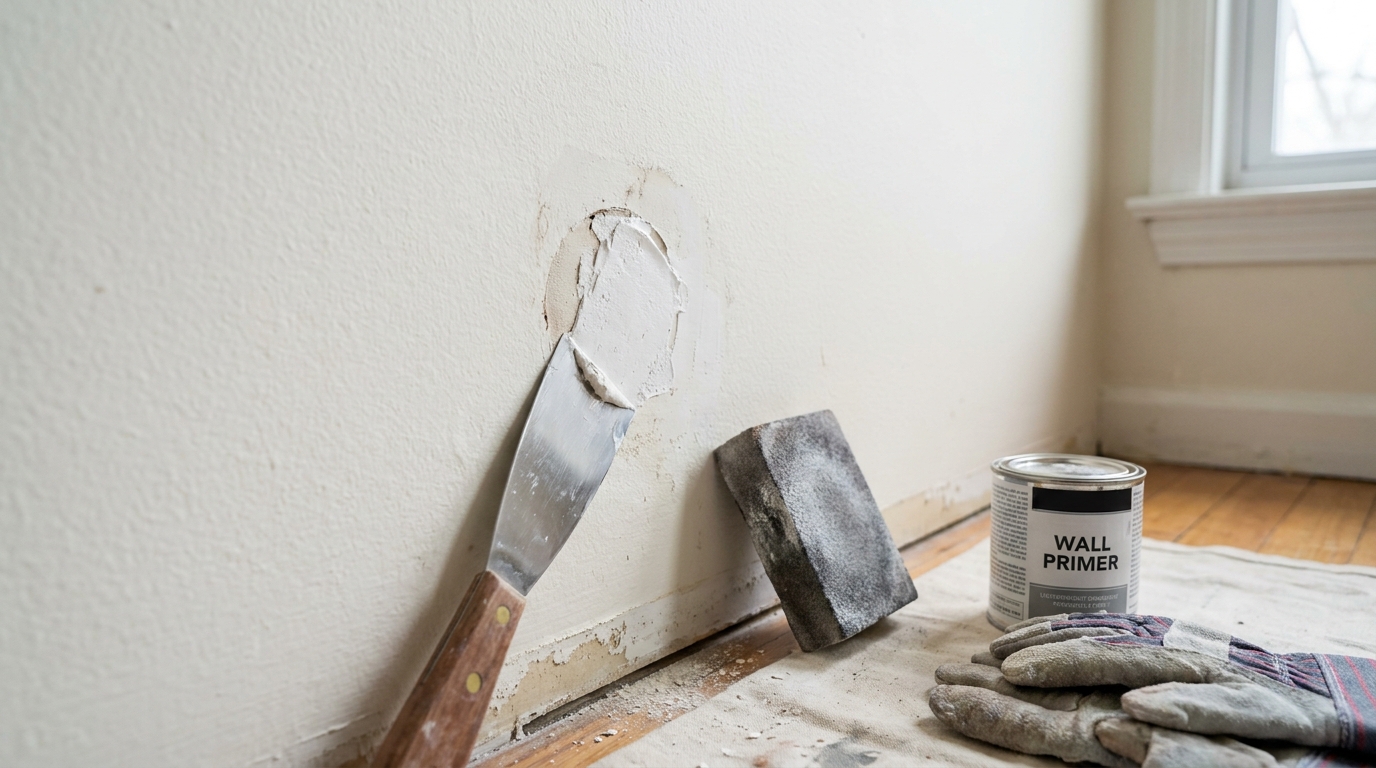
Most patches need primer before finish paint. Fresh filler can absorb paint differently than the surrounding wall, which leaves a dull flashing spot even when the color matches. A quick spot prime helps equalize the surface so the touch-up has a better chance of blending in. Use only enough primer to cover the patched area, and let it dry fully before moving on.
Step 5: Match the Original Tool and Application Method
This step is one of the least glamorous and one of the most important. If the original wall was rolled, use a small roller for the touch-up if possible. If the trim was brushed with a quality angled brush, use a similar brush for the repair. Tool marks create texture, and texture changes how light reads across the surface.
On walls, a brushed touch-up over roller texture often stands out because the surrounding paint film has a stippled pattern while the patch has linear brush marks. Even if the patch seems fine when wet, it can flash once dry and catch the light differently from the rest of the wall. A microfiber or woven mini roller is often a better choice for rolled surfaces because it helps mimic the original texture on a small scale.
Direction matters too. If the original paint was rolled in a certain pattern, keep your touch-up consistent and avoid overworking the area. On trim, brush in the same direction as the piece, lay the paint on lightly, and tip it off smoothly if needed. The goal is not just to add color. The goal is to recreate the original finish pattern as closely as possible.
Step 6: Use Less Paint Than You Think You Need
Heavy touch-ups almost always show. Thick paint builds a ridge, changes texture, and alters sheen. A professional-looking repair uses very little paint, applied in controlled passes, with the edges feathered gently into the surrounding surface.
Load the brush or mini roller lightly and remove excess before touching the wall or trim. Start in the center of the damaged area and work outward. If the spot is tiny, keep the paint confined as much as possible. If the repair is slightly larger, feather the edges so there is no hard ring of fresh paint sitting on top of older paint.
It often takes more than one thin coat to get the result you want. That is normal. Thin coats dry more evenly, reduce texture buildup, and make it easier to stop before the repair grows too large. Let each coat dry before judging it, because wet paint can look darker, glossier, or more obvious than it will once cured.
Step 7: Blend, Do Not Expand the Problem
There is a point where trying harder makes the repair worse. Good touch-up work is disciplined. You fix the flaw, soften the transition, and stop. What you do not do is keep brushing or rolling farther out across the wall because the wet area looks slightly different. That often creates a larger visible patch.
Blending is about reducing the edge of the repair, not repainting a random section around it. If you have matched the color, sheen, and tool properly, the spot should settle in as it dries. If it still stands out after a careful second coat, the issue is usually not a need for more paint. It is usually a mismatch in sheen, texture, or the size of the repair area relative to the surface.
This is where experience pays off, and where homeowners can save themselves frustration by recognizing limits. A tiny chip can disappear beautifully. A wide area on a satin wall near a window may never fully disappear as a spot repair. Knowing the difference is part of doing it like a pro.
Touching Up Walls
Walls are the most common touch-up surface, and they are also the place where matching application method matters the most. Hallways, mudrooms, kids’ rooms, and stairwells collect scuffs and small impact marks quickly. Most of these can be handled well if the finish is flat or matte and you still have the original paint.
For a simple wall scuff that did not clean off and has actually removed paint, use the smallest repair zone possible. If the original wall was rolled, a mini roller will usually blend better than a brush. Roll lightly across the spot, then feather outward with almost no pressure. Stand back after it dries rather than judging from six inches away.
If the wall damage includes a patch, prime first and expect that two finish coats may be needed. If the wall has multiple repaired areas clustered together, especially in a space with side lighting from windows, a full repaint of that wall from corner to corner may give a cleaner final result than several isolated patches.
Touching Up Trim and Doors
Trim, baseboards, casings, and doors take abuse from shoes, vacuum heads, pet claws, and general traffic. They are often finished in satin or semi-gloss, which makes touch-up harder than on flat walls. Still, small chips and rubs can be improved a lot if you use the same sheen and a precise brush.
Clean the trim thoroughly first because hand oils and dust build up fast on these surfaces. Sand only if needed to knock down a lifted edge or rough chip, and be cautious in older homes where lead may be a concern. Then apply a very small amount of matching paint with a quality angled brush, pulling the paint in the direction of the trim profile.
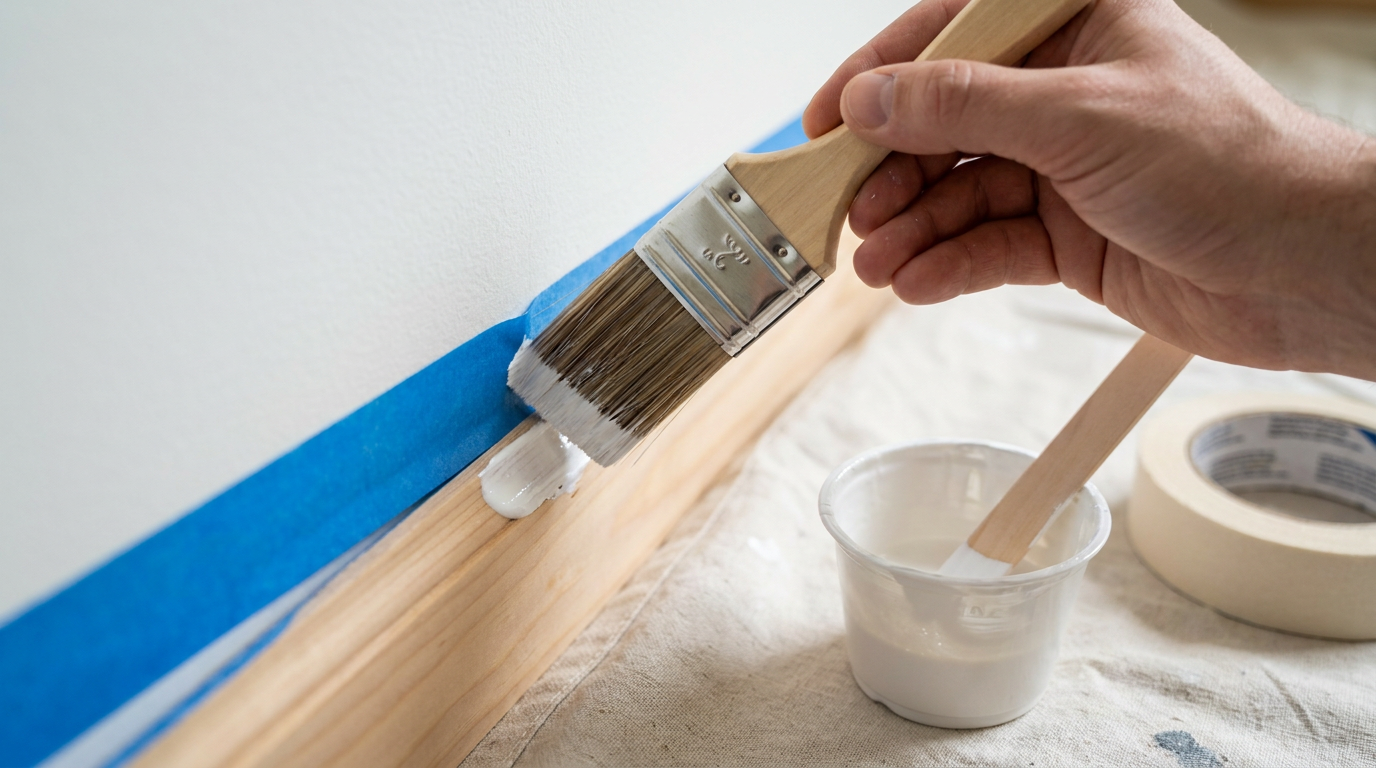
On trim, too much paint is the fastest way to make the repair visible. Heavy brushing leaves a patch that reflects light differently. For narrow chips, a couple of light passes are better than one loaded pass. If the finish level still looks off after drying, it may be because the old trim coat has aged differently, in which case repainting the full length of trim is often the cleaner answer.
Touching Up Painted Furniture
Painted furniture sits somewhere between wall work and fine finish work. It is usually smaller in scale, but the surfaces are closer to eye level and often get direct light, so flaws show clearly. Chairs, side tables, dressers, and shelves can all be touched up successfully if the damage is isolated and the finish is known.
Start by cleaning the area and checking whether the damage is just a rub mark or an actual paint chip. If the furniture piece has a smooth factory-like finish, use a small artist brush or fine angled brush and apply paint sparingly. If the piece was originally rolled or has a more casual painted texture, match that method as closely as you can.
Furniture touch-ups often benefit from patience more than coverage. Let the first coat dry and inspect it in the light where the piece normally sits. Because furniture gets touched and viewed up close, do not be surprised if a perfect invisible repair is harder than on a flat wall. The aim is a neat, durable correction that does not draw attention.
Common Mistakes That Make Touch-Ups Look Worse
Most bad touch-ups fail for predictable reasons. The first is using the wrong sheen. The second is brushing a rolled wall. The third is putting on too much paint and creating a picture frame around the repair. The fourth is skipping cleaning or primer and expecting the finish coat to solve everything on its own.
Another common mistake is trying to fix large or repeated damage with a tiny spot strategy. If one wall has half a dozen old patches, scuffs, and different aged repairs, adding one more usually does not improve the overall look. At some point, the labor of careful touch-up exceeds the labor of repainting the full wall, and the full wall looks better in the end.
Homeowners also get tripped up by the idea that any leftover paint is automatically a perfect match. In reality, stored paint may have changed, the wall may have faded slightly, and the original roller texture may be impossible to duplicate exactly. That does not mean you should give up. It means you should approach touch-up as controlled improvement, not magic.
When a Full Repaint Is the Better Call
There is no shame in deciding that touch-up is not the right solution for a given surface. In fact, that is often the more professional judgment. If the damaged area is large, if the sheen is medium to high, if there are multiple repair spots close together, or if the wall gets strong side lighting, repainting the full wall can save time and produce a better finish.
The same goes for trim runs and doors. A single small chip on a baseboard can be touched up well. A door face with several dents and hand-worn areas will usually look better if it is lightly prepped and repainted completely. Large furniture surfaces such as tabletops and dresser tops also tend to look more uniform when refinished as a whole rather than patched in several places.
Use this practical rule. If the repair keeps getting bigger, stop and reassess. A touch-up should stay small. Once you are trying to disguise the touch-up instead of just fixing the defect, you are often already in repaint territory.
How to Store Paint So Future Touch-Ups Go Better
One of the smartest things you can do is make future touch-ups easier before you need them. Every time you finish a painting project, label leftover paint clearly with the room, surface, brand, product line, color name or code, sheen, and date. If possible, note whether the wall was rolled and what nap was used, or what brush type was used on trim.
Keep the paint sealed tightly and stored where it will not freeze or overheat. For many homeowners, saving a small mason jar or tightly sealed touch-up container is more practical than hanging on to several nearly empty large cans. Just make sure the container is clean, labeled well, and sealed properly.
Better materials also help in the long run. Many newer interior paints now emphasize durability, hide, scuff resistance, and better touch-up performance. Product choice will not eliminate all touch-up issues, but using a quality paint and keeping accurate records can prevent a lot of future guessing.
A Simple Step by Step Touch-Up Sequence You Can Follow
-
Inspect the mark in good light and decide whether it is dirt, a scuff, paint loss, or actual surface damage.
-
Clean the area with mild soap and water and let it dry completely.
-
If the surface is damaged, fill it, let it dry, sand it smooth, and spot prime if needed.
-
Match the original paint as closely as possible by brand, color, sheen, and product line.
-
Use the same type of applicator and method whenever possible, especially roller versus brush.
-
Apply a small amount of paint to the center of the repair and feather lightly outward.
-
Let it dry fully before deciding whether a second thin coat is needed.
-
Stop if the repair is becoming larger than a realistic spot touch-up.
Final Thoughts
Quick paint touch-ups are one of the most useful maintenance skills a homeowner can learn. Done well, they keep a house looking fresh without the cost, disruption, and time of full repainting. The trick is to treat the job like a finish repair, not just a color patch. That means cleaning first, repairing damage properly, matching sheen and tool, and using less paint than your instincts tell you.
The best touch-ups are almost boring. They are careful, restrained, and specific to the surface in front of you. If you stay disciplined and work with the original finish instead of against it, you can fix many small problems in a way that blends cleanly and holds up over time.
And when a touch-up clearly is not enough, do not force it. Choosing to repaint a full wall, door, or trim run at the right moment is not failure. It is good judgment. In home maintenance, that kind of judgment is what usually separates a patchy result from a professional-looking one.



No Comment! Be the first one.