


Step-by-Step Guide to Patching Holes in Your Walls the Right Way
Wall damage is one of those home maintenance jobs that looks simple until you want it to look like it never happened. A tiny nail hole is one thing. A dent from moving furniture, a doorknob hit, or a fist-sized opening in drywall is another. The difference between a repair that holds up and a repair that keeps showing through paint usually comes down to two things: choosing the right patching method for the size of the hole and building the repair in thin, controlled layers.
Table Of Content
- Why the Hole Size Changes the Repair Method
- Before You Start: Check Safety, Surface Condition, and Tools
- Spackle vs Joint Compound: What to Use and When
- Step 1: Prepare the Hole Properly
- Step 2: Repair Small Nail Holes, Screw Holes, and Minor Dents
- What about popped nails or screws?
- Step 3: Repair Medium Holes with Mesh Tape or a Self-Adhesive Patch
- Step 4: Repair Larger Holes with a Drywall Patch or California Patch
- Step 5: Build the Repair in Thin Coats
- Step 6: Sand Lightly Without Damaging the Wall
- Step 7: Match the Wall Texture Before Priming
- Step 8: Prime the Repair Before Painting
- Step 9: Paint to Blend the Repair
- Traditional Patch Methods vs Modern Repair Kits
- Common Mistakes That Make Wall Patches Fail
- How Long Wall Repairs Usually Take
- When to Call a Pro Instead
- Final Thoughts on Getting a Repair That Lasts
This guide takes a practical approach because that is what wall repair needs. There is no single filler that works for every type of damage, and there is no shortcut that replaces proper prep, drying time, sanding, priming, and paint blending. If you want a long-lasting result, you need to match the materials to the hole, support larger repairs properly, and resist the temptation to slap on one thick coat and call it done.
The good news is that most wall holes are well within reach for a careful homeowner. Modern patch kits, self-adhesive mesh products, and ready-mixed compounds have made small and medium repairs easier than they used to be. Still, newer products do not change the basic rules of a good repair. Thin coats matter. Feathered edges matter. Full drying time matters. Primer matters. If you follow the steps in order, the final paint job has a much better chance of blending in instead of advertising the repair.
This article will show you how to patch small, medium, and moderately large holes in drywall, explain when spackle is enough and when joint compound is the better choice, and point out the common mistakes that make repairs crack, sink, or flash through the topcoat. It will also cover safety concerns in older homes, especially where sanding painted walls may disturb lead-based paint.
Why the Hole Size Changes the Repair Method
One of the biggest misconceptions in wall repair is that every hole can be filled with the same material in the same way. In practice, the size of the damage determines whether you need a simple filler, reinforcing tape, a self-adhesive patch, or a cut-out drywall patch. Small nail holes and shallow dents usually need nothing more than lightweight spackle or joint compound. Medium holes often need mesh support so the compound does not bridge open space and crack later. Larger holes need some kind of drywall patch panel or a cut-and-fit method such as a California patch.
This matters because drywall compound is not structural. It can smooth and finish a surface, but it should not be expected to span larger openings without support. If you try to force a thick blob of patching material into a bigger hole, it may shrink, crack, sag, or telegraph a visible repair line through the paint. A patch that is properly supported gives the compound something stable to bond to and helps the finished surface stay flat.
Professional repair guidance consistently separates repairs by size for a reason. A small finish repair is mostly cosmetic. A medium repair starts becoming a reinforcement issue. A larger repair becomes a replacement and finishing job. Once you understand that, the process becomes more straightforward and your chances of getting a clean result improve significantly.
Before You Start: Check Safety, Surface Condition, and Tools
Before opening a tub of compound, look closely at the wall itself. If the home is older and there is flaking, peeling, or damaged painted surface around the hole, stop and think about lead safety before sanding or scraping. Older homes in North America may contain lead-based paint, and disturbing that surface can create hazardous dust. If you suspect lead, follow current health guidance for testing and safe work practices rather than dry sanding the area casually.
You should also make sure the damage is limited to the wall surface. If the hole was caused by a leak, condensation, or repeated impact, take care of the underlying issue before patching. A repaired wall will not stay looking good if moisture keeps getting into it or if the area remains loose and crumbling. Press gently around the damaged section and cut away any soft, broken, or detached drywall paper before patching.
For most standard drywall repairs, you will want a basic set of tools and materials ready before you begin. Having everything on hand keeps you from rushing a coat because you are trying to finish before a trip to the store. The exact list changes by hole size, but the core materials are fairly consistent.
- Drop cloth or floor protection
- Utility knife
- Putty knife or taping knives in a couple of widths
- Lightweight spackle for tiny holes or ready-mix joint compound for general patching
- Fiberglass mesh tape or a self-adhesive wall patch for medium holes
- Drywall piece for larger cut-in repairs or California patches
- Sanding sponge or fine-grit sandpaper
- Primer
- Matching wall paint
- Dust mask and eye protection when sanding
Some homeowners now use dust-control patch compounds because cleanup is easier and sanding is less messy. These can be useful, especially for indoor repairs in occupied rooms. They are not magic products, though. You still need proper smoothing, full drying, and good feathering to get a patch to disappear.
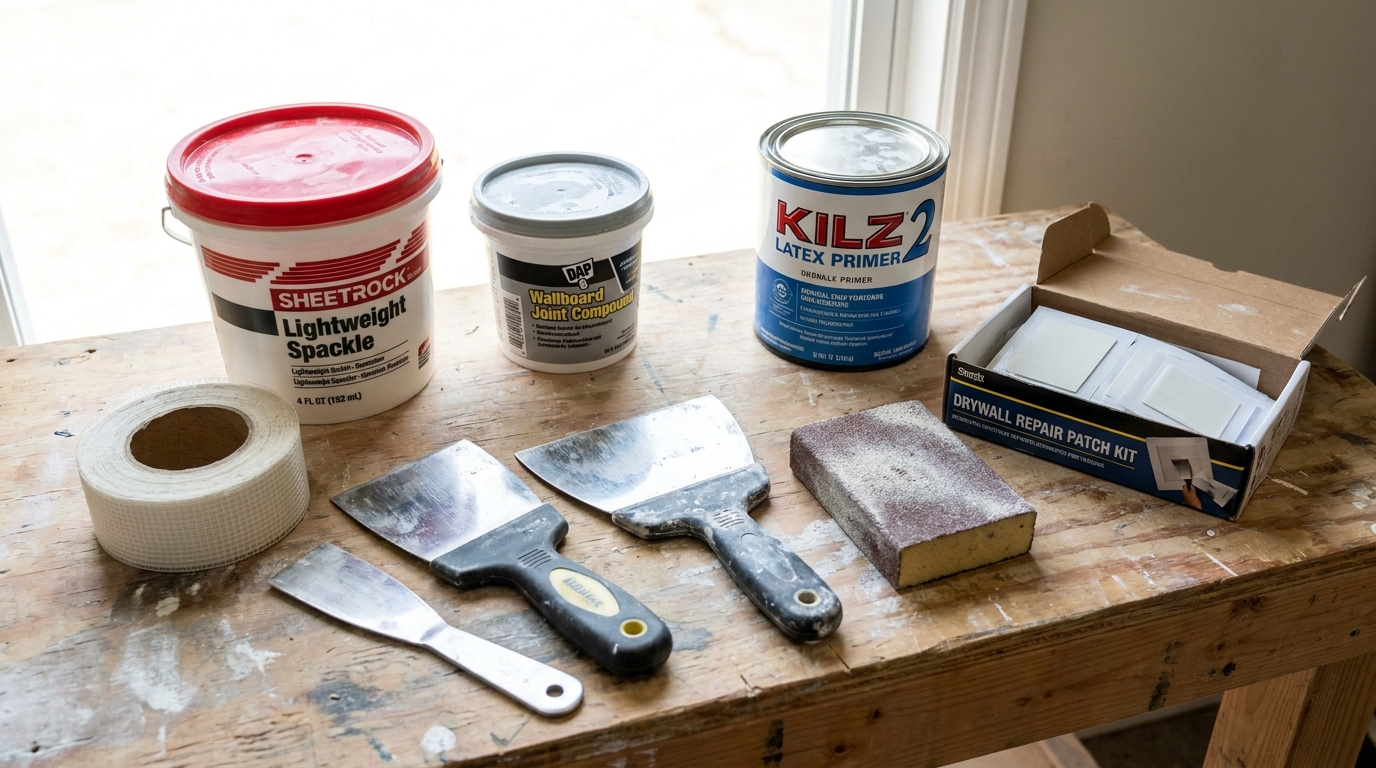
Spackle vs Joint Compound: What to Use and When
Homeowners often use the words spackle and joint compound as if they are interchangeable. They overlap, but they are not exactly the same thing. Spackle is commonly used for very small repairs such as nail holes, pinholes, and shallow dents. It is often sold in smaller containers, goes on easily, and is convenient for touch-up work. For tiny damage, it is a practical choice.
Joint compound is the more versatile finishing material for drywall work. It is widely used for taping seams, embedding repairs, building finish coats, and feathering patches into the surrounding wall. It sands well and helps create a seamless finish over a broader area, which is why it is often the better choice for medium and larger repairs. If you are using mesh tape, a patch panel, or a California patch, joint compound is generally the material doing the real finishing work.
The mistake is thinking one product can save time on every repair. Lightweight spackle is not usually the best choice for wider taped areas or patch build-up where finish quality matters. At the same time, using a large bucket of compound for one tiny picture-hanger hole may be more than you need. Keep the job matched to the material and the material matched to the repair method.
Step 1: Prepare the Hole Properly
Good wall repair starts with preparation, not filler. Remove any loose paper, crumbling gypsum, popped paint edges, or ragged drywall around the damage. A utility knife is often the right tool here because it lets you trim away torn paper cleanly instead of pulling at it. If the hole edge is fuzzy or broken, square it up enough to create a sound base for the patching material or support patch.
For shallow dents and nail holes, prep may be as simple as brushing away dust and lightly scraping any raised paint. For medium and larger holes, you may need to cut back to solid material. The reason is simple: patch compound sticks better to stable, clean edges than it does to crushed or loose drywall. Any weak material left in place can show up later as cracking, bubbling, or an uneven patch surface.
Once the area is sound, wipe away dust and check whether the surface around the hole is proud or recessed. If paint has built up around an old anchor hole or impact mark, knock that down first. A patch is much easier to hide when the surrounding wall is flat and clean before the first coat goes on.
Step 2: Repair Small Nail Holes, Screw Holes, and Minor Dents
Small wall damage is the easiest repair category, but it still benefits from a careful hand. If you are dealing with nail holes, tiny screw holes, or shallow dents from daily use, use a putty knife to press a small amount of lightweight spackle or joint compound into the opening. The key is to force material into the hole first, then scrape off the excess so you do not leave a raised lump behind.
Many people make a small repair bigger by overworking it. If the hole is truly tiny, you often need only one light application and maybe a second skim after drying if the material shrinks slightly. The goal is not to build a mound over the hole. The goal is to fill the void and leave the wall face as flat as possible. Once dry, sand lightly and only enough to remove any edge or ridge.
If the hole came from a drywall anchor, inspect it carefully. Some anchors leave a wider broken edge than a simple nail hole. In that case, a basic fill may not be enough, and you may need to treat it as a medium repair so the area does not crack out later.
What about popped nails or screws?
If a wall fastener has popped through the surface, do not just cover it with compound. Reset the fastener or drive a new drywall screw into solid backing nearby if needed, then remove the loose material and patch the surface. Covering movement without fixing the cause usually leads to the same bump showing up again through the paint.
Step 3: Repair Medium Holes with Mesh Tape or a Self-Adhesive Patch
Medium holes are where technique starts to matter more. These are often the kind of openings left by a doorknob impact, a removed wall anchor, or accidental contact from furniture. For this category, a self-adhesive mesh patch or fiberglass mesh tape is often the practical choice. The support spans the opening so the compound is not hanging in midair with nothing behind it.
Place the patch centered over the hole or apply the mesh so it fully covers and overlaps stable wall surface around the opening. Press it down firmly so it lies flat. Then use a putty knife to apply a thin coat of joint compound over the mesh, pressing enough to embed and cover it. Do not try to finish it in one pass. The first coat is mostly about bonding and coverage, not perfection.
After the first coat dries fully, apply a second coat that extends wider beyond the first. This is where feathering begins to matter. A patch can be solid and still look bad if the edges are abrupt. By widening the second coat, you ease the repair into the surrounding wall plane. If needed, apply a third thin coat even wider, especially if the wall gets side lighting that makes surface flaws more obvious.
Mesh products are convenient because they are easy to position and they save time, but they are not foolproof. If you leave too little compound over the mesh or fail to feather the edges, the patch pattern or ridge can still show through after paint. The convenience is real, but the finish work still determines the final result.
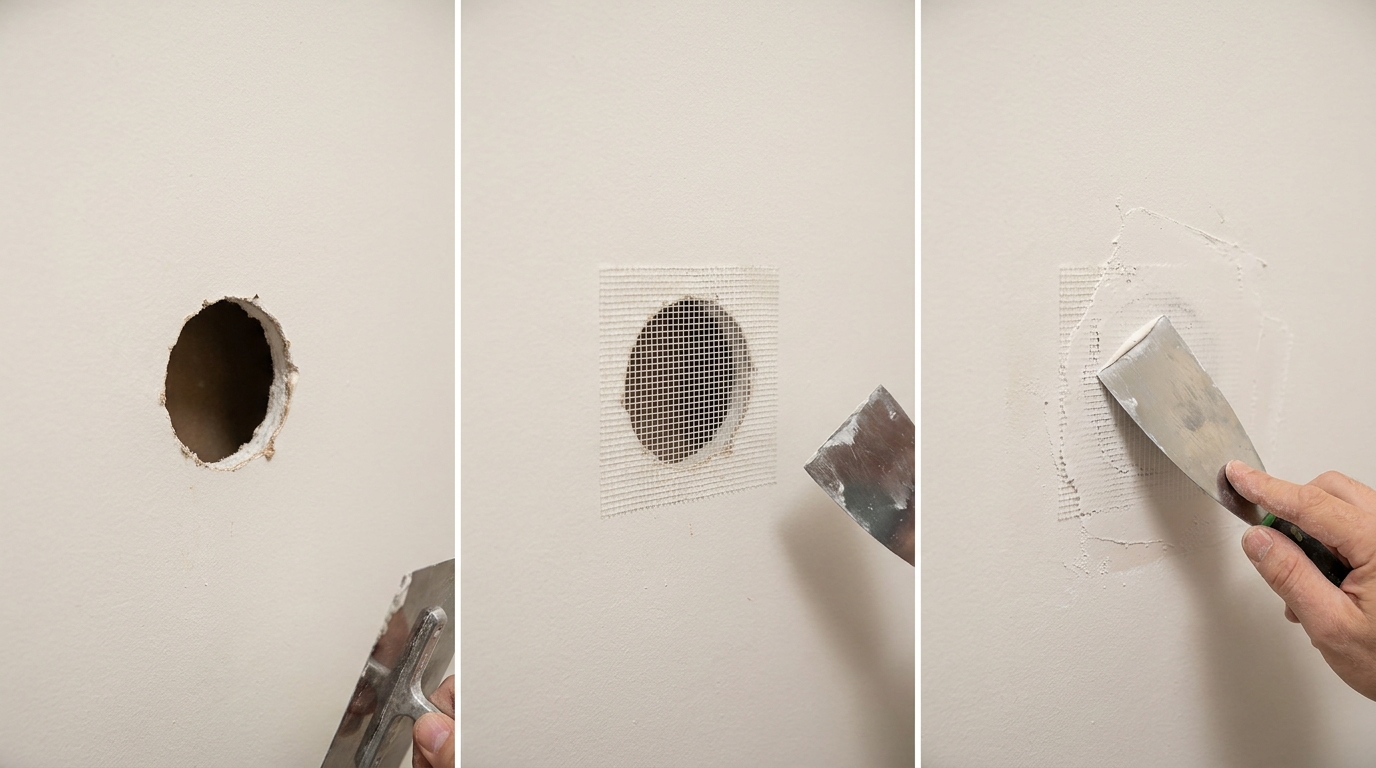
Step 4: Repair Larger Holes with a Drywall Patch or California Patch
Once a hole gets beyond the point where mesh alone makes sense, you are into actual drywall replacement territory. For openings up to roughly 6 by 6 inches and under, a California patch is a useful method and often a very clean one for homeowners willing to work carefully. The basic idea is to cut a drywall patch piece that includes a paper border, which helps the patch sit flush and bond into the wall surface.
To do this, square the damaged opening first so you have clean edges. Cut a new drywall piece to match the opening, then trim back the gypsum around the face of the patch to leave a margin of front paper extending beyond the gypsum core. That paper acts as a flange around the patch. Fit the patch into the hole so the gypsum fills the opening and the paper border lies flat on the wall face. Then embed and cover that paper with joint compound in thin coats.
This method works well because the patch is not just filler. It is actual drywall replacing missing drywall. The paper border gives you a stable finishing plane, and the repair often feathers nicely if you take your time. The downside is that it takes careful cutting and fitting. If the patch is loose, uneven, or cut carelessly, it will be harder to finish cleanly.
For larger damage beyond that range, or where the area feels weak, a more traditional cut-out-and-replace method with backing support may be the better approach. That usually means cutting the damaged section back to a neat rectangle, adding backing strips or fastening to framing if available, screwing in a new drywall piece, taping the seams, and finishing with multiple coats of compound. It is still a DIY-capable repair, but it takes more patience and layout work.
Step 5: Build the Repair in Thin Coats
If there is one habit that separates a clean repair from a messy one, it is the discipline to work in thin coats. Thick compound shrinks more, takes longer to dry, is harder to sand, and is more likely to crack or leave a hump. Thin coats dry more evenly and let you control the shape of the patch instead of fighting it later with aggressive sanding.
The first coat should bond the repair and cover the support material. The second should start leveling the surface and extending the feathered area. The third, when needed, should refine the transition and reduce any visible edge. On each pass, apply just enough material to improve the surface. Let the knife do the work. A clean swipe with steady pressure is usually better than repeated fussing over the same spot.
Drying time matters just as much as thickness. If the surface feels dry but the compound underneath is still soft, sanding or recoating too early can tear the repair or trap moisture. Follow product directions and give each coat the time it needs. Rushing this step is one of the most common reasons a patch looks rough or fails to finish smoothly.
A durable wall repair is usually not about using more material. It is about using the right support, applying thin coats, and letting each step fully dry before moving on.
Step 6: Sand Lightly Without Damaging the Wall
Sanding is where many homeowners either save the patch or ruin it. The purpose is to smooth ridges and blend edges, not to dig into the wall until everything is flat by force. Use a sanding sponge or fine-grit paper and work with a light touch. If you see the paper face of the drywall starting to fuzz or tear, you are going too far.
Focus on high spots and knife lines first. Run your hand across the repair more than you stare at it. Your hand will often detect a ridge faster than your eyes will, especially before paint. Between coats, a quick light sanding is usually enough. After the final coat, sand just enough to create a smooth transition into the surrounding wall.
Keep dust control in mind while you work. Drywall sanding creates very fine dust that gets everywhere. Protect nearby surfaces, wear a dust mask, and consider using low-dust products if cleanup is a concern. If you are repairing a room that is occupied daily, spending a little more on dust control is often worth it.
Step 7: Match the Wall Texture Before Priming
A patch can be perfectly flat and still stand out if the surrounding wall has texture. This is where many repairs go wrong. Homeowners get the hole filled, sand it smooth, paint it, and then wonder why the repair flashes in the light. The answer is that a smooth patch in the middle of a lightly textured wall will always look different.
Look at the wall from an angle and decide what texture you are matching. Many interior walls have a very subtle roller stipple from the original paint application. Others may have orange peel, knockdown, or a more pronounced hand-applied finish. Small texture differences are often more visible after repainting than you expect, so it is worth taking time here.
For lightly textured walls, the simplest approach is often to rely on primer and roller application to recreate a mild stipple over the patch. For stronger textures, you may need a dedicated texture product or a practice board before spraying or dabbing it on the wall. Always keep the texture build modest at first. It is easier to add a little more than to sand off an overdone texture later.
Step 8: Prime the Repair Before Painting
Skipping primer is one of the most common and most visible drywall repair mistakes. Fresh compound is porous and absorbs paint differently than the surrounding painted wall. If you paint directly over an unprimed patch, you can end up with flashing, dull spots, uneven sheen, or a visible patch outline even if the surface itself is smooth.
Primer seals the repaired area so the topcoat absorbs evenly and develops a more consistent finish. It also gives you one last honest look at the repair. Once the primer dries, side light the wall and inspect it. If you see low spots, ridges, or mesh shadowing, fix them now with a light skim coat and sand again. It is much easier to correct a patch after primer than after two finish coats.
Use a primer that is appropriate for drywall repairs and let it dry fully before painting. This step is not glamorous, but it is usually what separates a repair that blends well from one that catches your eye every time you enter the room.
Step 9: Paint to Blend the Repair
Paint blending is part product match and part expectation management. If you have the original wall paint and it is still in good condition, that gives you your best chance. Even then, age, sunlight, and wear can change how a wall looks over time. Spot painting a patch may work in some cases, but on walls with sheen or aging, the patched area can still show unless you repaint a larger section or the full wall plane.
Apply paint the same way the wall was originally finished whenever possible. If the wall has roller texture, use a similar nap roller. If you brush a small rectangle onto a rolled wall, the texture difference may show even if the color is right. Extend the paint out enough to soften the transition, and consider painting corner to corner on highly visible walls if you want the cleanest result.
Sheen matters here as much as color. Flat paint hides repairs best. Eggshell, satin, and semi-gloss reflect more light and reveal more surface variation. On higher-sheen walls, the finishing and sanding steps need to be even cleaner because the paint will be less forgiving.
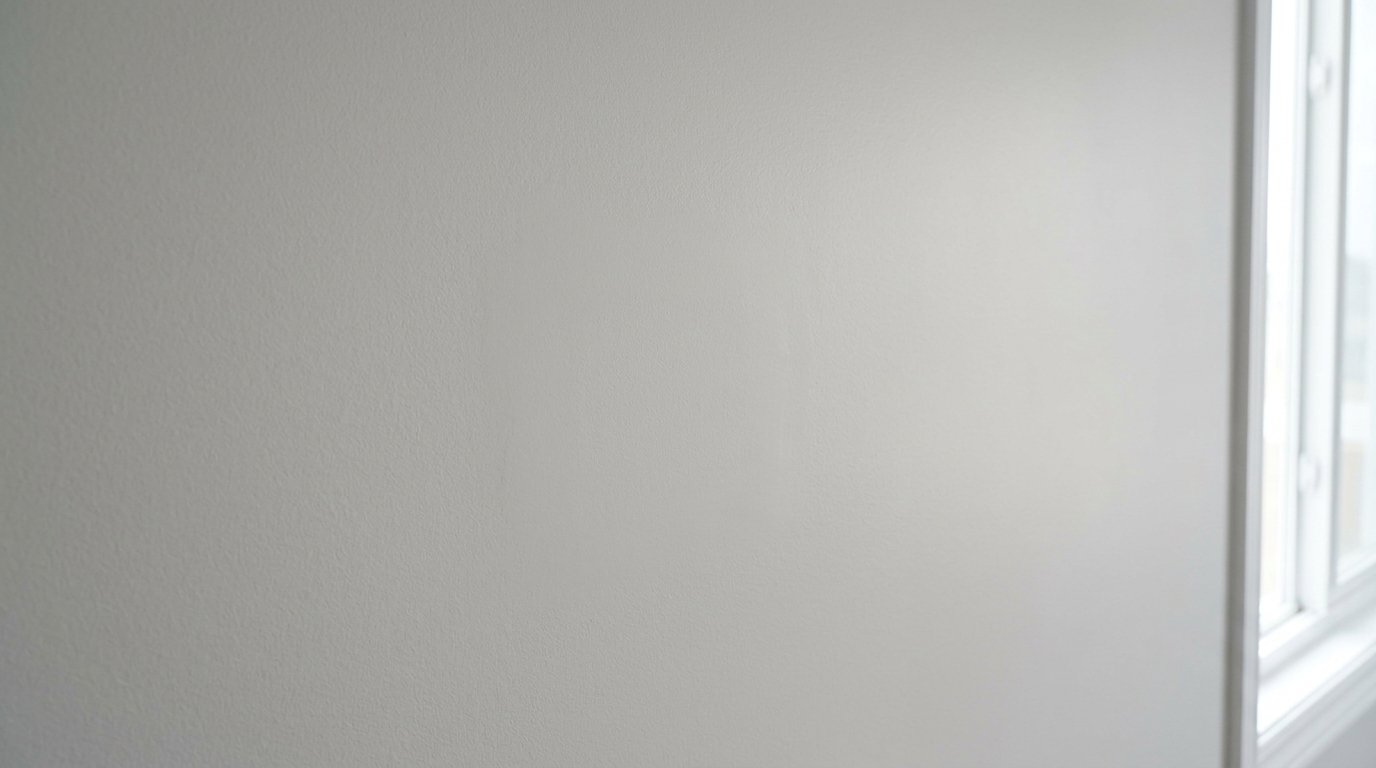
Traditional Patch Methods vs Modern Repair Kits
Modern drywall repair kits have made basic patching faster, especially for small and medium wall damage. Many include a self-adhesive patch, a small knife, sanding pad, and patching compound in one package. For a homeowner handling a one-off repair, that convenience is real. It reduces shopping, simplifies the process, and makes it easier to tackle common wall damage without collecting a full drywall toolkit.
That said, kits are not automatically the best choice for every repair. They work best when the hole fits the patch size and the wall surface is otherwise solid. They are less impressive when the surrounding drywall is crushed, the repair area is larger, or the finish quality needs to be especially clean under close inspection. In those cases, a traditional patch method with properly fitted drywall and broader finishing work is often more durable and less visible.
The practical rule is simple. Use a kit when the damage is modest and the product matches the repair. Move to a more traditional cut-and-patch approach when size, support, or finish demands go beyond what a quick patch can realistically deliver.
Common Mistakes That Make Wall Patches Fail
Most bad-looking patches are not caused by bad products. They are caused by rushed process. Homeowners often use too much material, skip drying time, sand too aggressively, or paint over bare compound without primer. Each of those mistakes leaves a visible result, and sometimes a repair that seemed fine at first starts telegraphing through paint weeks later.
- Using spackle alone for holes that really need mesh, support, or replacement drywall
- Applying one thick coat instead of several thin coats
- Failing to feather edges wide enough beyond the repair
- Sanding so hard that the surrounding drywall paper gets damaged
- Ignoring texture differences between the patch and the wall
- Skipping primer before repainting
- Assuming paint will hide poor surface preparation
- Disturbing old painted surfaces without considering lead safety in older homes
If you avoid those mistakes, your repair quality improves quickly. Wall patching is less about special talent than about sequence and restraint. Most homeowners can get a very respectable result by slowing down and doing each step cleanly.
How Long Wall Repairs Usually Take
The actual hands-on work is not usually the longest part of drywall patching. Drying time is. A small nail hole repair may take only a few minutes of labor and be ready for sanding fairly quickly, depending on the product. A medium mesh patch or a California patch may require several coats spread over a day or two because each layer needs time to set up fully before the next step.
This matters when planning a room touch-up. If you start a repair late in the day and expect it to be painted by bedtime, you may end up forcing the process and creating more work. Build enough time into the job for coats to dry naturally. If you do, the final sanding is easier, the primer sits better, and the paint looks more even.
When to Call a Pro Instead
There are times when patching a wall hole is no longer a basic DIY job. If the damage is extensive, if the wall feels soft from moisture, if there are repeated cracks suggesting movement, or if the repair involves textured finishes you know you cannot match, it may be worth hiring a drywall finisher or painter. The same goes for older homes where lead-safe procedures are needed and you are not equipped to manage the dust safely.
You should also be cautious if you suspect utilities behind the wall are involved. A hole made during plumbing or electrical access may look patchable on the surface, but if the opening needs backing, reframing, or coordination with another trade, it is smart to step back and make sure the wall is ready to close properly before doing finish work.
Final Thoughts on Getting a Repair That Lasts
The best wall patches are usually the least dramatic ones. They are built on sound material, matched to the hole size, finished in thin coats, sanded with control, primed properly, and painted with an eye for texture and sheen. That may sound like a lot of steps for a simple repair, but in practice it is a straightforward process. What takes time is not complexity. It is patience.
If you remember one thing, make it this: do not ask filler to do the job of structure. Tiny holes can be filled. Medium holes need support. Larger holes need real patching. Once you follow that basic rule, the rest of the work becomes a matter of careful finishing rather than guesswork.
For homeowners willing to go step by step, patching holes in walls is one of the most useful maintenance skills to learn. It saves money, improves the look of the room, and gives you a better understanding of how drywall actually works. Done properly, the repair should not just cover the damage for now. It should stay solid, paint cleanly, and disappear into the wall for the long run.


No Comment! Be the first one.