


How to Conduct a Wiring Inspection in Your Home: A Practical Safety Guide for Homeowners
Most homeowners do not need to become electricians, but they do need to know how to notice when something is wrong. A wiring inspection at the homeowner level is not about taking apart your electrical system or making repairs. It is about doing a careful, visual check of the parts you can safely see so you can catch warning signs early and get qualified help when needed.
Table Of Content
- What a Home Wiring Inspection Really Means
- Why Regular Wiring Checks Matter in Any Home
- Tools You Can Use Safely
- Safety First Before You Start
- Start With the Most Obvious Warning Signs
- How to Inspect Outlets and Switches
- What GFCI Protection Does
- Check Cords, Plugs, and Portable Equipment
- Inspect Kitchens, Bathrooms, Laundry Areas, and Other Damp Spaces
- Look at Accessible Wiring Runs in Basements, Utility Rooms, and Attics
- What You Can Observe at the Electrical Panel Without Opening It
- Warning Signs That Mean Call an Electrician Soon
- Common Misconceptions That Lead to Risk
- How to Document What You Find
- What Not to Do During a Home Wiring Inspection
- When to Schedule Professional Help Even If Nothing Looks Urgent
- A Simple Room by Room Inspection Routine
- Final Thoughts
This matters because electrical problems are not minor maintenance issues. They can lead to shock, equipment damage, and house fires. Statistics Canada has reported that about 1 in 10 residential fire deaths were associated with mechanical or electrical failures or malfunctions, and fire data across North America continue to show that fixed wiring, receptacles, switches, and related electrical distribution equipment are a significant source of home fires.
The good news is that many electrical problems leave clues before they become emergencies. A warm outlet, a buzzing switch, a breaker that trips often, or a faint burning smell can all point to trouble. If you know what to look for, you can make your home safer and avoid the common mistake of assuming that if something still works, it must still be safe.
This guide will walk you through a practical home wiring inspection step by step. It will explain what tools help, what areas to check, what warning signs deserve attention, and what you should never do as a homeowner. The goal is simple: improve awareness, reduce risk, and help you decide when a licensed electrician should take over.
Important: A homeowner wiring inspection should be visual and non invasive. Do not open energized equipment, touch exposed conductors, remove panel covers, or attempt repairs unless you are trained and licensed to do that work.
What a Home Wiring Inspection Really Means
When people hear the word inspection, they often picture someone opening the main panel, testing circuits, and diagnosing every hidden defect in the house. That is not what a homeowner inspection should be. For most homeowners, a wiring inspection means checking the visible parts of the electrical system and looking for obvious signs of wear, damage, overheating, moisture exposure, or unsafe use.
This approach lines up with how many home inspections are handled in Canada. They are generally non invasive and visual. Visible electrical items such as junction boxes, distribution panels, fixtures, receptacles, and accessible wiring may be assessed, but anything unsafe, concealed, or beyond ordinary access should be evaluated by a licensed electrician.
That distinction is important because electrical systems can be dangerous even when they look straightforward. You might be able to spot symptoms, but you cannot confirm grounding, bonding, arc faults, hidden damage, or internal connection problems without the right training and equipment. Your job is to observe carefully, document what you find, and escalate quickly when a warning sign appears.
A practical wiring inspection also helps separate wiring problems from product misuse. Sometimes the issue is not inside the wall at all. It may be a damaged lamp cord, an overloaded power bar, an uncertified charger, or an extension cord being used as permanent wiring. Those are still safety hazards, and they deserve just as much attention.
Why Regular Wiring Checks Matter in Any Home
Many people assume electrical inspections only matter in old houses with outdated wiring. Older homes do deserve extra attention, especially if there may be legacy systems such as knob and tube or aluminum branch wiring. Still, newer homes can have electrical problems too. Renovations, poor workmanship, heavy appliance loads, home office setups, moisture, and simple wear can all create hazards over time.
Modern life has increased the demand on household electrical systems. It is common now for one room to support computers, monitors, chargers, heaters, entertainment equipment, and smart devices all at once. Kitchens and laundry rooms often carry even heavier loads. If circuits are overloaded or connections loosen over time, the warning signs may show up as nuisance tripping, flickering lights, or warm receptacles long before anyone sees obvious failure.
Preventive inspections are especially useful after changes in the house. If you finished a basement, added appliances, installed a space heater for winter, upgraded workshop tools, or bought a hot tub, electric vehicle charger, or new air conditioning equipment, your home load profile changed. A visual inspection helps you catch signs that the system is struggling to keep up.
Public safety guidance also continues to stress the importance of protective devices like GFCIs and AFCIs. Ground fault circuit interrupters help reduce shock risk, especially near water. Arc fault circuit interrupters help detect dangerous arcing conditions linked to fires. Even if your house is not brand new, knowing where these protections should be present gives you a better sense of whether your home is keeping up with current safety expectations.
Tools You Can Use Safely
You do not need a large toolbox for a visual wiring inspection, but a few basic items help. Keep your approach simple and focused on observation. The best tools are ones that improve visibility, help you document findings, and allow limited basic checks without exposing you to energized parts.
- Flashlight: A bright flashlight helps you inspect outlets, fixtures, basement ceilings, attics, utility spaces, and behind furniture where signs of damage are easy to miss.
- Notebook or phone: Take photos and write down locations, dates, and symptoms. Electrical issues are easier to address when you can show a licensed electrician exactly what you noticed and where.
- Outlet tester: A simple plug in receptacle tester can help identify obvious wiring issues on accessible outlets, though it is not a complete diagnosis.
- Non contact voltage tester: This can help confirm that power appears present before use or absent where expected, but it should never be treated as permission to touch conductors or open devices.
- Infrared thermometer: Some homeowners use one to compare outlet or breaker face temperatures, but visible heat damage and symptoms are more important than chasing numbers without training.
Do not bring screwdrivers into this process unless you are simply tightening a loose lamp plug cover or doing a task specifically allowed by product instructions with power disconnected. A homeowner inspection is not the time to start removing receptacles, opening junction boxes, or taking covers off service equipment. The point is to stay on the safe side of the line.
Safety First Before You Start
Before you inspect anything, reduce the electrical load in the area you are checking. Turn off lights and unplug portable appliances where practical. That does not make the house dead, but it lowers activity and helps you notice irregularities more clearly. It also reduces the chance that a damaged cord or overheating plug keeps working while you inspect nearby.
Wear dry shoes and avoid inspecting in wet conditions. If an area has active water leaks, damp floors, or suspected electrical contact with moisture, stop there and call a professional. Water and electricity are a dangerous combination, and there is no homeowner level benefit in pressing ahead.
Never touch exposed metal parts if you suspect damage. Never insert anything into an outlet. Never remove the dead front cover from the electrical panel. Never bypass a breaker, replace a breaker with a larger one to stop tripping, or assume a flicker is harmless because it goes away on its own. Those are common mistakes that can hide a serious fault.
If at any point you smell something burning, hear arcing, see sparks, or notice smoke, stop the inspection immediately. If it is safe to do so, shut off the affected circuit at the breaker without touching damaged equipment. Then contact a licensed electrician right away. If there is fire or immediate danger, leave the house and call emergency services.
Start With the Most Obvious Warning Signs
The easiest and most valuable part of a wiring inspection is looking for symptoms that show up in daily life. These are the clues people often ignore because the house still has power. In practice, they are exactly the signs that should get your attention.
NFPA guidance specifically flags frequent breaker trips, warm or discolored outlets, sparks, flickering lights, and burning smells as warning signs that deserve evaluation by a qualified electrician. Buzzing at switches or receptacles also deserves respect. Electricity should generally be quiet. If you hear noise from wiring devices under normal use, treat it as a problem until proven otherwise.
Go room by room and ask simple questions. Do lights dim when appliances start? Has one outlet become loose and stopped gripping plugs firmly? Is a switch plate warmer than nearby plates? Are there scorch marks around plugs? Has anyone in the house noticed a rubbery or fishy smell near a wall, outlet, or appliance? These small clues often point to loose connections, overloads, or deteriorating components.
How to Inspect Outlets and Switches
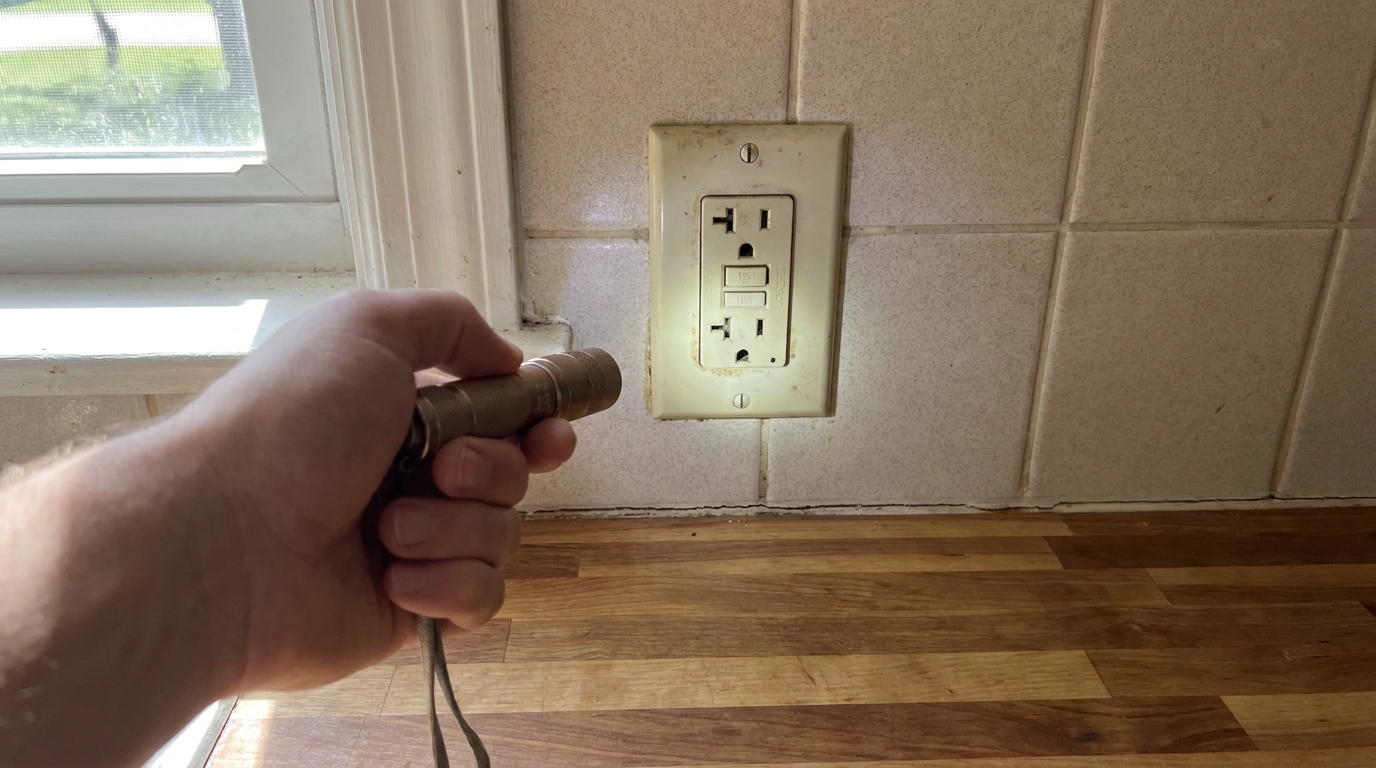
Outlets and switches are where many problems become visible first because they are the contact points people use every day. Start by looking at the faceplates and surrounding wall surfaces. You are checking for cracks, missing cover plates, paint buildup inside the slots, discoloration, melting, staining, or signs that the device has shifted or loosened in the wall box.
Then pay attention to how the outlet behaves in use. A plug should fit firmly. If it falls out easily or hangs loosely, the internal contacts may be worn. That can lead to arcing and heat buildup. If a receptacle feels warm after normal use, especially when it is not serving a heavy load, that is a warning sign worth documenting.
Switches should operate cleanly and predictably. A switch that buzzes, crackles, feels hot, or works intermittently may have a loose or failing connection. If lights flicker when you touch the switch or if the plate around it is discolored, stop using it if possible and arrange for repair by a licensed electrician.
Also notice location. Outlets near sinks, tubs, laundry equipment, unfinished basements, garages, and outdoor spaces should typically have GFCI protection. In many homes, that means either a GFCI receptacle is visible or the circuit is protected upstream. If you do not see GFCI protection in these areas, make a note and ask an electrician whether upgrades are needed.
What GFCI Protection Does
A GFCI compares the current flowing out and returning on a circuit. If it senses an imbalance that could indicate electricity is going through a person to ground, it trips quickly to reduce shock risk. That is why these devices are strongly recommended in kitchens, bathrooms, laundry rooms, basements, garages, and outdoor areas. They are one of the most practical life safety upgrades available in a home.
If you have GFCI receptacles with test and reset buttons, inspect their condition visually. If you know how to use the built in test feature according to the manufacturer instructions, you can do that as part of routine maintenance. If the device does not reset or does not trip when tested, it needs professional attention. If you are unsure, leave testing to an electrician.
Check Cords, Plugs, and Portable Equipment
Some of the most common household electrical risks are not hidden in walls at all. They are right in plain view on floors, counters, and behind furniture. Portable cords and plugs live a hard life. They get bent, pinched, walked on, pulled from outlets by the cord, and overloaded by devices that draw more power than the setup can safely handle.
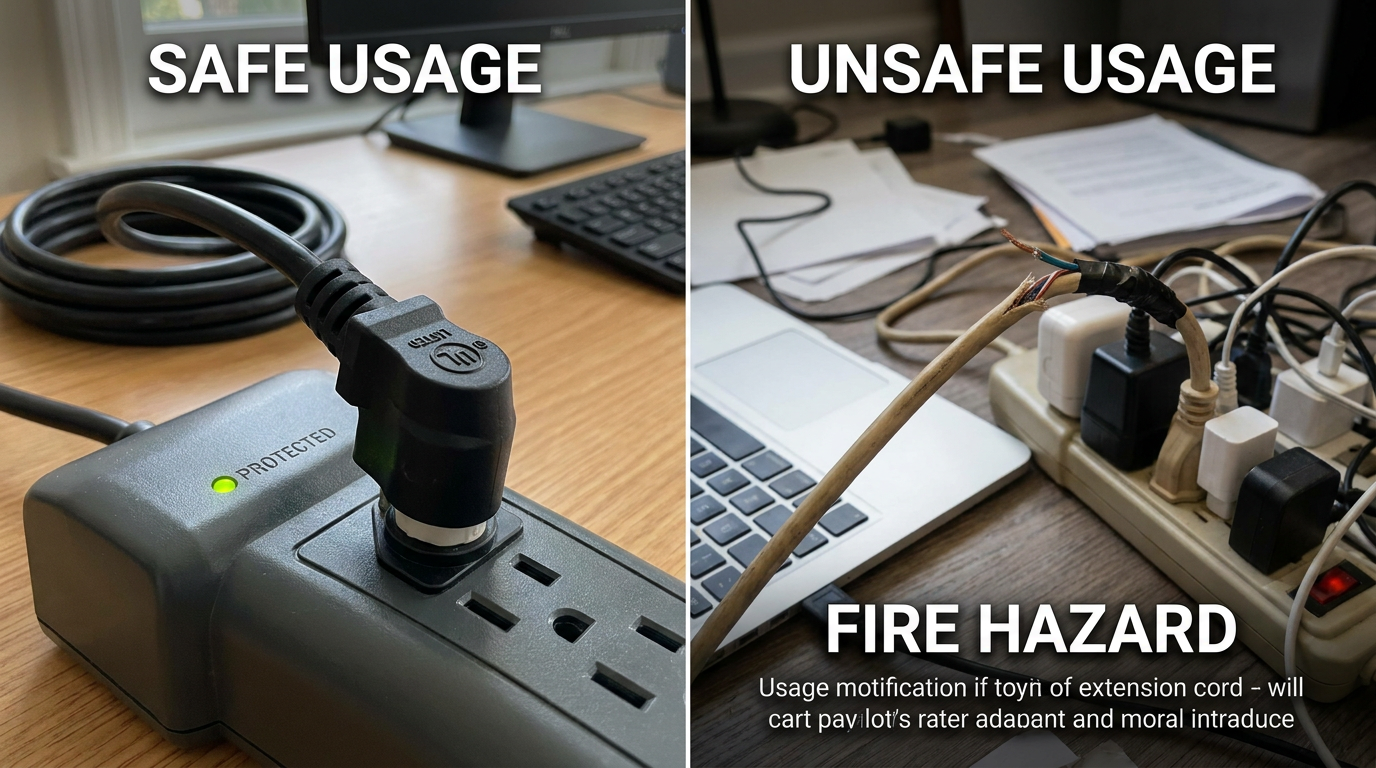
Inspect lamp cords, small appliance cords, power bars, chargers, and extension cords for cracked insulation, repaired sections wrapped in tape, exposed wire, bent blades, scorch marks, and loose plug ends. If a cord is frayed or the plug is damaged, stop using it. Replacement is safer than trying to patch it together.
In Canada, electrical products that plug into outlets should carry a recognized certification mark such as CSA, cUL, or cETL. This matters because uncertified products may not meet Canadian safety standards and can create shock or fire risks. It is especially important with online purchases, discount accessories, and chargers that look generic or unusually cheap.
Extension cords deserve special attention. They are meant for temporary use, not as a substitute for fixed wiring. They should never run under carpets, through doorways, behind baseboards, or anywhere heat can build up unnoticed. If you rely on extension cords all the time because you do not have enough outlets where you need them, that is not just an inconvenience. It is a sign that your home may need additional permanent receptacles installed by an electrician.
Inspect Kitchens, Bathrooms, Laundry Areas, and Other Damp Spaces
Any place where electricity and moisture can meet deserves closer attention. Kitchens, bathrooms, laundry rooms, basements, garages, and outdoor receptacles are all higher risk areas because water increases shock danger. These are also places where heavy use, steam, humidity, and appliance loads can put extra stress on the electrical system.
In kitchens, inspect outlets above countertops and near sinks. Look for GFCI protection, damaged faceplates, discoloration, and signs that cords are stretched awkwardly because there are not enough receptacles for regular use. Pay attention to appliances that generate heat, such as kettles, toaster ovens, microwaves, and coffee makers. If using them causes lights to dim or breakers to trip, that deserves follow up.
In bathrooms, look for secure receptacles, proper cover plates, and GFCI protection near sinks and vanities. Check for curling irons, hair dryers, or heated styling tools that may have scorched counters or overloaded power bars. In laundry rooms, inspect receptacles serving washers and dryers, especially if there is any sign of moisture, corrosion, or lint buildup around equipment.
Basements and garages often reveal wiring problems because more of the system is visible there. These spaces may include utility lighting, freezers, workshops, and older wiring runs. Outdoor outlets should have weather appropriate covers and should not show cracking, rust, or moisture intrusion. If a receptacle looks weathered or loose, have it checked rather than hoping it is still fine.
Look at Accessible Wiring Runs in Basements, Utility Rooms, and Attics
Homeowners can often inspect visible wiring in unfinished basements, crawl-access utility spaces, garages, and some attics without opening anything. What you are looking for is not technical perfection. It is obvious damage, poor support, unsafe exposure, and signs of overheating or moisture contact.
Check whether cable jackets appear intact and whether wires are hanging loosely where they could be snagged or damaged. Look for unsupported splices, open junction boxes, missing covers, rodent damage, and cables crushed by storage or framing changes. If you see wire nuts outside a box or exposed conductors anywhere, stop there and call an electrician. All splices should be protected inside approved enclosures.
Also check for signs that renovations were done carelessly. Homeowners sometimes discover wires draped over ductwork, stapled too tightly, notched unsafely through framing, or left exposed where a finished surface was removed. If something looks improvised, undocumented, or inconsistent with the rest of the installation, it is worth professional review.
In attics, be cautious with footing and insulation. Do not crawl over ceiling areas you cannot safely access. A quick visual scan from a secure location is enough. Look for overheated light fixtures, damaged cable insulation, and any wiring that appears buried in a way that traps heat around non insulation rated fixtures. If you are not comfortable accessing the area safely, skip it.
What You Can Observe at the Electrical Panel Without Opening It
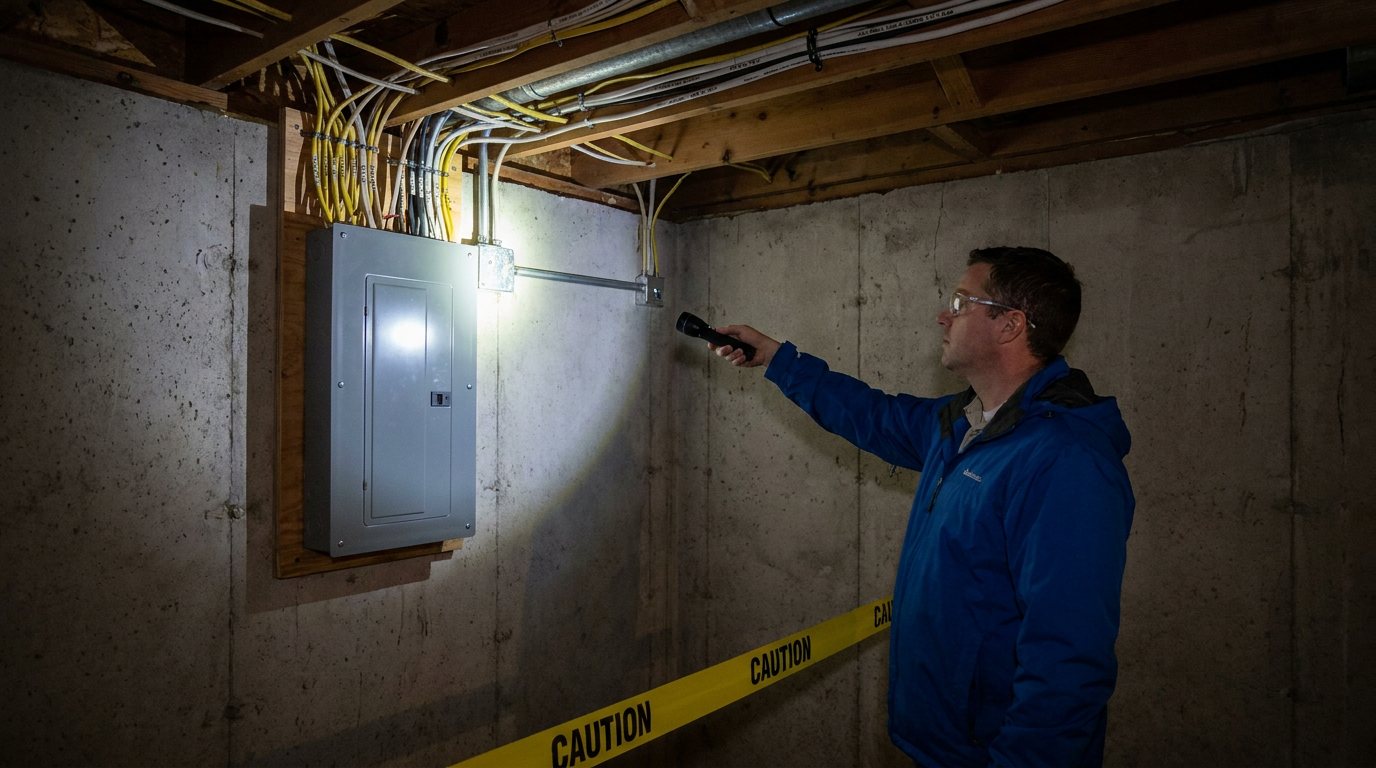
The electrical panel is the control center of your home, but it is not the place for casual DIY exploration. Homeowners should not remove the panel cover or reach inside. That said, there are a few useful observations you can make from the outside.
First, look for the basics. Is the area in front of the panel clear and accessible? Are the breakers labeled in a way that makes sense? A panel that is blocked by storage, hidden behind fixed shelving, or completely unlabeled creates problems during emergencies and routine maintenance alike.
Second, note any signs of moisture, rust staining, scorch marks, unusual heat on the exterior, or buzzing sounds. A panel should not smell hot or make persistent crackling noise. If it does, contact an electrician promptly. Also pay attention to breakers that trip repeatedly. Frequent tripping is not a reason to install a bigger breaker. It is a sign that the circuit may be overloaded or faulty.
If you know which breaker controls a troubled area, note it in your inspection record. Do not keep resetting a breaker that trips again and again. A one time trip may happen for an obvious reason, but repeated trips mean the circuit needs evaluation. Protective devices are there to interrupt dangerous conditions, not to be worked around.
Warning Signs That Mean Call an Electrician Soon
Some issues are worth monitoring, but others should move straight to the top of your list. If you find any of the following, arrange for a licensed electrician to assess the problem. These signs may indicate overheating, loose connections, arcing, inadequate protection, or hidden damage inside the system.
- Frequent breaker trips or blown fuses
- Warm, hot, discolored, or scorched outlets and switches
- Sparks when plugging in or unplugging devices
- Buzzing, crackling, or humming from outlets, switches, fixtures, or the panel
- Burning, fishy, or rubber like smells near electrical equipment
- Flickering lights not caused by a loose bulb
- Loose receptacles that do not hold plugs firmly
- Missing junction box covers or exposed splices
- Visible wire damage from pests, moisture, or mechanical impact
- No GFCI protection in high risk wet areas
If several of these symptoms are happening at once, treat the situation with more urgency. Electrical failures often build from a combination of age, heat, loose connections, and overloading. Catching the problem early can prevent both property damage and injury.
Common Misconceptions That Lead to Risk
One of the most persistent myths is that if the lights are on and the outlet works, everything must be fine. That is not how electrical failures develop. A receptacle can still deliver power while running hot, arcing internally, or loosening in the box. Function does not guarantee safety.
Another common misconception is that breaker tripping is just an annoyance. People get tired of it and start looking for workarounds. They replace a breaker with a larger one, stop using the safety device properly, or move loads around without understanding what the circuit can handle. That approach can turn a manageable warning into a serious fire risk.
Some homeowners also assume extension cords are an acceptable long term solution for lack of outlets. They are not. Temporary cords are more vulnerable to damage, overheating, and misuse than fixed wiring. If a room depends on cords every day, the safer answer is to install permanent receptacles where needed.
Finally, many people think only old homes need inspection. Age matters, but workmanship, renovations, moisture, appliances, and daily wear matter too. Newer homes can have poor device installation, overloaded circuits, damaged cords, missing protection, or products that should never have been used in the first place.
How to Document What You Find
Good documentation makes the inspection more useful. Start by walking through the house in a consistent order, such as floor by floor or room by room. Take clear photos of any issue from both close and wider angles. Write down the exact location, what you noticed, when it happens, and whether the problem seems tied to a particular appliance or switch.
For example, do not just write “kitchen outlet bad.” Write “north wall kitchen counter outlet to the left of sink feels warm after coffee maker and toaster are used together, no visible scorch marks, GFCI present.” Specific notes help an electrician narrow down likely causes and reduce repeat visits.
It also helps to track breaker trips over time. Record the circuit if you know it, what was running when it tripped, and whether the trip was immediate or delayed. Patterns matter. A circuit that only trips when a heater is plugged in may suggest overload. A circuit that trips randomly with little load may point to a fault that needs closer testing.
What Not to Do During a Home Wiring Inspection
There are a few hard limits homeowners should respect. These are not overcautious rules. They are what keep a basic inspection from turning into an electrical injury. If your plan crosses into any of these areas, stop and bring in a professional.
- Do not remove the cover from an energized electrical panel.
- Do not pull outlets or switches out of wall boxes to look behind them.
- Do not touch exposed conductors or terminals.
- Do not test live parts with improvised tools.
- Do not replace breakers with larger ones to stop nuisance trips.
- Do not cover warning signs with cosmetic fixes like paint, tape, or new faceplates.
- Do not assume old wiring is safe because it has worked for years.
- Do not leave damaged cords, plugs, or receptacles in service while you wait to deal with them.
The line is simple. Observation is for homeowners. Diagnosis and repair are for qualified electricians. Respecting that line is one of the best decisions you can make for home safety.
When to Schedule Professional Help Even If Nothing Looks Urgent
Not every call to an electrician needs to happen during a crisis. Sometimes the smart move is to schedule an evaluation before visible damage appears. If your home has older wiring methods, lacks enough outlets for modern use, has no obvious GFCI protection in wet areas, or has had several unpermitted looking renovations over the years, a professional assessment is worthwhile.
You should also consider a professional electrical review after major renovations, after buying an older home, after adding large appliances, or if you are planning a home office, workshop, or entertainment setup that increases load. These are practical checkpoints, not signs of panic. A small amount of prevention often costs less than emergency repair after a failure.
Homes with persistent minor symptoms deserve attention too. If lights dim a little too often, breakers trip occasionally without clear reason, or one room always seems to need power bars and extension cords, the system may be telling you it needs upgrading. An electrician can test circuits, assess panel capacity, verify grounding and bonding, and recommend code appropriate improvements.
A Simple Room by Room Inspection Routine
If you want a repeatable system, use this quick routine once or twice a year. It works well in spring and fall, or any time after changing appliances or finishing renovation work. Keep it visual, stay consistent, and write things down.
- Start at the front entry and move room by room in one direction.
- Check each outlet and switch face for cracks, looseness, heat, discoloration, and secure cover plates.
- Notice whether plugs fit snugly and whether any device buzzes, flickers, or smells hot.
- Inspect cords, power bars, and extension cords for damage or overuse.
- Pay extra attention to kitchens, bathrooms, laundry areas, basements, garages, and outdoor receptacles.
- Scan accessible wiring in unfinished spaces for open boxes, damaged cable, rodent activity, or poor support.
- Look at the outside of the electrical panel for labeling, clear access, noise, heat, or moisture signs.
- Document anything unusual and decide what needs immediate removal from use and what needs an electrician.
This routine does not take long once you get used to it. More importantly, it trains you to see your electrical system as a working part of the house that needs observation just like roofing, plumbing, or heating equipment. Most problems are easier to deal with when they are caught early.
Final Thoughts
A home wiring inspection is not about doing an electrician’s job. It is about becoming a more aware homeowner. By checking visible outlets, switches, cords, accessible wiring runs, and high risk damp areas, you can catch warning signs before they become bigger problems. Warm receptacles, repeated breaker trips, damaged cords, missing covers, sparks, buzzing, and burning smells all deserve serious attention.
The practical rule is this: inspect what you can see, document what you notice, and do not push past the limits of safe homeowner work. Electrical safety depends as much on early awareness as it does on technical repair. A careful visual check today can prevent a costly and dangerous failure later.
If anything during your inspection feels questionable, trust that instinct and bring in a licensed electrician. Good workmanship matters most where you cannot see it, and that is exactly why visible warning signs should never be ignored. A safe electrical system is not just about keeping the lights on. It is about protecting the people who live behind those walls.



No Comment! Be the first one.