


Your Ultimate Guide to Installing Exterior Lighting Wisely
Exterior lighting does a lot of jobs at once. It helps people walk safely, makes entry doors easier to use, improves visibility around steps and driveways, supports security, and gives the house a finished look after dark. When it is done well, it feels natural and useful. When it is done poorly, it creates glare, wastes energy, bothers the neighbours, and often fails early because the wrong materials or methods were used.
Table Of Content
- Start With Purpose Before You Buy Anything
- Know the Safety and Code Side Before Installation
- Choose the Right Fixture Type for the Job
- Damp Location vs Wet Location Ratings
- Plan Placement Carefully for Better Results
- Think About Light Trespass and Neighbour Comfort
- Pick Controls That Save Energy and Improve Convenience
- Understand the Difference Between Replacing a Fixture and Adding New Wiring
- Step by Step: Replacing an Existing Exterior Wall Fixture
- Step by Step: Planning and Installing Low Voltage Landscape Lighting
- Weatherproofing Details Matter More Than Most People Think
- How LED Performance Should Guide Your Purchase
- Common Mistakes to Avoid
- When It Is Time to Call a Licensed Electrician
- Simple Maintenance That Keeps Exterior Lights Working Longer
- Final Thoughts on Installing Exterior Lighting Wisely
- Quick Reference Checklist for Homeowners
The practical part of exterior lighting is what matters most. You need the right fixture for the location, the right amount of light for the job, and an installation method that handles moisture, temperature changes, and real outdoor wear. You also need to think about local electrical rules before opening a wall, running cable, or adding a new hardwired fixture. In Canada, exterior electrical work must follow the electrical code adopted in your province or territory, and that can affect permits, inspections, trenching rules, and what kind of protection is required.
This guide is built for homeowners who want straight answers. It covers planning, fixture choice, placement, controls, basic installation logic, low voltage options, wiring considerations, and the most common mistakes. If you are replacing an existing fixture on a sound box, the job may be manageable for a careful homeowner. If you are adding new circuits, burying cable, moving electrical boxes, or working where code compliance is unclear, it is wise to bring in a qualified electrician. Good exterior lighting is part design and part trade work, and both sides matter.
Practical rule: The best outdoor lighting is not the brightest system you can buy. It is the system that puts the right light in the right place, only when needed, with safe wiring and durable weatherproof details.
Start With Purpose Before You Buy Anything
The first mistake many homeowners make is shopping by appearance alone. A fixture can look perfect on a shelf and still be wrong for the actual job. Start by identifying what each area needs to do. Your front door may need clear face level visibility for unlocking the door and greeting visitors. A side yard may need motion activated utility light for garbage bins or gate access. A backyard patio may need softer ambient light so people can sit comfortably without feeling like they are under a floodlight.
It helps to divide the property into lighting zones. Think in terms of the entry, walkway, driveway, steps, deck, patio, rear door, side passage, and any garden or feature areas. Some zones are safety driven. Some are security driven. Some are there for comfort and appearance. Once you know the purpose of each area, it becomes much easier to choose fixture type, light output, beam spread, and controls.
Natural Resources Canada has long promoted practical lighting controls such as timers, photocells, and motion sensors to cut unnecessary energy use. That advice is especially useful outdoors, where lights are often left on much longer than needed. Instead of planning for all night full brightness, think in layers. You may want a modest dusk to dawn light at the front entry, motion activated light at the side yard, and low level pathway lighting on a timer for the hours when the space is actually used.
Good planning also helps prevent overlighting. Many people assume more light always means better security, but that is not really how visibility works. Too much brightness can create harsh contrast and glare, making it harder to see beyond the lit area. A more balanced plan with shielded fixtures and sensible spacing usually performs better and looks better too.

Know the Safety and Code Side Before Installation
Exterior electrical work is not just another decorating project. Moisture, snow, freeze thaw cycles, and exposed surfaces make outdoor wiring less forgiving than indoor work. In Canada, the governing baseline is the Canadian Electrical Code as adopted or amended by the province or territory. Ontario, for example, uses the Ontario Electrical Safety Code, which adopts CSA C22.1:24 with provincial amendments. The key point for homeowners is simple: the local rules control the job, not generic internet advice.
Before you start any hardwired project, confirm whether a permit or inspection is required in your area. This becomes especially important when the work involves a new circuit, moving or adding electrical boxes, trenching to detached structures or landscape lights, installing receptacles, or changing the method of wiring on exterior walls. Some work may look small from the outside but still fall under rules that require inspection.
You should also understand the limits of DIY electrical work where you live. Even if homeowner electrical work is allowed, it must still meet code. If you are unsure about load calculations, grounding and bonding, GFCI protection where applicable, weatherproof boxes, or approved cable methods, that is a sign to stop and get trade help. Exterior lighting is not the place to improvise with connectors, extension cords, or makeshift enclosures.
A common misconception is that any product with a familiar label is automatically fine for Canadian installation. That is not always true. The fixture, device, and accessories need the appropriate certification for use in Canada, and the installation must match the local code requirements. Always read the product label, manufacturer instructions, and certification information before buying. It is much easier to choose the right product up front than to replace a noncompliant fixture after the wall is open.
Choose the Right Fixture Type for the Job
Exterior lighting works best when the fixture type matches the task. Wall lanterns and sconces are common at entry doors because they bring light close to locks, handles, and faces. Floodlights are useful for broad utility coverage at driveways, rear yards, and work areas, but they need careful aiming and shielding so they do not blast light into windows. Step lights, bollards, and low path lights handle circulation areas more comfortably than overhead floods.
Landscape systems often use low voltage fixtures, which can be a practical option for homeowners because they are flexible and easier to expand. These systems usually rely on a transformer that reduces standard household voltage to 12 volts for path lights, spotlights, deck lights, and garden accents. Low voltage does not eliminate the need for good installation practice, but it can simplify layout and make future adjustments easier than reworking hardwired line voltage fixtures.
When comparing products, do not focus only on wattage or vague claims about brightness. Modern LED fixtures vary widely in actual performance. Look at lumens for light output, beam spread for how the light is distributed, and color temperature for visual comfort. In many residential settings, warmer outdoor light creates a more comfortable and less harsh result than very cool white light. The right choice depends on the area, but many homeowners find moderate, warm to neutral light easier on the eyes.
Shielding matters too. Dark sky guidance consistently points to the value of directing light downward and minimizing glare, light trespass, and upward spill. A fixture that hides the bright light source from normal view often performs better than a bare bulb style fitting. That is true for pathways, entry doors, and backyard seating areas. People should see the space, not stare into the lamp.
Damp Location vs Wet Location Ratings
This is one detail that causes a lot of problems. Outdoor fixtures are not all rated the same. A damp location fixture may be suitable for a covered porch where it is protected from direct weather exposure. A wet location fixture is designed for areas where rain, snow, or water contact is more direct. Put a damp rated fixture in a wet location and you are asking for corrosion, water intrusion, and early failure.
Some products also include an IP rating that indicates resistance to dust and moisture. That can be useful, especially for exposed landscape fixtures or locations near spray and runoff. Still, the rating only helps if the whole installation is done properly. A well rated fixture installed on a poor box with a bad gasket or loose connector can still fail. The weatherproofing is only as strong as the weakest point in the assembly.
Plan Placement Carefully for Better Results
Placement makes a bigger difference than most homeowners expect. If your front door lights are mounted too high, they may throw light over people instead of onto the lockset and entry landing. If path lights are packed too close together, the yard can end up looking like a runway. If a floodlight is installed without thinking about neighbouring windows, you can create nuisance glare and light trespass with one wrong angle.
A practical approach is to start with the most important tasks. Light the front step, door hardware, changes in elevation, and major walking paths first. Then look at utility areas such as side passages, gates, and storage zones. Accent lighting should come after the safety and function layers are working. This order helps keep the system efficient and prevents overspending on decorative effects while basic circulation areas remain underlit.
Wall fixtures at entrances generally work best when they are mounted at a height that supports both visibility and proportion. Exact dimensions vary with architecture, but the goal is to light faces and door hardware without creating hard shadows or direct glare. Path lights should overlap gently rather than creating isolated bright circles with dark gaps between them. Step lighting should define the edge of each rise clearly, especially where stairs turn or landings change direction.
Motion sensor coverage also deserves planning. The sensor should watch the approach zone you care about, not a busy street or a tree branch that moves in the wind. Poor placement leads to nuisance activation, which shortens fixture life, annoys occupants, and defeats the purpose of energy saving controls. Test the detection path before final tightening whenever possible.
Think About Light Trespass and Neighbour Comfort
Exterior lighting should serve your property without becoming someone else’s problem. Unshielded floodlights and oversized wall fixtures can throw light across lot lines, into upper bedroom windows, or straight into the eyes of someone walking by. That is not good design and it is not necessary. A properly shielded fixture with lower output and better aiming usually improves visibility while reducing spill.
Dark sky friendly practice is not just for rural areas or observatories. It makes everyday residential lighting better. When glare is controlled, people can see more comfortably. When light is directed only where needed, the system feels calmer and more useful. In practical terms, that means choosing fixtures that aim down or toward the task area, avoiding unnecessary uplighting, and using the minimum useful brightness.
Pick Controls That Save Energy and Improve Convenience
One of the smartest upgrades in exterior lighting is better control. Outdoor fixtures tend to burn for long periods, often with nobody around to use the light. Controls solve that. A photocell can switch lights on at dusk and off at dawn. A timer can shut down decorative or pathway lighting after the evening activity is over. A motion sensor can activate utility lighting only when someone approaches.
Motion activated lighting is often treated as a pure security feature, but that misses half its value. In real homes, it is one of the easiest ways to reduce energy use while keeping convenience high. Side doors, trash areas, sheds, and side yards are classic examples. These are places where full time lighting is often unnecessary, but instant light on approach is genuinely useful.
Smart controls can add another layer, especially if you want schedules, grouping, and remote adjustments. The practical caution is compatibility. Make sure the fixture, lamp type, driver, switch, and control system are meant to work together. Not every LED fixture behaves properly with every dimmer, smart switch, or sensor. Read the specifications before purchase rather than troubleshooting flicker and nuisance behavior later.
Photocell placement also matters. If the sensor sees another fixture’s light, porch reflections, or even nearby street lighting, it may cycle incorrectly. Install it where it can read natural ambient light without being fooled by the very system it controls. This is a small detail, but it often separates a reliable installation from one that behaves unpredictably.
Understand the Difference Between Replacing a Fixture and Adding New Wiring
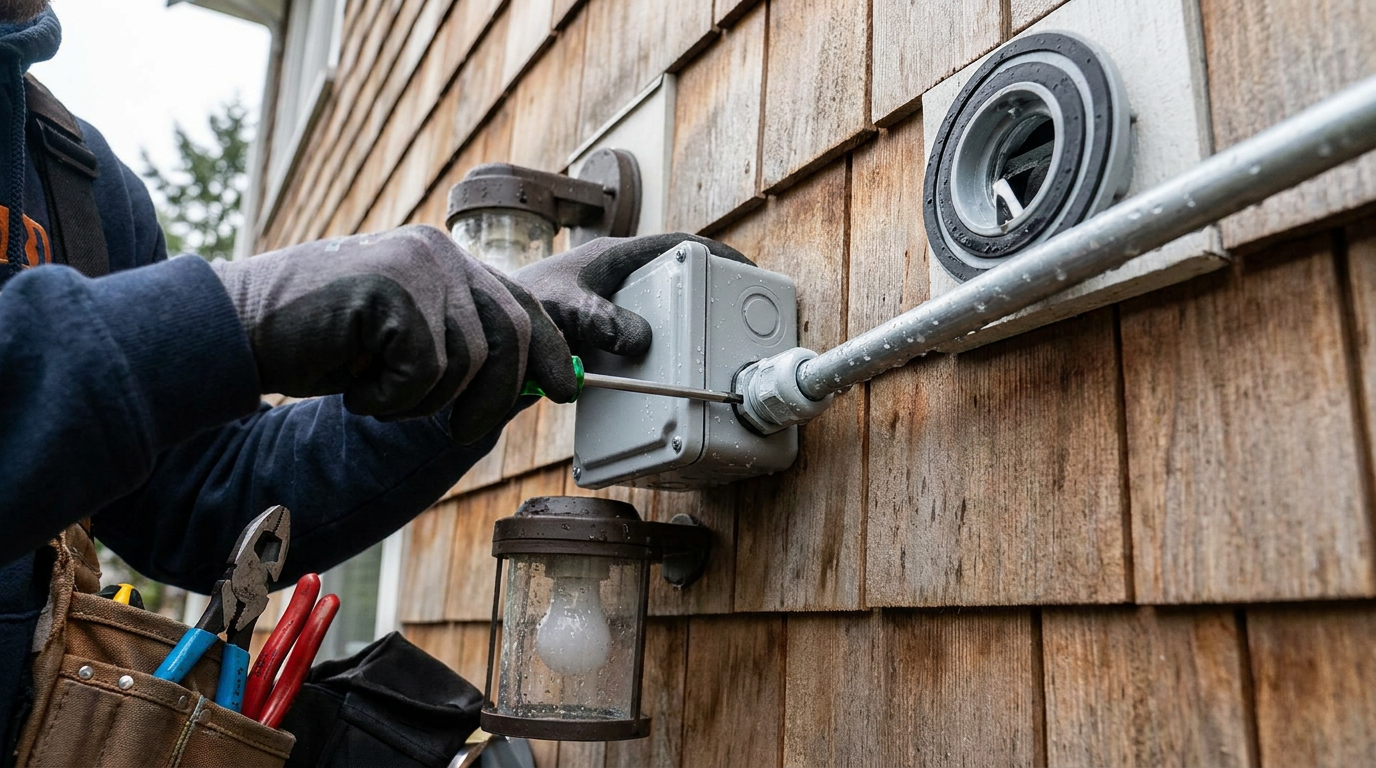
There is a big practical difference between replacing an existing exterior light and creating a new one. Replacing an old fixture on an existing, sound, code compliant box can be straightforward if power is shut off properly and the mounting surface is in good shape. Even then, you still need to confirm the box is secure, the conductors are in good condition, the fixture rating matches the location, and all gaskets and seals are installed as instructed.
Adding a new fixture is a different level of work. New cable routing may require drilling, fishing conductors, opening finishes, adding a switch leg, installing a new box, and verifying circuit capacity. Outside, you also need to think about exposure, support, approved wiring methods, weatherproof covers, and whether the location requires additional protection. That is where many homeowner projects move out of casual DIY territory and into electrician work.
If the installation involves underground runs, detached garages, gate posts, or landscape lighting spread across the yard, planning gets more technical. Burial depth, cable type, conduit requirements, physical protection, and transformer location all matter. These are not details to guess at. Local code and manufacturer instructions should drive the method.
Step by Step: Replacing an Existing Exterior Wall Fixture
If you are dealing with a simple replacement on an existing box and local rules allow homeowner work, the safest path is to treat the job methodically. The first step is to shut off the correct breaker and verify that power is actually off using an appropriate tester. Never trust a label on the panel without checking. Exterior circuits are sometimes tied to unexpected switches, garage feeds, or mixed loads that make assumptions dangerous.
Once the old fixture is removed, inspect the electrical box and surrounding wall surface carefully. The box should be solidly mounted, suitable for the fixture weight, and in condition to support a weatherproof installation. Look for signs of rust, loose fasteners, cracked siding blocks, damaged conductors, missing cable clamps, or water staining. If the box is not right, stop there and fix the box issue first. A nice new fixture cannot compensate for a bad mounting point.
Before making any connection, read the manufacturer’s instructions for the new fixture all the way through. Confirm that it is approved for the location, that the supplied gasket and mounting parts are correct for your wall type, and that the conductors are long enough and in good condition. Dry fit the mounting hardware if needed. Exterior fixtures often fail because someone rushed the mechanical side, pinched the gasket, or left a gap where water can enter behind the fixture base.
Make the electrical connections with approved connectors, keeping splices neat and protected inside the box. Support the fixture as intended by the manufacturer, and make sure no insulation, gasket edge, or conductor gets trapped incorrectly during final tightening. Once mounted, any required caulking should follow the fixture instructions and local best practice. In many cases, the top and sides are sealed while the bottom is left open for drainage, but do not assume. Follow the fixture guidance so trapped water does not become the next problem.
After restoring power, test the fixture, switch, sensor, and aim. Check for stable operation, proper activation, and clean fit against the wall. If the fixture includes adjustable heads, set them so the light lands where it is useful rather than spilling outward. Final aiming is part of the installation, not an optional extra.
Step by Step: Planning and Installing Low Voltage Landscape Lighting
Low voltage lighting is often the most practical way to improve pathways, planting beds, patios, and yard features. The system starts with a transformer, usually mounted near the house at a suitable power source. From there, low voltage cable runs to the fixtures. Because the fixtures are easier to relocate than hardwired line voltage lights, this approach works well for homeowners who want flexibility and a more gradual project.
Begin by laying out the lighting plan on paper and then roughly on site. Identify the fixtures you need, their wattage or power draw, cable route, and the total run length. Transformer sizing matters. If the connected load is too close to the transformer limit, you leave no room for expansion and may create poor performance. A practical rule is to give yourself margin rather than buying the smallest transformer that barely covers the present load.
Mock the fixture placement before trenching or burying any cable. Place path lights where they guide movement, not at rigid equal intervals that ignore the actual walkway shape. Use spotlights to graze textures or highlight trees sparingly. Good landscape lighting is subtle. You should be able to walk safely and enjoy the yard without seeing every fixture as a bright point source.
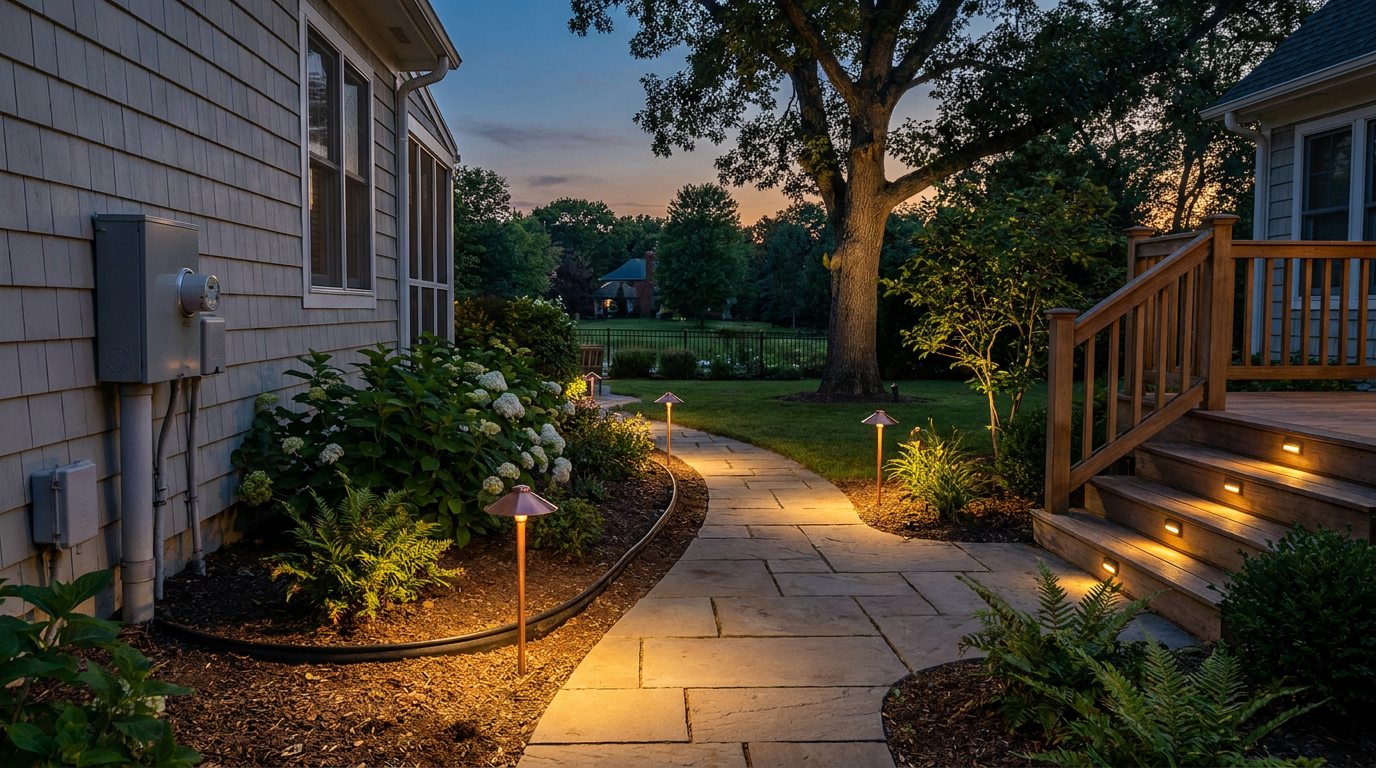
When you are satisfied with the layout, install the transformer according to the manufacturer’s instructions and local electrical requirements. Route the cable neatly and protect it as required, especially where it emerges from grade or passes near structures, edging, or digging zones. Even low voltage cable needs thoughtful placement. Sloppy routing creates maintenance headaches, accidental cuts during gardening, and connection failures over time.
Make connections with the approved methods for the system rather than improvised splices. Cheap or poorly sealed connectors are one of the most common failure points in landscape lighting. Moisture intrusion, corrosion, and voltage drop can turn a neat looking installation into a dim, unreliable mess. Once the system is operating, walk the property after dark and adjust fixture positions. Small shifts in angle and spacing can make a huge difference in comfort and appearance.
Weatherproofing Details Matter More Than Most People Think
Outdoor electrical work usually fails at joints and openings, not at the main body of the fixture. That means box covers, gaskets, seals, connectors, cable entries, and mounting surfaces deserve real attention. If water can get behind a fixture base, into an improperly fitted box, or through a loose connector, it eventually will. Freeze thaw cycling only makes the problem worse by opening small gaps and stressing weak materials.
Use weatherproof boxes and covers appropriate to the installation. Match the fixture base to a sound mounting block or flat surface where needed so the gasket can do its job. Replace brittle old foam pads instead of trying to reuse them. If the wall is uneven, address the mounting issue rather than overtightening the fixture and bending the backplate.
Corrosion resistance also matters. Exterior screws, mounting straps, and hardware should suit the environment. Coastal and heavy moisture areas are especially hard on metals, but even ordinary climates can damage poor quality hardware over time. Better materials cost more up front, but they usually save money and trouble later by reducing call backs, water damage, and early replacement.
How LED Performance Should Guide Your Purchase
LED is now the default choice for most exterior residential lighting, and for good reason. It offers long life, lower energy use, less frequent lamp replacement, and strong compatibility with controls. But LED products are not all equal. Homeowners should compare actual performance rather than relying on generic packaging claims.
Start with lumens, not wattage. Wattage tells you how much power the fixture uses, not how much useful light it delivers. Next, consider color temperature. Very cool light can look harsh outdoors and may increase apparent glare. Warmer light often feels more comfortable around entries, decks, and paths, though utility areas sometimes benefit from a slightly cooler neutral tone. Think about the mood and task, not just the spec sheet.
Because Canada formally retired ENERGY STAR certification for most new lighting products after December 31, 2024, homeowners should put more emphasis on certification, product build quality, optical design, and compatibility with controls. Look for clear information about lumen output, expected life, location rating, color quality, and control compatibility. A well designed LED fixture with a proper driver and good shielding will usually outperform a cheaper bright looking product that simply pushes more glare into the yard.
Common Mistakes to Avoid
Some exterior lighting mistakes show up immediately. Others take one winter or one rainy season to reveal themselves. Either way, the pattern is familiar. People choose indoor rated products for covered exterior locations that are actually more exposed than they realize. They buy oversized floodlights because brighter seems safer. They space path lights too tightly, creating visual clutter instead of calm guidance. Or they skip instructions and end up with a leaking fixture because the gasket was misaligned.
Another common problem is poor sensor setup. A motion light pointed toward passing traffic, moving shrubs, or heat sources will cycle unnecessarily and frustrate everyone. The same goes for photocells that read stray light and switch unpredictably. Exterior controls save energy only when they are installed and aimed properly.
Low voltage systems are often underplanned. Homeowners forget to calculate transformer capacity, ignore voltage drop on long runs, or make weak connections that corrode underground. Hardwired systems can suffer from a different problem: the assumption that replacing one old fixture means the existing box and wiring must be fine. That is not always true. Age, moisture, and past shortcuts leave plenty of outdoor boxes in poor condition.
One more misconception worth clearing up is the idea that security equals maximum brightness. In practice, harsh, unshielded light can make seeing harder by creating deep shadows and eye strain. Balanced, targeted, controlled lighting is more effective than simply adding more output.
When It Is Time to Call a Licensed Electrician
There is no shame in handing a job to a professional when the work moves beyond basic replacement. In fact, that is often the smartest money you can spend. Call a licensed electrician if you need a new exterior circuit, panel capacity review, trenching with line voltage wiring, detached structure feeds, GFCI related changes where required, box relocation, or any work where permit and inspection rules are not clear to you.
You should also get professional help if the existing wiring shows age, damage, overheating, aluminum branch circuit concerns, water intrusion, or signs of past amateur repairs. Outdoor electrical work has too many failure paths to leave questionable conditions buried behind a new fixture. A good electrician will sort out the infrastructure first and then make the visible parts look right.
If your main goal is design rather than wiring, some homeowners benefit from a combined approach. Have a lighting plan developed first, then let the electrician install exactly what the plan requires. This helps avoid the common outcome where fixtures are installed one at a time without an overall layout, leaving the house with inconsistent spacing, mismatched color temperature, and uneven brightness.
Simple Maintenance That Keeps Exterior Lights Working Longer
Even a well installed system needs occasional care. Outdoor lenses collect dirt, pollen, and road film that cut output faster than most people realize. Motion sensors can shift. Path lights get knocked out of alignment. Trim plants can block photocells or bury small fixtures in foliage. If your lighting seems weaker than it used to, start with cleaning and alignment before assuming the fixture has failed.
Check visible seals, gaskets, and fasteners each season, especially after winter. Look for cracks, corrosion, loose mounting, or water inside lenses. On low voltage systems, inspect exposed cable routes and connectors where gardening tools or frost movement may have disturbed them. Catching small issues early is the difference between a quick tune up and replacing several fixtures after moisture gets in.
For LED fixtures, maintenance is often more about keeping optics clean and controls working than about changing lamps. That is one reason they remain such a practical upgrade. Less frequent service means fewer ladder trips, fewer replacement parts, and more consistent lighting over time.
Final Thoughts on Installing Exterior Lighting Wisely
Good exterior lighting is a mix of restraint and competence. You want enough light for safety, comfort, and visibility, but not so much that it creates glare, waste, and nuisance. You want fixtures that are properly rated, certified for Canadian use, and matched to the actual exposure conditions. You want controls that cut runtime when light is not needed. And you want installation details that keep water out, wiring protected, and maintenance simple.
If you remember nothing else, remember this: plan first, buy second, install carefully. Define the job each light needs to do. Choose efficient LED fixtures with the correct wet or damp rating, sensible light output, and shielding. Verify local code, permits, and inspection requirements before touching hardwired work. Use motion sensors, photocells, or timers where they make sense. Then take your time with placement, weatherproofing, and final aiming.
That is how exterior lighting should be approached. Not as a quick cosmetic add on, but as part of how the house functions after dark. Done wisely, it will look better, work better, and last longer.
Quick Reference Checklist for Homeowners
-
Decide the purpose of each lighting zone before shopping.
-
Verify provincial or territorial code requirements, permits, and inspections for hardwired work.
-
Choose fixtures certified for Canadian use and rated correctly for damp or wet locations.
-
Compare lumens, beam spread, shielding, and color temperature instead of buying by wattage alone.
-
Use controls such as photocells, timers, or motion sensors to reduce unnecessary runtime.
-
Plan placement to light tasks and walking areas without glare or light trespass.
-
Use weatherproof boxes, covers, gaskets, and approved connectors.
-
For low voltage systems, size the transformer properly and protect cable routes.
-
Test sensor aim and photocell behavior before considering the job finished.
-
Call a licensed electrician when the project involves new circuits, trenching, relocation, or uncertain code issues.



No Comment! Be the first one.