


How to Perform a Ventilation Check for a Healthy Home
Ventilation is easy to overlook because it is mostly invisible when it works well. Air moves through grilles, ducts, fans, filters, and small pressure differences that most homeowners never need to think about until a bathroom stays damp, cooking smells linger for hours, or windows start collecting condensation in winter. Yet ventilation is one of the core systems that supports a healthy home, right alongside insulation, air sealing, and heating. If you want cleaner indoor air, better moisture control, and a more comfortable living environment, a ventilation check is one of the most useful maintenance habits you can build into your routine.
Table Of Content
- Why a ventilation check matters more than many homeowners realize
- Step 1: Identify what kind of ventilation your home actually has
- Step 2: Start with a simple indoor air and moisture reality check
- Step 3: Check bathroom exhaust fans carefully
- Step 4: Check kitchen ventilation where pollutant loads are highest
- Step 5: Inspect supply registers, return grilles, and air pathways
- Step 6: Inspect filters and the mechanical side of the system
- Step 7: Review controls, schedules, and settings
- Step 8: Pay attention to combustion safety and pressure problems
- Step 9: Evaluate your home habits, not just the hardware
- Common misconceptions to leave behind
- When to call a professional
- A simple homeowner checklist you can repeat each season
- Ventilation as part of a healthier, more resilient home
That matters even more in Canada and across much of North America, where people spend a remarkable amount of time indoors. Health Canada notes that Canadians spend about 90 percent of their time inside, which means indoor air quality has a direct effect on day to day comfort and long term health. Ventilation helps reduce moisture, odors, and indoor pollutants while bringing in fresh outdoor air when conditions are appropriate. In tighter, more energy efficient homes, mechanical ventilation is often essential because relying on accidental air leakage or occasional window opening is simply not enough.
This guide is designed to make the process approachable. You do not need to become an HVAC technician to perform a meaningful ventilation check. What you do need is a clear method, a willingness to observe how your home behaves, and a basic understanding of what healthy airflow should look like in bathrooms, kitchens, bedrooms, and main living spaces. The goal is not perfection in one afternoon. The goal is to identify obvious problems, improve what you can, and know when a more detailed professional assessment is worth it.
A good ventilation check also benefits the building itself. Excess humidity can contribute to paint failure, peeling finishes, musty odours, condensation, and eventually mold or material damage. Poor exhaust in kitchens can leave grease and combustion byproducts indoors. Weak airflow distribution can create rooms that feel stale, stuffy, or uneven in temperature. Seen this way, ventilation is not a niche mechanical issue. It is part of the larger building envelope story, where air, moisture, durability, and energy use all meet.
Healthy home principle: Ventilation works best when it is treated as part of a broader indoor air quality strategy that includes source control, filtration, moisture management, and equipment maintenance.
Why a ventilation check matters more than many homeowners realize
Many people assume that if a fan turns on, the home is being ventilated properly. Unfortunately, that is not always true. A bathroom fan may make noise but move very little air because the grille is clogged, the duct is crushed, or the termination outside is blocked. A kitchen range hood may recirculate air through a basic filter rather than venting outdoors. A whole home HRV or ERV may be running on the wrong setting, have dirty filters, or be out of balance. In all of these cases, equipment appears to work while indoor air quality quietly suffers.
Another common assumption is that opening windows is enough. Sometimes it helps, especially during mild weather and when outdoor air is clean, but it is not a complete strategy for most homes. In cold climates, frequent window ventilation can increase heating demand and make humidity harder to control. In hot or humid weather, it can add unwanted moisture or cooling load. During wildfire smoke events or periods of poor outdoor air quality, bringing in more outdoor air without filtration may actually make indoor air worse rather than better.
Health Canada emphasizes that efficient ventilation helps reduce pollutant and moisture levels that can affect comfort and health. The important word there is efficient. Good ventilation is not just about moving more air. It is about moving the right amount of air, in the right places, at the right times, while also accounting for filtration, outdoor conditions, and the way people actually live in the home. That is why a practical homeowner check should look at both the equipment and the habits that shape indoor air quality every day.
The current direction of building science reflects this more balanced view. ASHRAE Standard 62.2 remains the primary North American benchmark for residential ventilation in low rise dwellings, and recent updates have strengthened attention to filtration, local exhaust, and indoor air quality performance. At the same time, post pandemic guidance from public health agencies has reinforced the value of layered indoor air strategies. Fresh air matters, but so do filtration, local exhaust, humidity control, and source reduction.
Step 1: Identify what kind of ventilation your home actually has
The first step is simply understanding your setup. Homes generally rely on one or more of three broad residential ventilation approaches recognized by Health Canada: exhaust only, supply only, and balanced ventilation. Many homes also use a central forced air HVAC system for heating or cooling, but that system alone does not always guarantee intentional fresh air delivery. Knowing what you have gives context to everything that follows.
An exhaust only system commonly uses bathroom fans and a range hood to pull indoor air out of the house. Replacement air comes in through leakage pathways or dedicated inlets. A supply only system brings fresh outdoor air in through a fan or ducted arrangement, often paired with the central air system. A balanced system, often using an HRV or ERV, brings outdoor air in and exhausts stale indoor air out at roughly equal rates. Balanced systems are especially common in tighter and more energy efficient homes because they offer more control and can recover heat or energy from outgoing air.
Walk through your home and note the visible components. Look for bathroom exhaust fans, a range hood, ceiling or wall grilles, supply registers, return grilles, an HRV or ERV unit in the mechanical room, and any controller or wall panel that adjusts ventilation settings. If you have manuals, keep them nearby. If you do not, most model numbers can be searched online. This small bit of homework can save a lot of guesswork later.
It also helps to understand what the system is supposed to do during normal life. Some homes run continuous low level ventilation. Others depend on intermittent fan use in bathrooms and kitchens. Some HRV and ERV systems shift settings depending on humidity or occupancy. If you are unsure whether your current operation matches the intended design, make a note of it. That uncertainty itself is useful information.
Step 2: Start with a simple indoor air and moisture reality check
Before touching equipment, spend a day noticing the signs your house is already giving you. Do mirrors stay fogged long after showers? Does the kitchen smell like last night’s dinner the next morning? Are some bedrooms stuffy by morning when doors are closed? Do you see condensation on windows in winter, especially at the corners or lower edges? These are often early clues that ventilation, airflow distribution, or humidity control need attention.
A small digital hygrometer can be very helpful here. It gives you a quick read on indoor relative humidity, which is one of the most practical indicators for homeowners. While ideal ranges vary with season and climate, persistently high indoor humidity can create comfort issues and raise the risk of condensation and mold. Persistently low humidity can also reduce comfort. The point is not to chase a single magic number. The point is to see whether your home is consistently drifting into unhealthy or impractical territory.
Also pay attention to activities that generate pollutants or moisture. Long showers, indoor drying of laundry, frequent cooking without using a hood, candles, cleaning products, hobby materials, and combustion appliances all affect indoor air. Ventilation checks work best when they consider these sources rather than assuming air movement alone will solve everything. Source control matters because it reduces the burden on the ventilation system in the first place.
If anyone in the household has asthma, allergies, chemical sensitivities, or recurring sinus irritation, this home level observation becomes even more valuable. Odor free air does not necessarily mean clean air. Many important pollutants are odorless, including some combustion byproducts. A ventilation check should always be grounded in what the home feels like, smells like, and how it performs over time, not only whether a switch turns on a fan.
Step 3: Check bathroom exhaust fans carefully
Bathrooms are one of the easiest places to begin because the purpose of the fan is clear: remove moisture and odours at the source. Run each bathroom fan and listen to how it sounds. A smooth, steady sound is usually a good sign. A rattling, straining, or unusually loud fan may be dirty, aging, or poorly installed. But sound alone does not tell you enough, because some loud fans move little air while some quiet modern fans perform well.
A simple homeowner test is the tissue test. Hold a piece of toilet tissue or lightweight paper near the fan grille while the fan is running. If the fan is working reasonably well, the tissue should cling to the grille or at least be pulled toward it noticeably. This does not measure airflow precisely, but it can reveal obvious underperformance. If nothing happens, the grille may be clogged, the duct may be blocked, or the fan may not be exhausting outdoors properly.
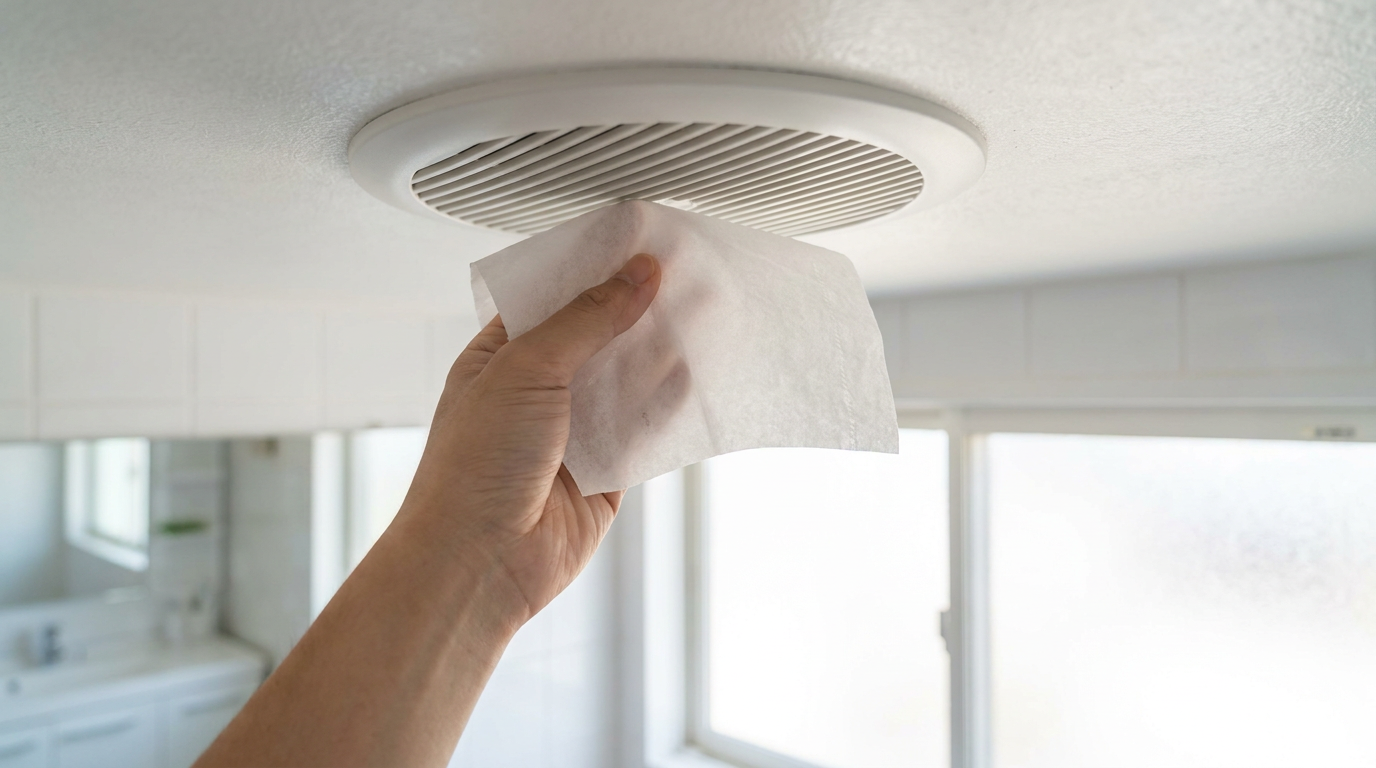
Next, check cleaning and runtime habits. Fan grilles often collect dust that reduces airflow. Turn off power if needed, remove the grille if your model allows it, and clean it gently. Make sure household members run the fan during showers and for a period afterward. If moisture lingers on surfaces, the fan may need to run longer than you think. In some homes, an upgraded timer switch is one of the simplest improvements because it helps the fan continue operating after the room is vacant.
If possible, verify where the duct goes. Bathroom fans should vent outdoors, not into an attic, crawl space, or soffit cavity where moisture can accumulate and damage materials. If the outside termination is accessible, check that the damper opens and that it is not blocked by lint, debris, nests, or snow in winter. A fan that exhausts moisture into the wrong place can create hidden building problems even while the bathroom itself seems slightly improved.
Step 4: Check kitchen ventilation where pollutant loads are highest
The kitchen is often the most important room for local exhaust because cooking releases heat, moisture, particles, odours, and sometimes combustion byproducts. This is particularly important in homes with gas stoves, where Health Canada has noted that adequate stovetop ventilation can help homes meet nitrogen dioxide guidance. A range hood should do more than light the cooktop and make noise. It should capture pollutants at the source and direct them outdoors whenever possible.
Begin by determining whether your range hood is ducted to the exterior or recirculating. Many homeowners are surprised to discover they have a recirculating model that filters grease but does not remove moisture or combustion gases from the home. If your hood vents outdoors, turn it on and feel for air discharge at the exterior termination if it is safe and accessible. If it is recirculating, recognize its limitations and consider whether an upgrade to a properly ducted hood is possible in the future.

Inspect grease filters and clean them according to the manufacturer’s instructions. A filter coated in grease cannot perform well, and the same buildup can also become a fire risk over time. Then think about usage patterns. The best range hood is only effective when used consistently, especially for frying, searing, boiling, and any cooking that produces smoke or steam. A useful household habit is to switch the hood on before cooking begins and let it run briefly afterward.
Capture also depends on how you cook. Front burners on some setups are harder for a hood to capture effectively than back burners, especially with a shallow hood. While the long term solution may involve equipment changes, small practical choices can still help. Use the hood regularly, choose the fan speed that matches the cooking task, and avoid treating kitchen ventilation as optional just because a smell disappears after a while. Pollutants that matter are not always obvious.
Step 5: Inspect supply registers, return grilles, and air pathways
Whole home ventilation and comfort depend on more than dedicated exhaust equipment. Air must also be able to move through the house. Walk room to room and make sure supply registers are not blocked by rugs, furniture, drapes, or storage boxes. Check return grilles as well, particularly large central returns that can become obstructed by furniture or dust. A well designed system still needs clear pathways if it is going to distribute air properly.
Interior doors can affect airflow more than many homeowners realize. Bedrooms with doors kept closed overnight may become stuffy if they do not have an adequate return path or transfer route. In some homes, undercut doors, jumper ducts, or transfer grilles help air move back to the central return. You do not need to redesign the house during a basic check, but you should notice whether certain rooms consistently feel stagnant when doors are closed. That pattern often points to airflow imbalance rather than a simple need for more heating or cooling.
Dust patterns can offer useful clues. A supply register with almost no visible airflow effect and a nearby room that feels stale may indicate a balancing issue, disconnected duct, or mechanical problem. A return grille with heavy buildup may simply need cleaning, but it can also reflect high particle loads in the house or long neglected maintenance. Be observant without jumping to conclusions. The goal is to connect what you see with how the house performs.
If your home uses a central HVAC fan to help move air through pleated filters, check whether fan operation settings match your needs. In some scenarios, especially when visitors are present or when extra air mixing is useful, public health guidance has supported running the fan on on rather than auto for a period of time. This is not a universal all day recommendation for every house, but it illustrates an important point: airflow distribution and filtration are part of the ventilation conversation now.
Step 6: Inspect filters and the mechanical side of the system
Filtration is increasingly central to healthy home air strategies, and recent residential ventilation guidance has placed stronger emphasis on it. If your home has a forced air furnace, heat pump air handler, HRV, or ERV, find the filters and inspect their condition. A visibly dirty filter restricts airflow and weakens performance. It can also increase strain on equipment. Even a good system cannot deliver what it should if the filter is loaded with dust.
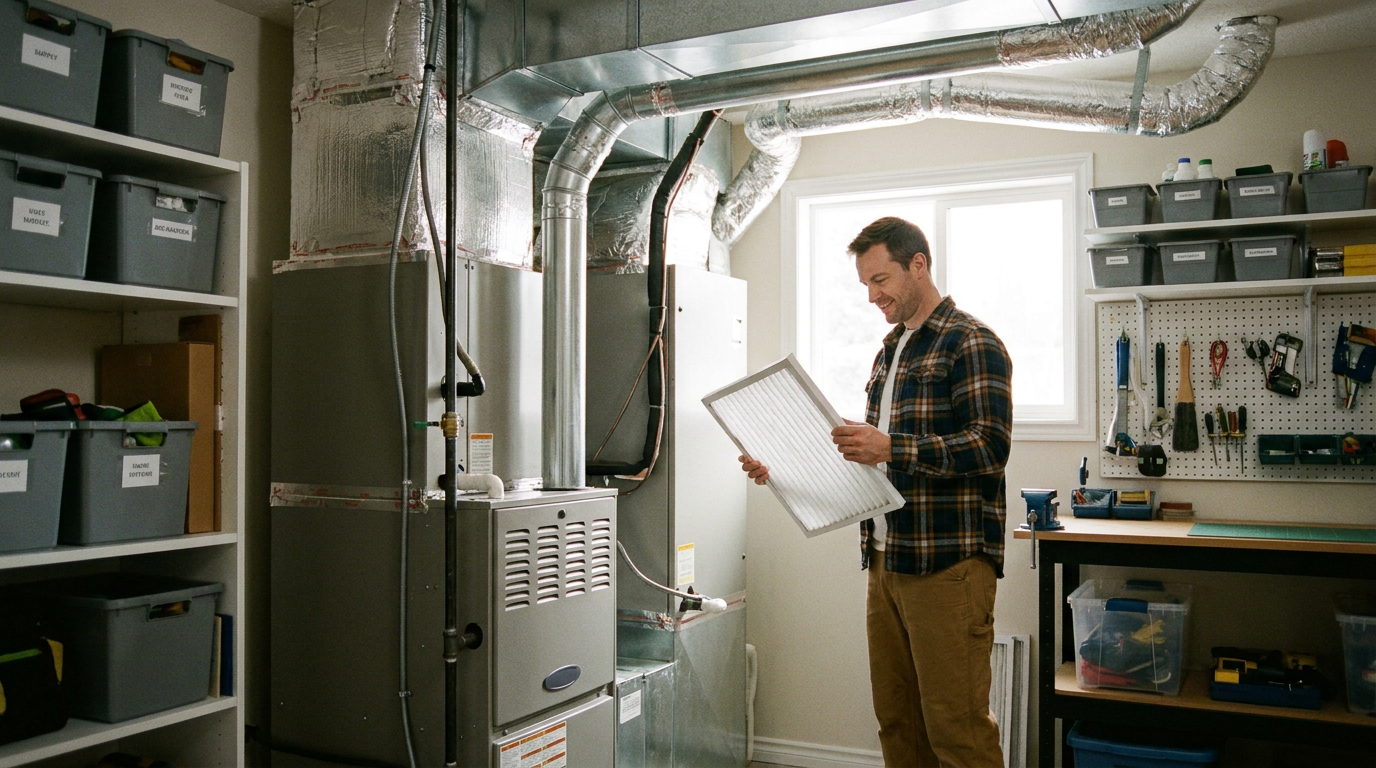
Replace filters according to the equipment requirements and the manufacturer’s guidance. Many homeowners now choose pleated filters for better particle capture, but it is important not to install an overly restrictive filter that the system is not designed to handle. The ideal balance depends on the blower capacity, duct design, and equipment specifications. If you are unsure, ask a qualified technician what filter type and rating are appropriate for your system.
For HRV and ERV systems, inspect both the filters and the core if the manufacturer’s instructions allow homeowner maintenance. A neglected heat recovery ventilator may still run while delivering reduced airflow. Some systems also have outdoor intake screens that can become blocked by debris, leaves, insect material, or snow. During your check, follow the air path from the unit as far as is practical and safe. Often the issue is not dramatic equipment failure but ordinary buildup that accumulates slowly over time.
While you are in the mechanical room, look for disconnected ducts, crushed flexible duct sections, unusual condensation, or signs of water around the unit. These are all clues that performance may be compromised. Mechanical ventilation systems are durable when maintained, but they are not self sustaining forever. Like any part of a well performing building envelope, they need periodic attention if you want them to deliver both health and efficiency benefits.
Step 7: Review controls, schedules, and settings
A well designed system can still underperform if it is operated incorrectly. Many ventilation issues come down to controls. Your home may have fan timers, a humidistat, an HRV or ERV controller, boost switches in bathrooms, or integrated HVAC controls that affect airflow and fresh air delivery. Spend time understanding what each control does. If labels are unclear, write them down and look up the manual later.
Ask simple questions. Is the whole home ventilation running continuously on low, intermittently on a schedule, or only when manually activated? Are bathroom boost functions still working? Is the humidistat set so high that indoor moisture rises before the system responds? Has someone switched the controller to a reduced setting and forgotten about it? These are common, very fixable issues that can affect comfort and indoor air quality for months or years.
Seasonal adjustment also matters. In winter, homeowners often reduce ventilation because outdoor air feels cold and dry. In summer, they may disable fresh air because the air conditioner is working hard. During wildfire smoke events, bringing in outdoor air without a strategy can be counterproductive. Health Canada is clear that more ventilation does not automatically mean better indoor air quality when outdoor conditions are poor. A healthy approach is weather aware and source aware rather than rigid.
If your system includes an HRV or ERV, balancing and commissioning become especially important. Homeowners can check basic operation and maintenance, but precise airflow balancing is generally a professional task. If supply and exhaust rates are significantly off, the house may be pushed into unwanted pressure conditions that affect comfort, infiltration, and in some cases combustion safety. If your system has never been professionally checked since installation, that is worth considering.
Step 8: Pay attention to combustion safety and pressure problems
Ventilation checks should always include a note of caution around combustion appliances. If your home has a naturally vented water heater, furnace, fireplace, or other combustion equipment, strong exhaust can create pressure imbalances that interfere with safe venting in some situations. This is one reason balanced ventilation and proper make up air matter. Backdrafting and spillage are not issues to diagnose casually if you are uncertain. They deserve qualified help.
At the homeowner level, your role is to notice warning signs. Watch for persistent combustion odors, soot, moisture around venting, or appliances that seem to struggle when multiple exhaust devices are running. If a bathroom fan, range hood, and clothes dryer operating together seem to affect fireplace draft or cause unusual smells, stop and investigate further with a trained professional. Safety should always take precedence over experimentation.
Carbon monoxide alarms should be installed and maintained according to local requirements and manufacturer instructions. They are not a substitute for proper ventilation or appliance maintenance, but they are an important layer of protection. Combustion appliances should also be serviced as recommended. A ventilation check is a good reminder that indoor air quality is not only about freshness and comfort. It is also about managing invisible risks responsibly.
Step 9: Evaluate your home habits, not just the hardware
One of the most useful parts of a ventilation check is often behavioral. Homes can have excellent equipment and still suffer from poor indoor air quality if everyday practices work against the system. Think about when people cook, shower, use cleaning products, burn candles, store solvents, or bring outdoor contaminants indoors. Source control is one of the quiet foundations of healthy air because removing or reducing pollutants at the source makes every other strategy more effective.
That can mean very simple changes. Use the range hood every time you cook. Run bathroom fans during and after showers. Avoid indoor smoking entirely. Store paints, fuels, and strong chemicals away from living spaces. Choose lower emitting materials and products when possible. Dry wet boots and gear in a ventilated area rather than in closed rooms. Small habits accumulate, just as small ventilation failures do.
This is also where dehumidifiers and portable air cleaners should be understood clearly. They can be useful tools, but they do not replace ventilation. A dehumidifier removes moisture from air but does not bring in fresh outdoor air or remove combustion gases. An air purifier may reduce particles but does not exhaust kitchen pollutants or bathroom humidity. These devices can complement a healthy home strategy, but they should not be mistaken for complete substitutes.
Common misconceptions to leave behind
Ventilation is full of persistent myths, and clearing them up helps homeowners make better choices. The first misconception is that opening windows is always enough. In reality, window ventilation is variable, weather dependent, and often inadequate for airtight homes. The second is that if a fan is running, the problem is solved. Performance depends on airflow, duct condition, destination, and usage, not simply on whether a motor is audible.
The third misconception is that more ventilation is always better. That sounds intuitive, but it ignores climate, energy use, humidity, and outdoor pollution. During smoke events or other poor outdoor air periods, smart operation may involve more filtration and selective use of ventilation rather than simply opening everything up. The fourth misconception is that odor free air is healthy air. Many pollutants have no obvious smell, which is why structured checks and maintenance matter.
The final misconception is that ventilation systems are install once and forget forever. Like any mechanical system, they need cleaning, filter changes, occasional adjustment, and sometimes professional servicing. Dirty grilles, blocked dampers, disconnected ducts, and neglected HRV or ERV cores can quietly undermine performance. A healthy home is usually the result of ordinary attention applied consistently, not one dramatic fix.
When to call a professional
A homeowner ventilation check is valuable, but there are clear times to bring in expert help. Call a qualified HVAC or ventilation professional if you suspect a disconnected or hidden duct issue, if your HRV or ERV needs balancing, if airflow is dramatically uneven, or if there are signs of backdrafting or combustion safety concerns. Professional testing may also be worthwhile after a renovation, air sealing project, equipment replacement, or persistent moisture problem.
It can also make sense to seek help if your home feels stuffy despite basic maintenance, if condensation remains a recurring issue, or if allergies and irritation seem linked to time spent indoors. In tighter homes, ventilation rates and pressure relationships are not always obvious. A trained professional can measure airflow, evaluate controls, inspect terminations, and confirm whether the system aligns with current best practice.
If you are planning upgrades, ask thoughtful questions. Is the current range hood actually vented outdoors? Would a timer switch improve bathroom fan use? Is the existing filter setup appropriate? Would an HRV or ERV be beneficial in this climate and house type? These are practical questions, not luxury questions. Better ventilation often delivers comfort and durability gains that extend well beyond indoor air quality alone.
A simple homeowner checklist you can repeat each season
If you want to keep this manageable, repeat a short ventilation check every season and a deeper one once or twice a year. The checklist below can help you stay organized without overcomplicating the task.
-
Identify your ventilation system type and confirm how it is supposed to operate during normal occupancy.
-
Check indoor humidity, window condensation, stale rooms, and lingering odors for early warning signs.
-
Test bathroom fans with tissue, clean grilles, and verify they exhaust outdoors.
-
Confirm whether the range hood is ducted outside and clean the grease filters regularly.
-
Inspect supply registers, return grilles, and room air pathways for blockages.
-
Replace or clean HVAC, HRV, and ERV filters as required and inspect outdoor intake or exhaust points.
-
Review controls, timers, humidistats, and ventilation schedules for seasonally appropriate settings.
-
Watch for combustion safety concerns and maintain carbon monoxide alarms.
-
Reduce indoor pollutant sources through better daily habits and product choices.
-
Call a professional when airflow, balancing, moisture, or safety issues go beyond basic maintenance.
Ventilation as part of a healthier, more resilient home
A healthy home does not depend on a single fan or device. It depends on how the building envelope, ventilation system, filtration, moisture control, and occupant habits work together. That is why a ventilation check is so useful. It creates a moment to step back and see whether your house is simply operating or truly supporting the people who live in it. In a world of tighter homes, changing outdoor air conditions, and growing awareness of indoor pollutants, that kind of check is no longer optional background maintenance. It is part of responsible home care.
The encouraging part is that meaningful improvements are often quite achievable. Cleaning a grille, replacing a filter, adjusting a timer, using the range hood more consistently, or clearing a blocked return can all make a real difference. Larger upgrades such as better local exhaust or a properly maintained HRV or ERV can build on that foundation. None of this requires a perfectionist approach. It requires a practical one.
If you start with what you can observe, maintain the equipment you already have, and make thoughtful adjustments based on season, occupancy, and outdoor conditions, your home will likely become more comfortable and more resilient over time. That is the quiet promise of good ventilation. It helps a house feel fresher, function better, and protect both health and materials with a steady, almost invisible kind of support.
And that may be the best way to think about ventilation overall. It is not just airflow for airflow’s sake. It is a daily building service that manages moisture, reduces pollutants, supports energy conscious living, and helps your home work the way it was meant to. A regular ventilation check is simply the homeowner’s way of making sure that support is still there.



No Comment! Be the first one.