



A Complete Guide to Repairing and Refreshing Your Interior Walls with Style
Interior walls shape far more than the outline of a room. They hold light, color, mood, and proportion, creating the visual field against which every piece of furniture, artwork, and architectural detail is experienced. When walls become cracked, dented, stained, or uneven, the entire space can feel tired, no matter how carefully it is furnished. The good news is that wall repair does not have to feel like a purely technical task. When approached thoughtfully, it becomes a design gesture in its own right, one that restores clarity, calm, and polish to the home.
Table Of Content
- Why wall repairs matter more than most homeowners realize
- Start with a careful assessment of the wall surface
- Common types of interior wall damage
- Gather the right tools and materials for a polished repair
- Prepare the room and protect surrounding finishes
- How to repair small holes, dents, and everyday marks
- How to fix cracks without letting them return too quickly
- Repairing larger holes in drywall with confidence
- Addressing peeling paint, bubbling surfaces, and old layers
- When stains and water marks need special treatment
- The art of sanding and feathering for an invisible finish
- Why primer is essential before painting repaired walls
- Selecting the right paint finish for beauty and durability
- How to paint for a cohesive and elegant result
- Refresh beyond repair with thoughtful finishing touches
- Common mistakes that make wall repairs look obvious
- When to call a professional for wall repair
- Maintaining your walls so they stay beautiful longer
- Final thoughts on repairing walls with both practicality and grace
This guide is designed to make interior wall repair approachable, practical, and aesthetically rewarding. Whether you are dealing with hairline cracks, nail holes, scuffed paint, bubbling patches, or areas of minor water damage, the process follows a sequence that is easy to understand when broken into clear stages. More importantly, every repair decision, from filler selection to paint sheen, influences the finished atmosphere of the room. A well repaired wall should disappear into the architecture, allowing the room to feel seamless and intentional again.
Rather than treating maintenance as an interruption to beauty, it helps to see it as part of beauty. A fresh wall surface reflects light more evenly, enriches color, and gives decorative elements a stronger presence. In a serene bedroom, a precise repair preserves softness and order. In a lively family room, durable finishes help maintain grace despite daily wear. Across every interior style, from classic to contemporary, sound wall repair is a quiet luxury because it supports the elegance of the whole environment.
Beautiful interiors are rarely the result of decoration alone. They are built on surfaces that feel cared for, balanced, and complete.
Why wall repairs matter more than most homeowners realize
Wall damage often begins subtly. A slight crack above a doorway, a few dents near a hallway corner, or peeling paint beside a window can seem minor in isolation. Yet because walls occupy such a large visual area, even small flaws tend to repeat themselves across the eye line. They interrupt color continuity, cast uneven shadows, and make a space feel less finished than it truly is. Repairing these issues restores visual calm, which is essential in any room intended to feel comfortable and elevated.
There is also a practical dimension that should not be overlooked. Some wall defects are cosmetic, but others hint at moisture issues, structural movement, poor adhesion, or repeated impact. Addressing damage early can prevent larger and more expensive problems later. A stain may indicate a leak. Persistent cracking may reveal shifting at seams. Bubbling paint may point to trapped moisture or inadequate surface preparation. Repair therefore protects both appearance and performance.
From a design perspective, smooth and healthy wall surfaces allow finishes to behave as they should. Matte paint looks velvety rather than chalky. Satin reflects light softly rather than exposing every dent. Wallpaper adheres more cleanly. Decorative moldings align more convincingly against a flat plane. In this sense, wall maintenance is foundational to good interior design. It supports not only longevity but also refinement.
Start with a careful assessment of the wall surface
The first step in any successful repair is observation. Before buying products or opening a tub of compound, walk through the room slowly and inspect the wall under different lighting conditions. Daylight reveals waviness, stains, and textural inconsistencies, while evening side lighting can expose dents, patch lines, and surface ridges. It is helpful to stand at several distances. Up close you will notice material damage, and from across the room you will understand what the eye actually perceives in the finished space.
As you assess, identify the type of wall construction involved. Most interiors have drywall, but some homes feature plaster, paneling, or previously skim coated surfaces. Each material responds differently to impact and repair. Drywall tends to dent and puncture more easily, while plaster may crack in distinctive fine lines or break away in chunks if weakened. Matching the repair method to the wall type is one of the simplest ways to improve the result.
It is also wise to distinguish between isolated surface damage and repeating patterns. A single nail hole near a picture frame is a quick cosmetic fix. A vertical crack running repeatedly from ceiling to door frame may require more attention to movement or seam integrity. Discoloration around windows, bathrooms, or ceilings may suggest moisture. If a wall feels soft, smells musty, or shows active dampness, repair should wait until the underlying cause is resolved.
Common types of interior wall damage
Most household wall repairs fall into a few familiar categories. Understanding them helps you choose the right sequence of tools and materials rather than treating every flaw the same way. Although they may appear similar from a distance, a scuff mark, a crack, and a puncture require different levels of intervention to disappear properly.
- Nail holes and pin marks that remain after hanging art, mirrors, or shelving
- Dents and minor gouges caused by furniture, door handles, or everyday impact
- Hairline cracks that often appear around joints, corners, windows, and doors
- Larger cracks or seam issues that may involve drywall tape or structural settling
- Peeling, bubbling, or flaking paint caused by poor adhesion, humidity, or old finishes
- Stains and water marks that may require sealing before repainting
- Small holes from anchors or accidental knocks
- Larger holes that require backing support or a drywall patch
Gather the right tools and materials for a polished repair
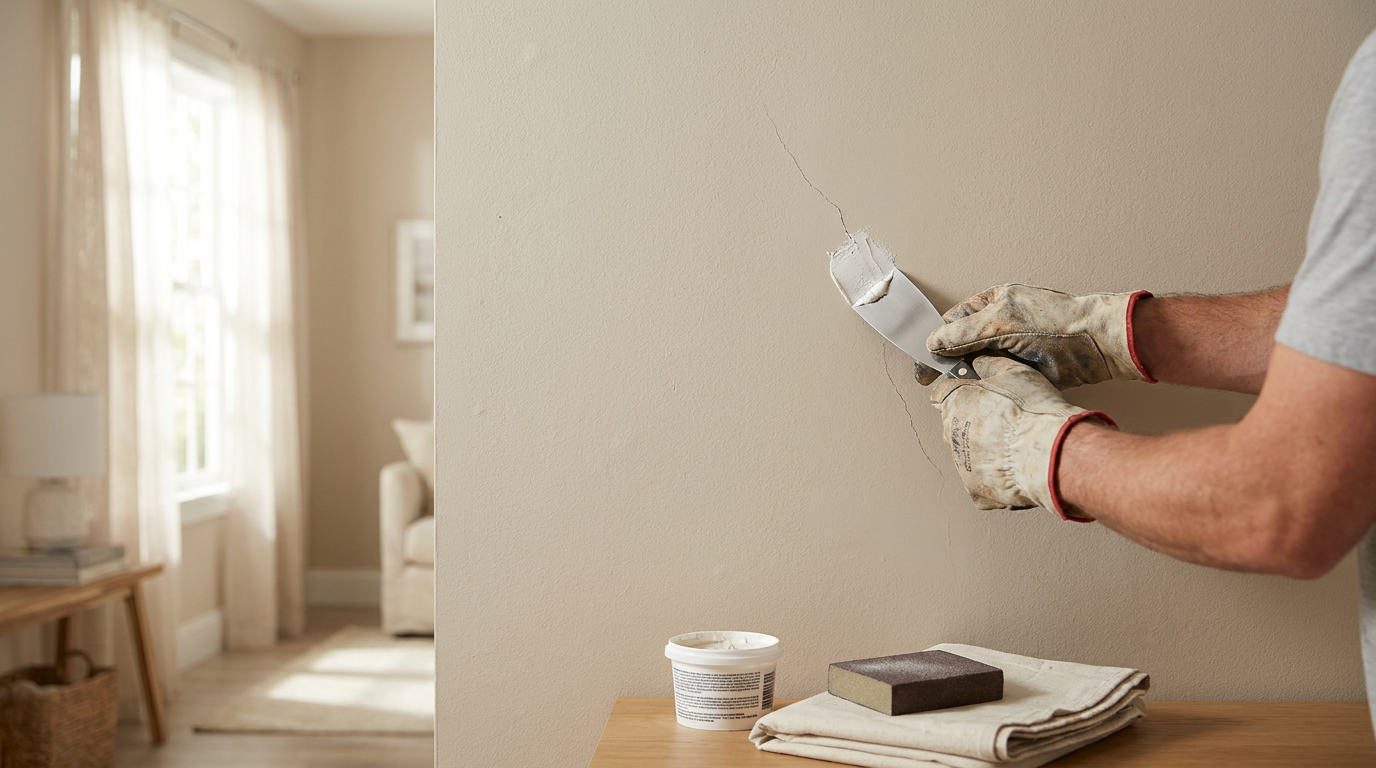
Wall repair is often less about advanced skill and more about preparation. Working with appropriate tools allows you to achieve cleaner edges, smoother surfaces, and a finish that blends naturally into the surrounding wall. For most interior repairs, you will want a few staple items on hand, including a putty knife, joint compound or spackling paste, sanding sponges in fine and medium grits, primer, paint, painter’s tape, a utility knife, and clean cloths. If you are repairing deeper damage, you may also need drywall tape, patch mesh, a backing piece, or replacement drywall.
The choice between lightweight spackle and joint compound depends on the repair. Lightweight spackle is convenient for small nail holes and shallow dents because it dries quickly and sands easily. Joint compound is often better for broader areas, seam repairs, and layered applications because it feathers more gracefully across the surface. For corner cracks or recurring joints, tape can add reinforcement and reduce the likelihood of the crack returning through the paint film.
Paint matching deserves special attention. Many wall repairs fail aesthetically not because the patch was poor, but because the topcoat did not blend. If possible, use the original paint in the same finish and application method. Even then, age, sunlight, and touch up patterns can create subtle variation. In high visibility areas, repainting the entire wall from corner to corner often yields the most elegant and invisible result.
Prepare the room and protect surrounding finishes
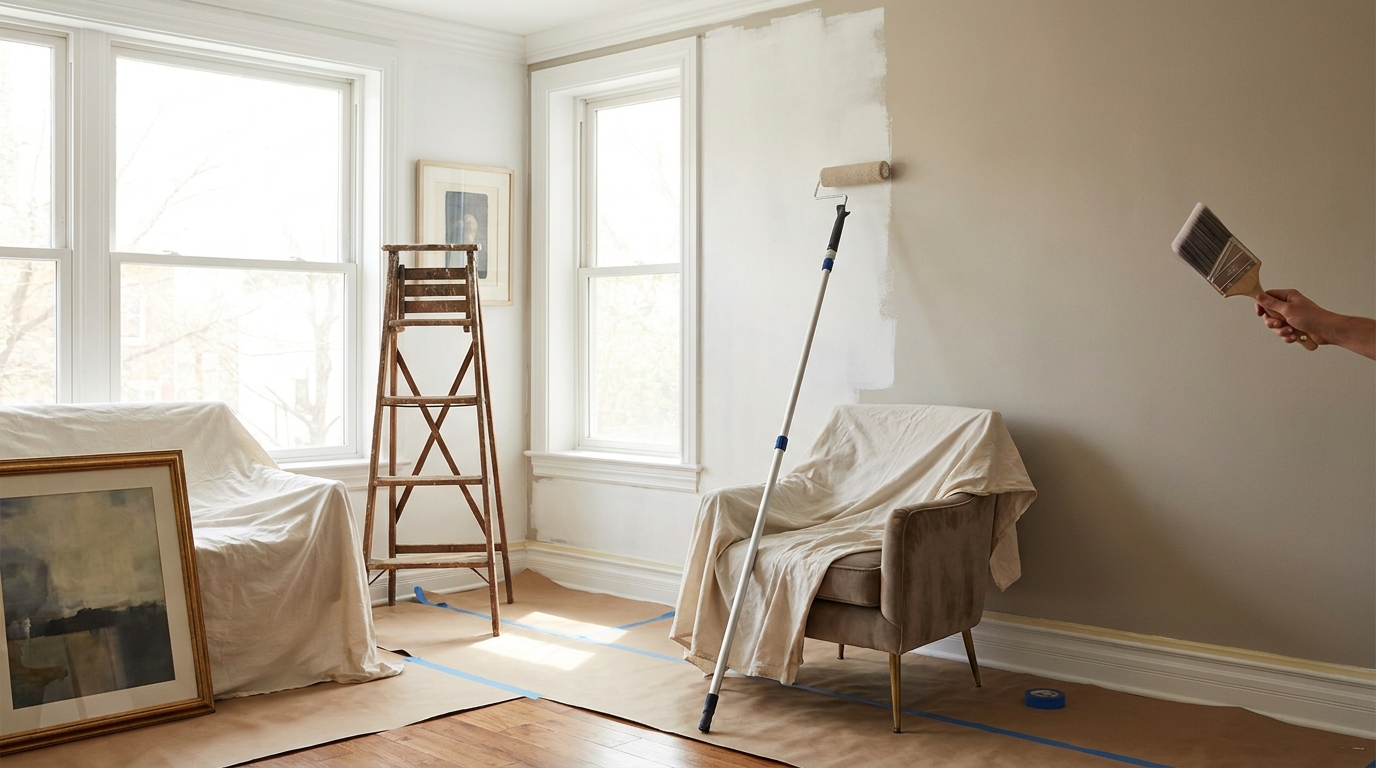
A beautiful repair begins with order. Move furniture away from the wall where possible and cover floors with a drop cloth. Remove artwork, switch plates, and fragile decorative pieces nearby. Fine dust from sanding travels more than many people expect, and drips from paint or compound are easier to prevent than remove. A calm, clean work zone not only protects the room but also helps you focus on achieving precision.
Next, clean the wall gently with a dry or slightly damp cloth depending on the surface condition. Dust, grease, and residue interfere with adhesion and can trap imperfections under compound or primer. Kitchens, hallways, and children’s rooms often collect more surface grime than formal spaces, so cleaning is especially important there. Let the wall dry fully before proceeding with any filler or paint.
Good lighting is another overlooked tool. If possible, direct a lamp across the wall at a shallow angle. This side lighting makes raised edges and depressions visible, allowing you to work more accurately. In decorative interiors where smoothness is essential, this extra step can make the difference between a patch that merely covers damage and one that truly disappears.
How to repair small holes, dents, and everyday marks
For small holes from nails or picture hooks, the repair process is simple but still benefits from patience. Use the edge of a putty knife to remove any loose paper or raised paint around the hole. Apply a small amount of spackling paste or lightweight filler, pressing it firmly into the opening. Then scrape the surface smooth so the patch sits nearly flush with the wall. Avoid leaving a mound, because excess material creates more sanding later and often becomes visible through paint.
Allow the patch to dry fully according to the product instructions. Once dry, sand lightly with a fine grit sponge until the area feels smooth to the touch and blends into the surrounding wall. Run your hand across the repair with your eyes closed if necessary. Touch is often more honest than sight when judging flatness. Wipe away the dust with a clean cloth before priming.
Dents and shallow gouges are repaired in much the same way, though they may benefit from two thin applications instead of one thick one. Thin layers dry more evenly and reduce shrinkage, which helps preserve a flatter finish. In elegant interiors, restraint is key. A repair should restore the plane of the wall without creating a glossy or raised island that catches light differently from the rest of the room.
How to fix cracks without letting them return too quickly
Cracks are among the most common wall issues, especially near doors, windows, and ceiling lines where movement naturally occurs. Fine hairline cracks can often be opened slightly with the tip of a utility knife to remove loose edges, then filled with joint compound or a flexible paintable filler depending on the location. Opening the crack may feel counterintuitive, but it creates a cleaner channel for the repair material to bond within rather than merely sitting on top.
For drywall seams or recurring cracks, reinforcement matters. Apply a thin layer of joint compound, embed drywall tape into the wet compound, then cover it with another thin layer, smoothing the edges outward. Once dry, apply one or two additional feathered coats as needed, sanding lightly between coats where appropriate. The goal is not simply to hide the crack line but to rebuild the wall surface gradually so it reads as continuous again.
Cracks at corners or trim junctions sometimes benefit from a quality paintable caulk rather than rigid compound, particularly where slight seasonal movement is expected. The surrounding design should guide the choice. In a formal room with crisp moldings and a refined paint finish, a flexible and neatly tooled caulk line can preserve a sharper appearance over time than a brittle patch that reopens quickly.
Repairing larger holes in drywall with confidence
A larger hole can look intimidating, yet it remains manageable with a methodical approach. For small to medium holes beyond the range of simple filler, a self adhesive mesh patch may be sufficient. After trimming away any loose material, place the patch over the opening, cover it with joint compound, and feather the edges outward in widening passes. Several coats may be necessary to conceal the patch profile completely, especially under flat side lighting.
For bigger openings, replacing the damaged section of drywall is often the best route. Cut the hole into a neat square or rectangle with solid edges. Install support behind the wall, such as wood backing strips secured inside the cavity, then fit a new drywall piece into the opening. Tape the seams, apply joint compound in thin coats, and feather each layer wider than the last. This gradual transition is what makes the patch disappear once painted.
Patience is the most important ingredient here. Many visible patches result from rushing the feathering stages or failing to sand between coats. In well designed interiors, scale and proportion are everything, and that same principle applies to repairs. The larger the patch, the more gently the edge must disperse into the surrounding wall so that the eye perceives a single uninterrupted surface.
Addressing peeling paint, bubbling surfaces, and old layers
Peeling or bubbling paint requires more than simply painting over the damaged area. First, all loose material must be removed with a scraper or putty knife until only firmly adhered paint remains. The edges should then be sanded so the transition from bare wall to painted wall becomes smooth rather than abrupt. If bubbling was caused by moisture, the source must be corrected before refinishing, otherwise the problem will reappear beneath the new coating.
After scraping and sanding, inspect the substrate. If the drywall paper has torn or become fuzzy, seal it with an appropriate primer before applying compound. Exposed paper can blister when moistened again by water based products, so sealing first stabilizes the surface. Once stabilized, apply compound as needed to level the area, sand smooth, then prime again before painting.
In older homes, layers of past paint repairs can create ridges and uneven texture that become more obvious after spot work. If the wall has widespread surface fatigue rather than one isolated defect, a broader skim coat may be the more graceful solution. Skimming refreshes the field of the wall and creates a cleaner canvas for paint, allowing the room to regain a sense of quiet sophistication rather than a patchwork appearance.
When stains and water marks need special treatment
Not every wall mark is solved by filler and paint. Brown rings, yellow patches, smoke discoloration, and old water stains often bleed through ordinary paint if they are not sealed properly. Once the wall is dry and any source issue has been resolved, clean the area and use a stain blocking primer suited to the type of stain. This intermediate layer prevents discoloration from migrating into the new finish.
If the wall suffered from water damage that caused swelling, crumbling, or softness, replacing the damaged material may be necessary. Surface cosmetics cannot disguise compromised drywall for long. Press gently with your fingers to test integrity. A sound wall should feel firm and stable. Where softness remains, removal and replacement are usually the cleaner, safer, and more durable choice.
After the damaged section is repaired and sealed, repainting the full wall is often the best aesthetic decision. Stained areas can alter absorbency and sheen, making isolated touch ups stand out. In serene interiors where consistency matters, a continuous paint film from edge to edge restores the calm and clarity that piecemeal correction often disrupts.
The art of sanding and feathering for an invisible finish
Sanding is where many repairs are either refined or ruined. The aim is not to abrade aggressively but to shape gently. Use a sanding sponge or fine sandpaper and move in light, even motions, checking often with your hand and the side light. A well feathered patch should taper softly into the surrounding wall with no detectable ridge at its perimeter.
Dust control is equally important. Residual dust clings to primer and paint, creating texture and reducing adhesion. Wipe the surface carefully with a microfiber cloth or tack cloth where appropriate, then allow the air to settle before coating. Cleanliness during this stage contributes directly to the elegance of the final result, particularly in rooms painted in deeper or more reflective colors where flaws are magnified.
If a repair remains visible after the first sanding, that is not failure. It simply means the wall needs another thin coat and a second refinement. Professionals rarely expect perfection from one application. They build smoothness in stages, always widening and softening the transition. This layered approach mirrors the patience of good design itself, where beauty emerges through proportion, balance, and editing.
Why primer is essential before painting repaired walls
Primer is one of the most important yet frequently skipped steps in wall repair. Fresh compound, exposed drywall paper, old paint, and patched areas all absorb paint differently. Without primer, the repaired spot may flash through the topcoat as a dull patch, a shiny patch, or a subtle color shift. Primer evens absorbency and creates a unified surface, allowing the final paint to look richer and more consistent.
The type of primer depends on the wall condition. Standard drywall primer works well for most patching jobs, while stain blocking primers are better for water marks or smoke damage. Bonding primers can be useful over problematic glossy surfaces. In each case, the primer serves as a bridge between repair and finish, reducing surprises and improving durability.
Allow primer to dry fully and inspect the wall afterward under strong light. Primer often reveals imperfections that were less visible before. This is an advantage rather than a setback. It gives you a final opportunity to sand lightly or apply a skim touch up before committing to the finished color. In refined interiors, this extra check is often what separates an adequate repair from a truly seamless one.
Selecting the right paint finish for beauty and durability
Color naturally receives much of the attention in interior design, but finish has equal influence on how walls look and perform. Flat and matte paints soften light and conceal minor imperfections well, making them ideal for formal rooms, bedrooms, and ceilings. Eggshell offers a subtle sheen with a little more washability, often suiting living spaces and dining rooms beautifully. Satin is more durable and easier to clean, which can make it practical for hallways, kitchens, and busy family areas.
When choosing a finish after repairs, consider both lifestyle and architecture. A high traffic corridor may benefit from a durable sheen, but if the wall surface is less than perfect, too much reflectivity can emphasize flaws. Conversely, a quiet sitting room with elegant moldings may glow beautifully in a soft matte that diffuses light across the room. Balance is the key. Function should support atmosphere rather than overpower it.
Color can also transform a repair into a broader refresh. If a wall needs full repainting, it may be the perfect moment to revisit the palette. Warm whites, mineral grays, muted taupes, and soft clay tones can lend repaired walls a fresh yet timeless character. In homes seeking depth, smoky blues or olive infused neutrals add mood while still allowing the restored surface to feel composed and sophisticated.
How to paint for a cohesive and elegant result
After priming and final sanding, begin painting with careful cut in lines around trim, ceilings, and corners using an angled brush. Then use a roller appropriate for the wall texture and work in manageable sections, maintaining a wet edge to reduce lap marks. Consistency matters more than speed. Smooth, even coverage creates the kind of finish that feels effortless once the room is reassembled.
Spot painting may work for very small, hidden repairs if you have the original paint and the surrounding wall is still fresh. However, most visible areas benefit from painting the entire wall. This approach ensures even sheen, uniform color, and a more luxurious visual outcome. The eye reads the wall as whole and uninterrupted, which is especially important in rooms where natural light grazes the surface throughout the day.
Allow each coat to dry fully before deciding whether a second coat is needed. Many elegant paint colors reveal their true depth only after full curing and complete coverage. Rushing this stage can lead to drag marks, inconsistent sheen, or lifted touch ups. The final effect should feel calm, luminous, and tailored to the room rather than obviously newly painted in one isolated corner.
Refresh beyond repair with thoughtful finishing touches
Once the wall is repaired and painted, consider how the renewed surface interacts with the rest of the room. A wall in good condition frames furnishings more beautifully and can make familiar pieces feel newly intentional. This is an ideal moment to straighten artwork, update switch plates, touch up trim, or reconsider the spacing of decorative elements. Small surrounding adjustments often amplify the sense of transformation.
Texture also deserves consideration. In some interiors, a perfectly smooth wall is the desired expression. In others, a subtle plaster effect, panel molding, or tonal paint finish can enrich the room after repairs are complete. The important principle is cohesion. Any enhancement should feel integrated with the architecture and not like a distraction from the quality of the restoration.
Repair can therefore become an opening rather than a chore. It offers a chance to refine the room’s visual identity, edit what no longer works, and reinforce the atmosphere you want to live with daily. A carefully refreshed wall supports everything around it, from the softness of curtains to the silhouette of a chair, creating a more resolved and graceful interior.

Common mistakes that make wall repairs look obvious
Even diligent homeowners can undermine a repair by moving too quickly or skipping small but crucial steps. One common mistake is applying too much filler at once. Thick patches shrink, crack, and require aggressive sanding, which can damage surrounding paint. Another is failing to remove loose material before patching, which prevents proper adhesion and shortens the life of the repair.
Poor paint matching is another frequent issue. Even a well repaired surface can appear amateur if the touch up sheen differs from the rest of the wall. Similarly, neglecting primer often causes flashing, where the patched area absorbs paint differently and remains visible from certain angles. Finally, inadequate sanding leaves ridges that become more pronounced once the wall is painted and the room’s lighting resumes its usual rhythm.
If you remember only one principle, let it be this: thin layers, patient drying, and full wall awareness create the best results. The wall is never just the patch itself. It is the entire visual field around the patch, and every step should serve that broader sense of unity.
When to call a professional for wall repair
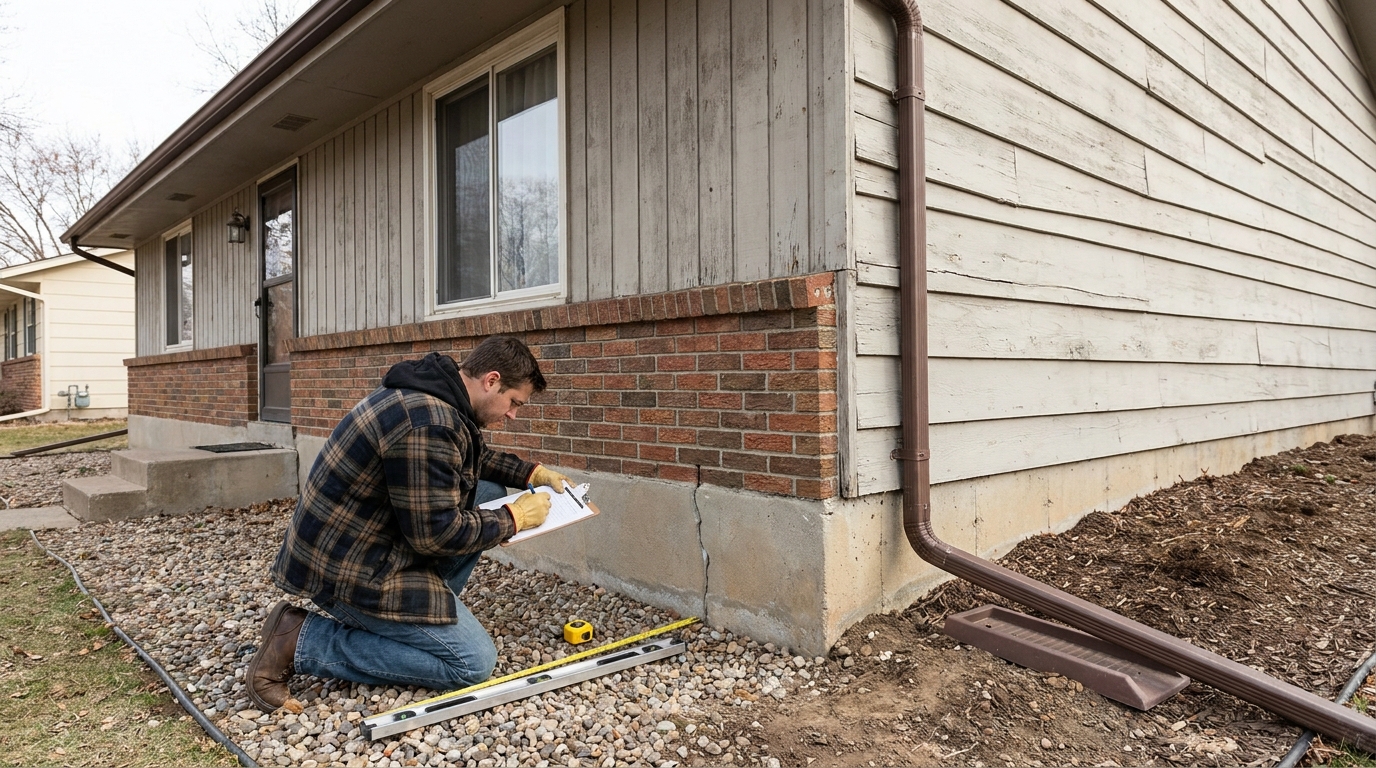
Many wall repairs are fully suitable for a careful homeowner, but some conditions deserve professional evaluation. Large cracks that widen over time, recurring moisture damage, signs of mold, crumbling plaster, extensive water intrusion, and major drywall failures often exceed routine cosmetic repair. In these cases, the priority should be diagnosing the underlying problem correctly before restoring the surface appearance.
Professionals can also be worthwhile in spaces where finish quality is especially important. Double height entry halls, formal entertaining rooms, historic plaster walls, and interiors with demanding light conditions often require an advanced hand to achieve a flawless result. The investment may be justified not only by speed but by the level of finish, especially if the room anchors the visual identity of the home.
There is elegance in knowing when to do the work yourself and when to invite expertise. The most successful interiors are not built on perfectionism alone, but on wise decisions that respect both craft and context.
Maintaining your walls so they stay beautiful longer
After a successful repair and refresh, simple habits can help preserve the result. Use doorstops where handles tend to hit, felt pads behind furniture that may shift, and washable finishes in high traffic areas. Clean marks gently before they build into stubborn stains, and keep humidity levels balanced in kitchens, baths, and laundry spaces. Prevention is often the most elegant form of maintenance because it protects the room without constant intervention.
Seasonal inspections are also useful. Look around windows, ceilings, and trim lines every few months, especially after extreme weather changes. Catching a small crack or faint stain early allows for discreet correction before the issue expands. In homes where walls are part of a carefully composed interior scheme, this quiet vigilance helps preserve the sense of order that makes rooms feel restorative and complete.
It is worth keeping a small maintenance kit with matching paint, filler, a sanding sponge, and a quality brush for future touch ups. This makes minor repairs far less intimidating and encourages prompt action. When wall care becomes part of the household rhythm, interiors remain fresher, brighter, and more gracious over time.
Final thoughts on repairing walls with both practicality and grace
Repairing interior walls is often framed as a basic home maintenance task, yet its impact reaches deeply into the experience of space. Smooth, well finished walls support light, amplify color, and give a room the composed backdrop it deserves. They make interiors feel cared for, and that sense of care is one of the most powerful ingredients in any beautiful home.
By assessing damage carefully, choosing the right materials, working in thin and patient layers, and finishing with thoughtful paint and design decisions, you can achieve repairs that feel almost invisible. More than that, you can turn a necessary fix into an act of refinement. The result is not only a wall restored to service, but a room restored to elegance.
In the end, functionality and aesthetic appeal do not compete. They complete one another. A repaired wall that is structurally sound, visually seamless, and sensitively finished becomes part of the quiet architecture of everyday life, and that is where true interior beauty begins.


No Comment! Be the first one.