


How to Troubleshoot Low Water Pressure in Your Home: Practical Steps Before You Call a Plumber
Low water pressure is one of those house problems that gets frustrating fast. Showers feel weak, sinks take longer to fill, and everyday jobs like washing dishes or running laundry start to drag. The good news is that many low pressure complaints come from a handful of common causes, and a lot of them can be checked without tearing into walls or guessing at expensive repairs.
Table Of Content
- Start by Defining the Problem Clearly
- If the Problem Is Only at One Fixture
- If the Problem Is Throughout the House
- Step 1: Check the Simple Fixture-Level Restrictions First
- Step 2: Test the Actual Water Pressure at a Hose Bib
- Step 3: Check the Main Shutoff Valve
- Step 4: Inspect the Pressure-Reducing Valve if Your Home Has One
- Step 5: Look for Hidden Leaks and Obvious Water Loss
- Step 6: Consider Pipe Corrosion and Sediment Buildup in Older Homes
- Step 7: Separate Hot Water Problems from Cold Water Problems
- Step 8: If You Are on a Well, Check the Well System Basics
- Step 9: Rule Out a Supply-Side Problem from the Utility
- Common Misconceptions That Lead Homeowners in the Wrong Direction
- A Practical Decision Tree You Can Follow
- When You Should Call a Professional
- Simple Maintenance That Helps Prevent Future Pressure Problems
- Final Thoughts
The key is to work in a sensible order. Start small, confirm whether the issue affects one fixture or the whole house, and test what you can before jumping to conclusions. In a lot of homes, what feels like a pressure problem is actually a flow restriction at a faucet or showerhead caused by mineral buildup, sediment, or a partly closed valve. In other homes, the issue is more central, such as the main shutoff valve, a leak, a faulty pressure-reducing valve, or a supply problem from the utility or a private well system.
This guide walks you through a practical troubleshooting process you can follow step by step. It is designed for homeowners who want straight answers and useful actions before calling in a plumber. Some problems are simple maintenance. Others point to repairs that should not be delayed. Either way, a little method goes a long way.
Important distinction: Low water pressure and low water flow are not always the same thing. If one faucet is weak but the rest of the house works normally, the system pressure may be fine and the fixture itself may be restricted.
Before you begin, it helps to have a few basic items ready. A simple water pressure gauge that threads onto a hose bib is the most useful diagnostic tool for this job. You may also want an adjustable wrench, pliers with jaw protection, an old toothbrush, white vinegar, a bucket, a flashlight, and a towel. None of that is complicated, but having the right tools keeps you from forcing parts or creating a leak while trying to solve one.
Start by Defining the Problem Clearly
The first job is not repair. It is diagnosis. You need to figure out whether the low pressure affects one fixture, a group of fixtures, or the entire house. This one distinction narrows the cause more than almost anything else. Municipal plumbing guidance across Canada and the United States regularly starts here because it saves time and prevents unnecessary repairs.
Walk through the house and test the cold and hot water at several points. Check a kitchen faucet, at least one bathroom sink, a shower, and if possible an outdoor spigot. Notice whether the issue is present on both hot and cold lines or only one side. If a sink has weak cold water but normal hot water, for example, that suggests a local valve, supply line, or fixture issue rather than a whole-house pressure problem.
Pay attention to timing as well. Does the pressure stay low all day, or only in the morning or evening when neighborhood demand may be higher? Does it drop only when two fixtures run at once? Temporary changes can point to supply conditions or system limitations, while constant weakness usually points to a mechanical issue that needs attention.
If the Problem Is Only at One Fixture
When low pressure is isolated to one sink, one shower, or one appliance, the cause is often close to that fixture. The most common culprits are a clogged faucet aerator, mineral buildup inside a showerhead, a partly closed angle stop valve under the sink, a kinked supply tube, or debris caught in the fixture cartridge. These are all much more likely than a main water line issue if everything else in the house is working normally.
This is good news because those problems are usually accessible. You can often fix them with cleaning, a minor adjustment, or a small replacement part. It also means you should not assume the city supply is to blame just because one bathroom sink runs weakly.
If the Problem Is Throughout the House
If every tap feels weak, then it is time to think more broadly. Whole-house low pressure points toward the main shutoff valve, a pressure-reducing valve, a leak in the plumbing system, corrosion or sediment in older pipes, a restriction in the service line, or a supply issue from the utility. In homes on private wells, pump performance, the pressure switch, and the pressure tank also move to the top of the list.
This does not automatically mean an expensive repair is coming, but it does mean you need a system-level check rather than a fixture-level one. The next steps help you separate those possibilities in a practical order.
Step 1: Check the Simple Fixture-Level Restrictions First
Even if you suspect a bigger issue, start with the easiest maintenance items. Faucet aerators and showerheads collect mineral deposits, sand, rust particles, and general sediment over time. In many homes, especially where hard water is common, this buildup can reduce flow enough to make a healthy system feel weak.
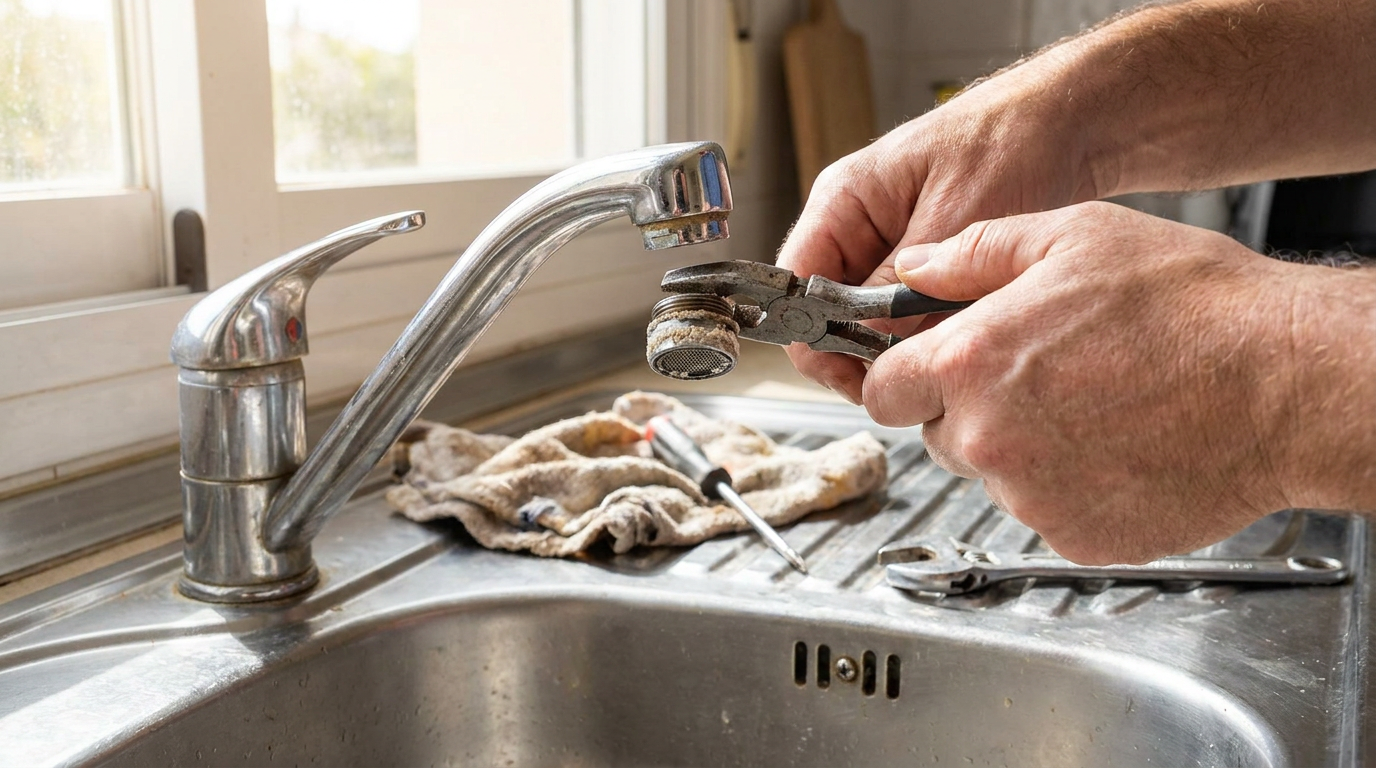
At a sink, unscrew the aerator at the tip of the faucet. Some come off by hand, while others need light help from pliers. Wrap the finish with a cloth first so you do not scar it. Once it is off, inspect the screen and any internal parts for grit or scale. Rinse loose debris and soak the pieces in white vinegar if mineral buildup is heavy.
For showerheads, remove the head if you can, or fill a plastic bag with vinegar and tie it around the head to soak the nozzles. After soaking, scrub gently with a toothbrush and flush it thoroughly. If pressure improves afterward, you have confirmed the issue was local restriction, not a true house-wide pressure failure.
Under sinks, check the angle stop valves. These are the small shutoff valves on the supply lines. If they were partially closed during previous work and never reopened fully, they can limit water flow enough to be noticeable. Turn them gently counterclockwise until fully open, but do not force old valves if they feel stuck. A brittle or corroded stop valve can start leaking if handled roughly.
Also look at the supply tubes. Flexible braided lines can occasionally twist or kink during cabinet work, and older rigid lines can become restricted internally. If a line looks bent sharply or damaged, replacing it is usually straightforward and inexpensive.
Step 2: Test the Actual Water Pressure at a Hose Bib
Once you have ruled out obvious fixture issues, the most useful next step is to measure your pressure. EPA WaterSense recommends checking home water pressure with a gauge attached to an outdoor hose bib, with all water-using fixtures and systems turned off first. That includes faucets, showers, dishwashers, washing machines, irrigation systems, and anything else drawing water at the time of the test.
This test matters because it gives you a baseline. Without it, you are relying only on how the water feels, and that can be misleading. A restricted showerhead can feel like low pressure even if the incoming house pressure is normal. A gauge tells you whether the problem is in the system overall or in individual fixtures.
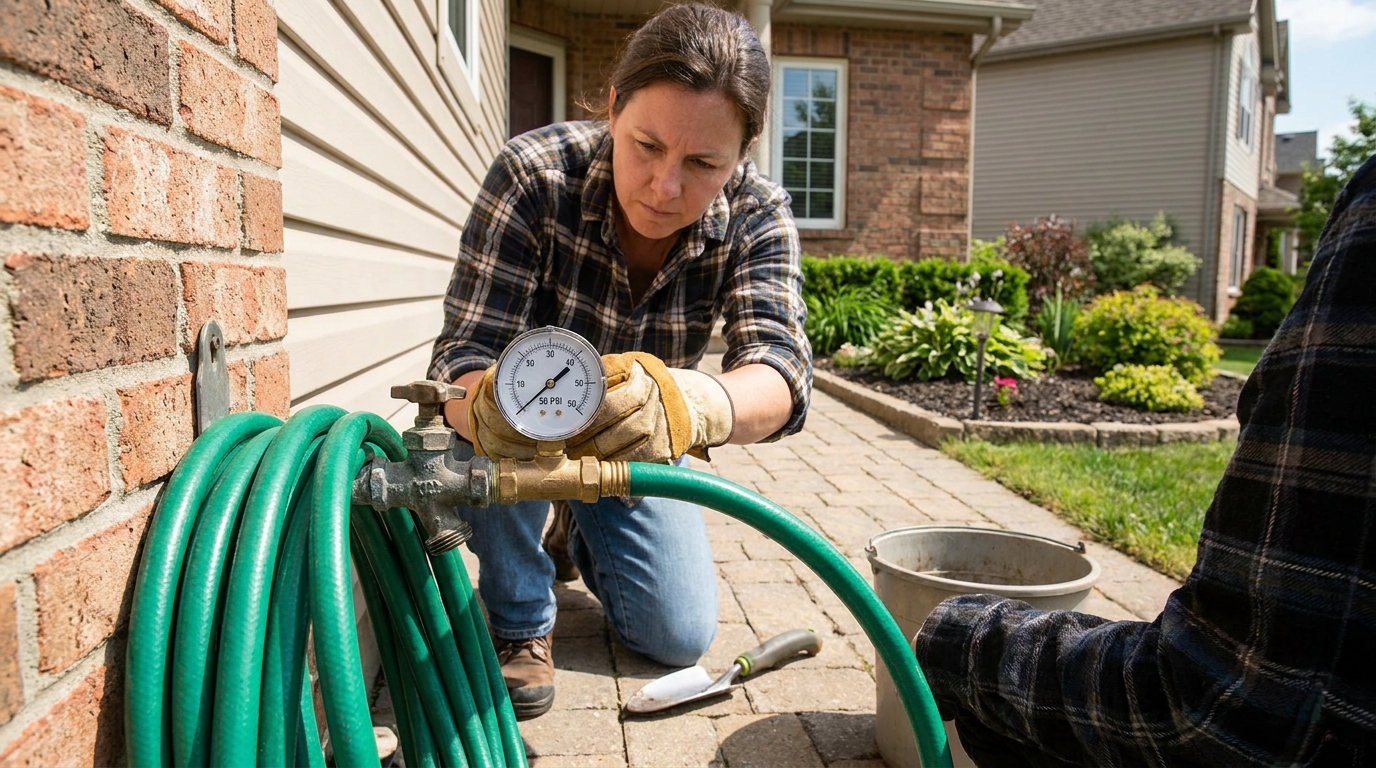
To run the test, thread the gauge onto an outdoor hose bib or laundry sink faucet if it has the right fitting. Make sure no water is running inside the home. Open the bib fully and read the gauge. In general, many homes function comfortably in a moderate pressure range, and many North American code frameworks require a pressure-reducing valve when incoming pressure exceeds 80 psi. More pressure is not always better. Excessively high pressure can strain appliances, fixtures, and pipe joints, and it can shorten system life.
If your reading is solid and normal at the hose bib, but certain fixtures inside still feel weak, that points back toward local fixture restrictions or branch line issues. If the reading is low at the hose bib too, the problem is more likely upstream, such as the main shutoff valve, the pressure-reducing valve, a service line restriction, a leak, or a utility or well supply issue.
If you are in Canada, you may also see plumbing guidance discussed in kilopascals rather than psi. The exact code language varies by edition and context, but the larger point for homeowners is simple: there is a baseline for usable pressure, and your house should not be running far below it. At the same time, pressure that is too high is a separate problem, not a sign of a healthy system.
Step 3: Check the Main Shutoff Valve
One of the most common whole-house causes of low pressure is a main shutoff valve that is not fully open. This often happens after a repair, renovation, appliance replacement, or emergency shutoff. Someone closes the valve partway and never returns it to the full-open position. Since the restriction affects the incoming water supply to the home, every fixture can feel weaker.
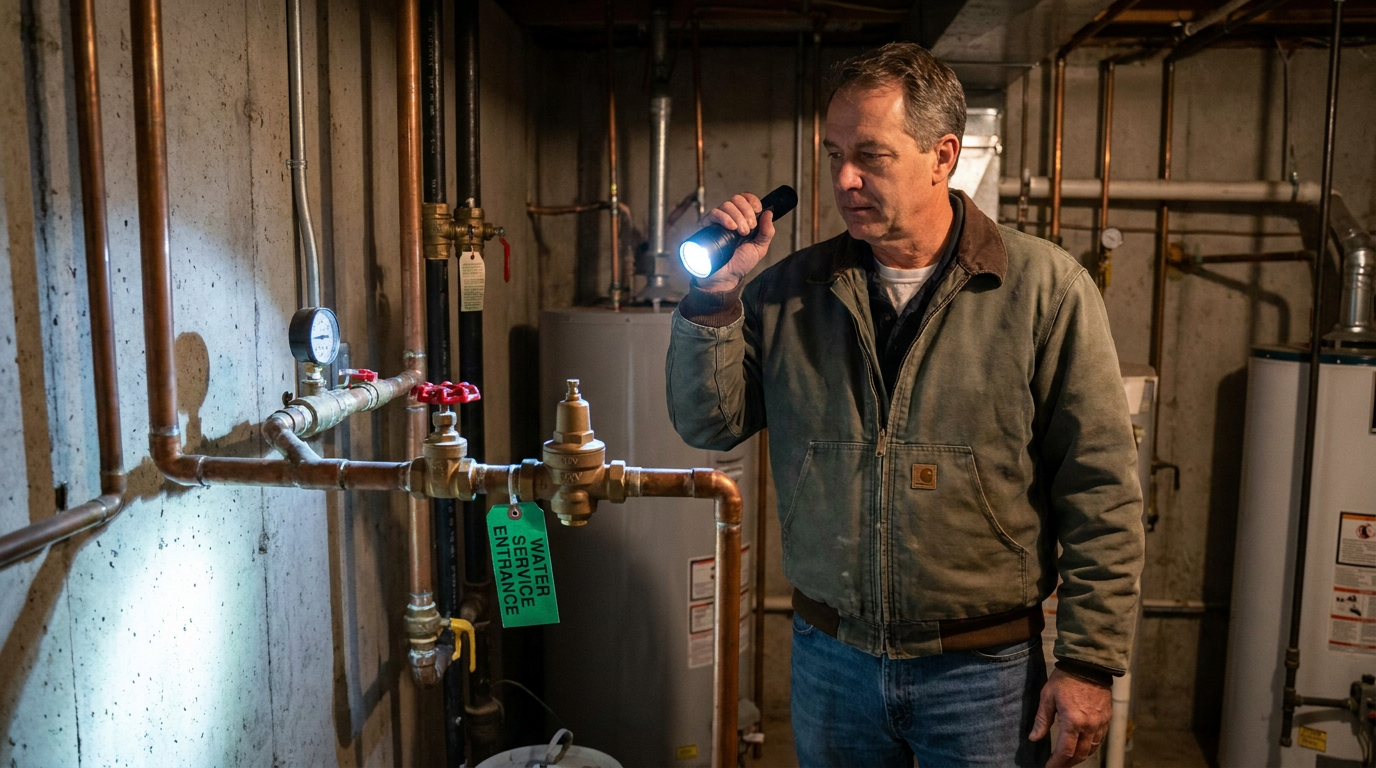
Look for the main shutoff where the water line enters the house, often in a basement, utility room, crawl space, or near the water meter. You may have a wheel-style gate valve or a lever-style ball valve. A lever valve should be parallel with the pipe when fully open. A wheel valve should turn counterclockwise to open, though older valves can be unreliable and should be handled gently.
If the valve appears partly closed, open it fully and test your fixtures again. If the valve is difficult to turn, corroded, or leaks around the stem, do not force it. Old shutoff valves are known failure points. In that case, the correct move is to stop and have it repaired or replaced by a plumber.
Step 4: Inspect the Pressure-Reducing Valve if Your Home Has One
Many homes have a pressure-reducing valve, often called a PRV, installed on the main water line. Its job is to keep incoming pressure at a safe, controlled level inside the house. This is especially important where street pressure is high. Code frameworks commonly require pressure reduction when incoming pressure exceeds 80 psi because excessive pressure can damage plumbing systems.
A failing PRV can cause pressure that is too low, too high, or inconsistent. In some cases, homeowners notice that the pressure used to be fine but has gradually weakened over time. In others, the pressure seems normal at one moment and poor the next. If your hose bib test shows low pressure throughout the house and your main shutoff valve is fully open, the PRV becomes a strong suspect.
PRVs are usually bell-shaped or dome-shaped valves installed just after the main shutoff or meter area. Some have an adjustment screw, but adjustment should not be your first move. If the valve is old, noisy, corroded, or producing unstable readings, tweaking it can mask the issue rather than solve it. Before touching the adjustment, confirm the pressure with a gauge and look for a manufacturer label or model number.
In theory, a knowledgeable homeowner can make minor PRV adjustments. In practice, if you are not comfortable reading the gauge and making controlled changes, this is where many people are better off calling a plumber. An incorrect setting can create new problems, including excessive pressure, water hammer, or poor fixture performance. If the valve is failing internally, adjustment will not fix it anyway. Replacement is often the real repair.
Step 5: Look for Hidden Leaks and Obvious Water Loss
Leaks can steal pressure and flow from the system, especially if they are significant or have been developing for some time. Some leaks are easy to spot, such as damp cabinets, dripping pipe joints, stained ceilings, or puddles near the water heater. Others are hidden in crawl spaces, behind finished walls, under slabs, or in buried service lines between the house and the street.
Start with what you can see. Check under sinks, around toilets, near the water heater, around hose bibs, and along exposed basement or utility piping. Look for corrosion, green staining on copper, mineral crusting, rust trails, swollen materials, and soft spots. Any of these signs suggest water has been escaping.
Then use your water meter if you have one. Turn off all fixtures and anything that uses water, then watch the meter. If the leak indicator moves or the reading changes while no water is intentionally running, that suggests water is going somewhere it should not. This does not tell you exactly where the leak is, but it confirms that further investigation is needed.
A buried service line leak can be especially tricky. You may notice soggy ground, unusually green patches of lawn, or a drop in pressure that affects the whole house. If you suspect the line between the street and the house is compromised, that is no longer a small DIY situation. Service line diagnostics and repairs usually need a licensed plumber, and in some areas you may also need to coordinate with the utility.
Step 6: Consider Pipe Corrosion and Sediment Buildup in Older Homes
If your home has older galvanized steel piping, decades of internal corrosion can reduce the effective pipe diameter enough to choke water flow. This does not always show up suddenly. More often, the pressure complaint grows over time as the lines gradually narrow with rust and mineral deposits. At that point, cleaning aerators may help at the fixture, but the underlying restriction remains in the piping itself.
Signs of aging pipe restrictions include widespread low flow, discolored water after sitting, recurring sediment in aerators, and better performance at some fixtures than others depending on the pipe route. If only hot water pressure is poor throughout the house, sediment at the water heater or restrictions on the hot side may also be part of the problem.
This is where honest diagnosis matters. There is only so much you can do if the piping itself is the bottleneck. In a house with badly corroded galvanized lines, the long-term fix may be repiping sections or replacing the system. It is not the answer homeowners hope for, but it is often the right one when the distribution pipes have simply reached the end of their useful life.
Step 7: Separate Hot Water Problems from Cold Water Problems
If low pressure appears only on the hot water side, focus your troubleshooting there. Check whether the problem is present at every fixture that draws hot water or only at one. A single weak hot faucet can point to a local stop valve, cartridge, or supply tube issue. Weak hot flow everywhere suggests a broader problem tied to the water heater or hot water distribution piping.
Start with the shutoff valve on the cold water inlet to the water heater. If it is not fully open, the entire hot water system can be starved. Then consider sediment buildup. Water heaters accumulate mineral deposits over time, especially in hard water areas. While sediment often affects heating efficiency first, it can also contribute to flow problems in some systems and fixtures downstream.
Tankless water heaters can introduce a different kind of confusion. They do not usually reduce house pressure on their own when working properly, but inlet screens, internal scaling, or service valve issues can limit performance. If hot-side flow is weak after a tankless unit and the cold side remains strong, the unit may need cleaning or service according to the manufacturer instructions.
Step 8: If You Are on a Well, Check the Well System Basics
Homes on private wells have another layer to consider because the utility side is not part of the equation. In a well system, the pump, pressure switch, and pressure tank work together to deliver stable household pressure. If one of those components is underperforming, the whole house can feel weak even though the plumbing inside the house is otherwise fine.
The pressure tank is especially important because it helps stabilize flow and reduce pump cycling. If the tank loses its proper air charge or the internal bladder fails, pressure can swing more than it should. You may notice the pump turning on and off frequently, water pressure fading quickly during use, or inconsistent flow from one moment to the next.
Check the pressure gauge on the well system if one is installed. Watch how pressure behaves while water is running and when the pump cycles. If the pump struggles to reach cutoff pressure, the tank is waterlogged, or the system short cycles, you are likely beyond basic fixture maintenance and into well equipment diagnostics. Some homeowners are comfortable checking the tank charge and switch settings, but many are better served by a well technician or plumber with well-system experience.
Also remember that low-producing wells and clogged sediment filters can create symptoms that feel like pressure failure. If your system includes whole-house filters, check whether the cartridges are overdue for replacement. A dirty filter can throttle flow to the entire home.
Step 9: Rule Out a Supply-Side Problem from the Utility
Sometimes the issue is not in your house at all. Municipal utilities often note that low water pressure can be temporary or ongoing and may result from nearby repairs, hydrant use, main breaks, high local demand, or operational changes in the distribution system. That is why it helps to ask neighbors whether they are seeing the same problem.
If neighboring homes are also affected, the utility becomes a more likely source. Check your city or water provider website for service notices, maintenance alerts, or known issues in your area. If there is no posted explanation and your whole house pressure remains low at the hose bib, call the utility and ask whether there are supply-side problems or whether they can confirm pressure at the street.
Do not skip your own checks first. Utilities will usually expect you to confirm that the issue is not a clogged fixture or a partly closed house valve. The more specific you can be about what you tested, the faster the conversation goes.
Common Misconceptions That Lead Homeowners in the Wrong Direction
One common mistake is assuming every weak faucet means low house pressure. In reality, a clogged aerator can make a perfectly healthy system feel inadequate at one sink. Another mistake is thinking that replacing the faucet or showerhead is the obvious answer. New fixtures will not solve a partly closed main valve, a failing PRV, a hidden leak, or a bad well pressure tank.
It is also worth clearing up the idea that low-flow fixtures are the same thing as low pressure. They are not. Modern water-efficient fixtures are designed to perform under a range of conditions while using less water. If they feel weak, the cause is often poor maintenance, incompatible parts, mineral buildup, or a pressure issue elsewhere in the system. Replacing efficient fixtures without diagnosing the real problem is wasted money.
On the other end of the spectrum, some homeowners believe higher pressure is always better. It is not. Pressure that is too high can damage supply lines, washing machine hoses, valves, water heaters, and fixture cartridges over time. Good plumbing is about controlled, reliable pressure, not the highest number possible.
Practical rule: If one fixture is weak, inspect the fixture. If the whole house is weak, inspect the system.
A Practical Decision Tree You Can Follow
If you want to keep the process simple, follow this order. First, determine whether the problem affects one fixture, one branch, the hot side, or the whole house. Second, clean aerators and showerheads and confirm local shutoff valves are fully open. Third, test pressure at an outdoor hose bib with all water use turned off. Fourth, check the main shutoff valve and look for signs of leaks. Fifth, consider the PRV, service line, utility supply, or well equipment based on what the gauge and your observations tell you.
That stepwise approach matters because it keeps you from jumping to expensive conclusions too early. It is common for homeowners to worry about buried pipes or city supply when the real problem is at the faucet. It is just as common for people to keep replacing fixture parts when the whole-house reading already shows a main-line problem. A little structure keeps the troubleshooting grounded.
When You Should Call a Professional
There is no prize for pushing past your comfort level with plumbing. Call a plumber if the main shutoff valve is seized or leaking, if the pressure-reducing valve appears faulty, if you suspect a hidden leak, if the house has old corroded piping, or if the hose bib pressure test shows a whole-house issue you cannot isolate. Those are all problems where the right diagnosis matters more than trial and error.
You should also call for help if pressure problems are tied to the water heater, if well equipment is short cycling or failing to build pressure, or if you suspect a service line issue. These repairs can affect the safety and reliability of your water system, and they are not good places for guesswork. If you are on municipal service and your tests suggest a utility-side problem, contact the utility as well as your plumber if needed.
A good plumber will usually appreciate that you did the basic checks first. Telling them whether the problem affects one fixture or the whole house, what the hose bib pressure was, whether the main shutoff is fully open, and whether you found any leaks gives them a head start. That often saves time and money.
Simple Maintenance That Helps Prevent Future Pressure Problems
Some causes of low water pressure are not preventable, but many are. Clean faucet aerators and showerheads periodically, especially if you have hard water or recurring sediment. Exercise shutoff valves gently from time to time so they do not seize in one position for years. Replace old washing machine hoses and keep an eye on visible plumbing for corrosion or small leaks before they grow into larger failures.
If your home has a PRV, ask your plumber to check it during routine plumbing service, especially in older homes. If you are on a well, keep up with pressure tank checks, filter changes, and pump maintenance. And if your home has a history of mineral scale, consider whether water treatment would reduce fixture clogging and extend the life of your plumbing components.
None of this is glamorous, but that is the reality of good home maintenance. Water systems work best when small problems are handled early. Most of the time, low water pressure does not start as a crisis. It starts as a weak shower, a slow sink, or a fixture that used to work better. Catching it early gives you the best chance of an easy fix.
Final Thoughts
Troubleshooting low water pressure is not about knowing every plumbing detail. It is about following a clear process. Start by identifying where the problem occurs. Check the simple restrictions first. Measure the pressure instead of guessing. Then move logically toward valves, leaks, regulators, service lines, or well equipment only as the evidence points you there.
That practical approach does two things. It helps you solve the common easy problems on your own, and it gives you solid information when the issue needs a professional. Either way, you are no longer just living with weak water flow and hoping it improves.
If there is one takeaway to remember, it is this: low pressure at one fixture usually means a local problem, while low pressure everywhere usually means a system problem. Once you know which one you are dealing with, the path forward gets a lot clearer.



No Comment! Be the first one.