


How to Effectively Clean Your Solar Panels for Maximum Efficiency
Solar panels have a well earned reputation for being low maintenance, and that is one of the reasons they appeal to homeowners looking for a practical long term investment. Once installed, a good solar system often runs quietly in the background with very little day to day attention. Even so, low maintenance does not mean no maintenance. Dirt, dust, pollen, bird droppings, traffic residue, salt, and seasonal debris can collect on the surface over time and reduce how much sunlight reaches the cells beneath the glass.
Table Of Content
- Why cleaning solar panels matters
- How often should you clean solar panels?
- Inspect before you clean
- Safety first: when DIY is appropriate and when it is not
- What you need to clean solar panels properly
- The best time of day to clean solar panels
- Step by step: how to clean your solar panels
- Step 1: Turn your attention to the manual and the surroundings
- Step 2: Start with a gentle rinse
- Step 3: Gently wipe stubborn areas with a soft sponge or brush
- Step 4: Rinse thoroughly
- Step 5: Let the panels air dry and inspect the finish
- Step 6: Monitor production over the next few days
- Common mistakes to avoid
- Special considerations for pollen, bird droppings, salt, and snow
- Ground mounted vs rooftop systems
- How to tell if cleaning helped
- When to call a professional
- A simple seasonal maintenance routine
- Final thoughts
If you have been wondering whether cleaning your solar panels is really necessary, the most honest answer is that it depends on where you live and what lands on your system throughout the year. In many homes, rain and a decent panel tilt do a reasonable amount of the cleaning work. In other settings, especially dry climates, coastal areas, high pollen regions, or homes near roads, farms, and tree cover, buildup can linger and start affecting output in a meaningful way. Research from NREL shows that soiling losses vary widely by geography and conditions, and in some cases those losses are large enough to justify occasional cleaning.
This guide is designed to help homeowners take a calm, informed approach. Rather than assuming your panels need frequent washing, or assuming rain will always handle everything, the better path is to inspect first, clean only when needed, and use a gentle method that protects the glass, frame, and warranty. That approach is practical, safe, and aligned with what major industry sources recommend.
Below, you will find a straightforward step by step process for cleaning solar panels at home, along with clear guidance on what not to do. You will also learn when it makes sense to call a professional instead, particularly for steep roofs, difficult access, winter conditions, or systems that are simply not safe to reach. The goal is not perfection. It is steady performance, sensible upkeep, and protecting the value of your solar investment over time.
Why cleaning solar panels matters
Solar panels work best when sunlight reaches the photovoltaic cells with as little interference as possible. A thin film of grime might not seem significant from the ground, but even a modest layer of dust or pollen can reduce output. In some environments, the effect is minor and temporary. In others, especially where buildup cements onto the surface or combines with humidity, losses can become much more noticeable.
NREL has documented that annual soiling losses can be economically meaningful, with one insolation weighted example around 5 percent and much higher losses possible in dustier regions. Its research on pollen is particularly useful for homeowners because it challenges a common assumption that rain always cleans panels well enough. In a North Carolina study, panel performance dropped by as much as 15 percent during peak pollen season, and annual losses could reach around 10 percent without planned cleaning in that environment. That does not mean every home will see those numbers, but it does show that bio soiling can be more stubborn than many people expect.
EnergySage also reports that cleaning can improve production by 10 to 25 percent in some cases, particularly where panels collect dust, salt, bird droppings, or other buildup. The important phrase there is in some cases. A home with steeply tilted panels in a rainy area may see little benefit from frequent washing, while a home near a gravel road or under heavy spring pollen may notice a real improvement after a careful cleaning. Cleaning should be based on actual conditions, not on a fixed assumption.
The smartest maintenance plan is not the most aggressive one. For most homeowners, the best approach is to inspect regularly, monitor production, and clean only when visible soiling or falling output suggests it is worth the effort.
That balanced mindset matters for another reason. Overcleaning carries its own risks. Every unnecessary trip onto a roof raises the chance of injury, and every overly aggressive cleaning method increases the chance of scratches, seal damage, or warranty issues. The objective is to preserve efficiency, not create new problems while chasing an idealized spotless finish.
How often should you clean solar panels?
There is no universal schedule that fits every home. Canadian Solar notes that modules with enough tilt may not require routine cleaning because rainfall can have a self cleaning effect, but it still recommends annual maintenance to avoid soiling and keep an eye on system condition. Hydro Québec similarly describes solar photovoltaic systems as requiring little maintenance, which supports a low effort message, but not a no maintenance message.
For many homeowners, a good starting point is a visual inspection once or twice a year, along with a quick check after major events such as wildfire smoke, heavy pollen season, a long dry spell, nearby construction, or a bird problem. If your production monitoring shows an unexplained drop, that is another signal to inspect. A decline in energy output does not always mean dirty panels, but soiling is one of the easiest causes to evaluate.
Climate and surroundings should shape your schedule. Homes in dry western climates may deal with dust and less natural rinsing from rain. Coastal properties may accumulate salt residue. Homes near farms or unpaved roads may see fine particles settle more often. Tree heavy lots can bring sap, leaves, and shade related debris. Eastern and southeastern regions can experience thick seasonal pollen that does not fully wash away. In these cases, you may end up cleaning once or twice a year, or occasionally more often if conditions are severe.
On the other hand, if your panels look clean, your system output is stable, and your roof is not easy or safe to access, there is little reason to create work just for the sake of it. NREL and other sources increasingly emphasize the economics of cleaning, which means comparing the effort and cost of washing against the energy lost to soiling. For a homeowner, that simply means doing maintenance with a purpose.
Inspect before you clean
Before reaching for a hose or sponge, take a few minutes to inspect the system. This simple step often determines whether cleaning is necessary at all. Look at the panel surfaces from the ground, or from a safe vantage point, during morning or late afternoon light when residue is easier to see. Dusty haze, yellow pollen film, bird droppings, and streaky deposits tend to show up more clearly at an angle.
It is also helpful to review your system monitoring app or inverter display. Compare recent production to a similar sunny period from the previous week, month, or year, taking weather differences into account. If output has been lower than expected and there is visible buildup on the panels, cleaning may be justified. If output looks normal and the panels appear reasonably clear, you may decide to leave them alone.
Inspection is also your chance to look for issues that cleaning will not solve. Cracked glass, loose wiring, discoloration, damaged seals, pests nesting under panels, or persistent shading from tree growth are all signs that the system may need professional attention. A cleaning guide should never blur the line between basic maintenance and technical repair. If something looks damaged, pause and call your installer or a qualified solar professional.
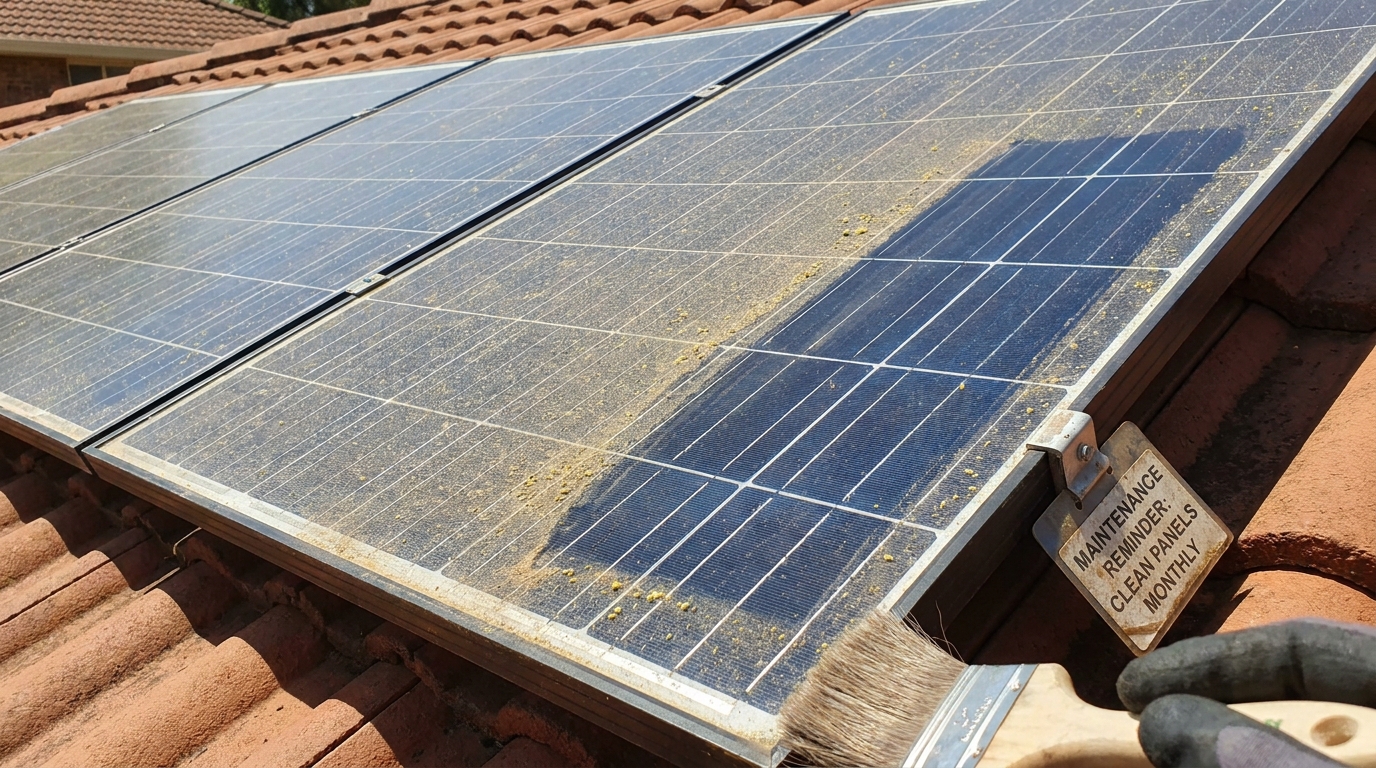
One final inspection note is easy to overlook but very important. Always review your panel manufacturer instructions and warranty terms before cleaning. Canadian Solar warns that inappropriate cleaning methods can affect warranty coverage. Different manufacturers may have slightly different guidelines for approved tools, water quality, acceptable access methods, or cleaning frequency. A few minutes spent checking those documents can prevent a much more expensive mistake.
Safety first: when DIY is appropriate and when it is not
Cleaning solar panels sounds simple, but the real challenge is often access rather than technique. A ground mounted array is usually very DIY friendly because you can reach the surface safely from stable ground. A low slope garage roof with easy access may also be manageable for some homeowners with the right equipment and experience. A steep, high, icy, or fragile roof is a completely different situation and should not be treated casually.
If you need to climb onto a roof to clean the panels, stop and evaluate the risk honestly. Slippery surfaces, changing weather, overhead power lines, and awkward body positioning make falls much more likely than people realize. Solar panels themselves should never be walked on, leaned on, or used for balance. If safe access is not straightforward, the most efficient choice may be to hire a professional rather than force a risky DIY job.
There are also situations where cleaning from the ground may be possible with an extension pole, soft brush head, and gentle water flow. This can work well on lower roof sections if you can maintain control of the tool and avoid scraping the glass. The key is to stay within methods that are both safe and gentle. If controlling the equipment feels awkward, if the angle is poor, or if you cannot clearly see what you are doing, it is better to stop.
Weather matters too. Never attempt cleaning during thunderstorms, high winds, extreme heat, freezing conditions, or when the roof is wet or slick. If there is snow or ice on the roof, the risk rises quickly. In many Canadian climates, winter maintenance should focus more on monitoring output and safely clearing accessible obstructions than on trying to wash panels during unsuitable conditions.
What you need to clean solar panels properly
The best solar panel cleaning kit is surprisingly simple. Most manufacturers and editorial guidance point to the same fundamentals: clean water, a soft non abrasive sponge or cloth, and a soft brush if needed for light debris. The goal is to lift and rinse away residue without scratching the glass or stressing the panel surface.
Here is a sensible set of tools for a homeowner cleaning a safely accessible system:
- Clean water, ideally from a hose with gentle flow rather than a pressure setting
- A soft non abrasive sponge or microfiber applicator for loosening residue
- A soft brush on an extension pole if you need extra reach and the manufacturer allows it
- A bucket of water for wetting the sponge or brush
- A squeegee with a soft rubber edge if recommended by the manufacturer and used gently to reduce spotting
- Safe footwear and stable footing if you are working near the array on a secure surface
What you should not use is just as important. Avoid pressure washers, wire brushes, abrasive scrub pads, metal blades, harsh detergents, solvents, and hot water on cool panels. Canadian Solar specifically advises washing dirty panels with water and a non abrasive sponge during the cool part of the day and warns against scraping dry dirt because it can cause micro scratches. Those small scratches may not be visible immediately, but over time they can reduce clarity and performance.
Water quality deserves a quick mention as well. Hard water can leave mineral spots after drying, especially in sunny climates. If your tap water is very mineral heavy, a final rinse with deionized or filtered water can help reduce spotting. This is not always necessary, but it can make a difference if you regularly notice residue on windows, cars, or outdoor fixtures after rinsing.
The best time of day to clean solar panels
Timing affects both safety and results. The best time to clean solar panels is usually early morning or late evening when the panels are cool to the touch and the sun is not intense. Cleaning during the hottest part of the day is not ideal because water can evaporate quickly, leaving spots, and temperature differences can put unnecessary stress on the glass surface.
Cool conditions also make the work easier physically. You are less likely to rush, and residue often softens more predictably when the surface is not baking in direct sun. If the panels have been in full sun for hours, allow them to cool before rinsing or wiping them. Gentle, patient cleaning is more effective than trying to force quick results in harsh midday conditions.
After a light rain can also be a practical moment to inspect, since moisture may reveal where pollen or dust remains stuck. If the rain left noticeable streaking or only partially cleared the surface, a more complete rinse and wipe may be worthwhile. Again, the point is to respond to actual conditions rather than adhering to a rigid calendar.
Step by step: how to clean your solar panels
If your panels are safely accessible and the manufacturer permits homeowner cleaning, this process keeps the job simple and low risk. The method below is intentionally gentle because solar panels are precision equipment, not exterior siding. Treating them carefully protects both performance and longevity.
Step 1: Turn your attention to the manual and the surroundings
Before doing anything else, confirm the cleaning guidance provided by your panel manufacturer and installer. Look for any specific instructions related to approved cleaning agents, water pressure, and physical access. While many systems can be cleaned with plain water and a soft sponge, warranties are not all identical. It is worth getting this right before you begin.
Once you have confirmed the method, assess the area around the array. Remove nearby obstacles, secure hoses and poles so they do not snag, and make sure children or pets stay clear while you work. If you are using a ladder for access to a non roof surface or a low structure, ensure it is stable and follows standard ladder safety practices. If there is any uncertainty at this stage, that is your sign to stop and reconsider whether the work should be professional.
Step 2: Start with a gentle rinse
Use a hose with a soft flow to wet the panel surfaces and loosen loose dirt. This first rinse often removes more residue than people expect, especially after a dry spell when dust has built up lightly. Let the water move across the glass rather than blasting at it. The purpose is to soften and carry away particles that might otherwise scratch the surface during wiping.
Do not use a pressure washer. This is one of the clearest points of agreement across manufacturer and editorial guidance. High pressure can damage seals, coatings, mounting components, or the panel surface itself. It may seem efficient in the moment, but it creates unnecessary risk for a task that responds best to patience rather than force.
Step 3: Gently wipe stubborn areas with a soft sponge or brush
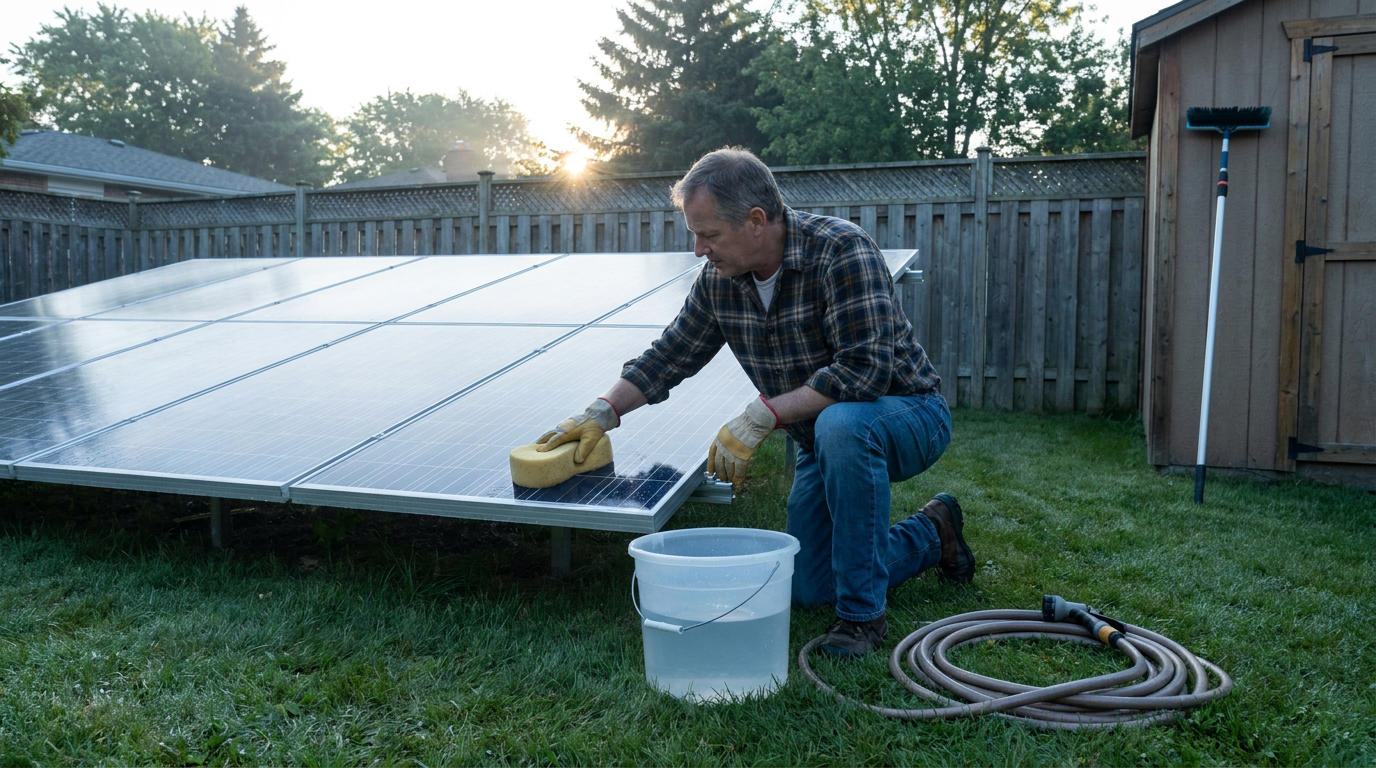
After rinsing, use a non abrasive sponge, microfiber applicator, or very soft brush to lightly clean any remaining film or droppings. Keep the tool wet while you work. If you encounter dried bird droppings, pollen paste, or sticky residue, let it soak a little longer rather than scrubbing harder. This is especially important because scraping dry contamination can create fine surface scratches.
Work in small sections and use straight, controlled motions. There is no need to press hard. If the residue does not lift easily, add more water and allow more time. A slow method usually protects the glass better and leaves a cleaner finish than aggressive wiping.
Step 4: Rinse thoroughly
Once the visible buildup is removed, rinse the panels again with clean water. This second rinse helps wash away fine particles and any loosened debris left behind by the sponge or brush. A complete rinse is particularly useful if your environment includes dust or pollen, since those materials can smear slightly when first wetted.
If your water is hard, you may notice spots as the panels dry. In that case, a final rinse with lower mineral water, if available, can improve the result. Some homeowners use a gentle soft edged squeegee afterward, but only if the manufacturer permits it and the tool is clean, soft, and used with a very light touch.
Step 5: Let the panels air dry and inspect the finish
Most systems can simply be left to air dry. Once dry, step back and inspect the surface from a few angles. You are looking for obvious remaining soiling, streaking, or areas where runoff collected extra debris. Perfectly spotless panels are not necessary. What matters is that major residue has been removed and light can pass through the glass more effectively.
This is also a good time to check the frames, mounting points visible from your vantage point, and the area beneath the array for nests, leaves, or trapped debris. Cleaning can be a useful opportunity for a light visual maintenance review, as long as you stay within what can be observed safely and do not attempt electrical or structural work.
Step 6: Monitor production over the next few days
The final step is one many homeowners skip, yet it is one of the most valuable. Check your system monitoring data over the next several clear days and compare it with recent performance. This helps you understand whether cleaning made a noticeable difference in your specific location and season. Over time, that information can guide a smarter maintenance rhythm for your home.
Data is especially useful because soiling is highly local. One neighborhood may have heavy pollen and dust while another nearby may not. Your own monitoring results can tell you more than generic cleaning schedules ever will. This is the homeowner version of the broader industry trend toward performance based maintenance and soiling monitoring.
Common mistakes to avoid
Many solar panel cleaning problems come from doing too much rather than too little. The most common mistake is assuming that if gentle cleaning is good, stronger cleaning must be better. In reality, abrasive tools, harsh chemicals, and pressure washing can damage the very surface you are trying to maintain. Solar equipment responds best to restraint.
Another mistake is cleaning on a dangerously hot day or while the panels are still hot from direct sun. This can increase water spotting and may put stress on the panel glass. Working in the cool part of the day is not just more comfortable, it is better for the equipment. Rushing through a cleaning session in poor conditions rarely produces a better outcome.
Homeowners also sometimes scrape off dry droppings, thick dust, or stuck on debris with rigid tools. That approach may feel efficient, but it risks micro scratching the glass. Canadian Solar specifically warns against scraping dry dirt for this reason. It is far better to soak residue patiently and let water do most of the work.
One more mistake is ignoring production data. If you clean panels without ever checking before and after performance, you miss the chance to learn whether your cleaning schedule is actually useful. Smart maintenance is not about constant action. It is about understanding what your system needs and responding with just enough effort to keep it working well.
Special considerations for pollen, bird droppings, salt, and snow
Not all soiling behaves the same way. Light dust often rinses away easily. Pollen can be more stubborn because it may mix with moisture and create a film that rain does not fully remove. This is why NREL’s pollen findings matter so much for homeowners in eastern and southeastern regions. If spring output falls even after rainfall, residual pollen may be part of the story.
Bird droppings deserve quick attention when practical because they can block concentrated areas of sunlight and harden onto the glass if left in place for long periods. Salt buildup near the coast may appear as a hazy film and can justify periodic rinsing in drier stretches of weather. Agricultural dust, wildfire residue, and industrial particles can also create a more persistent layer than ordinary urban dust.
Snow is a different category. In Canada and northern U.S. climates, a light layer of snow can temporarily stop production, but many tilted panels shed snow on their own when conditions warm and sunlight returns. The safest advice for most homeowners is not to climb onto a snowy or icy roof to clear panels. If you have a ground mounted system or a safely reachable lower array, a roof safe non abrasive snow tool may be appropriate if the manufacturer allows it. Otherwise, it is often better to wait for natural shedding or call a professional if buildup is severe and persistent.
Whatever the contaminant, the principle stays the same. Understand the material, respond gently, and never let the desire for immediate perfect output push you into unsafe or damaging methods. Solar maintenance works best when it is thoughtful rather than reactive.
Ground mounted vs rooftop systems
Ground mounted systems are generally the easiest and safest type of array for homeowners to clean themselves. You can access the panels from stable ground, inspect them closely, and work with a hose and soft sponge without balancing on a roof. For many people, this is where DIY cleaning makes the most sense. If your array is ground mounted, a modest seasonal maintenance routine can be very manageable.
Rooftop systems require more caution. Even if the roof feels familiar because you have done other maintenance there, solar panels change the working conditions. They create new slip points, awkward reaches, and fragile zones where your weight should never be placed. A rooftop that seems easy for gutter cleaning may still be a poor candidate for DIY panel washing.
One balanced option for rooftop owners is to separate inspection from cleaning. You can often inspect from the ground with binoculars or zoom photos, monitor production digitally, and then decide whether a professional cleaning is warranted. This avoids turning every minor concern into a roof access event. In many homes, that is the most sensible compromise between maintenance awareness and personal safety.
How to tell if cleaning helped
After cleaning, give the system a few clear days and then compare production to recent sunny days with similar temperatures and daylight conditions. Look for modest improvements rather than dramatic miracles. If your panels were visibly dirty, especially with pollen, droppings, or dusty haze, you may notice stronger daytime output or improved consistency across the week.
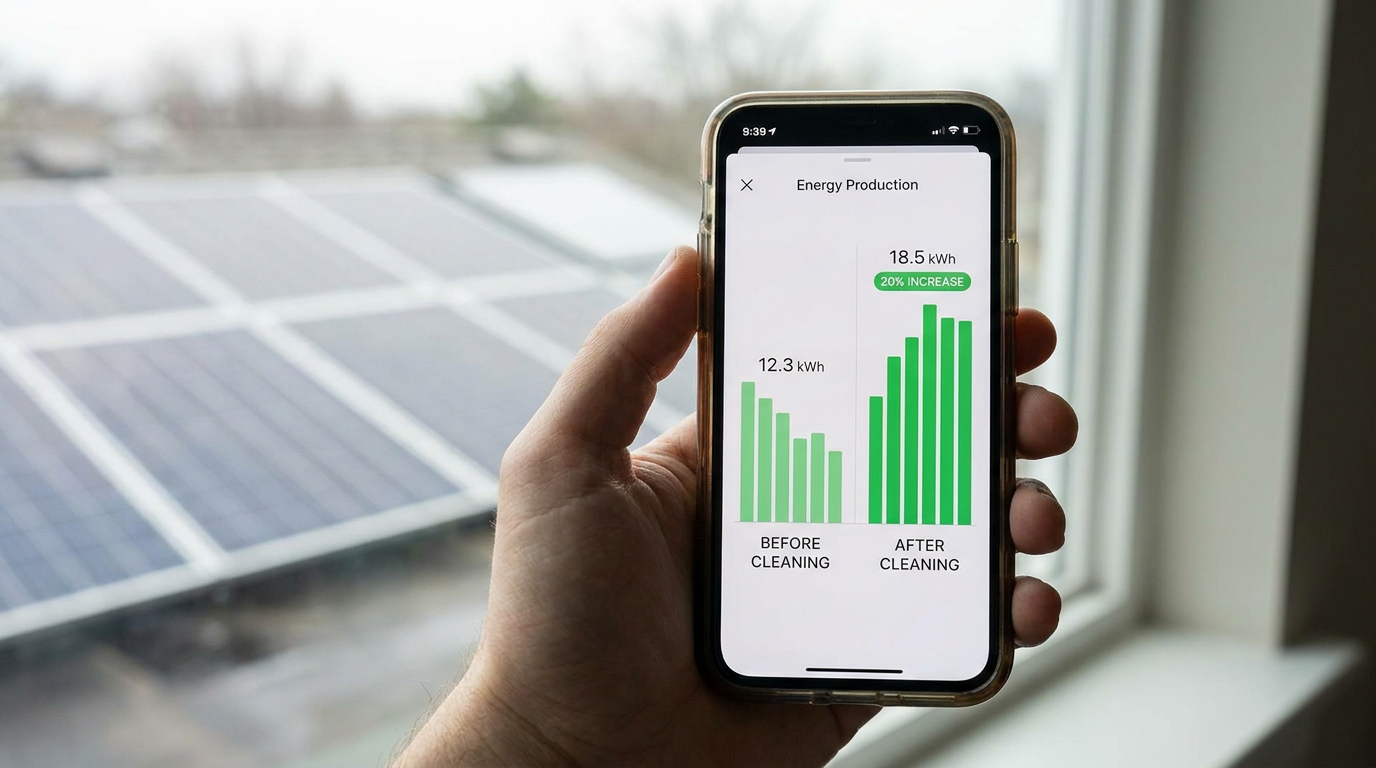
If there is no noticeable improvement, that does not necessarily mean cleaning was pointless. It may simply mean your system was already fairly clean, or that weather and seasonal solar angle mattered more than soiling at that moment. This is still useful knowledge. It suggests you may not need to clean often, which can save time, reduce risk, and help you build a more efficient maintenance routine.
On the other hand, if cleaning produces a clear improvement, make note of what kind of buildup was present and what time of year it occurred. Over a couple of seasons, patterns emerge. Maybe spring pollen is your main issue, or maybe late summer dust near a road causes the biggest losses. Those patterns allow you to maintain with intention instead of guesswork.
When to call a professional
There is no loss of self reliance in deciding a job should be handled by someone with the right equipment and insurance. Professional cleaning is the better choice if your panels are on a steep roof, your access is limited, the array is very high, or local weather makes footing unreliable. It is also worth considering if your system includes hard to reach areas with heavy residue or if you suspect a technical issue beyond surface dirt.
A professional may also be appropriate if your warranty language is strict, if the installer recommends approved service partners, or if you simply want a combined cleaning and inspection visit once every year or two. For some homeowners, especially those with multi story roofs or limited mobility, outsourcing the task is the most practical path. Sustainable home care is not about doing every task personally. It is about making good decisions for the home, the equipment, and your own safety.
If you hire someone, ask how they clean the panels, what tools they use, whether they follow manufacturer guidance, and whether they carry insurance for roof work. A reputable cleaner should be comfortable answering those questions. You want the same gentle, warranty aware approach described in this guide, just delivered by a professional team.
A simple seasonal maintenance routine
For most households, the most effective solar maintenance plan is surprisingly modest. Inspect the panels visually in spring and fall. Check your monitoring app periodically for unexpected drops in production. Clean only when visible soiling and performance changes suggest that cleaning is likely to help. This rhythm keeps effort low while still protecting efficiency.
In spring, pay attention to pollen, bird activity, and tree debris. In summer, dust, wildfire smoke residue, and dry conditions may matter more. In fall, leaves and nearby construction dust can become issues. In winter, focus on safe observation rather than risky roof access. The exact schedule will depend on your climate, roof design, and surroundings, but the principle stays consistent throughout the year.
This practical routine also aligns well with newer trends in the solar industry. Rather than relying on arbitrary fixed cleaning intervals, more owners and operators are making decisions based on visible conditions, sensors, and actual production data. Homeowners do not need advanced soiling monitors to benefit from this mindset. A little observation and a little data go a long way.
Final thoughts
Cleaning solar panels is not something most homeowners need to do constantly, but it is a valuable maintenance skill when used thoughtfully. The most reliable guidance from public research and manufacturer sources points to the same conclusion: inspect first, clean only when needed, and use gentle methods that protect the panel surface and the warranty. In practical terms, that usually means water, a soft non abrasive sponge, cool conditions, and no pressure washing or scraping.
For many homes, rain and panel tilt will handle much of the work. For others, especially in dusty, coastal, agricultural, tree covered, or pollen heavy regions, periodic cleaning can help recover useful energy production. What matters most is not following a rigid schedule. It is paying attention to your specific environment and responding with sensible care.
That is the reassuring part of solar maintenance. You do not need to overcomplicate it, and you do not need to chase perfection. With occasional inspection, safe cleaning practices, and a little production monitoring, you can keep your system performing well year round while protecting both your investment and your peace of mind.



No Comment! Be the first one.