


How to Perform a Shading Check for Your Solar Panels: A Step-by-Step Guide
If your solar panels are producing less energy than expected, shading is one of the first things worth checking. It is easy to assume that a roof is either sunny or shaded, but real solar performance is more nuanced than that. A small shadow from a vent pipe, a nearby tree branch, or a neighboring roofline can reduce output more than many homeowners realize, especially if your system uses a string inverter.
Table Of Content
- Why a shading check is worth doing
- What you need before you start
- Step 1: Identify every potential source of shade
- Step 2: Observe the roof at different times of day
- Step 3: Check shade across seasons, not just today
- Step 4: Compare your observations with solar monitoring data
- Step 5: Estimate whether the shading is minor or significant
- Step 6: Decide on the right mitigation strategy
- Step 7: Watch for warning signs that go beyond normal shade loss
- Common misconceptions that can lead homeowners astray
- When to bring in a professional
- How often should you perform a shading check?
- A calm, practical way to protect solar performance
- Quick homeowner checklist for a solar shading check
A shading check is one of the most practical ways to protect your solar investment. It helps you understand whether your panels are losing production because of trees, chimneys, antennas, snow, seasonal sun angles, or other roof features. It also gives you a clearer sense of whether the problem is minor and manageable or significant enough to justify trimming vegetation, changing panel layout, or bringing in a solar professional for a deeper assessment.
This guide is designed for homeowners who want a straightforward, informed process they can follow without guesswork. You do not need to become a solar engineer to do a useful shading review, but you do need a careful eye, some simple documentation, and an understanding of how shade behaves across the day and throughout the year. The goal is not perfection. The goal is to make practical decisions that improve energy production and support the long term performance of your system.
Shading matters because solar panels operate as part of an electrical system, not as isolated glass rectangles on a roof. The U.S. Department of Energy notes that in string inverter systems, shading on one panel can reduce output across the whole string. That means one underperforming module can affect the performance of several others, which is why even brief or partial shading should be taken seriously rather than dismissed as a cosmetic issue.
Research from the National Renewable Energy Laboratory underscores this point. In a monitored study of 542 PV systems, NREL found an average power loss of 8.3% due to partial shading, and estimated that module level power electronics recovered about 36% of the power lost to shading. Those figures are useful because they show that shade is not a theoretical concern. It can have a measurable effect on annual production, savings, and payback.
For many homes, the challenge is that shading is dynamic. A roof that seems fully exposed in summer may receive meaningful winter shade when the sun sits lower in the sky. Morning and afternoon shadows can also be important, particularly if they overlap with strong production periods in your climate. A reliable shading check therefore looks at your roof as a living condition, not a one time snapshot.
Why a shading check is worth doing
Homeowners often focus on panel cleanliness, inverter status, or utility bills when something feels off with solar performance. Those are all valid places to look, but shading can be a hidden source of loss because it is not always obvious from the ground. A branch may only cast a narrow morning shadow. A chimney may affect one corner of an array for an hour or two. A neighboring addition may not matter in June but may become a serious obstruction in December.
There is also a financial reason to check shading with some discipline. NREL’s PVWatts documentation uses a default shading loss assumption of 3% for broadly unshaded systems, but it advises increasing that number when actual trees or structures create shade. If your roof conditions are no longer close to unshaded, using a generic assumption can lead you to overestimate what your system should be producing and underestimate the benefit of taking corrective action.
Shading also intersects with maintenance and reliability. Persistent partial shading can activate bypass diodes and create hot spots that stress modules over time. Manufacturers explicitly warn installers to avoid shading, which is a reminder that this is more than an efficiency issue. If you see unexplained production drops, recurring inverter alerts, or visible discoloration near shaded areas, it is wise to treat the issue seriously and involve a qualified solar technician rather than simply monitoring the problem from a distance.
Practical takeaway: A little shade is not always harmless. Even modest, recurring shade can reduce production disproportionately, especially on string inverter systems, and seasonal changes can make the issue more severe than it first appears.
What you need before you start
A homeowner shading check does not require specialized trade equipment, but it does benefit from a simple toolkit and a methodical mindset. The most useful things to have are a phone or camera, a notebook or digital notes app, access to your solar monitoring platform, a basic site sketch of your roof if available, and a way to observe the roof safely from the ground. Binoculars can help if your array is difficult to see closely.
If you are comfortable and permitted to access the roof safely, that can give you a better view of obstructions such as vent stacks, chimneys, satellite dishes, parapets, dormers, and roof mounted equipment. However, safety matters more than detail. If there is any risk of slipping, damaging the roof, or getting near electrical components, stay on the ground and use visual observation, photos, and monitoring data instead.
It is also useful to know your basic system setup before you begin. Try to confirm the orientation of your roof, the approximate number of panels, whether your system uses a string inverter, microinverters, or power optimizers, and whether your monitoring app provides system level or panel level production data. These details help you interpret what you see. For example, a shaded panel on a microinverter based system may affect that panel mostly, while a similar condition on a string inverter may have a broader impact.
Step 1: Identify every potential source of shade
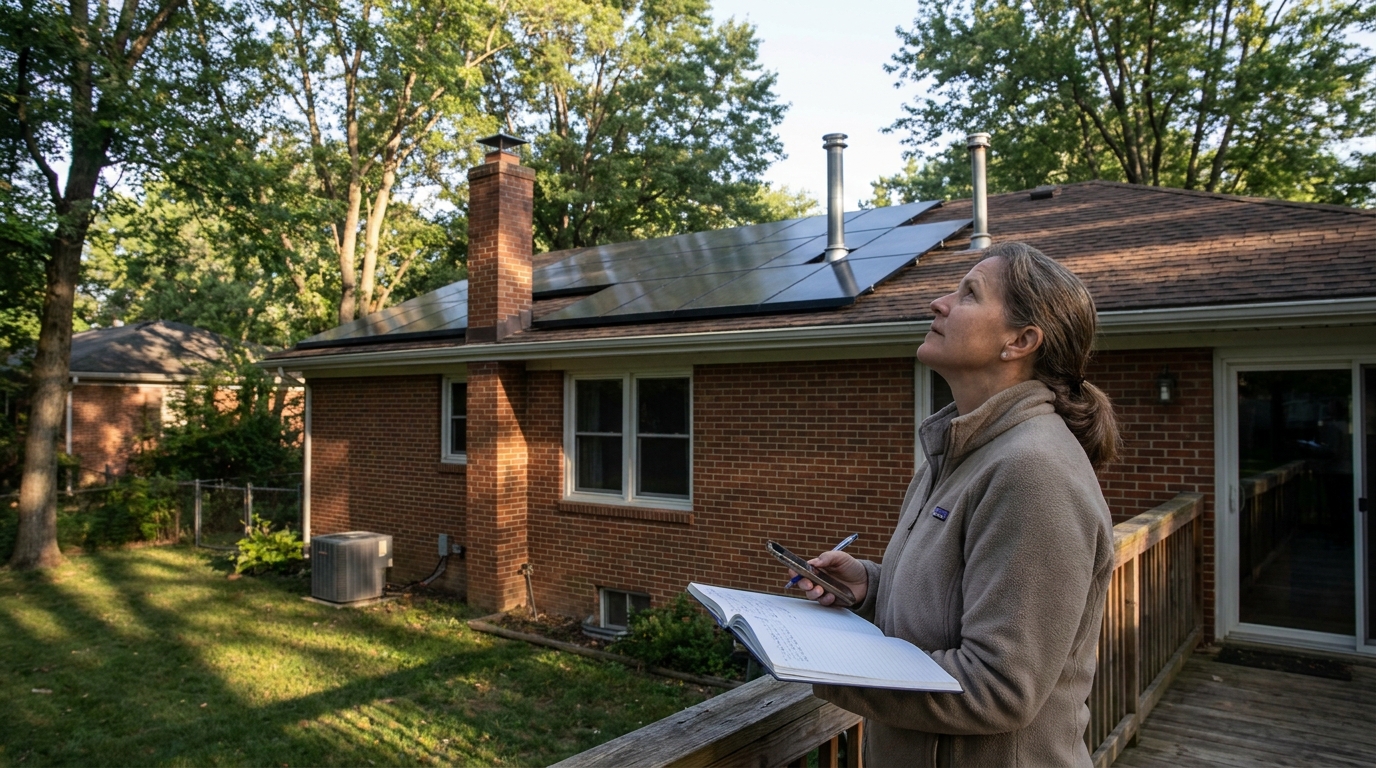
The first step is to walk your property and look for anything that can cast a shadow onto the panels now or in the future. Start with the obvious sources such as mature trees, neighboring buildings, chimneys, vent pipes, skylights, antennas, and roof ridges. Then look for less obvious contributors such as upper story walls, dormers, utility poles, pergolas, or new construction nearby that could alter the solar access of your roof over time.
Pay special attention to trees because they are dynamic. Deciduous trees may allow more sunlight in winter after leaf drop, but the lower winter sun can also make their branches cast longer shadows. Evergreens can block sunlight year round. Growth matters too. A tree that was harmless at installation may become a larger issue a few years later, which is why ongoing shading checks are useful even if your system initially performed well.
On the roof itself, features such as chimneys and vent stacks deserve careful attention because they can cast sharply defined shadows that move across the array. A shadow that clips the edge of one panel for part of the morning may not seem severe from the yard, but depending on panel layout and inverter type, it can still reduce production meaningfully. Make note of where these obstructions sit in relation to the panel rows and whether they appear likely to shade more than one module.
A simple list can help keep this organized.
- Trees on your property or nearby properties
- Chimneys and flues
- Vent pipes and roof penetrations
- Dormers, skylights, and parapets
- Antennas, satellite dishes, and roof equipment
- Neighboring homes, fences, and accessory structures
- Seasonal snow or ice buildup zones
- Future tree growth or planned construction
Step 2: Observe the roof at different times of day
Once you have identified possible obstructions, the next step is to watch what actually happens as the sun moves. Shade that appears for only a few minutes is different from shade that sits on a group of panels for two or three hours. Try to check the roof in the morning, around solar noon if possible, and again later in the afternoon. If you cannot do this on the same day, spread the observations over a few clear days.
Take photos from the same positions each time so you can compare them later. Stand far enough back to capture the whole array and nearby obstructions in one frame if possible. If you can only see part of the array, use multiple angles and label the photos clearly with the time and date. This may feel simple, but it is one of the most useful parts of the process because it turns vague impressions into a visual record.
As you observe, note which panels are shaded, how much of each panel is covered, and how long the shade persists. Be specific. Instead of writing “tree shade in morning,” write something like “top left two panels shaded from 8:15 a.m. to 9:30 a.m. by maple tree on south east side.” Good notes make it much easier to compare what you see with production data later.
This is also the stage where many homeowners discover that shading is more directional than expected. Morning shade from a tree to the east may disappear by midmorning, while a chimney closer to the center of the roof may create a concentrated shadow closer to midday in winter. The exact timing matters because not all shade causes the same annual loss. Consistent shading during productive daylight hours can have a larger effect than a small amount of shade very early or very late in the day.
Step 3: Check shade across seasons, not just today
A truly useful shading check looks beyond the current month. The Department of Energy and federal site assessment guidance emphasize that sun angles change through the year, and that solar access should be assessed with seasonality in mind. This matters because the winter sun is lower, which makes shadows longer and can expose problems that are nearly invisible in summer.
If you are doing this check during a bright summer period, pause before concluding that your roof is effectively unshaded. Ask yourself where the sun will be in late fall and winter, and whether nearby trees, chimneys, or neighboring homes could cast longer shadows then. In colder climates, snow piles, ice accumulation, and low sun angles can combine to create recurring winter production losses that are easy to miss during fair weather inspections.
One practical option is to repeat your observation routine several times per year, especially if your production has been inconsistent. Another is to use a sun path tool or sun tracking app to estimate where the sun will sit in different seasons. DOE and FEMP guidance recommend sun path or shading tools, including Solar Pathfinder type methods, because they provide a more complete picture than a single day of visual observation. For homeowners, a simple digital sun path app can be a helpful middle ground between professional modeling and casual guessing.
Step 4: Compare your observations with solar monitoring data
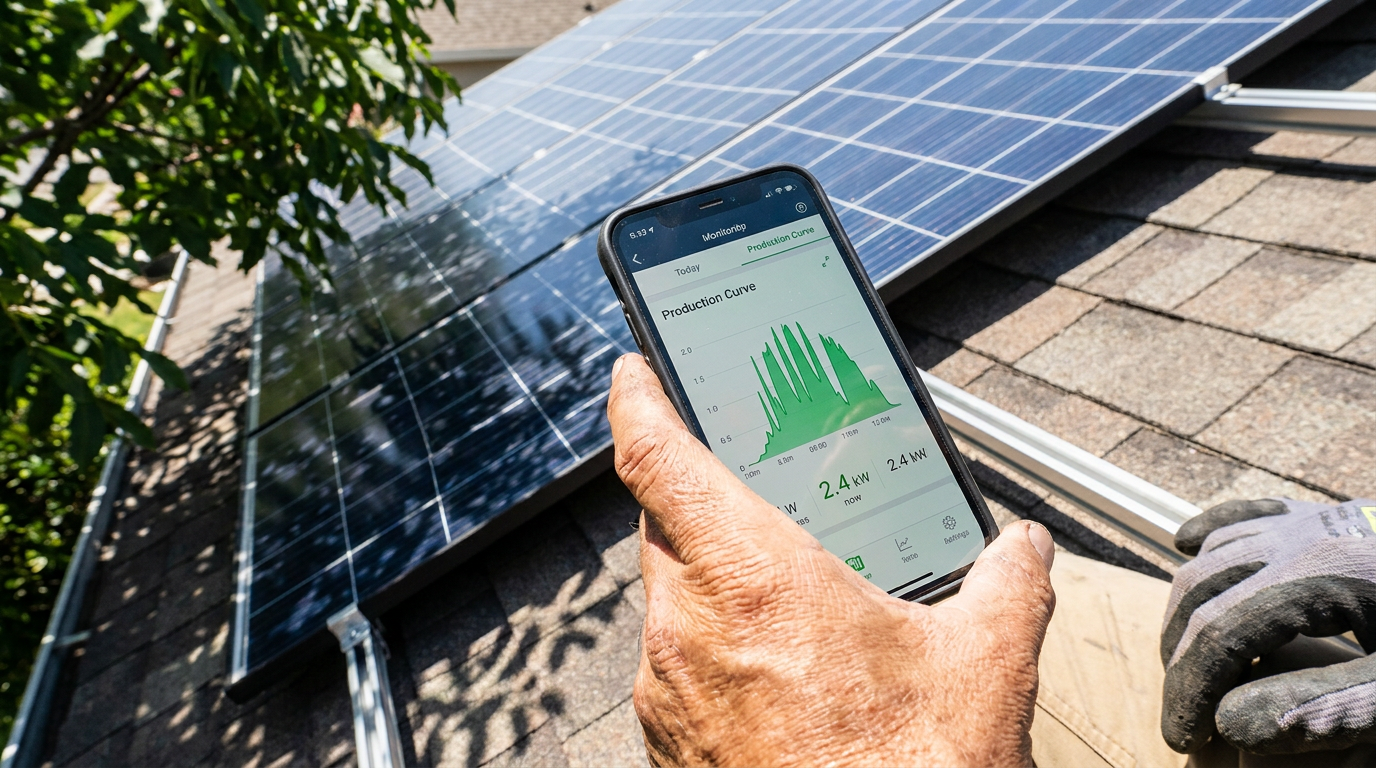
This is where the shading check becomes much more powerful. Once you have photos and notes, open your inverter portal or monitoring app and compare the production pattern against the times when shading occurs. You are looking for dips, flatter than expected ramps in the morning, early afternoon declines, or panel level underperformance if your system provides module level data.
On a clear day, a healthy solar production curve often rises smoothly in the morning, peaks around midday depending on system orientation and weather, and tapers later in the day. If your graph shows a repeated dent or delayed rise at the same time that tree shade hits the array, that is useful evidence. If a single panel or a subset of panels consistently trails the others, that can point to localized shade, mismatch, or a hardware issue that deserves attention.
It is important not to confuse shading with soiling or weather. Dirt tends to lower output more uniformly unless there is a localized buildup. Clouds affect the whole array more broadly and often fluctuate across the curve. Shade usually has a directional or time specific signature that matches a physical obstruction. Looking at several clear days rather than one imperfect day can make the pattern easier to see.
If your system only offers total output and not panel level monitoring, you can still learn a lot by comparing daily curves over time. Recurring reductions at the same hour or strong seasonal changes can still support a shading diagnosis. If the drop is abrupt, repeated, and visually consistent with your roof observations, you are likely on the right track.
Step 5: Estimate whether the shading is minor or significant
Not every shadow requires intervention. The practical question is whether the shading is small enough to accept or large enough to justify action. A reasonable way to think about this is to separate cosmetic shading from repeated production affecting shading. A brief edge shadow that appears very early in the morning may have little annual consequence, while repeated midmorning or afternoon shade on multiple panels may be worth addressing.
NREL’s broader rooftop methodology has used a criterion of not less than 70% of the output of an identical unshaded system in the same location when considering technical potential. That threshold is not a homeowner rule, but it is a useful reminder that there is a meaningful difference between a roof that is somewhat imperfect and a roof section that is too shaded to be efficient. If one part of your roof is regularly shaded, it may be better excluded from solar use rather than treated as acceptable simply because it still generates some power.
If you want a more structured estimate, tools such as PVWatts can help. The current PVWatts V8 includes updated weather data and monthly irradiance losses inputs, which makes it easier to model expected production under different assumptions. You can compare a broadly unshaded scenario to one with higher estimated shading losses and see how much annual energy and value are at stake. While this is still an approximation, it gives homeowners a better basis for decision making than intuition alone.
In simple terms, shading becomes significant when it is frequent, predictable, and aligned with productive daylight hours, or when it affects multiple panels repeatedly. It is also significant when the source is likely to worsen, such as a growing tree or nearby structure under construction. If the pattern is stable and small, monitoring may be enough. If the pattern is growing or visibly suppressing production, it is time to consider mitigation.
Step 6: Decide on the right mitigation strategy
Once you know where the shade comes from and how often it affects the array, you can think about what to do next. The right solution depends on whether the shade is temporary, seasonal, avoidable, or permanent. In some cases, trimming a branch can solve most of the problem. In other cases, the better answer is to relocate or redesign the affected section of the array.
Vegetation is often the most manageable source. Pruning trees or selectively thinning branches can restore solar access without removing all canopy value from the property. That balance matters because trees also support comfort, biodiversity, privacy, and cooling. Practical sustainability is often about thoughtful tradeoffs, not extreme choices. If a tree is highly valuable and the shading is modest, you may decide to keep the tree and accept some production loss. If the shade is severe and growing, a more assertive trimming plan may be warranted.
Roof obstructions can be harder to solve. You generally would not move chimneys, vents, or dormers simply to improve solar performance. In those cases, the more effective response may be to avoid placing panels in the shaded zone, reconfigure strings, or ask your installer whether module level electronics could reduce losses. DOE notes that string inverter systems can suffer reduced output when a single panel is shaded, which is why system design matters so much on complex roofs.
Microinverters and power optimizers can help when intermittent or localized shade is unavoidable, but they do not make shade irrelevant. This is an important misconception to clear up. NREL research indicates that module level electronics can recover a meaningful share of lost power, but severe or widespread shade still reduces available sunlight. In other words, better electronics improve resilience, but they do not create energy where light is not reaching the module.
- Trim or manage vegetation when tree growth is the main cause and the shading is practical to reduce.
- Adjust or exclude shaded roof areas when a particular roof section is permanently compromised.
- Review inverter architecture if your system uses a string inverter and one shaded panel is suppressing a larger group.
- Use monitoring to verify improvement after any change so you can confirm the effort actually helped.
- Call a professional when the cause is unclear, the production drop is substantial, or you suspect a safety issue.
Step 7: Watch for warning signs that go beyond normal shade loss
Most shading issues are performance issues first, but some can hint at deeper equipment stress. Persistent partial shading can contribute to hot spots, bypass diode activity, and localized heating. Homeowners should not open modules or inspect electrical internals, but they can look for outward signs that something deserves prompt professional attention.
Be alert for a sudden drop in output that is too large to be explained by weather alone, repeated inverter fault messages, visibly discolored areas on a panel, scorch like marks, or a panel that appears consistently much weaker than others in panel level monitoring. These are not signs to diagnose yourself on the roof. They are signs to pause, document what you can safely see, and contact a qualified solar technician or installer.
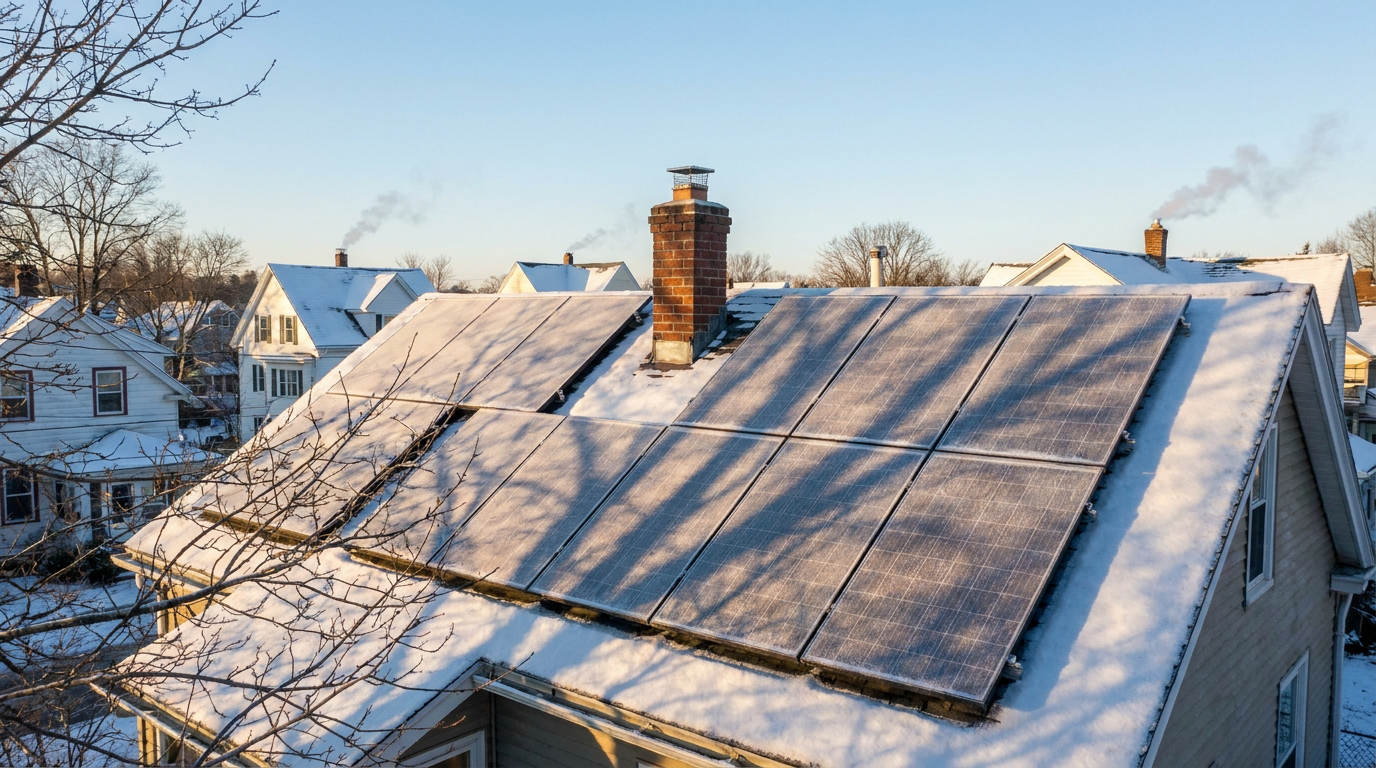
This is particularly relevant in northern climates where snow, ice, and low winter sun can create recurring partial shading patterns. Snow is not exactly the same as tree or chimney shade, but the production effect can be similar from a homeowner perspective. If parts of the array repeatedly remain snow covered while other parts clear, you may see mismatch and reduced output. That is one more reason seasonal monitoring matters.
Common misconceptions that can lead homeowners astray
One of the most common misconceptions is that shading only matters around noon. In reality, morning and afternoon shade can be consequential, especially if it overlaps with clear sky conditions and strong production windows. Seasonal timing matters too. A roof that looks excellent in June can behave very differently in January.
Another misconception is that if panels are still producing power, the issue is solved. Solar systems often continue operating under partial shade, but underperformance can still be substantial. The fact that the inverter is online does not mean the array is performing efficiently. This is why comparing observed shadows with production data is so valuable.
It is also common to hear that microinverters or optimizers eliminate shading losses. They do not. They reduce the system wide penalty caused by one shaded panel dragging down others, which is very helpful, but they cannot overcome severe physical loss of sunlight. Good design, smart placement, and realistic expectations still matter.
Finally, homeowners sometimes confuse dirt with shade. Both reduce production, but they work differently and should be evaluated separately. Soiling usually creates a more general reduction unless buildup is concentrated in one area. Shade tends to create patterns tied to time, direction, and specific obstructions. Treating them as the same issue can lead to missed diagnoses and unnecessary cleaning.
When to bring in a professional
A homeowner shading check is useful, but it has limits. If your observations suggest a recurring issue and the production impact appears meaningful, a solar professional can provide a more precise assessment. That may include sun path analysis, shade measurement tools, drone imagery, string level diagnostics, or updated production modeling using tools such as PVWatts or more detailed software platforms.
Professional support is especially worthwhile if you are considering spending money on tree work, relocating panels, replacing an inverter, or expanding your array. A technician or solar designer can help you quantify the likely energy gain so the decision is grounded in value rather than frustration. This is also helpful for homes with complex roof geometry, multiple azimuths, or mixed equipment.
You should also call a professional if the system shows warning signs beyond reduced output, such as electrical alerts, visible damage, or suspected overheating. Shade related performance loss is one thing. Potential equipment stress is another. Calm, timely action is usually the best response.
How often should you perform a shading check?
For most homeowners, an annual shading review is a sensible baseline. It is enough to catch tree growth, changing roof conditions, and obvious seasonal differences without turning maintenance into a full time project. If your property has fast growing vegetation, nearby construction, or known winter shade issues, checking twice a year can be even better.
The ideal times are often late winter or early spring and again in midsummer or early fall. This gives you a contrast between low and high sun conditions. It also aligns well with other solar maintenance habits such as reviewing monitoring data, checking for debris buildup, and confirming that roof drainage and snow patterns are not creating new issues around the array.
You should also do an extra check whenever production drops unexpectedly or after a visible site change. A neighbor’s renovation, a newly installed satellite dish, a growing tree canopy, or repeated snow drift buildup can all alter solar access. Waiting too long can mean accepting preventable losses for months or even years.
A calm, practical way to protect solar performance
A good shading check is not about chasing every last watt with perfect precision. It is about understanding your roof honestly and giving your solar system the conditions it needs to perform reliably. When you document shade carefully, compare it to production data, and think about it across seasons, you move from assumption to evidence. That alone can make maintenance decisions far more effective.
The encouraging part is that many shading issues are manageable once they are identified clearly. A pruning decision, a monitoring review, or a conversation with your installer may be enough to recover meaningful production. Even when shade cannot be fully eliminated, understanding its source helps you choose the right strategy, whether that means tolerating a small loss, improving system design, or planning future upgrades more thoughtfully.
Solar works best when it is treated as part of the whole home, connected to the landscape, the roof, the seasons, and the technologies supporting it. A shading check is a simple maintenance practice, but it reflects a bigger principle: long term efficiency comes from paying attention to real conditions. That mindset is practical, elegant, and ultimately one of the smartest ways to protect the value of clean energy at home.
Quick homeowner checklist for a solar shading check
- Walk the property and list every possible shade source.
- Photograph the array in the morning, midday, and afternoon.
- Repeat observations in more than one season if possible.
- Compare visible shadows with inverter or app production data.
- Separate shading issues from dirt, weather, and snow related effects.
- Estimate whether the shading is minor, recurring, or significant.
- Consider pruning, panel reconfiguration, or module level electronics where appropriate.
- Call a professional for major losses, safety concerns, or uncertain diagnoses.
With a little observation and a structured process, shading becomes much easier to understand. That clarity is often the first step toward better performance, steadier savings, and a more resilient solar home.


No Comment! Be the first one.