


10 Simple Steps to Organize Your Laundry Room for Maximum Efficiency
There are some rooms in a home that quietly shape the rhythm of everyday life, and the laundry room is one of them. When it feels crowded, messy, or unfinished, even a simple load of towels can become more frustrating than it needs to be. When it feels calm, clear, and easy to use, the entire routine changes. Laundry may never become anyone’s favorite task, but it can absolutely become smoother, lighter, and far less draining.
Table Of Content
- Why Laundry Room Organization Matters More Than You Think
- Step 1: Empty the Space and Reset It Completely
- Step 2: Define the Zones Before You Put Anything Back
- Step 3: Keep Only What You Actually Use
- Step 4: Use Vertical Storage to Free Up the Floor
- Step 5: Create a Sorting System That Matches Real Life
- Step 6: Build a Folding Surface You Will Actually Use
- Step 7: Decant and Contain Supplies to Reduce Visual Clutter
- Step 8: Make Space for Maintenance, Ventilation, and Safety
- Simple safety and maintenance habits to build into your setup
- Step 9: Add Drying Solutions That Save Space and Stress
- Step 10: Finish with Style So the Room Feels Good to Use
- Smart Laundry Room Ideas for Renters
- How to Keep the System Working Long Term
- Common Laundry Room Organization Mistakes to Avoid
- A Simple 10-Step Plan at a Glance
- Final Thoughts
A thoughtfully organized laundry room does more than look attractive. It helps you move through each step with less hesitation, less wasted motion, and less time spent hunting for stain remover, dryer sheets, or a missing basket. It can also support practical needs like moisture control, dryer safety, and appliance upkeep, all while making the space feel more personal and pleasant. That balance between beauty and utility is what turns a utility zone into a room that genuinely supports your life.
Today’s best laundry spaces are not overly complicated. Design trends continue to favor simpler systems, calming palettes, concealed storage, and layouts that reflect how people actually live. Whether you have a full laundry room, a compact closet, a basement setup, or a rental nook, the same principles apply. With a few intentional choices, you can create a space that feels organized, efficient, and quietly uplifting.
In this guide, we will walk through ten simple steps to organize your laundry room for maximum efficiency. These ideas are practical, flexible, and easy to adapt to both large and small homes. More importantly, they are designed to help laundry feel less like an interruption and more like a steady, manageable home routine.
Why Laundry Room Organization Matters More Than You Think
It is easy to think of laundry room organization as purely cosmetic, but the benefits are much more meaningful than that. An organized room reduces friction in your day. Sorting feels faster, folding feels easier, and routine tasks stop piling emotional weight onto an already busy schedule. Instead of approaching laundry with low-level dread, you begin to move through it with more clarity and confidence.
There are practical advantages too. A utility space works best when each zone is easy to reach and easy to maintain. When supplies are stored near where they are used, when floors stay clear, and when filters and vents remain accessible, the room supports both cleanliness and safety. The National Fire Protection Association warns that lint buildup is a fire hazard, which is one more reason to keep the dryer area uncluttered and the lint filter in regular use.
Moisture control also matters. The Centers for Disease Control and Prevention advises keeping indoor humidity at or below 50 percent to help reduce mold risk, and the Environmental Protection Agency makes the connection even clearer by emphasizing that mold growth is controlled by controlling moisture. A laundry room that is organized enough to allow airflow, proper venting, and regular cleaning is not just visually peaceful. It is healthier too.
A beautiful laundry room is not about perfection. It is about making an everyday task easier, safer, and gentler on your time and energy.
Step 1: Empty the Space and Reset It Completely
The most effective way to organize a laundry room is to begin with a full reset. Take everything out that you reasonably can, including stray tools, half-used cleaning products, old baskets, lone socks, extra paper goods, and anything else that has drifted in over time. This gives you the chance to see the room as it actually is, rather than as a collection of habits and clutter. You will also notice what belongs there and what has simply been tolerated there.
As you clear the room, pay attention to how much is truly laundry related. Utility spaces often become overflow storage for batteries, pet supplies, reusable bags, light bulbs, and miscellaneous household items. Some of that may be fine if you have enough space, but the first goal is to identify what interferes with the laundry routine. If an item slows you down or crowds a useful surface, it may belong somewhere else.
After emptying the room, wipe shelves, vacuum corners, and clean behind or around appliances if it is safe to do so. This is also a good moment to inspect for dust, residue, moisture, or signs of poor ventilation. Starting with a clean slate helps every later choice feel more intentional. It is much easier to build a calm system when the room has been physically and visually reset.
Step 2: Define the Zones Before You Put Anything Back
One of the smartest ways to organize a laundry room is to think in zones rather than in random storage categories. Laundry usually involves a sequence: sorting, washing, drying, treating stains, folding, and putting items away. When your room reflects that natural workflow, tasks become easier almost without effort. You stop crossing the room unnecessarily or interrupting yourself to search for the next thing you need.
A simple zoning plan might include a sorting zone with baskets, a washing zone with detergent and additives, a drying zone near the dryer and lint access, a stain-treatment area with a small tray or caddy, and a folding zone with a clear countertop or tabletop. If your room also includes a sink, that area can support soaking, handwashing, and quick cleanups. You do not need a large room to create these distinctions. Even a compact wall and one rolling cart can support a clear flow.
This approach also makes the room easier for everyone in the household to use. When the logic of the space is obvious, other family members can step in more confidently. Children can learn where to place clothing, partners can help without asking where supplies are, and routine tasks feel less dependent on one person carrying all the mental load.
Step 3: Keep Only What You Actually Use
Once the zones are clear, it becomes much easier to edit your supplies honestly. Many laundry rooms contain duplicates, expired products, products no one liked using, or niche stain removers that have not been touched in years. A crowded shelf does not make a room more prepared. In most cases, it simply creates decision fatigue and visual noise.
Keep the products and tools that support your real routine. That may mean detergent, stain remover, dryer balls, mesh bags, a lint brush, a small trash container, and a few baskets. If you regularly handwash delicates or soak sports uniforms, keep what helps you do that well. If you never use scented beads or specialty whiteners, there is no reason to let them take up your best storage space.
This step is where many rooms begin to feel calmer. Simpler organizing systems are easier to maintain over time, and current home organization advice increasingly reflects that truth. You do not need a complicated arrangement with dozens of tiny categories. You need a system that makes daily use feel easy and natural.
Step 4: Use Vertical Storage to Free Up the Floor
Floor space is precious in a laundry room, especially in smaller homes, condos, apartments, and basement corners. One of the fastest ways to improve efficiency is to move as much as possible upward. Vertical storage keeps necessities nearby while opening the room visually and physically. A clear floor is easier to clean, safer to walk through, and more relaxing to look at.
Wall-mounted shelves, cabinets, peg rails, slim utility racks, and hooks can all help. If you own your home, built-ins or custom shelving may be worth considering, especially if your laundry room is part of a renovation. If you rent, freestanding shelving, over-the-door organizers, stackable bins, adhesive hooks, and narrow rolling carts can work beautifully without permanent changes.
The goal is not to cover every inch of wall space. It is to use the wall area strategically so that the room supports your routine without feeling crowded. Place your most-used items at eye level, reserve higher shelves for back stock or less-used products, and avoid storing anything heavy or awkwardly shaped in a way that feels unsafe. Efficient organization should feel supportive, not precarious.
Step 5: Create a Sorting System That Matches Real Life
If laundry tends to pile up, the sorting stage is often where energy gets lost. A good sorting system reduces friction before a wash cycle even begins. Instead of tossing clothing into one overflowing basket and sorting it all later, create an arrangement that reflects how your household actually separates laundry. For many homes, that means whites, darks, delicates, towels, or activewear. For others, it may mean one basket per family member or one basket for urgent items.
Hampers with built-in sections can be helpful, but you can also create your own system with matching baskets or bins. Labels are useful here, especially if several people use the same room. Labels reduce second-guessing and help everyone maintain the system with less effort. They are particularly valuable in family homes where a simple visual cue can keep loads from becoming one giant mixed pile.
Try to place sorting containers as close as possible to where clothes first enter the laundry process. If your laundry room is near a mudroom or hallway, that is ideal. If it is farther from bedrooms, consider using portable baskets that can be carried in already pre-sorted. The best system is the one that fits your household rhythm so naturally that it becomes almost automatic.
Step 6: Build a Folding Surface You Will Actually Use
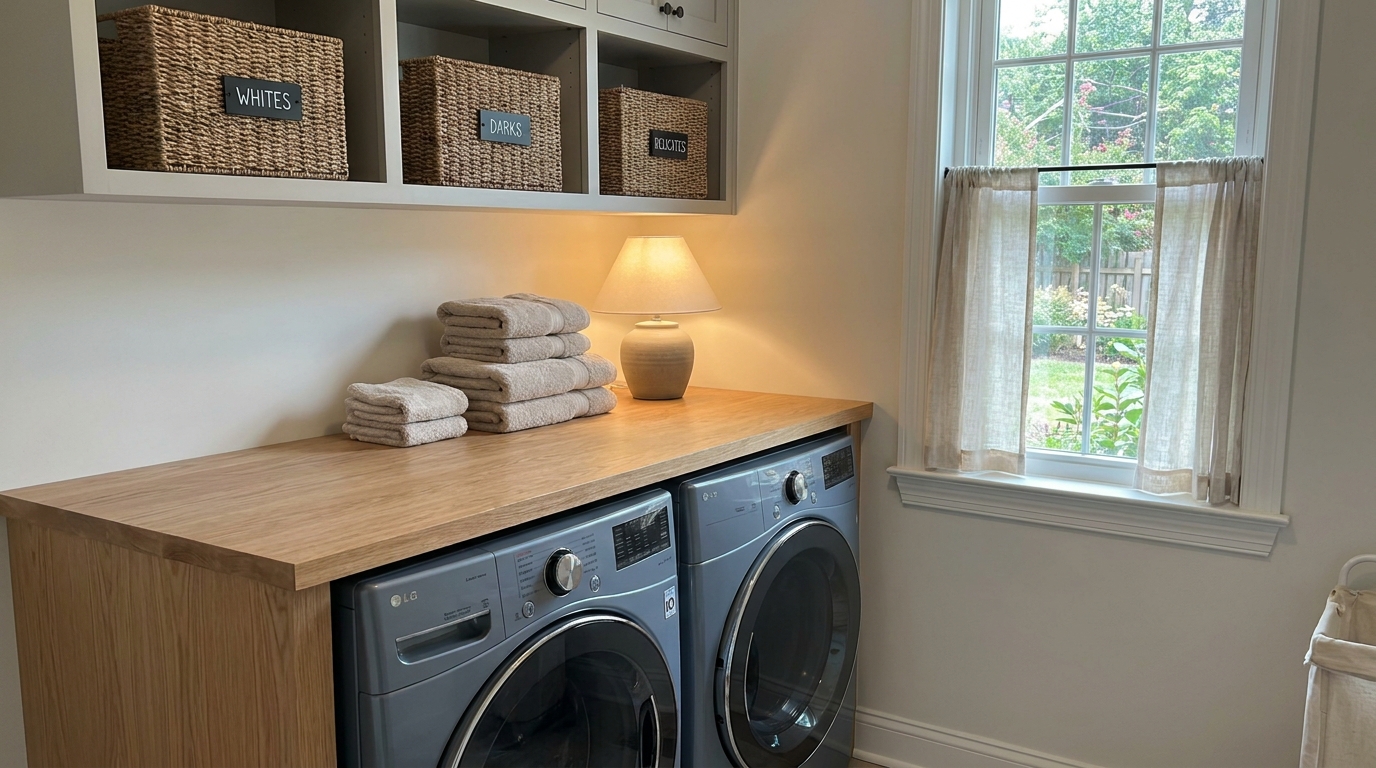
A clear folding surface is one of the features that makes a laundry room feel immediately more efficient. Without it, clean items often migrate to a bed, a sofa, or a dining chair, where they can sit much longer than intended. With even a modest countertop or tabletop available, folding becomes part of the same routine rather than a separate task waiting elsewhere in the house.
If you have front-load machines, a countertop installed above them is a beautiful and practical solution. If that is not possible, consider a slim table, a wall-mounted drop-leaf surface, or even a sturdy top on a rolling cart. The point is to claim a dedicated place for folding and stacking, not necessarily to create a large designer setup. Small improvements can still change the feel of the entire routine.
Try to keep this surface as clear as possible. It is tempting to use any flat area for extra storage, but clutter quickly steals the very function that makes the room more efficient. A folding surface works best when it feels inviting and ready. Add one simple decorative touch if you like, such as a small tray or a vase, but preserve the openness that makes it useful.
Step 7: Decant and Contain Supplies to Reduce Visual Clutter
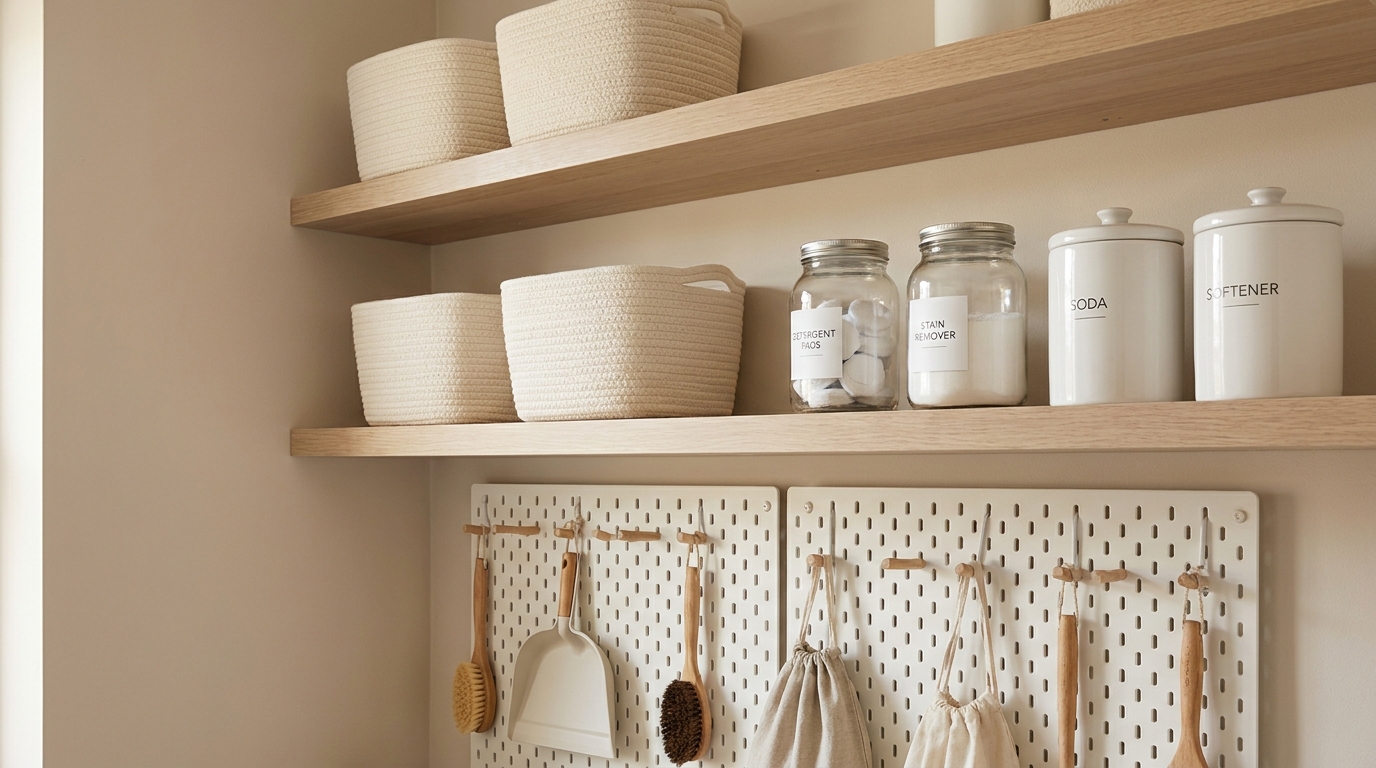
Packaging can make a laundry room feel busier than it really is. Bright labels, oversized boxes, and half-empty bottles tend to create visual clutter, even when the room is technically clean. If you want a calmer, more styled space, consider decanting some supplies into smaller, easier-to-handle containers or corralling them in matching bins. This is a simple shift that can make the entire room feel more cohesive.
Clear containers are popular, but they are not always the best choice for every space. In a room where serenity matters, opaque or matching containers can create a softer, quieter visual effect. The key is to choose a system that you can maintain and that feels safe for the products involved. Always label clearly, keep original instructions when needed, and avoid transferring anything into a container that could be mistaken for food or drink.
Use trays or bins to group categories such as stain treatment, delicates care, and machine cleaning products. This keeps small items from scattering across shelves and makes it easy to pull out exactly what you need. A contained system also simplifies cleaning because you can move one tray instead of ten loose items when wiping down surfaces.
Step 8: Make Space for Maintenance, Ventilation, and Safety
One of the most overlooked parts of laundry room organization is leaving room for the invisible work of the room itself. Appliances need access. Vents need to function properly. Filters need to be reached and cleaned. Dryers should never be buried behind piles of baskets, and lint filters should never be treated as optional. According to NFPA guidance, using a dryer without a lint filter and allowing lint buildup both increase fire risk.
Moisture deserves equal attention. The CDC recommends keeping indoor humidity at or below 50 percent, and the EPA notes that mold control depends on moisture control. In practical terms, that means an organized laundry room should support airflow and proper venting. Avoid crowding vents, watch for signs of excess dampness, and keep the room dry and clean enough that small issues are noticed before they become major problems.
It is also wise to keep appliance manuals, warranty details, or model numbers together in a labeled folder or envelope stored nearby. If you are shopping for new machines, energy efficiency is worth considering as part of the organization conversation. ENERGY STAR states that a certified clothes washer can save about $590 over its lifetime compared with a standard top-load model, and in Canada, EnerGuide labels help shoppers compare official energy performance information. A more efficient appliance can support not only lower utility use but also a smoother long-term laundry routine.
Simple safety and maintenance habits to build into your setup
- Keep the lint filter accessible and clean it regularly.
- Leave enough clearance around appliances for airflow and upkeep.
- Store supplies in a dry, labeled system away from excessive heat or moisture.
- Watch for condensation, musty smells, or signs of poor venting.
- Keep a small trash bin nearby for lint, empty packets, and used dryer sheets.
Step 9: Add Drying Solutions That Save Space and Stress
Not everything belongs in the dryer, and when there is no dedicated place for air-drying, delicate items can quickly take over shower rods, door handles, or random chairs. A thoughtful drying setup makes the room feel more complete and far more functional. It also helps preserve clothing, linens, and specialty fabrics that benefit from gentler care.
Wall-mounted drying racks, retractable lines, slim garment bars, and fold-down solutions are especially useful because they save floor space. In small laundry rooms, this matters enormously. You can create capability without adding bulk. If your room has a utility sink, placing a drying bar nearby can also support handwashing and drip-drying in one easy zone.
Think about the types of laundry you do most often. Families with children may need room for uniforms and swimwear. Pet owners may need a spot for washable mats or small blankets. If you love natural fibers or have a lot of athleisure, an air-drying area may become one of the hardest-working elements in the room. Organization is always more successful when it reflects real habits rather than idealized ones.
Step 10: Finish with Style So the Room Feels Good to Use
Efficiency matters, but comfort matters too. A room that feels harsh, cluttered, or forgotten is harder to enjoy and harder to maintain. That is why the final step is to add just enough personal style to make the laundry room feel intentional. Current design trends strongly support this approach, with more homeowners investing in personalized utility spaces that feel calm, practical, and beautifully resolved.
Start with a restrained palette. Soft whites, warm grays, muted greens, pale wood tones, and woven textures all bring a sense of ease. Matching bins, concealed storage, and a limited color story can reduce visual noise dramatically. If you prefer a more cheerful look, add personality through art, a patterned runner, a wallpaper accent, or a favorite basket rather than through an explosion of packaging and miscellaneous accessories.
The goal is not to overdecorate a utility room. It is to create a space that feels cared for. Even a tiny laundry nook can feel elevated with one framed print, a neatly folded stack of towels, a simple lamp if appropriate, or a small plant placed safely away from moisture concerns. When the room feels good to be in, the routine itself softens.
Smart Laundry Room Ideas for Renters
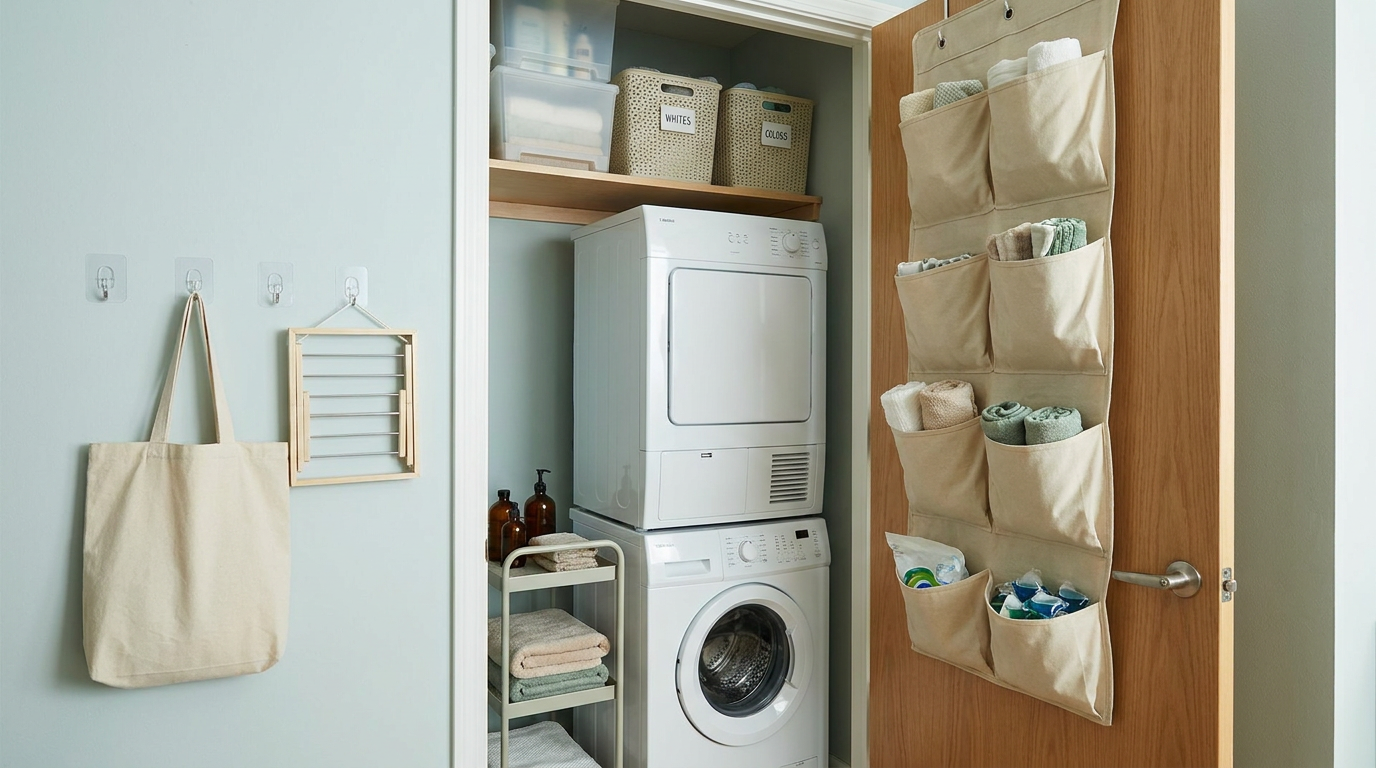
Organization is not only for homeowners with custom cabinetry and renovation budgets. Renters can create beautiful, efficient laundry spaces too, especially now that so many storage products are designed to be portable and no-drill. A rolling cart tucked beside a machine can hold detergent, dryer balls, and stain spray. Over-the-door organizers can keep smaller items off valuable shelves. Stackable bins can create order inside a closet or corner setup with almost no installation at all.
If your laundry area is shared or visible from another room, focus on containment and mobility. Baskets with lids, handled caddies, and freestanding shelving can make the zone feel more composed while still allowing everything to move with you later. Adhesive hooks can support lint brushes, reusable laundry bags, or cleaning cloths. Even a removable peel-and-stick backsplash or washable rug can make the nook feel more polished and personal.
The most important thing is to avoid assuming the space cannot improve because it is temporary. Small adjustments can create a huge difference in your everyday experience. A rental-friendly laundry room can still feel organized, calming, and very much your own.
How to Keep the System Working Long Term
The best organizing system is the one that continues to work after the first enthusiastic weekend. That usually means keeping it simple enough to reset quickly. Avoid overcomplicating labels, overfilling containers, or creating storage rules that are too rigid for daily life. If a system requires too much effort to maintain, it will quietly unravel.
Build in tiny maintenance habits instead. Return products to their zones after each use. Empty the trash regularly. Wipe the folding counter at the end of laundry day. Refill containers before they are completely empty. Check the lint filter each cycle and keep an eye on moisture or dust buildup. These habits only take moments, but they protect the calm you worked to create.
It also helps to reassess the room every season or two. Family routines shift. Children grow. Sports seasons change. Winter laundry may look different from summer laundry. Give yourself permission to adjust basket labels, swap shelf contents, or simplify again when life changes. A truly efficient room evolves with the household instead of staying frozen in one ideal setup.
Common Laundry Room Organization Mistakes to Avoid
Sometimes efficiency comes just as much from what you stop doing as from what you add. One common mistake is filling the room with too many products or bins before understanding the workflow. Another is using every surface for storage and leaving no room to fold, sort, or maintain appliances. Visual clutter is not always caused by lack of storage. Very often, it is caused by storage that has no clear purpose.
Another mistake is ignoring ventilation and safety because the room looks tidy on the surface. A beautiful shelf arrangement does not help much if the dryer vent is obstructed or humidity is quietly rising. Laundry rooms are working rooms, and they need to function well behind the scenes. Let your organizing choices support airflow, accessibility, and upkeep.
It is also easy to choose solutions based on trends rather than habits. Clear jars may look lovely online, but if you prefer a simpler, calmer look, matching closed bins may work better. A folding station may sound ideal, but only if you protect it from becoming a catchall. The right choices are the ones that make your own routine feel easier, not the ones that simply photograph well.
A Simple 10-Step Plan at a Glance
- Empty the room and clean it thoroughly.
- Define clear zones for sorting, washing, drying, folding, and stain treatment.
- Edit supplies and keep only what you truly use.
- Use vertical storage to open floor space.
- Create a realistic sorting system for your household.
- Add or protect a dedicated folding surface.
- Contain and label supplies to reduce visual clutter.
- Leave room for lint care, vent access, and moisture control.
- Add compact drying solutions for delicates and overflow.
- Finish with calming style so the room feels good to use.
Final Thoughts
Organizing a laundry room is really about honoring the quiet work of home life. It is about making one of the most repeated tasks in the week feel more graceful and less draining. With the right layout, a little containment, and a thoughtful sense of atmosphere, this practical room can become one of the most supportive spaces in the house.
You do not need a large footprint or a major renovation to make that happen. A calmer palette, better zoning, accessible storage, and room for safe appliance maintenance can transform even the smallest setup. Whether you are a homeowner planning upgrades or a renter working with a compact nook, the same idea holds true: when the room works better, daily life feels better too.
If you start with just one step this week, let it be the reset. Clear the room, define the flow, and notice what the space has been asking for all along. Often, maximum efficiency is not about doing more. It is about removing what gets in the way of a routine that could feel beautifully simple.



No Comment! Be the first one.