



Transform Your Kitchen with Under-Cabinet Lighting: A Step-by-Step Installation Guide
There are few kitchen upgrades as quietly transformative as under-cabinet lighting. It does not demand a wall to be demolished or a cabinet to be replaced, yet it can change the entire experience of the room. Countertops become brighter and more useful, textures in stone and wood emerge more clearly, and the kitchen begins to feel thoughtfully composed rather than merely functional. In design terms, it is one of those rare improvements that blends beauty and performance with remarkable ease.
Table Of Content
- Why Under-Cabinet Lighting Matters So Much
- Why LED Is the Best Choice for Most Kitchens
- Choosing the Right Type of Under-Cabinet Fixture
- Understanding Color Temperature, CRI, and Brightness
- Plug-In vs Hardwired: Which Installation Style Is Right for You?
- Safety First: Certification, Moisture, and Code Awareness
- Tools and Materials You May Need
- Step 1: Study Your Kitchen Before You Buy Anything
- Step 2: Create a Lighting Plan
- Step 3: Prepare the Surface Properly
- Step 4: Mount the Fixtures
- Step 5: Route and Hide the Wires
- Step 6: Connect the Power Safely
- Step 7: Test, Adjust, and Refine
- How to Make the Result Look Truly High-End
- Common Mistakes to Avoid
- Maintenance and Long-Term Care
- The Lasting Beauty of a Well-Lit Kitchen
In many homes, overhead lighting tries to do too much. A ceiling fixture may illuminate the room generally, yet still leave shadows where hands actually work. When you stand at the counter to slice vegetables, read a recipe, or arrange a serving platter, your own body often blocks the light from above. Under-cabinet lighting solves this problem elegantly by placing illumination exactly where it is needed, across the work surface itself.
This practical advantage is precisely why under-cabinet fixtures are so highly regarded in modern kitchen design. The most effective task lighting is directed toward the zone of activity rather than dispersed broadly across the room. In a kitchen, that means the countertop. A well-planned under-cabinet system reduces shadows, improves precision, and makes daily routines feel easier and more refined.
There is also a deeply aesthetic reason to love it. Soft, continuous light beneath cabinetry creates an atmosphere of intention. It traces architectural lines, enriches materials, and lends the room a subtle glow that feels almost custom tailored. If French sophistication is often defined by restraint and balance, and Lebanese design sensibility by warmth, texture, and hospitality, under-cabinet lighting sits beautifully between the two. It is discreet, graceful, and rich in effect.
This guide will walk you through the entire process of choosing and installing under-cabinet lighting in a way that is both safe and stylish. We will look at fixture types, color temperature, brightness, placement, electrical considerations, and step-by-step installation. Whether you are adding a simple plug-in LED system or planning a more integrated look, the principles remain the same: buy certified products, measure carefully, place light thoughtfully, and let the final result feel seamless.
Why Under-Cabinet Lighting Matters So Much
Under-cabinet lighting is often mistaken for a decorative extra, but in truth it is primarily a task-lighting solution. Its first purpose is to improve visibility where real work happens. Chopping, measuring, reading labels, cleaning produce, and plating meals all depend on clear sightlines. A countertop that is properly lit becomes safer, more comfortable, and more pleasurable to use.
From a design perspective, this practical role is what makes the upgrade so satisfying. Good interiors are not simply visually appealing. They support the rituals of everyday life with intelligence and grace. When a kitchen is illuminated from the underside of its cabinets, the room gains a layered quality that feels complete. Overhead light can remain ambient, pendants can become sculptural, and under-cabinet fixtures can quietly perform the precise work of task lighting.
Modern energy guidance strongly favors this kind of targeted approach. Rather than flooding an entire room with high-output general light, task lighting directs illumination where it is most useful. This can contribute to both energy efficiency and better visual comfort. The result is a kitchen that feels brighter where it needs to be, without becoming harsh or overly clinical.
The emotional effect is equally powerful. At full brightness, under-cabinet lights sharpen focus for morning preparation and evening cooking. Dimmed down, they become atmospheric and intimate, offering a soft wash that makes the kitchen feel calm after dark. This versatility is one reason dimmable LED systems have become so desirable. One layer of light can serve multiple moods, which is a hallmark of truly elegant interior design.
Why LED Is the Best Choice for Most Kitchens
For homeowners in Canada and the United States, LED is by far the strongest option for under-cabinet lighting. It combines efficiency, longevity, slim form, and control in a way older technologies simply cannot match. The U.S. Department of Energy has noted that LEDs have the highest luminous efficacy among common light sources, meaning they produce more useful light for less energy. In a project designed to improve both beauty and function, that matters greatly.
LEDs are especially well suited to under-cabinet use because they operate at relatively low temperatures and can be made in extremely low-profile forms. That means fixtures can stay visually discreet, almost disappearing beneath the cabinet edge. This supports a more polished result. You want to experience the light, not constantly notice the hardware that creates it.
Another major advantage is dimming and controls. Many LED systems are inherently dimmable and can be paired with compatible dimmers, smart switches, or home automation platforms. This allows you to shift from bright prep lighting to a more nuanced evening glow. In kitchens that serve as social spaces as much as work areas, that flexibility is invaluable.
Not all LED products are equal, however. This is one of the most important ideas to understand before you buy. Two strips may appear similar online, yet vary dramatically in color quality, diffuser performance, safety certification, and compatibility with dimmers. A beautiful kitchen deserves lighting that renders materials honestly and softly. That means looking beyond price alone.
Choosing the Right Type of Under-Cabinet Fixture
There are three main fixture categories to consider: LED light bars, LED tape or strip lights, and puck lights. Each has a distinct visual character and installation profile. The best choice depends on your cabinet design, the quality of light you want, and how seamless you want the final appearance to be.
LED light bars are one of the most popular solutions because they offer a clean, structured form and generally produce an even spread of light. They are excellent for homeowners who want reliable task lighting with a straightforward installation process. Slim linked bars can often connect across several cabinet sections, creating continuity with relatively little complication.
LED tape lights, sometimes called strip lights, are prized for their flexibility and minimal visual footprint. They can be tucked discreetly behind the cabinet lip or mounted inside an aluminum channel with a diffuser for a more finished result. This option is ideal when you want a refined, seamless wash of light rather than the visible rhythm of separate fixtures. In high-design kitchens, tape lights are often the most elegant answer.
Puck lights create pools of illumination rather than a continuous line. They can be charming and are sometimes easier to retrofit in small or segmented cabinet runs. They may suit kitchens where a decorative sparkle is welcome, though they can also create brighter spots and darker gaps if not carefully planned. For intense task work, bars and tape usually provide a smoother counter wash.
If your goal is a sophisticated, architectural effect, choose the fixture that produces the most even light with the least visual clutter. Many designers favor low-profile bars or high-quality LED tape in diffused channels because they support a calm and integrated look. The cabinet remains the star. The light simply reveals it beautifully.
Understanding Color Temperature, CRI, and Brightness
A successful installation depends not just on where you place the lights, but on the character of the light itself. One of the first specifications to consider is color temperature, measured in Kelvin. This tells you whether the light appears warm and golden, neutral, or cool and crisp. In kitchens, a range from 2,700K to 5,000K is commonly used, but the ideal choice depends on the mood you want and the materials in the room.
For a refined residential atmosphere, many homeowners prefer warm white to soft neutral white, often around 2,700K to 3,500K. This flatters wood, brass, natural stone, and painted cabinetry beautifully. It also creates a more gracious evening ambiance. Cooler temperatures can feel sharper for detailed tasks, but if they are too cold they may make a kitchen feel clinical rather than elegant.
Tunable white systems offer a compelling middle path. These fixtures allow you to adjust the color temperature depending on time of day or activity. In the morning or while prepping meals, you might prefer a cleaner neutral light. Later in the evening, you can shift to a warmer glow that feels softer and more intimate. This adaptability aligns perfectly with current kitchen lighting trends.
Equally important is CRI, or color rendering index. A higher CRI means colors appear more natural and accurate under the light source. In a kitchen, that affects everything from the tone of produce to the richness of veined marble or handmade tile. Aim for a CRI of 90 or higher if you want your finishes and ingredients to look their best.
Brightness should also be chosen carefully. More light is not always better. Overly intense fixtures can create glare on polished countertops and make the room feel exhausting. Manufacturers may list output in lumens or lumens per foot. The right level depends on your cabinet depth, countertop material, and how much ambient light the room already receives. The goal is a bright work surface with visual comfort, not a hard strip of light that dominates the space.
Beautiful kitchen lighting is not simply bright. It is balanced, flattering, and placed with precision.
Plug-In vs Hardwired: Which Installation Style Is Right for You?
Before purchasing your system, you will need to decide whether you are installing a plug-in setup or a hardwired one. This decision affects the look, complexity, and legal requirements of the project. Both can be successful when thoughtfully executed.
Plug-in systems are generally the most approachable choice for DIY homeowners. They often come as kits with connectors, power adapters, and mounting hardware included. Installation is usually faster and less invasive because you do not need to alter your home’s electrical system. If there is a nearby outlet, particularly one inside a cabinet or pantry, a plug-in solution can be clean and practical.
Hardwired systems offer a more built-in appearance because there is no visible plug and the lighting can be controlled from a wall switch. They are ideal when you want the installation to feel original to the kitchen rather than added later. However, hardwired work may be subject to local electrical rules and often requires a licensed electrician, especially in Canada and many U.S. jurisdictions. If your project involves new wiring, do not treat code compliance casually.
One common misconception is that plug-in lights are automatically safer than hardwired ones. In reality, safety depends on certified products, proper installation, and adherence to applicable local regulations. A poorly installed plug-in product with questionable certification is not preferable to a correctly hardwired listed luminaire. The essential rule is simple: buy quality, use listed products, and follow the manufacturer’s instructions exactly.
Safety First: Certification, Moisture, and Code Awareness
This is the part of the project where elegance must be matched with discipline. Under-cabinet lighting lives in a hardworking environment where heat, steam, cleaning products, and occasional moisture are all present. Choose fixtures that are certified for sale and use in the United States and Canada, and be wary of products with suspiciously vague listings or unauthorized safety marks. UL Solutions has recently warned that unauthorized UL marks on LED luminaires can pose fire and shock hazards, which makes careful sourcing more important than ever.
Look for recognized certification labels and buy from reputable retailers or manufacturers. The fixture, power supply, connectors, and dimming accessories should all be compatible and intended to work together. Mixing components casually is one of the most common ways DIY lighting projects become unreliable. A beautiful installation should also be a trustworthy one.
Pay attention to placement near sinks and ranges. Although many under-cabinet fixtures are suitable for typical kitchen environments, exposure to splashing water, high heat, or grease requires extra care. Follow any manufacturer clearances and suitability ratings, and keep transformers or drivers in approved, ventilated locations. Never install a product in a condition that exceeds its listed use.
If your installation requires opening walls, adding a new switch, connecting to branch wiring, or making other permanent electrical changes, consult a licensed electrician when required by local law. In both practical and aesthetic terms, discretion is wisdom here. There is no glamour in improvising electrical work that should have been professionally assessed.
Tools and Materials You May Need
The exact list will vary by fixture type, but most under-cabinet lighting projects involve a familiar set of tools and materials. It helps to gather everything in advance so the process feels orderly and calm rather than interrupted.
- LED under-cabinet light bars or LED tape kit
- Power supply or driver, if required
- Compatible dimmer or smart control, if desired
- Mounting clips, adhesive backing, or aluminum channels
- Measuring tape
- Pencil
- Level
- Screwdriver or drill/driver
- Wire clips or cable management accessories
- Cleaning cloth and degreasing cleaner
- Safety glasses
- Optional wire fish tape for concealed routing
If you are using LED tape, consider adding aluminum channels with diffusers. These small profiles elevate the installation dramatically. They help manage heat, soften the appearance of individual diodes, and create a cleaner line of light. In a kitchen where the details matter, this finishing element is often worth the extra effort.
Step 1: Study Your Kitchen Before You Buy Anything
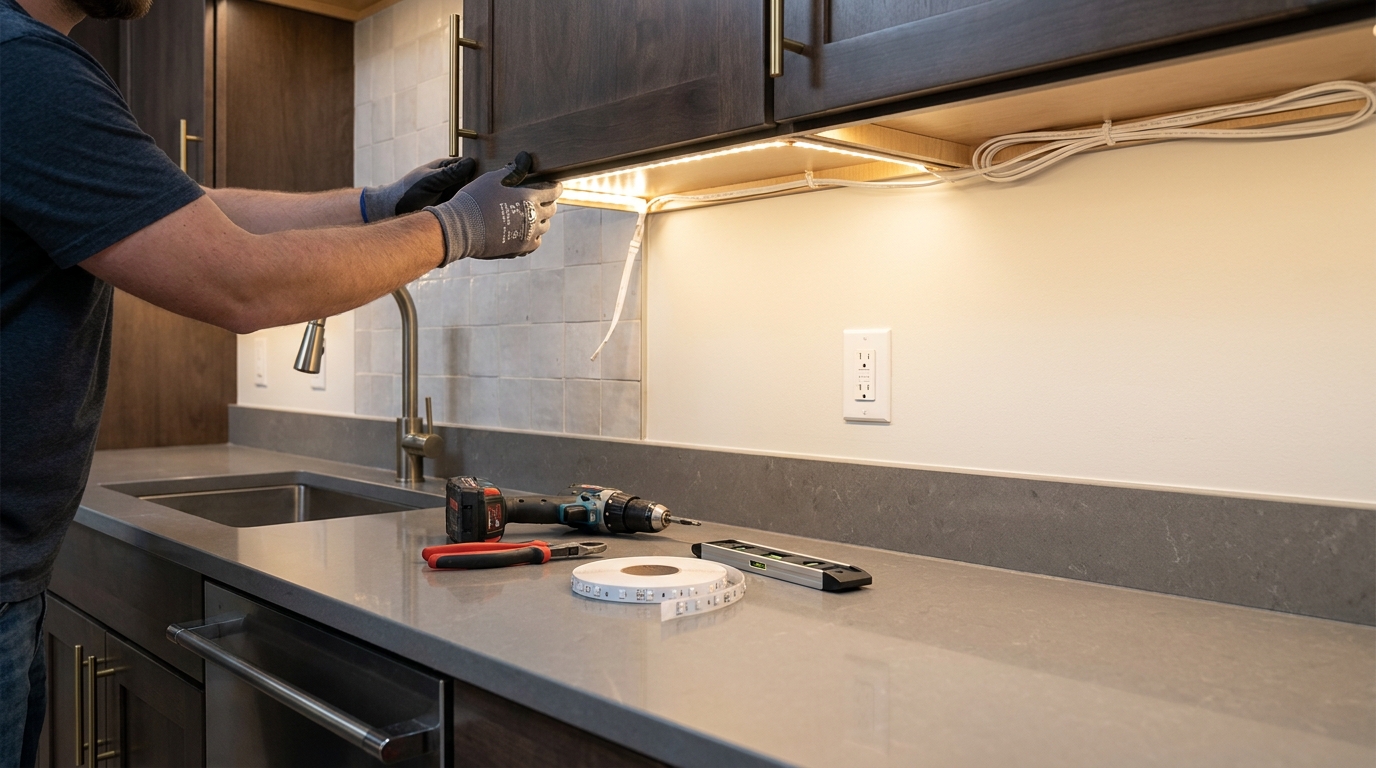
Begin by standing at your countertops and observing how you actually use the space. Notice where chopping, mixing, coffee preparation, and plating most often occur. These are your task zones. Also note where outlets exist, where cabinet valances may hide fixtures, and where wires could be routed discreetly.
Measure each cabinet run carefully, including any interruptions from a range hood, window trim, or tall pantry edge. Do not assume every section needs the same fixture length. A thoughtful design often uses different lengths to keep the light continuous while accommodating architectural changes. Precision at this stage prevents visual awkwardness later.
Also consider the cabinet underside itself. Is it flush and smooth, or does it have a recessed frame? Is there a front lip that can conceal the fixture from normal standing view? The more hidden the hardware, the more elegant the final result. In many cases, placing the light toward the front half of the cabinet underside provides the best illumination across the countertop while keeping the source discreet.
Step 2: Create a Lighting Plan
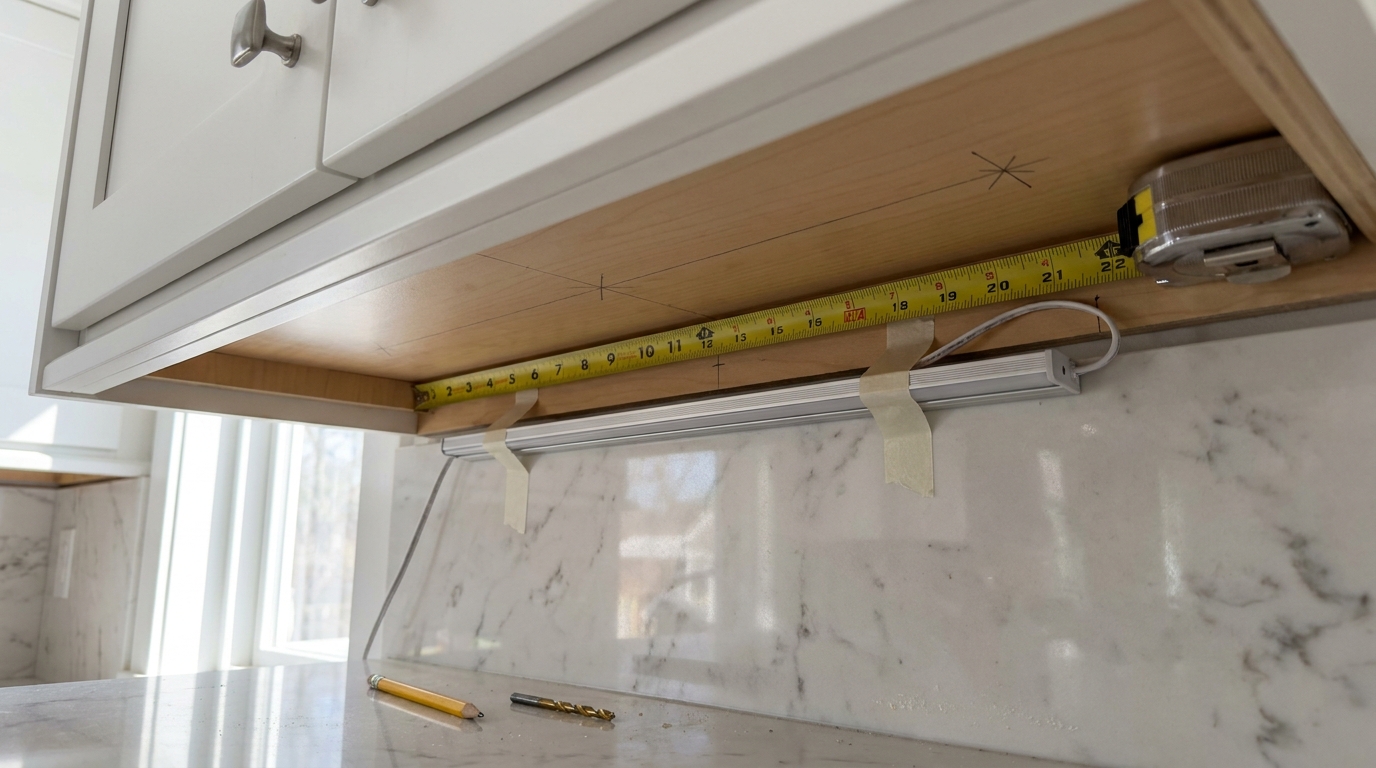
Once you have your measurements, map the fixture layout section by section. For the most effective task lighting, under-cabinet fixtures should illuminate the work surface without casting the user’s shadow line back onto the counter. That generally means mounting them closer to the front of the cabinet rather than against the wall. This placement sends light where hands work and reduces deep shadowing.
Think about continuity. If you are using bars, decide how linked segments will connect across cabinet breaks. If you are using tape, determine whether a single uninterrupted run is possible or whether connectors are needed around corners or gaps. Keep transformers, plugs, and cable routes in mind from the beginning. A polished project is one in which the hidden infrastructure has been designed just as carefully as the visible light.
This is also the moment to decide how the system will be controlled. Will the lights switch on from a wall control, an inline touch dimmer, a remote, or a smart app? Each method shapes the everyday experience of the kitchen. Simplicity is usually best. The most beautiful control is the one that feels intuitive every time you use it.
Step 3: Prepare the Surface Properly
Before any mounting begins, clean the underside of the cabinets thoroughly. Kitchens accumulate grease, dust, and invisible residue over time, and adhesive-backed products will not perform well on a contaminated surface. Use a suitable degreasing cleaner, wipe the area carefully, and allow it to dry completely.
Mark the fixture position lightly with pencil. Use a level so the installation remains visually crisp, especially in long runs where even a slight drift becomes obvious. If you are installing channels or bars, pre-mark screw holes before drilling. A calm, methodical setup always produces a more refined result than hurried guessing.
If wires need to pass through cabinet sides or bottoms, confirm those routes now and drill carefully according to the manufacturer’s requirements. Keep holes neat and discreet. Small finishing choices, such as aligning drill points or hiding them behind stored items, can make the entire project feel more custom.
Step 4: Mount the Fixtures
For LED bars, mount the clips or fixture body according to the instructions, usually with small screws. Confirm that each unit sits straight and does not protrude beyond the cabinet face when viewed from standing height. If your cabinet has a decorative rail or lip, use it to conceal the hardware as much as possible.
For LED tape, many homeowners are tempted to rely only on the adhesive backing. In some kitchens that may hold initially, but long-term performance is often better when the tape is installed in a proper channel or reinforced according to the product specifications. Press the tape evenly into place without twisting it, and avoid sharp bends that could damage the circuit. If using corner connectors, seat them firmly and test alignment before finalizing.
Puck lights should be positioned with care so the pools of light overlap enough to avoid pronounced dark spots. A symmetrical arrangement usually looks best, especially on shorter cabinet sections. Whatever fixture type you choose, step back frequently during installation and look at the whole run from different angles. A kitchen is a visual composition as much as a work zone.
Step 5: Route and Hide the Wires
Cable management is one of the defining details between a project that feels improvised and one that feels deliberate. Route wires along the least visible paths, often toward the back of cabinet undersides or through adjacent cabinet interiors. Use cable clips, channels, or covers that match the cabinet finish whenever possible.
If your system links multiple fixtures, avoid loose loops or sagging cords. Excess slack should be managed neatly according to the manufacturer’s guidance, never stuffed carelessly into tight or unventilated spaces. Drivers and power supplies should be located where they remain accessible yet discreet, such as inside an upper cabinet, pantry sidewall, or another approved concealed area.
For plug-in systems, consider whether the cord can be hidden by drilling a neat hole into the cabinet above the backsplash line or into a nearby cabinet interior, depending on your layout and product instructions. The goal is simple: when the installation is complete, the eye should read light and architecture, not clutter.
Step 6: Connect the Power Safely
Once the fixtures are mounted and cables are organized, connect the system to power according to the product instructions. For plug-in systems, this may be as straightforward as joining quick connectors and plugging into an outlet. For low-voltage systems, it may involve connecting the lights to a driver before plugging or hardwiring the driver to power.
Do not energize the system until all connections are secure. Check polarity where required, confirm dimmer compatibility if one is being used, and verify that no cable is pinched or strained. If you encounter uncertainty around branch wiring or fixed electrical connections, stop and consult a licensed electrician. Good design includes knowing when expertise is needed.
Remember that hardwired work may be regulated by local law, and compliance is not optional. Kitchens are among the most heavily used rooms in a home. A lighting upgrade should contribute peace of mind, not introduce hidden risk.
Step 7: Test, Adjust, and Refine
Turn the lights on and observe the effect at different times of day. During daylight hours, the fixtures should support task visibility without disappearing completely. At night, the room should feel layered and flattering rather than stark. Walk through the space, stand at each work zone, and look for glare on glossy backsplashes or reflections on polished stone.
If the system is dimmable, test the full range. You may find that your ideal everyday setting is lower than maximum output. This is very common and often preferable. Brightness should be available when needed for detailed work, but the most gracious kitchens rarely stay at full intensity all evening.
Adjust any visible cables, tighten clips if necessary, and make sure the light pattern is even. In some cases, a diffuser, a slightly warmer color temperature, or a modest repositioning toward the cabinet front can dramatically improve comfort. Small refinements are worth making. Lighting is one of the few design elements that changes both appearance and experience every single day.
How to Make the Result Look Truly High-End
If you want your under-cabinet lighting to feel luxurious rather than merely functional, pay close attention to restraint. The fixture should not call attention to itself. It should simply create a beautiful, shadow-free plane of light across the counter. Warm white or tunable white tones usually feel more residential and elegant than icy cool light, especially when paired with natural materials.
Use diffusers whenever possible. They soften diode visibility and create a more serene line of illumination. Match cable covers and channels to the cabinet finish. Hide drivers carefully. Choose a dimmer that lets you tune the room’s mood from practical morning brightness to gentle evening glow. This layered flexibility is what separates a kitchen that is simply lit from one that feels composed.
Also consider the relationship between under-cabinet lighting and the rest of the room. If your pendants are warm brass and your wall color is creamy, a harsh blue-white strip will feel visually discordant. If your backsplash has handmade texture or your countertops have expressive veining, a high-CRI light source will reveal those details with much more grace. Good lighting does not exist in isolation. It is always in conversation with the room around it.
Common Mistakes to Avoid
One of the most frequent mistakes is placing the fixture too far back against the wall. This may seem logical for concealment, but it often leaves the front of the countertop dim and can increase shadowing where you actually stand. Positioning closer to the front underside of the cabinet usually gives better task performance and a more balanced wash of light.
Another mistake is buying the cheapest LED strip available without checking CRI, certification, dimmer compatibility, or diffuser quality. A low-cost product can quickly become expensive if the light flickers, fails early, renders materials poorly, or creates an unpleasant dotted effect. In a room as central as the kitchen, quality matters.
Many homeowners also overestimate how bright they need the lighting to be. Excessive brightness creates glare and can flatten the warmth of the room. Choose output with intention, and remember that dimming adds tremendous flexibility. Finally, do not neglect cable management. Even beautiful light loses its elegance when surrounded by visible wiring and improvised attachments.
Maintenance and Long-Term Care
Once installed, under-cabinet lighting is generally low maintenance, especially if you have chosen LED fixtures from a reputable source. Periodically wipe the fixture exterior or diffuser with a soft dry or slightly damp cloth, depending on the manufacturer’s care guidance. Kitchens generate residue over time, and a light layer of grease can dull output surprisingly quickly.
Check occasionally that adhesive-backed products remain secure and that cables have not shifted. If a dimmer begins to behave inconsistently, confirm compatibility before assuming the fixture has failed. Because LED systems often last many years, preserving the installation’s neatness is usually more important than replacing the lights themselves.
If your kitchen evolves in the future, perhaps with a new backsplash, repainting, or cabinet refinishing, revisit the color temperature and dimming settings. A subtle lighting adjustment can help the entire room feel newly balanced. This is another reason under-cabinet lighting is such a worthwhile investment. It remains adaptable as the home changes.
The Lasting Beauty of a Well-Lit Kitchen
Under-cabinet lighting may begin as a practical DIY project, yet its real effect is larger and more poetic. It changes the way a kitchen receives the evening, the way materials reveal themselves, and the way daily routines unfold. It clarifies the task at hand while also softening the atmosphere around it. Few upgrades offer such a fine union of usefulness and beauty.
When chosen carefully and installed with patience, these fixtures can make even a modest kitchen feel more tailored, more generous, and more complete. The countertop becomes a stage for everyday rituals. Stone, tile, wood, and paint gain depth. The room starts to glow in the precise places where life happens most often.
If there is a lesson at the heart of good lighting, it is this: elegance is rarely loud. It is often found in the quiet decisions that make a space function beautifully while appearing effortless. Under-cabinet lighting is one of those decisions. Done well, it does not just brighten your kitchen. It transforms it.



No Comment! Be the first one.