



How to Perform Your Own Water Quality Tests at Home
Water is one of those essentials that quietly supports daily life until something changes. A strange taste, cloudy glass, metallic smell, or sudden stomach upset can make you realize how much trust you place in what comes out of the tap. Learning how to perform your own water quality tests at home is a practical way to protect that trust. It does not mean becoming a chemist, and it does not require turning your kitchen into a laboratory. It simply means understanding a few key tests, knowing what a home kit can and cannot tell you, and building water checks into normal home maintenance.
Table Of Content
- Why Water Quality Testing Matters at Home
- Private Well Water vs Municipal Water
- What You Can Test at Home and What Should Go to a Lab
- The Most Useful Water Quality Tests for Homeowners
- Total Coliform and E. coli
- Nitrates and Nitrites
- pH
- Total Dissolved Solids
- Hardness, Chlorine, and Other Basic Indicators
- When to Test Your Water
- The Supplies You Need for DIY Water Testing
- Step by Step: How to Test Your Water at Home
- Step 1: Decide What You Are Testing For
- Step 2: Choose the Right Sampling Point
- Step 3: Prepare the Faucet and Container
- Step 4: Collect the Sample Carefully
- Step 5: Run the Test and Record the Results
- Step 6: Compare the Results with Reliable Guidance
- How to Understand Your Results in Plain Language
- When to Stop DIY and Call an Accredited Lab
- What to Do If Your Water Test Shows a Problem
- Special Situations: Flooding, Emerging Contaminants, and New Wells
- Creating a Simple Long Term Water Testing Routine
- Final Thoughts
For many households, the approach depends on where the water comes from. If you are connected to a municipal system, your water utility is responsible for routine testing and public reporting. If you rely on a private well, the responsibility is usually yours. That distinction matters. Health Canada estimates that about 4 million people in Canada rely on a private well for drinking water, and both Health Canada and the U.S. Environmental Protection Agency emphasize that private well owners should test their water regularly. A well may feel reliable for years, but groundwater conditions can shift with weather, runoff, nearby land use, aging equipment, or flooding.
This guide is designed to make home water quality testing feel manageable rather than technical. You will learn what to test for, how to collect a sample properly, when a simple strip is useful, when an accredited laboratory is the better choice, and what to do with the results. The goal is not to create anxiety. It is to help you make informed, steady decisions that support your household’s health and your home’s long term resilience.
A good water test is not just about asking whether water is safe. It is about identifying which specific issue may be present so you can take the right next step.
When homeowners understand that distinction, water testing becomes much more useful. A pH strip may tell you if water is acidic enough to increase corrosion risk. A bacteria test may tell you whether the water should be avoided for drinking right away. A lab result may reveal nitrates, metals, or other contaminants that clear water alone would never show. Each test answers a different question, and together they create a more complete picture.
Why Water Quality Testing Matters at Home
One of the most common misconceptions about drinking water is that if it looks clear, it must be safe. In reality, clear water can still contain bacteria, nitrates, metals, PFAS, or other contaminants that you cannot see, smell, or taste. On the other hand, water that tastes a bit different is not always dangerous, but it may point to a plumbing issue, a treatment problem, or a seasonal change worth checking. Visual clues are helpful, but they are not enough on their own.
Home water quality testing matters because it brings hidden conditions into view. For private well owners, this is especially important because private wells are generally not regulated the same way public drinking water systems are. The homeowner is responsible for both testing and maintenance. That can sound like a burden at first, but it is also empowering. Once you know the routine, annual testing becomes as normal as servicing a furnace, cleaning gutters, or checking smoke alarms.
Even if you have municipal water, there are still reasons to do occasional home testing. Utilities test the water entering the system, but homeowners remain responsible for their internal plumbing, aging pipes, faucet fixtures, and home treatment devices. If you live in an older home, notice discolored water after plumbing repairs, or use a filter system that has not been serviced in a while, a home test can help you understand whether the issue is with the water supply or something happening inside the home.
Water testing also matters because households are not all equally vulnerable. Infants, pregnant people, older adults, and anyone with a weakened immune system may be more sensitive to water quality problems. The EPA specifically highlights nitrate and nitrite concerns for infants and pregnant people, and both EPA and Health Canada recommend more frequent attention when higher risk people live in the home. In practical terms, that means testing should be seen as part of family health planning, not just a response to an obvious problem.
Private Well Water vs Municipal Water
Before buying supplies or collecting a sample, it helps to clarify what kind of water system you have. Private well owners need a more proactive testing plan because they are managing their own source water. Groundwater can be affected by septic systems, agricultural runoff, flooding, nearby construction, or natural geology. A well can produce good water for years and then change after a heavy season, a repair, or a shift in local land conditions. Testing is how you keep track of those changes before they become more serious.
Municipal water users have a different relationship with testing. Public systems are routinely monitored and usually issue Consumer Confidence Reports or similar public summaries, depending on the jurisdiction. Those reports are worth reading because they tell you what is being tested in the broader system and whether any issues have been detected. Still, a municipal report does not tell you whether your home’s old plumbing is affecting what reaches your glass, or whether your under sink filter is still doing what it claims to do.
In both cases, a balanced approach works best. Trust the structure that exists, but verify the parts you control. If you are on a well, plan routine testing and know where to send a sample. If you are on city water, stay aware of utility reports and use home testing selectively when there is a change in taste, odour, colour, plumbing, or treatment performance. Water quality is not static, and thoughtful homeowners benefit from checking in periodically rather than assuming one good result will last forever.
What You Can Test at Home and What Should Go to a Lab
DIY water testing has improved noticeably in recent years. Homeowners can now find portable test kits, online analyzers, digital meters, and screening strips for a wide range of basic water quality indicators. These tools can be genuinely helpful when used for what they are designed to do. They are often good for quick checks of pH, hardness, total dissolved solids, chlorine, alkalinity, and sometimes nitrates or basic bacteria screening. They can help you notice trends and decide whether further testing is needed.
At the same time, it is important not to ask too much of a home kit. Health Canada notes that portable test kits and online analyzers exist for some parameters, but not every contaminant can be reliably handled with a simple at home kit. Many health related decisions should be based on accredited or certified laboratory analysis. That is especially true for contaminants such as E. coli, total coliform confirmation, PFAS, metals, natural radionuclides, radon in water, and other emerging concerns that require precise methods and careful interpretation.
A useful rule is this: use DIY tools for screening and routine awareness, and use an accredited lab for confirmation or anything that could influence your family’s health decisions. If a test strip suggests elevated nitrates, do not stop there. If a bacteria screening test is positive, do not rely on a second strip for reassurance. If your water changed after flooding, lab testing is usually the responsible next move. Home kits can point you in the right direction, but they are not the whole answer.
The Most Useful Water Quality Tests for Homeowners
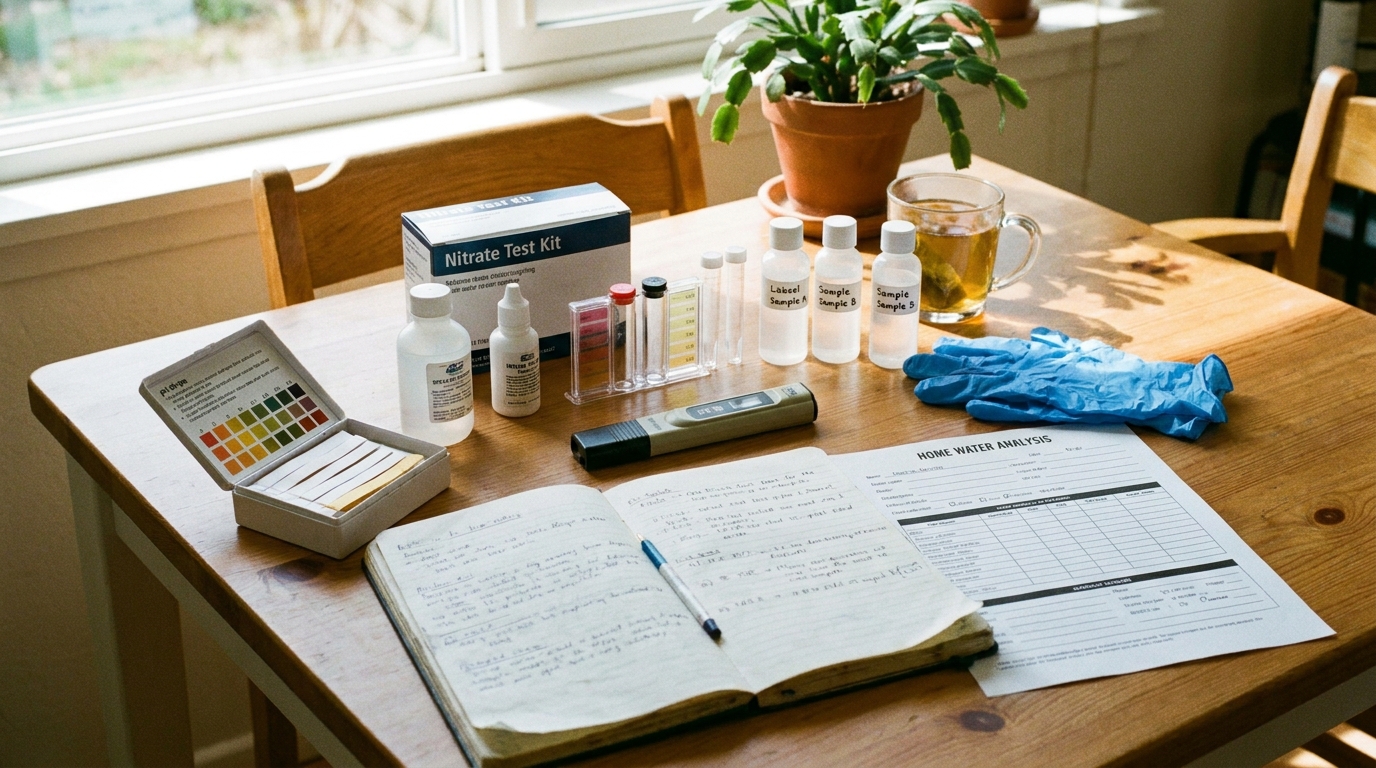
If you are not sure where to start, focus on the tests most commonly recommended for household drinking water. For many private well owners, annual testing for total coliform bacteria, E. coli, nitrates, total dissolved solids, and pH provides a strong basic foundation. These do not cover every possible concern, but they address some of the most common and meaningful risks.
Total Coliform and E. coli
Bacteria testing is one of the most important checks for private well water. Total coliform bacteria are often used as an indicator that surface water or contamination may be entering the system. E. coli is more serious because it points to fecal contamination. Health Canada states clearly that if a well water sample contains E. coli, the water is not safe to drink. That is one result homeowners should treat with urgency rather than uncertainty.
A positive bacteria result does not always tell you exactly why contamination happened, but it tells you the water requires attention. Causes may include a damaged well cap, a cracked casing, flooding, surface runoff, or a nearby septic issue. In those cases, next steps may involve temporary disinfection, shock chlorination, repairs, retesting, and guidance from local public health authorities or a well professional. The key is not to delay action while hoping the issue resolves itself.
Nitrates and Nitrites
Nitrates are especially important for households with infants or pregnant people. They can enter groundwater through fertilizers, manure, septic systems, and natural processes in some areas. Because they are invisible and usually tasteless, testing is the only practical way to know whether they are present at concerning levels. Elevated nitrate levels can be a serious health issue, which is why screening and confirmation matter so much.
If you use a home nitrate test, treat it as an early warning tool rather than a final verdict. If the result is high or unclear, follow up with a certified lab. If there is an infant in the home, avoid unnecessary delays. This is a good example of why simple testing and professional analysis work best together rather than in competition.
pH
pH tells you whether water is acidic, neutral, or alkaline. It may not sound urgent, but it can have meaningful effects on your plumbing and treatment systems. Water that is too acidic can contribute to corrosion, which may in turn increase the chance of metals leaching from plumbing components. Water with an unusual pH can also reduce the effectiveness of some treatment devices or change how water tastes.
pH is one of the easiest things to test at home, and it is a good example of a parameter where DIY tools can be very useful. Repeated pH checks over time can help you notice seasonal changes or understand whether a treatment system is doing its job. If pH is consistently outside a comfortable range, you may want to look more closely at plumbing impacts and discuss options with a water treatment professional.
Total Dissolved Solids
Total dissolved solids, often abbreviated as TDS, measure the combined amount of dissolved substances in water. TDS does not tell you which substances are present, so it is not a direct health diagnosis. What it can do is indicate a broader change in water quality, especially if readings suddenly rise or if water begins tasting more mineral heavy, salty, or unusual. It is best thought of as a general indicator rather than a final answer.
A portable TDS meter can be helpful for trend tracking. If a water softener, reverse osmosis unit, or another treatment system is installed, TDS readings may help you understand whether performance has shifted. Still, a normal TDS reading does not rule out bacteria, nitrates, PFAS, or metals. It is one piece of the puzzle, not the whole picture.
Hardness, Chlorine, and Other Basic Indicators
Depending on your water source, hardness and chlorine may also be worth checking. Hard water is not typically a health issue, but it can shorten appliance life, affect soap performance, and leave scale on fixtures. Chlorine testing can be useful if you use municipal water or if you disinfect a well and want to verify a flushing process. These tests are often straightforward for homeowners and can support routine maintenance choices.
Beyond these basics, you may also consider contaminant specific testing based on your location or concerns. Growing public interest in PFAS, radon, and naturally occurring radionuclides reflects a wider awareness that some water risks are regional or geologic rather than obvious. These are not generally DIY first tests. They are better handled through accredited labs and local guidance.
When to Test Your Water
Annual testing is a solid baseline for private well owners, and it is the minimum routine many public health sources encourage. But timing matters just as much as frequency. Water should also be tested whenever conditions suggest a meaningful change may have occurred. Testing is especially important after flooding, after a well is newly constructed, after major well repairs, after treatment equipment fails, or whenever water changes in taste, smell, or colour.
Seasonal runoff can also influence water quality, particularly in rural or agricultural areas. Spring melt, heavy rain, and long wet periods can increase the risk of contamination entering shallow wells or poorly protected systems. If your property has experienced standing water or drainage problems, testing after those events is sensible. The same applies if nearby land use has changed, such as construction, excavation, or intensive farming activity.
If your household includes infants, pregnant people, older adults, or anyone with a compromised immune system, you may want to test more often than once a year. EPA guidance highlights this higher need for caution. In practical terms, more frequent testing is not about living in fear. It is about matching your testing routine to your household’s actual risk profile.
The Supplies You Need for DIY Water Testing
You do not need a large collection of tools to begin. Most homeowners can start with a small, organized testing kit and add specialized items only if needed. If you are screening your own water at home, it helps to gather everything ahead of time so the process feels calm and methodical rather than rushed.
- A basic home water test kit that includes strips or reagents for pH, hardness, alkalinity, chlorine, nitrates, or similar screening parameters.
- A TDS meter if you want to track dissolved solids or compare untreated and treated water.
- Sterile sample bottles if you are collecting water for bacteria testing or sending samples to a lab.
- Disposable gloves and a clean workspace to reduce contamination during collection.
- A notebook or digital log for recording dates, results, weather conditions, and any taste or odour changes.
- Lab submission forms and a cooler pack if your local accredited lab requires time sensitive delivery.
If you plan to do bacteria testing through a lab, contact the lab or your local public health unit before collecting anything. Many bacteria samples have strict requirements around bottle type, timing, temperature, and handling. In Canada, provincial and territorial authorities and local public health units can often help homeowners find accredited laboratories and identify which contaminants are most relevant in their area. That local connection can save time and improve the usefulness of your results.
Step by Step: How to Test Your Water at Home
The testing process becomes much easier when broken into a few repeatable steps. The goal is consistency. If you collect and test the same way each time, your results become more useful because you are reducing random variation and accidental contamination.
Step 1: Decide What You Are Testing For
Start by being specific. Are you doing a routine annual check, investigating a sudden taste change, checking a new filter, or following up after flooding? The answer determines whether a simple home kit is enough for now or whether you should move directly to laboratory testing. A homeowner who wants to monitor pH and hardness can do a lot at home. A homeowner worried about bacteria, nitrates, PFAS, or flood contamination should think beyond test strips quickly.
It also helps to review any recent context before testing. Has there been heavy rain, nearby construction, plumbing work, or a treatment failure? Is there a baby in the home? Was the well cap loose, or has the pump system recently been serviced? Small details often make test results easier to interpret later.
Step 2: Choose the Right Sampling Point
Where you collect the water matters. If you want to understand the quality of the water your family actually drinks, sample from a cold water tap that is commonly used for drinking. Avoid mixing in hot water because hot water can pick up more from plumbing and is not representative of potable supply conditions. If you are investigating whether a treatment system is working, you may want to sample both before and after the treatment unit.
If your goal is to isolate a plumbing issue, a more targeted strategy may be helpful. For example, if only one faucet has a metallic taste, compare it with another tap in the house. A whole home issue points toward the water source or central treatment, while a localized issue may suggest fixture or plumbing problems.
Step 3: Prepare the Faucet and Container
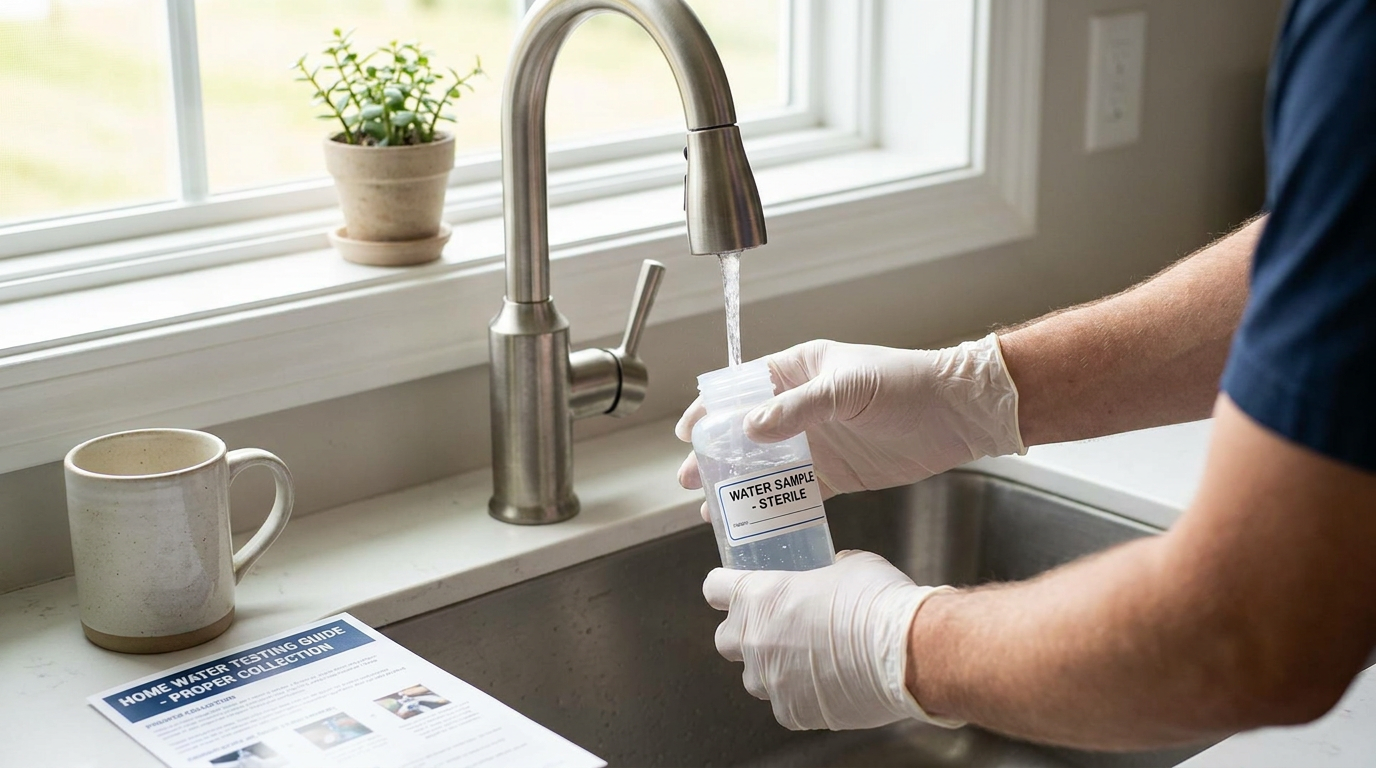
For many basic tests, use a clean container and follow the kit instructions closely. For bacteria testing, always use the sterile bottle provided by the lab and avoid touching the inside of the cap or container. Remove aerators if instructed, clean around the faucet if required, and let cold water run for the recommended amount of time. Exact requirements vary, so this is one area where following the instructions matters more than relying on memory.
Try to keep the process simple and clean. Wear gloves if appropriate, avoid setting open caps on the counter, and label samples right away. These details may feel small, but they reduce the chance of a misleading result caused by handling errors.
Step 4: Collect the Sample Carefully
When filling the container, do so steadily without splashing or overhandling. Some tests need the sample analyzed immediately, while others allow a short holding time. Bacteria samples often need to stay cool and reach the lab quickly. If the instructions say to leave an air gap, preserve a reagent, or avoid rinsing the bottle, follow those steps exactly. Precision here is less about complexity and more about respect for the process.
For at home strips or meters, use the sample right away if possible. Fresh samples are generally best because exposure to air, temperature changes, and time can alter some readings. If you are comparing untreated and treated water, collect them close together under the same conditions.
Step 5: Run the Test and Record the Results
Test strips are usually straightforward, but they require timing and good lighting. Dip the strip for the recommended number of seconds, wait the specified amount of time, and compare the colour carefully with the chart. For digital meters, calibrate if needed and rinse probes according to the manufacturer’s instructions. It is a good idea to record not just the final number, but also the date, location, weather, and any noticeable water changes.
If the result is close to the edge of a concerning range, repeat the test once more with a new strip or sample to see whether the reading is consistent. Home kits are best at spotting broad trends and obvious concerns. If a result is high, unusual, or difficult to interpret, that is your signal to confirm it through a qualified lab rather than trying to force certainty from a consumer tool.
Step 6: Compare the Results with Reliable Guidance
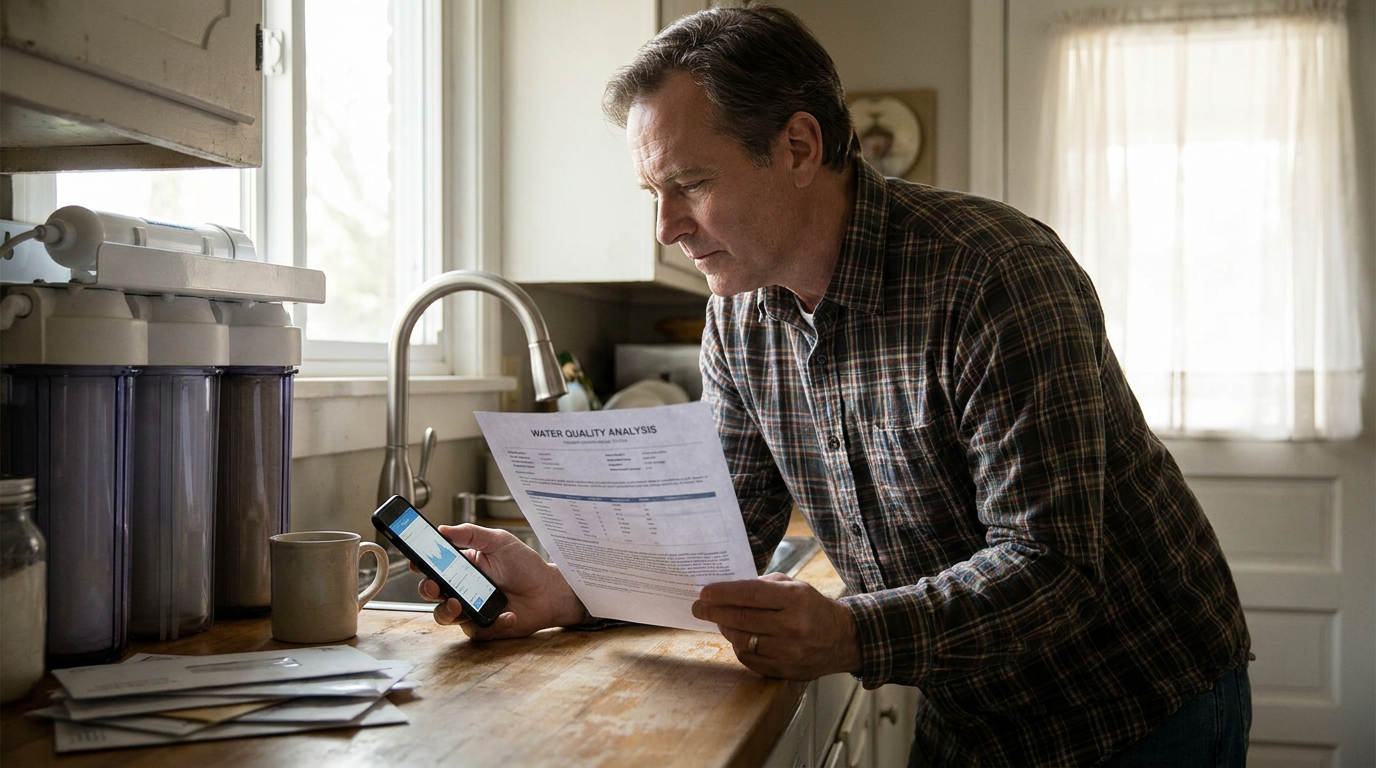
A test number means very little in isolation. What matters is whether it falls within accepted guidance and what that parameter actually indicates. Use Health Canada guidance, EPA resources, or your provincial, territorial, state, or local public health information rather than relying solely on general internet claims. This is especially important when treatment products promise to remove broad categories of contaminants without showing certification or specific performance claims.
If you are unsure what a result means, call your local public health unit, environmental health office, or lab. A brief conversation can often clarify whether you need immediate action, routine follow up, or no concern at all. Interpretation is part of testing, not a separate optional step.
How to Understand Your Results in Plain Language
Reading water results becomes much easier when you focus on action rather than chemistry. Ask yourself three simple questions. First, does this result suggest an immediate health risk. Second, does it suggest a maintenance or plumbing issue. Third, do I need a better test to confirm what I am seeing. Those questions keep the process grounded and practical.
If E. coli is present in a well sample, treat the water as unsafe to drink until the issue is addressed. That is a clear health result. If pH is low, you may be looking at a corrosion concern rather than a direct pathogen issue. If TDS is elevated, it signals that something in the dissolved mineral or contaminant picture may have changed, but it does not tell you exactly what. If nitrates are high or borderline, especially in a home with infants or pregnant people, move quickly to confirmation and safer water planning.
It is also worth remembering that one good result does not guarantee permanent safety. Water quality can change after flooding, seasonal runoff, equipment failure, or well repairs. Likewise, one odd result is not always a crisis, but it should be taken seriously enough to verify. Good water stewardship is built on patterns and thoughtful follow up, not isolated assumptions.
When to Stop DIY and Call an Accredited Lab
There is a point where the most responsible next step is to move beyond consumer testing. If your water is for a private well and you are doing annual health related monitoring, an accredited lab is often the best default for the core tests that matter most. That does not make DIY testing pointless. It simply places it in the right role. Screening is useful, but confirmation protects decision making.
Use an accredited or certified laboratory when you are testing for bacteria, nitrates that may affect vulnerable household members, metals, PFAS, radon in water, natural radionuclides, or any issue related to flooding or a major contamination event. Also use a lab when a home result is unclear, contradictory, or likely to influence whether you drink the water, install treatment, or seek repairs. In Canada, local public health units and provincial or territorial authorities can help direct you to accredited labs and tell you which tests are relevant in your region.
Certification matters because not all kits sold online are equally reliable. One of the most persistent misconceptions is that if a test is available for purchase, it must be trustworthy for health decisions. In reality, home use kits vary widely in quality. The same is true for filters. Not all filters remove all contaminants, and treatment claims should match the specific contaminant of concern.
What to Do If Your Water Test Shows a Problem
If a result comes back outside guidance, pause before you panic. Water testing is useful precisely because it gives you an opportunity to respond early and intelligently. The right next step depends on the contaminant. Some issues require immediate avoidance of the water for drinking. Others call for maintenance, confirmation testing, or treatment review.
- If bacteria or E. coli are detected, stop using the water for drinking until you have guidance on disinfection, repairs, and retesting. Boiling may be advised in some circumstances, but follow local health direction.
- If nitrates are elevated, especially in a home with infants or pregnant people, switch to a safer drinking source and confirm results through a lab.
- If pH is low or corrosion is suspected, inspect plumbing materials and consider treatment that addresses acidity, then test again after changes.
- If treatment equipment has failed, repair or replace it and verify performance by testing both before and after treatment.
- If flooding has occurred, assume the water may be compromised until appropriate testing confirms otherwise.
In many cases, treatment is possible, but treatment should be contaminant specific. A carbon filter, for example, may help with certain organic compounds or taste issues, but it is not a universal solution. Reverse osmosis, UV systems, chlorination, softening, neutralizing filters, and specialized media all serve different purposes. The most durable strategy is to match the treatment method to the confirmed contaminant and then verify performance with follow up testing.
Special Situations: Flooding, Emerging Contaminants, and New Wells
Climate related events have made post flood testing more important in recent years. Floodwater can carry bacteria, chemicals, and debris into private wells, even if the water clears visually after the event. If your well has been flooded, do not assume normal appearance means normal safety. EPA and public health guidance increasingly emphasize flood related well testing, and this is one area where laboratory analysis and professional advice are worth prioritizing.
Emerging contaminants such as PFAS have also moved into public awareness. Homeowners hear about them in news coverage and understandably want clear answers. The challenge is that PFAS are not a realistic DIY test strip topic. If you are concerned about PFAS because of industrial activity, airport firefighting foam history, landfill proximity, or regional advisories, ask local authorities or an accredited lab about targeted testing. The same principle applies to radon and naturally occurring radionuclides in certain geological settings.
Newly constructed wells also deserve extra attention. A new well is not automatically a safe well. Construction, drilling disturbance, surface sealing quality, and local geology all matter. Testing a new well soon after construction and again according to local guidance helps establish a baseline and catch issues early. That baseline becomes valuable over time because it gives you something concrete to compare with future results.
Creating a Simple Long Term Water Testing Routine
The most sustainable approach to water quality is not obsessive testing. It is a calm, repeatable routine. Choose a time of year when you are likely to remember, perhaps every spring after runoff or every fall before winter. Keep a folder with lab contacts, sampling instructions, your past results, and notes on any treatment maintenance. Once the system is in place, the process becomes much easier to repeat.
A home water log can be surprisingly helpful. Record annual results, dates of filter changes, plumbing repairs, flooding events, odour changes, and any treatment upgrades. Over the years, patterns become visible. Maybe pH dips in spring. Maybe TDS rises when a softener needs service. Maybe a certain faucet consistently tastes different after sitting overnight. Those details can turn vague concern into useful home knowledge.
There is also an environmental dimension to this routine. Caring for water quality at home encourages a broader awareness of how homes interact with land, drainage, wastewater, and local ecosystems. That awareness does not need to feel moralizing. It is simply part of thoughtful homeownership. When we notice what affects our water, we often make better choices about runoff, septic maintenance, chemical storage, and treatment system upkeep. Small actions at home can support both household health and the surrounding environment.
Final Thoughts
Learning how to perform your own water quality tests at home is ultimately about building confidence. You do not need to know everything at once, and you do not need to solve every possible contaminant with a single kit. What matters is knowing the difference between a basic screening check and a health related lab test, understanding which issues deserve urgent attention, and having a practical plan for follow up.
If you are a private well owner, annual testing is one of the most valuable habits you can develop. If you use municipal water, home testing can still help you monitor plumbing, filters, and unusual changes. In both cases, the most grounded approach is the same: observe carefully, test thoughtfully, confirm when needed, and respond with the right level of action. Water quality does not have to be mysterious. With a little structure and the right tools, it can become one more part of caring well for your home and the people in it.
Remember: clear water is not always safe, and one good test does not mean conditions will never change. But with a simple routine, reliable guidance, and a willingness to verify what matters, home water testing becomes less about worry and more about stewardship. That is a reassuring place to start.


No Comment! Be the first one.