



Build Your Own Custom Storage Solutions: A Step by Step Guide for Smarter Home Organization
Custom storage is one of the best DIY carpentry projects because it solves a real problem instead of just adding decoration. When you build your own storage, you control the size, layout, shelf spacing, finish, and features so the final piece fits your room and the way you actually live. That matters in homes where standard cabinets, freestanding shelves, and store bought organizers waste space or never quite fit the wall they are meant for.
Table Of Content
- Why Custom Storage Makes Sense
- Start With the Right Project Scope
- Choose the Type of Storage You Want to Build
- Step 1: Measure the Space Properly
- Step 2: Define What the Storage Must Hold
- Step 3: Pick Materials That Match the Job
- Common Material Choices
- Step 4: Plan the Design and Make a Cut List
- Step 5: Select a Beginner Friendly Joinery Method
- Step 6: Gather Tools and Hardware Before You Start
- Step 7: Cut Panels Accurately and Label Everything
- Step 8: Assemble the Cabinet or Shelf Carcass Square
- Step 9: Add Shelves, Dividers, and Functional Details
- Step 10: Finish Edges and Surfaces Properly
- Step 11: Install, Level, and Anchor the Storage Safely
- Common Mistakes to Avoid
- Ideas for Different Rooms
- How Beginners Can Keep the Project Manageable
- When to Call a Professional
- Final Thoughts
- Quick Step by Step Recap
The good news is that you do not need to be a master carpenter to build useful storage. Many strong and clean looking projects can be made with plywood, basic fasteners, a circular saw or track saw, a drill, and careful planning. If you can measure accurately, cut consistently, and work through the process in order, you can build shelves, cabinets, closet organizers, mudroom benches, garage storage, and simple built ins that look far better than many people expect from a first project.
This guide focuses on practical, step by step advice for both beginners and experienced DIYers. We will cover planning, measuring, material selection, hardware, safe construction, finishing, and installation. We will also address some details that people often skip, including low emission sheet goods, permit considerations for built ins, proper fasteners, shelf load planning, and why tall storage units should be anchored to the wall.
If there is one theme running through every good storage project, it is this: the success of the build is decided before the first cut. Most problems come from rushed planning, inaccurate measurements, weak installation, or using the wrong material for the job. Get those parts right and even a simple design can look clean, perform well, and last for years.
Why Custom Storage Makes Sense
Every house has awkward spaces that standard furniture does not use well. A narrow alcove, a sloped ceiling, a deep closet, a mudroom wall, the end of a hallway, or the space above a laundry machine can all become useful storage if you size the project properly. That is the real value of custom work. You build for the space you have instead of forcing the space to accept something off the shelf.
Custom storage also lets you match the project to the load it will carry. Books, pantry items, tools, shoes, seasonal bins, cleaning supplies, and kids gear all place different demands on shelves and cabinets. A bookcase needs different shelf spans than a linen cabinet. A garage cabinet needs tougher materials and hardware than a bedroom organizer. When you design from scratch, you can build stronger where needed and keep the project simpler where heavy duty construction is not necessary.
Another advantage is flexibility in appearance. You can leave plywood with a clear finish for a practical workshop look, paint a built in to match trim, add a face frame for a more furniture style finish, or use edge banding for a clean modern line. The same basic cabinet box construction can support many different styles. That makes custom storage one of the most adaptable woodworking projects for homeowners.
Good storage is not just about putting things away. It is about making a room work better every day without wasting space, materials, or effort.
Start With the Right Project Scope
Before you settle on a design, be honest about your skill level, available tools, budget, and timeline. This sounds basic, but it prevents many of the problems that turn a useful DIY job into a stalled project. A first time builder is usually better off making a simple plywood shelf unit with square cuts than attempting inset doors, complex trim details, and drawers on day one.
Think in terms of project scope, not just appearance. Ask yourself what the storage must hold, whether it needs doors or drawers, whether it should be freestanding or built in, and how finished it needs to look. A utility room shelf system can be more forgiving than living room cabinetry. A closet organizer can be highly effective with very simple construction if the dimensions are right.
It is also wise to check local permit and inspection requirements before building anything permanent. Consumer guidance in Canada notes that renovation work can trigger municipal rules depending on what is involved. If your storage project is part of a larger renovation, attaches permanently to the structure, includes electrical work such as built in lighting, or affects walls in a meaningful way, verify the requirements first. It is easier to confirm that upfront than to redo work later.
Choose the Type of Storage You Want to Build
The broad process is similar for most storage projects, but the details change depending on the type. Freestanding bookcases need anti tip protection and enough depth to stay stable. Closet systems often prioritize hanging space, adjustable shelves, and drawers. Mudroom storage usually combines a bench, cubbies, hooks, and durable finishes that can handle wet boots and heavy daily use.
Garage and workshop storage brings a different set of demands. You may need thicker shelves, stronger cleats, heavier duty fasteners, and finishes that tolerate dust, impacts, and changing temperatures. Pantry storage usually benefits from shallow shelves so food stays visible. Bedroom storage may focus more on appearance, trim work, and smooth drawer hardware.
For beginners, one of the best starting points is a simple cabinet carcass based system. Once you understand how to build one square, level box, you can repeat the process to create a wall of storage. This modular approach also works well with current interest in space saving and multipurpose storage, especially in smaller homes, condos, and open plan spaces.
Step 1: Measure the Space Properly
Measuring sounds easy, but this is where many builds go wrong. Do not measure only the overall width, height, and depth and assume the room is perfectly square. Walls can bow, floors can slope, corners can be out of square, and baseboards can interfere with the fit. Outlets, vents, window trim, and door swing also need to be accounted for before you design the final dimensions.
Take measurements at several points. Measure width at the floor, middle, and top. Measure height at both sides and in the center if you are fitting between floor and ceiling. Check depth in more than one location. If the project will sit against an existing wall, locate studs early because they affect how the storage will be anchored. Mark outlet locations and note whether baseboards will stay, be removed, or require notches or spacers behind the unit.
A notepad sketch helps more than most people think. Draw the wall, note every measurement, and label obstacles. This becomes the foundation for your cut list and your assembly plan. It also gives you a way to catch errors before material is purchased.
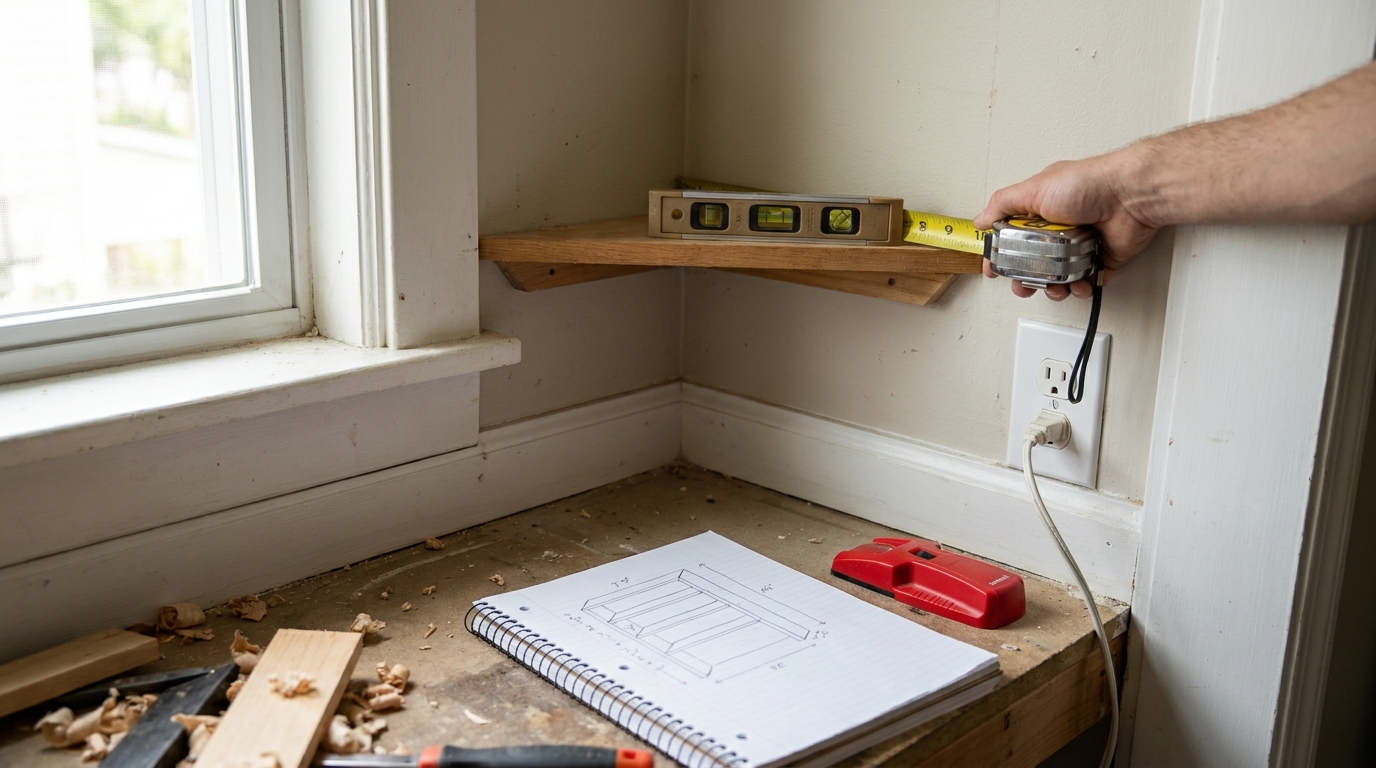
For built ins and snug fits, I strongly recommend leaving yourself a little margin where needed and planning for scribing or trim. Trying to force a perfectly measured cabinet into an imperfect opening is a common mistake. In many houses, especially older ones, the room has more personality than your tape measure suggests.
Step 2: Define What the Storage Must Hold
Storage should be designed from the items backward. If you are storing books, measure the tallest and deepest ones. If the project is for bins, baskets, appliances, or tools, measure those too. The internal dimensions matter more than the outside look. A good cabinet that does not fit the things it is meant to store is still a bad cabinet.
Load planning belongs here as well. Wide shelves carrying heavy books, paint cans, or power tools need more support than decorative shelves holding baskets or folded linens. Beginners often underestimate shelf deflection. A shelf may not break, but if it sags, the project looks cheap and performs poorly. Shorter spans, thicker material, edge stiffeners, center dividers, or back support can all improve shelf strength.
This is also the time to decide whether shelves should be fixed or adjustable. Adjustable shelves offer flexibility, but fixed shelves add rigidity to the cabinet box. Many successful designs use a mix of both. A couple of fixed shelves can square and stiffen the unit, while adjustable shelves above or below allow future changes.
Step 3: Pick Materials That Match the Job
For most indoor storage projects, plywood is the practical choice. It is stable, strong for its weight, widely available, and forgiving enough for many simple cabinet and shelf designs. It also tends to hold fasteners better at edges than some other sheet goods. For painted projects, good quality plywood or MDF can produce a smooth finish, though MDF is heavier and more vulnerable to moisture.
Pressed wood products such as particleboard, MDF, and hardwood plywood paneling are common in shelving, cabinets, and furniture. They can be perfectly serviceable if chosen well, but quality varies. Indoor air quality matters in storage that will live inside your home for years, especially in closets, bedrooms, and living spaces. EPA guidance recommends choosing composite wood products certified to recognized emissions standards or CARB or TSCA compliant materials when reducing formaldehyde exposure is a priority.
That does not mean every plywood panel is a problem. It means you should buy intentionally. Read labels, ask suppliers questions, and choose low emission products if available. In practical terms, this is a good habit for indoor carpentry because the storage will spend a long time in an enclosed environment.
Pressure treated lumber is generally not the right default for indoor storage. It is more appropriate where moisture, weather exposure, or code related conditions call for it. If treated lumber is used in a situation that requires it, remember that code related materials indicate it often requires proper compatible fasteners, including hot dipped galvanized fasteners in many applications. For normal interior cabinets, shelves, and closet systems, standard interior materials are usually the better and cleaner choice.
Common Material Choices
- Plywood: Strong, versatile, good for cabinet boxes, shelves, and dividers.
- MDF: Smooth for paint, heavy, good for some interior components, poor around moisture.
- Particleboard: Budget friendly but weaker at edges and less durable under heavy loads.
- Solid wood: Great for face frames, trim, edging, and visible details, but moves more with humidity.
- Melamine panels: Easy to clean and common in closets, but they need careful cutting and proper fasteners.
There is no single perfect material. The right choice depends on where the storage will live, what it will hold, how refined you want the finish to look, and what tools you have for cutting and assembly.
Step 4: Plan the Design and Make a Cut List
Once the space and function are clear, draw the project. This can be a hand sketch, graph paper layout, or a simple digital plan. You do not need fancy software for a solid result. What you need is a clear breakdown of each part, including overall dimensions, panel thickness, shelf count, back panel type, and where the fasteners or joinery will go.
A cut list is what keeps the build under control. List every piece with quantity, length, width, and material. Separate visible finished parts from hidden structural parts if they use different material or finishing methods. If the project uses multiple sheet goods, map out how you will cut them so you reduce waste and avoid ending up short on material after one mistake.
This is also where you decide on details like toe kicks, face frames, edge banding, drawer openings, and back panels. A back panel is often overlooked, but it does important work. It helps square the cabinet, stiffens the whole unit, and can improve appearance. Even a simple thin back attached correctly can make a big difference.
Step 5: Select a Beginner Friendly Joinery Method
You do not need advanced woodworking joinery to build reliable storage. The most accessible methods for many DIYers are screws, confirmat screws, pocket hole screws, glue where appropriate, and simple cleats. If the parts are cut accurately and assembled square, these methods can produce strong and neat results.
Pocket hole joinery is popular because it is fast and relatively forgiving. It works well for face frames, cabinet assembly, and many hidden connections. Basic screw and glue assembly can also work well, especially when screw locations are hidden or covered by trim. Rabbets and dados add strength and alignment if you have the tools and confidence to cut them accurately, but they are not mandatory for every build.
The best advice for beginners is to choose one method and use it consistently. Do not complicate the project with too many techniques at once. Clean layout, square assembly, and good fastening beat fancy joinery done poorly.
Step 6: Gather Tools and Hardware Before You Start
It is far easier to build smoothly when the materials, tools, and hardware are ready before cutting begins. At minimum, most custom storage builds require a tape measure, straightedge, square, drill and driver, clamps, level, stud finder, sander, and a cutting tool suited to sheet goods. A circular saw with a guide can do a lot of good work. A track saw makes sheet cuts easier. A table saw is helpful but not essential for every homeowner.
Hardware should be selected with the same care as the wood. Cheap drawer slides, weak shelf pins, and undersized screws can ruin an otherwise solid project. If doors or drawers are involved, choose hardware with a weight rating that makes sense for the build. For tall or freestanding units, plan your wall anchoring hardware at the same time instead of treating it like an afterthought.
Safety gear matters too. Use eye protection, hearing protection, and a dust mask or respirator suited to your cutting and sanding conditions. Sheet goods create fine dust, and careful handling is especially important indoors or in attached garages.
Step 7: Cut Panels Accurately and Label Everything
Make your major cuts first and your final trimming cuts second. Breaking down full plywood sheets is often easier on sawhorses with rigid foam insulation underneath than trying to wrestle large panels through a smaller saw setup. Use a good blade meant for sheet goods to reduce tear out, and support the material properly so offcuts do not bind the blade.
Label each part as soon as it is cut. Mark top, bottom, left, right, front, and inside face. This saves confusion once several similarly sized panels are leaning against the wall. It also helps you keep the cleaner face oriented where it will be most visible.
Dry fitting parts before assembly is worth the time. Stand panels together, confirm dimensions, and check that shelves, dividers, and backs line up where expected. It is much easier to correct a miscut before glue, screws, and finish enter the picture.
Step 8: Assemble the Cabinet or Shelf Carcass Square
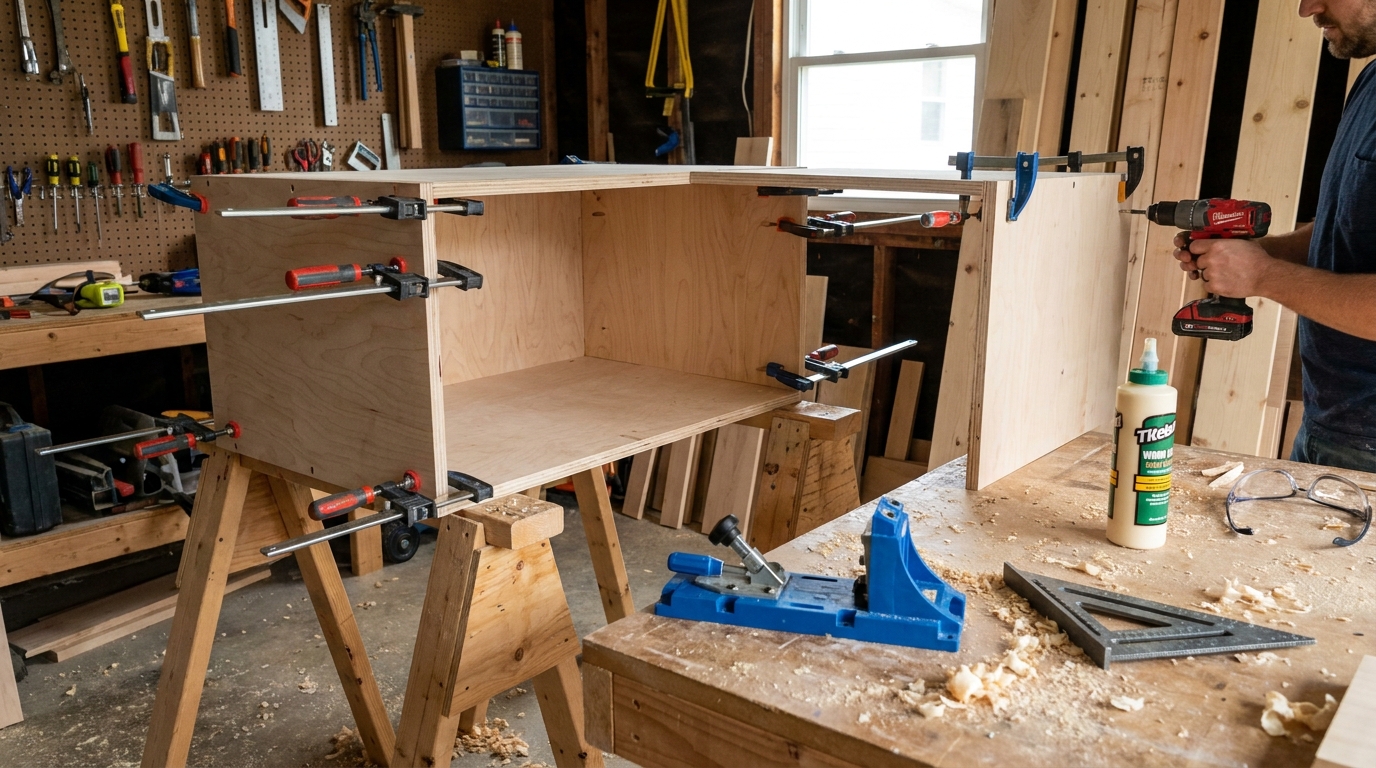
The carcass is the structural shell of your storage unit. If this part is not square, the rest of the build will fight you all the way through. Start on a flat surface if possible. Assemble one section at a time, checking for square as you go by measuring diagonals or using a reliable framing square.
Clamps help more than many beginners realize. They hold parts flush while you drive fasteners and reduce the tendency for panels to shift. Predrill where needed to prevent splitting, especially near panel edges. If you are using glue, apply it consistently and wipe squeeze out before it hardens.
Fixed shelves can be added during carcass assembly to stiffen the unit. If the design includes a back panel, installing it while the cabinet is held square can lock the shape in place. This is one of the simplest ways to improve rigidity in a beginner build.
If your project consists of several boxes, build each one carefully, then join them together during installation. This modular approach is easier to move, easier to level, and usually more manageable for one or two people than a single oversized piece.
Step 9: Add Shelves, Dividers, and Functional Details
Once the main box is together, install the internal features that make the storage useful. Fixed shelves, adjustable shelf pin holes, vertical dividers, hanging rods, drawer supports, and pull out trays all belong in this stage. Work from your plan, but stay aware of small adjustments that improve usability. A shelf moved up by even one inch can make the difference between bins fitting cleanly or not fitting at all.
When drilling for adjustable shelves, use a jig or guide if possible. Consistent spacing and alignment matter if you want shelves to sit level across the unit. For drawers, follow the slide manufacturer instructions closely. Many drawer problems come from slide installation that is slightly out of parallel, not from the drawer box itself.
Think about the way the storage will be used every day. Lower shelves may need more durability if they hold heavy items. Upper shelves may benefit from a lip or closed back if items could be pushed too far. A mudroom bench should have comfortable height, durable top material, and enough open space under or above for real life gear.
Step 10: Finish Edges and Surfaces Properly
Raw plywood edges can look rough if left untreated in finished living spaces. Edge banding is a common solution and can make a basic plywood build look much cleaner. Solid wood edging is another option if you want more durability or a furniture style appearance. For utility spaces, careful sanding may be enough, but it depends on the look you want.
Finish should match the project location. Paint works well for many built ins and can hide a lot of material variation. Clear coats show the wood and are useful when the panel veneer is attractive enough to feature. In garages, laundry rooms, and mudrooms, moisture resistance and easy cleaning may matter more than fine furniture looks.
Before applying finish, fill visible fastener holes if needed, sand surfaces evenly, and remove dust thoroughly. Do not rush this stage. A clean finish often depends more on patient prep than on the final coat itself.
Low odor and lower emission finishing products are worth considering for indoor projects, especially in bedrooms, nurseries, and closets. Ventilate the area well during application and curing. Even a strong build can be unpleasant to live with if the finishing stage is rushed and the room is sealed up immediately afterward.
Step 11: Install, Level, and Anchor the Storage Safely
Installation is where a nice project becomes a truly reliable one. Set the unit in place, level it front to back and side to side, and use shims where needed. Floors are often uneven, and trying to force a cabinet to sit flat without shimming can twist the box and affect door and drawer alignment.
For tall bookcases, dressers, and freestanding cabinets, anchoring is a safety requirement, not an optional extra. The U.S. Consumer Product Safety Commission advises anchoring furniture such as bookcases and dressers to the wall to reduce tip over hazards. This is especially important in homes with children, but it is good practice in any house. Even heavy furniture can tip if drawers are open or weight shifts forward.
Install anti tip or wall anchoring hardware correctly and into solid framing where required by the hardware instructions. If you are building a wall mounted or built in system, locate studs in advance and plan fastening points into the design. A beautiful storage system that is not properly secured is unfinished work.
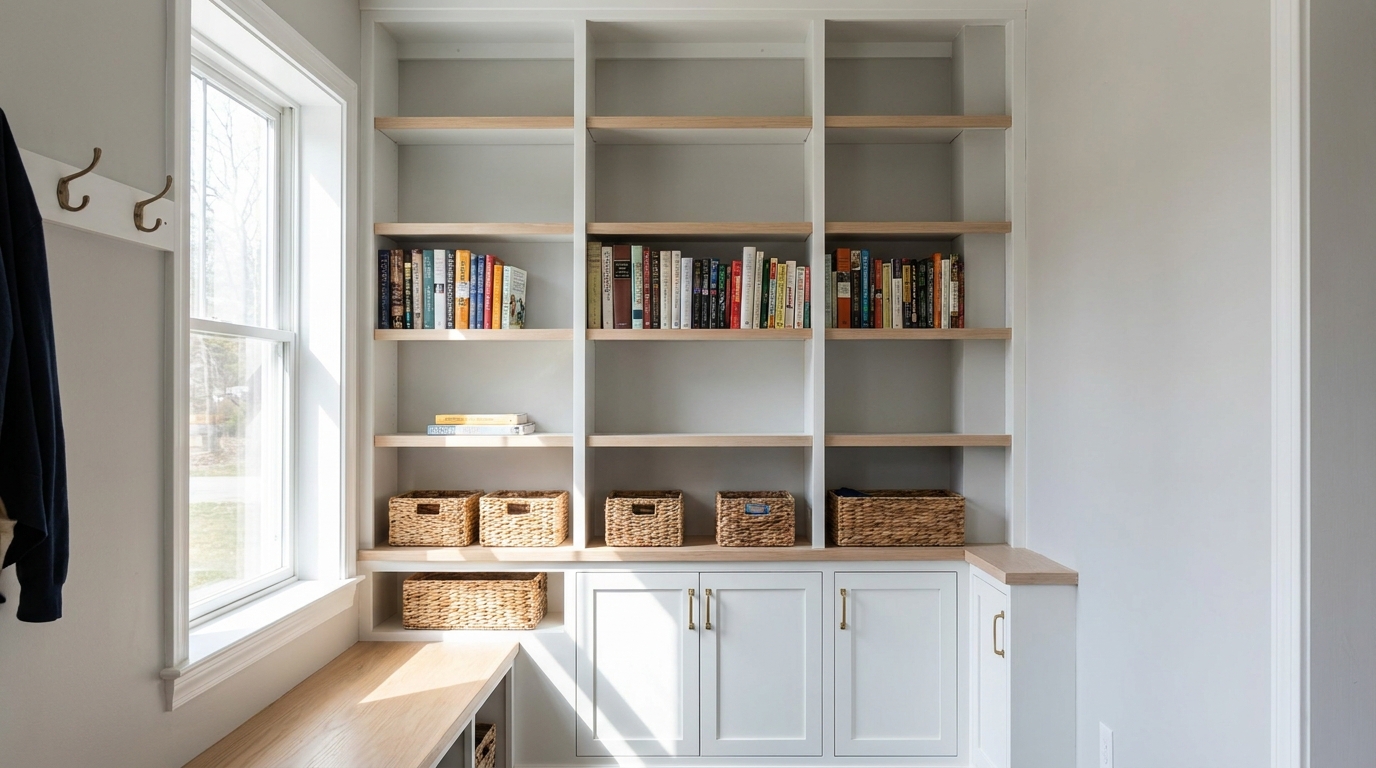
Take your time checking reveals, shelf level, and door gaps if the design includes moving parts. Small adjustments during installation make the difference between a homemade look and a custom built look.
Common Mistakes to Avoid
Most storage project failures come from a short list of repeat issues. The first is poor measuring. People measure the opening once, forget about baseboards or outlets, and cut expensive material too soon. The second is overbuilding visually while underbuilding structurally. A cabinet can have nice paint and trim and still sag, rack, or pull away from the wall if the basic box is weak.
Another common mistake is choosing materials by price alone. Cheap sheet goods can be warped, rough, inconsistent in thickness, or unpleasant for indoor use if emissions and quality are ignored. Not every project needs premium material, but very low quality panels usually cost you back in wasted time and finish problems.
Skipping dry fitting is another preventable error. So is treating anchoring like something to do later. If the project is tall or wall attached, plan the anchoring from the start. Also avoid making every shelf too deep. Deep shelves often waste storage because items disappear at the back, especially in pantries, linen cabinets, and closets.
Ideas for Different Rooms
In living rooms, custom storage often works best as a mix of open shelves and closed lower cabinets. This gives you display space above and clutter control below. In bedrooms, full height storage around a bed or along one wall can add a surprising amount of usable volume without taking over the room if proportions are handled carefully.
Closets are ideal DIY territory because function matters more than decorative detail. A straightforward combination of hanging sections, adjustable shelves, and drawer space can dramatically improve a basic closet. Mudrooms benefit from hooks, cubbies, bench seating, and durable lower surfaces that can take abuse. Garages usually reward simple, strong designs with generous clearances, labeled bins, and shelves sized for real tools and supplies.
For small homes and condos, modular and multipurpose storage is especially useful. A bench with hidden compartments, a shallow wall unit around a desk, or a cabinet that combines display and utility storage can solve more than one problem at once. This trend toward space saving and dual function storage is practical, not just stylish.
How Beginners Can Keep the Project Manageable
If you are new to woodworking, keep the first build simple and repeatable. Use straight lines, full overlay doors if you add doors at all, and standard sheet material dimensions to reduce waste. A plain built in can still look excellent when it is square, painted well, and fitted neatly to the wall with simple trim.
It also helps to build one module first as a prototype. If the first box goes together well, you can duplicate it with more confidence. If you discover that a shelf height should change or the depth feels too large, you can adjust before building the whole system.
There is no shame in outsourcing a few steps if needed. Many home centers or lumber yards can break down sheet goods for easier transport and handling. That can make the difference between starting the project safely and putting it off because the material feels unmanageable.
When to Call a Professional
DIY storage is practical, but not every situation is a good candidate for a solo build. If the project touches electrical wiring, HVAC components, plumbing, structural framing, or complicated built in conditions, bring in the right professional where needed. The same goes for installations in very uneven older homes where careful scribing and advanced fitting are required for a polished result.
You should also pause and get advice if local permit or code questions are unclear. Permanent built ins, wall mounted systems, or larger renovation related storage projects may have rules that vary by municipality or province or state. Verifying that before work begins is simply part of building responsibly.
A good DIYer knows the difference between a challenge that teaches and a problem that should be handled by someone with the right license or trade experience. That judgment protects the house and the people living in it.
Final Thoughts
Building your own custom storage is one of the most rewarding carpentry projects you can take on because the result improves daily life in a visible and lasting way. You do not need ornate joinery or a full professional shop to get there. What you need is a clear plan, accurate measurements, suitable materials, safe assembly, and solid installation.
If you focus on fit, strength, and real world function, the project will usually turn out better than one built around appearance alone. Choose indoor materials thoughtfully, especially if low emission products matter in your home. Plan shelf loads honestly, build square, finish carefully, and anchor tall units properly. Those details are what turn a homemade project into a dependable part of the house.
The best storage is not flashy. It is the kind that fits cleanly, holds what it should, stands safely, and keeps working year after year. Build with that standard in mind and your custom storage will earn its place every day.
Quick Step by Step Recap
- Define the storage problem and project scope.
- Check whether permits, inspections, or code requirements may apply.
- Measure the space at multiple points and note walls, outlets, baseboards, and studs.
- Measure what the storage must hold and plan shelf loads realistically.
- Choose materials suited to the location, function, and indoor air quality goals.
- Draw the design and prepare a complete cut list.
- Select a simple, reliable joinery method.
- Cut panels accurately, label parts, and dry fit the assembly.
- Build the carcass square and add shelves, dividers, or hardware.
- Finish edges and surfaces to suit the room and intended look.
- Install the unit level, shim where needed, and anchor tall storage securely.
Follow that order and you will avoid most of the usual mistakes. Storage projects reward patience more than speed. Take the time to plan well, and the build itself becomes much more straightforward.


No Comment! Be the first one.