


Transform Your Tables: 5 Stunning DIY Makeover Ideas for Every Style
There is something deeply satisfying about giving a table a second life. Unlike larger furniture projects that can feel intimidating or expensive, a table makeover offers a manageable canvas for creativity. A side table, console, coffee table, or dining table can be refreshed with paint, stain, texture, or subtle decorative detail, and the result often changes far more than the furniture itself. It changes the atmosphere of the room around it.
Table Of Content
- Before the Makeover: How to Choose the Right Approach for Your Table
- Idea One: The Two-Tone Painted Table
- Best Colors and Material Pairings
- How to Create the Look
- Idea Two: The French-Inspired Distressed Finish
- What Distressing Should Actually Look Like
- How to Achieve a Refined Patina
- Idea Three: The Natural Wood and Paint Combination
- Why This Style Works So Well
- Step-by-Step Direction
- Idea Four: The Faux Marble or Stone Effect
- Choosing the Right Stone Inspiration
- How to Paint a Faux Stone Top
- Idea Five: The Hardware and Leg Detail Upgrade
- Elegant Detail Ideas That Feel Current
- How to Pull the Look Together
- Lead Safety, Ventilation, and Smart DIY Practices
- Common Mistakes That Undermine a Table Makeover
- How to Choose the Best Makeover for Your Style
- A Simple Tool and Materials Checklist
- Final Thoughts: A Table as a Work of Everyday Art
Table makeovers remain one of the most approachable DIY furniture projects for good reason. With the right preparation, a durable finish, and a clear style direction, even a worn or forgettable piece can become polished, elegant, and highly functional. Home improvement guidance consistently notes that basic furniture painting is beginner friendly, especially when the transformation relies on careful cleaning, light sanding, primer, thin coats of paint, and a protective topcoat. In other words, beauty here does not come from complexity alone. It comes from intention.
This article explores five stunning DIY table makeover ideas for every style, from soft French-inspired finishes to contemporary painted wood combinations and faux stone effects. The emphasis is on transformations that look elevated without requiring advanced carpentry. Inspired by French sophistication and Lebanese craftsmanship, these ideas celebrate patina, texture, detail, and material contrast while remaining realistic for beginners and rewarding for more experienced DIYers.
Before you begin, it is worth remembering that not every table should be stripped or painted. Some older or antique pieces may have original finishes with historical or financial value, and aggressive sanding can erase their character. If your table is an heirloom, a collectible, or an unusually old piece, a gentle cleaning or spot repair may be a wiser choice than a full makeover. Refinishing should always serve the piece, not erase what makes it special.
Safety deserves the same level of attention as style. In North America, older furniture can carry lead-based paint risk, particularly if it came from a pre-1978 home in the United States or from an older Canadian home built before consumer paints became virtually lead-free by around 1990. Disturbing old paint through sanding, scraping, or stripping can release hazardous dust. If the age or history of the table is uncertain, especially if there are multiple layers of old paint, take lead-safe precautions, seek testing, or bring in certified help before beginning a makeover.
Important: A beautiful table makeover starts with a safe one. If your piece may have old paint, especially chipped or layered finishes, pause before sanding. Testing and dust-safe methods are not optional details. They are the foundation of responsible DIY.
With those essentials in place, let us step into five elegant and achievable makeover ideas that can transform an ordinary table into something memorable.
Before the Makeover: How to Choose the Right Approach for Your Table
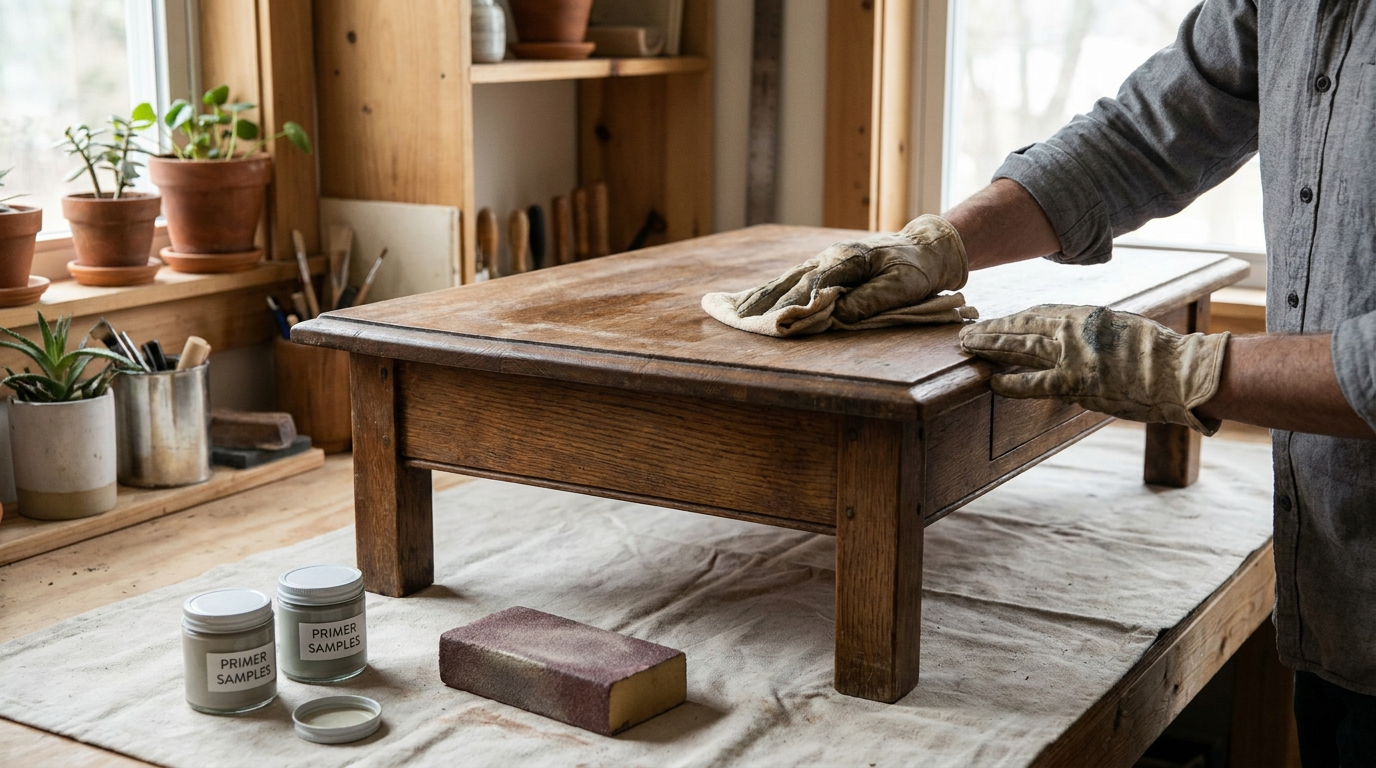
The most successful table makeovers begin with observation rather than paint. Start by identifying what your table is made from and how it is constructed. Solid wood can usually be sanded and refinished more flexibly than veneer, while laminate requires specific bonding primers and does not respond to staining in the same way. Metal details, carved trim, cane inserts, or glass tops each call for a different treatment, and the final finish should respect those differences instead of masking them indiscriminately.
It also helps to decide what role the table plays in your home. A dining table or kitchen table faces spills, friction, and daily wear, which means durability matters as much as style. A side table in a bedroom or formal sitting room may tolerate more delicate finishes, subtle distressing, or decorative paintwork. Thinking about use first allows you to select coatings and techniques that are not only beautiful on day one but still beautiful months later.
Preparation is the silent luxury behind every polished DIY result. Furniture experts commonly emphasize the same sequence: clean thoroughly to remove wax, oils, and dust, sand or degloss the surface as needed, prime for adhesion and stain blocking, apply thin even coats, and protect the finish with a topcoat suited to the table’s function. Even products marketed as easy or all-in-one generally perform better when the surface has been properly prepared. The difference between amateur and elegant often lies in the steps that no one sees.
If you are working with an antique or family piece, consider whether restoration is the right path at all. Canadian conservation guidance reminds us that original finishes can hold both historical and aesthetic value. A mellow old varnish, minor wear at the corners, or a softened sheen acquired over decades may be part of the piece’s identity. In such cases, preserving the finish and improving it gently can be more sophisticated than replacing it completely.
Idea One: The Two-Tone Painted Table
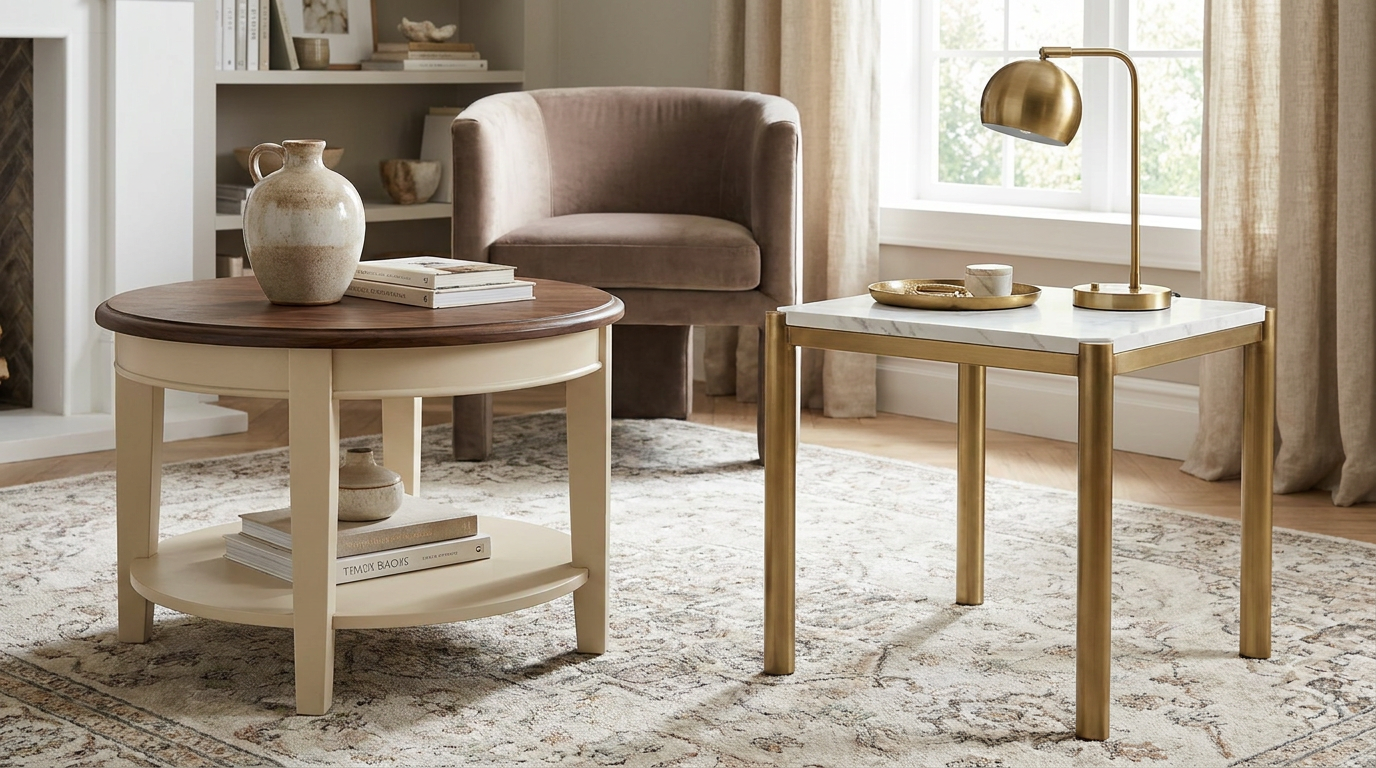
If you want a makeover that feels current, versatile, and immediately intentional, the two-tone painted table is an excellent place to begin. This approach uses contrast in a refined way, often pairing a painted base with a stained or natural wood top. It works beautifully on coffee tables, consoles, dining tables, and bedside tables because it gives shape to the piece. The eye reads the table not as a single block, but as a composition of surfaces.
The appeal of this idea lies in balance. A painted base can soften heavy legs, update dated detailing, or introduce color without overwhelming a room. A natural or stained top preserves warmth and wood grain, which is especially useful when you want your makeover to feel elegant rather than flat. It is a style that bridges country charm, transitional interiors, and modern rustic spaces with remarkable ease.
Best Colors and Material Pairings
For a quietly luxurious result, consider combinations such as warm ivory with walnut, soft taupe with medium oak, muted sage with natural ash, or deep charcoal with honey wood. French-inspired interiors often favor chalky neutrals, antique whites, and stone-like tones, while Lebanese decorative sensibility brings richness through contrast, texture, and depth. A dark painted base under a luminous wood top can feel grounded and graceful at once.
If your room leans more contemporary, desert-inspired neutrals and earthy mineral shades feel especially timely. Trend coverage continues to highlight warm clay, sand, ochre, olive, and jewel-like depth in furniture finishes. On a small table, these colors can read as sophisticated rather than trendy, particularly when balanced by visible wood grain or matte black hardware.
How to Create the Look
Begin by deciding which portions of the table will remain wood and which will be painted. Usually the tabletop receives stain or clear finish while the apron and legs are painted, though the reverse can also be striking on more modern forms. Clean the entire piece thoroughly, make necessary repairs, and lightly sand to create an even surface. If the existing finish is glossy, a deglosser or sanding pass helps primer bond more reliably.
Mask the sections carefully so the transition between paint and wood feels crisp. Prime the painted areas, especially if you are covering a dark or uneven surface, then apply thin coats of durable furniture-grade paint. For the wood top, sand in the direction of the grain, apply your chosen stain if needed, and protect it with a durable clear coat appropriate for tabletops. Allow proper drying and curing time, because a rushed finish is more likely to chip or imprint.
What makes this makeover especially approachable is that it is forgiving. If a stain color feels too pale, you can deepen it. If the painted section needs another coat, you can build it gradually. The result looks custom, but the process remains very manageable for a weekend project.
Idea Two: The French-Inspired Distressed Finish
Some table makeovers are not about perfection at all. They are about atmosphere, memory, and the poetry of age. A French-inspired distressed finish captures that spirit beautifully, bringing softness and patina to a table that might otherwise feel too plain or too formal. The goal is not to make a table look damaged. It is to make it look storied, as though it belongs in a sun-washed room with linen curtains and old books.
This style is particularly lovely for pedestal tables, side tables, entry tables, and decorative consoles. Ornate details, curved legs, carved aprons, and turned forms tend to respond especially well because the finish settles into the contours of the piece. Antique white, putty, pale grey, soft mushroom, and dusty blue are all beautiful starting points, and they pair naturally with brass, aged bronze, or gilded accents.
What Distressing Should Actually Look Like
Elegant distressing is subtle and selective. It usually appears on edges, corners, raised carvings, and places where natural wear would occur over time. Heavy sanding across broad flat surfaces can quickly make the piece look artificial, while a light hand creates nuance. Think of distressing as editing rather than attacking. The objective is to reveal shape and age, not to shout the technique.
A sophisticated version of this finish often includes layered paint tones or a glaze. For example, a warm cream base with a whisper of taupe glaze in the carved details can create a depth that feels far richer than a single flat coat. Wax finishes can contribute softness to lower-use tables, though dining or coffee tables usually benefit from stronger protective topcoats if they see frequent contact.
How to Achieve a Refined Patina
After cleaning and preparing the table, apply primer if the previous finish is slick, stained, or uneven. Paint the piece in your chosen base color, allowing each coat to dry thoroughly. Once cured enough to handle, use fine sandpaper to soften the paint at edges and raised details. Work slowly and step back often. Distressing tends to look best when it is uneven in a believable way rather than perfectly mirrored on all sides.
If you want more depth, apply a tinted glaze or antiquing wax into recesses and wipe back the excess with a clean cloth. This is where the artistry of the finish emerges. The glaze lingers in carvings and seams, emphasizing craftsmanship and creating the sense of age that flat paint alone cannot provide. Finish with a protective product suited to the table’s use, especially if it will hold drinks, lamps, or everyday accessories.
This makeover speaks beautifully to the article’s dual design inspiration. It carries the quiet elegance of French interiors while honoring the layered, handcrafted sensibility often associated with Lebanese decorative richness. It is less about trend and more about presence.
Idea Three: The Natural Wood and Paint Combination
For those who love a cleaner look but still want warmth, the natural wood and paint combination is one of the most versatile table makeover ideas available. Unlike a traditional full paint job, this transformation preserves part of the table’s organic texture and color, allowing the grain to become an active part of the design. It feels calm, modern, and tactile, with just enough contrast to keep the piece visually alive.
This approach is ideal when the tabletop has decent wood beneath a dated stain, or when the legs and base are worn enough to benefit from paint but the top still deserves to breathe. It also suits Scandinavian, organic modern, Japandi, and transitional interiors, especially when the palette stays restrained. A cream base with pale oak, a black base with walnut, or a clay-painted frame with a natural top can all feel quietly elevated.
Why This Style Works So Well
Part of its beauty is psychological as much as visual. Painted furniture can sometimes feel heavy if every inch is coated in one opaque color, particularly on substantial pieces. Leaving wood visible allows the eye to rest. It introduces natural variation, grain movement, and a sense of authenticity that mass-produced furniture often lacks.
This makeover is also a thoughtful answer to sustainability. Upcycling is increasingly driven by cost, aesthetics, sentimentality, and environmental awareness, and the natural wood plus paint approach often uses what is already there instead of hiding it completely. Rather than forcing a table into an entirely new identity, you are drawing out its best features and framing them with a new finish.
Step-by-Step Direction
First, assess whether the exposed wood section is solid wood or veneer. If it is veneer, sand lightly and carefully to avoid cutting through the surface. Strip or sand only as much as needed to remove the old finish and create an even base for stain or clear coat. If the natural color is attractive, you may choose a clear finish only. If it appears uneven, a light stain can unify the tone.
For the painted section, select a furniture-appropriate interior paint or enamel designed for durability. Prime first if you need extra adhesion or stain blocking. Apply several thin coats instead of one heavy coat, then finish with a protective topcoat where required by the product system. The end result should feel intentional and balanced, not split awkwardly between rustic and painted surfaces.
This style is especially successful when paired with thoughtful accessories. A ceramic lamp, a linen runner, a stone bowl, or a brass tray can echo the dialogue between natural and refined elements. The table becomes more than a project. It becomes a visual bridge between materials.
Idea Four: The Faux Marble or Stone Effect
For dramatic elegance without the cost of replacing a tabletop, faux marble or stone effects can be surprisingly effective. When done with restraint and good materials, this makeover creates a tailored look that feels both decorative and contemporary. It works best on side tables, entry tables, occasional tables, nesting tables, and even certain coffee tables where the top can become a statement surface.
The key to a believable faux stone finish is not trying to imitate luxury too literally. Real marble and stone are beautiful because of variation, softness, movement, and layered translucency. A DIY version succeeds when it captures the spirit of those qualities rather than drawing thick cartoon veins over a white background. Think mineral, not costume.
Choosing the Right Stone Inspiration
Classic white marble with grey veining remains a favorite because it suits almost every palette, but warmer options can be even more inviting. Limestone-inspired finishes, travertine tones, sand-colored stone, or moody charcoal veining on a greige base feel especially sophisticated in today’s interiors. If your room already contains brass, bronze, black accents, or earthy textiles, these warmer stone looks can feel deeply integrated.
You can also adapt the effect to your style. A glamorous room may welcome a high-contrast marble effect with polished gold accents, while a quieter interior may prefer matte stone tones paired with painted wood legs. The finish does not need to shout to feel luxurious.
How to Paint a Faux Stone Top
Begin with a smooth, well-primed surface. Any dents, peeling finish, or texture left underneath will interrupt the illusion, so preparation is especially important here. Apply a base color in thin even coats and allow it to dry fully. Then use a feather, fine brush, sponge, or soft cloth to build veining and tonal variation gradually. Real stone has layers, so work in transparent passes rather than a single definitive line.
Soften veins immediately with a dry brush or damp sponge so they sink gently into the background. Add faint cloudy patches, directional movement, and subtle color shifts to avoid a flat result. Once you are satisfied, seal the tabletop with a durable clear topcoat suited to horizontal furniture surfaces. A satin or matte finish often looks more convincing than a very high gloss, depending on the stone you are referencing.
This makeover is an excellent example of visible style shift without structural rebuilding. It can convert a very ordinary table into a striking accent piece, especially when the legs are painted in black, taupe, ivory, or deep olive. The drama comes from finish artistry, not complexity of construction.
Idea Five: The Hardware and Leg Detail Upgrade
Not every table makeover needs to revolve around paint alone. Sometimes the most elegant transformation comes from the details around the structure rather than the structure itself. A simple top refresh combined with updated hardware, leg wraps, brass caps, painted feet, cane insets, or decorative trim can completely alter the personality of a table. This is especially effective on side tables, console tables with drawers, and vintage finds that are solid but visually tired.
In design, details create memory. A table with beautiful proportions can still feel forgettable if the feet are clumsy, the knobs are generic, or the finish lacks punctuation. By contrast, a modest table can suddenly feel bespoke when its hardware gleams softly, its feet are accented in blackened bronze, or its drawer front receives a subtle textural insert. These interventions are small, but they communicate intention.
Elegant Detail Ideas That Feel Current
One approach is to paint the body of the table in a restrained neutral and replace outdated knobs with aged brass, unlacquered brass, or matte black pulls. Another is to wrap or cap the lower legs in metallic detail for a tailored finish. You might also add narrow trim molding to a plain apron before painting, creating the illusion of more expensive joinery. Cane or reeded detailing can be integrated into drawer fronts or lower shelves for texture without visual heaviness.
For a more artisanal look, consider hand-painted edge lines, delicate borders, or a contrasting stripe on the apron. This nods beautifully to decorative traditions where craftsmanship and ornament matter, but it can be kept restrained enough for contemporary interiors. A single line in charcoal, bronze, or muted ochre can sharpen the silhouette of a table with remarkable effect.
How to Pull the Look Together
Because this makeover often combines multiple small updates, cohesion is essential. Choose one main finish direction and one accent material, then let everything else support that pairing. For example, a mushroom-painted side table with antique brass hardware and a lightly stained top feels elegant because the palette is controlled. Too many accents can weaken the effect.
Prepare and paint or stain the table as needed, install new hardware only after the finish has cured, and measure carefully if drilling fresh holes. If adding trim, test the layout first and use wood filler to integrate seams before painting. With leg details or metal accents, keep lines clean and placement symmetrical so the table feels tailored rather than improvised.
This type of makeover is ideal for anyone who wants a transformation with personality but without fully artistic surface work like faux stone or glazing. It also allows an experienced DIYer to customize a table in a way that feels genuinely one of a kind.
Lead Safety, Ventilation, and Smart DIY Practices
Because table makeovers often involve older secondhand pieces, safety deserves a dedicated place in the process. The common misconception that lead risk belongs only to walls or houses is simply not true. Old furniture itself can be a source of lead exposure, and disturbing old coatings through sanding or scraping can release dangerous dust. The older the piece and the less certain its history, the more cautious you should be.
In the United States, homes built before 1978 are a particular concern, and older furniture from such settings may have been painted and repainted over time. In Canada, older homes and furniture can also present risk, while homes built after around 1990 should not contain consumer lead paint because paints produced in Canada and the United States were virtually lead-free by then. If your table may carry old paint, do not begin with aggressive sanding out of habit.
Instead, use the following decision framework before refinishing an older table.
- Identify the likely age and origin of the piece, especially if it has multiple paint layers.
- Consider lead testing or professional evaluation if the age is uncertain or if the table came from an older home.
- If work proceeds, contain the area, minimize dust, ventilate well, and clean with HEPA vacuuming and wet wiping rather than dry sweeping.
- Keep children and pets away from the work zone until cleanup is complete and the finish is fully safe to handle.
Even when lead is not a concern, low-VOC coatings, open-air ventilation where possible, gloves, masks appropriate to the task, and careful cleanup make the project more comfortable and responsible. Elegance in DIY is not only about the final appearance. It is also about the quality of the process.
Common Mistakes That Undermine a Table Makeover
Many disappointing furniture makeovers do not fail because the idea was wrong. They fail because the execution skipped the quiet disciplines that durable beauty requires. One common mistake is assuming all tables can be sanded and painted the same way. Veneer, laminate, solid wood, and metal all behave differently, and using the wrong prep or finish can cause peeling, blotching, or swelling.
Another mistake is rushing past cleaning. Old furniture often carries polish residue, kitchen grease, wax, dust, and invisible oils from hands. Paint and primer bond poorly over contamination, which means even a beautiful color choice can end up scratching off too easily. Cleaning may be the least glamorous part of a makeover, but it often determines whether the result lasts.
A third error is neglecting topcoat protection, especially on working surfaces. While some products are designed as all-in-one finishes, many painted tables benefit from a suitable protective layer, particularly dining tables, coffee tables, and desks. Without it, rings, scratches, and soft spots can appear far sooner than expected. The most elegant makeover is one that can survive actual living.
Finally, avoid over-restoration. If a table has genuine age and appealing wear, removing every trace of character can flatten the piece. There is a meaningful difference between damage and patina. Learning to distinguish them is one of the most sophisticated skills a DIYer can develop.
How to Choose the Best Makeover for Your Style
If your home leans classic or romantic, the French-inspired distressed finish may feel the most natural. It pairs beautifully with linen upholstery, antique mirrors, carved wood accents, and soft neutral palettes. If your rooms are more transitional or organic modern, the natural wood and paint combination offers a cleaner language while still preserving warmth.
For homes that embrace contrast and graphic definition, a two-tone painted table creates structure and visual clarity. If you love decorative impact and would like a small table to become a statement, the faux marble or stone effect offers drama with manageable effort. And if your style is subtle but tailored, detail-driven updates such as hardware changes or leg accents can produce the most polished result of all.
You can also make the decision based on the table itself. Ornate shapes often favor distressed or glazed finishes because their carved details catch shadow beautifully. Very plain tables benefit from contrast, hardware, or faux stone tops because they need a focal point. A heavily worn top with decent base construction may be ideal for a painted base and refinished wood surface. The piece usually tells you where its strength lies, if you look closely enough.
A Simple Tool and Materials Checklist
While every table makeover is slightly different, a thoughtful basic kit makes the process smoother and more controlled. Having the right tools also reduces the temptation to improvise poorly when you reach a delicate step. The following essentials cover most of the projects in this guide.
- Cleaner or degreaser suitable for furniture prep
- Fine and medium grit sandpaper or sanding sponges
- Tack cloth or lint-free cloths
- Bonding or stain-blocking primer as needed
- Furniture-grade paint or enamel
- Wood stain or clear wood finish if exposing grain
- Protective topcoat suitable for tabletops
- Quality brushes, foam rollers, or paint sprayer if preferred
- Painter’s tape for clean transitions
- Drop cloths, gloves, and safety gear appropriate to the task
If lead may be a possibility, add containment materials, a HEPA vacuum strategy, and any testing or professional support needed before beginning. It is always better to pause and verify than to move quickly and create risk.
Final Thoughts: A Table as a Work of Everyday Art
A well-made table is never just a surface. It is where coffee is placed, letters are opened, flowers are arranged, meals are shared, and objects of daily life gather quietly. To remake a table is to remake one of the small stages on which home life unfolds. That is why these projects feel so rewarding. Their scale is modest, but their effect is intimate and lasting.
The most beautiful DIY table makeovers are not necessarily the boldest ones. They are the ones that feel coherent with the room, respectful of the material, and thoughtfully finished. Whether you choose a two-tone painted silhouette, a softly distressed patina, a natural wood pairing, a faux stone top, or a detail-focused update, the real luxury lies in creating something with care. Style, after all, is not only what you buy. It is what you notice, preserve, and transform.
In a time when upcycling continues to grow for reasons of sustainability, cost, sentiment, and individuality, table makeovers offer a particularly graceful entry point into second-life design. They allow us to work with what we have, to refine rather than replace, and to make our homes feel more personal in the process. With the right preparation, safe methods, and a clear eye for beauty, an old table can become one of the most compelling pieces in the room.
So begin slowly. Study the piece. Respect its age, understand its material, and choose the finish that reveals its best self. A brushstroke, a softened edge, a reimagined top, a renewed leg line, these are small gestures, yet together they can create something that feels remarkably complete. And that, perhaps, is the true art of the table makeover.


No Comment! Be the first one.