


Mastering Tile and Grout Care: A Step by Step Guide to Pristine Floors
Tile has a remarkable way of bringing order, texture, and quiet luxury into a room. Whether it appears as cool porcelain underfoot in a modern kitchen, a patterned cement style surface in an entryway, or glossy ceramic framing a shower wall, tile contributes geometry and polish that instantly elevates daily life. Yet even the most beautiful installation can lose its presence when grout becomes dingy, surfaces are coated with residue, or moisture quietly settles into vulnerable joints. The difference between a floor that feels timeless and one that feels tired often lies in maintenance.
Table Of Content
- Why Tile and Grout Need Different Care
- The Most Common Causes of Dull Tile and Dirty Grout
- Your Essential Tile and Grout Care Toolkit
- Step One: Remove Dust and Grit Before Wet Cleaning
- Step Two: Clean Tile Gently but Thoroughly
- Step Three: Focus on Grout With Precision
- When Staining Is More Than Surface Deep
- Step Four: Dry the Surface Completely
- Step Five: Determine Whether Your Grout Needs Sealing
- Step Six: Seal Cement Based Grout Correctly
- How Often Should Grout Be Resealed?
- Common Mistakes That Quietly Damage Tile and Grout
- Special Care for Bathrooms, Kitchens, and Entryways
- What About Natural Stone, Unglazed Porcelain, and Specialty Tile?
- Low Maintenance Grout Options for Future Renovations
- A Simple Maintenance Schedule for Lasting Elegance
- How Good Care Protects Design Value
- Final Thoughts
Thoughtful tile and grout care is not only about hygiene. It is also about preserving design clarity. Clean grout lines sharpen the visual rhythm of a pattern, support contrast between tiles, and help the entire surface read as intentional and refined. Well maintained tile reflects light more beautifully, resists premature wear, and allows a room to retain the composed atmosphere it was meant to have from the very beginning.
This guide brings together practical maintenance advice and a more design conscious way of thinking about care. You will learn how tile and grout behave differently, how to clean each surface properly, when sealing matters, and how to prevent the common mistakes that quietly shorten the life of a tiled area. The aim is simple: to help you maintain floors, showers, backsplashes, and walls in a way that keeps them elegant for years to come.
Why Tile and Grout Need Different Care
One of the most important principles in flooring maintenance is that tile and grout are not the same material, and they should not be treated as though they are. Many tile surfaces, especially glazed ceramic and porcelain, are relatively nonporous and highly resilient. They resist everyday staining better than many other finish materials and often require only regular dust removal and gentle cleaning to stay attractive. Grout, however, is a different story.
Traditional cement based grout is more porous, which means it can absorb moisture, dirt, soap residue, oils, and spills more readily than the tile around it. This porosity is what makes grout so susceptible to discoloration over time. In wet areas such as bathrooms, laundry rooms, mudrooms, and kitchen floors, grout lines can become the first place where age and neglect begin to show. Even on a perfectly durable tile surface, neglected grout can make the entire installation look worn.
Understanding porosity also explains why some cleaning habits fail. A harsh cleaner may make a surface look bright in the short term, yet slowly degrade the protective sealer on grout and leave it more vulnerable than before. A homeowner may think the tile itself has become harder to clean, when in fact the issue is that the grout has lost its barrier and begun absorbing residue. In refined interiors, maintenance should support materials rather than fight them.
Design insight: Clean grout is not merely a maintenance detail. It preserves the linework, spacing, and tonal balance that make tile installations feel crisp, intentional, and architecturally composed.
The Most Common Causes of Dull Tile and Dirty Grout
Before building a care routine, it helps to understand what usually causes decline. In most homes, tile loses its fresh appearance because of three overlapping issues: abrasive debris, cleaning residue, and unmanaged moisture. Fine grit from shoes, pets, and open doors behaves almost like sandpaper underfoot. Over time, it can dull certain finishes and make even a high quality floor appear tired.
Cleaning residue is another subtle problem. Using too much product, choosing the wrong formula, or failing to rinse and dry thoroughly can leave a haze on tile and encourage grime to cling to grout joints. This is especially common in kitchens and bathrooms, where soap film and grease blend into a stubborn layer that mutes color and sheen. Surfaces then attract more dirt, making the room feel perpetually less clean than it truly is.
Moisture is the most serious concern of all. Health guidance consistently emphasizes that mold growth indicates a moisture problem that should be corrected, not simply scrubbed away. Hard, nonporous tile can often be cleaned with detergent and water and then dried thoroughly, but recurring discoloration along grout lines usually points to poor ventilation, lingering dampness, leaks, or repeated saturation. If you clean mold without solving the moisture source, the visual issue will return.
Your Essential Tile and Grout Care Toolkit
The most elegant maintenance routines are rarely the most aggressive. They rely on consistency, the right tools, and a measured touch. A thoughtful toolkit keeps surfaces looking polished without causing hidden damage to sealers or finishes. For most homes, the essentials are refreshingly simple and easy to store.
You will want a soft broom or microfiber dust mop, a vacuum suitable for hard floors, several microfiber cloths, a neutral or manufacturer approved tile and grout cleaner, a bucket of clean water, and a soft bristle grout brush. For sealing, keep a penetrating grout sealer recommended for your grout type, along with a small applicator bottle or brush. In wet areas, a squeegee and exhaust fan become just as important as any cleaner because drying is part of maintenance.
What should be avoided is equally important. Repeated use of strong acidic or strongly alkaline cleaners can gradually weaken sealers. Bleach and vinegar are often treated as universal solutions, yet routine reliance on them is discouraged by professional tile care guidance because they can affect protective treatments and some finishes over time. Abrasive pads can also scratch delicate tile surfaces and roughen grout.
- Soft broom, microfiber mop, or vacuum for regular grit removal
- Neutral pH or manufacturer approved tile and grout cleaner
- Soft bristle brush for focused grout cleaning
- Microfiber cloths for drying and buffing
- Penetrating grout sealer for cement based grout
- Squeegee and ventilation support for showers and wet rooms
Step One: Remove Dust and Grit Before Wet Cleaning
The first step in proper tile maintenance is always dry soil removal. This may seem modest compared with deep cleaning, yet it is the habit that protects finish quality day after day. Dust, sand, and debris trapped under foot traffic can abrade tile surfaces and settle into grout lines, especially in entries, kitchens, hallways, and family zones. If left in place, they make later cleaning both more difficult and less effective.
Sweep, dust mop, or vacuum tiled areas regularly based on how heavily they are used. In high traffic spaces, daily or near daily attention is ideal. In quieter areas, several times a week may be sufficient. The goal is to lift loose particles before any moisture is introduced, because wetting grit can simply move it around and press it further into textured surfaces.
For larger format tile and minimalist interiors, this step has visual benefits as well as practical ones. A dust free floor reflects light more evenly and feels more serene. Cleanliness is perceived instantly in broad uninterrupted surfaces, and a well maintained tiled floor contributes to the calm sophistication that many homeowners seek in contemporary design.
Step Two: Clean Tile Gently but Thoroughly
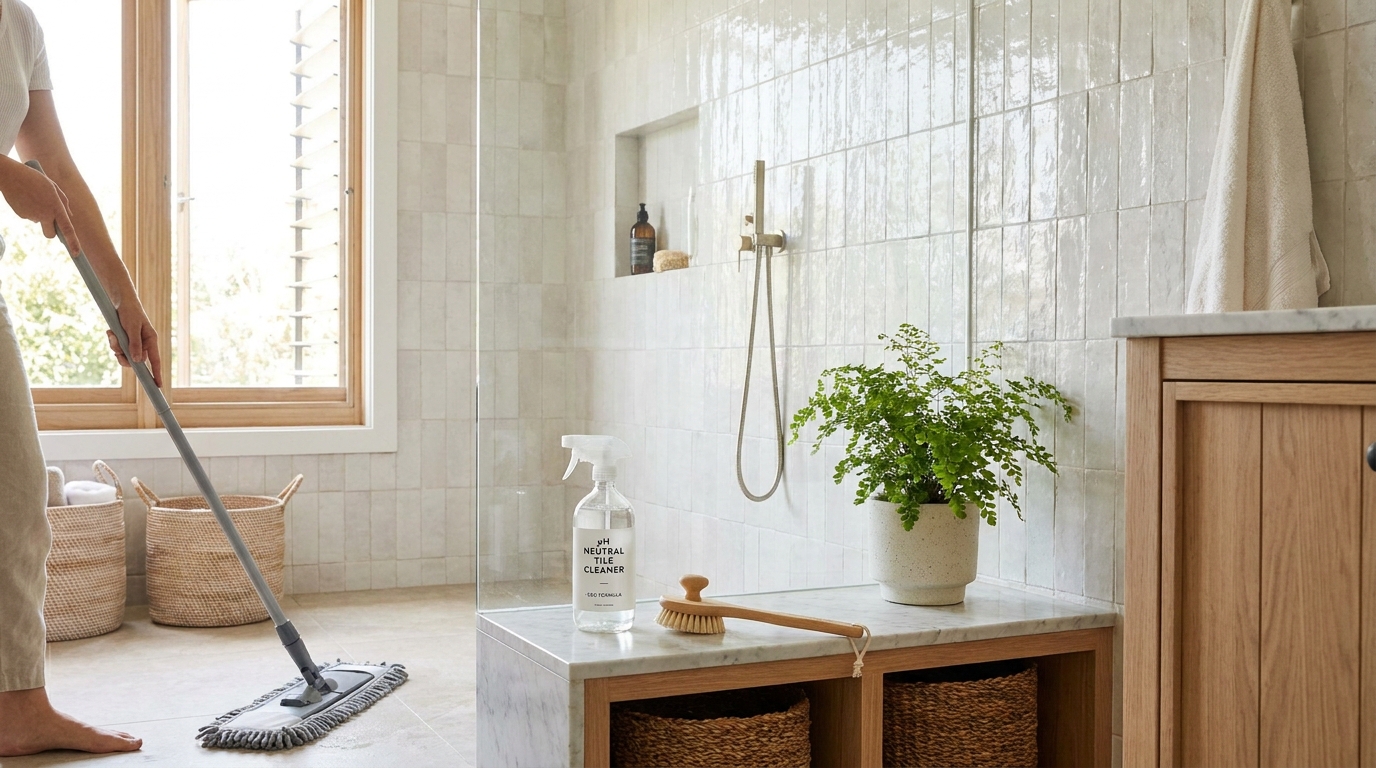
Once loose debris has been removed, the next step is routine washing. For most glazed ceramic and porcelain tile, a mild detergent solution or an approved tile cleaner is appropriate. The aim is to break down everyday soils without coating the surface in residue or exposing it repeatedly to harsh chemistry. Warm water, moderation in product use, and proper drying often produce the best results.
Begin by preparing your cleaning solution according to label directions. More cleaner does not necessarily mean a cleaner floor. In fact, concentrated product can leave a film that dulls the tile and attracts fresh dirt. Mop the floor in sections, using enough moisture to clean but not so much that water floods into grout joints or lingers along the edges of baseboards and cabinets.
Rinse if the product requires it, then dry the surface with a clean microfiber cloth or allow it to air dry with good ventilation. This final step is particularly valuable in preserving clarity and reducing streaks. On walls, backsplashes, or shower surrounds, wipe with a damp cloth, then follow with a dry one to prevent droplets from settling into grout.
Step Three: Focus on Grout With Precision
Grout should be approached with more care and more intention than tile because it is usually the more absorbent and vulnerable element. When grout begins to darken, the temptation is often to scrub hard or reach for aggressive chemicals. Yet a refined approach is more effective over time. Gentle targeted cleaning protects both the grout and any sealer that remains.
Apply a suitable grout cleaner or a mild detergent solution directly to the grout lines and let it dwell briefly according to the product instructions. Dwell time matters because it allows the cleaner to loosen embedded dirt instead of forcing you to use unnecessary physical force. Use a soft bristle grout brush and work in small sections, brushing enough to lift discoloration without eroding the grout surface.
Once cleaned, wipe away residue with clean water and dry thoroughly. If the grout still appears patchy, pause before escalating to stronger chemistry. Sometimes the issue is not dirt but a failing sealer, mineral buildup, old staining, or moisture intrusion. A patient assessment often prevents avoidable damage.
When Staining Is More Than Surface Deep
Not every grout line that looks dark is simply dirty. In kitchens, oils and food residue can migrate into porous grout. In bathrooms, soap film, hard water deposits, and recurring moisture can create complex discoloration. In basements or shower corners, dark spotting may suggest mold or mildew related to trapped dampness. In those cases, cleaning alone is incomplete unless the underlying moisture source is corrected.
Health authorities stress that mold growth means moisture is present, and that hard nonporous surfaces such as tile can generally be cleaned with detergent and water followed by thorough drying. The deeper lesson for homeowners is that ventilation, leak repair, and faster drying are maintenance tasks too. Beauty in tiled spaces depends on dryness just as much as it depends on detergent.
Step Four: Dry the Surface Completely
Drying is one of the most overlooked steps in tile and grout care, yet it is one of the most transformative. Water left on the surface can settle into grout, encourage residue, and foster conditions in which mold returns. In practical terms, a room that stays damp cannot remain visually pristine for long. In design terms, lingering moisture steals the crispness that tile is meant to express.
After mopping or washing, use microfiber cloths to absorb excess moisture from floors and walls. In bathrooms, run the exhaust fan during and after showers. Open a window when weather allows. In enclosed areas or humid climates, a dehumidifier can be a quietly effective addition. These are simple interventions, but together they support the long term integrity of grout and reduce recurring maintenance.
Pay special attention to corners, shower niches, base edges, and the seam where floor tile meets tub surrounds or cabinetry. These transition points often trap moisture and become the first areas to show wear. Thoughtful drying helps preserve both hygiene and the neat visual framing that gives tiled spaces their tailored finish.
Step Five: Determine Whether Your Grout Needs Sealing
Sealing is where many homeowners feel uncertain, partly because advice online is often too general. The key distinction is material type. Glazed ceramic and porcelain tile generally do not need sealing. Cement based grout, however, is commonly porous and usually benefits from a penetrating sealer once it has cured. Natural stone, unglazed porcelain, and other absorbent surfaces may also require protection depending on the product.
If you are caring for an older installation and do not know whether the grout was sealed, use a simple water drop test. Place a few drops of water on a clean dry grout line and observe. If the water beads on the surface for several minutes, the sealer may still be functioning. If the grout quickly darkens and absorbs the water, it is a strong sign that protection has weakened and resealing should be considered.
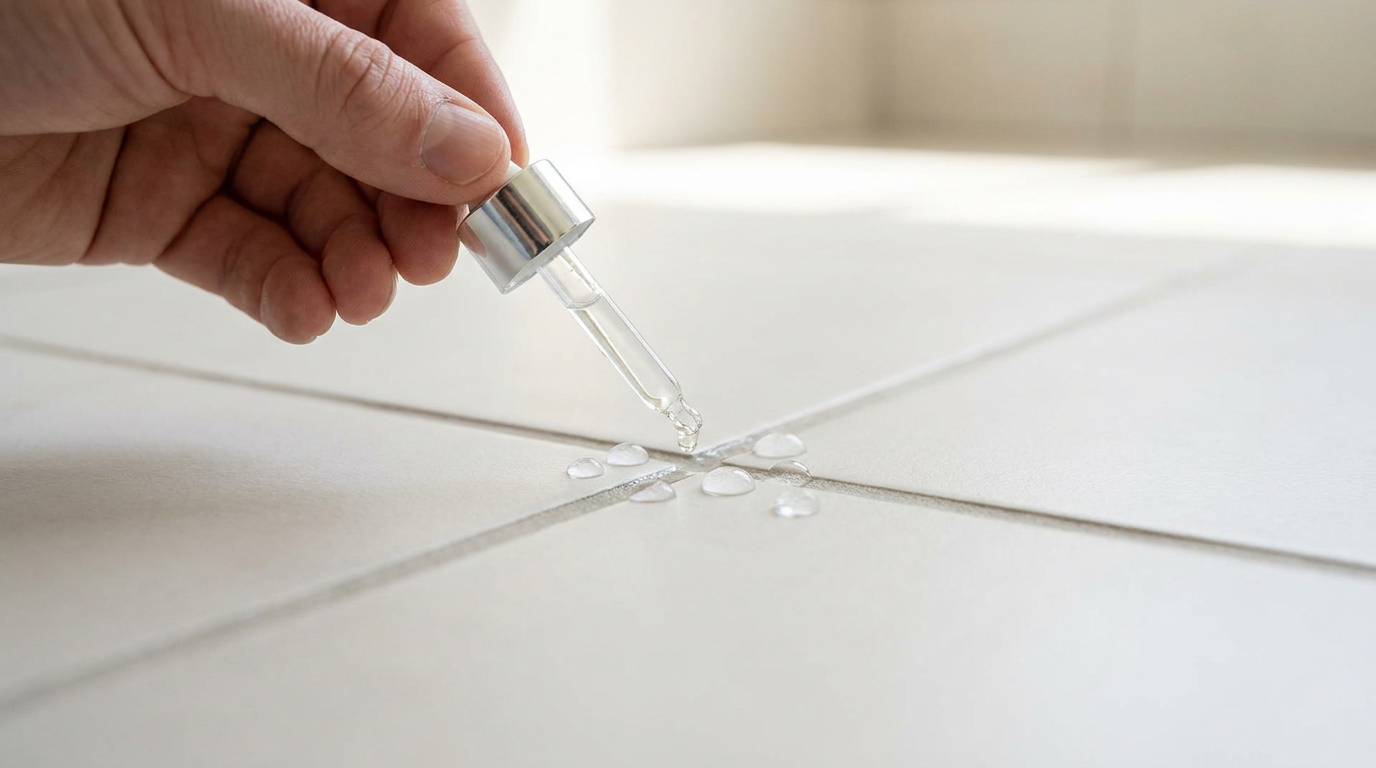
This small test is useful because it replaces guesswork with observation. It also reinforces a broader principle of elegant home care: maintenance should be responsive to how materials actually behave, not based on habit alone. A surface that is properly sealed often stays cleaner with less effort, preserving the refined appearance of the installation between deep cleanings.
Step Six: Seal Cement Based Grout Correctly
If your grout is cementitious and the water test shows reduced protection, sealing can significantly improve stain resistance and ease of maintenance. New grout should only be sealed after it has fully cured according to manufacturer instructions, commonly after twenty four to seventy two hours, though some products require longer. Always verify the guidance for the specific grout and sealer you are using. Rushing this step can interfere with proper performance.
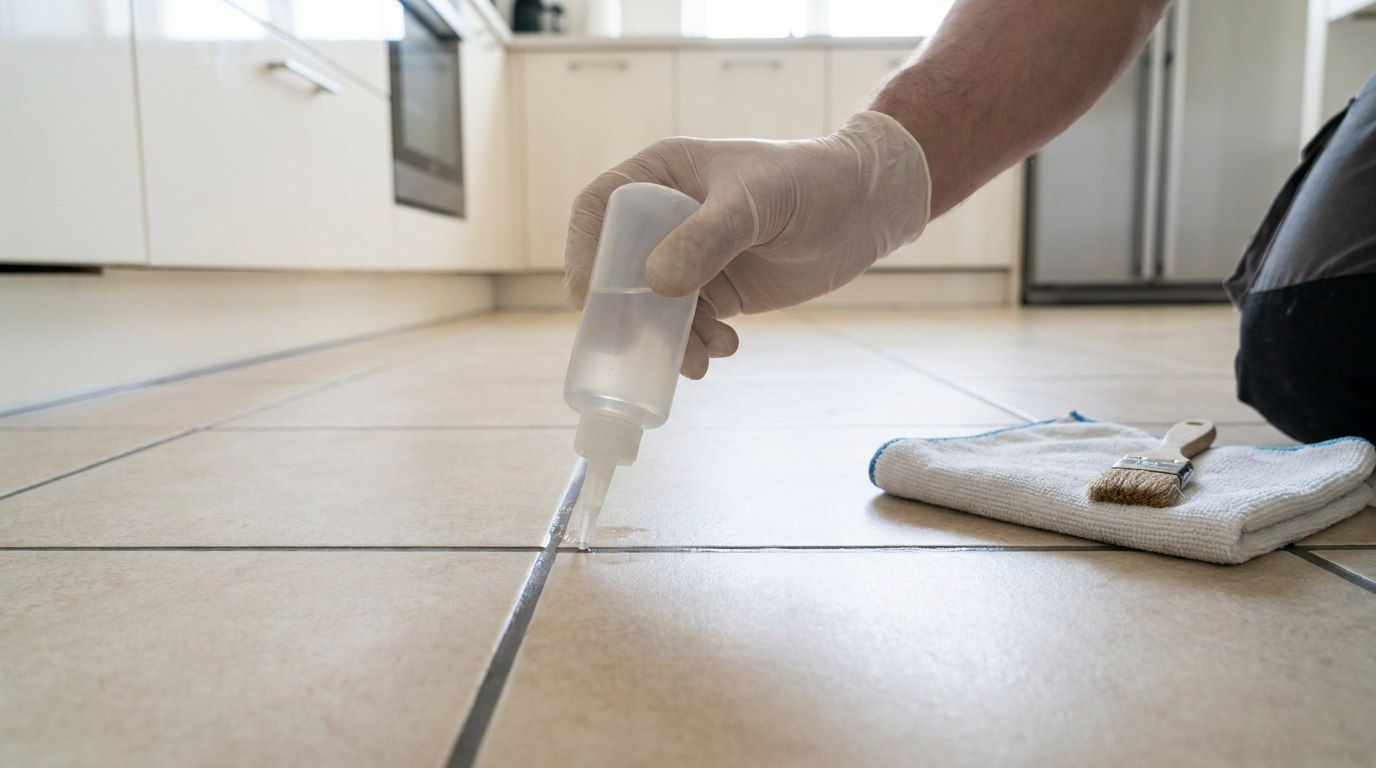
Begin with a thoroughly cleaned and completely dry surface. Any dirt, soap film, or discoloration trapped beneath the sealer may become more difficult to address later. Apply the penetrating sealer carefully along the grout joints using an applicator bottle, brush, or sponge applicator designed for precision. Work in manageable sections and avoid flooding the tile face unnecessarily.
Allow the sealer to penetrate for the specified time, then wipe away any excess from the tile surface before it dries into haze. Some products require a second coat, particularly on very porous grout. After application, keep the area dry for the full curing period recommended on the label. Once cured, the grout should resist moisture more effectively and remain easier to maintain.
How Often Should Grout Be Resealed?
There is no universal calendar for resealing because wear depends on traffic, cleaning habits, moisture exposure, and the quality of the original sealer. Kitchen floors, shower enclosures, and busy family bathrooms may require more frequent attention than decorative wall tile in dry spaces. Rather than relying solely on a date, repeat the water drop test periodically to assess performance.
As a practical rhythm, inspect grout every six to twelve months in wet or heavily used areas. If water still beads and the grout cleans easily, resealing may not be necessary yet. If absorption is quick or staining seems to settle more readily than before, it is time to renew protection. This measured approach keeps the maintenance routine efficient and material led.
Common Mistakes That Quietly Damage Tile and Grout
Many maintenance problems come not from neglect alone but from good intentions paired with the wrong method. One of the most widespread mistakes is assuming that stronger cleaners guarantee better results. Repeated use of bleach, vinegar, or highly aggressive products can weaken sealers, affect certain finishes, and leave surfaces more vulnerable over time. What feels powerful in the moment may be corrosive in the long run.
Another common mistake is mixing cleaning products. This is never worth the risk. Health guidance clearly warns against mixing chemicals such as bleach and ammonia because dangerous vapors can form. A graceful home care routine is always a safe one, and restraint is often the better strategy.
Over scrubbing is equally problematic. Abrasive pads and excessive force can scratch tile, roughen grout, and create a surface that attracts more dirt later. It is also a mistake to treat recurring mold or mildew as only a cosmetic issue. If discoloration returns quickly, the true concern is likely poor ventilation, a plumbing leak, or chronic dampness behind the scenes.
- Using vinegar or bleach as a routine all purpose cleaner
- Mixing cleaning products in search of faster results
- Skipping dry dust and grit removal before mopping
- Leaving cleaned surfaces wet for too long
- Sealing dirty or damp grout
- Ignoring signs of recurring moisture or mold
Special Care for Bathrooms, Kitchens, and Entryways
Every tiled zone in the home has its own pattern of wear. Bathrooms are shaped by steam, standing water, soap film, and ventilation challenges. Here, quick drying habits make a dramatic difference. Squeegeeing shower walls, running the fan after bathing, and washing grout gently but regularly can prevent the gradual shadowing that makes a bathroom feel older than it is.
Kitchens introduce grease, food spills, acidic ingredients, and frequent foot traffic. The best maintenance strategy is prompt response. Wipe spills before they migrate into grout, especially around ranges, sinks, and islands. Regular sweeping is especially important here because a polished kitchen floor loses elegance quickly when crumbs and fine grit gather in corners and along grout lines.
Entryways and mudrooms face dirt, moisture, salt, and abrasion from outdoor traffic. A layered preventive strategy works best. Use quality mats, remove shoes when possible, and clean grit before it is walked deeper into the home. These spaces often set the visual tone of the interior, so maintaining crisp tile in the threshold area has an outsize effect on how clean and welcoming the entire house feels.
What About Natural Stone, Unglazed Porcelain, and Specialty Tile?
Not all tile can be cared for identically. Glazed ceramic and standard porcelain are often forgiving, but natural stone and unglazed or polished surfaces require more caution. Some stones can etch, stain, or lose polish if exposed to unsuitable cleaners. Certain textured finishes can also trap residue more easily, making product choice and rinsing even more important.
If your installation includes marble, limestone, slate, travertine, encaustic style cement tile, or polished porcelain, always check the manufacturer or installer guidance before using a cleaner or sealer. The product suitable for one surface may be inappropriate for another. In sophisticated interiors where materials are layered intentionally, a tailored maintenance plan preserves the individuality of each finish without compromising the whole composition.
This is also where penetrating sealers become especially valuable. Rather than forming a visible film, they are designed to protect from within while preserving the natural look of the surface. That quiet invisibility is part of their appeal. They support the material rather than masking it.
Low Maintenance Grout Options for Future Renovations
If you are planning a renovation rather than simply maintaining an existing surface, grout selection deserves more attention than it often receives. Traditional cement based grout remains common and beautiful when properly sealed and maintained, but newer non cement and epoxy type grout systems are increasingly favored for areas where durability and reduced upkeep matter most. Showers, kitchen backsplashes, laundry rooms, and family bathrooms are all strong candidates.
These lower maintenance grout systems are marketed for improved stain resistance and reduced sealing needs. They can be an excellent choice for households that want a cleaner, more resilient look with less routine intervention. Design wise, they also help preserve sharp contrast and color consistency, which is especially attractive in spaces where grout color is part of the visual concept.
That said, even low maintenance systems still benefit from regular cleaning and moisture control. No product is a substitute for sound ventilation, prompt spill care, or thoughtful housekeeping. The most successful interiors pair good material selection with equally good habits.
A Simple Maintenance Schedule for Lasting Elegance
Consistency matters more than intensity. A practical care schedule keeps tiled surfaces fresh without requiring exhausting deep cleans. In most homes, the most effective approach is a layered rhythm of daily awareness, weekly refreshment, and occasional inspection. This keeps dirt from embedding deeply and allows small issues to be corrected before they become expensive or visually disruptive.
- Daily or every few days: Sweep, dust mop, or vacuum high traffic tile floors. Wipe fresh spills promptly. In showers, remove excess water after use and improve ventilation.
- Weekly: Wash tile with a gentle cleaner, paying attention to corners and edges. Spot clean grout where needed and dry the surface well.
- Monthly: Inspect grout lines for discoloration, residue, cracking, or signs of persistent dampness. Check around tubs, sinks, and transitions for moisture related issues.
- Every six to twelve months: Perform a water drop test on grout in wet or heavily used areas to evaluate whether resealing is needed.
This rhythm is not rigid. It can be adjusted for pets, children, entertaining, climate, and room type. What matters is that tile and grout are observed regularly enough that maintenance remains light, controlled, and aesthetically preserving rather than reactive.
How Good Care Protects Design Value
There is a reason tile appears so often in interiors associated with permanence and grace. It holds line, light, and proportion exceptionally well. But its beauty depends on precision, and precision is most visible at the joints. When grout is bright, intact, and properly protected, the eye reads the installation as sharp and complete. Patterns look more deliberate, stone tones richer, and spaces better kept.
This is particularly true in contemporary homes, where restrained palettes and clean surfaces leave little room for visual noise. A shadowed grout line or cloudy tile finish can disrupt an otherwise elegant composition. In traditional interiors too, care matters because patterned floors, handcrafted ceramics, and decorative backsplashes derive much of their charm from clarity and contrast. Maintenance is therefore not separate from design. It is one of the ways design endures.
Viewed this way, tile and grout care becomes less of a chore and more of a stewardship practice. It protects investment, yes, but it also preserves atmosphere. Rooms feel calmer, brighter, and more intentional when their surfaces are respected in small, regular ways.
Final Thoughts
Mastering tile and grout care is ultimately about understanding materials and responding to them with intelligence and restraint. Tile is often durable, but grout asks for more protection. Gentle cleaning, regular grit removal, full drying, and timely sealing work together to maintain surfaces that feel polished rather than overworked. The effect is both practical and aesthetic.
If there is one principle to carry forward, let it be this: the most beautiful tiled interiors are usually the ones cared for consistently, not aggressively. A neutral cleaner used correctly, a soft brush in the right place, and attention to moisture can do far more for longevity than harsh products ever will. Over time, those habits preserve the serenity, crispness, and architectural beauty that make tile such a lasting favorite.
In the end, pristine floors are not created by perfection. They are created by rhythm, by attentiveness, and by a respect for the subtle details that shape how a home feels. Clean grout lines, luminous tile, and dry well kept joints may seem modest things, yet together they create the quiet impression of a house that is deeply and beautifully cared for.



No Comment! Be the first one.