



How to Perform an Air Sealing Check for Your Home
If your home feels drafty in winter, stuffy in summer, or simply harder to keep comfortable than it should, an air sealing check is one of the most useful places to begin. Air leaks let conditioned air escape and allow outdoor air to sneak in through small cracks, joints, and openings in the building envelope. That movement of air often affects comfort before homeowners even think about energy efficiency, which is why this is such an approachable project. You do not need to understand every detail of building science to start noticing where your home may be losing energy.
Table Of Content
- What an Air Sealing Check Actually Tells You
- What You Need Before You Start
- How to Do a Room by Room Air Sealing Check
- Start at the front door and work inward
- Check windows carefully
- Inspect baseboards, flooring edges, and wall penetrations
- The Highest Value Places to Check
- Attic hatches, bypasses, and top plates
- Rim joists and basement transitions
- Ducts in unconditioned spaces
- How to Prioritize What You Find
- Choosing the Right Sealing Method
- What DIY often handles well
- What deserves professional help
- Why Ventilation and Indoor Air Quality Still Matter
- When a Blower Door Test Is Worth It
- Common Misconceptions That Make Air Sealing Feel Harder Than It Is
- A Step by Step Homeowner Checklist
- Looking Beyond Today’s Drafts
- Final Thoughts
Air sealing matters because it helps your house work more efficiently as a system. The U.S. Department of Energy says reducing drafts may save about 5% to 30% per year, depending on the home and its conditions. ENERGY STAR also notes that sealing air leaks and adding insulation can save up to 10% on annual energy bills. Those numbers vary, of course, but they point to something homeowners feel right away: a home with fewer leaks is often cozier, quieter, and easier to heat and cool.
This guide is designed to make the process feel manageable. Instead of aiming for perfection, the goal is to help you identify the biggest leaks first, understand what they mean, and make informed decisions about what you can handle yourself. Along the way, it also helps to remember that a tighter home is not automatically better in every case. Ventilation, indoor air quality, combustion safety, and in some homes radon levels all deserve attention when you start reducing draftiness.
In practical terms, an air sealing check is simply a careful walkthrough of your home. You are looking for the places where air commonly slips through, especially around doors, windows, attic hatches, plumbing penetrations, electrical outlets, recessed lights, baseboards, duct connections, rim joists, and the transition between walls and ceilings. Some leaks are easy to spot, and others leave clues like dirty insulation, moisture staining, or rooms that never seem to feel quite right. Once you know where these trouble spots are, the next steps become much clearer.
What an Air Sealing Check Actually Tells You
An air sealing check is not a formal energy audit, but it can tell you a great deal about how your house is performing. Most homes have some level of air leakage, especially older ones. The point is not to panic over every little crack. The real value comes from learning where leakage is concentrated and which areas are likely driving comfort problems, HVAC strain, and unnecessary energy use.
Think of the building envelope as the shell that separates indoors from outdoors. It includes exterior walls, windows, doors, ceilings below attics, floors above crawlspaces, and all the openings that pass through them. Every pipe, wire, vent, and fixture creates a potential pathway for air movement. Even when the gaps are small, their combined effect can be significant, especially when warm air rises in winter and escapes through upper parts of the home while colder air gets pulled in below.
This is also where many homeowners mix up air sealing and insulation. Insulation slows heat transfer, while air sealing reduces the movement of air. Both matter, but they solve different problems. A well insulated attic can still underperform if warm indoor air is leaking around attic bypasses, recessed lights, wiring holes, or the attic hatch. That is why current guidance in both the U.S. and Canada treats air sealing and insulation as a system rather than isolated upgrades.
A simple home check can also reveal when the issue may be larger than a tube of caulk can solve. If you find evidence of major leakage in the attic, large gaps around framing transitions, disconnected or leaking ducts, or persistent moisture and frost issues, it may be time to bring in a professional. Blower door testing is the standard diagnostic method used to measure airtightness and identify leakage paths with much more precision than a visual check alone.
What You Need Before You Start
You do not need specialized equipment to perform a basic air sealing check, though a few simple tools help. A notepad or phone for taking notes is useful because problem spots tend to repeat from room to room. You may also want a flashlight, a small mirror for tight spaces, and a tissue, incense stick, or smoke pencil to help detect moving air. If you already own an infrared thermometer or thermal camera attachment for a phone, those can be helpful, but they are not required.
It also helps to choose the right day. A cool, windy day is often ideal because drafts are easier to feel. If weather is mild and still, you may not notice leaks as clearly. During the check, keep exterior doors and windows closed, and if your HVAC system is running, pay attention to whether certain rooms become pressurized or feel noticeably different from the rest of the house.
Safety matters as well. If you plan to inspect an attic, crawlspace, basement mechanical area, or places near combustion appliances, go slowly and do not step beyond what feels safe and accessible. Never block combustion air pathways or seal around heat producing fixtures without confirming the right materials and clearances. A calm inspection is far more valuable than a rushed one.
How to Do a Room by Room Air Sealing Check
Start at the front door and work inward
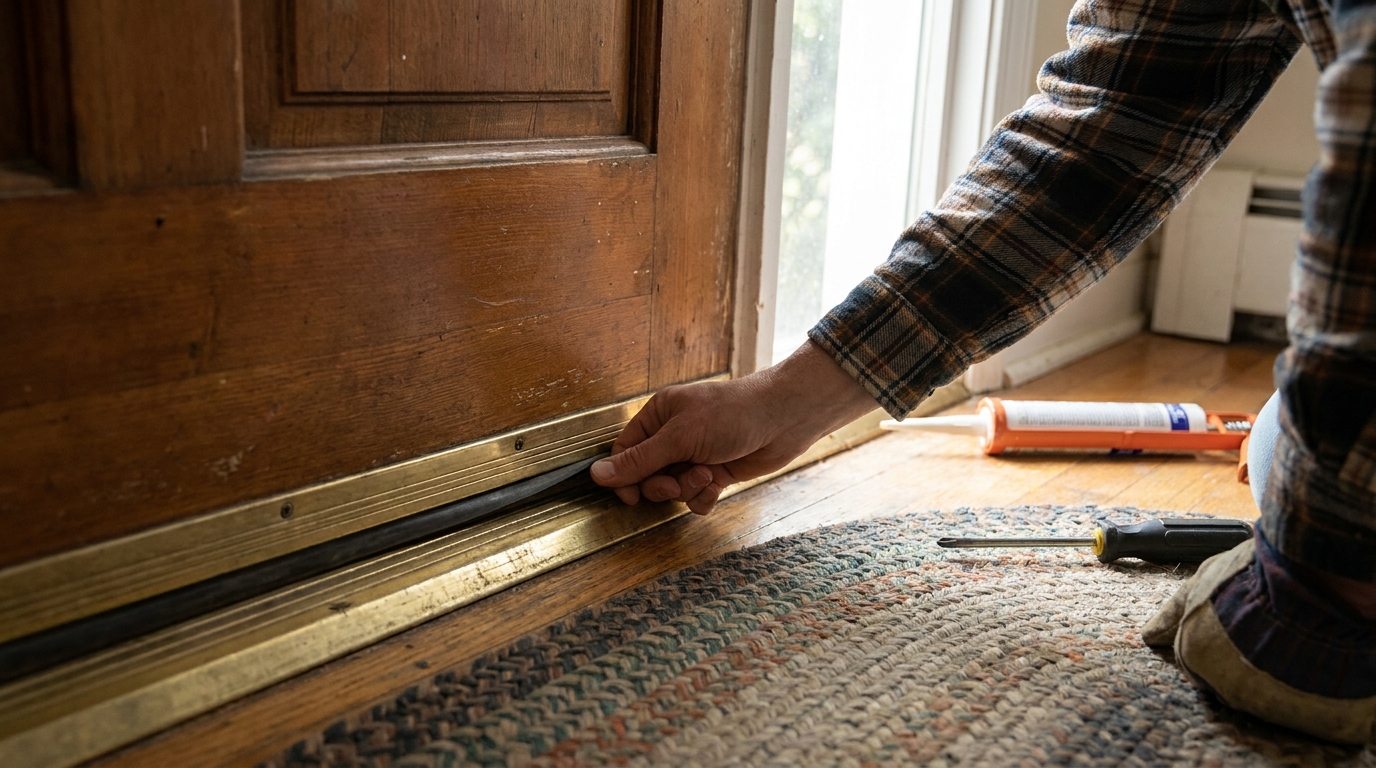
Beginning at your main entry is helpful because door leaks are among the easiest to understand. Stand near the perimeter of the closed door and move your hand slowly around the sides, top, and threshold. Look for visible light around the frame, worn weatherstripping, gaps under the door, or places where the latch side does not pull tightly closed. These are often simple fixes, yet they can noticeably improve comfort.
As you move through the rest of the home, keep a consistent routine. Check windows, exterior doors, trim, and baseboards in each room before moving to the next. This makes it easier to compare patterns and see whether leaks are isolated or part of a broader issue in a certain section of the house. Homes often tell a story when you view them systematically rather than as a collection of unrelated annoyances.
If you use a tissue or smoke source, hold it near suspected gaps and watch for movement. Even a slight flutter can indicate air flow. If you use incense, do so carefully and avoid it around smoke detectors, children, pets, or sensitive indoor air conditions. The point is not to dramatize every motion, but to confirm whether the draft you feel is real and directional.
Check windows carefully
Windows are a familiar source of discomfort, but not every chilly feeling near glass is an air leak. Glass surfaces can feel cold in winter even when the frame is relatively tight. What you are looking for is leakage around the sash, frame, casing, or where the window meets the wall. Operable windows may have worn weatherstripping, misaligned locks, or old sealant that has cracked over time.
Pay attention to signs that suggest repeated air movement. Curtains that sway slightly when no vent is blowing, dust accumulation near trim, or cold spots concentrated at one corner can all be useful clues. In older homes, the gap may not be at the window itself but in the surrounding framing, where settlement and age have opened small pathways behind interior trim.
If condensation appears regularly on interior glass or nearby surfaces, it may also point to a broader moisture and temperature issue. Air leaks can carry warm moist indoor air into colder cavities, which is one reason air sealing affects durability as well as comfort. This is especially relevant in colder climates where escaping interior air can contribute to frost and moisture damage in hidden spaces.
Inspect baseboards, flooring edges, and wall penetrations
Leaks are not always dramatic. Some of the most persistent drafts come from the quiet edges of a room, especially where the floor meets the wall, where pipes pass under sinks, or where wiring enters cabinets and utility spaces. Kneel down and feel along baseboards on exterior walls. In homes with basements or crawlspaces, these transitions can connect to larger leakage paths below.
Under sinks, look at the holes where plumbing lines enter the wall or floor. Around laundry hookups, bathtub plumbing, and utility penetrations, builders often leave oversized openings that are later hidden by trim or cabinets. These gaps can connect directly to wall cavities, crawlspaces, or other unconditioned spaces. They are common, and they are often worth sealing once identified.
Electrical outlets and switch plates on exterior walls can also leak, particularly in older homes or those with little attention to air barrier continuity. If an outlet cover feels cold or drafty, note it down. Specialized gaskets can help in some cases, but if the wall cavity itself is open to a larger leakage area, the better fix may involve addressing the source elsewhere.
The Highest Value Places to Check
Some parts of a house deserve extra attention because they are more likely to contain significant hidden leaks. Guidance from DOE, ENERGY STAR, and NRCan repeatedly points homeowners toward attics, rim joists, and penetrations through the building envelope. These zones matter because they connect interior living space to larger unconditioned volumes where pressure differences can drive substantial air movement.
One helpful idea is to prioritize areas based on impact rather than visibility. A tiny crack around a bedroom window may be easy to notice, but a large hidden gap at the top of a wall below the attic may be costing you more in comfort and energy. The most useful air sealing check is not the one that finds the most leaks. It is the one that helps you rank them intelligently.
Attic hatches, bypasses, and top plates
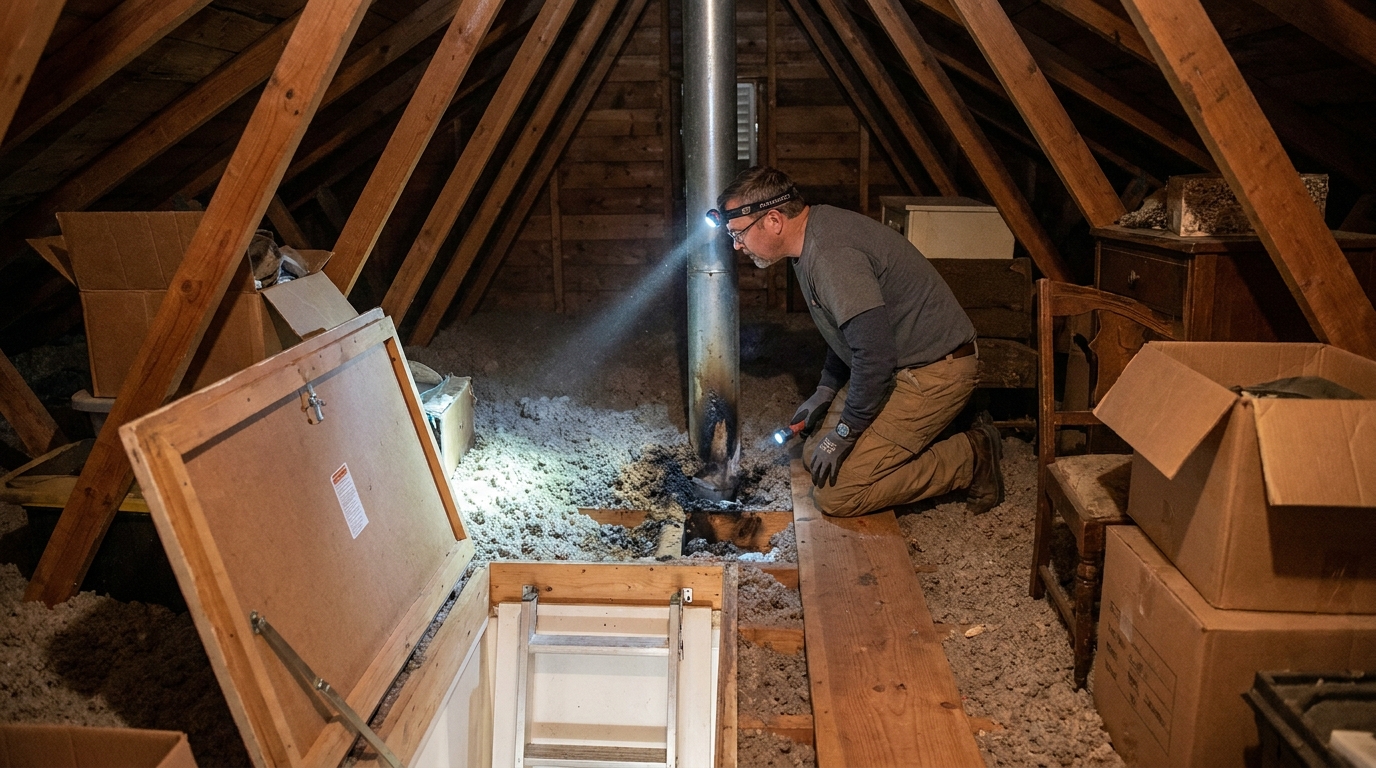
If your home has an attic, this is one of the best places to focus. Warm air naturally rises, so upper ceiling leaks can act like open pathways for conditioned air to escape during the heating season. Check around the attic hatch or pull down stairs for worn gaskets, poor latching, or visible gaps. Even when insulation is present, the hatch itself may be a weak point if it is not weatherstripped and insulated properly.
Inside accessible attics, look for signs of air leakage around plumbing stacks, wiring penetrations, exhaust fan housings, recessed lights, chimneys with proper safety clearances, and the top plates of interior and exterior walls. Dirty insulation can indicate that air has been moving through it over time. In colder climates, frost or water staining can signal that warm, moist indoor air is reaching a cold attic surface and condensing there.
These openings are often called attic bypasses, and they can be surprisingly important. They may be hidden beneath insulation, which is why many homeowners underestimate them. If your attic insulation looks patchy, stained, or compressed around penetrations, take note. Air sealing these areas often delivers better results than simply adding more insulation on top without first stopping the air movement.
Rim joists and basement transitions
The rim joist is the band of framing around the perimeter where the house structure meets the floor system, usually visible in unfinished basements or crawlspaces. It is a frequent leakage area because multiple materials meet there, and the area often includes small cracks, utility penetrations, and limited insulation. If your lower level feels damp, cold, or drafty, this is a smart place to inspect.
Move around the basement perimeter with a flashlight and look for daylight, visible cracks, gaps around pipes and wires, or sections that feel noticeably cooler. Even if there is batt insulation in place, air may still be moving behind or through it. This is a good example of why insulation alone is not enough if the air barrier is incomplete.
Rim joists are also tied to comfort upstairs. Cold air infiltration at the lower level can create a subtle but persistent draft pattern through the house. In many homes, this area can be improved with carefully selected materials such as caulk, rigid foam, or professionally applied foam products, depending on gap size and local code considerations.
Ducts in unconditioned spaces
If your home uses forced air heating or cooling, do not overlook the duct system. DOE states that in a typical house, about 20% to 30% of air moving through ducts is lost due to leaks, holes, and poorly connected ducts. That is a major hidden source of wasted energy, especially when ducts run through attics, crawlspaces, garages, or other unconditioned zones.
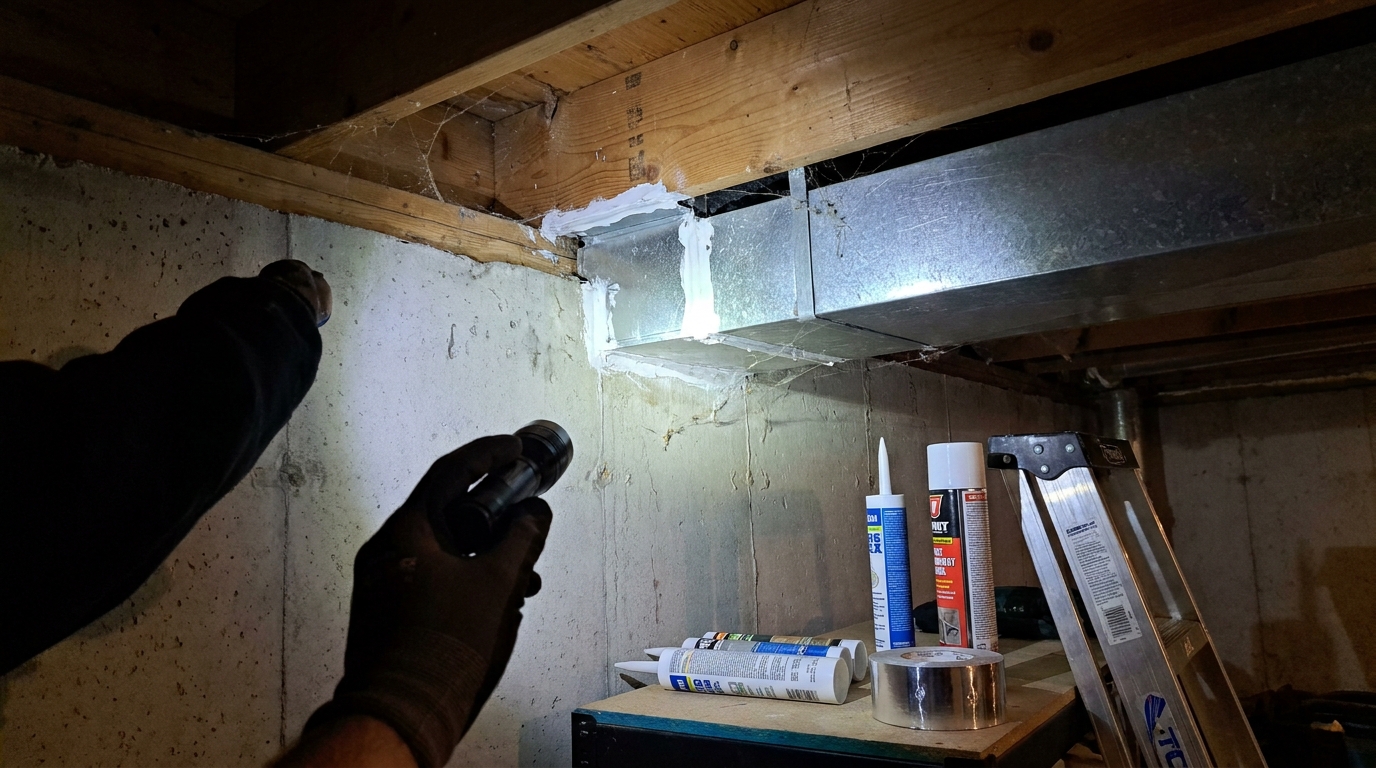
During your air sealing check, look at exposed ducts near joints, seams, takeoffs, and connections to registers or air handlers. Disconnected sections, old tape, obvious gaps, or dusty streaks around joints can all suggest leakage. You may also notice that some rooms are difficult to heat or cool evenly, which can be a symptom of duct leakage rather than just a room level air leak.
Duct leaks can also affect pressure balance. In some situations, they pull in unwanted air from attics, crawlspaces, or wall cavities, which can introduce dust, moisture, and pollutants while making your HVAC system work harder. This is one reason a thoughtful air sealing strategy looks beyond windows and doors and includes the distribution system that moves conditioned air through the home.
How to Prioritize What You Find
After your walkthrough, you may have a long list of possible trouble spots. That is completely normal. The next step is to sort them into categories: easy fixes, moderate fixes, and professional evaluation. This keeps the process practical and prevents the project from feeling larger than it needs to be.
Easy fixes are typically places where the leak is visible, accessible, and suited to straightforward materials like weatherstripping or caulk. Moderate fixes may include areas that are still within a confident DIY range but require more care, such as accessible attic hatch upgrades, larger utility penetrations, or certain basement sealing tasks. Professional evaluation is a smart choice for extensive attic bypasses, combustion appliance zones, significant duct problems, moisture related issues, or anything that could affect fire safety, ventilation, or code compliance.
A useful way to prioritize is to ask three questions. First, is this leak connected to outdoors or an unconditioned space. Second, is it large enough to matter for comfort or HVAC performance. Third, is the fix durable and appropriate for the material and location. The best first projects are usually the ones that score well on all three.
Practical reminder: You do not need to seal every tiny crack before seeing results. In most homes, the biggest leaks usually matter most, and addressing them first is often the smartest use of time and money.
Choosing the Right Sealing Method
One reason air sealing can feel confusing is that different leaks need different materials. Caulk works well for stable gaps that are relatively small and do not need to move, such as trim joints or certain wall penetrations. Weatherstripping is better for movable components like doors and operable windows. Spray foam can be useful for some irregular gaps, but it needs to be used carefully and in the right location.
Material choice matters because the wrong fix can fail quickly or create a maintenance problem. A large gap around a pipe may need backing material and sealant rather than a thin cosmetic bead. A draft at a door threshold may call for adjustment, replacement weatherstripping, or a new sweep rather than more caulk. A recessed light fixture near insulation may require special consideration if it is not rated for insulation contact and air tightness.
This is also why homeowner guidance often emphasizes the phrase the right material in the right place. Sealing is not just about closing holes. It is about doing so in a way that handles movement, moisture, temperature, and safety. When in doubt, slow down and verify the intended use of the product.
What DIY often handles well
Most homeowners can manage basic weatherstripping at exterior doors, small caulking repairs around trim, and sealing obvious utility penetrations in accessible nonhazardous locations. Attic hatches can often be improved with weatherstripping and hatch insulation if access is safe and the work is simple. These are usually satisfying projects because the effect on comfort can be noticeable soon after completion.
DIY also works well when the leak is easy to see and the solution is clearly defined. If cold air enters beneath a back door and the sweep is visibly worn, the path from diagnosis to repair is straightforward. If a pipe penetration under a sink opens into a basement or wall cavity, sealing that gap is also fairly direct once the right sealant is selected.
What deserves professional help
Professional help is wise when leaks are hidden, extensive, or tied to broader house performance issues. Attic air sealing beyond simple hatch work can involve multiple penetrations, buried openings, thermal barriers, and access challenges. If your home has fuel burning equipment such as a furnace, boiler, fireplace, or water heater, any major tightening work should be approached with combustion safety in mind. In some regions, radon is also an important consideration when reducing leakage to and from lower levels.
A professional energy advisor or qualified contractor can also help when you want a whole home view rather than a patchwork of small repairs. Blower door testing can measure airtightness, identify pathways that are hard to find manually, and help quantify the value of a more comprehensive approach. That can be particularly worthwhile if you are planning insulation upgrades, HVAC replacement, or participation in rebate programs tied to airtightness or whole home performance.
Why Ventilation and Indoor Air Quality Still Matter
Air sealing is beneficial, but it should be thought of as part of a larger system. NRCan and DOE both caution that tightening a home may require attention to ventilation and, in some cases, combustion safety or radon levels. That does not mean homeowners should avoid sealing drafts. It simply means that comfort and efficiency should be balanced with healthy indoor air.
In a leaky house, outdoor air may enter in random, uncontrolled ways. That is not the same thing as good ventilation. Controlled ventilation is intentional, predictable, and designed to support indoor air quality. If you significantly reduce leakage, especially during a larger retrofit, it may make sense to assess bathroom exhaust fans, kitchen ventilation, fresh air strategies, and the performance of any combustion appliances.
This systems view is becoming more important as homes adopt heat pumps, better insulation, and more advanced weatherization methods. The house, the HVAC equipment, the duct system, and the ventilation strategy all interact. A more comfortable and efficient home is usually the result of aligning these pieces rather than treating each one in isolation.
When a Blower Door Test Is Worth It
For many homeowners, a visual and hands on check is enough to get started. But there are times when a blower door test adds real value. This test uses a calibrated fan in an exterior doorway to depressurize or pressurize the house so leaks become easier to detect and measure. It is the standard professional method for evaluating airtightness, and it often reveals leakage paths that are invisible during a normal walkthrough.
A blower door test is especially useful if you have already handled the obvious fixes but still have persistent comfort issues, high utility bills, or moisture concerns. It can also help if you are planning a major insulation project, considering new HVAC equipment, or pursuing government or utility incentives. Many retrofit programs increasingly tie rebates to measured airtightness improvements or whole home energy outcomes.
The result is not just a number. A good energy advisor will use the test to explain where the house leaks, how severe the leakage appears, and which improvements are likely to provide the best return. That kind of guidance can keep you from spending money on low impact fixes while missing the larger opportunities hidden behind walls, in attics, or around ducts.
Common Misconceptions That Make Air Sealing Feel Harder Than It Is
One of the most common misconceptions is that air sealing means making the house perfectly airtight. In reality, the goal for most existing homes is to reduce unwanted leakage thoughtfully and safely. There is a meaningful difference between improving a drafty home and turning it into a high performance enclosure without a ventilation plan. Homeowners often get good results long before they approach that boundary.
Another misconception is that insulation alone will solve discomfort. Insulation is essential, but it does not stop air movement by itself. If warm air is leaking into the attic through ceiling penetrations, more insulation on top may not deliver the expected benefit until those leakage paths are addressed. This is one reason attic air sealing continues to receive so much attention in modern retrofit guidance.
It is also easy to assume that visible drafts near windows and doors are the entire problem. Sometimes they are, but often they are only part of a broader pressure pattern created by attic leakage, basement leakage, or duct imbalances. A calm, whole home check is more useful than chasing one symptom at a time.
Finally, many people assume duct leakage is a separate issue from air sealing. In practice, it is closely related. A leaky duct system can waste energy directly and can also change how air moves through the house, pulling in unconditioned air from unwanted places. If your house has ducts outside the conditioned envelope, they deserve attention alongside the rest of your air sealing check.
A Step by Step Homeowner Checklist
-
Pick a cool or windy day when drafts will be easier to detect, and close exterior windows and doors before you begin. Bring a flashlight, notepad, and a tissue or smoke tool if you want a visual cue for air movement.
-
Start at the main entry door and inspect the top, sides, threshold, and hardware side for visible gaps, worn weatherstripping, and noticeable drafts. Repeat the same routine for every exterior door in the house.
-
Move room by room and check windows, especially operable units and trim transitions on exterior walls. Note any movement of curtains, cold spots at corners, or visible gaps and cracked sealant.
-
Inspect baseboards, flooring edges, outlet covers, switch plates, and plumbing penetrations under sinks or behind appliances. Focus especially on exterior walls and areas above basements or crawlspaces.
-
Check the attic hatch or pull down stairs for air leaks and insulation gaps. If attic access is safe, look for dirty insulation, staining, frost, or visible openings around penetrations and top plates.
-
In the basement or crawlspace, inspect the rim joist and utility penetrations with a flashlight. Look for cracks, daylight, cold surfaces, and places where insulation may be present without real air sealing behind it.
-
Inspect exposed ductwork in attics, basements, crawlspaces, or garages for disconnected joints, damaged tape, dusty seams, or obvious holes. Pay attention to rooms that are hard to keep comfortable, since they may reflect duct problems rather than room level leaks.
-
Sort your findings into easy DIY fixes, moderate projects, and areas that deserve professional evaluation. Start with the biggest, clearest leaks that connect directly to outdoors or unconditioned spaces.
Looking Beyond Today’s Drafts
Air sealing is one of those home improvements that can feel modest at first, yet support a wide range of long term benefits. It can help reduce energy use, improve temperature consistency, limit moisture movement into vulnerable assemblies, and reduce pathways for dust and pests. In many homes, it also makes heating and cooling equipment perform more effectively because the system is no longer working against as much uncontrolled air exchange.
It is also becoming more relevant as rebate and retrofit programs evolve. Across the U.S. and Canada, many incentive structures increasingly reward whole home performance, measurable airtightness improvements, and coordinated upgrades. Newer methods such as aerosol envelope sealing are also emerging for harder to reach leakage areas. DOE has cited research showing average leak reduction of 47% across 34 sites using this kind of advanced approach, which suggests the field is continuing to evolve beyond simple manual spot sealing.
For most homeowners, though, the best first step is still a simple, systematic check. By understanding where your home leaks and why, you can make practical choices that improve comfort now and support smarter upgrades later. You do not need to do everything at once. You just need to begin with the leaks that matter most.
Final Thoughts
An air sealing check is one of the most approachable ways to make your home more efficient without turning the process into a major renovation. It invites you to pay attention to how your house feels and how its parts work together. That can be empowering, especially if home energy topics have ever seemed technical or overwhelming.
If you find a few obvious leaks and fix them well, that is already meaningful progress. If your inspection points to larger attic bypasses, duct losses, or pressure balance issues, that knowledge is equally valuable because it helps you invest more wisely. Either way, the process moves you toward a home that feels more comfortable, wastes less energy, and supports healthier long term performance.
Practical sustainability often starts with small observations. A draft near a door, a cold basement rim joist, a dusty duct seam, or a stained patch of attic insulation can all point to a better next step. Taken together, those details help transform air sealing from an abstract efficiency concept into a grounded homeowner skill, and that is where real progress usually begins.



No Comment! Be the first one.