

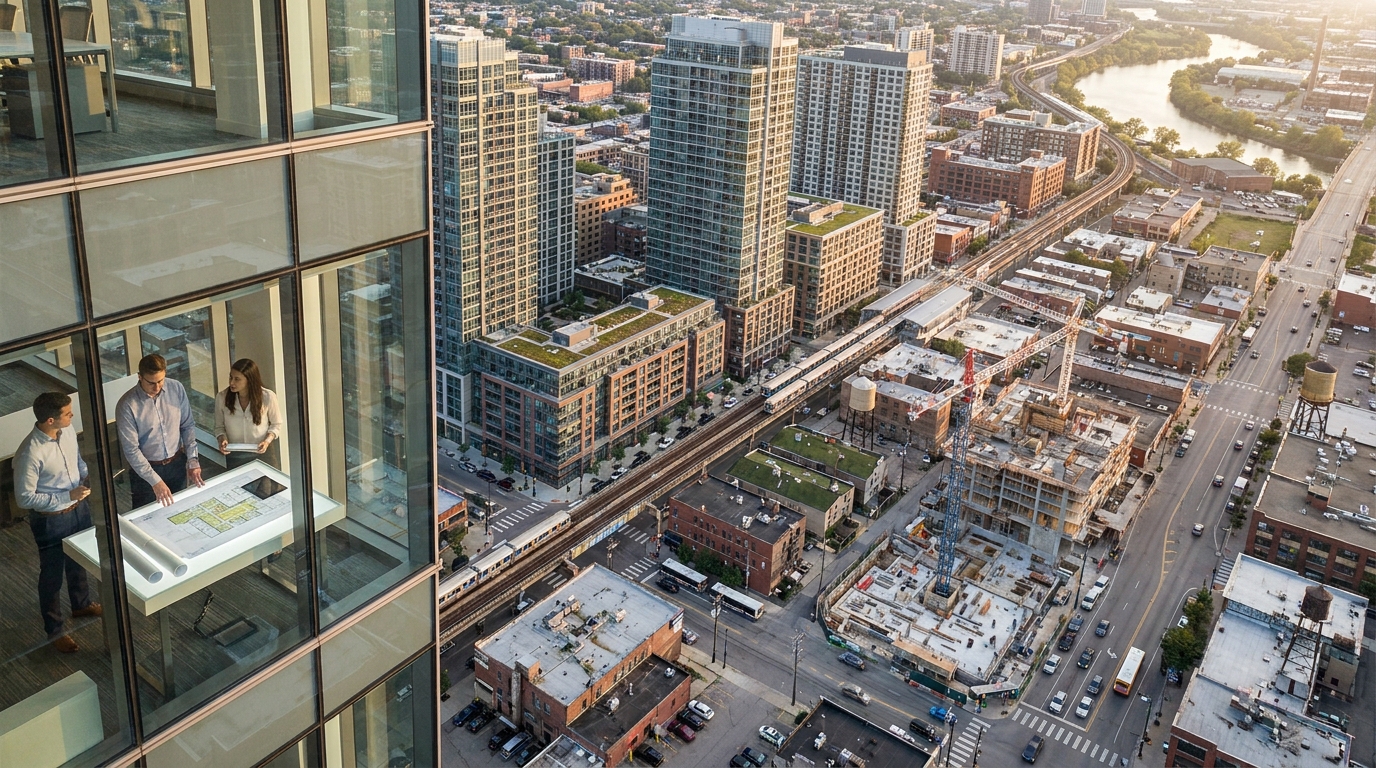

If you ask most people what cladding is, they usually point to the visible outside finish of a house or building. That answer is not wrong, but it is incomplete. In practical construction terms, cladding is part of a larger exterior wall system that has to handle rain, wind, temperature changes, air leakage, fire requirements, and long term wear while still looking good from the street. For homeowners and builders, that means cladding is never just a style choice. It is a performance decision that affects durability, comfort, maintenance, and cost for years after construction is finished.
Table Of Content
- What a Cladding System Really Is
- Why Water Management Comes First
- Why air leakage matters as much as visible rain
- Cladding Selection Is Also a Code and Safety Decision
- Common Cladding Types and Their Real World Tradeoffs
- Vinyl and PVC siding
- Wood siding and wood cladding
- Fiber cement siding and panels
- Metal cladding
- EIFS and other stucco like systems
- Brick veneer and masonry cladding
- Composite panels and engineered cladding products
- Why Rainscreen and Drained Assemblies Matter
- The Role of Exterior Insulation and Thermal Bridging
- Where Cladding Installations Commonly Fail
- Sealant dependence is not a long term strategy
- How to Choose the Right Cladding for a Project
- Questions worth asking before you commit
- What Good Installation Looks Like on Site
- Maintenance Planning After Installation
- Final Thoughts
That practical view matters even more in Canada and across North America, where buildings deal with a wide range of climate conditions. A wall in a wet coastal region faces very different moisture demands than one in a cold inland climate or a hot mixed climate. Local building codes, site exposure, building height, product approvals, and installation methods all influence which cladding system makes sense. Model building codes in Canada are updated on a five year cycle, with the current national code cycle based on 2020 documents, but adoption and interpretation still happen at the provincial, territorial, and municipal levels. In plain language, what is allowed in one location may not be acceptable in another without changes to the wall assembly.
This guide takes a practical look at cladding systems for homeowners planning renovations, self builders trying to understand the wall assembly, and contractors or project managers comparing options. We will cover what cladding actually does, how common materials perform, why water management is the first issue to get right, and where installations usually go wrong. The goal is simple. By the end, you should be able to ask better questions, compare products more clearly, and understand why the best cladding decision is rarely about appearance alone.
Key point: A cladding product is only one part of the exterior wall. Real performance depends on the full assembly, including sheathing, air barrier, insulation, flashing, fasteners, joints, and the details around every opening and penetration.
What a Cladding System Really Is
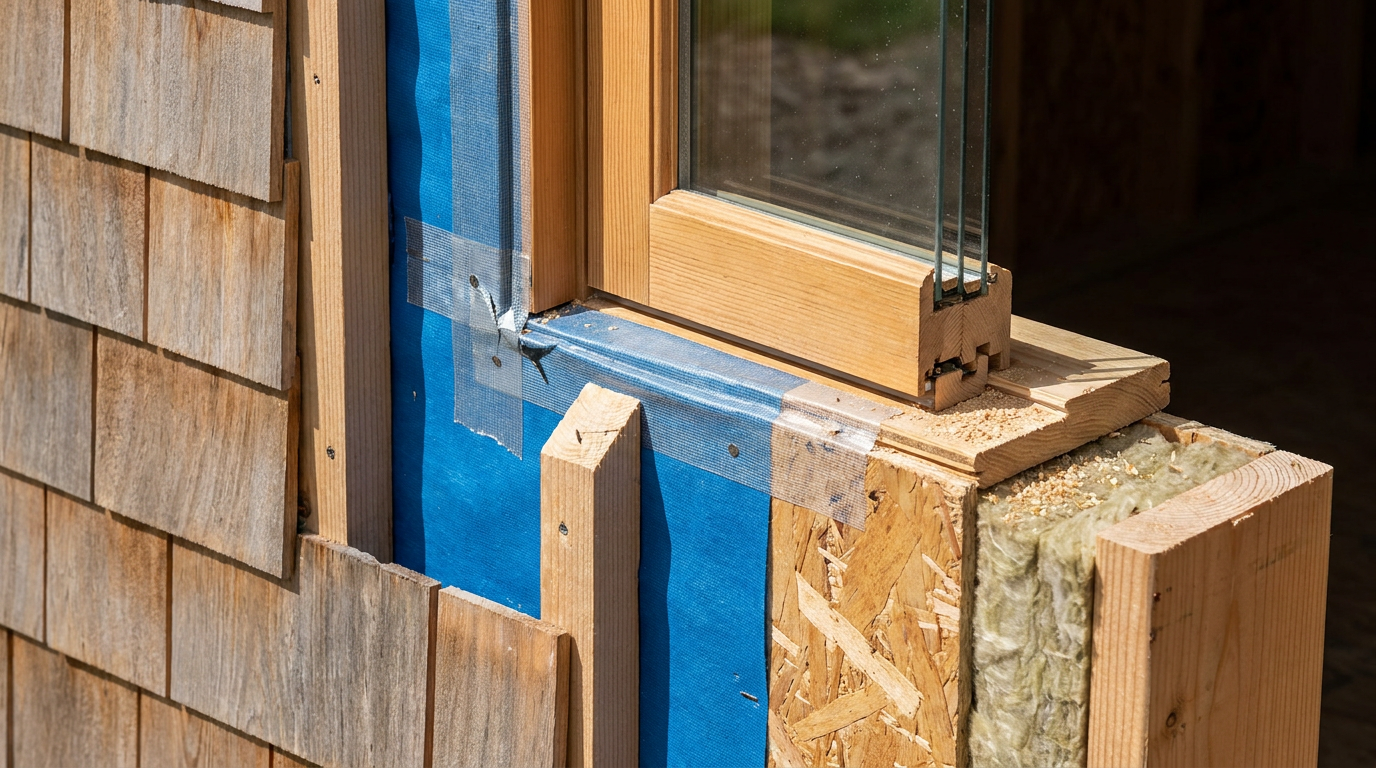
Cladding is often described as the outer layer of a building envelope, but the useful way to think about it is as a managed exterior skin. It is the part of the wall that faces the weather first, but it is not expected to stop every drop of water or every bit of air movement on its own. In fact, building science guidance has made this clear for years. Most cladding systems will allow some water past the outer surface over time because of wind pressure, capillary action, small joints, movement, and normal aging. That is why good walls are designed to drain and dry, not just to resist water at the face.
A proper cladding system usually includes the visible finish, a drainage or ventilation space where appropriate, a water resistive barrier behind the cladding, flashings at transitions and openings, and a continuous approach to air sealing. On many modern walls, it also includes exterior insulation, strapping or clips, fasteners designed for the substrate, sealants used in specific locations, and carefully planned expansion joints. If one of those elements is missing or poorly connected, the wall may still look finished from the outside while hidden problems start developing behind it.
This is one of the biggest misconceptions in residential and light commercial construction. People tend to shop for siding, panels, brick, or stucco as if they are shopping for a finish only. In reality, they are choosing one piece of a weather management system. The better question is not simply, “Which cladding looks best?” The better question is, “Which cladding works best with this wall assembly, this climate, this budget, and this code environment?”
Why Water Management Comes First
If there is one issue that drives cladding performance more than any other, it is water. Bulk water from rain and snow, moisture carried by air leakage, and condensation from temperature differences can all damage exterior walls. Wet sheathing, decayed framing, corroded fasteners, stained interior finishes, and mold growth often trace back to small exterior details that were missed or handled badly. In other words, failures usually begin quietly.
Practical guidance from U.S. Department of Energy building science resources is direct on this point. Most exterior wall cladding systems eventually leak, so walls should include a drainage plane or water resistive layer behind the finish. That layer gives water a place to go when it gets past the outer skin. It also helps protect the sheathing and framing from repeated wetting. In wet, cold, or mixed climates, drained and vented rainscreen assemblies have become more common because they improve drying potential and reduce the risk of trapped moisture.
Homeowners do not need to become building scientists to understand the basic rule. The outer finish is the first line of defense, but the real durability of the wall depends on what happens behind it. If water gets in, the system should be built so that water can drain out and the materials can dry. That is why a good installer spends so much time on flashings, tapes, corner details, starter strips, kickout flashings, and penetrations. Those details are not extras. They are the wall doing its job.
Why air leakage matters as much as visible rain
Moisture problems are not always caused by obvious leaks. Air movement through small gaps can carry large amounts of moisture into wall cavities, especially during cold weather when warm interior air wants to move outward. Once that moisture reaches a cold surface inside the wall, condensation can form. The result can look like a roof leak or plumbing issue even when the actual cause is poor air sealing in the exterior assembly.
This is why moisture control cannot be separated from air barrier continuity. A wall with expensive cladding but poor air sealing may still underperform. Drafts, heat loss, localized condensation, and comfort complaints often come down to the connection points between the cladding system and the rest of the building envelope. Windows, doors, decks, vents, and utility penetrations are common weak spots. They need to be treated as part of the wall system from the start, not patched after the finish is already on.
Cladding Selection Is Also a Code and Safety Decision
Another practical point that homeowners often do not hear until late in a project is that cladding approval is not universal. Products that are sold widely may still be approved only under specific conditions of use. In Canada, model codes are national, but local authorities adopt and interpret them. Product evaluations from the Canadian Construction Materials Centre are often used as evidence of code compliance, and those evaluations usually include limits related to building type, height, substrate, installation method, fire protection conditions, and other technical factors.
That matters because a product brochure and a code compliant installation are not the same thing. A panel that works on a low rise wood framed wall may not be acceptable on a taller building or on a different substrate without a tested assembly. A finish that appears noncombustible may still be part of a wall assembly that requires specific backing, insulation type, or fire tested conditions. The practical lesson is simple. Before choosing a cladding product, confirm that it is acceptable for your exact building and wall design.
Fire performance deserves particular attention. Exterior wall fire behavior is evaluated as an assembly issue, not just a face material issue. In relevant Canadian applications, CAN or ULC S134 is used to assess fire performance of exterior wall assemblies. That means insulation, air space, attachment methods, membranes, and the cladding itself can all affect compliance. For homeowners, this may sound technical, but the takeaway is straightforward. You cannot judge fire safety from appearance alone.
Common Cladding Types and Their Real World Tradeoffs
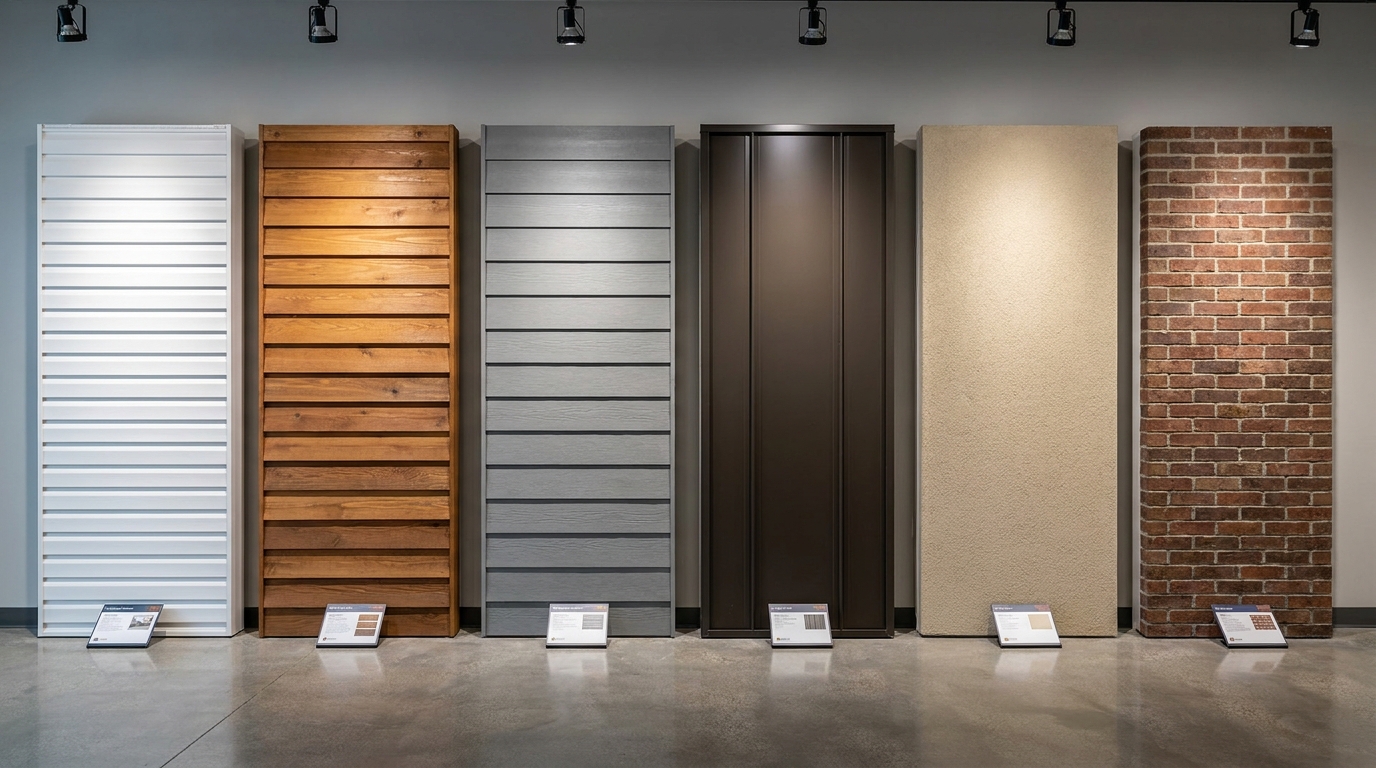
There is no perfect cladding for every project. Each material comes with its own balance of cost, appearance, weight, maintenance, installation difficulty, code considerations, and expected service life. The best choice depends on the wall assembly and the owner’s priorities. Below is a practical look at the main options used across North America.
Vinyl and PVC siding
Vinyl siding remains popular because it is affordable, widely available, relatively quick to install, and low maintenance compared with painted wood products. For many homeowners, it offers a practical path to a clean exterior without frequent upkeep. It also comes in a broad range of colors and profiles, which makes it easy to match neighborhood expectations or renovation goals.
The tradeoff is that vinyl is light duty compared with some other systems. It can crack in impact situations, distort with heat exposure, and look less substantial than heavier materials. It also depends heavily on correct installation details. Siding needs room to move with temperature changes, and poor fastening can cause buckling or waviness. Vinyl can be a good budget choice, but it still needs proper WRB continuity, flashing, and trim detailing behind it.
Wood siding and wood cladding
Wood is still one of the best looking cladding materials when it is done well. It brings warmth, texture, and character that many factory finished materials try to imitate. It can work beautifully on traditional homes, cabins, custom houses, and modern designs that use natural finishes. It is also relatively workable on site, which can help with custom detailing.
The challenge with wood is maintenance and moisture sensitivity. Wood moves with seasonal humidity, it needs protection from repeated wetting, and finish failure can lead to rapid weathering. End cuts, horizontal trim surfaces, and areas near grade are common problem zones. Homeowners choosing wood should go in with a realistic maintenance plan. Builders should make sure the wall can dry well and that clearances, flashings, and coatings are treated seriously from day one.
Fiber cement siding and panels
Fiber cement has become a go to option for many projects because it offers a practical middle ground between appearance, durability, and fire performance. It can mimic wood lap siding, shakes, or contemporary panels while generally requiring less maintenance than natural wood. It is resistant to rot and insects, and many owners see it as a safer long term value than lower cost vinyl in demanding climates.
Its drawbacks are mostly related to handling and installation. Fiber cement is heavier than vinyl and more brittle at edges if mishandled. Cutting creates dust, so installers need proper tools and safety practices. The system also depends on manufacturer specific detailing for clearances, fasteners, joints, and flashing. When done right, fiber cement is a strong practical choice. When installed casually, it can fail at joints, edges, and moisture transitions.
Metal cladding
Metal cladding includes a wide range of products, from steel siding to aluminum panels to standing seam style systems and architectural rainscreen panels. It is popular for modern aesthetics, long service life, and relatively low maintenance. Metal also works well in many vented assemblies and can pair effectively with continuous exterior insulation when the attachment system is engineered properly.
At the same time, metal systems demand careful detailing. Expansion and contraction, oil canning, corrosion compatibility, and fastening methods all need attention. Panel alignment must be precise because visual flaws are easy to see on smooth surfaces. Depending on the product, cost can range from moderate to premium. For owners who want a sharp, durable exterior and are willing to pay for proper detailing, metal can be excellent.
EIFS and other stucco like systems
Exterior insulation and finish systems, often called EIFS, are attractive because they combine insulation potential with design flexibility and a seamless appearance. They can produce clean modern shapes, curves, and trim profiles that are difficult to get with other systems. Improved EIFS assemblies have addressed many earlier concerns by focusing more on drainage and moisture management.
Still, EIFS is a system that leaves little room for shortcuts. Moisture detailing, impact considerations, transitions, sealant joints, substrate preparation, and fire related requirements all matter. A common mistake is assuming a smooth finished surface means a simple wall. In reality, EIFS needs disciplined design and trained installation. It can perform well, but only when the drainage, flashing, and approved assembly conditions are respected.
Brick veneer and masonry cladding
Brick veneer is one of the most durable and proven exterior finishes in North America. It offers strong visual appeal, a sense of permanence, and excellent resistance to weathering. Properly built masonry veneer assemblies can last for generations. Many homeowners also appreciate that brick generally requires less routine finish maintenance than painted products.
The tradeoffs are weight, cost, labor, and structural support needs. Brick veneer requires shelf angles or foundation support, cavity detailing, ties, drainage provisions, and weeps. It is not simply a layer glued onto a wall. If moisture management is neglected behind brick, trapped water can still cause serious problems. Brick is robust, but it still relies on a proper drainage cavity, flashing, and attention to movement joints.
Composite panels and engineered cladding products
Composite products cover a broad category that includes engineered wood, high pressure laminates, polymer based panels, and other manufactured systems. These products can offer good design flexibility, factory finishes, and strong consistency from piece to piece. Some are aimed at low maintenance residential work, while others are intended for more architectural applications.
The key practical issue is product specific compliance and installation limits. Composite systems often come with strict requirements for substrates, fasteners, cavity depth, fire conditions, and panel layout. That is not a negative by itself, but it means these products need closer review than many homeowners expect. A builder should verify evaluation reports and follow tested details exactly rather than trying to adapt the system casually on site.
Why Rainscreen and Drained Assemblies Matter
One of the clearest trends in current exterior construction is the move toward drained or vented cladding systems. The logic is straightforward. If some water is going to get behind the cladding, give it a reliable way to drain out and allow the assembly to dry. A rainscreen cavity, whether created by strapping, clips, or another system, separates the cladding from the water managed layer behind it. That separation improves drying and reduces the chance that moisture will remain trapped against vulnerable materials.
For cold and mixed climates, this approach is especially practical. Walls often deal with wind driven rain on the outside and vapor drive or air leakage from the inside. A drained cavity helps the wall recover from small wetting events that would otherwise build up over time. It also tends to make the cladding more forgiving because the wall is not relying on the outer face to be perfect forever. That is a much more realistic expectation.
Not every cladding is installed the same way, and some systems are inherently more vented than others. But the principle holds across many assemblies. Drained and flashed walls generally outperform walls that depend on sealant alone. Sealants have their place, but they age, move, crack, and require maintenance. A wall that can manage water through layers and drainage paths is usually the more durable wall.
The Role of Exterior Insulation and Thermal Bridging
Another practical shift in modern wall design is the use of more continuous exterior insulation. This helps improve energy performance by reducing thermal bridging through framing members. When insulation is placed continuously outside the structural wall, it can keep the wall cavity warmer and lower the risk of condensation in some assemblies. It can also improve comfort by reducing cold spots and drafts near exterior walls.
However, adding exterior insulation changes the cladding support and attachment design. Fasteners may need to span insulation layers, clip systems may be required, and window and door detailing becomes more involved. This is a good example of why cladding cannot be selected in isolation. Once insulation thickness changes, trim depths, flashing geometry, and fastening strategies usually change with it.
For homeowners, the message is that higher performance walls can be worth the effort, but they demand better planning. Energy upgrades done without attention to attachment and moisture details can create expensive problems. Builders need to account for the full stack of materials, not just the visible finish and insulation R value.
Where Cladding Installations Commonly Fail
Most cladding failures do not happen because the material itself was inherently bad. They happen because small details were missed, sequencing was poor, or the wall was expected to do too much with too little redundancy. In practical terms, the danger zones are nearly always the same. Windows, doors, roof to wall intersections, decks, balconies, penetrations, horizontal trim lines, and transitions between materials are where trouble starts.
One common mistake is poor flashing around openings. Water needs a shingled path that directs it outward, not deeper into the assembly. If head flashings are missing, sill details trap water, or tapes are reversed, the wall can leak even if the cladding itself is installed neatly. Another common issue is discontinuous WRB installation. Gaps, tears, or poorly lapped seams behind the cladding can undermine the entire drainage strategy.
Fastener problems are also frequent. Wrong fastener type, inadequate corrosion resistance, missed framing, or improper spacing can reduce both durability and wind resistance. Some systems are also damaged by overdriven nails or screws, which distort the material or reduce movement capacity. Add in poorly planned penetrations for lights, vents, hose bibs, and service lines, and you have a wall full of weak points if the crew is not disciplined.
Sealant dependence is not a long term strategy
A lot of problem walls share one assumption. Someone believed sealant would take care of everything. Sealant is useful, but it is a maintenance item, not a substitute for drained design. Sunlight, temperature movement, and age all affect how long sealant joints last. If the wall has no secondary drainage approach behind those joints, small failures can turn into hidden damage quickly.
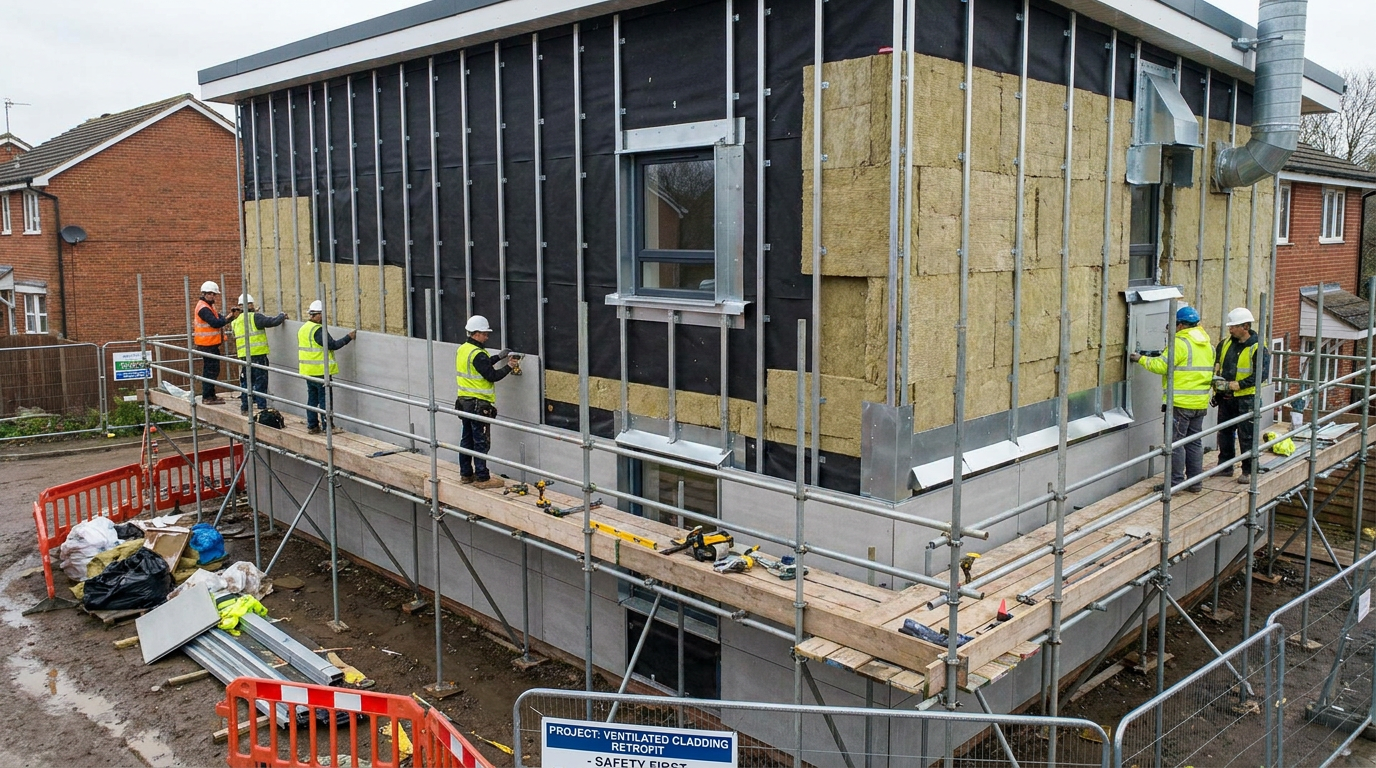
That is why practical builders prefer layered defense. The outer cladding sheds most water. The cavity or drainage space handles what gets past. The WRB protects the sheathing. Flashings direct water back out. The wall is built to manage imperfections because every exterior assembly sees movement and weather over time. That layered approach is what separates durable construction from finish first construction.
How to Choose the Right Cladding for a Project
The right cladding choice usually comes from working through a few practical questions in order. First, what climate and exposure does the building face? A sheltered inland wall and a wind driven coastal wall should not be detailed the same way. Second, what does the local code or authority having jurisdiction require for the building type and height? Third, what level of maintenance is the owner actually willing to commit to over time?
After that, cost should be looked at in full life terms rather than first price alone. A cheaper cladding with shorter service life or more maintenance may not be the lower cost choice over twenty years. Installation quality should also be part of the decision. Some systems are forgiving and common in the local labor market. Others require more specialized crews. A material is only a good value if it can be installed properly by the people available for the job.
It also helps to compare products against the full wall design. If the project includes exterior insulation, a vented cavity, higher wind exposure, or stricter fire conditions, that can narrow the field quickly. Homeowners should ask for a wall section, not just a finish sample. Builders should confirm fastening schedules, clearance requirements, flashing details, and product evaluation documents before materials are ordered.
Questions worth asking before you commit
-
What water management strategy is being used behind this cladding, and where does drained water exit the wall?
-
Is there a continuous WRB and air barrier plan around windows, doors, corners, and penetrations?
-
Does this product have recognized compliance documentation for this building type, height, substrate, and location?
-
What maintenance is expected over five, ten, and twenty years?
-
How does this system perform in wind, fire, freeze thaw, and local climate conditions?
-
Who is responsible for coordinating the interfaces between cladding, windows, roofing, insulation, and mechanical penetrations?
What Good Installation Looks Like on Site
Good cladding work is usually easy to recognize before the final finish goes on. The crew has clear sequencing, the WRB is continuous, openings are flashed carefully, and penetrations are planned instead of improvised. Materials are stored properly, joints are consistent, and transitions are thought through. On better jobs, someone is paying close attention to how one trade hands work over to the next because cladding failures often happen between scopes, not within a single scope.
Documentation matters too. Manufacturers publish detailed instructions for a reason, and code related evaluations often depend on those details being followed. If a project uses a product with specific fastening patterns, cavity depths, sealant conditions, or substrate requirements, those are not suggestions. They are part of how the system was evaluated. Cutting corners there can void warranties and create compliance issues at the same time.
From an owner’s perspective, jobsite photos are valuable. Ask for photos of the wall before the cladding covers the WRB, flashings, and insulation layers. Once the finish is on, those hidden details are no longer visible. The exterior may look perfect while the critical water management work is concealed behind it. Good builders understand this and are usually willing to document the assembly.
Maintenance Planning After Installation
Even the best cladding system is not truly finished on the day the project wraps up. Exterior walls need periodic inspection because weather, movement, and age affect every material eventually. Maintenance needs vary by product, but all buildings benefit from a simple review routine. Look at joints, flashings, trim interfaces, sealant condition, ground clearances, and areas below roof runoff points. Catching small issues early is much cheaper than opening a wet wall later.
Wood surfaces may need cleaning, repainting, or resealing on a regular cycle. Metal may need inspection for coating damage or incompatible contact points. Masonry should be checked for cracking, failed mortar, blocked weeps, and moisture staining. Fiber cement and vinyl generally ask for less finish maintenance, but they still need checks around penetrations, transitions, and impact damage. EIFS and composite systems should be reviewed according to manufacturer guidance, especially at joints and movement areas.
Homeowners often assume low maintenance means no maintenance. That is never really true. Durable exteriors are usually the result of straightforward inspection and timely repairs, not neglect. A good cladding system buys you resilience, not immunity.
Final Thoughts
Cladding systems sit right at the intersection of appearance and performance, which is why they are so often misunderstood. People see the finish and judge the project by what is visible, but the real quality of the wall depends on layers and details that most people never notice after completion. Water management, air control, code compliance, wind resistance, fire performance, attachment design, and maintenance planning all matter as much as color or profile.
For homeowners, the smartest move is to ask about the assembly, not just the product. For builders, the priority is to treat cladding as part of the full building envelope, with special attention to openings, transitions, and conditions of use. Trends in current construction point toward better drained assemblies, more continuous insulation, tighter air barrier continuity, and more scrutiny of documented compliance. That is a good direction because it reflects a more honest understanding of how walls actually survive in the real world.
If you remember one thing from this guide, let it be this. Cladding is a system, not a skin. Choose it, design it, and install it that way, and the building has a much better chance of staying dry, durable, safe, and good looking for the long haul.



No Comment! Be the first one.