



How to Detect Water Leaks in Your Home: A Practical Guide That Can Save Water and Money
Water leaks have a way of staying quiet until they become expensive. A slow drip under a sink, a silent toilet leak, or a hidden pipe issue behind a wall can waste water for weeks or months before anyone notices. By that point, the cost is often larger than most homeowners expect, not just in utility bills, but also in damaged flooring, stained drywall, mold growth, and repair work that could have been avoided with earlier action.
Table Of Content
- Why water leaks are so often missed
- The benefits of early leak detection
- Start with the simplest signs: a visual and sensory check
- Where to check first
- Check your water bill for hidden clues
- Use your water meter to test for hidden leaks
- How to narrow the source after a meter test
- Do the toilet dye test: one of the most useful checks in the house
- Inspect faucets, showerheads, and fixture connections
- Look behind and around appliances
- Check the water heater and utility room
- Pay attention to walls, floors, ceilings, and odors
- Use simple leak alarms and smart detectors for added protection
- Where leak detectors make the most sense
- A practical step by step leak detection routine
- When a leak may be hidden deeper in the system
- When to call a professional
- Common leak detection myths to leave behind
- Leak detection as part of a smarter home maintenance strategy
- Final thoughts
This is what makes leak detection such an important part of routine home maintenance. It is not only a plumbing concern. It is also a practical financial habit and, increasingly, an environmental one. The U.S. EPA says the average household leak can waste nearly 10,000 gallons of water per year. That number is large enough to matter on your bill and meaningful enough to matter for water conservation, especially in regions where water systems are under pressure.
The good news is that finding leaks does not always require specialized equipment or a service call. In many homes, the first clues come from simple checks that take only a few minutes. Looking under sinks, testing toilets with dye, checking your water meter, and paying attention to odors or stains can reveal a surprising amount. If you want more protection, newer tools such as water alarms and smart leak detectors can add another layer of security without making your home feel complicated.
This guide is designed to help you move through leak detection in a calm, practical way. We will start with the easiest checks, then work toward more targeted tests and smart devices. Along the way, you will also learn what common warning signs to watch for, what misconceptions often delay repairs, and when it is time to bring in a professional.
Why early detection matters: Even a small leak can waste a surprising amount of water over time. EPA WaterSense materials note that a faucet dripping once per second can waste more than 3,000 gallons per year.
Why water leaks are so often missed
Many homeowners assume that a leak will announce itself with a puddle, a loud drip, or obvious water damage. In reality, some of the most wasteful leaks are nearly invisible at first. A toilet flapper can fail quietly. A supply line can seep only when a fixture is used. A pipe inside a wall can release moisture slowly enough that the first sign is a faint musty smell or a slight discoloration in paint.
Another common misconception is that a small drip is harmless. In practice, low level leaks can continue for a long time and gradually damage materials that are expensive to replace. Wood swells, baseboards soften, flooring cups, and drywall begins to stain. By the time standing water appears, the repair often extends beyond plumbing and into carpentry, finishing, and mold remediation.
There is also a psychological reason leaks get overlooked. Most people are busy, and home systems are designed to fade into the background when they are working properly. Utility bills may rise gradually enough to seem normal. A damp cabinet might be blamed on humidity. A running toilet may be dismissed as an annoyance instead of a source of measurable water loss. Leak detection becomes easier once you know that these subtle clues often appear long before a dramatic failure.
The benefits of early leak detection
Finding leaks early protects your home in several ways at once. First, it reduces water waste. That matters financially because every unnecessary gallon shows up on your bill. It also matters environmentally because water treatment and delivery require energy and infrastructure, and in many places clean water is becoming more valuable every year.
Second, early detection helps prevent structural and finish damage. Moisture is persistent. It can move into flooring, trim, cabinets, subfloors, insulation, and framing. In bathrooms, kitchens, basements, and utility rooms, repeated small leaks can quietly shorten the life of materials that otherwise would have lasted for years. A five minute inspection today can be much less disruptive than replacing warped flooring later.
Third, leak detection can support better indoor air quality. Damp spaces encourage mold and mildew, and even mild growth can create odors and trigger sensitivities. The earlier you identify and repair the source of moisture, the easier it is to keep the problem contained. This is one reason leak detection is not only about saving water, but also about maintaining a healthier and more resilient home.
There may be insurance benefits as well. Some insurers view leak prevention devices favorably, particularly systems that can alert you to unusual water flow or shut water off automatically. Coverage varies, of course, but it is another example of how practical maintenance choices can protect both property and long term costs.
Start with the simplest signs: a visual and sensory check
The most effective place to begin is with a calm walk through of the home. You do not need to inspect everything at once. Focus on the areas where water is most likely to be present or where plumbing connections are concentrated. Kitchens, bathrooms, laundry areas, basements, utility rooms, and spaces around water heaters are the usual priorities.
As you move through each area, look for visible moisture, water stains, corrosion, mineral buildup, warped wood, peeling paint, bubbling finishes, cracked caulking, and darkened grout lines. Touch surfaces carefully if you suspect dampness. A cabinet floor under a sink may feel slightly soft before it shows obvious damage. Around toilets, the base may reveal discoloration or subtle movement in flooring that suggests long term seepage.
Use your sense of smell as well. Musty odors are often one of the earliest signs of hidden moisture. They tend to appear in enclosed areas like under sink cabinets, behind washing machines, near water heaters, or in basement corners where ventilation is limited. If a space smells damp repeatedly, it is worth inspecting more closely even if you cannot yet see standing water.
Good lighting helps. A flashlight makes it easier to spot reflective moisture, rust on fittings, and staining along pipe joints. Taking photos can also be useful. If you are unsure whether a stain is new or old, a dated picture gives you a reference point for comparison during your next inspection.
Where to check first
- Under sinks: Look at shutoff valves, supply lines, P traps, cabinet bases, and the back corners where slow drips often hide.
- Around toilets: Check for rocking, damp flooring, discoloration at the base, and sound from the tank refilling unexpectedly.
- Behind appliances: Inspect dishwashers, refrigerators with ice makers, and washing machines for hose wear, moisture, or staining.
- Near the water heater: Look for rust, pooled water, corrosion on valves, or dampness near the drain pan.
- At exposed pipes: Pay attention to joints, elbows, and shutoff valves in basements, crawl spaces, and utility areas.
- On ceilings and walls: Look for yellowing, bubbling paint, sagging drywall, or fresh patches that may be concealing a recurring problem.
This first pass often catches the most common leak sources, and it costs nothing beyond a few minutes of attention. For many homeowners, that alone is enough to identify a problem early.
Check your water bill for hidden clues
Your monthly water bill can serve as an early warning system, particularly if your household habits have not changed much. If water use rises steadily without a clear reason, a hidden leak may be part of the explanation. This is especially useful in cooler months when outdoor watering is low or absent, because indoor consumption patterns are easier to compare.
EPA guidance notes that a family of four with no outdoor winter water use may have a serious leak if monthly winter use exceeds 12,000 gallons. This is not a diagnosis by itself, but it is a practical benchmark. If your bill seems unusually high for your household size and routine, it is worth doing a more thorough check.
Look at several billing periods rather than reacting to a single month. An isolated spike may come from guests, extra laundry, or seasonal changes. A pattern that persists is more telling. Keeping a simple record of usage can help you notice trends sooner and gives a plumber useful context if professional help becomes necessary.
Use your water meter to test for hidden leaks
If visual signs are inconclusive, the water meter test is one of the best next steps. It is simple, low cost, and widely recommended because it can reveal leaks that are silent or hidden behind finishes. The idea is straightforward. If no water is being used in the house and the meter still moves, water is going somewhere.
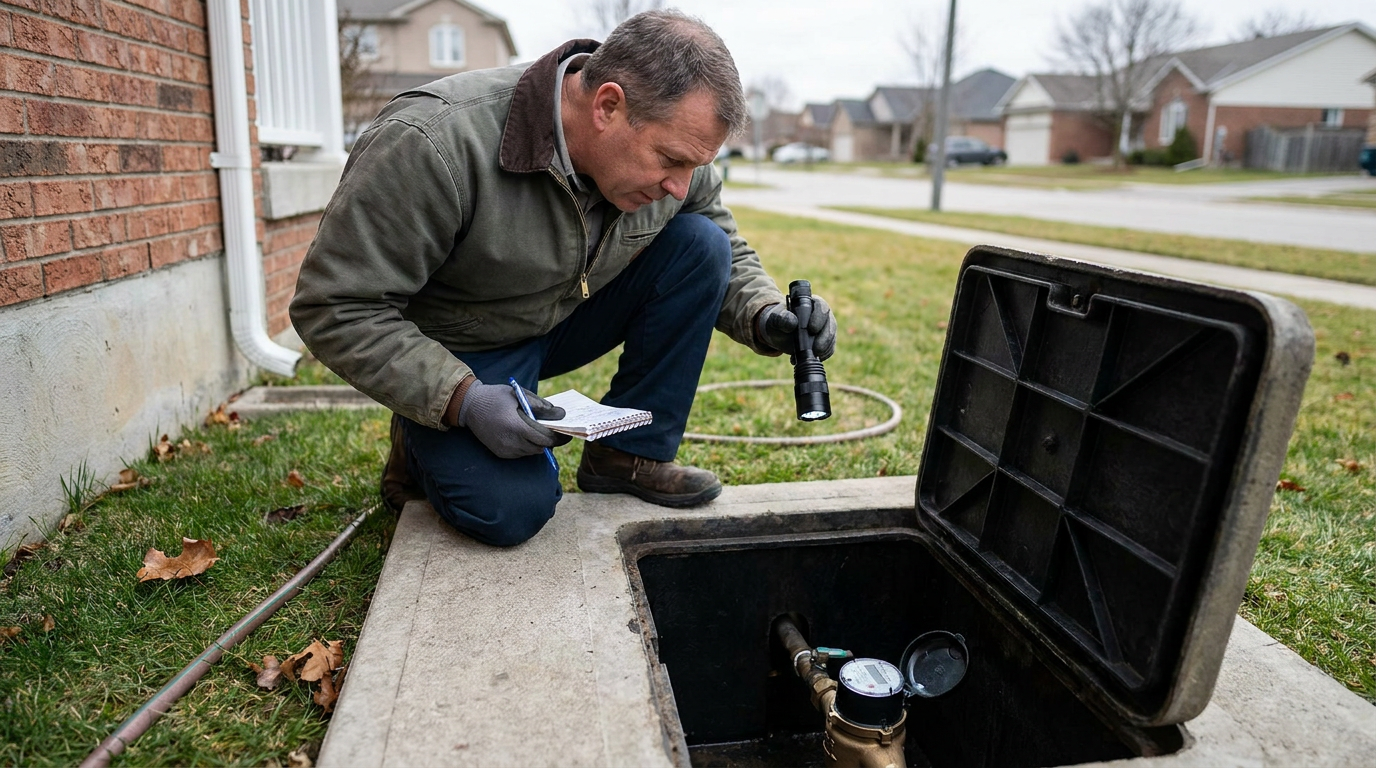
Start by turning off all fixtures and appliances that use water. Make sure no one runs a faucet, flushes a toilet, uses the dishwasher, or starts a laundry cycle during the test. If your home has irrigation, ice makers, humidifiers, or water treatment equipment, be aware that these can affect readings too.
Find your water meter and note the reading carefully. Some meters have a small leak indicator that spins even with very low flow. Others require watching the main reading over time. Once you have the initial reading, wait at least 15 to 30 minutes without using any water. Then check the meter again. If the reading has changed or the leak indicator has moved, there is a good chance a leak exists somewhere in the system.
For a more sensitive version of the test, many homeowners do it overnight. Record the meter before bed after all water use is finished, then check it first thing in the morning before anyone turns on a tap. This longer interval can make small leaks easier to detect. If movement is confirmed, you can narrow things down by checking individual fixtures and shutoff points.
How to narrow the source after a meter test
If the meter suggests a leak, the next step is to isolate likely zones. Start with toilets, then move to faucets, appliance lines, the water heater, and exposed pipe runs. In some homes, shutting off the valve to a toilet or an appliance and repeating the meter check can help identify whether that branch is part of the problem. This process takes patience, but it can save time when deciding whether a repair is simple enough to handle yourself or better left to a licensed plumber.
Do the toilet dye test: one of the most useful checks in the house
Toilets are one of the most common sources of silent water waste. Because the leak often occurs from the tank into the bowl, there may be no water on the floor and no obvious damage nearby. The system still appears to work, but water is being lost continuously in the background. This is why the toilet dye test is so valuable. It is simple, inexpensive, and strongly recommended by EPA guidance.
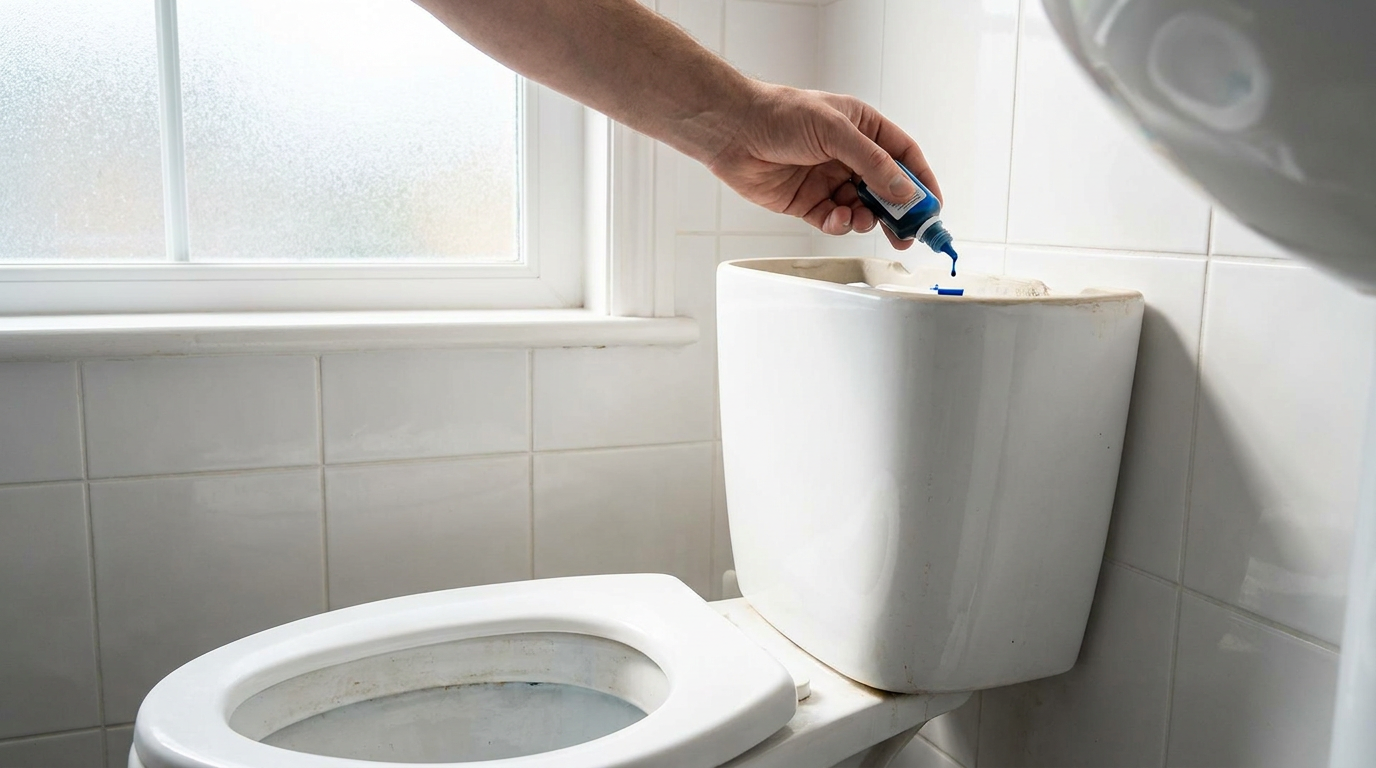
To perform the test, remove the toilet tank lid and add a few drops of food coloring or a dye tablet into the tank water. Do not flush. Wait about 10 to 15 minutes and check the bowl. If colored water appears in the bowl, the toilet is leaking from the tank. In many cases, the cause is a worn flapper, a poorly seated seal, or an issue with the flush valve assembly.
This test is worth doing on every toilet in the home, even if none seem to be running. Some leaks are intermittent, and others are so quiet that they are easy to miss. If you hear the tank refilling occasionally when no one has used the toilet, that is another strong clue that water is escaping slowly between flushes.
The repair is often relatively straightforward, and replacement flappers are inexpensive. Even so, it helps to confirm compatibility with your toilet model and to inspect related parts while the tank is open. A silent toilet leak may seem minor, but over a year it can add significantly to both water use and utility costs.
Inspect faucets, showerheads, and fixture connections
Dripping faucets and showerheads are easy to dismiss because they look small and familiar. Yet they can be surprisingly wasteful over time. Beyond the drip itself, leaks often develop at supply connections under sinks, around escutcheon plates, or where fixture bodies meet countertops or walls. That means the visible drip is only one part of what to check.
Turn each faucet on and off, then observe whether dripping continues. Look under the sink while the water is running and again after you shut it off. A connection may leak only under pressure or only as water drains from the fixture. Pay attention to cabinet floors, valve stems, braided supply lines, and any signs of mineral residue. White or greenish buildup around fittings often points to a slow, ongoing leak.
In showers and tubs, check the caulk and grout, but also consider the plumbing behind the wall if damage appears on adjacent ceilings or baseboards. A shower leak is not always a failed tile joint. Sometimes the issue is inside the wall at the mixing valve, shower arm, or drain connection. If water stains appear in a room below after bathing, that pattern can help narrow the source.
Look behind and around appliances
Appliances are frequent leak points because they combine water supply lines, drainage, vibration, and limited visibility. Washing machines, dishwashers, and refrigerators with ice makers or water dispensers deserve regular attention. A hose can age, a clamp can loosen, or a connection can seep only while the appliance is running.
Pull appliances forward carefully if access allows. Check for dampness on the floor, staining on nearby walls, soft baseboards, and rust on metal fittings. Washing machine supply hoses should be examined for bulges, cracks, corrosion, or signs of wear at the connection points. Dishwasher leaks can appear as swelling in adjacent cabinetry or flooring rather than an obvious puddle in front.
Refrigerator lines are particularly easy to forget because they are hidden once the appliance is pushed back into place. Yet a slow leak there can damage flooring over time. If you ever notice warped material near the front corners of the refrigerator or unexplained moisture at the wall behind it, inspect that supply line promptly.
Check the water heater and utility room
The water heater is another area where a small problem can become a large one if left unchecked. Look around the base for moisture, rust, corrosion, or crusty mineral deposits. Check the temperature and pressure relief valve discharge pipe area, the drain valve, and all incoming and outgoing connections. Even minor seepage deserves attention because it may indicate a failing fitting or an aging tank.
Utility rooms also tend to collect many of the home’s plumbing components in one place, which makes them ideal for routine inspection. If your home has a water softener, filtration system, condensate line, or floor drain, include those in your scan. Any area with repeated humidity and occasional water use can hide problems unless it is checked intentionally.
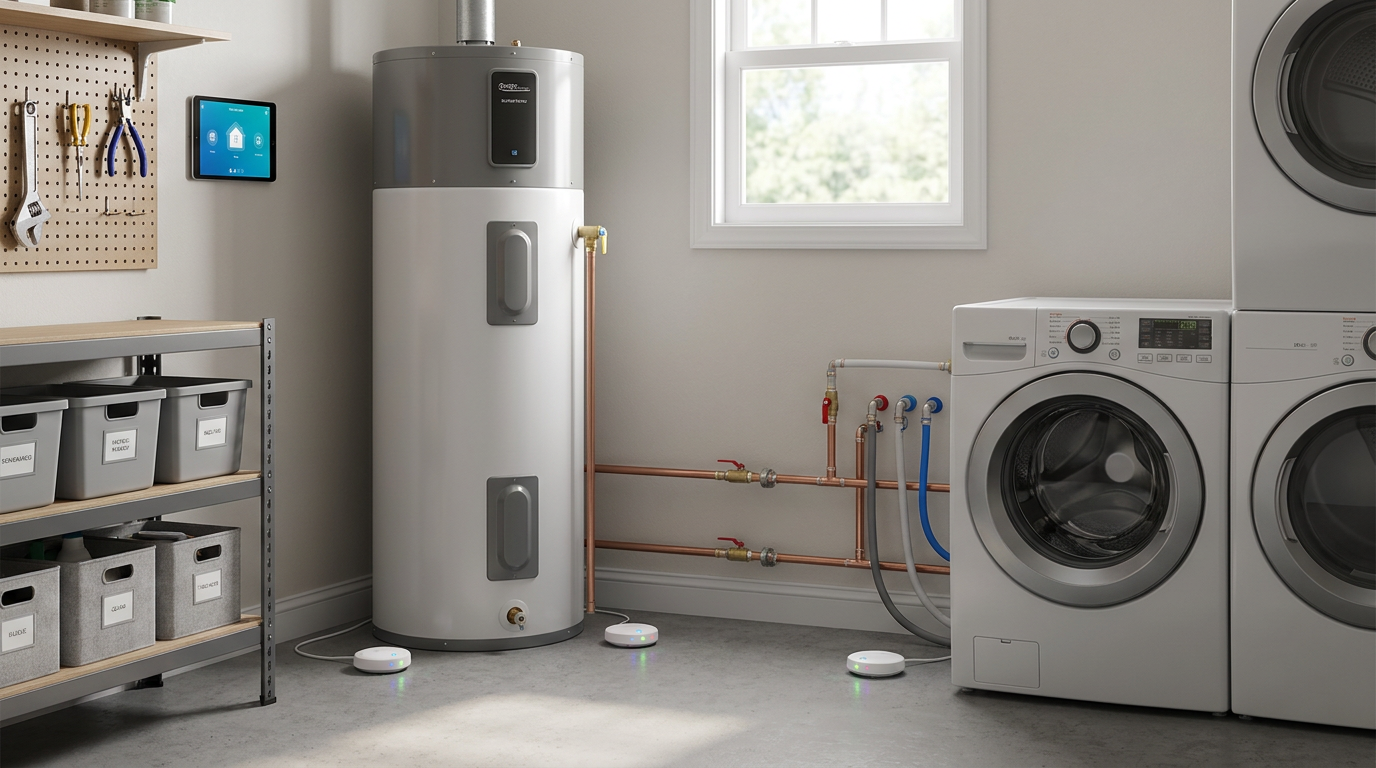
When the water heater itself is the issue, symptoms may include rust colored water, popping sounds from sediment buildup, or a small amount of moisture that returns after being cleaned. If the tank body is leaking, replacement is usually the solution rather than repair. Acting quickly matters because water heaters can fail suddenly after a period of minor warning signs.
Pay attention to walls, floors, ceilings, and odors
Not every leak begins where you can see the pipe. Sometimes the most revealing clues appear in the building materials around it. A dark patch on a ceiling below a bathroom, paint that bubbles on a wall, a laminate floor edge that lifts slightly, or a persistent musty smell in one corner of the room can all indicate hidden moisture movement.
One reason these signs matter is that water often travels before it appears. A leak in one location may stain a ceiling several feet away or dampen trim near a floor edge rather than at the source itself. This can make diagnosis feel confusing, but patterns help. If staining becomes more noticeable after showers, laundry, or dishwasher use, note that timing. The trigger can point toward the relevant branch of the plumbing system.
If you suspect a hidden leak but cannot confirm it visually, a moisture meter can be a useful next step. These handheld tools are not expensive compared with the cost of water damage, and they can help identify damp drywall, trim, or flooring. Infrared cameras are another option, though they are less common for the average homeowner. They can highlight temperature differences caused by moisture, especially when used by an experienced inspector.
Use simple leak alarms and smart detectors for added protection
Basic visual checks are still the foundation of leak detection, but technology has made it easier to monitor problem areas between inspections. Water alarms and leak detectors are now widely available, and official Canadian guidance also promotes water alarms as a practical flood prevention tool. These devices are especially useful near water heaters, washing machines, sinks, and other places where a leak could go unnoticed for hours.
Some devices are simple battery powered alarms that sound when water touches the sensor. They are affordable, easy to place, and useful in homes of almost any size. Others are smart detectors that send alerts to your phone if they detect moisture or abnormal flow. More advanced systems can monitor overall household water use, identify unusual patterns, and in some cases shut off the water supply automatically.
This growing category reflects a broader shift in home maintenance. Leak detection is becoming more proactive and accessible, not just something that happens after damage appears. Research and product development in 2025 and 2026 are even moving toward lower maintenance and battery free IoT sensors, which suggests these tools will become more convenient over time.
Smart systems are not essential for every homeowner, but they can be a thoughtful investment in the right context. If you travel often, own a second property, have an older plumbing system, or have previously dealt with water damage, an alert based system may provide valuable peace of mind. The most practical approach is usually to match the technology to the risk level of the home rather than assume more complexity is always better.
Where leak detectors make the most sense
- Behind washing machines and dishwashers
- Near water heaters and utility sinks
- Under kitchen and bathroom sinks
- Near refrigerators with water lines
- In basements, crawl spaces, or low points where water may collect first
- Near toilets that have leaked before or are rarely used guest fixtures
A practical step by step leak detection routine
If you want a clear process to follow once or twice a year, a simple routine can make the task feel manageable. The goal is not to turn your home into a maintenance project. It is to build a short habit that catches problems while they are still small.
- Review your water bill. Compare recent usage with the same season last year if possible.
- Walk through wet areas. Check bathrooms, kitchen, laundry room, basement, and utility spaces for stains, dampness, corrosion, and odors.
- Inspect toilets. Listen for refilling, check around the base, and perform a dye test in each tank.
- Check under sinks and around fixtures. Look at supply lines, shutoff valves, and cabinet floors.
- Inspect appliance connections. Examine hoses and nearby flooring for wear or moisture.
- Test your water meter. Turn off all water use and verify whether the meter remains still.
- Place or test leak alarms. Confirm batteries and app notifications if you use smart sensors.
- Document what you find. A few notes and photos make future checks more useful.
This routine does not take long once you are familiar with your home. In many cases, a focused annual or seasonal check is enough to catch developing issues early. Homes with older plumbing, finished basements, or a history of leaks may benefit from more frequent inspections.
When a leak may be hidden deeper in the system
Sometimes the signs are real but the source remains difficult to locate. You may notice unexplained meter movement, recurring stains, damp odors, or rising bills without finding anything obvious under sinks or around appliances. This can point to a hidden pipe leak in a wall, under a floor, in a crawl space, or even below a slab.
Hidden leaks often require a more methodical approach. A licensed plumber may use pressure testing, acoustic listening tools, thermal imaging, or other specialized equipment to identify where water is escaping. This is especially important if you suspect a slab leak, because the symptoms can be subtle at first and the consequences more serious if the problem continues.
One clue that deserves prompt attention is the sound of running water when no fixtures are on. Another is a warm or damp spot on the floor that appears without explanation. Cracks in flooring, persistent mold growth, and a water heater that seems to run more often than usual can also be related to hidden line issues in some homes.
When to call a professional
There is a reassuring middle ground between ignoring a leak and attempting a repair beyond your comfort level. Many homeowners can handle detection and some very minor fixes, such as replacing a toilet flapper or tightening an accessible connection. But if the leak source is unclear, if water damage is visible, or if any part of the plumbing system seems compromised, professional help is the wiser choice.
Call a licensed plumber if your meter test shows a leak that you cannot isolate, if ceilings or walls are staining, if flooring is warping, if the water heater appears to be leaking, or if you suspect a pipe inside the wall or under the slab. It is also worth getting help if corrosion is extensive or if shutoff valves are old and difficult to operate. For mold concerns, especially in larger areas, a qualified remediation professional may be necessary as well.
There is real value in addressing water problems while they are still contained. A professional diagnosis may cost less than the finish repairs and disruption caused by waiting too long. In that sense, calling early is not overreacting. It is often the most practical and cost conscious decision available.
Common leak detection myths to leave behind
Myth one: All leaks are noisy or obvious. Many are silent, intermittent, or hidden. Toilets are a perfect example, and so are small pipe leaks behind walls.
Myth two: A small drip does not matter. It does. Slow leaks can waste thousands of gallons annually and cause cumulative damage to surrounding materials.
Myth three: If there is no standing water, there is no leak. In reality, elevated bills, odors, stains, or meter movement may appear long before a puddle does.
Myth four: Leak detectors are only for large homes or new construction. Simple water alarms are inexpensive and useful in condos, older houses, rentals, and family homes alike.
Myth five: A running toilet is just a nuisance. Toilet leaks are among the most common and wasteful household problems, and they are often easy to test and repair.
Leak detection as part of a smarter home maintenance strategy
Leak detection works best when it is viewed as part of a broader maintenance rhythm rather than an emergency response. The same mindset that leads you to change HVAC filters, clean gutters, or inspect caulking can also support better plumbing awareness. The task does not need to feel technical. It simply asks you to notice how your home behaves and respond early when something changes.
There is also a larger sustainability dimension here, but it does not need to feel abstract. Conserving water begins with avoiding waste you never intended in the first place. Fixing leaks is one of the most direct ways to reduce household water use without sacrificing comfort. It supports a home that is efficient, durable, and aligned with sensible long term stewardship.
In that way, leak detection is both humble and meaningful. It is not a glamorous upgrade, yet it protects the systems and materials you rely on every day. It lowers the chance of preventable damage, trims unnecessary utility costs, and helps preserve a resource that deserves care.
Final thoughts
If you remember only one thing from this guide, let it be this: water leaks are often quieter than we expect, but they almost always leave clues. A stain, a smell, a higher bill, a moving meter, or a toilet that seems to refill on its own can all be early signals worth taking seriously.
The most practical approach is to start simple. Check visible areas, test your toilets, watch your water bill, and learn how to use your meter as a diagnostic tool. If you want extra reassurance, add water alarms or smart leak detectors in the places where a hidden leak would be most disruptive. These small actions can prevent significant damage and make homeownership feel more manageable rather than more complicated.
Early detection is not about becoming a plumbing expert. It is about building confidence in the everyday care of your home. With a little attention and a few reliable methods, you can catch leaks sooner, reduce waste, and protect both your budget and the spaces you live in.



No Comment! Be the first one.