



How to Create Beautiful DIY Planters for Your Outdoor Space
There is something deeply satisfying about stepping outside and seeing a planter you made yourself overflowing with healthy, happy plants. A DIY planter does more than hold soil and roots. It adds personality, color, texture, and a sense of story to a patio, porch, balcony, or garden corner. Even a very small outdoor space can feel more welcoming when it includes containers that reflect your style and support the kind of everyday outdoor life you want to enjoy.
Table Of Content
- Why DIY Planters Make Outdoor Spaces Feel More Personal
- Start With the Most Important Rule: Drainage
- Choosing the Right Container for Style and Performance
- Why Potting Mix Matters More Than Most Beginners Expect
- Match the Planter to the Plants You Want to Grow
- Tools and Supplies to Gather Before You Begin
- Step by Step: How to Make a Beautiful DIY Planter
- Step 1: Choose Your Container Thoughtfully
- Step 2: Add Multiple Drainage Holes
- Step 3: Elevate the Planter Slightly
- Step 4: Line the Container if Needed
- Step 5: Fill With Quality Potting Mix
- Step 6: Arrange and Plant
- Step 7: Style the Space Around It
- Three DIY Planter Ideas to Try
- Upcycled Bucket Herb Planter
- Reclaimed Wood Flower Box
- Vertical Small Space Planter
- Watering, Sun, and Ongoing Care
- Design Ideas for Different Outdoor Styles
- Common DIY Planter Mistakes to Avoid
- Seasonal Refresh Ideas to Keep Planters Looking Beautiful
- Creating a Pollinator Friendly or Edible Planter Garden
- The Real Joy of DIY Planters
One of the loveliest things about DIY planters is how approachable they are. You do not need a huge budget, a workshop full of specialty tools, or years of gardening experience to create something beautiful. You simply need a sturdy container, a little imagination, and a clear understanding of what plants need in order to thrive. That combination of creativity and care is what makes this project so joyful. It is not just a craft. It is a way of shaping your environment and bringing nature closer to your daily routine.
DIY planters are also incredibly useful for the way many people live now. They are perfect for balconies, townhouses, rental homes, front steps, sunny decks, and compact yards. They let you grow herbs near the kitchen door, soften a concrete corner with flowers, or create a little pollinator haven where bees and butterflies can visit. For people in Canada and across North America, container gardening is especially appealing because it can work beautifully in short growing seasons and can be adapted as the weather changes.
If you have ever assumed that any attractive vessel can become a planter instantly, this guide will help you avoid the most common mistakes while still having fun with the design process. The reality is that the most successful planters are the ones that balance style with function. A charming old bucket, a thrifted crate, a terracotta bowl, or a sleek resin pot can all work wonderfully, but they need proper drainage, good potting mix, and plants that suit the space. Once those basics are in place, your planter can become both a design feature and a thriving little garden.
In this article, we will walk through how to choose materials, prepare containers, ensure proper drainage, select the right soil, match plants to light and pot size, and build a few beautiful planter styles step by step. The goal is to help you create outdoor planters that feel personal and inspiring, while also giving your plants a strong, healthy start. The process is practical, but the result is emotional too. A well made planter can make an outdoor space feel softer, more alive, and much more yours.
Why DIY Planters Make Outdoor Spaces Feel More Personal
Outdoor spaces often feel their best when they look collected rather than bought all at once. That is why DIY planters have so much charm. They allow you to bring in pieces that feel expressive and slightly unexpected, whether that means painting old terracotta pots in soft earthy tones, turning a wooden crate into a cottage style herb box, or giving new life to a vintage bucket from a flea market. These touches make a garden or balcony feel lived in and loved.
Planters also help create visual layers that make an outdoor area feel cozy and complete. A group of containers at different heights can frame a seating area, define an entry path, or soften railings and corners that otherwise feel hard or plain. Because planters are movable, they are wonderfully flexible. You can shift them with the season, rotate them for better sun, or rearrange them when you want a fresh look without changing the whole yard.
There is also an emotional benefit to container gardening that is easy to underestimate. Caring for plants, even in just a few containers, invites you into a small, grounding daily rhythm. You notice new growth, changing weather, and the subtle progress of the season. That kind of attention can be calming and restorative. A handmade planter enhances that connection because you are involved from the very beginning, from shaping the vessel to choosing what will grow inside it.
Beautiful DIY planters are not only about decoration. They create little moments of care, creativity, and connection with nature right outside your door.
For families, DIY planters can also become an easy shared project. Children can help paint pots, choose flowers, or plant herbs they will later pick for meals. Adults can use planters to experiment with new garden styles without committing to large landscape changes. Renters can enjoy gardening in a way that moves with them. In every case, the planter becomes more than an object. It becomes part of how the space is used and enjoyed.
Start With the Most Important Rule: Drainage
If there is one practical detail that matters most in a DIY planter, it is drainage. Plants generally do not want to sit in stagnant water, and containers without proper drainage can quickly lead to root stress, rot, fungal issues, and disappointing growth. Many beginners focus first on the look of a container, which is understandable, but the hidden details at the bottom of the pot are what determine whether the planter will truly support healthy plants.
A common misconception is that one drainage hole is enough, or that adding rocks at the bottom of a container replaces the need for holes. In reality, extension guidance consistently points to the value of multiple drainage holes. Several small holes are often more effective than one large hole because they allow excess water to escape more evenly. They also reduce the chance that part of the base stays saturated for too long after watering or heavy rain.
Another myth worth letting go of is the idea that a decorative cachepot can simply be filled with soil and treated as a real planter. Unless it has proper drainage, it is better used as an outer sleeve for a nursery pot rather than as the main growing container. The same caution applies to bowls, baskets, and vintage finds. They can become lovely planters, but only after they are carefully adapted for plant health.
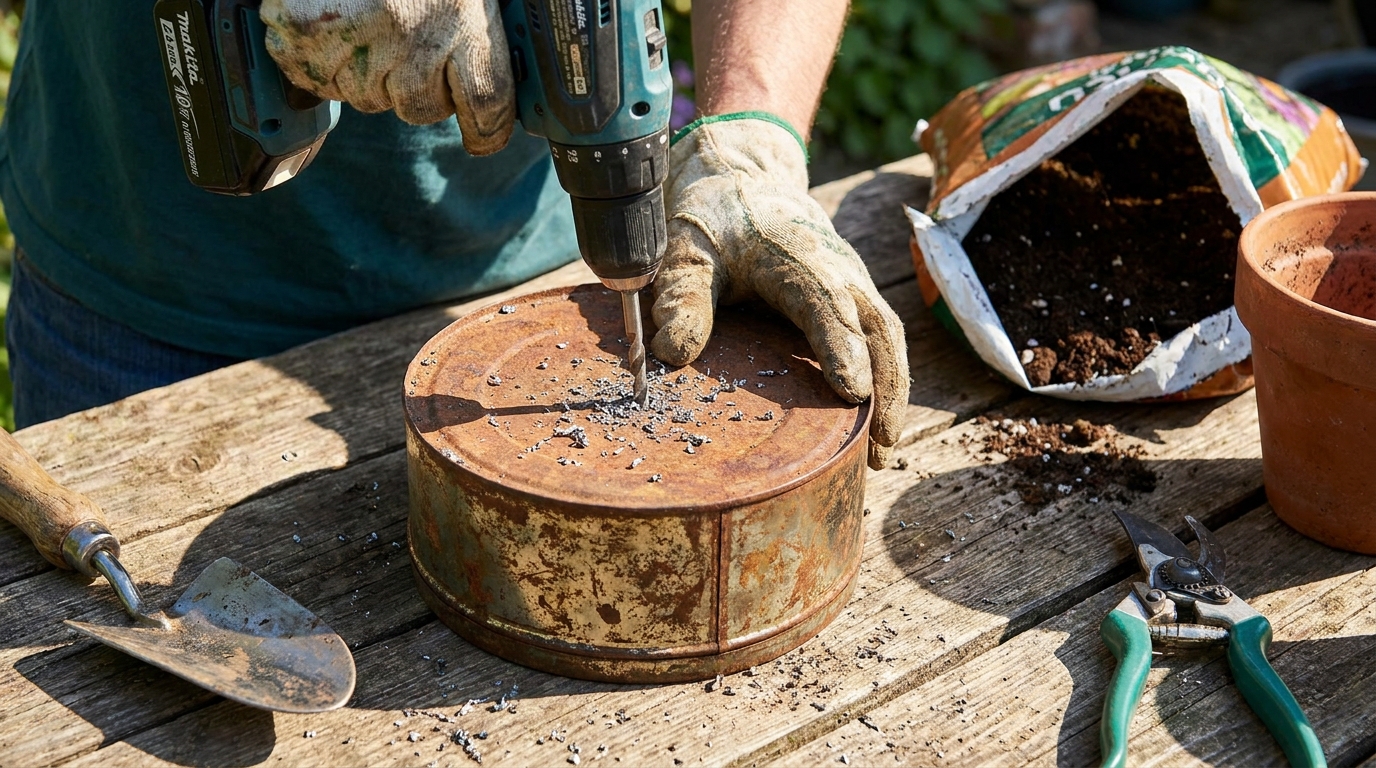
When you create your planter, drill or punch several drainage holes in the bottom. The exact number depends on the size of the container, but the goal is to avoid trapped water. If the material is metal or plastic, use the correct drill bit and work slowly. For wood, leave slight gaps or drill clean holes. If you are using a fragile material like terracotta, use a masonry bit and steady pressure. Afterward, check that water can move through freely and that the holes are not blocked by rough edges or debris.
It also helps to elevate your planter slightly so water can drain away rather than collecting underneath. Pot feet, narrow wood slats, or a plant stand can all help. If you use a saucer, avoid letting water sit there for long periods. Saucers can protect a balcony floor or deck, but they should not become a reservoir that keeps roots constantly wet. Good drainage is simple, but it is the single best foundation for a successful container garden.
Choosing the Right Container for Style and Performance
One of the pleasures of making DIY planters is the freedom to use almost any sturdy object that suits your taste. Wooden boxes, terracotta pots, resin containers, galvanized buckets, crates, boots, baskets with liners, and even old wagons can all be transformed into charming planters. The key is to choose something that is clean, durable, and safe for plants, then adapt it thoughtfully for outdoor use.
Every material has a slightly different personality, both visually and practically. Terracotta has a warm, timeless look that feels at home in cottage gardens, Mediterranean spaces, and relaxed patios. It is porous, which many gardeners love, but that porosity also means it tends to dry out faster. In hot weather, plants in terracotta often need more frequent watering than the same plant in a less porous container. That does not make it a poor choice. It simply means you plan with that characteristic in mind.
Plastic and resin containers are lightweight and easy to move, which is especially helpful for balconies, renters, and people who like to rearrange their outdoor spaces. They also tend to hold moisture a bit longer than terracotta, making them practical for busy households or windy areas where pots dry quickly. Some newer resin styles are very attractive and can mimic stone or concrete while being much easier to lift.
Wooden planters have a beautiful natural feel and work especially well for farmhouse, Scandinavian, and cottage inspired outdoor spaces. Reclaimed wood crates and simple box planters are among the most versatile DIY options. If you use wood, make sure it is not treated with chemicals that are unsuitable for edible crops. Lining the inside with landscape fabric can help protect the wood while still allowing water to move through, though you still need proper drainage holes in the base.
Metal containers can look striking and modern, especially in urban gardens or minimalist outdoor designs. Galvanized tubs, pails, and troughs are popular choices. Keep in mind that metal can heat up in strong sun, which may stress roots in some climates or on exposed balconies. A larger soil volume helps moderate temperature swings, and choosing plants suited to the conditions will improve your results.
As you choose your vessel, ask yourself a few useful questions. Will it be easy to move once filled with soil? Can it tolerate outdoor weather, including freeze and thaw cycles if you live in a cold climate? Does it suit the scale of the plants you want to grow? Will it still look attractive if it gets a little weathered over time? The right container is not just pretty on day one. It supports the full season gracefully.
Why Potting Mix Matters More Than Most Beginners Expect
Once you have the planter itself, the next essential step is filling it properly. This is where many DIY projects succeed or struggle. It is tempting to scoop up soil from the garden and use what you already have, but garden soil is usually too dense for containers. In a planter, it can compact easily, reduce airflow to roots, and drain poorly. That means healthier roots are much less likely, even if everything else about the planter is lovely.
Potting mix is designed specifically for containers. It is lighter, airier, and better able to balance moisture retention with drainage. That matters because container plants live in a very different environment from in ground plants. Their roots are confined, exposed to quicker temperature changes, and dependent on the limited soil inside the pot. A good potting mix gives them the best possible conditions within that smaller space.
You also do not need to create a gravel layer in the bottom in an attempt to improve drainage. This is a persistent gardening myth. In most cases, drainage holes do the real work, while rocks at the bottom may actually complicate how moisture moves through the pot. It is much better to start with a container that drains properly and then fill it with quality potting mix from top to bottom.
If you are planting herbs, flowers, or vegetables, choose a potting mix that suits container growing and refresh it seasonally as needed. Over time, mix settles and loses structure, especially after repeated watering. Topping up with compost or adding a gentle fertilizer can support longer season growth, but more is not always better. Overfertilizing can stress roots and push weak, uneven growth. A balanced, moderate approach usually leads to healthier plants and a more beautiful planter overall.
Match the Planter to the Plants You Want to Grow
One of the easiest ways to create a DIY planter that both looks good and thrives is to match the container size to the root needs of the plants you choose. A small, shallow vessel can be charming, but it is best for compact herbs, small annual flowers, succulents, or low growing ornamentals. Larger crops like tomatoes, peppers, and vigorous flowering plants need more root space, deeper soil, and more consistent moisture.
Overcrowding is another common issue. A densely planted container may look lush in the moment, but if plants do not have enough room, they compete for water, nutrients, and air circulation. The result is often stress rather than abundance. Leaving enough space allows each plant to develop properly and helps the arrangement stay attractive over time instead of becoming tangled and tired after a few weeks.
Sunlight should guide your plant choices just as much as aesthetics. Many flowering and edible containers do best with around six hours of direct sunlight each day. If you have a bright balcony or sunny patio, herbs, tomatoes, peppers, petunias, geraniums, and many pollinator plants can do well there. If your space is shadier, it is better to choose plants that naturally tolerate less light rather than trying to force sun lovers to perform in the wrong conditions.
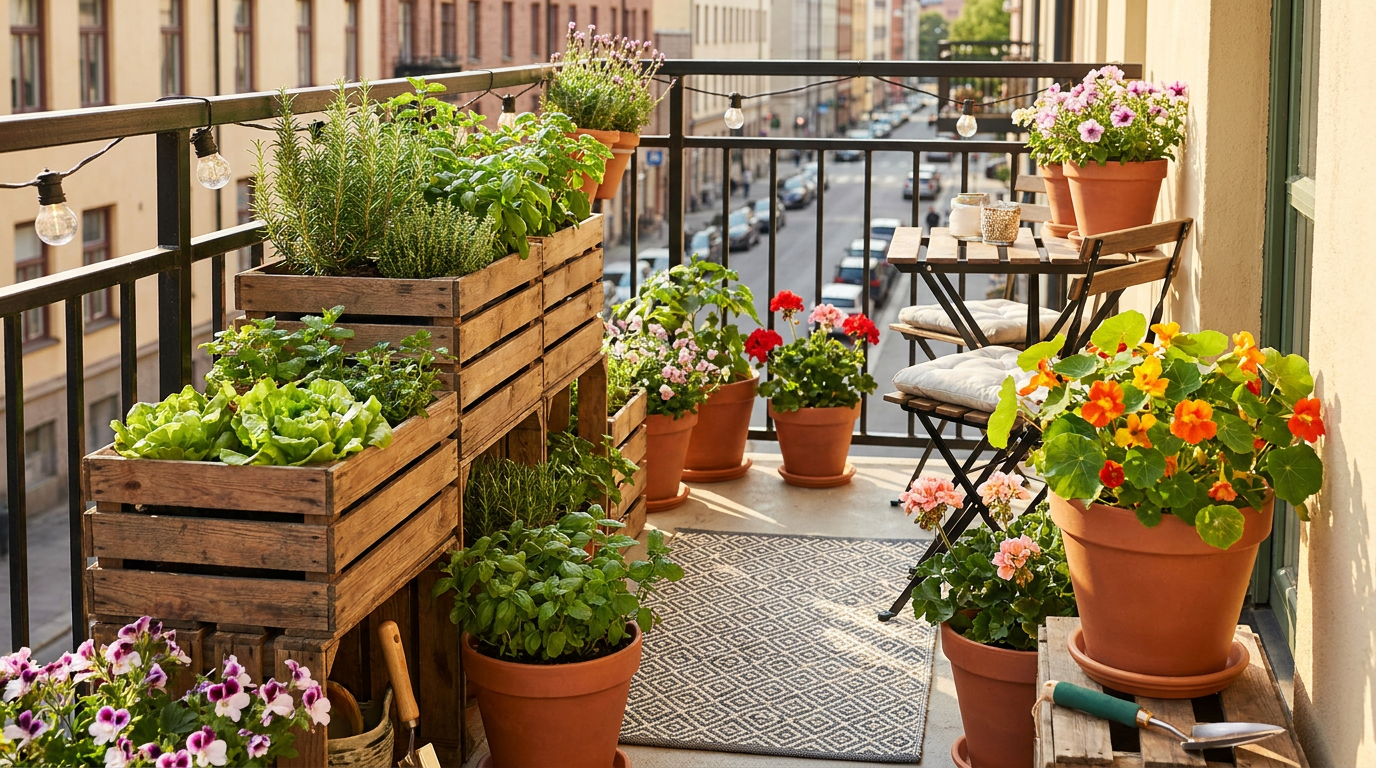
For edible container gardens, think in terms of both convenience and scale. Herbs like basil, parsley, thyme, mint, and chives are rewarding choices for beginners and can be grown near the kitchen for easy use. Lettuce and compact greens are great for cooler seasons and smaller spaces. Fruiting plants such as tomatoes and peppers are very satisfying, but they need larger containers, steady watering, and regular feeding to stay productive.
For ornamental containers, a simple design approach works beautifully. You might combine an upright focal plant, a mounding middle layer, and a trailing edge to create a balanced arrangement. Or you might choose a single plant variety and let the shape of the container and the texture of the foliage do the work. Native flowering plants can also be excellent in planters, especially if you want to support pollinators and create a more ecologically friendly outdoor space.
Tools and Supplies to Gather Before You Begin
Before you start building, it helps to gather your materials so the process feels easy and enjoyable rather than interrupted. The exact list will vary by project, but a basic setup can be very simple. You do not need a perfectly equipped workshop. A few practical tools and some thoughtful preparation go a long way.
- A sturdy container or repurposed object
- Drill and appropriate drill bits for the material
- Work gloves and eye protection
- Pot feet, risers, or a plant stand
- Quality potting mix
- Landscape fabric or coconut liner if needed
- Plants or seeds suited to your light conditions
- Watering can or hose with gentle spray
- Optional paint, sealant, or exterior finish for decorative updates
If you are upcycling an older object, clean it thoroughly before planting. Remove rust flakes, old soil, residues, or loose paint. If you plan to grow edibles, be especially careful about what materials come into contact with the soil. Plant safety matters just as much as visual appeal. The goal is always a container that is creative, durable, and genuinely supportive of healthy growth.
Step by Step: How to Make a Beautiful DIY Planter
Step 1: Choose Your Container Thoughtfully
Begin with a container that fits both your design style and your practical needs. Look at the size of your outdoor space, the amount of sunlight it receives, and whether you will want to move the planter around during the season. A balcony herb planter might need to be lightweight and compact, while a porch flower box can be larger and more decorative. If you are drawn to upcycled pieces, inspect them for sturdiness and weather resistance before committing.
This is also the moment to think about proportion. A very small planter can disappear visually on a large patio, while an oversized one may overwhelm a narrow balcony. Try to picture the finished arrangement in the context of the surrounding furniture, railings, or steps. A planter should feel integrated into the space, not like an afterthought.
Step 2: Add Multiple Drainage Holes
Turn the container over and mark several spots on the base where water can escape. Drill multiple holes rather than relying on one. If the planter is especially wide, spread the holes across the bottom so drainage is even. After drilling, smooth or clear away sharp pieces and test the opening with a little water if needed.
If drilling is not possible because the vessel is too fragile or unsuitable, consider using it as a decorative outer container for a smaller nursery pot that already has drainage. That way you can still enjoy the look without compromising plant health. It is a lovely solution for vintage finds or sentimental pieces you do not want to alter permanently.
Step 3: Elevate the Planter Slightly
Place the planter on pot feet, risers, or a stand so water can drain freely after watering or rain. This small detail often makes a surprising difference. It protects surfaces, improves airflow, and helps prevent the planter from sitting in moisture that can affect roots or damage wood decks and balcony floors.
If you are using a saucer, empty standing water when possible. This is particularly important after heavy rain. The goal is moisture balance, not constant saturation. Plants appreciate regular watering, but they also need oxygen around their roots.
Step 4: Line the Container if Needed
Some materials benefit from a liner. A wooden crate may last longer if lined with landscape fabric. A wire basket can hold soil better with a coconut fiber insert. A porous or decorative vessel may need a simple layer of fabric to help hold mix in place while still allowing drainage through the bottom holes.
Liners are useful, but they should never block drainage. Always make sure excess water can still escape. If your liner covers the bottom fully, cut openings that align with the drainage holes. This keeps the system functional while protecting the structure of the planter.
Step 5: Fill With Quality Potting Mix
Add potting mix until the container is nearly full, leaving enough space at the top for watering. Avoid packing it down too tightly. A light, airy fill encourages better root development and healthier moisture flow. If you are planting something large, check the root ball depth and adjust the soil level so the plant sits comfortably without being buried too deeply.
This is also a good time to mix in a moderate amount of slow release fertilizer if the product directions recommend it. Container plants often benefit from steady nutrition, especially if they will be growing for a full season. Keep the approach gentle and balanced. More is not always better.
Step 6: Arrange and Plant
Before planting, place your pots or seedlings on top of the soil and test the arrangement. This lets you adjust spacing and visual balance before anything goes in. Think about how the planter will look not just today, but in a month when the plants have grown. Give each one enough room to develop naturally.
Once you are happy with the layout, remove each plant from its nursery pot, loosen roots gently if they are tightly bound, and place it into the container. Fill around it with more potting mix, pressing lightly just enough to stabilize the plant. Water thoroughly right after planting so the soil settles around the roots and any air pockets are reduced.
Step 7: Style the Space Around It
A DIY planter looks especially beautiful when it feels like part of a larger outdoor moment. Consider grouping containers in odd numbers, mixing heights, or repeating one material or color for cohesion. Add a stool, lantern, outdoor rug, or watering can nearby if it suits your style. These little details do not need to be elaborate. They simply help the planted area feel intentional and inviting.
When styling, remember that living plants will keep changing. Leave a little breathing room so the arrangement can grow into itself. The most graceful outdoor spaces are not overfilled. They are balanced, layered, and easy to live with.
Three DIY Planter Ideas to Try
Upcycled Bucket Herb Planter
An old metal bucket or sturdy plastic pail can become a charming herb planter with very little effort. Clean it thoroughly, drill several drainage holes, and place it on pot feet or a stand. Fill it with potting mix and plant a few compatible herbs such as basil, parsley, and thyme. This kind of planter is practical, fragrant, and ideal near a back door or kitchen step where you can snip what you need for meals.
If you like a softer look, paint the outside in a muted sage, warm white, or dusty blue. Label the herbs with simple wood markers for a relaxed cottage feel. This project is easy enough for beginners and rewarding almost immediately, especially once the herbs begin to fill out.
Reclaimed Wood Flower Box
A wooden flower box is one of the most versatile DIY planters for porches, decks, and front entries. Build a simple rectangular box from untreated or safe reclaimed wood, drill multiple drainage holes in the base, and line it with landscape fabric. Plant it with seasonal annuals, trailing ivy, or a combination of upright and spilling blooms for a full, romantic effect.
This style works beautifully if you enjoy layering color through the seasons. In spring, you might plant pansies and trailing greens. In summer, you could switch to petunias, calibrachoa, and compact grasses. In autumn, mini ornamental kale and late blooms can carry the look forward. The flower box becomes a flexible decorative anchor that can evolve all year.
Vertical Small Space Planter
For balconies and compact patios, a vertical planter is a smart and stylish solution. You can build one from stacked crates, a narrow wooden frame with shelves, or wall mounted pocket containers. The key is to keep each section well drained and to choose plants according to both light and watering access. Herbs, lettuces, compact flowers, and trailing ornamentals often work especially well in this format.
Vertical planters make small spaces feel lush without taking up precious floor area. They also create an intimate garden atmosphere, especially when paired with a chair or bench nearby. If your outdoor area is limited, this type of project can completely change how the space feels and functions.
Watering, Sun, and Ongoing Care
Once your planter is made and planted, care becomes the next piece of the experience. Container gardens generally need more frequent watering than in ground gardens because they dry out faster, especially in hot, sunny, or windy conditions. This catches many beginners by surprise. A pot can look perfectly fine one day and noticeably thirsty the next, particularly if it is small or made of porous material like terracotta.
Rather than watering on a rigid schedule alone, get into the habit of checking the soil regularly. Touch the top inch or so and notice whether it feels dry. Lift smaller containers if possible, since weight can tell you a lot about moisture levels. Water deeply enough that moisture reaches the root zone and excess begins to drain out the bottom. Shallow sips are less helpful than thorough watering.
Sunlight matters just as much as water. Productive edible containers and many flowering combinations usually need about six hours of direct sun each day. If your space gets less than that, choose plants that suit those conditions. Shade tolerant ornamentals can still be beautiful and lush. Success often comes from working with your site rather than trying to imitate a sunny garden in a shaded one.
Feeding should be steady and moderate. Because watering gradually flushes nutrients from the soil, many container plants benefit from periodic fertilizer during the growing season. Follow the directions of the product you choose and resist the temptation to overdo it. Healthy roots and balanced growth are more important than forcing rapid size.
Deadheading spent flowers, harvesting herbs often, and trimming back leggy stems can keep planters looking fresh and encourage continued performance. At the height of summer, your planter may need a little more attention, but it also tends to give the most visual reward. Those few minutes of care can become a pleasant rhythm in the day rather than a chore.
Design Ideas for Different Outdoor Styles
DIY planters can easily be adapted to match the mood of your outdoor space. If you love a Scandinavian inspired look, focus on simple forms, pale wood, matte finishes, and a restrained palette of green and white. A few clean lined containers with textural grasses, herbs, or white blooms can feel calm and elegant.
If you prefer cottage style, lean into terracotta, weathered wood, soft paint colors, and abundant planting. Mix trailing flowers, herbs, and pollinator friendly blooms in a way that feels relaxed and layered rather than overly formal. This style is especially lovely around porches, fences, and garden paths where containers can soften edges and invite movement through the space.
For a modern or minimalist patio, choose fewer planters with stronger shapes and repeat them for impact. Metal, dark resin, or concrete lookalike containers can feel sleek and architectural. Pair them with grasses, structural foliage, or a simple monochromatic planting scheme. In this setting, restraint is what makes the result feel luxurious.
Family friendly outdoor spaces often benefit from durable, easy to move planters in cheerful but practical designs. Lightweight containers, edible plantings, and grouped herb pots near seating areas encourage everyday use. When children can interact with the space by watering, harvesting, or noticing visiting pollinators, the planters become part of family life rather than just decoration.
Common DIY Planter Mistakes to Avoid
Even the prettiest planter project can struggle if a few basic details are overlooked. One of the biggest mistakes is choosing a container only for looks and forgetting drainage. No matter how attractive the vessel is, it still needs multiple holes and a way for water to escape freely. Another frequent mistake is using garden soil instead of potting mix, which often leads to dense, poorly aerated conditions in the container.
Plant choice can also create problems when it does not align with the size of the pot or the amount of available sunlight. A large tomato in a tiny decorative pot is unlikely to thrive, just as a sun loving flowering annual will not perform its best in deep shade. It is far more satisfying to choose plants that naturally suit the conditions you already have.
Overcrowding and inconsistent watering are also common. It is understandable to want an instant full look, but crowded plants tend to compete and decline faster. Watering only occasionally can be equally stressful, especially during hot weather when containers dry out quickly. Small, regular check ins usually produce much better results than a rushed attempt to rescue a very dry planter later.
Finally, do not overlook the effect of climate and season. In colder regions, some containers may crack if left outdoors through winter when saturated. Tender plants may need protection on chilly nights in spring or fall. The more you treat your planter as a living garden rather than a static decoration, the more graceful and successful it will become.
Seasonal Refresh Ideas to Keep Planters Looking Beautiful
One of the joys of container gardening is how easy it is to refresh the look as the seasons change. In spring, planters can be filled with cool season flowers, greens, and fresh herbs that signal a new beginning. Summer invites bolder color, fragrant foliage, and abundant growth. Autumn is the perfect time for ornamental grasses, late flowers, and textured foliage that warms up the space as the weather cools.
If you live in a climate with winter frost, you can still keep empty planters attractive by styling them with evergreen cuttings, branches, pinecones, or weatherproof decorative elements. The vessel itself remains part of the outdoor design story even when it is not actively growing. This can help patios and porches feel finished year round rather than neglected between planting seasons.
Refreshing a planter does not always mean starting from scratch. Sometimes it is as simple as swapping out one tired plant, trimming back overgrowth, or top dressing the soil with a clean new layer of potting mix or compost. Small updates can make a container feel revitalized very quickly.
Creating a Pollinator Friendly or Edible Planter Garden
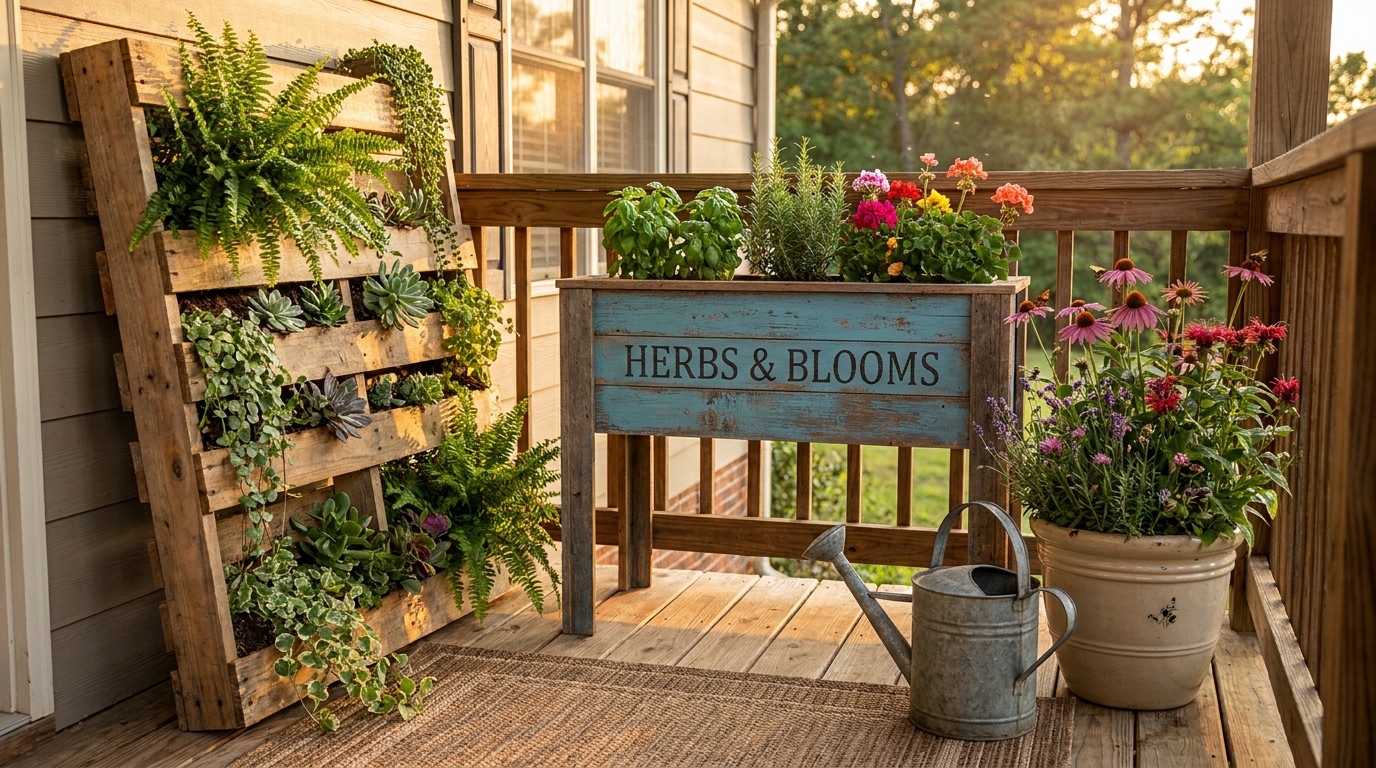
If you want your DIY planters to do more than look pretty, consider giving them a meaningful purpose. Pollinator friendly containers can provide nectar and habitat support in even very small spaces. Choosing native plants where possible, along with a succession of seasonal blooms, helps create a planter that attracts bees, butterflies, and other beneficial visitors. It is a lovely way to make a balcony or patio feel more alive and connected to the surrounding environment.
Edible planters offer a different kind of pleasure. There is something wonderful about stepping outside to harvest basil for pasta, mint for iced tea, or lettuce for lunch. Even a few containers can create this feeling of abundance. For many people, edible planter gardening is less about total production and more about convenience, freshness, and the satisfaction of growing something useful.
You can also combine both goals thoughtfully. Flowering herbs, compact edible flowers, and certain fruiting plants can be beautiful while still supporting pollinators. A planter can be decorative and functional at the same time, which is one reason container gardening continues to be so popular. It aligns beauty with everyday life in a very natural way.
The Real Joy of DIY Planters
At their best, DIY planters are more than weekend projects. They are a gentle invitation to make outdoor life feel richer and more personal. A pot you painted yourself, a crate you turned into a flower box, or a thrifted bucket now full of herbs can shift the mood of an entire space. It does not have to be expensive or elaborate to feel meaningful. Often the most memorable outdoor corners are the ones shaped with a little creativity and a lot of care.
There is also a special confidence that grows with this kind of project. Once you understand drainage, potting mix, sunlight, and plant sizing, you can keep experimenting. You can make planters for shade, containers for tomatoes, pollinator pots for the front step, or vertical gardens for a small balcony. Each one teaches you something new while making your outdoor space feel more welcoming and alive.
If you are just starting, begin with one planter that feels manageable and exciting. Choose a container you love, make sure it drains properly, fill it with quality potting mix, and plant something suited to your light. Water it, watch it, and enjoy the process. That single planter may be all it takes to start seeing your outdoor space differently.
Beautiful outdoor living is often built from small choices repeated with attention. A handmade planter is one of those choices. It blends practical gardening with personal expression, and it invites nature into your daily life in a way that feels intimate and uplifting. Whether you are growing flowers, herbs, vegetables, or pollinator plants, the result is more than decoration. It is a space that feels cared for, lived in, and wonderfully your own.


No Comment! Be the first one.