



Step-by-Step Guide to Installing Baseboards Like a Pro
Baseboards do more than cover the joint between the wall and the floor. They frame the room, hide flooring expansion gaps, protect drywall from bumps, and make a space look finished instead of incomplete. When they are installed cleanly, most people do not think about them at all. When they are installed poorly, every open joint, wavy line, and lumpy caulk bead catches the eye.
Table Of Content
- Why baseboard installation deserves careful attention
- Choosing the right baseboard material
- Tools that actually make the job easier
- Recommended tool checklist
- Prepare the room before you start cutting
- Measure the room the right way
- Understand inside corners before making the first cut
- How to cope an inside corner
- How to handle outside corners cleanly
- Working with long walls, scarf joints, and uneven surfaces
- When scribing makes sense
- Cutting and test-fitting each piece
- Fastening baseboards without overdoing it
- Fastening tips that improve the result
- Step-by-step baseboard installation process
- Filling, caulking, and finishing for a seamless look
- Painting and touch-up
- Common mistakes to avoid
- How new tool trends help DIY installers
- When to repair instead of replace
- Final thoughts on getting professional results
The good news is that baseboard installation is a job many homeowners can handle if they slow down and work carefully. This is finish carpentry, which means details matter more than brute force. You do not need a full cabinet shop to get strong results, but you do need a good plan, accurate measurements, a sharp blade, and the discipline to test-fit before nailing anything in place.
This guide covers the full process from choosing materials and setting up tools to cutting corners, fastening trim, and finishing the work so it looks professional. Along the way, we will focus on the mistakes that usually cause trouble, because trim work is often won or lost in the small decisions. If you want straight answers on how to install baseboards like a pro, start here and work methodically.
Practical rule: professional-looking baseboards come from planning, fit, and finishing discipline far more than expensive tools alone.
Why baseboard installation deserves careful attention
Baseboards are one of the last visible steps in a room finish sequence, so any flaw stands out. A wall that is slightly out of square, a floor that rises at one corner, or a drywall hump behind the trim can all create visible gaps if you try to force the pieces together without adjusting the cuts. That is why experienced installers treat baseboard as a fitting job, not just a cutting job.
In most finish workflows, baseboards are installed after flooring is complete. That approach allows the trim to cover the expansion gap around floating floors or the perimeter gap left at the wall edge. It also lets you judge the actual floor line before you decide whether the trim needs scribing or slight trimming to sit tight and look even.
Another reason to take your time is that corners in real houses are rarely perfect. If you assume every inside corner is a true 90 degrees and cut every joint at exact 45-degree settings, you will often end up with gaps at the face or the back of the profile. Good trim work means adjusting to the room you have, not the room you wish you had.
Choosing the right baseboard material
Before you cut anything, decide what material fits the room and the finish you want. Paint-grade trim is commonly made from MDF, finger-jointed pine, poplar, or solid pine. Stain-grade trim is usually hardwood, because the grain and appearance matter once the finish goes on.
MDF is popular for painted interior trim because it is stable, straight, consistent, and easy to machine. It usually gives a smooth painted result with less grain telegraphing than solid wood. The tradeoff is moisture sensitivity. In bathrooms, basements, laundry rooms, or entries where wet boots or mops are common, MDF can swell or break down if it gets repeatedly wet.
Solid wood and engineered moisture-resistant products are often a better choice where impact resistance or humidity matters more. PVC and composite trim products are also increasingly used in moisture-prone spaces because manufacturers emphasize lower expansion and contraction along with easier installation. If you are working in a dry bedroom or living room, MDF can be a practical paint-grade choice. If you are trimming out a bathroom or basement, think carefully about moisture exposure before buying material.
Tools that actually make the job easier
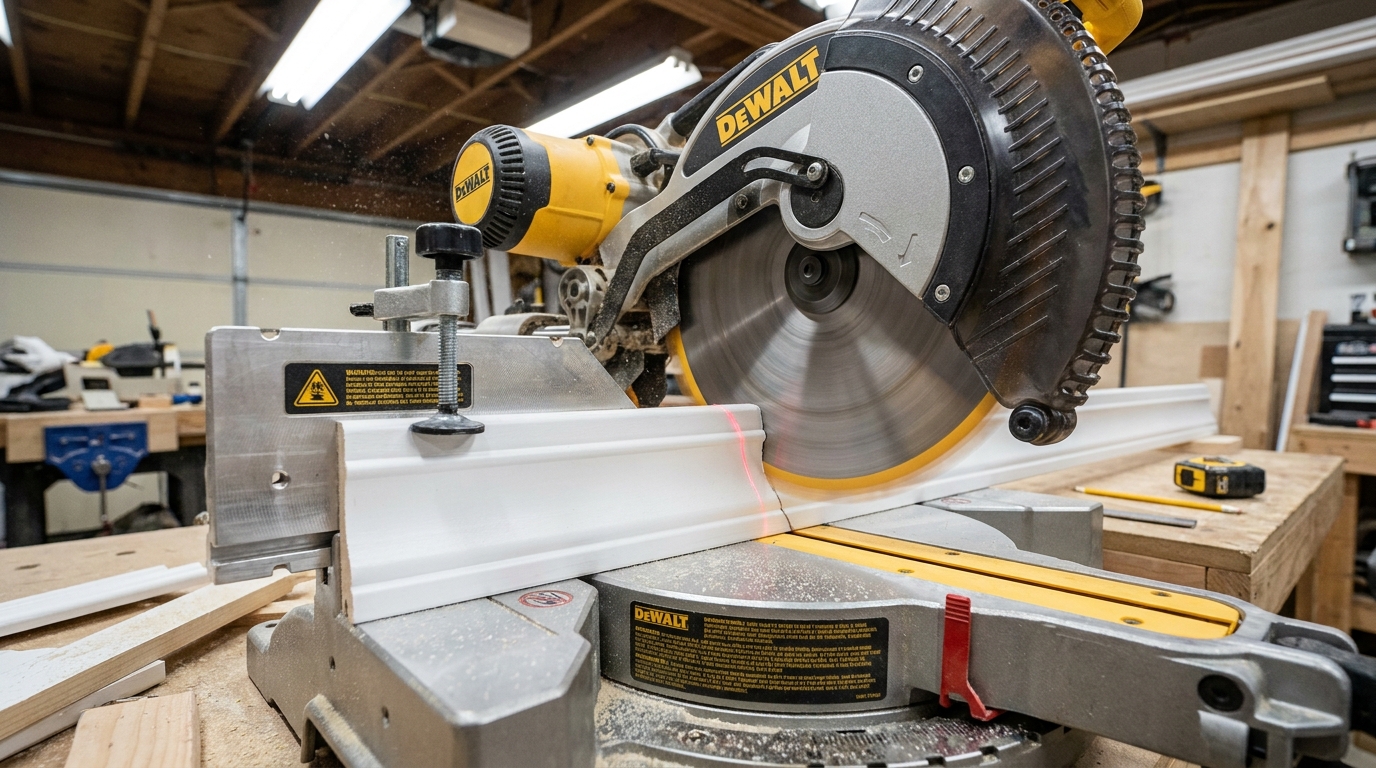
You can install baseboards with basic hand tools, but some tools make a major difference in both speed and finish quality. A miter saw is the main cutting tool for straight crosscuts, miters, and many outside corners. Modern saws often advertise tall fences and baseboard capacity for a reason. Base molding is commonly cut vertically against the fence, and stable support helps keep those cuts accurate.
A finish nailer is the other big time saver. A 16-gauge angled finish nailer is widely used for baseboards because it gives solid holding power while leaving smaller holes that are easy to fill. Cordless nailers have become especially popular for trim work because they remove the hose and compressor from the room, which can make setup easier in finished interiors.
You will also want reliable measuring and layout tools. A tape measure, a sharp pencil, a quality level, and a stud finder are all basic necessities. Add a coping saw or fine-tooth handsaw for inside corners, a utility knife for scoring paint lines or trimming caulk, a putty knife, wood filler, paintable caulk, sandpaper, and touch-up paint supplies. None of these items are glamorous, but each one solves a problem that tends to show up during trim installation.
Recommended tool checklist
- Miter saw with a sharp finish blade
- 16-gauge angled finish nailer and appropriate nails
- Tape measure and sharp pencil
- Stud finder
- Level
- Coping saw or fine saw for inside corners
- Caulk gun with paintable caulk
- Wood filler or nail hole putty
- Sandpaper or sanding sponge
- Utility knife
- Touch-up paint supplies
Prepare the room before you start cutting
Good prep saves a lot of frustration later. Remove old baseboards carefully if this is a remodel. Use a utility knife to score the top paint line first, then pry gently with a flat bar so you do not tear the drywall face. If you want to patch and repaint after installation, some minor wall damage is manageable, but the cleaner the removal, the less repair work you create.
Vacuum the floor edges and check the walls for high spots, crumbling drywall, and obvious bows. Drive any protruding drywall nails or screws flush and patch large voids behind where the baseboard will sit. This is also the time to locate studs and mark them lightly on the wall, just above the future trim line, so you know where to nail once the pieces are in place.
Bring the trim into the room and let it acclimate before installing it. That is especially important with wood products, since seasonal humidity and heating cycles can cause small movement. If you caulk and paint too early, before the material has settled and before everything is fully secured, you increase the chance of later cracking at seams and wall joints.
Measure the room the right way
Measuring for baseboards sounds simple until corners and long runs get involved. The biggest mistake DIY installers make is measuring every wall once, cutting a full batch, and expecting everything to drop into place. In real rooms, walls vary, corners shift, and slight measuring errors add up. A better approach is to measure carefully, cut one piece at a time or one wall sequence at a time, and dry-fit each section before fastening.
Start by sketching the room and noting each wall length. Mark inside corners, outside corners, door casings, and any areas where a scarf joint may be needed because the wall is longer than the trim stock. Label which ends of each piece need a square cut, a miter, or a cope. This simple sketch helps prevent expensive mistakes when multiple pieces are leaning against the wall waiting to be installed.
Measure from the actual point where the trim will land, not from an estimated wall edge. That matters most at corners. An inside corner may require a square-cut backing piece plus a coped return on the adjoining piece. An outside corner may need slight angle adjustment if the corner is not perfectly square. Measure, mark, cut, then test-fit. That sequence is slower than guesswork, but it is much faster than remaking trim.
Understand inside corners before making the first cut
Inside corners are where most beginner frustration starts. Many people think the answer is simple: cut both pieces at 45 degrees and push them together. Sometimes that works well enough in a new house with very straight framing and drywall. More often, the corner is slightly open or slightly tight, and the face profile does not close neatly.
The more reliable method for painted baseboard is usually to run one piece square into the corner and cope the mating piece. Coping means cutting along the profile so the second piece fits over the face of the first piece. This hides slight corner irregularities better than relying on a perfect miter and tends to hold up well even if the wood moves a bit over time.
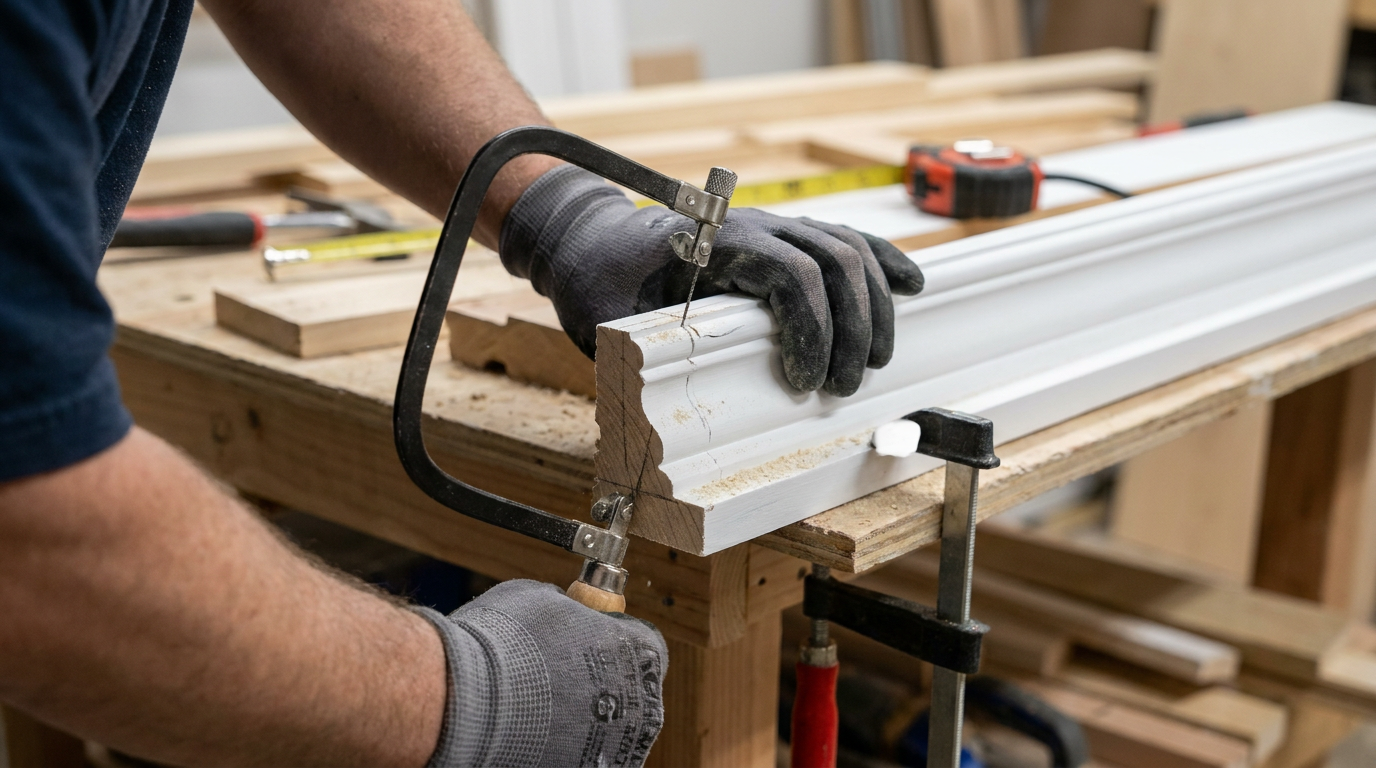
If coping is new to you, do not let the idea intimidate you. It is a learned skill, but not an impossible one. After you cut a 45-degree inside miter on the piece, the profile becomes visible at the cut edge. You then use a coping saw to follow that profile, removing the waste behind it so the shaped face can nest tightly against the square-cut piece in the corner.
How to cope an inside corner
- Cut the first piece square and fit it tight into the corner.
- Cut a 45-degree inside miter on the mating piece to expose the profile.
- Use a coping saw to follow the profile line carefully.
- Back-cut slightly so the front face touches first and the rear does not interfere.
- Test-fit the coped piece against the installed or dry-fit square piece.
- Trim small spots as needed until the joint closes cleanly.
The key is the back-cut. If you leave the rear edge proud, the profile can bind before the visible face fully seats. A slight back angle lets the visible detail make contact without interference behind it. You can refine the fit with a file, sandpaper, or a sharp utility knife if needed. This is one of those tasks where patience pays off immediately in the final appearance.
How to handle outside corners cleanly
Outside corners are usually cut with miters, but that does not mean every outside corner should automatically be cut at 45 degrees. Drywall corners often drift a bit from true, and corner bead can build extra thickness at the edge. If you cut both pieces at exact 45 degrees and the corner is not exact, the front edges may touch while the back opens up, or the opposite may happen.
To avoid that, check the corner angle if it looks suspicious. You can use an angle finder, test blocks, or even small scrap cuts to sneak up on the right fit. Make a pair of sample cuts and hold them to the corner before cutting your actual finished pieces. This extra step is especially helpful on expensive trim or stained wood, where filler and caulk are poor substitutes for a proper fit.
Once the outside corner fits well, fasten both sides carefully so the miter stays aligned. Some installers use a small amount of wood glue on outside miter joints for extra stability, especially on longer runs. If you do, use it sparingly and wipe away squeeze-out immediately so it does not interfere with paint or finish.
Working with long walls, scarf joints, and uneven surfaces
Not every wall can be covered with a single piece of trim. On long runs, you may need a scarf joint where two pieces meet between corners. A scarf joint is an angled joint, typically cut at matching angles so the overlap is less visible than a simple butt joint. Position scarf joints over a stud whenever possible so both ends can be fastened securely.
Pay attention to wall bow and floor slope on long walls. A piece that looks straight on the saw horses may reveal gaps once it is held in place across a wavy drywall surface or a floor that rises and falls. This is why dry-fitting matters so much. Hold the full length against the wall, check the top reveal, and look along the floor line before you commit to nails.
If the floor is uneven, you may need to scribe the bottom edge of the baseboard so it follows the floor more closely. Scribing is a practical way to reduce visible gaps at the bottom without using a heavy line of caulk to hide poor fit. It takes more time, but on older houses with uneven floors, it can make the difference between trim that looks custom and trim that looks rushed.
When scribing makes sense
Scribing is worth considering when a gap at the bottom edge is too large to ignore and too inconsistent to caulk neatly. Set the board in place, level it visually or keep the top line where you want it, then use a compass or scribing tool to transfer the floor contour onto the bottom edge. Trim to that line carefully with a jigsaw, block plane, or sanding method that matches the material.
This technique is common in older homes where floors are rarely flat from one end of the room to the other. It is also useful when a room gets strong side lighting that makes every shadow line obvious. Clean trim work often means adjusting the material to the building, not trying to bully the building into geometric perfection.
Cutting and test-fitting each piece
Once your plan is set, cut each piece with a clear routine. Mark the back of the trim with the wall location and orientation so you do not confuse left and right ends. Make sure the trim is sitting on the saw exactly the same way it will sit against the wall. A lot of wasted stock comes from pieces being cut upside down or reversed.
Use a sharp blade made for finish work. A dull blade tears profiles, leaves fuzzy edges on MDF, and increases the chance of chipping on factory-primed trim. Clean cuts matter because small defects on the face profile become hard to hide once light hits the installed trim from the side.
After cutting, always test-fit the piece before nailing. Check both ends, the top edge against the wall, and the bottom edge against the floor. If the fit is close but not perfect, adjust it now. A few minutes on the saw or coping bench saves much more time than trying to patch a visible gap after the piece is permanently fastened.
Fastening baseboards without overdoing it
There is a common misconception that more nails always mean a stronger installation. In practice, well-placed fasteners into studs matter far more than simply filling the board with nails. Too many fasteners can split delicate profiles, leave unnecessary filler work, and make later adjustments harder if you need to pull a piece back off.
A 16-gauge angled finish nailer is a practical choice for most baseboard jobs. It provides enough holding power for typical trim installation while keeping nail holes manageable. Common nail lengths range from about 1 1/4 inches to 2 1/2 inches depending on trim thickness, wall conditions, and whether you are trying to catch solid framing behind drywall.
As a rule, aim to hit studs consistently along the run. In many cases, baseboard is nailed through the thicker lower portion and sometimes again slightly higher if the profile and wall condition call for it. What matters is that the board sits tight to the wall and stays there without obvious face damage. If a section of wall lacks backing and the trim wants to spring away, adhesive or added blocking may help, but use those methods thoughtfully.
Fastening tips that improve the result
- Mark stud locations before installation so nailing is deliberate, not guesswork.
- Hold the board tight to the wall while fastening instead of trying to pull it in with the nail alone.
- Check miters and coped corners again after the first nails go in because they can shift slightly.
- Use enough nails for secure contact, but avoid peppering the face with unnecessary holes.
- Set nail depth properly so fasteners sink cleanly without crushing the trim face.
Step-by-step baseboard installation process
If you want a clean workflow, follow a consistent sequence around the room. Start with the most visible wall or a corner that gives you a clear reference. Install square-cut pieces into inside corners first when possible, then bring coped pieces into them. Save your most difficult outside corners for when you have a steady rhythm and a better feel for how the room is behaving.
- Acclimate the trim in the room and inspect for damage or bowing.
- Mark stud locations and note problem areas in walls or floors.
- Plan the room layout and identify inside corners, outside corners, and long runs.
- Cut and dry-fit the first piece, usually a square-cut run into an inside corner.
- Cut mating inside corners using coping where appropriate.
- Adjust outside miters to actual corner conditions and test-fit before fastening.
- Install long runs and scarf joints, checking wall bow and floor gaps as you go.
- Fasten trim into studs with consistent spacing and good alignment.
- Fill nail holes and patch minor imperfections after all pieces are secure.
- Caulk small gaps at the wall line and corners, then sand, prime if needed, and paint.
This sequence works because it keeps each step dependent on a verified fit rather than an assumption. When people get into trouble, it is usually because they cut too many parts in advance and then try to force the room to accept them. Finish carpentry rewards the opposite mindset. Make a piece, fit the piece, then move on.
Filling, caulking, and finishing for a seamless look
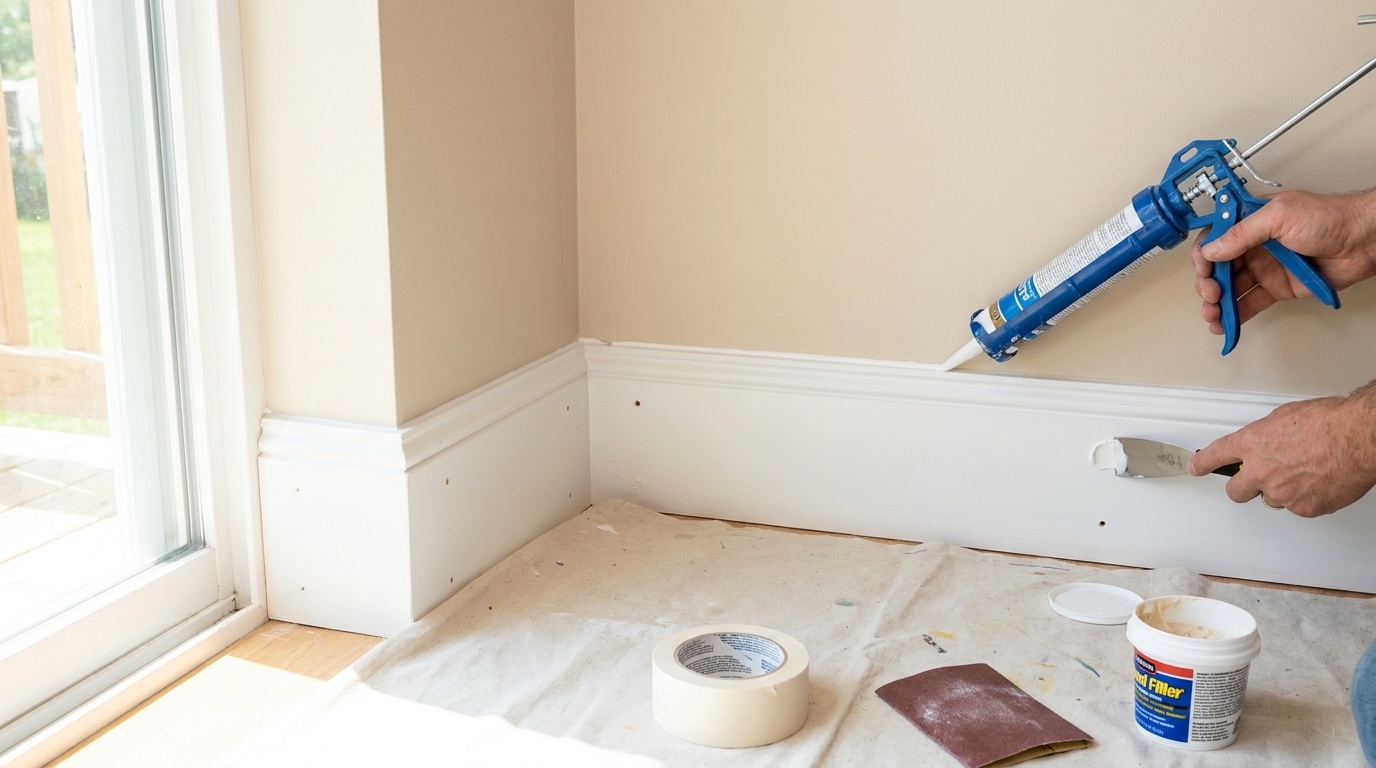
Once all the trim is installed and you are satisfied with the fit, move on to finishing. Fill nail holes with a suitable wood filler or putty that matches the intended finish system. For painted trim, many fillers work well as long as they sand smoothly and accept paint evenly. Let the filler dry fully before sanding it flush.
Use paintable caulk where the baseboard meets the wall and at small corner irregularities. This is one of the most useful finishing materials in trim work, but it has limits. Caulk is meant to hide minor movement lines and small gaps, not major fitting errors. If you rely on a huge caulk bead to correct bad cuts, the final job will almost always look soft and amateurish.
Apply caulk sparingly and tool it smoothly. A clean bead that just bridges the seam is usually all you need. Keep a damp rag nearby and wipe excess immediately. Overfilled caulk and heavy putty are among the most common reasons a trim job looks lumpy after paint.
Painting and touch-up
If the trim is factory primed, inspect all cut ends and filled areas before painting. Exposed MDF edges and raw wood cuts often need extra sealing or primer for an even finish. Light sanding between filler, caulk, and paint steps can make the final surface much cleaner.
Whether you paint before installation or after depends on your workflow, but many DIY homeowners get the best final result by doing a first coat before installation and a finish coat after filling and caulking. That approach reduces brush work in awkward corners while still hiding joints and repairs. If you install prefinished or stain-grade trim, be even more careful during fastening and handling, because touch-ups are harder to disguise.
Common mistakes to avoid
Most failed baseboard installations can be traced to a handful of predictable mistakes. The first is assuming all corners are exactly 90 degrees. They are not. The second is rushing layout and cutting too many pieces before test-fitting. The third is trying to make caulk do the work that proper fitting should have done in the first place.
Another frequent problem is missing studs and relying on too few meaningful fasteners. The board may look tight at first but separate later as seasonal movement works on it. On the other side of the issue, some installers use too many nails, creating extra face damage without improving holding strength. Deliberate fastening beats random fastening every time.
Dull blades are another hidden problem. They tear profiles, chip factory finishes, and make joints look rough even when the measurements are accurate. Finally, many people forget about material suitability. Not every trim product belongs in a damp basement or a bathroom with regular moisture exposure. Choose trim based on room conditions, not just price and appearance on the rack.
How new tool trends help DIY installers
Recent tool developments genuinely help homeowners tackle finish carpentry with less setup hassle. Cordless finish nailers have made it easier to move room to room without dragging an air hose across finished floors and furniture. Compact miter saws and space-saving glide systems have also helped people work in garages, basements, or small shops where space is limited.
Many saws now include laser or shadow cutline guidance that makes mark alignment easier, especially for beginners. These features do not replace good measuring habits, but they can reduce small positioning errors. Better saw capacity and tall fences also make vertical trim cutting more stable, which matters a lot when you are trying to keep profile orientation consistent.
At the material level, engineered trim, PVC, and composite options have become more common, especially in rooms where traditional wood is less forgiving. For a homeowner doing one room at a time, these options can remove some of the uncertainty around seasonal movement and moisture. That said, no product makes up for careless fitting. The cleanest installations still come from patience and method.
When to repair instead of replace
Not every baseboard project has to start from scratch. If the existing trim profile suits the room and only a few sections are damaged, you may be better off replacing short runs rather than tearing out everything. This is especially true in older homes where matching historic profiles may be difficult and where removing all trim may lead to more wall repair than expected.
Patch-and-repair makes sense when the majority of the trim is sound, the paint finish can be refreshed, and the damaged areas are isolated. Full replacement makes more sense when the trim is heavily layered with old paint, badly warped, water damaged, or mismatched from prior remodels. The decision often comes down to whether you want the room to look preserved or completely updated.
Final thoughts on getting professional results
Installing baseboards like a pro is not about working fast or owning every premium tool on the shelf. It is about understanding what the room is doing and adjusting your approach accordingly. Walls are not always straight, floors are not always level, and corners are rarely perfect. Once you accept that, the whole job becomes more manageable because you stop chasing machine-perfect assumptions.
Focus on accurate measuring, thoughtful material choice, sharp cuts, and careful dry-fitting. Cope inside corners when needed, adjust outside miters to real conditions, and fasten trim into studs with intention rather than excess. Then take the finishing stage seriously, because neat filler, restrained caulk, and proper paint work are what turn solid carpentry into a polished final result.
If you follow a steady process and resist the urge to rush, baseboard installation is one of the most satisfying upgrades you can make in a room. The trim frames everything else, and when it is done well, the whole space feels sharper, cleaner, and more complete. That is the real goal of pro-level trim work. It looks effortless because the care happened before the finish coat ever dried.



No Comment! Be the first one.