



Transform Your Space: A DIY Guide to Creating Elegant Backsplashes
There are certain upgrades that instantly change the mood of a room, and a backsplash is one of the most effective among them. In both kitchens and bathrooms, it sits at eye level, catches the light, and quietly defines the character of the space. A carefully chosen backsplash protects the wall from splashes, stains, and moisture, yet its visual role is just as important. It can soften a modern kitchen, sharpen a traditional bath, or bring a sense of custom refinement to a room that previously felt incomplete.
Table Of Content
- Why a Backsplash Has Such Transformative Power
- Start with an Elegant Vision, Not Just a Tile
- Choosing the Best Material for a Beginner Friendly Yet Luxurious Look
- Ceramic and Porcelain as the Smart Foundation
- When to Consider Handmade Look and Zellige Style Finishes
- What Beginners Should Approach Carefully
- Design Layouts That Feel Personal and Polished
- How Grout Color Changes the Entire Effect
- Where to Install for Maximum Impact
- Prepare the Wall Like a Professional
- Tools and Supplies That Make the Process Smoother
- Measure, Dry Fit, and Plan the Layout Before Adhesive
- Step by Step Installation for Beginners
- 1. Protect the Space and Establish Reference Lines
- 2. Apply Adhesive in Small Sections
- 3. Set Tiles with Steady Pressure and Spacing
- 4. Make Cuts Thoughtfully
- 5. Allow Proper Cure Time
- Understanding Grout, Caulk, and Why They Are Not the Same
- How to Grout for a Clean, Elegant Finish
- Finishing Details That Make a DIY Project Look Custom
- Elegant Backsplash Ideas for Kitchens
- Elegant Backsplash Ideas for Bathrooms
- Common DIY Mistakes and How to Avoid Them
- Maintenance for Lasting Beauty
- When DIY Is the Right Choice and When to Pause
- Final Thoughts: Elegance Is Built One Careful Detail at a Time
For many homeowners, the idea of installing a backsplash without professional help may sound ambitious. Yet this is precisely why backsplashes have become one of the most popular DIY upgrades. They offer a high design return without requiring the scale, dust, or cost of a full renovation. Professional backsplash installation often falls in the range of about $480 to $1,500 according to HomeAdvisor’s 2026 cost overview, with the average near $1,000 before additional wall repair or removal costs. That makes the project especially attractive for anyone who wants sophistication on a more measured budget.
The secret to an elegant result is not extravagance. It is restraint, proportion, and precision. An expensive tile cannot rescue a poor layout, while a modest ceramic tile can look quietly luxurious when installed with care. Houzz’s 2025 kitchen trends reporting notes that more than three quarters of homeowners choosing an upgraded kitchen backsplash still select tile, and full coverage to cabinets or range hoods is now the most popular approach. The lesson is reassuring. Elegance often comes from simple materials used thoughtfully, not from chasing complexity.
This guide is designed to help beginners create a backsplash that feels polished, personal, and timeless. We will look at materials, planning, tools, design decisions, installation steps, and the finishing details that distinguish a rushed project from one that feels composed. Whether you are updating a kitchen wall behind the counter or adding definition around a bathroom vanity, you can create something beautiful with patience, a steady plan, and a careful eye.
Why a Backsplash Has Such Transformative Power
A backsplash occupies a relatively small footprint, but it holds an outsized role in the visual rhythm of a room. In a kitchen, it bridges cabinetry and countertops while reflecting the tone of fixtures, hardware, and lighting. In a bathroom, it can act as a frame for the vanity area, introducing texture and color where the room most needs depth. Because it sits in the line of sight, it becomes a backdrop for everyday rituals and therefore influences how finished and luxurious the space feels.
There is also a practical beauty to the backsplash. It protects painted drywall or other wall surfaces from water, soap, cooking residue, and accidental splashes. This matters especially around sinks, vanities, and tubs, where moisture can linger. It is worth remembering, however, that a backsplash is not the same thing as a full waterproofing system. In wet rooms or shower areas, the wall assembly requires proper waterproofing methods beyond decorative tile. Around most kitchen counters and bathroom vanities, though, a well installed backsplash with correct sealants provides excellent protection for everyday use.
Current design trends support a more expansive and integrated look. Full height coverage, especially from countertop to upper cabinets or all the way to the ceiling in selected areas, creates a composed architectural finish. This can make even a compact room feel taller and more intentional. Yet trends should serve your home rather than dominate it. The most lasting designs tend to use these ideas with moderation, choosing clarity over excess.
Start with an Elegant Vision, Not Just a Tile
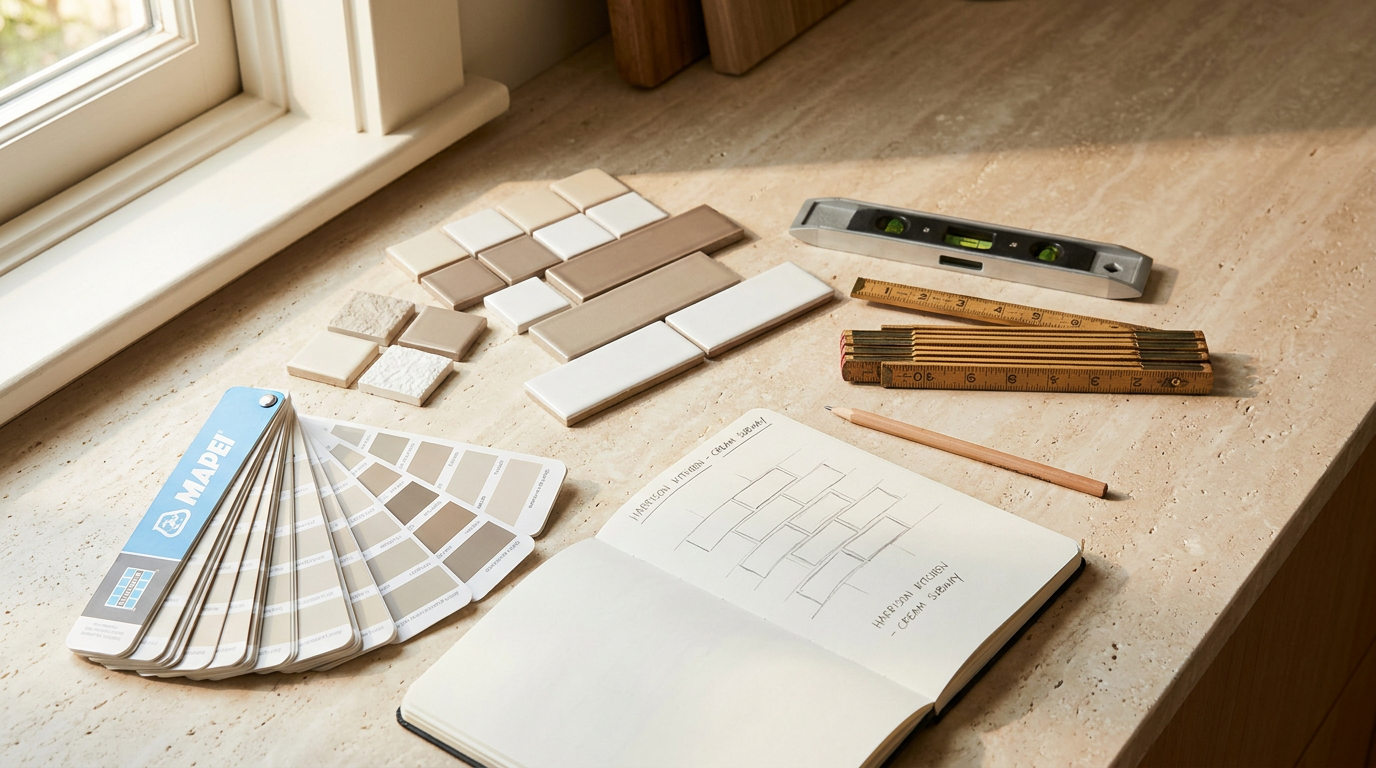
Before selecting materials, pause to define the atmosphere you want to create. A backsplash should belong to the room around it. If your kitchen features warm wood cabinetry, soft brass, and creamy counters, a stark high contrast tile may feel abrupt. If your bathroom is minimal and pale, a tile with subtle variation or a handmade finish may add exactly the depth it needs. Think in terms of mood: serene, tailored, luminous, earthy, classic, or contemporary.
An elegant backsplash rarely relies on too many competing gestures. Instead, it usually builds its effect through one or two refined choices. This could be a classic rectangular tile in a fresh layout, a matte finish that catches light softly, or a tonal palette that echoes the countertop and cabinetry. The room should feel coherent, not crowded. If you are uncertain, choose fewer design moves and execute them beautifully.
Design callout: The most sophisticated backsplashes are often the quietest ones. Consistent spacing, balanced proportions, and a harmonious grout color can look far more luxurious than an overly decorative pattern.
Choosing the Best Material for a Beginner Friendly Yet Luxurious Look
Ceramic and Porcelain as the Smart Foundation
For most DIY beginners, ceramic and porcelain tile are the strongest choices. They are durable, widely available, and generally more forgiving to cut and maintain than natural stone, glass, or intricate mosaics. They come in a broad range of finishes, from clean and polished to softly irregular. This makes them ideal for homeowners who want a tailored look without using difficult materials that demand advanced tools or installation skill.
Ceramic is often slightly easier for beginners because it can be simpler to cut and is available at approachable price points. Porcelain is denser and highly durable, making it especially appealing in moisture prone areas. Both can offer a remarkably elevated look when selected carefully. The key is to focus not only on color, but also on surface quality. A tile with a lightly handmade appearance, gentle variation, or a matte glaze can introduce richness without becoming visually busy.
When to Consider Handmade Look and Zellige Style Finishes
One of the most graceful current directions in backsplash design is the embrace of subtle irregularity. Zellige inspired tiles, handmade look ceramics, and softly textured glazes create movement that feels artisanal rather than flashy. They are especially beautiful in neutral shades such as ivory, soft white, clay, warm gray, dusty green, or pale taupe. Because the variation is built into the surface, the wall gains personality even if the layout remains simple.
These tiles are excellent for personalized elegance, though it is wise to read manufacturer guidance carefully. Some highly irregular products need more planning during layout and spacing. If you love the look but want a less demanding installation, choose a tile that captures the handmade effect while maintaining relatively consistent dimensions. This gives you the atmosphere of craft with a friendlier DIY experience.
What Beginners Should Approach Carefully
Natural stone slab backsplashes and slab style continuity with countertops are undeniably luxurious, and they are becoming more visible in design conversations. Yet slab installation is not usually the ideal first DIY project. The same caution applies to glass tile, complex mosaics, and materials that require highly precise specialty cuts. These can be stunning, but they often demand tools, setting techniques, and handling methods that are less forgiving.
Peel and stick products are another category that deserves nuance. They are marketed as quick DIY solutions and can be useful for fast makeovers or rental friendly updates, but quality varies widely. They are not automatically waterproof or permanent, and durability depends heavily on the substrate, the room conditions, and the manufacturer’s instructions. If your goal is a long lasting elegant finish in a main kitchen or moisture exposed bathroom, traditional tile often remains the more dependable path.
Design Layouts That Feel Personal and Polished
Once you have chosen a material, the next decision is the layout. Houzz reports that rectangular tiles remain the most common backsplash shape, with classic horizontal brick patterns still leading among homeowners. There is a reason for this. The running bond or traditional subway pattern has enduring balance, and it suits nearly every architectural style. It is also among the easiest layouts for a beginner to execute successfully.
Still, personalization matters, and a classic tile can feel fresh in a new arrangement. A vertical stack can make a room feel taller and more contemporary. Herringbone adds movement and refinement, though it requires more planning and more cuts. A simple stacked layout can be wonderfully elegant if your space is minimal and your tile has texture. Running bond is ideal if you want familiarity with a subtle sense of rhythm. Each option changes the mood without changing the material itself.
Think carefully about scale. Large format pieces can reduce grout lines and create a seamless impression, but they may be less forgiving on uneven walls. Smaller tiles can adapt more easily to minor inconsistencies, though they produce more joints and therefore require more grouting and maintenance. In many kitchens and bathrooms, a medium scale rectangular tile offers the most graceful balance between ease and style.
How Grout Color Changes the Entire Effect
Grout is often treated as an afterthought, but it has extraordinary influence on the final look. Matching or near matching grout creates calm continuity and allows the tile surface to read as a whole. Contrasting grout highlights each shape and emphasizes pattern. For an elegant result, softer contrast is often the wiser choice. It keeps the backsplash integrated with the room rather than turning it into a graphic statement that may feel harsh over time.
In kitchens and bathrooms, practical performance matters too. Very light grout can show stains more easily, while very dark grout may leave haze on lighter tiles if not handled carefully. The ideal choice is usually one that supports the tile and also reflects real life maintenance needs. A warm gray, soft beige, or muted off white can often be more forgiving and more sophisticated than bright white.
Where to Install for Maximum Impact
Coverage height changes the visual architecture of the room. A short backsplash can be functional, but a fuller installation generally feels more considered. Full height coverage from countertop to upper cabinets or shelving creates a clean and continuous field. Behind a range or a bathroom mirror wall, extending tile higher can add drama while making the room feel more intentionally designed.
Current trends increasingly favor these fuller applications, including tile carried to the ceiling in selected zones. This does not mean every room requires complete vertical coverage. The more important question is how the backsplash relates to cabinetry, mirrors, windows, and architectural lines. If you stop tile partway, end it in a place that feels natural and symmetrical. If you carry it upward, make sure the scale and simplicity of the material can support the larger visual presence.
Prepare the Wall Like a Professional
The hidden success of a backsplash begins long before the first tile touches adhesive. Wall preparation is one of the least glamorous stages, and one of the most important. The substrate must be clean, dry, stable, and reasonably flat. Grease residue behind a stove, peeling paint, loose drywall paper, old adhesive, or uneven patches can all compromise the final bond and finish.
In many kitchen backsplash areas, painted drywall in good condition is suitable for tile. Around bathroom vanities, this can also be true when exposure is limited to normal splashing. Around tubs or areas with heavier and repeated moisture, you need to check product recommendations more carefully and understand whether backer board or another more moisture resistant substrate is appropriate. Decorative backsplash tile is not a substitute for wet area waterproofing, so always match your wall assembly to the level of exposure.
Repair dents, fill holes, sand rough areas, and remove anything that might interfere with adhesion. Then clean thoroughly. If you are tiling over glossy paint, some products may require light abrasion or a primer to improve bonding. The point is not to overcomplicate the process, but to treat the wall with respect. The beauty you want later depends on this quiet discipline now.
Tools and Supplies That Make the Process Smoother
Having the right tools creates confidence and improves accuracy. You do not need an elaborate professional setup, but you do need the essentials. A tape measure, level, pencil, notched trowel, tile spacers, sponge, buckets, grout float, utility knife, caulk gun, and suitable tile cutter are central to the work. Depending on your tile, a manual score and snap cutter may be enough, though harder porcelain or more intricate cuts may require a wet saw.
You will also need tile adhesive or thinset appropriate for your tile and substrate, grout selected according to joint width and application, and silicone or flexible caulk for movement joints. Edge trim may be necessary if your tile will end on an exposed side. Many elegant installations look finished because the edges were planned just as carefully as the field tile. This is the sort of detail that quietly elevates the whole project.
Before starting, read every product label. Adhesives, grouts, sealers, and caulks each come with specific instructions for mixing, application, open time, cure time, and compatible surfaces. A refined DIY result is not only about aesthetics. It is about respecting the technical logic that allows those aesthetics to endure.
Measure, Dry Fit, and Plan the Layout Before Adhesive
One of the most common beginner mistakes is beginning too quickly. Dry fitting your tile before mixing adhesive allows you to check alignment, spacing, and ending points. Start by measuring the full area and locating the visual center or your most important focal point, which is often the space behind a faucet, range, or mirror. Then test how the tile will fall at corners, outlets, and edges.
You are looking for balance. Avoid ending with an extremely narrow sliver of tile if possible. Shift the starting point slightly if it gives you cleaner cuts on both sides. Mark a level reference line because countertops and vanities are not always perfectly level. Your first visible row needs to follow the level line rather than the surface below, otherwise tiny variations can become visually obvious across the entire wall.
Outlet and switch cutouts deserve special planning. They can interrupt the pattern and reveal rushed workmanship if handled carelessly. Measure them carefully, mark tiles with precision, and cut patiently. In some cases, moving a layout line by even half a tile can create more flattering and less awkward outlet placements. That extra thought is often what makes a backsplash feel custom rather than improvised.
Step by Step Installation for Beginners
1. Protect the Space and Establish Reference Lines
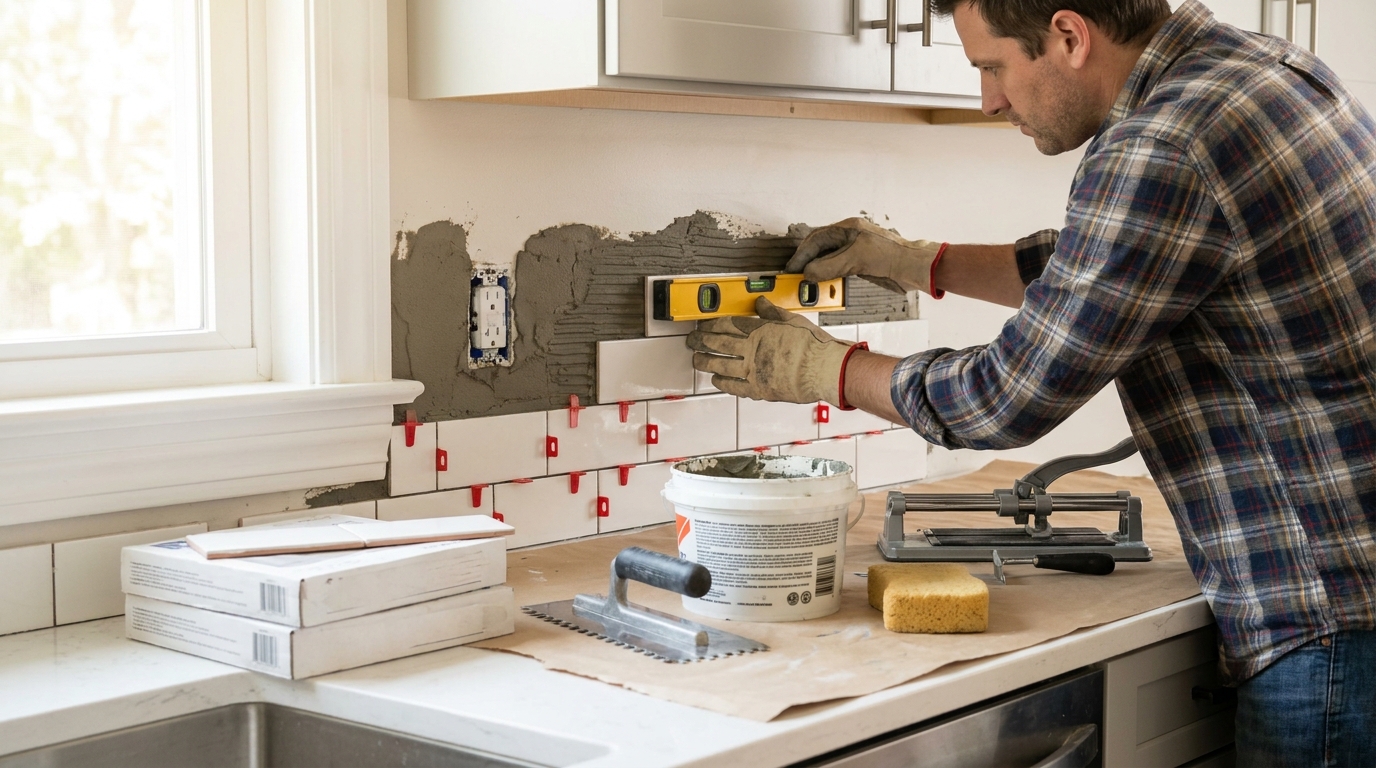
Cover countertops, fixtures, and floors before you begin. Remove outlet and switch covers, turn off power where necessary, and tape off vulnerable surfaces. Use a level to mark your reference line and any vertical guides needed to keep the pattern straight. This is the framework that will hold the installation together visually.
2. Apply Adhesive in Small Sections
Spread adhesive or thinset in manageable areas rather than covering the whole wall at once. Use the correct notched trowel size recommended for your tile. Comb the adhesive consistently so the ridges remain even. Working in smaller sections helps prevent the adhesive from skinning over before the tile is set.
3. Set Tiles with Steady Pressure and Spacing
Press each tile firmly into place with a slight sliding motion to create good contact. Insert spacers to maintain uniform joints. Keep checking with a level because small drifts become increasingly difficult to correct later. If your tile has slight variation, step back often and assess the overall visual rhythm rather than focusing only on one piece at a time.
4. Make Cuts Thoughtfully
Edges, outlets, corners, and the underside of cabinets usually require cuts. Measure twice and cut once. If the cut edge will remain visible, place extra attention on cleanliness and alignment, or use edge trim to frame it beautifully. A precise cut can make an affordable tile look bespoke, while a rough one can diminish an otherwise lovely wall.
5. Allow Proper Cure Time
Once the tile is in place, allow the adhesive to cure according to manufacturer instructions. Resist the temptation to rush into grouting too soon. Stability at this stage supports every finish layer that follows. A backsplash is a layered system, and each layer needs its own moment to set properly.
Understanding Grout, Caulk, and Why They Are Not the Same
This is one of the most important technical distinctions for any beginner. Grout fills the joints between tiles, but it is not a waterproofing layer. Grout is porous and can absorb moisture or stain over time, which is why sealing is commonly recommended in kitchens and bathrooms. Lowe’s installation guidance also emphasizes that grout should not be used where movement is expected.
At corners, where backsplash meets countertop, around sinks, and where tile changes plane, a flexible caulk or silicone sealant is generally the correct finish. These joints move slightly with building shifts, temperature changes, and daily use. Rigid grout can crack there. Silicone or another approved flexible sealant helps maintain a neat appearance while allowing that subtle movement.
Choose grout type based on the tile and joint width. Unsanded grout is often used for very narrow joints and delicate surfaces, while sanded grout is common for wider joints. Epoxy grout offers excellent stain resistance but can be more demanding to apply. For many first time backsplash projects, a standard cementitious grout paired with a quality sealer is a balanced and accessible option.
How to Grout for a Clean, Elegant Finish
Grouting changes the project from a field of individual pieces into a unified surface. Mix and apply the grout according to instructions, pressing it firmly into the joints with a grout float held at an angle. Work in sections and remove excess diagonally across the tile face. This reduces the chance of pulling grout back out of the joints.
Then begins the gentle art of cleanup. Use a damp sponge, not an overly wet one, to smooth joints and remove haze gradually. Rinsing too aggressively can weaken or wash out the grout. Move with patience. It is better to make several light passes than one harsh pass. Once the haze fully develops, polish the tile surface with a dry microfiber cloth.
Allow the grout to cure fully, then seal it if the manufacturer recommends sealing. This step matters. Sealer helps protect porous grout from staining and moisture absorption, especially in kitchens where oils and food splashes occur, and in bathrooms where daily humidity is higher. It is a practical measure that supports the longevity of the elegant finish you worked to achieve.
Finishing Details That Make a DIY Project Look Custom
True sophistication lives in the small decisions. Edge trim, carefully aligned outlet covers, smooth caulk lines, and consistent grout joints all contribute to the feeling of professionalism. If your backsplash ends at an exposed side, choose a trim profile that suits the room’s tone. A slim metal edge in brushed brass or matte black can complement fixtures beautifully, while a simple color matched trim can keep the effect quiet and seamless.
Reinstall outlet and switch covers thoughtfully, using extenders if needed so they sit properly over the new tile thickness. Wipe every surface clean. Remove adhesive residue and haze from the tile face. These are not decorative flourishes. They are what allow the room to feel finished rather than merely completed.
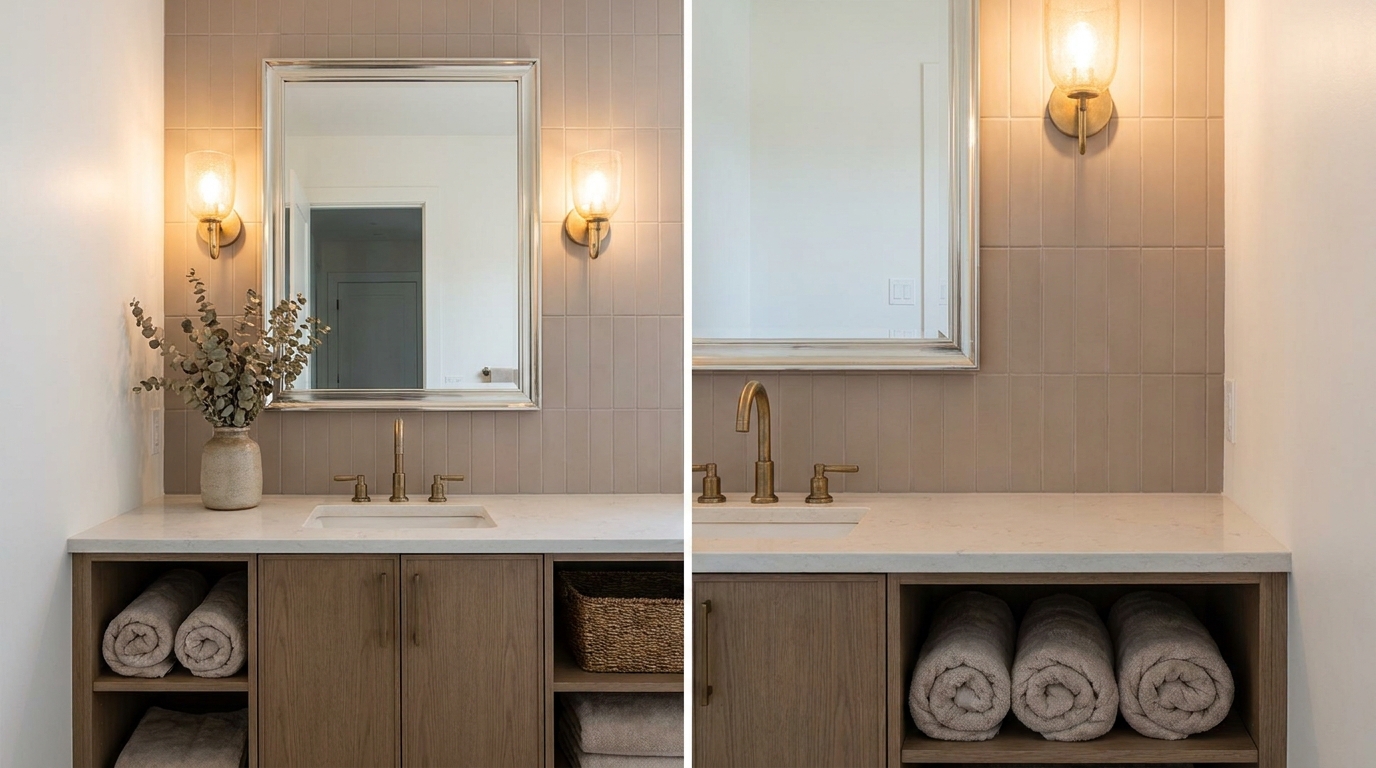
Styling also matters once the work is done. A backsplash looks especially refined when the surrounding surfaces are edited with intention. In a kitchen, this may mean a restrained arrangement of utensils, ceramics, or a cutting board that allows the tile to breathe. In a bathroom, folded towels, a tray, or a vase with a simple branch can draw attention to the new backdrop without cluttering it.
Elegant Backsplash Ideas for Kitchens
If you want a timeless kitchen look, consider warm white or ivory subway tile in a running bond pattern with grout just one shade deeper than the tile. Extend it fully to the upper cabinets for an effect that feels architectural and clean. Pairing this with warm metal hardware and stone or stone look counters creates a calm, polished atmosphere that suits both classic and modern interiors.
For a slightly more contemporary expression, a vertical stack layout in a matte porcelain tile can feel fresh and composed. This is especially striking in smaller kitchens because the vertical lines draw the eye upward. If your cabinetry is colorful, choose a backsplash tone that gently supports the cabinets rather than competing with them. The result can feel custom and understated at once.
Behind a range, consider extending the same tile to the hood or the ceiling. This creates a visual anchor and elevates the whole wall. The continuity is what gives it richness. You do not need ornate tile to make the area special. Often a subtle textural shift in a single color palette is more elegant than introducing an entirely different insert or accent panel.
Elegant Backsplash Ideas for Bathrooms
In bathrooms, the backsplash can soften hard surfaces and create intimacy around the vanity. A vertically stacked tile in a muted neutral often feels serene and modern, especially when paired with a floating vanity or warm wood finishes. If the mirror is simple, the texture of the tile can become the room’s quiet ornament.
For powder rooms or guest baths, this is a wonderful place to introduce a slightly more expressive surface. Handmade look tiles in soft green, blush clay, or smoky blue can feel personal while still tasteful. Keep the palette restrained and let the finish do the work. If you tile higher around the mirror wall, the room can gain a jewel box quality without relying on busy patterns.
Bathroom readers should also keep moisture in mind. Around vanities, standard backsplash methods are often suitable, but near tubs and higher splash zones, product specifications and sealant recommendations matter more. The elegance of the result depends not only on how it looks the day you finish, but on how well it withstands steam, water, and cleaning over time.
Common DIY Mistakes and How to Avoid Them
-
Choosing a tile that is too difficult for your skill level. Simple ceramic or porcelain rectangles are often the wisest first project. They leave room for good craftsmanship, which is what creates elegance.
-
Ignoring wall preparation. Uneven or dirty surfaces compromise adhesion and alignment. A beautiful finish begins with a stable substrate.
-
Skipping dry layout planning. Without planning, you may end up with awkward cuts, uneven edges, or poor outlet placement. A few extra minutes of strategy can save hours of frustration.
-
Using grout where flexible sealant belongs. Corners, countertop joints, and sink transitions generally need caulk or silicone, not rigid grout. This prevents cracking and helps manage movement and moisture.
-
Assuming grout is waterproof. It is porous and often needs sealing. This is one of the most common misconceptions in beginner projects.
-
Rushing cleanup. Grout haze, adhesive smears, and uneven caulk lines are highly visible on a backsplash. Careful finishing is what makes the project feel refined.
Maintenance for Lasting Beauty
One of the gifts of a well chosen backsplash is that it can be relatively easy to maintain. Wipe it regularly with a soft cloth and a cleaner appropriate for the tile and grout. Avoid harsh abrasives that may dull glazes or damage sealants. In kitchens, try to remove cooking residue before it builds up, especially near ranges and behind faucets.
Check silicone joints periodically around sinks, counters, and tubs. If the sealant begins to separate or discolor significantly, replacing it promptly helps protect the wall and preserve the finished appearance. Reapply grout sealer as recommended by the product manufacturer. This small maintenance routine can have an outsized effect on how fresh and elegant the backsplash continues to look.
The good news is that timeless materials age gracefully when cared for properly. A restrained tile, a well chosen grout, and neat sealant lines do not demand constant reinvention. They simply continue doing their work, lending the room a sense of polish every day.
When DIY Is the Right Choice and When to Pause
There is real pleasure in completing a backsplash yourself. It is a practical act of making, but it is also a way of shaping the emotional atmosphere of your home. If your wall is in good condition, the layout is straightforward, and your tile selection is beginner friendly, this project can be deeply rewarding. The savings compared with professional installation can be significant, and the visual return is immediate.
Still, discernment is part of good design. If your wall is severely uneven, your material is delicate or expensive, or the installation involves highly visible specialty cuts and complex transitions, it may be wise to seek professional help. Choosing assistance where needed does not diminish the vision. It protects it. The most elegant rooms are not those made through stubbornness, but those made through thoughtful decisions.
Final Thoughts: Elegance Is Built One Careful Detail at a Time
A beautiful backsplash does more than cover a wall. It gives a kitchen or bathroom a point of quiet focus, a material richness, and a sense of completion. It is one of the rare home upgrades that can feel decorative and practical in equal measure. And unlike larger renovations, it offers a path to transformation that many homeowners can genuinely take on themselves.
If there is one principle to hold throughout the project, let it be this: elegance is not about excess. It is about harmony, proportion, and attentiveness. Choose a material that suits your skill level, a layout that supports the architecture, and finishing details that honor the whole room. Follow sound installation practices, respect curing and sealing times, and treat grout and caulk according to their proper roles.
When you do, the result is far more than a DIY success. It becomes a lasting part of how your home feels. In the morning light of a kitchen, in the soft glow above a vanity, a well made backsplash brings refinement to daily life. And perhaps that is the truest luxury of all: not extravagance, but beauty thoughtfully placed where you will encounter it every day.


No Comment! Be the first one.