


Step-by-Step Guide to Installing Laminate Flooring Like a Pro
Laminate flooring has earned its place as one of the most practical upgrades a homeowner can tackle. It gives you the look of wood at a lower cost, it is easier to maintain than many traditional flooring options, and most modern products are designed around click-lock installation systems that make the work much more approachable for a careful DIYer. That said, laminate is only simple when you respect the details. A floor that looks great on day one can start clicking, separating, or buckling later if the subfloor was uneven, the underlayment was wrong, or the perimeter expansion space was ignored.
Table Of Content
- Why Laminate Flooring Is a Good DIY Project
- What You Need Before You Start
- Step 1: Measure the Room and Plan the Layout
- Step 2: Acclimate the Flooring and Check Room Conditions
- Step 3: Remove Existing Trim and Prepare the Work Area
- Step 4: Check the Subfloor for Flatness, Damage, and Moisture
- Step 5: Choose and Install the Correct Underlayment
- Step 6: Undercut Door Jambs and Plan Around Obstacles
- Step 7: Start the First Row Straight
- Step 8: Build the Field and Stagger End Joints Properly
- How to Keep Seams Tight
- Step 9: Make Clean Cuts Around Vents, Pipes, and Tight Areas
- Step 10: Install the Last Row Without Forcing It
- Step 11: Install Transitions and Finishing Trim the Right Way
- Common Mistakes That Ruin Laminate Installations
- Indoor Air Quality and Product Selection
- How Long the Job Takes and What to Expect
- When to Call a Professional Instead
- Final Tips for a Professional-Looking Result
- Conclusion
This guide is built around the way the job actually gets done in the real world. You will learn how to plan the layout, check the subfloor, choose the right underlayment, set the first row straight, stagger joints correctly, make clean cuts around obstacles, and finish the room without pinning the floor in place. Laminate flooring is generally installed as a floating floor, which means the planks lock to each other and rest over the subfloor rather than being nailed or glued through the field. That floating design is exactly why preparation and expansion gaps matter so much.
If you want a professional-looking result, the best mindset is to slow down early so you do not have to redo work later. Most installation problems trace back to skipped prep, not to the click-lock planks themselves. A clean, flat, dry subfloor, the right room conditions, and careful first-row setup will do more for your final result than rushing through boxes of flooring. Once the foundation is right, the rest of the installation becomes much more predictable.
Before you start, always read the specific installation instructions that come with your flooring. Product lines differ on underlayment requirements, acceptable subfloors, moisture control, transition spacing, and room size limits. Think of this article as the practical field guide and your manufacturer instructions as the rulebook for your exact product. Use both, and you will be in much better shape.
Why Laminate Flooring Is a Good DIY Project
There is a reason laminate keeps coming back into the conversation for homeowners. Newer products offer better wood visuals, improved surface durability, and stronger water resistance than older generations. In a market where renovation budgets are tight and people still want a finished, updated interior, laminate fits the practical middle ground. It can transform a room without the cost and complexity that often come with site-finished hardwood.
It also helps that click-lock systems are built for efficient installation. You are not dealing with sanding, staining, or long finish cure times. In many rooms, once the subfloor is ready and the layout is planned, the actual plank installation moves at a steady pace. That does not mean the job is foolproof, but it does mean a homeowner with patience, a decent saw, and a careful approach can often get a result that looks professional.
What separates a pro-looking laminate floor from an amateur one is not just tight seams. It is the whole system working together. The rows stay straight, the cuts around doorways are clean, the floor feels solid underfoot, and the trim covers the expansion space without trapping the floor. Those are the details this guide will focus on.
What You Need Before You Start
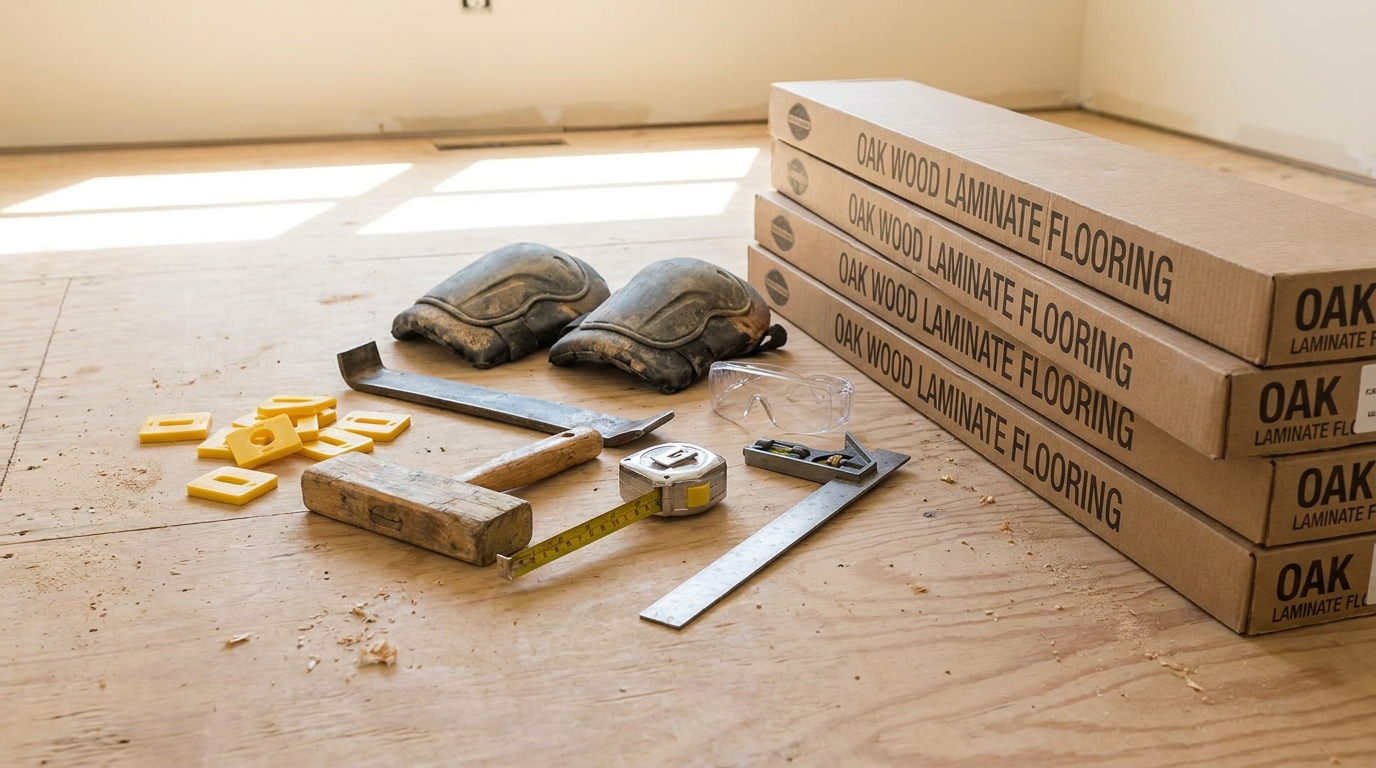
Before the first plank comes out of the box, gather your tools and materials. Stopping halfway through to search for spacers or a pull bar slows the work and usually leads to mistakes. A smooth flooring job comes from good setup as much as steady hands.
For most laminate flooring installations, you will need a tape measure, pencil, chalk line, straightedge, carpenter square, utility knife, spacers, tapping block, pull bar, and a saw suitable for clean cuts. A miter saw is useful for crosscuts, while a jigsaw, oscillating multi-tool, or circular saw can help with detail work depending on the room. You should also have safety glasses, hearing protection, knee pads, and a dust mask for cutting operations. For prep, keep a vacuum, moisture-related materials if required, patching compound if approved for the subfloor, and the proper underlayment on hand.
It is also smart to confirm what is already built into your laminate product. Some laminates come with attached pad. Others require a separate underlayment. Over concrete, you may need a specific vapor-retarding layer or underlayment system to manage moisture. Underlayment is not just soft padding. It can affect sound control, support, comfort, and moisture performance, and using the wrong one can create failure points or warranty issues.
Step 1: Measure the Room and Plan the Layout
Start by measuring the room length and width to calculate square footage, then add extra for waste. In a simple rectangular room, many homeowners order about 5 to 10 percent extra depending on plank pattern and cutting complexity. If the room has closets, angled walls, multiple doorways, or several obstacles, you may want a little more. It is much easier to return unopened material than to run short with only a few rows left.
Then think through the direction of the planks. In many homes, laminate looks best running parallel to the longest wall or in the same direction as adjacent flooring for visual continuity. In some rooms, the light direction also affects the look. None of these are absolute rules, but they are worth considering before you lock yourself into the first row.
Layout planning matters because it helps you avoid ending with a very narrow rip on the final row. Measure the room width and divide by the width of a plank. If the last row would be extremely narrow, trim the first row slightly so the first and last rows are more balanced. This small adjustment often makes the finished floor look more intentional, especially in visible spaces like bedrooms, hallways, and living rooms.
Also identify transition points in advance. Doorways, room breaks, long runs, and width limits may require transition strips or expansion molding depending on the product. A floating floor cannot be treated like one continuous sheet without regard for movement. Professional-looking work includes planning for where the floor will stop, where it will change direction, and where it needs controlled movement space.
Step 2: Acclimate the Flooring and Check Room Conditions
One of the easiest ways to create trouble is to bring laminate into a house and install it immediately without checking room conditions or acclimation guidance. Follow the manufacturer instructions for how long the flooring should sit in the installation space and under what temperature and humidity conditions. The point is to let the material adjust to the room it will live in, not to a garage, truck bed, or damp basement.
Acclimation is especially important when there is a big difference between storage conditions and indoor living conditions. If the flooring was sitting in a cold warehouse or a humid area and you install it right away, movement after installation can be more pronounced. Laminate still needs perimeter room to expand and contract, but proper acclimation helps keep that movement within the expected range.
This is also the time to make sure the room itself is ready. If you are working in a renovation, finish wet trades first. That means painting can happen before flooring, but tile thinset, concrete work, or major moisture-producing activities should not still be underway when you install laminate. A stable indoor environment gives the floor a much better start.
Step 3: Remove Existing Trim and Prepare the Work Area
Take off base shoe or quarter round if it is already installed. If you are replacing baseboards entirely, remove those too. Work carefully with a pry bar so you do not tear up the wall surface more than necessary. Save any trim you plan to reuse, and label longer pieces if that helps with reinstalling them later.
Next, clear the room completely. A proper flooring job is much easier when you are not constantly shifting furniture from side to side. Remove doors if it makes the work easier, especially in tight rooms. Floor registers, thresholds, and old transition strips should also come up if they interfere with the new installation.
Vacuum thoroughly so you are not working over grit, fasteners, drywall dust, or old adhesive debris. Small debris under a floating floor can create noise, uneven support, and a rough feel underfoot. Cleanliness sounds basic, but it is part of what makes the floor feel solid when the job is done.
Step 4: Check the Subfloor for Flatness, Damage, and Moisture
This is where many DIY projects either succeed or fail. Laminate can bridge only so much. If the subfloor has dips, humps, loose panels, water damage, or soft spots, the floating floor above it will tell on you. A common misconception is that any surface is acceptable as long as it gets covered. In reality, subfloor flatness, dryness, and structural soundness matter a great deal.
Use a long straightedge or level to check for high and low areas. Compare what you find with the manufacturer tolerance for flatness. Some products specify a maximum variation over a given distance. If you exceed that, correct the subfloor before you go any further. On wood subfloors, sanding down high spots and securing loose areas may help. On concrete, patching low areas with an approved leveling product may be necessary. The right fix depends on the base you are working over.
Inspect for squeaks and movement on wood subfloors. Tighten loose sections with appropriate fasteners into framing where needed. A floating floor will not cure a noisy or moving subfloor underneath. It may actually make the problem more noticeable over time as planks flex at joints.
Moisture deserves special attention, especially over concrete slabs. Concrete can look dry and still carry moisture that affects flooring performance. Follow the manufacturer guidance for acceptable moisture conditions and any required vapor retarder or underlayment system. If your laminate instructions call for moisture testing or specific concrete age and dryness standards, take that seriously. Moisture issues are one of the fastest ways to ruin an otherwise good installation.
The cleanest-looking laminate floor starts before the flooring goes down. A flat, dry, solid subfloor and the correct underlayment matter more than any trick used during the last row.
Step 5: Choose and Install the Correct Underlayment
Underlayment is one of the most misunderstood parts of laminate flooring. Many people think it is always optional or only there to make the floor feel softer. In reality, underlayment can be required, and its job may include sound control, minor surface smoothing, comfort, compression support, and moisture management. The right choice depends on your laminate product and the type of subfloor below it.
If your laminate has an attached pad, do not automatically add another soft layer beneath it. Extra cushioning can create too much movement, stressing the joints and making the floor feel spongy. Some systems allow specific vapor barriers or specialty layers, but you need to verify what the manufacturer permits. More material is not always better.
Roll out underlayment according to the product instructions. Keep seams tight and tape them if required. Trim neatly at edges, but do not bunch or overlap material unless the system is designed that way. Over concrete, make sure any moisture-control layer is installed exactly as required. Poorly installed underlayment can create telegraphing, noise, and uneven support that you will feel every time you walk across the room.
Step 6: Undercut Door Jambs and Plan Around Obstacles
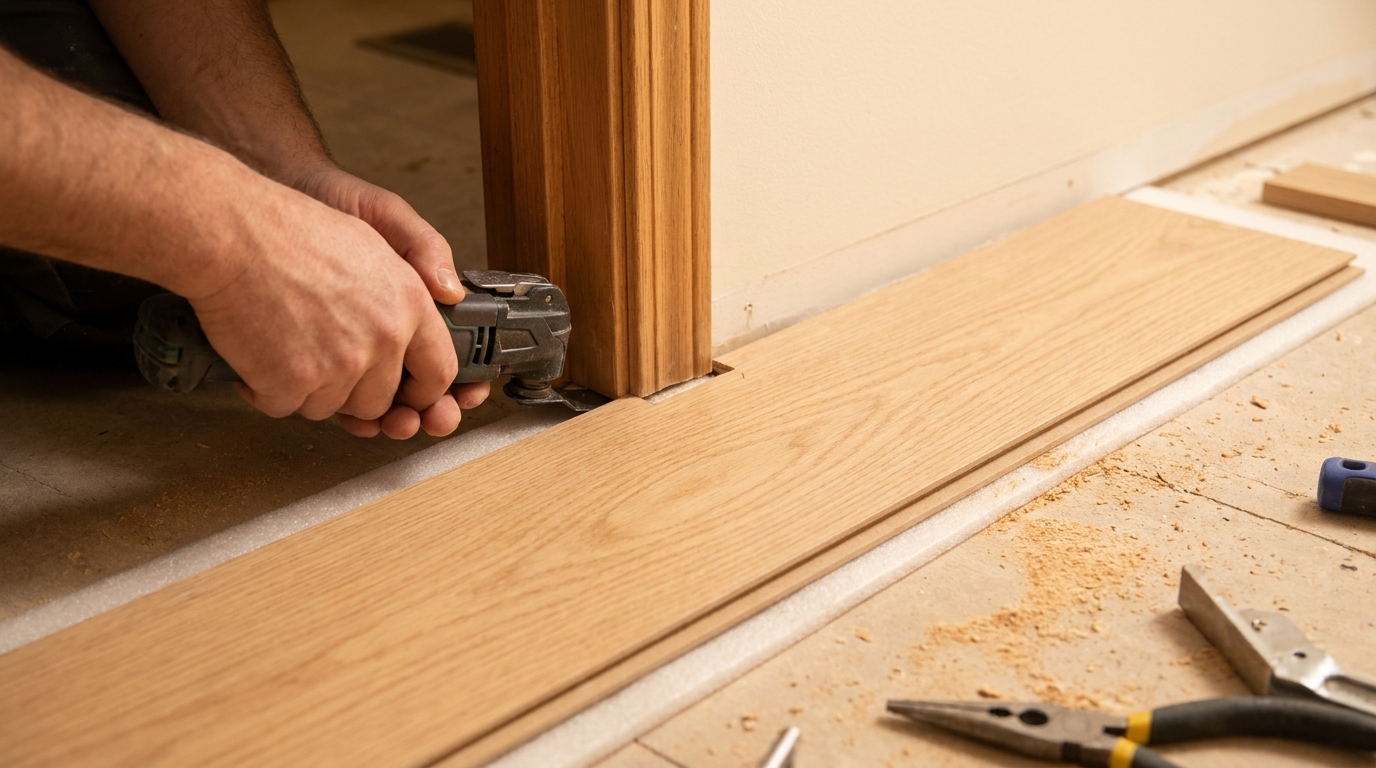
Before you start laying planks, deal with door jambs, casings, floor vents, and other details that are easier to address early. Undercutting door jambs is one of the small professional moves that improves the finished appearance right away. Instead of trying to notch flooring tightly around trim, you cut the jamb so the laminate slides underneath it, leaving a cleaner result with the necessary expansion space hidden from view.
Use a scrap piece of flooring plus underlayment as a height guide, then make the cut with an oscillating tool or jamb saw. Test-fit a piece so you know it slides under without forcing. This is also the stage to think through how vent openings, closet doors, and threshold areas will be handled. If there are pipes or unusual shapes, plan those cuts before the rows get too close to them.
Remember that laminate needs expansion space around all vertical obstructions, not just at walls. That includes cabinets, columns, hearth edges where applicable, and pipes if the manufacturer requires spacing there. The trim or trim ring should cover the gap later, but the floor itself should not be pinched tight.
Step 7: Start the First Row Straight
The first row sets the tone for the whole room. If it drifts, every row after it follows the drift, and the problem gets harder to hide as you go. Take time to snap a reference line if needed and verify that your starting wall is reasonably straight. In older homes, walls are often out of line, so do not assume the drywall edge is the truth.
Place spacers along the starting wall to maintain the manufacturer-required expansion gap. This gap is not optional and should never be squeezed tighter for appearance. A floating floor needs room to expand and contract. If it is locked too tightly to the perimeter, it can buckle, lift, or push against trim and transitions later.
Assemble the first row carefully. Depending on the click system, you may lock planks end to end first and then connect the full row, or you may build progressively one plank at a time. Follow the product instructions for the specific locking action and handling angle. Check every joint visually and by touch. Even a small gap left in the first row can carry through and become a noticeable issue several rows later.
If the starting wall is not straight, you may need to scribe and rip the first row to follow the room while still preserving your expansion gap. That sounds intimidating, but it often makes the final floor look much more even. The goal is not to force the floor to match a crooked wall. The goal is to establish a straight field while keeping edge gaps covered later by trim.
Step 8: Build the Field and Stagger End Joints Properly
Once the first row is in and confirmed straight, the rest of the field usually goes faster. Most laminate flooring looks best and performs best when the end joints are staggered rather than lining up in a repeating ladder pattern. Follow the manufacturer minimum offset requirements between adjacent row end joints. This helps both the appearance and the structural integrity of the installed floor.
A good working method is to use the cutoff from the previous row to start the next one, but only if the piece is long enough to satisfy the minimum stagger. This reduces waste and creates a more natural pattern. If the cutoff is too short, start with a new piece trimmed to a practical length. Avoid obvious repeating patterns that draw the eye across the room.
As you lock rows together, work carefully rather than aggressively. Use a tapping block only as directed for your product, and do not hammer directly on the tongue or edge of a plank. Damaged locking profiles can lead to seams that will not stay closed. On the far side of the room or near walls, a pull bar helps close joints without damaging edges.
Keep checking that the floor remains square and that the expansion gap is still consistent along the edges. A floating floor can creep slightly during installation, especially in larger rooms. A few quick checks every couple of rows are easier than discovering at the end that the gap vanished on one side and doubled on the other.
How to Keep Seams Tight
Seams usually stay clean and tight when the planks are fully engaged before you move on. If a joint does not want to close, stop and inspect it. A chip in the locking edge, debris in the groove, or an angle that is slightly off can all prevent a proper connection. Forcing the plank often does more damage than good.
It also helps to keep the work area swept as you go. Tiny scraps, underlayment fuzz, or dust can interfere with a click joint more than you might expect. Professionals do not just work fast. They keep the assembly surfaces clean, and that habit pays off in tighter seams and fewer callbacks.
Step 9: Make Clean Cuts Around Vents, Pipes, and Tight Areas
Every room has details that separate a rough DIY job from a polished one. Floor vents, closet openings, radiator pipes, and corners all require thoughtful cuts. Measure carefully and dry-fit whenever possible before locking the plank into the field. Laminate is forgiving in some ways, but a bad cut at a visible opening can stand out every time you enter the room.
For floor vents, mark the opening from fixed reference points rather than guessing from the nearest plank edge alone. Cut the opening with the right saw for the shape, then install the vent cover later to hide the cut edge cleanly. For pipes, drill a hole large enough to preserve the required movement space, then make a relief cut to the edge so the plank can fit around the pipe. The cutout piece can be glued back behind the pipe if your manufacturer instructions allow that detail.
Near the final rows, space gets tight and the work becomes more awkward. This is where a pull bar earns its keep. Keep your patience here. Most visible installation damage happens near the last wall because the installer is tired and trying to finish too fast.
Step 10: Install the Last Row Without Forcing It
The last row often needs to be ripped lengthwise to fit. Measure from the face of the previous row to the wall in several places, then subtract the required expansion gap. Walls are rarely perfectly straight, so transfer measurements carefully rather than assuming one rip width will fit the entire length.
Rip the planks cleanly and test-fit them before locking them in. Depending on the click profile and available room, the last row may require a combination of angling and pulling into place. Use the proper tools and do not pin the row hard against the wall just because it is hidden. The expansion gap at the final wall matters just as much as the gap at the starting wall.
If the row is extremely narrow, work even more carefully to avoid breaking the locking edge. This is another reason layout planning at the beginning matters. A little adjustment to the first row can save a lot of frustration at the last row.
Step 11: Install Transitions and Finishing Trim the Right Way
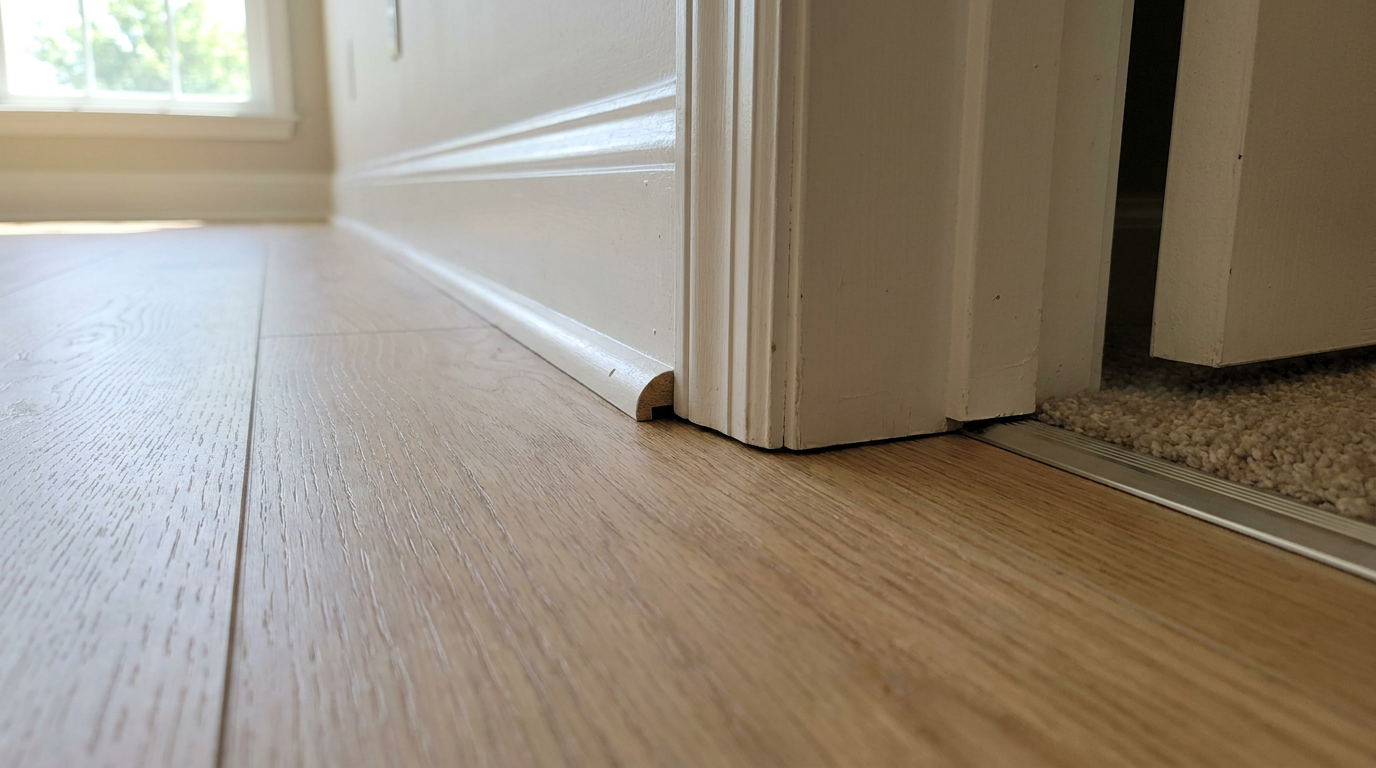
Once the flooring field is complete, the temptation is to rush through trim and call it done. Do not. Finishing details are where many floating floors get accidentally restrained. Expansion gaps are required around walls, cabinets, thresholds, and other vertical obstructions, and the trim should cover those gaps without fastening through the laminate field.
Install transition strips where required by the product instructions or by changes between rooms and flooring types. Doorways are common places for T-moldings, reducers, or other transition profiles. In longer or wider areas, the manufacturer may also require expansion molding at specific intervals. These pieces are not cosmetic afterthoughts. They are part of how the floor handles movement.
When reinstalling baseboards, base shoe, or quarter round, fasten the trim to the wall or baseboard, not through the laminate flooring. That point cannot be overstated. If you nail through the floating floor to tighten the edge, you can trap movement and create problems later. The right finish is one that looks snug while still allowing the floor beneath it to float.
Common Mistakes That Ruin Laminate Installations
One of the biggest mistakes is assuming laminate can go over any existing floor or subfloor without real prep. If the base is uneven, soft, wet, or dirty, the new floor will reflect those problems. Another common mistake is treating underlayment like an afterthought. It must match the flooring system and the substrate below, especially over concrete where moisture control can be critical.
Another damaging misconception is that a tighter fit against the wall means a cleaner result. It may look neat before trim goes on, but it works against the way a floating floor is designed to function. Expansion space around the perimeter is non-negotiable. Laminate also should not be trapped under cabinets or fixed elements unless the product specifically allows that condition.
People also overestimate water resistance. Some modern laminates have better moisture performance than older products, but that does not make them invincible. Standing water, soaked seams, and wet subfloor conditions can still cause swelling and failure. Good installation and good maintenance both matter.
Finally, many DIYers damage joints by hitting planks too hard or using the wrong tapping method. If a joint does not close, inspect it instead of escalating force. Flooring systems are engineered to lock in a specific way. Respect the profile and you will get a better result.
Indoor Air Quality and Product Selection
When you are buying laminate, it is worth paying attention to product compliance and indoor air quality, especially because laminate often uses composite wood materials in its core. Formaldehyde concerns are real enough to take seriously, but there is no need for panic or confusion. A practical approach is to choose products that carry appropriate TSCA Title VI compliant labeling and to buy from reputable suppliers.
Ventilation after installation is also a sensible step. Open windows if conditions allow, run the HVAC system as appropriate, and avoid closing up the room immediately after bringing in large amounts of new flooring and underlayment. Indoor conditions affect comfort and can influence how new materials behave in the short term.
This is not only about emissions. Stable indoor temperature and humidity also help the flooring itself. A well-ventilated, conditioned room is usually better for both people and materials.
How Long the Job Takes and What to Expect
In a straightforward bedroom or home office, a prepared DIYer can often install laminate in a day or weekend, depending on room size and the amount of cutting required. The visible installation usually moves faster than the prep. If the subfloor needs leveling, squeak repair, old flooring removal, or moisture-related corrections, add that time in before you promise yourself a quick finish.
Do not judge the project only by how fast online videos make it look. Those clips often skip the measuring, the dry-fitting, the doorway work, and the cleanup between steps. Real flooring work is a sequence. Good pace comes from staying organized and working methodically, not from racing the clock.
If this is your first time, plan extra time for door jamb cuts, vents, and the final row. Those are the areas where new installers usually slow down. That is normal. A careful finish always beats a fast mistake.
When to Call a Professional Instead
Some laminate projects are better left to a pro. If the room has significant subfloor damage, concrete moisture concerns, complex layouts, many built-ins, unusual transitions, or large open areas that require careful movement planning, paying for skilled installation can save money in the long run. The same goes for homes with known moisture history or major out-of-level floors.
There is also no shame in handing off part of the work. Some homeowners remove trim and old flooring themselves, then hire out the subfloor correction or final installation. Others do the room field and bring in a finish carpenter for trim details. A professional result is not about ego. It is about knowing where the risk is and making smart decisions.
Final Tips for a Professional-Looking Result
If you want the floor to look like it was installed by someone who does this every week, focus on consistency. Keep the first row straight, maintain proper expansion space everywhere, check seams as you go, and make your transition plan before you are standing in the doorway with a half-cut plank. The floor should look calm and intentional when it is done, not pieced together one reaction at a time.
Keep your cuts clean and your pattern natural. Avoid tiny slivers at walls if you can plan around them. Undercut jambs instead of notching tightly around trim. Fasten finishing trim to the wall, not the floor. Those are the habits that make a job look finished rather than merely completed.
Most of all, respect the fact that laminate is a system. The planks, underlayment, subfloor conditions, transition pieces, and trim all work together. When one part is ignored, the whole installation suffers. When each part is handled correctly, laminate flooring can be one of the best-value upgrades in a home.
Conclusion
Installing laminate flooring like a pro is absolutely within reach for many homeowners, but the best results come from treating the job as more than a quick click-together project. Measure carefully, acclimate the material, prep the subfloor properly, match the underlayment to the system, and protect the required expansion space at every edge. Those steps are what keep a floating floor looking good and performing properly long after the tools are put away.
Laminate remains popular for good reason. It offers realistic visuals, affordability, and easy day-to-day maintenance, and modern products continue to improve. If you take the time to install it correctly, you can get a clean, durable floor that feels solid underfoot and looks right in the room. That is the difference between simply laying planks and actually building a floor you will be happy to live with.



No Comment! Be the first one.